fog light VOLVO S60 2008 Owners Manual
[x] Cancel search | Manufacturer: VOLVO, Model Year: 2008, Model line: S60, Model: VOLVO S60 2008Pages: 230, PDF Size: 5.33 MB
Page 45 of 230
47 02 Instruments and controls
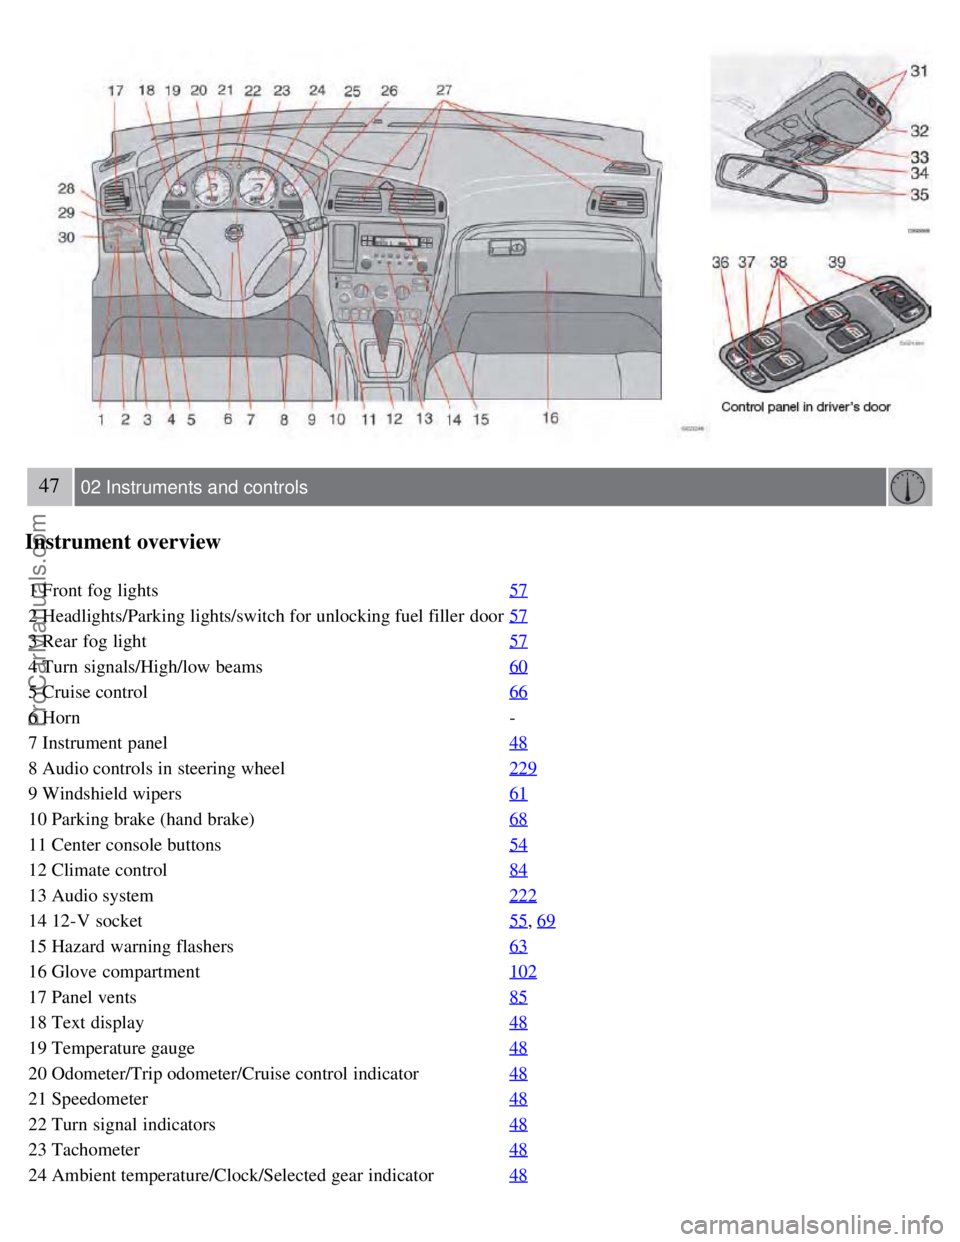
Instrument overview
1 Front fog lights57
2 Headlights/Parking lights/switch for unlocking fuel filler door57
3 Rear fog light57
4 Turn signals/High/low beams60
5 Cruise control66
6 Horn-
7 Instrument panel 48
8 Audio controls in steering wheel229
9 Windshield wipers61
10 Parking brake (hand brake)68
11 Center console buttons54
12 Climate control84
13 Audio system222
14 12-V socket55, 69
15 Hazard warning flashers63
16 Glove compartment102
17 Panel vents85
18 Text display48
19 Temperature gauge48
20 Odometer/Trip odometer/Cruise control indicator48
21 Speedometer48
22 Turn signal indicators48
23 Tachometer48
24 Ambient temperature/Clock/Selected gear indicator48
ProCarManuals.com
Page 49 of 230
WARNING
If the fluid level is below the MIN mark in the reservoir or if a "Brake failure - Service urgent" message is displayed in
the text window: DO NOT DRIVE. Have the vehicle towed to a trained and qualified Volvo service technician and
have the brake system inspected.
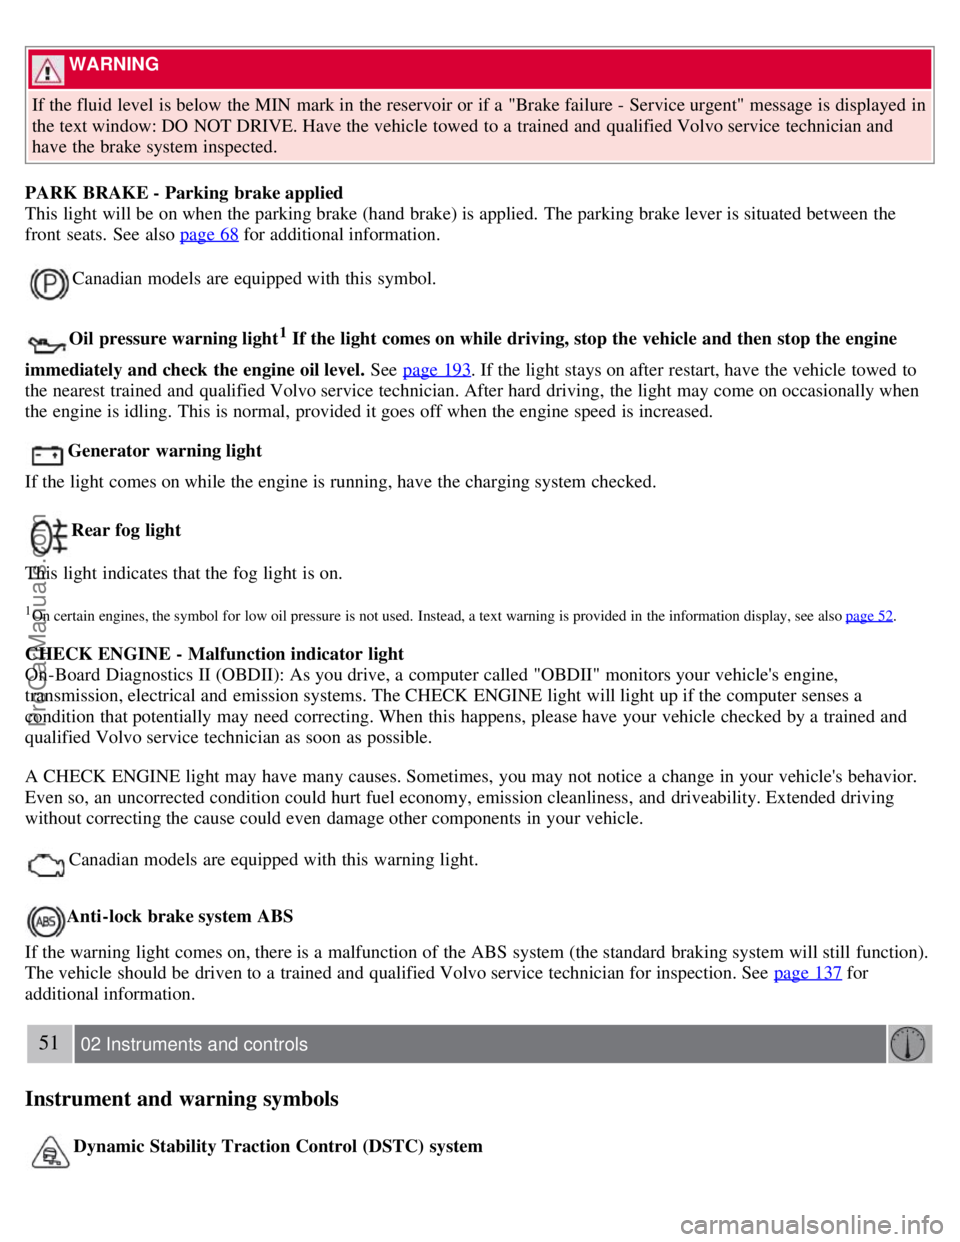
PARK BRAKE - Parking brake applied
This light will be on when the parking brake (hand brake) is applied. The parking brake lever is situated between the
front seats. See also page 68
for additional information.
Canadian models are equipped with this symbol.
Oil pressure warning light1 If the light comes on while driving, stop the vehicle and then stop the engine
immediately and check the engine oil level. See page 193
. If the light stays on after restart, have the vehicle towed to
the nearest trained and qualified Volvo service technician. After hard driving, the light may come on occasionally when
the engine is idling. This is normal, provided it goes off when the engine speed is increased.
Generator warning light
If the light comes on while the engine is running, have the charging system checked.
Rear fog light
This light indicates that the fog light is on.
1On certain engines, the symbol for low oil pressure is not used. Instead, a text warning is provided in the information display, see also page 52.
CHECK ENGINE - Malfunction indicator light
On-Board Diagnostics II (OBDII): As you drive, a computer called "OBDII" monitors your vehicle's engine,
transmission, electrical and emission systems. The CHECK ENGINE light will light up if the computer senses a
condition that potentially may need correcting. When this happens, please have your vehicle checked by a trained and
qualified Volvo service technician as soon as possible.
A CHECK ENGINE light may have many causes. Sometimes, you may not notice a change in your vehicle's behavior.
Even so, an uncorrected condition could hurt fuel economy, emission cleanliness, and driveability. Extended driving
without correcting the cause could even damage other components in your vehicle.
Canadian models are equipped with this warning light.
Anti-lock brake system ABS
If the warning light comes on, there is a malfunction of the ABS system (the standard braking system will still function).
The vehicle should be driven to a trained and qualified Volvo service technician for inspection. See page 137
for
additional information.
51 02 Instruments and controls
Instrument and warning symbols
Dynamic Stability Traction Control (DSTC) system
ProCarManuals.com
Page 54 of 230
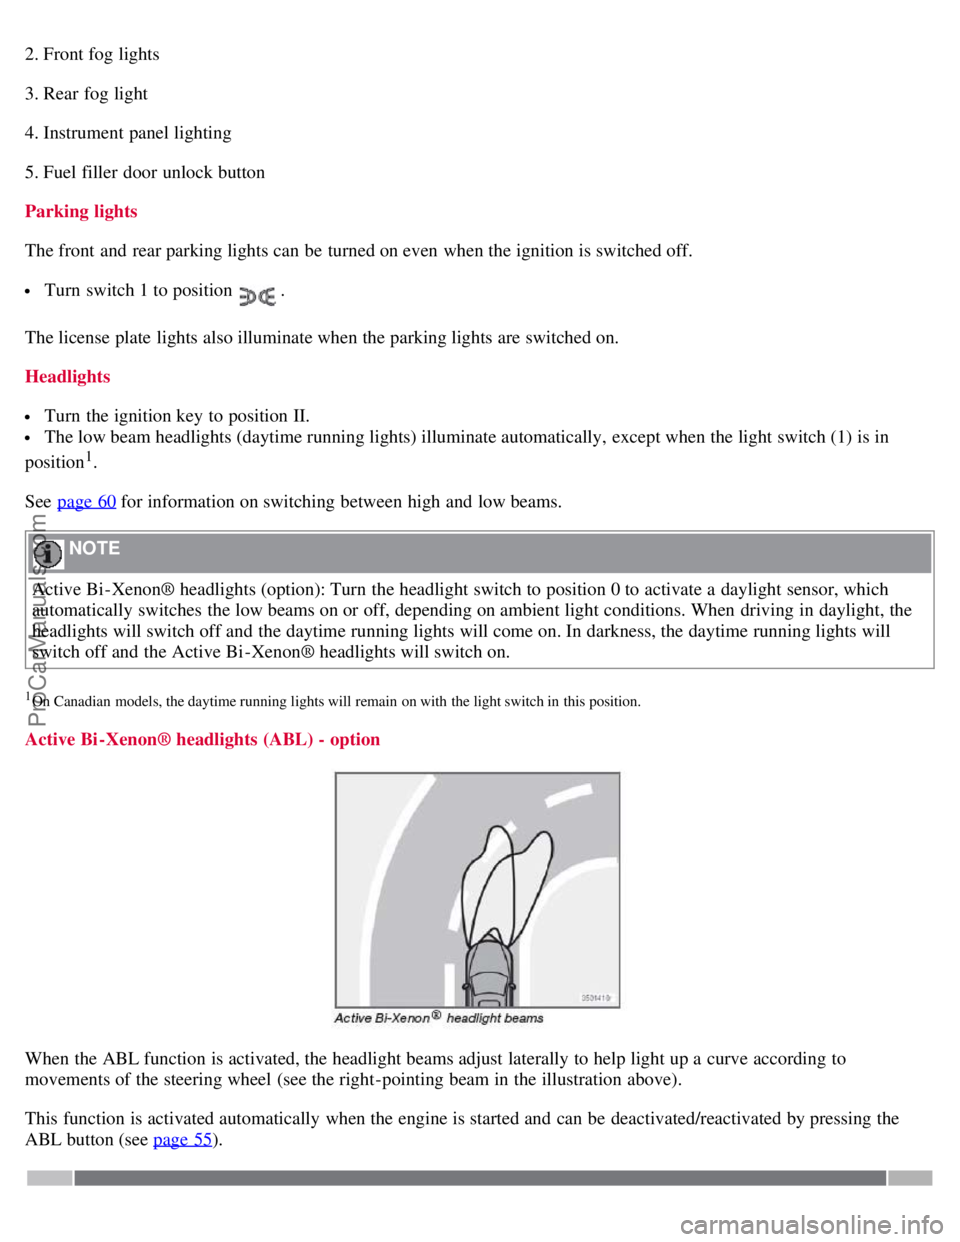
2. Front fog lights
3. Rear fog light
4. Instrument panel lighting
5. Fuel filler door unlock button
Parking lights
The front and rear parking lights can be turned on even when the ignition is switched off.
Turn switch 1 to position .
The license plate lights also illuminate when the parking lights are switched on.
Headlights
Turn the ignition key to position II.
The low beam headlights (daytime running lights) illuminate automatically, except when the light switch (1) is in
position
1.
See page 60
for information on switching between high and low beams.
NOTE
Active Bi -Xenon® headlights (option): Turn the headlight switch to position 0 to activate a daylight sensor, which
automatically switches the low beams on or off, depending on ambient light conditions. When driving in daylight, the
headlights will switch off and the daytime running lights will come on. In darkness, the daytime running lights will
switch off and the Active Bi -Xenon® headlights will switch on.
1On Canadian models, the daytime running lights will remain on with the light switch in this position.
Active Bi -Xenon® headlights (ABL) - option
When the ABL function is activated, the headlight beams adjust laterally to help light up a curve according to
movements of the steering wheel (see the right-pointing beam in the illustration above).
This function is activated automatically when the engine is started and can be deactivated/reactivated by pressing the
ABL button (see page 55
).
ProCarManuals.com
Page 55 of 230
58 02 Instruments and controls
Lighting panel
Fog lights
Front fog lights (option)
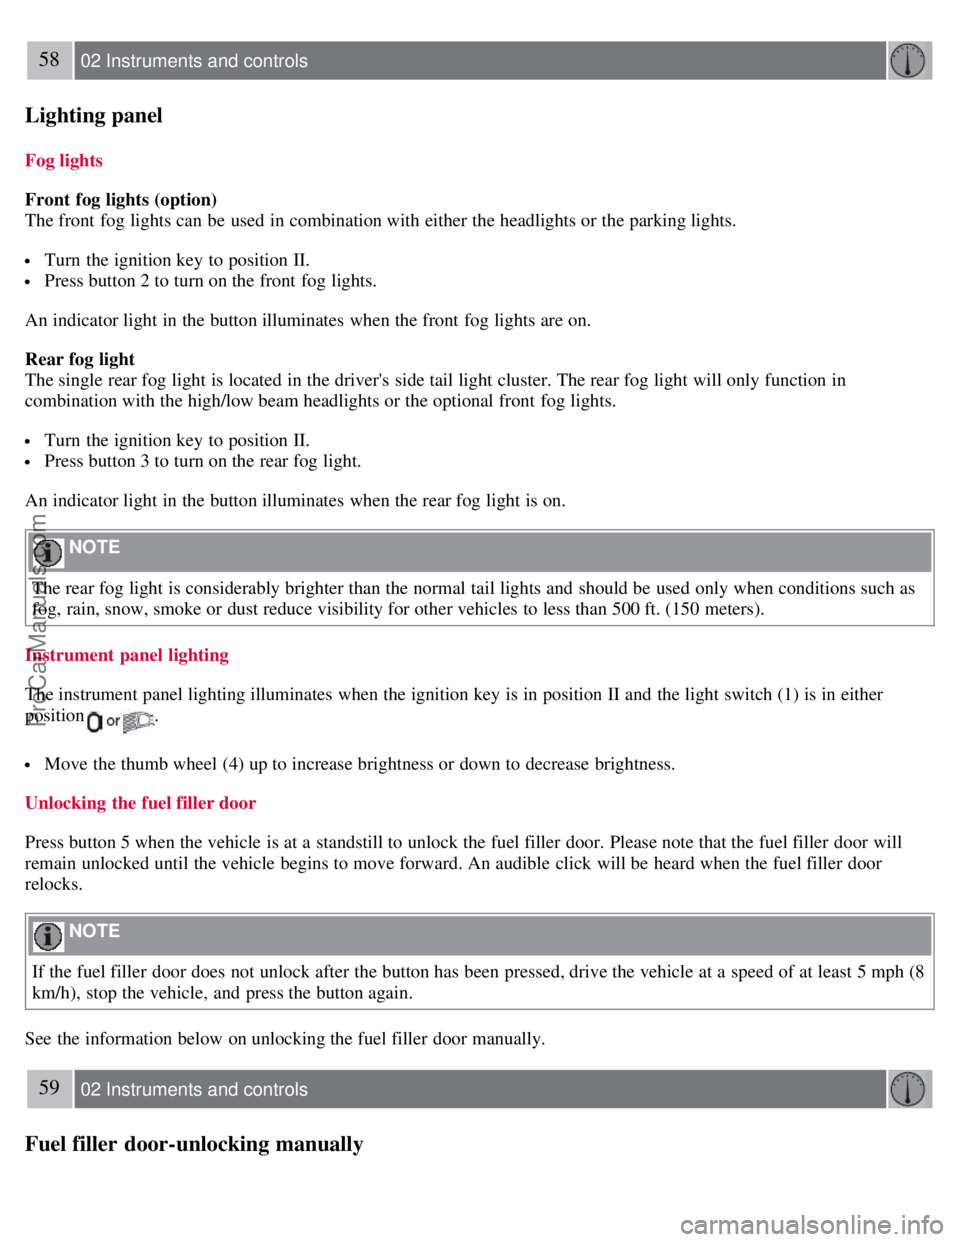
The front fog lights can be used in combination with either the headlights or the parking lights.
Turn the ignition key to position II.
Press button 2 to turn on the front fog lights.
An indicator light in the button illuminates when the front fog lights are on.
Rear fog light
The single rear fog light is located in the driver's side tail light cluster. The rear fog light will only function in
combination with the high/low beam headlights or the optional front fog lights.
Turn the ignition key to position II.
Press button 3 to turn on the rear fog light.
An indicator light in the button illuminates when the rear fog light is on.
NOTE
The rear fog light is considerably brighter than the normal tail lights and should be used only when conditions such as
fog, rain, snow, smoke or dust reduce visibility for other vehicles to less than 500 ft. (150 meters).
Instrument panel lighting
The instrument panel lighting illuminates when the ignition key is in position II and the light switch (1) is in either
position
.
Move the thumb wheel (4) up to increase brightness or down to decrease brightness.
Unlocking the fuel filler door
Press button 5 when the vehicle is at a standstill to unlock the fuel filler door. Please note that the fuel filler door will
remain unlocked until the vehicle begins to move forward. An audible click will be heard when the fuel filler door
relocks.
NOTE
If the fuel filler door does not unlock after the button has been pressed, drive the vehicle at a speed of at least 5 mph (8
km/h), stop the vehicle, and press the button again.
See the information below on unlocking the fuel filler door manually.
59 02 Instruments and controls
Fuel filler door-unlocking manually
ProCarManuals.com
Page 77 of 230
2 0 0 8
VOLVO S60
82 03 Climate
Climate control systems - general information 84
Air distribution85
Electronic Climate Control, ECC86
83 03 Climate
84 03 Climate
Climate control systems - general information
Condensation on the inside of the windows
The defroster function should be used to remove fog or mist from the inside of the windows. Keeping the windows
clean with a commercially available window washing spray will also help prevent fogging or misting.
Ice and snow
Always keep the air intake grille at the base of the windshield free of snow.
Cabin air filter
Replace the cabin air filter with a new one at the recommended intervals. Please refer to your Warranty and Service
Records Information booklet, or consult a trained and qualified Volvo service technician for these intervals. The filter
should be replaced more often when driving under dirty and dusty conditions. The filter cannot be cleaned and
therefore should always be replaced with a new one.
Sensors
The sunlight sensor on the dashboard and passenger compartment temperature sensor in the ECC control panel should
not be covered in any way as this could cause incorrect information to be sent to the ECC system.
Parking the vehicle in warm weather
ProCarManuals.com
Page 82 of 230
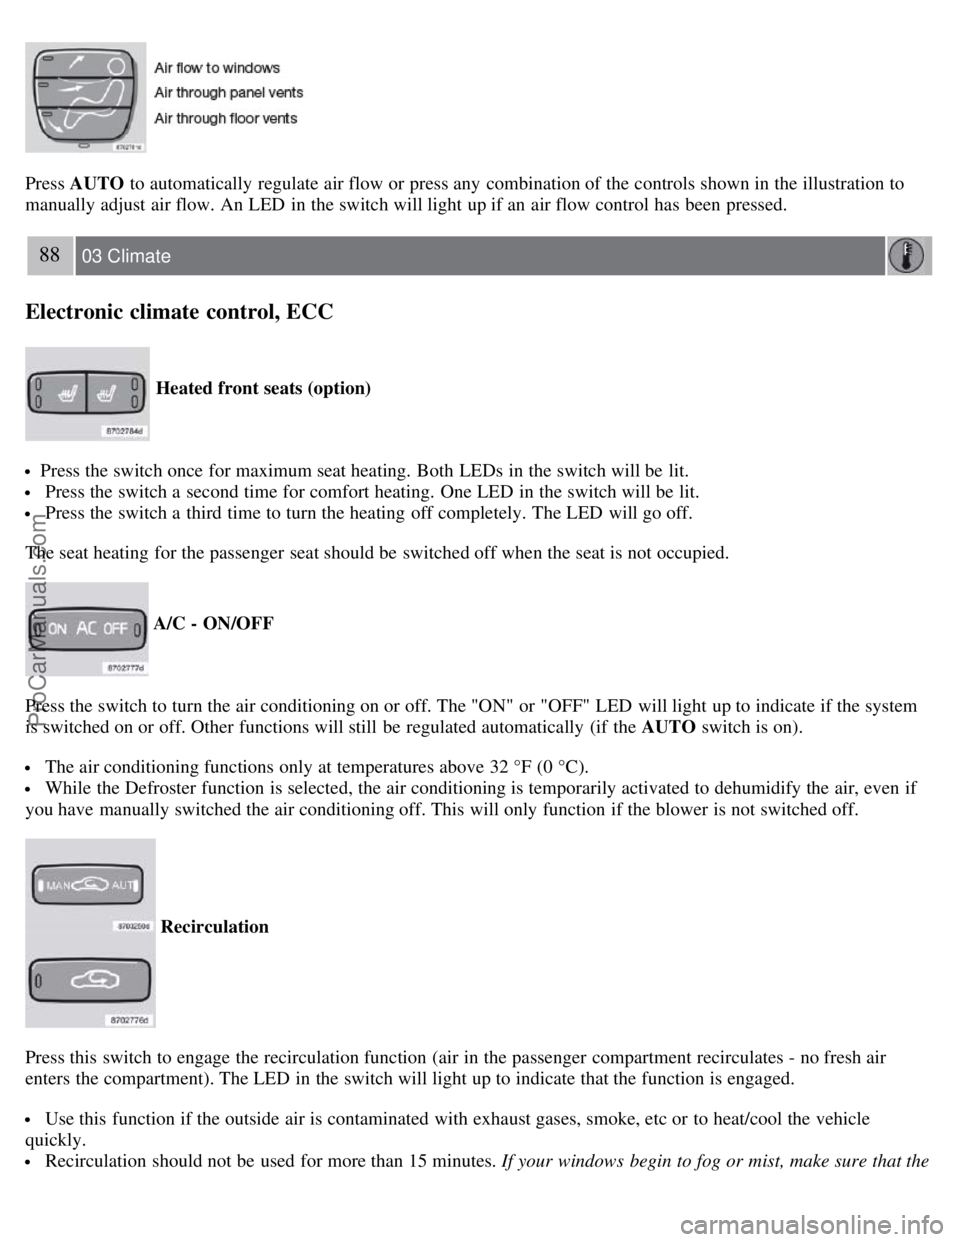
Press AUTO to automatically regulate air flow or press any combination of the controls shown in the illustration to
manually adjust air flow. An LED in the switch will light up if an air flow control has been pressed.
88 03 Climate
Electronic climate control, ECC
Heated front seats (option)
Press the switch once for maximum seat heating. Both LEDs in the switch will be lit.
Press the switch a second time for comfort heating. One LED in the switch will be lit.
Press the switch a third time to turn the heating off completely. The LED will go off.
The seat heating for the passenger seat should be switched off when the seat is not occupied.
A/C - ON/OFF
Press the switch to turn the air conditioning on or off. The "ON" or "OFF" LED will light up to indicate if the system
is switched on or off. Other functions will still be regulated automatically (if the AUTO switch is on).
The air conditioning functions only at temperatures above 32 °F (0 °C).
While the Defroster function is selected, the air conditioning is temporarily activated to dehumidify the air, even if
you have manually switched the air conditioning off. This will only function if the blower is not switched off.
Recirculation
Press this switch to engage the recirculation function (air in the passenger compartment recirculates - no fresh air
enters the compartment). The LED in the switch will light up to indicate that the function is engaged.
Use this function if the outside air is contaminated with exhaust gases, smoke, etc or to heat/cool the vehicle
quickly.
Recirculation should not be used for more than 15 minutes. If your windows begin to fog or mist, make sure that the
ProCarManuals.com
Page 83 of 230
recirculation function is switched off.
Selecting Defroster automatically switches recirculation off.
Timer mode activation: (vehicles with the Interior Air Quality system have no timer mode) Press and hold the
recirculation button for at least 3 seconds to activate a recirculation timer mode. The amber LED in the recirculation
button will flash 5 times to show that the timer mode is being activated. In timer mode, each time the recirculation
button is pressed, the climate control system will recirculate the air in the passenger compartment for 5-12 minutes,
depending on the outside air temperature, and then revert back to fresh air.
Timer mode deactivation: Press and hold the recirculation button for 3 seconds. The amber LED in the recirculation
button will illuminate steadily for 5 seconds to show a return to "normal" mode.
In normal mode, when the recirculation button is pressed, the climate control system will recirculate the air in the
passenger compartment until the recirculation button is pressed again.
Timer mode memory: If the vehicle is turned off while timer mode is active, timer mode will still be active when
the vehicle is restarted.
Interior air quality sensor (option)
Some vehicles are equipped with a multifilter and air quality sensor. The filter separates gases and particles, thereby
reducing the amounts of odors and contaminants entering the vehicle. The air quality sensor detects increased levels of
contaminants in the outside air. When the air quality sensor detects
89 03 Climate
Electronic climate control, ECC
contaminated outside air, the air intake closes and the air inside the passenger compartment is recirculated, i.e. no
outside air enters the vehicle. The filter also cleans recirculated passenger compartment air.
When the ECC system is in the AUTO mode, the green LED will be on
.
Operation
Press
to operate the air quality sensor (normal setting).
or
Select one of the following three functions by pressing
1, 2 or 3 times.
1. The AUT LED lights. The air quality sensor is now activated.
2. No LED lights. Recirculation is not activated unless needed to cool the passenger compartment in a warm climate.
3. The MAN LED lights. Recirculation is now activated.
Keep in mind the following
Make it a rule to have the air quality sensor activated at all times.
Recirculation is limited in cold climates to avoid fogging.
If window fogging occurs, you should deactivate the air quality sensor.
If fogging occurs, use the defroster functions for the windshield, side windows and rear window. See page 63.
ProCarManuals.com
Page 162 of 230
important, especially in the winter. Some automatic washers do not have facilities for washing the underbody.
Before driving into an automatic vehicle wash, make sure that side view mirrors, auxiliary lamps, etc, are secure,
and that any antenna(s) are retracted or removed. Otherwise there is risk of the machine dislodging them.
Exterior lighting
Condensation may form temporarily on the inside of the lenses of exterior lights such as headlights, fog lights, or tail
lights. This is normal and the lights are designed to withstand moisture. Normally, condensation will dissipate after the
lights have been on for a short time.
Polishing and waxing
Normally, polishing is not required during the first year after delivery, however, waxing may be beneficial.
Before applying polish or wax the vehicle must be washed and dried. Tar spots can be removed with kerosene or tar
remover. Difficult spots may require a fine rubbing compound.
After polishing use liquid or paste wax.
Several commercially available products contain both polish and wax.
Waxing alone does not substitute for polishing a dull surface.
A wide range of polymer-based vehicle waxes can be purchased today. These waxes are easy to use and produce a
long-lasting, high-gloss finish that protects the bodywork against oxidation, road dirt and fading.
Do not polish or wax your vehicle in direct sunlight (the surface of the vehicle should not be warmer than 113° F
(45° C).
CAUTION
Volvo does not recommend the use of long-life or durable paint protection coatings, some of which may claim to
prevent pitting, fading, oxidation, etc. These coatings have not been tested by Volvo for compatibility with your
vehicle's clear coat. Some of them may cause the clear coat to soften, crack, or cloud. Damage caused by application
of paint protection coatings may not be covered under your vehicle's paint warranty.
180 08 Car care
Washing and cleaning the vehicle
Cleaning the upholstery
Fabric
Clean with soapy water or a detergent. For more difficult spots caused by oil, ice cream, shoe polish, grease, etc., use a
clothing/fabric stain remover. Consult your Volvo retailer.
Interior plastic components
Cleaning interior plastic components should be done with a cleaning agent specially designed for this purpose. Consult
your Volvo retailer.
Alcantera™ suede-like material
Suede -like upholstery can be cleaned with a soft cloth and mild soap solution.
Leather care
Volvo's leather upholstery is manufactured with a protectant to repel soiling. Over time, sunlight, grease and dirt can
break down the protection. Staining, cracking, scuffing, and fading can result.
Volvo offers an easy-to-use, non-greasy leather care kit formulated to clean and beautify your vehicle's leather, and to
renew the protective qualities of its finish. The cleaner removes dirt and oil buildup. The light cream protectant
ProCarManuals.com
Page 181 of 230
Never touch the glass of bulbs with your fingers. Grease and oils from your fingers vaporize in the heat and will leave
a deposit on the reflector, which will damage it.
The optional Active Bi -Xenon® headlight bulbs contain trace amounts of mercury. These bulbs should always be
disposed of by an authorized Volvo retailer.
The following bulbs should only be replaced by an authorized Volvo service technician:
- Active Bi -Xenon® headlights,
- Courtesy (dome) lighting,
- Reading lights,
- Glove compartment lights
- Turn signals and courtesy lights in the side door mirrors
- High-mounted brake lights
- Diodes in the rear tail lights
Replacing bulbs at the front of the vehicle
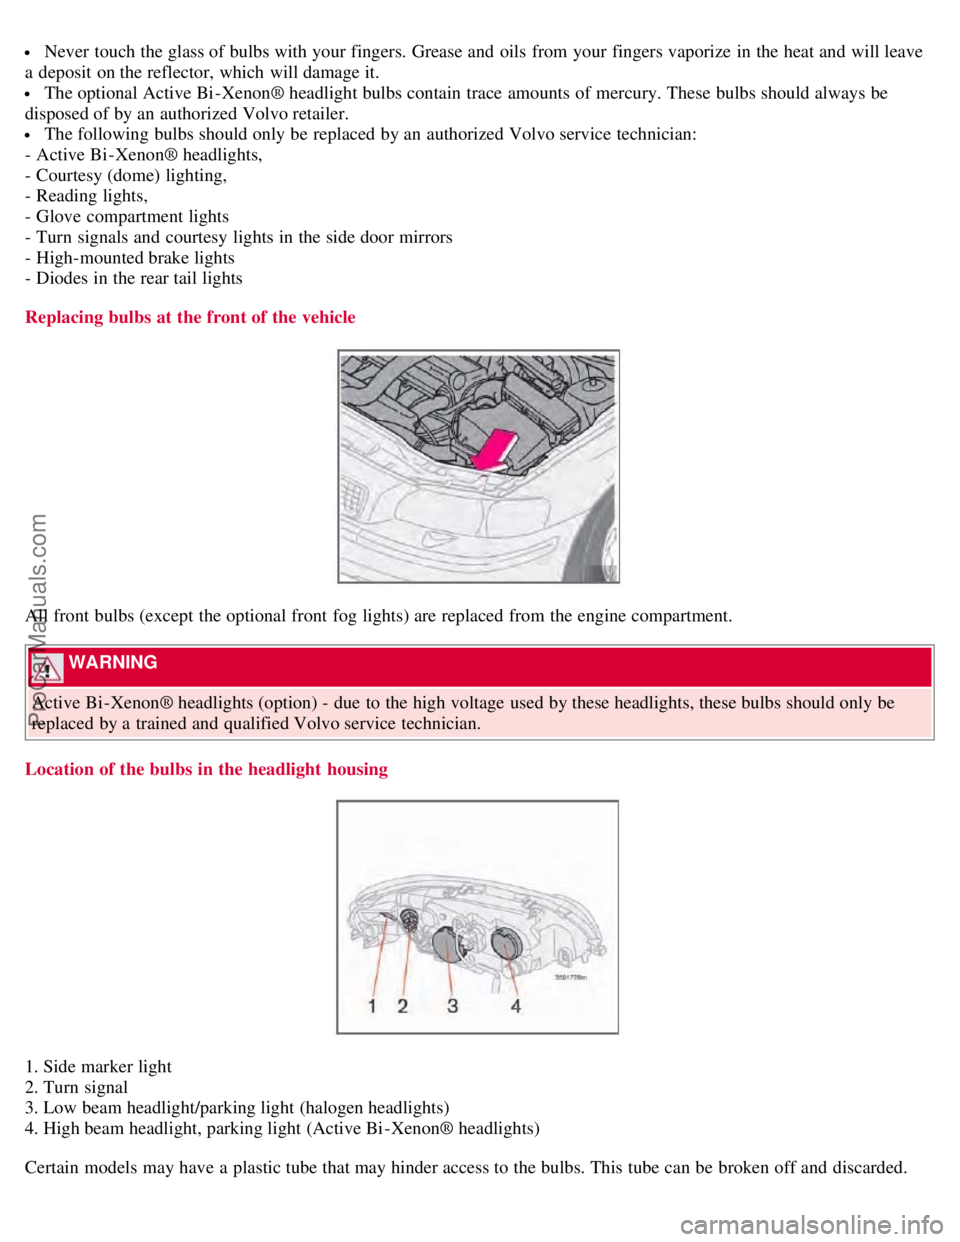
All front bulbs (except the optional front fog lights) are replaced from the engine compartment.
WARNING
Active Bi -Xenon® headlights (option) - due to the high voltage used by these headlights, these bulbs should only be
replaced by a trained and qualified Volvo service technician.
Location of the bulbs in the headlight housing
1. Side marker light
2. Turn signal
3. Low beam headlight/parking light (halogen headlights)
4. High beam headlight, parking light (Active Bi -Xenon® headlights)
Certain models may have a plastic tube that may hinder access to the bulbs. This tube can be broken off and discarded.
ProCarManuals.com
Page 186 of 230
5. Remove vent hose (4) from filler pipe.
Installing the new bulb:
1. Replace the bulb (same procedure as the driver's side bulb).
2. Ensure that the seal between the washer fluid reservoir and the filler pipe is correctly positioned.
3. Press the filler pipe (3) back into position.
4. Press the vent hose (4) into place on the filler pipe.
5. Reinstall and tighten the filler pipe screw (2).
6. Reinstall the radiator pipe to the box (1).
206 09 Maintenance and servicing
Replacing bulbs
Side marker light
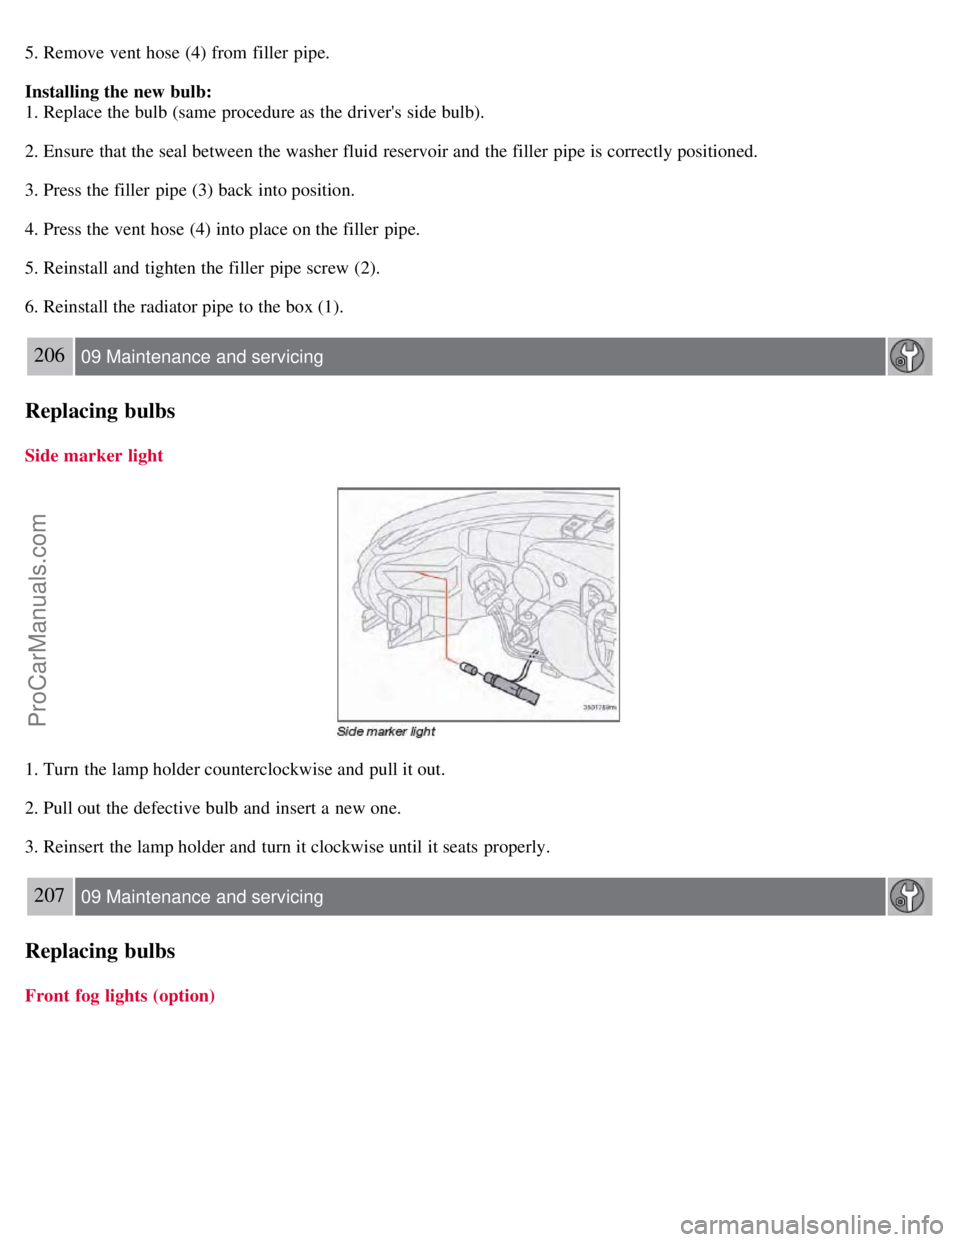
1. Turn the lamp holder counterclockwise and pull it out.
2. Pull out the defective bulb and insert a new one.
3. Reinsert the lamp holder and turn it clockwise until it seats properly.
207 09 Maintenance and servicing
Replacing bulbs
Front fog lights (option)
ProCarManuals.com