spare tire VOLVO S60 2008 Owners Manual
[x] Cancel search | Manufacturer: VOLVO, Model Year: 2008, Model line: S60, Model: VOLVO S60 2008Pages: 230, PDF Size: 5.33 MB
Page 3 of 230
Power moonroof (option)76
Home Link® Universal
Transceiver (option)78
3 Contents
03 Climate
Climate control systems - general
information84
Air distribution
85
Electronic Climate Control, ECC86
04 Interior
Front seats92
Interior lighting97
Storage compartments99
Rear seat and trunk103
Spare wheel, tools and jack106
05 Locks and alarm
Keys110
Remote control112
Locking and unlocking115
Child safety locks117
Alarm118
4 Contents
06 Starting and driving
General information 122
Fuel requirements124
Refueling125
Starting the vehicle127
Economical driving129
Handling and road holding130
Manual transmission131
Automatic transmission (option)132
All Wheel Drive (option)136
Brake system137
Stability system139
Towing141
Jump starting143
Towing a trailer144
Detachable trailer hitch146
Load carriers (accessory)147
Cold weather precautions149
Before a long distance trip150
Front/rear park assist
(option/accessory)151
07 Wheels and tires
General information
156
Tire inflation158
Tire inflation pressure table -U.S.
models160
Tire inflation pressure table -
Canadian models161
Tire Pressure Monitoring
System(TPMS) - U.S. models162
Tire designations
164
Glossary of tire terminology165
Vehicle loading166
Uniform Tire Quality Grading168
Snow chains, snow tires, studded
tires169
Temporary spare
170
Changing wheels171
Tire rotation174
08 Car care
Washing and cleaning the vehicle178
Paint touch up181
5 Contents
ProCarManuals.com
Page 10 of 230
Power moonroof (option)76
Home Link® Universal
Transceiver (option)78
3 Contents
03 Climate
Climate control systems - general
information84
Air distribution
85
Electronic Climate Control, ECC86
04 Interior
Front seats92
Interior lighting97
Storage compartments99
Rear seat and trunk103
Spare wheel, tools and jack106
05 Locks and alarm
Keys110
Remote control112
Locking and unlocking115
Child safety locks117
Alarm118
4 Contents
06 Starting and driving
General information 122
Fuel requirements124
Refueling125
Starting the vehicle127
Economical driving129
Handling and road holding130
Manual transmission131
Automatic transmission (option)132
All Wheel Drive (option)136
Brake system137
Stability system139
Towing141
Jump starting143
Towing a trailer144
Detachable trailer hitch146
Load carriers (accessory)147
Cold weather precautions149
Before a long distance trip150
Front/rear park assist
(option/accessory)151
07 Wheels and tires
General information
156
Tire inflation158
Tire inflation pressure table -U.S.
models160
Tire inflation pressure table -
Canadian models161
Tire Pressure Monitoring
System(TPMS) - U.S. models162
Tire designations
164
Glossary of tire terminology165
Vehicle loading166
Uniform Tire Quality Grading168
Snow chains, snow tires, studded
tires169
Temporary spare
170
Changing wheels171
Tire rotation174
08 Car care
Washing and cleaning the vehicle178
Paint touch up181
5 Contents
ProCarManuals.com
Page 97 of 230
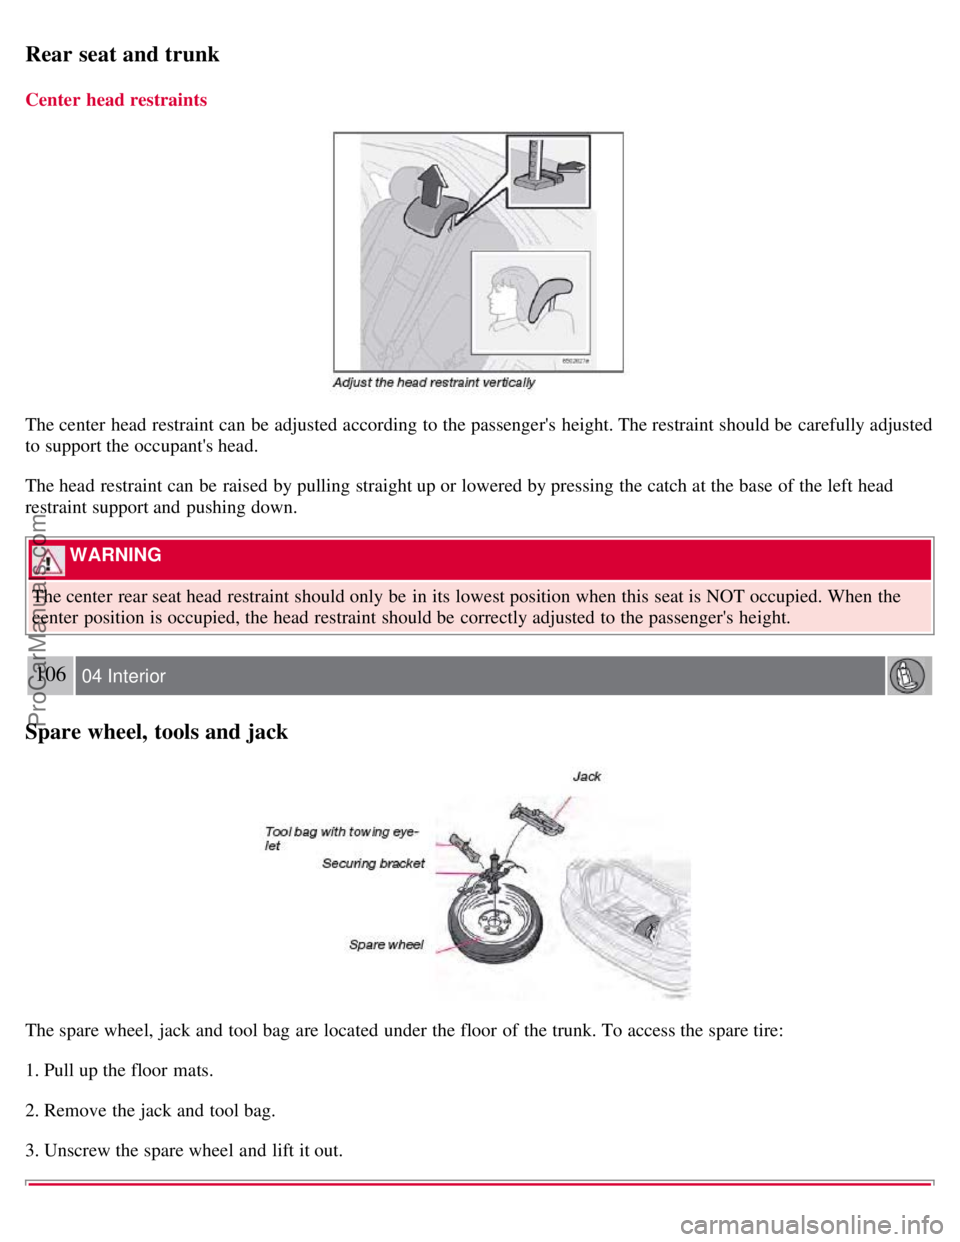
Rear seat and trunk
Center head restraints
The center head restraint can be adjusted according to the passenger's height. The restraint should be carefully adjusted
to support the occupant's head.
The head restraint can be raised by pulling straight up or lowered by pressing the catch at the base of the left head
restraint support and pushing down.
WARNING
The center rear seat head restraint should only be in its lowest position when this seat is NOT occupied. When the
center position is occupied, the head restraint should be correctly adjusted to the passenger's height.
106 04 Interior
Spare wheel, tools and jack
The spare wheel, jack and tool bag are located under the floor of the trunk. To access the spare tire:
1. Pull up the floor mats.
2. Remove the jack and tool bag.
3. Unscrew the spare wheel and lift it out.
ProCarManuals.com
Page 98 of 230
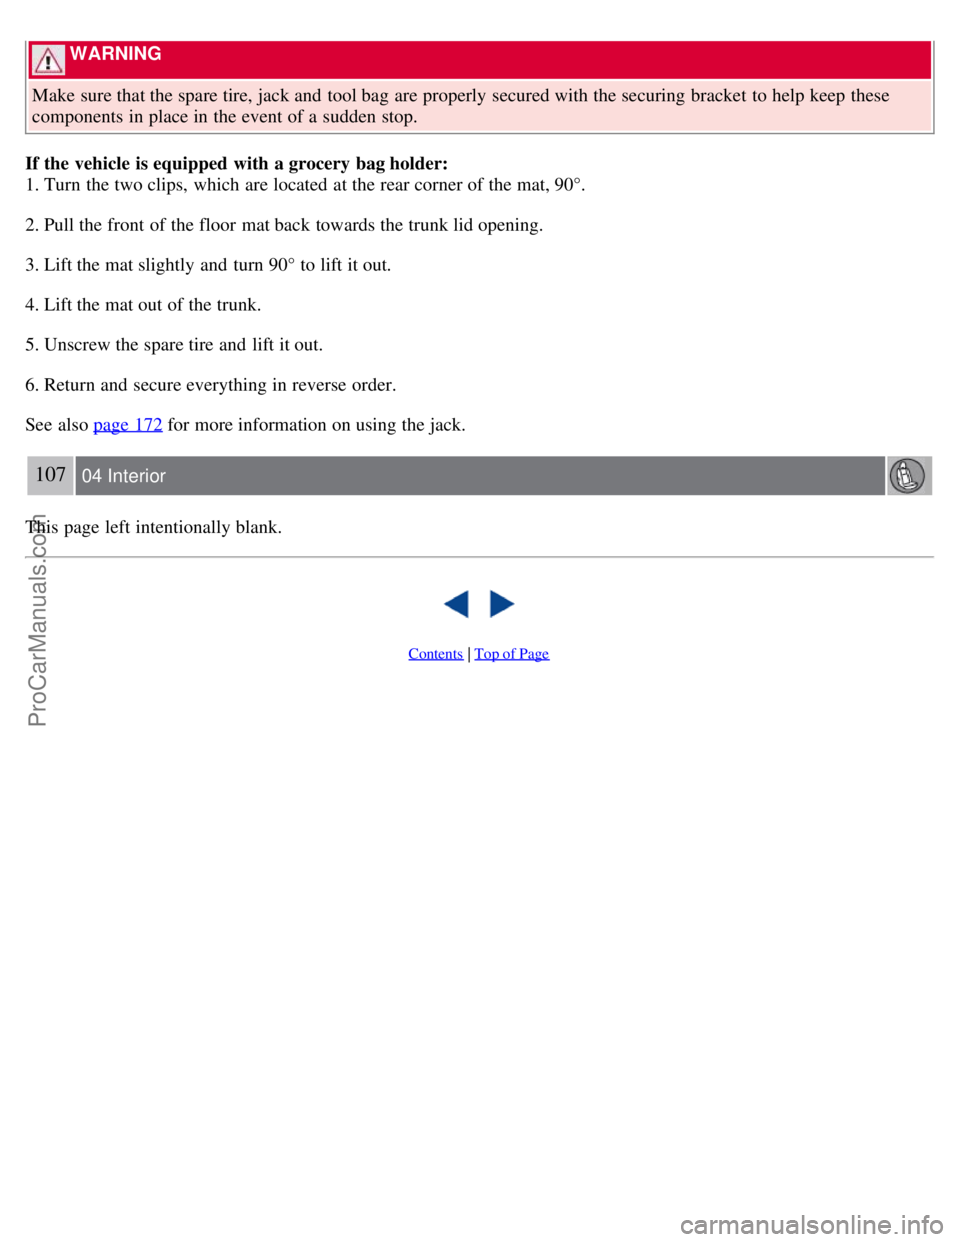
WARNING
Make sure that the spare tire, jack and tool bag are properly secured with the securing bracket to help keep these
components in place in the event of a sudden stop.
If the vehicle is equipped with a grocery bag holder:
1. Turn the two clips, which are located at the rear corner of the mat, 90°.
2. Pull the front of the floor mat back towards the trunk lid opening.
3. Lift the mat slightly and turn 90° to lift it out.
4. Lift the mat out of the trunk.
5. Unscrew the spare tire and lift it out.
6. Return and secure everything in reverse order.
See also page 172
for more information on using the jack.
107 04 Interior
This page left intentionally blank.
Contents | Top of Page
ProCarManuals.com
Page 125 of 230
If you slow down to a very low speed, the transmission will automatically shift down.
When starting in the MAN position, 3rd gear is the highest gear that may be selected.
NOTE
Kickdown does not function when the transmission is in the manual shift (Geartronic) mode.The gear selector must
be in the D position.
Kickdown
Automatic shift to a lower gear (kickdown) is achieved by depressing the accelerator pedal fully and briskly. An
upshift will occur when approaching the top speed for a particular gear or by releasing the accelerator pedal slightly.
Kickdown can be used for maximum acceleration or when passing at highway speeds.
Kickdown does not function when the transmission is in the manual shift (Geartronic) mode.
W - Winter/Wet driving mode - enhanced vehicle traction
Please refer to the information on page 133
.
136 06 Starting and driving
All Wheel Drive (option)
All Wheel Drive (AWD) - general information
Your Volvo can be equipped with permanent All Wheel Drive, which means that power is distributed automatically
between the front and rear wheels. Under normal driving conditions, most engine's power is directed to the front
wheels. However, if there is any tendency for the front wheels to spin, an electronically controlled coupling distributes
power to the wheels that have the best traction.
Tire dimensions
Volvo recommends that you always drive on tires of the same brand, size, construction (radial), tread pattern, load-,
speed-, traction- , temperature-, and treadwear rating. Never drive on mixed tires, except for brief periods when the
temporary spare tire is in use.
Always use properly inflated tires of correct dimensions. Tire size and inflation pressures are shown on the tire
inflation pressure placards, located on the driver's side B-pillar (the structural member at the side of the vehicle, at the
rear of the driver's door opening), or on the inside of the fuel filler door on Canadian models.
Temporary Spare
The temporary spare tire is for temporary, low-speed, short-distance use only. Replace it with a full-sized tire as soon
as possible. Do not drive on the temporary spare at speeds above 50 mph (80 km/h) or for distances greater than 50
miles (80 km).
Never install snow chains on a temporary spare.
137 06 Starting and driving
ProCarManuals.com
Page 130 of 230
3. If the indicator light goes out, the fault was temporary and no further action is required.
4. If the indicator light remains on, drive to an authorized Volvo workshop as soon as possible to have the system
checked.
The Stability Control indicator light glows steadily
If "DSTC SPIN CONTROL OFF" is displayed in the text window at the same time, this is a reminder that spin control
has been disabled by the driver.
The warning symbol
The warning symbol glows steadily yellow
The system has been temporarily switched off due to high brake temperature. "TRACTION CONTROL
TEMPORARILY OFF" will be displayed. The system will automatically switch on again when the brakes have cooled.
WARNING
The stability system is intended to help improve driving safety. It supplements, but can never replace, the driver's
judgement and responsibility when operating the vehicle. Speed and driving style should always be adapted to traffic
and road conditions.
141 06 Starting and driving
Towing
Emergency towing
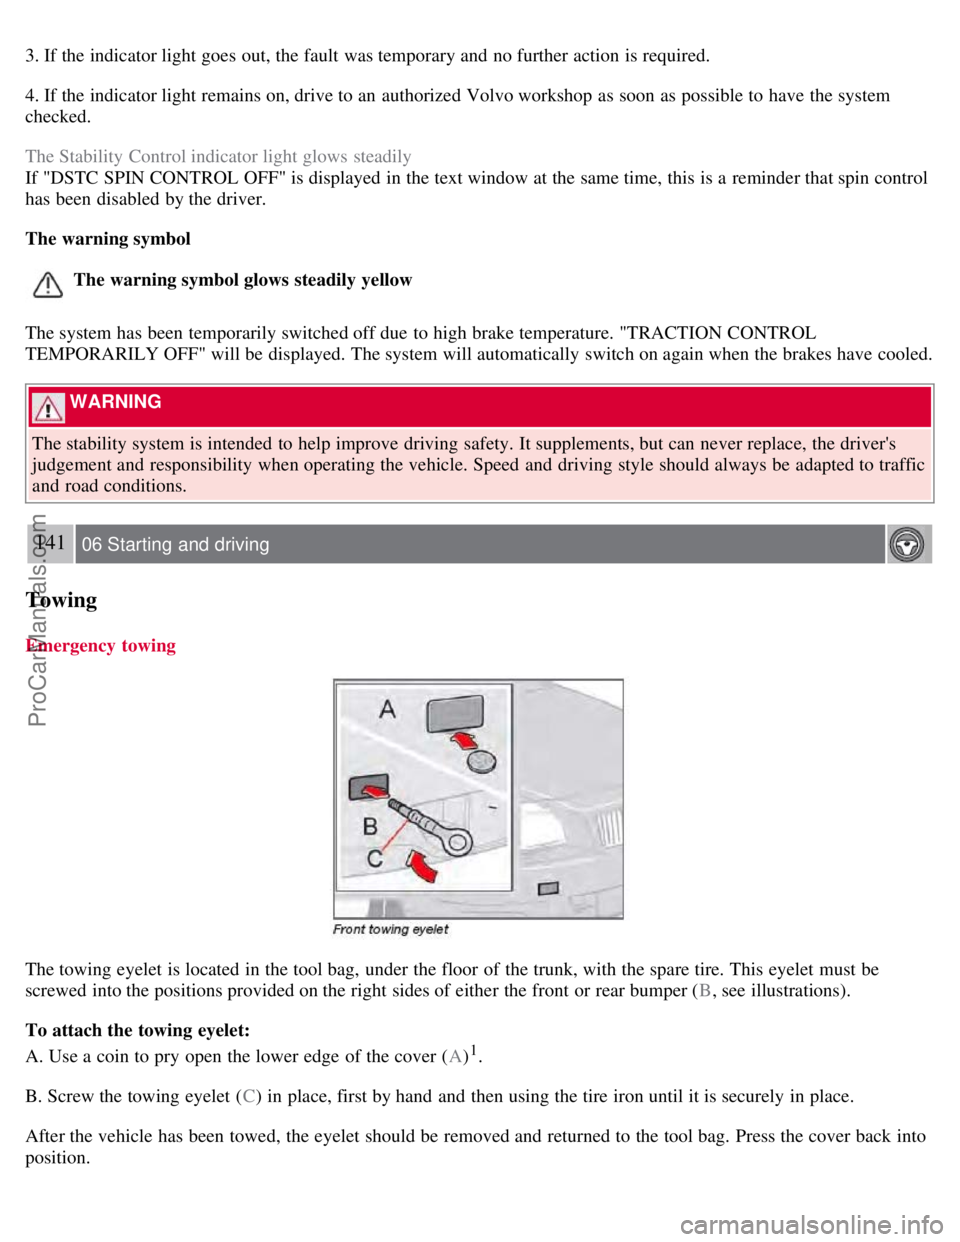
The towing eyelet is located in the tool bag, under the floor of the trunk, with the spare tire. This eyelet must be
screwed into the positions provided on the right sides of either the front or rear bumper ( B, see illustrations).
To attach the towing eyelet:
A. Use a coin to pry open the lower edge of the cover ( A)
1.
B. Screw the towing eyelet ( C) in place, first by hand and then using the tire iron until it is securely in place.
After the vehicle has been towed, the eyelet should be removed and returned to the tool bag. Press the cover back into
position.
ProCarManuals.com
Page 138 of 230
well as decreasing fuel consumption while the engine is warming up. For winter use, 5W - 30 oil, particularly the
synthetic type1, is recommended. Be sure to use good quality oil but do not use cold-weather oil for hard driving or in
warm weather. See section "Engine oil" for more information.
The load placed on the battery is greater during the winter since the windshield wipers, lighting, etc. are used more
often. Moreover, the capacity of the battery decreases as the temperature drops. In very cold weather, a poorly charged
battery can freeze and be damaged. It is therefore advisable to check the state of charge more frequently and spray an
antirust oil on the battery posts.
Volvo recommends the use of snow tires on all four wheels for winter driving - see section "Wheels and tires."
To prevent the washer fluid reservoir from freezing, add washer solvents containing antifreeze (see page 195 for
the location of the washer fluid reservoir). This is important since dirt is often splashed on the windshield during
winter driving, requiring the frequent use of the washers and wipers. Volvo Washer Solvent should be diluted as
follows:
- Down to 14° F (-10° C): 1 part washer solvent and 4 parts water
- Down to 5° F (-15° C): 1 part washer solvent and 3 parts water
- Down to 0° F (-18° C): 1 part washer solvent and 2 parts water
- Down to -18° F (-28° C): 1 part washer solvent and 1 part water
Use Volvo Teflon Lock Spray in the locks.
1Synthetic oil is not used when the oil is changed at the normal maintenance service intervals.
NOTE
Avoid the use of de -icing sprays as they can cause damage to the locks.
W - Winter/Wet driving mode - enhanced vehicle traction (automatic transmission)
Mode W will only function if the gear selector is in the D position.
Press the button at the base of the gear selector to engage/disengage this driving mode.
An LED in the button will light up to indicate that W is engaged and this will also be displayed in the instrument
panel (see page 48
).
This mode may be selected for starting/moving off on slippery roads.
150 06 Starting and driving
Before a long distance trip
It is always worthwhile to have your vehicle checked by a trained and qualified Volvo service technician before
driving long distances. Your retailer or service technician will also be able to supply you with bulbs, fuses, spark plugs
and wiper blades for your use in the event that problems occur.
As a minimum, the following items should be checked before any long trip:
Check that engine runs smoothly and that fuel consumption is normal.
Check for fuel, oil, and fluid leakage.
Check transmission oil level1.
Check condition of drive belts.
Check state of the battery's charge.
Examine tires carefully (the spare tire as well), and replace those that are worn. Check tire pressures.
The brakes, front wheel alignment, and steering gear should be checked by a trained and qualified Volvo service
technician only.
Check all lights, including high beams.
Reflective warning triangles are legal requirement in some countries.
ProCarManuals.com
Page 142 of 230
2 0 0 8
VOLVO S60
154 07 Wheels and tires
General information 156
Tire inflation158
Tire inflation pressure table -U.S. models160
Tire inflation pressure table -Canadian models161
Tire Pressure Monitoring System(TPMS) - U.S. models162
Tire designations164
Glossary of tire terminology165
Vehicle loading166
Uniform Tire Quality Grading168
Snow chains, snow tires, studded tires169
Temporary spare170
Changing wheels171
Tire rotation174
155 07 Wheels and tires
156 07 Wheels and tires
General information
Your vehicle is equipped with tires according to the vehicle's tire information placard on the B-pillar (the structural
member at the side of the vehicle, at the rear of the driver's door opening), or on the inside of the fuel filler door on
Canadian models.
The tires have good road holding characteristics and offer good handling on dry and wet surfaces. It should be noted
however that the tires have been developed to give these features on snow/ice-free surfaces.
Certain models are equipped with "all-season" tires, which provide a somewhat higher degree of road holding on
slippery surfaces than tires without the "all-season" rating. However, for optimum road holding on icy or snow-
ProCarManuals.com
Page 144 of 230
vehicle warranty. Volvo assumes no responsibility for death, injury, or expenses that may result from such
installations.
New tires
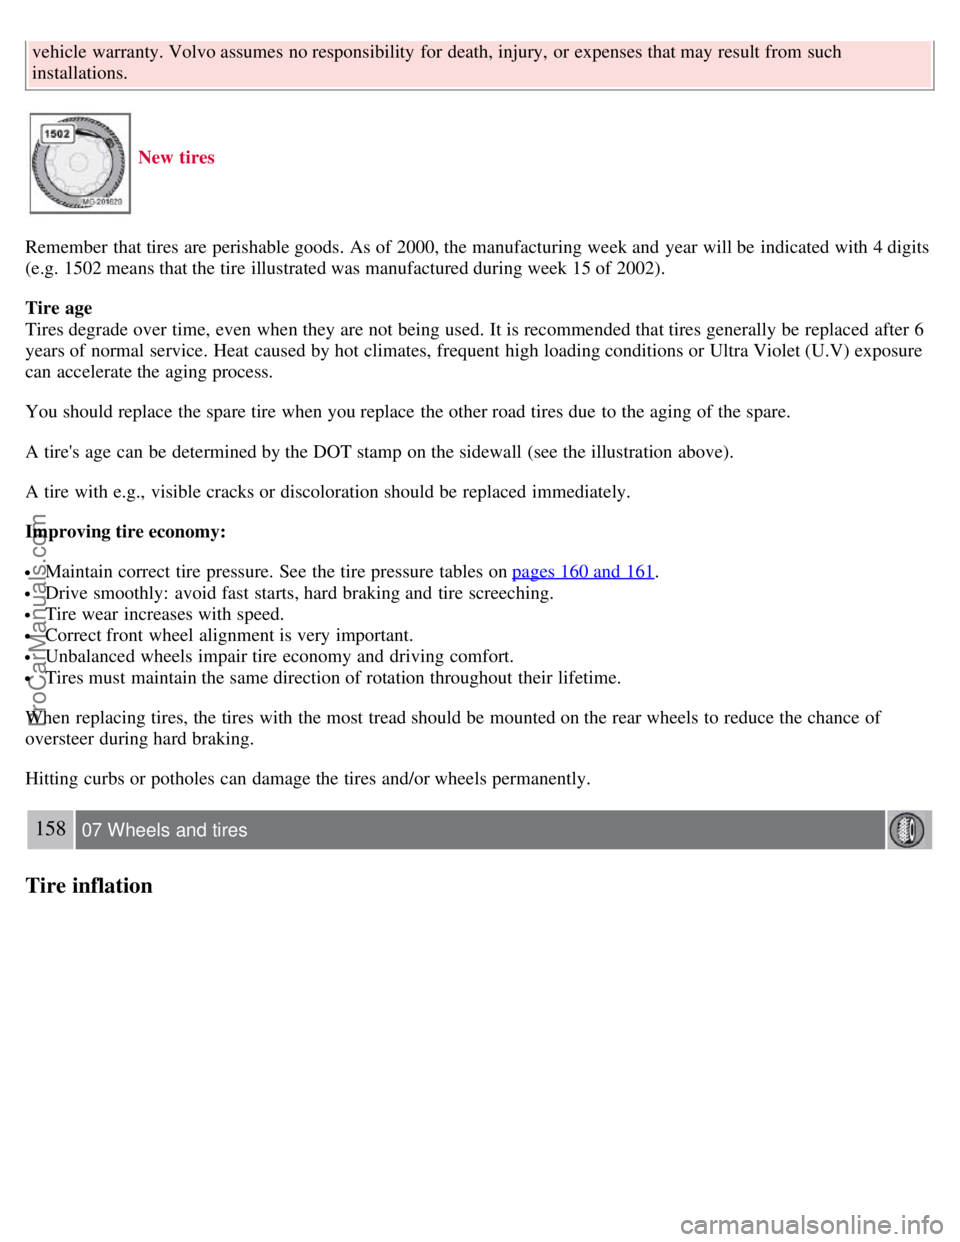
Remember that tires are perishable goods. As of 2000, the manufacturing week and year will be indicated with 4 digits
(e.g. 1502 means that the tire illustrated was manufactured during week 15 of 2002).
Tire age
Tires degrade over time, even when they are not being used. It is recommended that tires generally be replaced after 6
years of normal service. Heat caused by hot climates, frequent high loading conditions or Ultra Violet (U.V) exposure
can accelerate the aging process.
You should replace the spare tire when you replace the other road tires due to the aging of the spare.
A tire's age can be determined by the DOT stamp on the sidewall (see the illustration above).
A tire with e.g., visible cracks or discoloration should be replaced immediately.
Improving tire economy:
Maintain correct tire pressure. See the tire pressure tables on pages 160 and 161.
Drive smoothly: avoid fast starts, hard braking and tire screeching.
Tire wear increases with speed.
Correct front wheel alignment is very important.
Unbalanced wheels impair tire economy and driving comfort.
Tires must maintain the same direction of rotation throughout their lifetime.
When replacing tires, the tires with the most tread should be mounted on the rear wheels to reduce the chance of
oversteer during hard braking.
Hitting curbs or potholes can damage the tires and/or wheels permanently.
158 07 Wheels and tires
Tire inflation
ProCarManuals.com
Page 145 of 230
Check tire inflation pressure regularly.
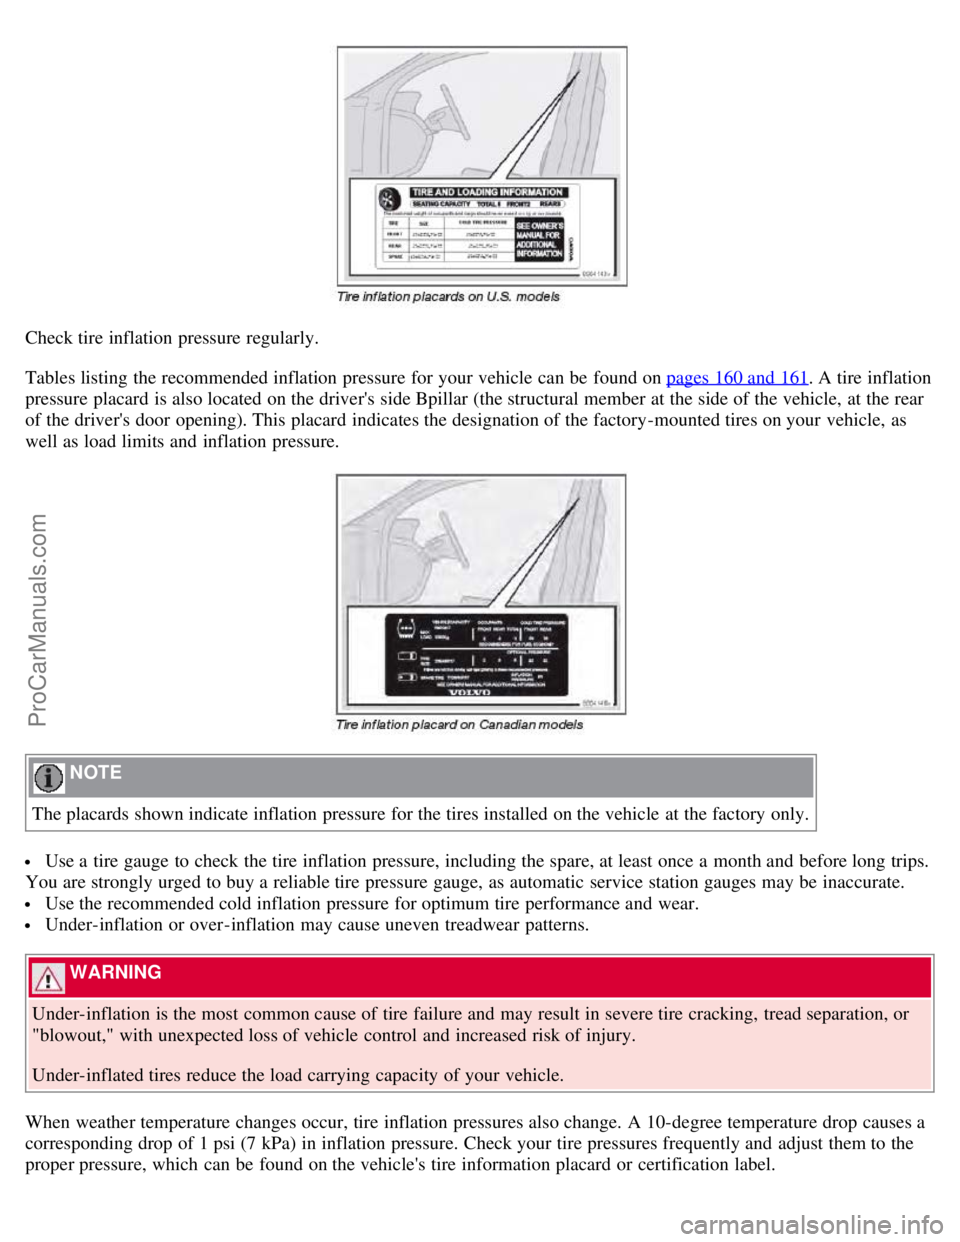
Tables listing the recommended inflation pressure for your vehicle can be found on pages 160 and 161
. A tire inflation
pressure placard is also located on the driver's side Bpillar (the structural member at the side of the vehicle, at the rear
of the driver's door opening). This placard indicates the designation of the factory-mounted tires on your vehicle, as
well as load limits and inflation pressure.
NOTE
The placards shown indicate inflation pressure for the tires installed on the vehicle at the factory only.
Use a tire gauge to check the tire inflation pressure, including the spare, at least once a month and before long trips.
You are strongly urged to buy a reliable tire pressure gauge, as automatic service station gauges may be inaccurate.
Use the recommended cold inflation pressure for optimum tire performance and wear.
Under-inflation or over-inflation may cause uneven treadwear patterns.
WARNING
Under-inflation is the most common cause of tire failure and may result in severe tire cracking, tread separation, or
"blowout," with unexpected loss of vehicle control and increased risk of injury.
Under-inflated tires reduce the load carrying capacity of your vehicle.
When weather temperature changes occur, tire inflation pressures also change. A 10-degree temperature drop causes a
corresponding drop of 1 psi (7 kPa) in inflation pressure. Check your tire pressures frequently and adjust them to the
proper pressure, which can be found on the vehicle's tire information placard or certification label.
ProCarManuals.com