sensor VOLVO S60 2013 Owner´s Manual
[x] Cancel search | Manufacturer: VOLVO, Model Year: 2013, Model line: S60, Model: VOLVO S60 2013Pages: 366, PDF Size: 6.85 MB
Page 97 of 366
03 Your driving environment
Lighting
03
* Option/accessory, for more information, see Introduction.95
Active high beams – AHB*AHB is a feature that uses a camera at the
upper edge of the windshield to detect the
headlights of oncoming vehicles or the tail-
lights of a vehicle directly ahead. When this
happens, the headlights will automatically
switch from high beams to low beams. When
the camera no longer detects the headlights/
taillights of other vehicles, your headlights will
switch back to high beams after several sec-
onds.
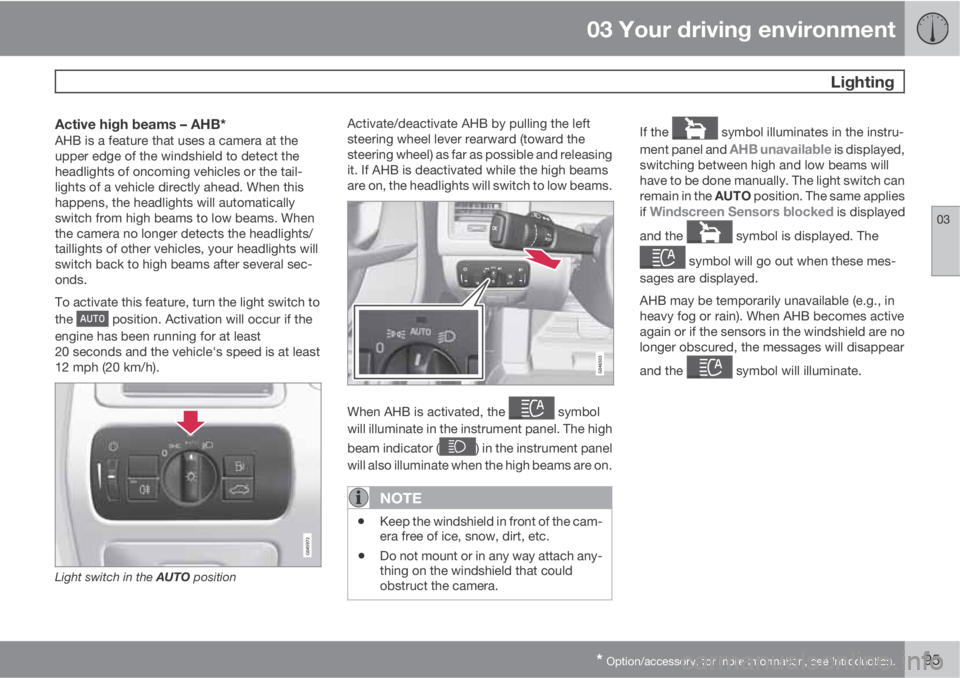
To activate this feature, turn the light switch to
the
position. Activation will occur if the
engine has been running for at least
20 seconds and the vehicle's speed is at least
12 mph (20 km/h).
Light switch in the AUTO position
Activate/deactivate AHB by pulling the left
steering wheel lever rearward (toward the
steering wheel) as far as possible and releasing
it. If AHB is deactivated while the high beams
are on, the headlights will switch to low beams.
When AHB is activated, the symbol
will illuminate in the instrument panel. The high
beam indicator (
) in the instrument panel
will also illuminate when the high beams are on.
NOTE
•Keep the windshield in front of the cam-
era free of ice, snow, dirt, etc.
•Do not mount or in any way attach any-
thing on the windshield that could
obstruct the camera.
If the symbol illuminates in the instru-
ment panel and
AHB unavailable is displayed,
switching between high and low beams will
have to be done manually. The light switch can
remain in the AUTO position. The same applies
if
Windscreen Sensors blocked is displayed
and the
symbol is displayed. The
symbol will go out when these mes-
sages are displayed.
AHB may be temporarily unavailable (e.g., in
heavy fog or rain). When AHB becomes active
again or if the sensors in the windshield are no
longer obscured, the messages will disappear
and the
symbol will illuminate.
Page 98 of 366
03 Your driving environment
Lighting
03
96* Option/accessory, for more information, see Introduction.
CAUTION
In the following situations, it may be neces-
sary to switch between high and low beams
manually:
•In heavy fog or rain
•In blowing snow or slush
•In bright moonlight
•In freezing rain
•In areas with dim street lighting
•When oncoming vehicles have dim front
lighting
•If there are pedestrians on or near the
road
•If there are reflective objects, such as
signs, near the road
•When oncoming vehicles' lights are
obscured by e.g., fences, bushes, etc.
•When there are vehicles on connecting
roads
•At the top of hills or in dips in the road
•In sharp curves
See page161 for more information about the
camera's limitations.
Tunnel detection (standard on models
with a rain sensor)
The optional rain sensor reacts to the change
in lighting conditions when, for example, the
vehicle is driven into a tunnel. If the daytime
running lights have been deactivated, tunnel
detection will activate the low beam headlights
while the vehicle is in the tunnel. The low
beams will be switched off approx.
20 seconds after the vehicle leaves the tunnel.
The rain sensor does not have to be activated
for tunnel detection to function.
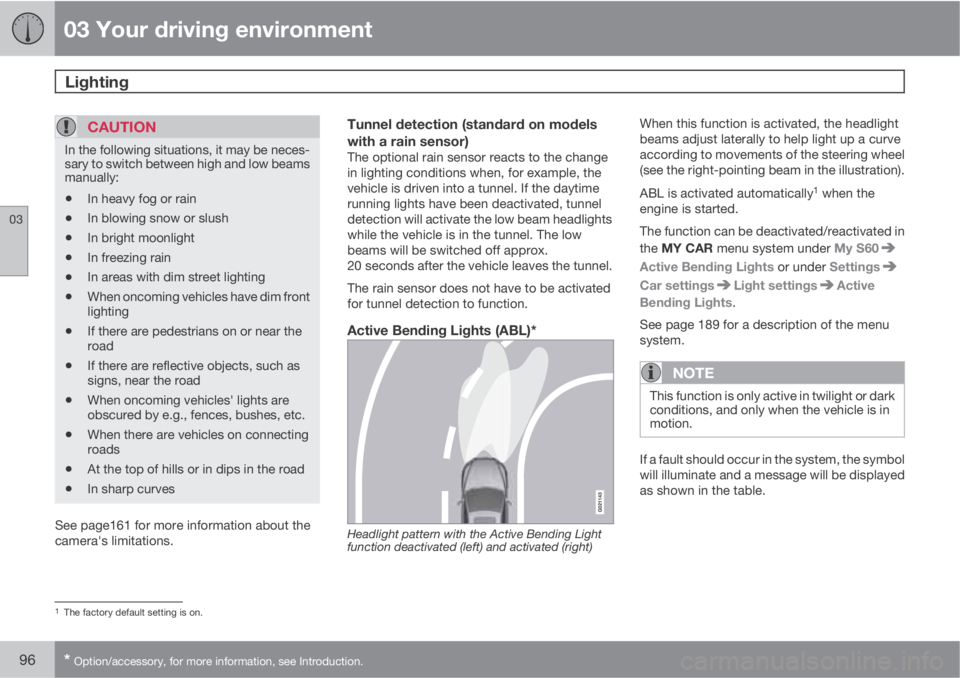
Active Bending Lights (ABL)*
Headlight pattern with the Active Bending Light
function deactivated (left) and activated (right)
When this function is activated, the headlight
beams adjust laterally to help light up a curve
according to movements of the steering wheel
(see the right-pointing beam in the illustration).
ABL is activated automatically
1 when the
engine is started.
The function can be deactivated/reactivated in
the MY CAR menu system under My S60
Active Bending Lights or under Settings
Car settingsLight settingsActive
Bending Lights.
See page 189 for a description of the menu
system.
NOTE
This function is only active in twilight or dark
conditions, and only when the vehicle is in
motion.
If a fault should occur in the system, the symbol
will illuminate and a message will be displayed
as shown in the table.
1The factory default setting is on.
Page 103 of 366
03 Your driving environment
Wipers and washers
03
* Option/accessory, for more information, see Introduction.101 Windshield wipers/washers
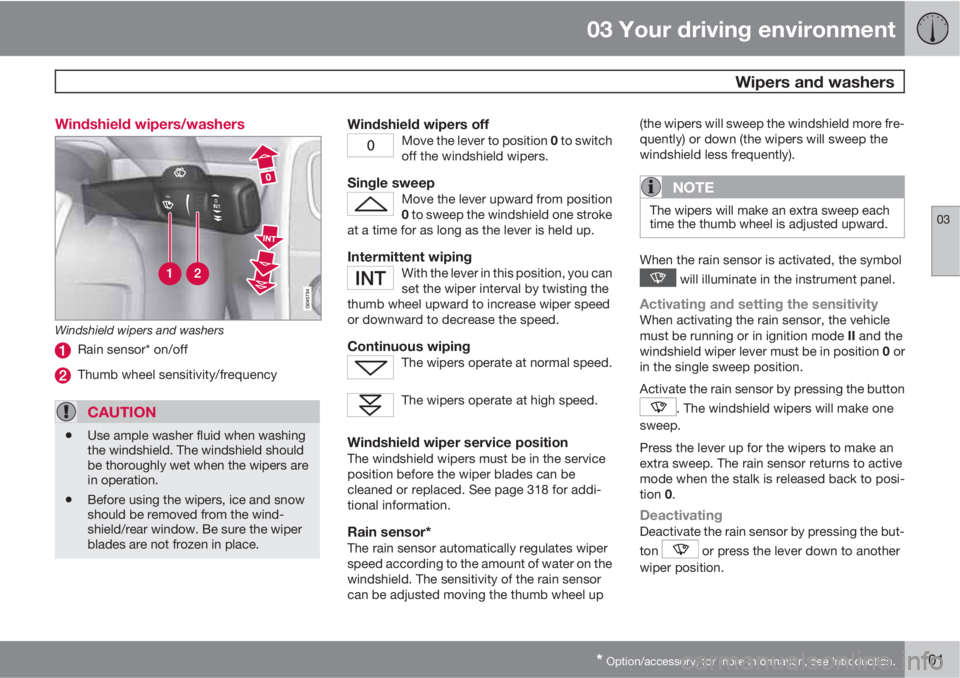
Windshield wipers and washers
Rain sensor* on/off
Thumb wheel sensitivity/frequency
CAUTION
•Use ample washer fluid when washing
the windshield. The windshield should
be thoroughly wet when the wipers are
in operation.
•Before using the wipers, ice and snow
should be removed from the wind-
shield/rear window. Be sure the wiper
blades are not frozen in place.
Windshield wipers offMove the lever to position 0 to switch
off the windshield wipers.
Single sweepMove the lever upward from position
0 to sweep the windshield one stroke
at a time for as long as the lever is held up.
Intermittent wipingWith the lever in this position, you can
set the wiper interval by twisting the
thumb wheel upward to increase wiper speed
or downward to decrease the speed.
Continuous wipingThe wipers operate at normal speed.
The wipers operate at high speed.
Windshield wiper service positionThe windshield wipers must be in the service
position before the wiper blades can be
cleaned or replaced. See page 318 for addi-
tional information.
Rain sensor*The rain sensor automatically regulates wiper
speed according to the amount of water on the
windshield. The sensitivity of the rain sensor
can be adjusted moving the thumb wheel up(the wipers will sweep the windshield more fre-
quently) or down (the wipers will sweep the
windshield less frequently).
NOTE
The wipers will make an extra sweep each
time the thumb wheel is adjusted upward.
When the rain sensor is activated, the symbol
will illuminate in the instrument panel.
Activating and setting the sensitivityWhen activating the rain sensor, the vehicle
must be running or in ignition mode II and the
windshield wiper lever must be in position 0 or
in the single sweep position.
Activate the rain sensor by pressing the button
. The windshield wipers will make one
sweep.
Press the lever up for the wipers to make an
extra sweep. The rain sensor returns to active
mode when the stalk is released back to posi-
tion 0.
DeactivatingDeactivate the rain sensor by pressing the but-
ton
or press the lever down to another
wiper position.
Page 104 of 366
03 Your driving environment
Wipers and washers
03
102* Option/accessory, for more information, see Introduction.
The rain sensor is automatically deactivated
when the key is removed from the ignition slot
or five minutes after the ignition has been
switched off.
CAUTION
The rain sensor should be deactivated when
washing the car in an automatic car wash,
etc. If the rain sensor function is left on, the
wipers will start inadvertently in the car
wash and could be damaged.
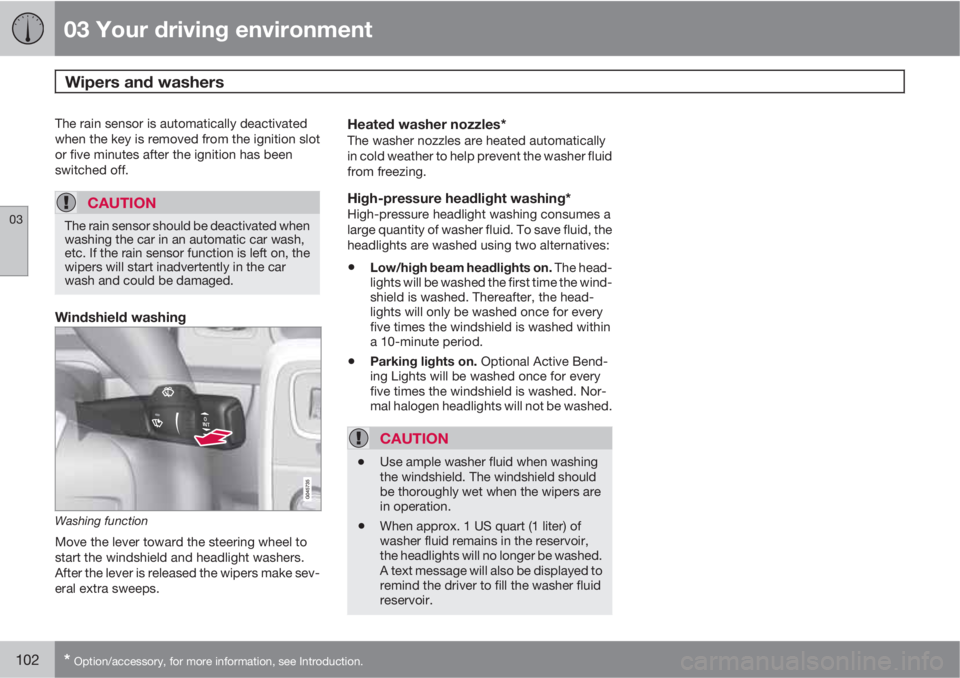
Windshield washing
Washing function
Move the lever toward the steering wheel to
start the windshield and headlight washers.
After the lever is released the wipers make sev-
eral extra sweeps.
Heated washer nozzles*The washer nozzles are heated automatically
in cold weather to help prevent the washer fluid
from freezing.
High-pressure headlight washing*High-pressure headlight washing consumes a
large quantity of washer fluid. To save fluid, the
headlights are washed using two alternatives:
•Low/high beam headlights on. The head-
lights will be washed the first time the wind-
shield is washed. Thereafter, the head-
lights will only be washed once for every
five times the windshield is washed within
a 10-minute period.
•Parking lights on. Optional Active Bend-
ing Lights will be washed once for every
five times the windshield is washed. Nor-
mal halogen headlights will not be washed.
CAUTION
•Use ample washer fluid when washing
the windshield. The windshield should
be thoroughly wet when the wipers are
in operation.
•When approx. 1 US quart (1 liter) of
washer fluid remains in the reservoir,
the headlights will no longer be washed.
A text message will also be displayed to
remind the driver to fill the washer fluid
reservoir.
Page 108 of 366
03 Your driving environment
Mirrors
03
106
reverse, the mirrors will automatically return to
their original position.
This function can be activated/deactivated in
MY CAR under Settings
Car settings
Side mirror settingsIn reverse gear tilt
left mirror or
In reverse gear tilt right
mirror. See page 189 for information about
the MY CAR menu system.
Automatic retraction when lockingWhen the vehicle is locked/unlocked with the
remote key the door mirrors are automatically
retracted/extended.
The function can be activated/deactivated in
MY CAR under Settings
Car settings
Side mirror settingsRetract side mirrors
when locking. See page 189 for a description
of the menu system.
Resetting to neutralMirrors that have been moved out of position
by an external force must be electrically reset
to the neutral position for electric retracting/
extending to work.
•Retract the mirrors with the L and R but-
tons.
•Fold them out again with the L and R but-
tons.
The mirrors are now reset in neutral position.
Home safe and approach lightingThe light on the door mirrors comes on when
approach lighting or home safe lighting is
selected, see page 100.
Rear window and door mirror
defrosters
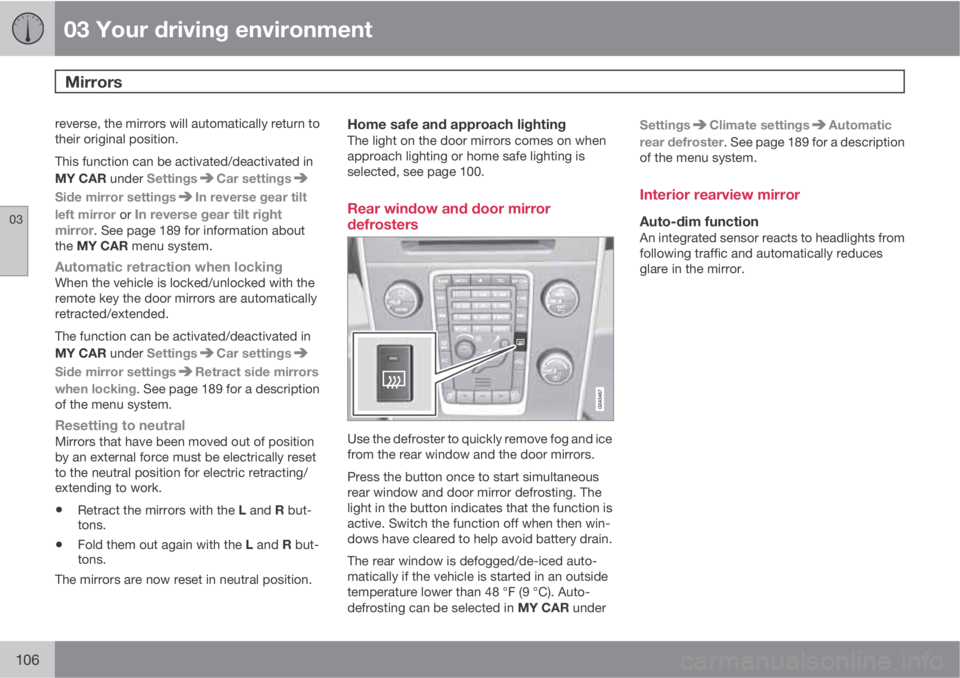
Use the defroster to quickly remove fog and ice
from the rear window and the door mirrors.
Press the button once to start simultaneous
rear window and door mirror defrosting. The
light in the button indicates that the function is
active. Switch the function off when then win-
dows have cleared to help avoid battery drain.
The rear window is defogged/de-iced auto-
matically if the vehicle is started in an outside
temperature lower than 48 °F (9 °C). Auto-
defrosting can be selected in MY CAR underSettings
Climate settingsAutomatic
rear defroster. See page 189 for a description
of the menu system.
Interior rearview mirror
Auto-dim functionAn integrated sensor reacts to headlights from
following traffic and automatically reduces
glare in the mirror.
Page 139 of 366
04 Driver support
Adaptive Cruise Control (ACC)*
04
* Option/accessory, for more information, see Introduction.137 Introduction
Adaptive Cruise Control (ACC) is an optional
system designed to assist the driver by main-
taining a set speed or a set time interval to the
vehicle ahead. It is primarily intended for use
on long straight roads in steady traffic, such as
on highways and other main roads.
When the driver has set the desired speed and
the time interval to the vehicle ahead, ACC
functions as follows:
•If there are no other vehicles in the lane
ahead of you, your vehicle will travel at the
set speed.
•If ACC's radar sensor detects a slower
moving vehicle in the lane ahead, the sys-
tem will adapt your vehicle's speed to help
maintain the set time interval to the vehicle
ahead. When there are no longer slower
moving vehicles ahead, your vehicle will
accelerate to resume the set speed.
If ACC is switched off completely or in standby
mode and your vehicle comes too close to
another vehicle ahead, the driver will be
warned by the Distance Alert system (see
page 148).
WARNING
•Adaptive Cruise Control cannot cover
all driving situations and traffic, weather
and road conditions. The "Function"
section provides information about lim-
itations that the driver must be aware of
before using this feature.
•This system is designed to be a supple-
mentary driving aid. It is not, however,
intended to replace the driver's atten-
tion and judgement. The driver is
responsible for maintaining a safe dis-
tance and speed and must intervene if
Adaptive Cruise Control does not main-
tain a suitable speed or suitable dis-
tance to the vehicle ahead.
•Maintenance of ACC components may
only be performed by a trained and
qualified Volvo technician.
Function
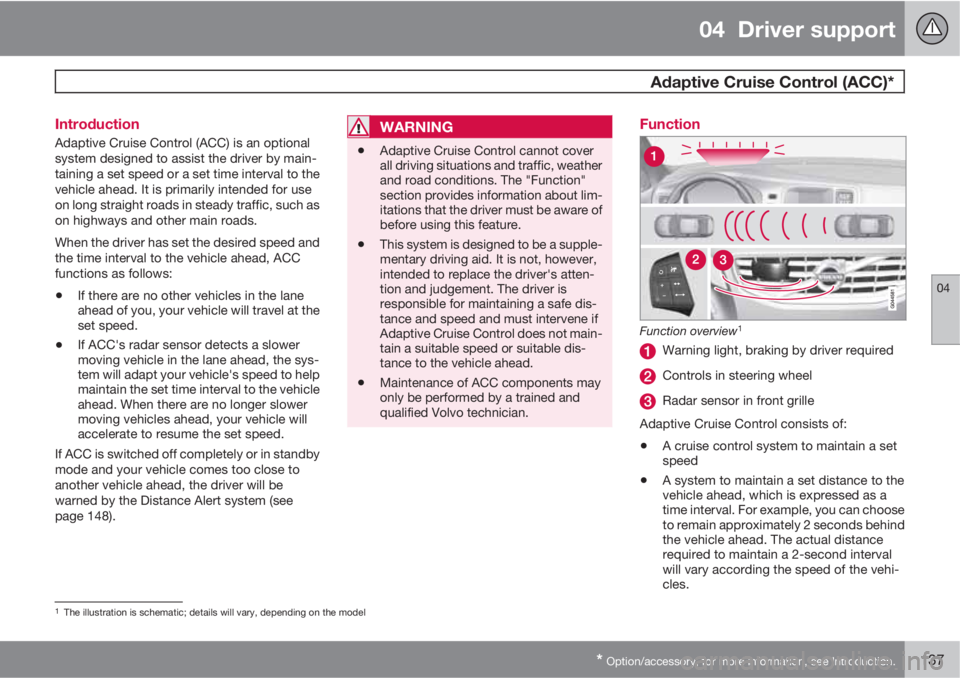
Function overview1
Warning light, braking by driver required
Controls in steering wheel
Radar sensor in front grille
Adaptive Cruise Control consists of:
•A cruise control system to maintain a set
speed
•A system to maintain a set distance to the
vehicle ahead, which is expressed as a
time interval. For example, you can choose
to remain approximately 2 seconds behind
the vehicle ahead. The actual distance
required to maintain a 2-second interval
will vary according the speed of the vehi-
cles.
1The illustration is schematic; details will vary, depending on the model
Page 140 of 366
04 Driver support
Adaptive Cruise Control (ACC)*
04
138* Option/accessory, for more information, see Introduction.
WARNING
•Adaptive Cruise Control is not a colli-
sion avoidance system. The driver is
always responsible for applying the
brakes if the system does not detect
another vehicle.
•Adaptive Cruise Control does not react
to people or animals, or small vehicles
such as bicycles and motorcycles. It
also does not react to slow moving,
parked or approaching vehicles, or sta-
tionary objects.
•Do not use Adaptive Cruise Control in
demanding driving conditions such as
city driving or other heavy traffic situa-
tions, in slippery conditions, when there
is a great deal of water or slush on the
road, during heavy rain or snow, in poor
visibility, on winding roads or on high-
way on- or off-ramps.
The distance to the vehicle ahead (in the same
lane) is monitored by a radar sensor. Your vehi-
cle's speed is regulated by accelerating and
braking. The brakes may emit a sound when
they are being modulated by the adaptive
cruise control system. This is normal.
WARNING
The brake pedal moves when the adaptive
cruise control system modulates the
brakes. Do not rest your foot under the
brake pedal.
The ACC system is designed to smoothly reg-
ulate speed. However, the driver must apply
the brakes in situations that require immediate
braking. This applies when there are great dif-
ferences in speed between vehicles, or if the
vehicle ahead brakes suddenly.
WARNING
Due to limitations in the radar sensor, brak-
ing may occur unexpectedly or not at all,
see page 143.
Adaptive Cruise Control can be put in active
mode at any permitted speed. However, if the
vehicle's speed falls below 18 mph (30 km/h)
or if engine speed (rpm) becomes too low, ACC
disengages (goes into standby mode) and will
no longer modulate the brakes
2. The driver will
then have to maintain a safe distance to the
vehicle ahead.
WARNING
When Adaptive Cruise Control is in standby
mode or is switched off completely, the
brakes will not be modulated automatically.
The driver must assume full control over the
vehicle.
Warning light—driver braking requiredAdaptive Cruise Control can exert brake force
that is equivalent to approximately 40% of the
vehicle's total braking capacity. In situations
requiring more brake force than ACC can pro-
vide and if the driver does not apply the brakes,
an audible signal from the Collision Warning
system will sound and warning light will illumi-
nate (see page 158) in the windshield to alert
the driver to react.
NOTE
Strong sunlight, reflections, extreme light
contrasts, the use of sunglasses, or if the
driver is not looking straight ahead may
make the visual warning signal in the wind-
shield difficult to see.
2Does not apply to vehicles with the optional Queue Assist. See page 141 for more information.
Page 141 of 366
04 Driver support
Adaptive Cruise Control (ACC)*
04
* Option/accessory, for more information, see Introduction.139
WARNING
Adaptive Cruise Control only warns of vehi-
cles detected by the radar sensor, see
page 143. In some cases there may be no
warning or the warning may be delayed. The
driver should always apply the brakes when
necessary.
Steep inclines and/or heavy loadsACC is primarily intended for use on fairly level
roads. The system may have difficulty main-
taining the correct distance to a vehicle ahead
on steep inclines, if the vehicle is carrying a
heavy load or is towing a trailer. In these situa-
tions, the driver should always be prepared to
apply the brakes if necessary.
Operation
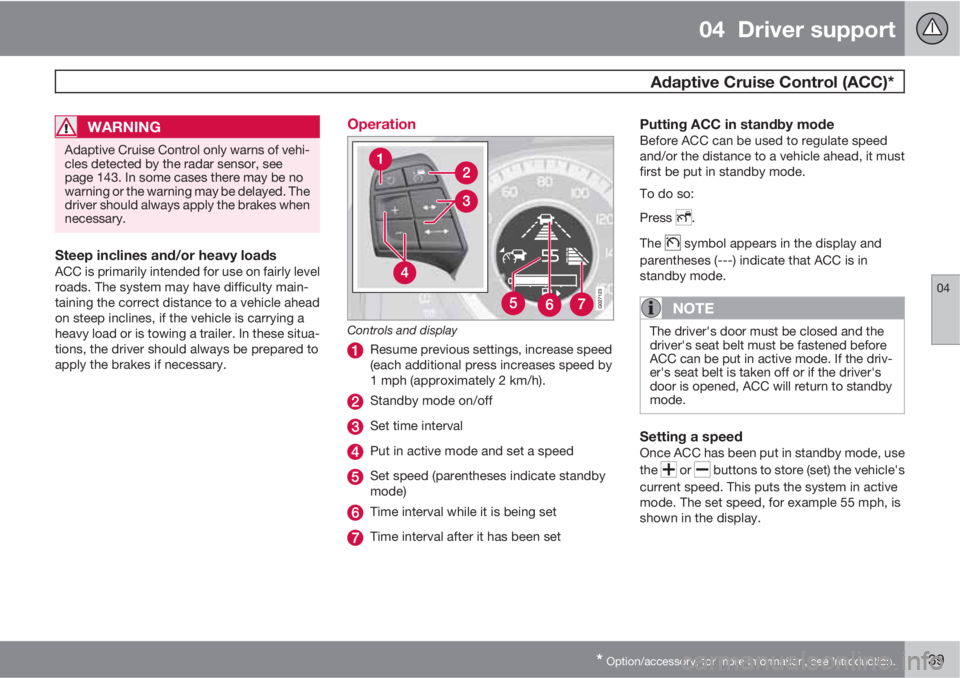
Controls and display
Resume previous settings, increase speed
(each additional press increases speed by
1 mph (approximately 2 km/h).
Standby mode on/off
Set time interval
Put in active mode and set a speed
Set speed (parentheses indicate standby
mode)
Time interval while it is being set
Time interval after it has been set
Putting ACC in standby modeBefore ACC can be used to regulate speed
and/or the distance to a vehicle ahead, it must
first be put in standby mode.
To do so:
Press
.
The
symbol appears in the display and
parentheses (---) indicate that ACC is in
standby mode.
NOTE
The driver's door must be closed and the
driver's seat belt must be fastened before
ACC can be put in active mode. If the driv-
er's seat belt is taken off or if the driver's
door is opened, ACC will return to standby
mode.
Setting a speedOnce ACC has been put in standby mode, use
the
or buttons to store (set) the vehicle's
current speed. This puts the system in active
mode. The set speed, for example 55 mph, is
shown in the display.
Page 143 of 366
04 Driver support
Adaptive Cruise Control (ACC)*
04
* Option/accessory, for more information, see Introduction.141
Standby mode due to action by the driverACC is temporarily deactivated and put in
standby mode:
•if the brakes are applied
•if the gear selector is moved to N
•if the driver drives at a speed higher than
the set speed for more than 1 minute.
In this happens, the driver will have to regulate
the vehicle's speed.
NOTE
If the accelerator pedal is only depressed for
a short time, such as when passing another
vehicle, ACC is deactivated temporarily and
is reactivated when the pedal is released.
Automatic standby modeAdaptive cruise control is linked to other sys-
tems such as the stability and traction control
system (DSTC). If this system is not functioning
properly, adaptive cruise control is automati-
cally deactivated and will go into standby
mode.
In the event of automatic deactivation, an audi-
ble signal will sound and the message
Cruise
control Cancelled is shown in the display.
The driver must then intervene and adapt thevehicle's speed to the surrounding traffic and
regulate the distance to the vehicle ahead.
An automatic switch to standby mode may be
caused if:
•engine speed (rpm) is too high/low
•the vehicle's speed goes below 18 mph
(30 km/h)3
•the wheels lose traction
•brake temperature is high
•the radar sensor is obstructed by, for
example, wet snow or rain.
Resuming the set speedIf ACC is in standby mode, it can be reactivated
by pressing the
button on the steering
wheel keypad. The vehicle will return to the
most recently set speed.
WARNING
The vehicle may accelerate quickly after has been pressed if its current speed is
considerably lower than the set speed.
Passing another vehicleIf your vehicle’s speed is being regulated by
ACC and the driver indicates that he/she would
like to pass the vehicle ahead by using theleft turn signal, ACC can assist by accelerating
briefly.
This function is active at speeds above approx-
imately 45 mph (70 km/h).
WARNING
Please be aware that this function will also
cause the vehicle to accelerate briefly in
certain situations other than passing
another vehicle, for example using the left
turn signal to indicate a lane change or a
turn toward a highway exit at speeds above
approximately 45 mph (70 km/h).
Queue AssistQueue Assist is an added ACC feature that is
linked to your vehicle's automatic transmis-
sion.
Queue Assist consists of the following func-
tions:
•Enhanced speed interval (including when
the vehicle is at a complete stop or is mov-
ing at speed below 18 mph (30 km/h))
•Automatic standby mode when ACC
changes target vehicles
•No automatic braking when at a standstill
•The parking brake is applied automatically
3Does not apply to vehicles equipped with the optional Queue Assist
Page 144 of 366
04 Driver support
Adaptive Cruise Control (ACC)*
04
142* Option/accessory, for more information, see Introduction.
Please note that the lowest speed that can be
set is 18 mph (30 km/h), although ACC can
maintain a set speed/distance to a vehicle
ahead down to a standstill. Queue Assist con-
sists of the following features:
Enhanced speed interval
NOTE
The driver's door must be closed and the
driver's seat belt must be fastened before
ACC can be put in active mode. If the driv-
er's seat belt is taken off or if the driver's
door is opened, ACC will return to standby
mode.
Your vehicle can maintain the set time interval
to the vehicle ahead at any permissible speed,
including a complete stop.
In order to activate ACC at speeds below
18 mph (30 km/h):
•The vehicle ahead must be within a rea-
sonable distance (not farther away than
approx. 100 ft/30 meters)
•The lowest speed that can be selected is
18 mph (30 km/h), although ACC will also
help maintain the set time interval to the
vehicle ahead at lower speeds, including a
complete stop.During short stops (less than approximately
3 seconds) in slow-moving traffic, your vehicle
will begin moving again automatically as soon
as the vehicle ahead begins to move.
If it takes more than 3 seconds for the vehicle
ahead to begin moving, ACC will be automati-
cally go into standby mode.
The driver will then have to reactivate ACC in
one of the following ways:
•By pressing
•By accelerating up to at least 3 mph
(4 km/h). ACC will then resume following
the vehicle ahead.
Your vehicle will then resume following the
vehicle ahead at the set time interval.
NOTE
ACC can remain active and keep your vehi-
cle at a standstill for up to 4 minutes. After
4 minutes have elapsed, the parking brake
will be engaged and ACC will go into
standby mode.
To reactivate ACC, the driver must release
the parking brake (see page 125).
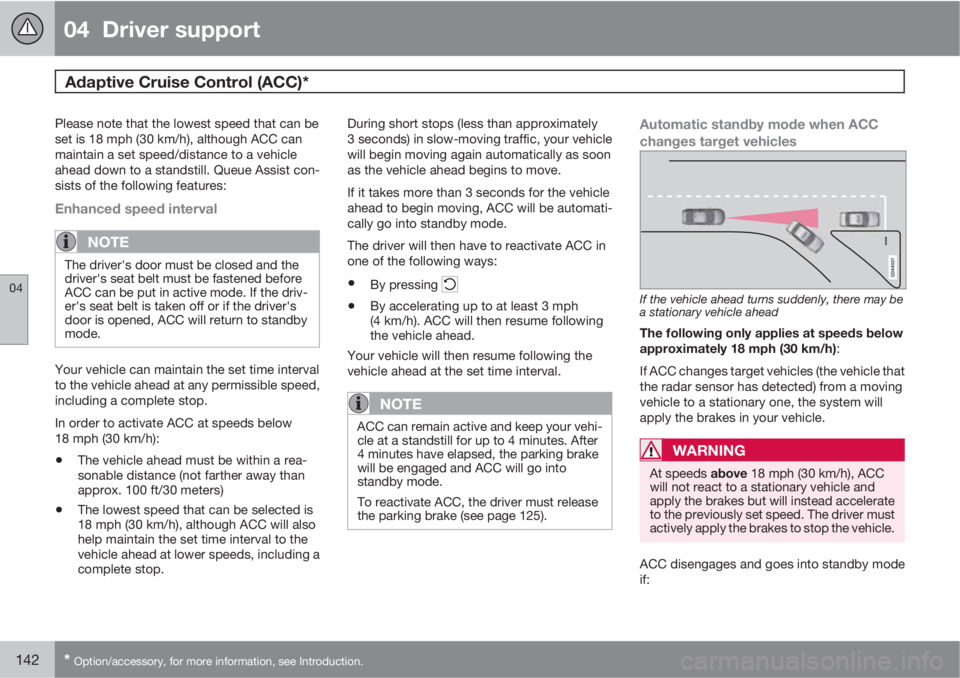
Automatic standby mode when ACC
changes target vehicles
If the vehicle ahead turns suddenly, there may be
a stationary vehicle ahead
The following only applies at speeds below
approximately 18 mph (30 km/h):
If ACC changes target vehicles (the vehicle that
the radar sensor has detected) from a moving
vehicle to a stationary one, the system will
apply the brakes in your vehicle.
WARNING
At speeds above 18 mph (30 km/h), ACC
will not react to a stationary vehicle and
apply the brakes but will instead accelerate
to the previously set speed. The driver must
actively apply the brakes to stop the vehicle.
ACC disengages and goes into standby mode
if: