stop start VOLVO S60 2014 Owner´s Manual
[x] Cancel search | Manufacturer: VOLVO, Model Year: 2014, Model line: S60, Model: VOLVO S60 2014Pages: 386, PDF Size: 11.24 MB
Page 18 of 386
01 Safety
Occupant safety 01
16
Volvo's concern for safety
Safety is Volvo's cornerstone. Our concern dates back to 1927 when the first Volvo rolledoff the production line. Three-point seat belts(a Volvo invention), safety cages, and energy-absorbing impact zones were designed intoVolvo vehicles long before it was fashionableor required by government regulation. We will not compromise our commitment to safety. We continue to seek out new safetyfeatures and to refine those already in ourvehicles. You can help. We would appreciatehearing your suggestions about improvingautomobile safety. We also want to know ifyou ever have a safety concern with yourvehicle. Call us in the U.S. at:1-800-458-1552 or in Canada at:1-800-663-8255.
Occupant safety remindersHow safely you drive doesn't depend on howold you are but rather on:• How well you see.
• Your ability to concentrate.
• How quickly you make decisions under stress to avoid an accident.
The following suggestions are intended to help you cope with the ever changing trafficenvironment. •
Never drink and drive.
• If you are taking any medication, consult your physician about its potential effectson your driving abilities.
• Take a driver-retraining course.
• Have your eyes checked regularly.
• Keep your windshield and headlightsclean.
• Replace wiper blades when they start toleave streaks.
• Take into account the traffic, road, andweather conditions, particularly withregard to stopping distance.
• Never send text messages while driving.
• Refrain from using or minimize the use ofa cell phone while driving.
Recall information
Information regarding recalls or other service campaigns is available on our website atwww.volvocars.com/us/. Select the tabYOUR VOLVO and the heading RECALLINFORMATION will be displayed at the lowerleft side of the screen. Enter your VehicleIdentification Number for your vehicle (foundat the base of the windshield). If your vehiclehas any open Recalls, they will be displayedon this page.
Volvo customers in CanadaFor any questions regarding open recalls foryour vehicle, please contact your authorizedVolvo retailer. If your retailer is unable toanswer your questions, please contact VolvoCustomer Relations at 905 695-9626, Mon-day through Friday, 8:30 A.M. to 5:00 P.M.EST or by e-mail at [email protected] may also write us at: Volvo Cars of CanadaNational Customer Service9130 Leslie Street, Suite 101Richmond Hill, Ontario L4B 0B9
Page 67 of 386

02 Locks and alarm
Keyless drive
02
65
Locking the vehicle
Models with keyless drive have a pressure-sensi- tive area on the outside door handles and a rub-ber-covered button next to the trunk openingcontrol
The doors and the trunk can be locked by pressing the pressure-sensitive area on eachof the outside door handles or the rubber-covered button next to the trunk openingcontrol. The lock indicator on the dash willbegin to flash.
NOTE
On keyless drive vehicles, the gear selec- tor must be in the Park ( P) position, all
doors and the trunk must be closed andthe ignition must be switched off beforethe vehicle can be locked.
Keyless drive remote key and driver's seat/door mirror memory
• When you leave the vehicle with a PCC in your possession and lock any door, theposition of the driver's seat and door mir-rors will be stored in the seat's memory.
• The next time a door is opened by a per-son with the
same PCC in his/her pos-
session, the driver's seat and door mir-rors will automatically move to the posi-tion that they were in when the door wasmost recently locked.
NOTE
If several people carrying PCCs approach the vehicle at the same time, the driver'sseat and door mirrors will assume thepositions they were in for the person whoopens the driver's door.
See also page 89 for information on adjust- ing and storing the seat's position in the seatmemory.
Keyless drive information messagesIf all of the PCCs are removed from the vehi-cle while the engine is running or if the igni-tion is in mode II (see page 86) and all of
the doors are closed, a message will appearin the instrument panel display and an audiblesignal will sound. When at least one PCC has been returned tothe car, the message will be erased in the dis-play and the audible signal will stop when:
• A door has been opened and closed
• The PCC has been inserted in the ignition slot
• The
OK button (see page 195 for the
location of this button) has been pressed.
CAUTION
• Keyless drive remote keys should never be left in the vehicle. In the eventof a break-in, a remote found in thevehicle could make it possible to startthe engine.
• Electromagnetic fields or metalobstructions can interfere with thekeyless drive system. The remote keyshould never be placed closer thanapproximately 4-6 in. (10-15 cm) tocell phones, metallic objects or e.g.,stored in a metal briefcase.
USA – FCC ID:KR55WK48952, KR55WK48964 NOTEThis device complies with part 15 of the FCC Rules. Operation is subject to the followingtwo conditions: (1) This device may not cause
Page 75 of 386

02 Locks and alarm
Alarm
02
73
Disarming the alarm
–Press the Unlock button on the remote key.
> Two short flashes from the car's direc-tion indicators confirm that the alarm has been deactivated and that alldoors are unlocked.
Turning off (stopping) the alarm
If the alarm is sounding, it can be stopped by pressing the Unlock button on the remote keyor by inserting the remote key in the ignitionslot. Two short flashes from the car's direc-tion indicators confirm that the alarm hasbeen turned off.
Other alarm-related functions
Automatic re-armingIf the doors are unlocked, the locks will auto- matically re-engage (re-lock) and the alarmwill re-arm after 2 minutes unless a door orthe trunk has been opened.
Audible/visual alarm signal
• An audible alarm signal is given by a bat- tery powered siren. The alarm cycle lastsfor 30 seconds.
• The visual alarm signal is given by flash-ing all turn signals for approximately5 minutes or until the alarm is turned off.
Remote key not functioningIf the remote key is not functioning properly, the alarm can be turned off and the vehiclecan be started as follows:
1. Open the driver's door with the key blade
(see page 60 for information on detaching the key blade).
> This will trigger the alarm.
2. Insert the remote key into the ignition slot(also on vehicles with the optional keyless drive). This will turn off the alarm.
3. Start the engine (see page 118 for instructions).
Page 79 of 386

03 Your driving environment
Instruments and controls
03
}}
* Option/accessory, for more information, see Introduction.77
FunctionPage
Controls for menus and messages, turn signals,high/low beams, tripcomputer197, 101, 96,212
Paddles for manually shifting gears*124
Cruise control142
Horn, airbag94, 23
Main instrument panel77
Infotainment system/ Bluetooth hands-freecontrols226, 254
START/STOP ENGINE button86
Ignition slot86
Display for infotainment system functions andmenus226, 195
Door handle-
In-door control panels (power windows, mirrors,central locking button)106, 108, , 67
FunctionPage
Hazard warning flashers101
Controls for the infotain- ment system and menus197, 226, 206
Climate system controls206
Gear selector123
Controls for active chas- sis (Four-C)*219
Wipers and washers104, 105
Steering wheel adjust- ment94
Hood opening control325
Parking brake132
Power seat* adjustment controls88
Lighting panel, buttons for opening fuel fillerdoor and unlocking andopening the trunk96, 276, 69
Instrument panel information displays
Information displays: analog instrument panel
Information displays: digital instrument panel* These displays show information on some of the vehicle's functions, such as cruise con-
Page 83 of 386
03 Your driving environment
Instruments and controls
03
* Option/accessory, for more information, see Introduction.81
change in your car's behavior. Even so, an uncorrected condition could hurt fuel econ-omy, emission controls, and drivability.Extended driving without correcting the causecould even damage other components inyour vehicle. This light may illuminate if the fuel filler cap is not closed tightly or if the engine was runningwhile the vehicle was refueled.
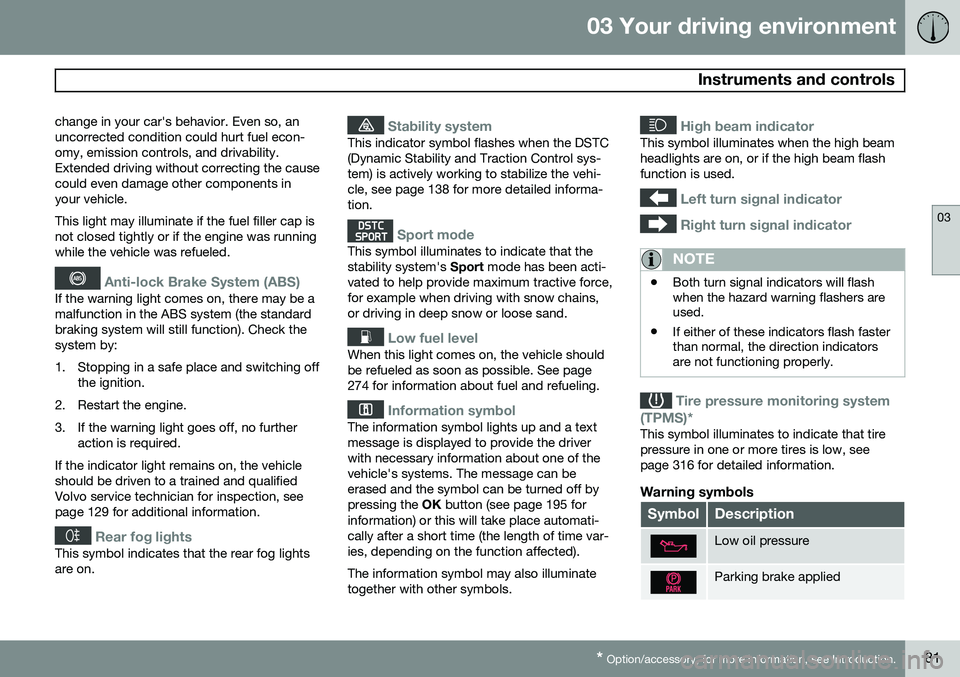
Anti-lock Brake System (ABS)
If the warning light comes on, there may be a malfunction in the ABS system (the standardbraking system will still function). Check thesystem by:
1. Stopping in a safe place and switching off
the ignition.
2. Restart the engine.
3. If the warning light goes off, no further action is required.
If the indicator light remains on, the vehicle should be driven to a trained and qualifiedVolvo service technician for inspection, seepage 129 for additional information.
Rear fog lights
This symbol indicates that the rear fog lights are on.
Stability system
This indicator symbol flashes when the DSTC (Dynamic Stability and Traction Control sys-tem) is actively working to stabilize the vehi-cle, see page 138 for more detailed informa-tion.
Sport mode
This symbol illuminates to indicate that the stability system's Sport mode has been acti-
vated to help provide maximum tractive force,for example when driving with snow chains,or driving in deep snow or loose sand.
Low fuel level
When this light comes on, the vehicle should be refueled as soon as possible. See page274 for information about fuel and refueling.
Information symbol
The information symbol lights up and a text message is displayed to provide the driverwith necessary information about one of thevehicle's systems. The message can beerased and the symbol can be turned off bypressing the OK button (see page 195 for
information) or this will take place automati-cally after a short time (the length of time var-ies, depending on the function affected). The information symbol may also illuminate together with other symbols.
High beam indicator
This symbol illuminates when the high beam headlights are on, or if the high beam flashfunction is used.
Left turn signal indicator
Right turn signal indicator
NOTE
• Both turn signal indicators will flash when the hazard warning flashers areused.
• If either of these indicators flash fasterthan normal, the direction indicatorsare not functioning properly.
Tire pressure monitoring system
(TPMS)*
This symbol illuminates to indicate that tire pressure in one or more tires is low, seepage 316 for detailed information.
Warning symbols
SymbolDescription
Low oil pressure
Parking brake applied
Page 84 of 386
03 Your driving environment
Instruments and controls
03
82
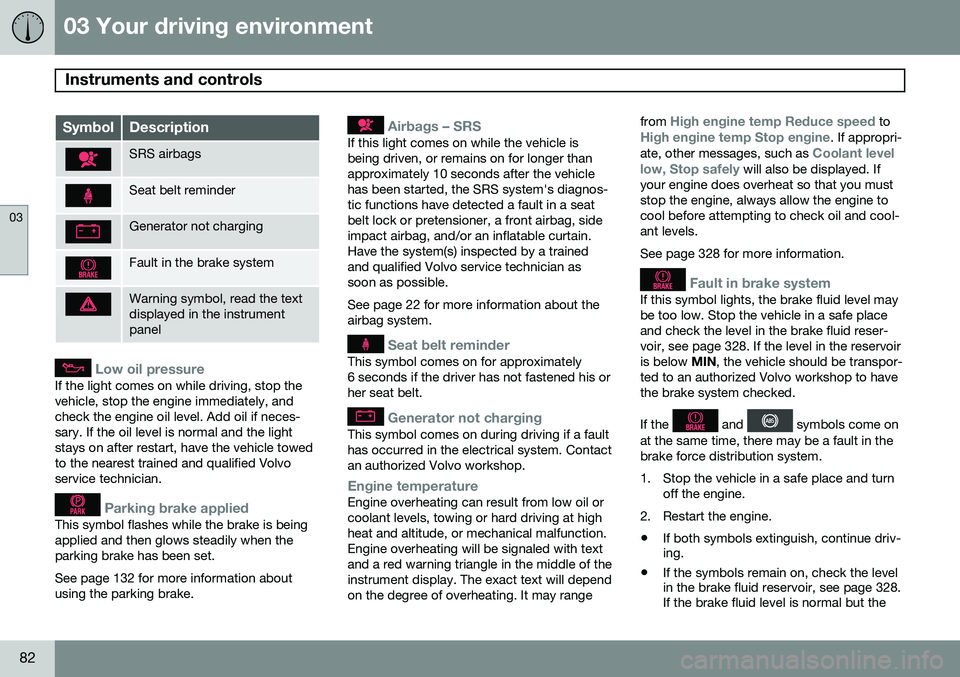
SymbolDescription
SRS airbags
Seat belt reminder
Generator not charging
Fault in the brake system
Warning symbol, read the text displayed in the instrumentpanel
Low oil pressure
If the light comes on while driving, stop the vehicle, stop the engine immediately, andcheck the engine oil level. Add oil if neces-sary. If the oil level is normal and the lightstays on after restart, have the vehicle towedto the nearest trained and qualified Volvoservice technician.
Parking brake applied
This symbol flashes while the brake is being applied and then glows steadily when theparking brake has been set. See page 132 for more information about using the parking brake.
Airbags – SRS
If this light comes on while the vehicle is being driven, or remains on for longer thanapproximately 10 seconds after the vehiclehas been started, the SRS system's diagnos-tic functions have detected a fault in a seatbelt lock or pretensioner, a front airbag, sideimpact airbag, and/or an inflatable curtain.Have the system(s) inspected by a trainedand qualified Volvo service technician assoon as possible. See page 22 for more information about the airbag system.
Seat belt reminder
This symbol comes on for approximately 6 seconds if the driver has not fastened his orher seat belt.
Generator not charging
This symbol comes on during driving if a fault has occurred in the electrical system. Contactan authorized Volvo workshop.
Engine temperatureEngine overheating can result from low oil or coolant levels, towing or hard driving at highheat and altitude, or mechanical malfunction.Engine overheating will be signaled with textand a red warning triangle in the middle of theinstrument display. The exact text will dependon the degree of overheating. It may rangefrom
High engine temp Reduce speed toHigh engine temp Stop engine. If appropri-
ate, other messages, such as Coolant level
low, Stop safely will also be displayed. If
your engine does overheat so that you must stop the engine, always allow the engine tocool before attempting to check oil and cool-ant levels. See page 328 for more information.
Fault in brake system
If this symbol lights, the brake fluid level may be too low. Stop the vehicle in a safe placeand check the level in the brake fluid reser-voir, see page 328. If the level in the reservoiris below MIN, the vehicle should be transpor-
ted to an authorized Volvo workshop to havethe brake system checked. If the
and symbols come on
at the same time, there may be a fault in the brake force distribution system.
1. Stop the vehicle in a safe place and turn off the engine.
2. Restart the engine.
• If both symbols extinguish, continue driv- ing.
• If the symbols remain on, check the levelin the brake fluid reservoir, see page 328.If the brake fluid level is normal but the
Page 88 of 386
03 Your driving environment
Ignition modes
03
86* Option/accessory, for more information, see Introduction.
Inserting and removing the remote key
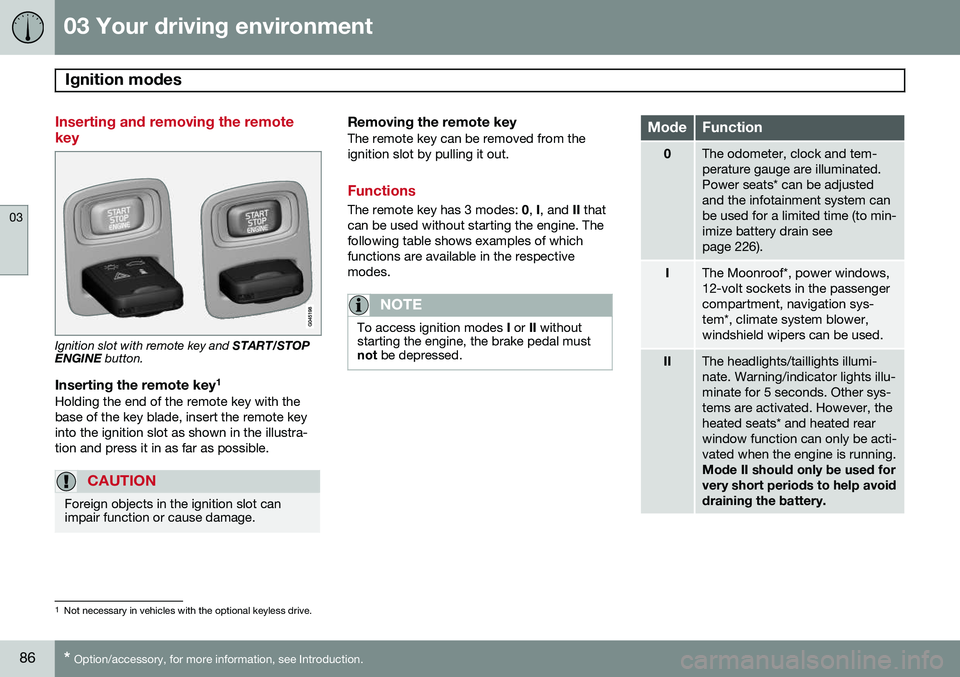
Ignition slot with remote key and START/STOP
ENGINE button.
Inserting the remote key 1Holding the end of the remote key with the base of the key blade, insert the remote keyinto the ignition slot as shown in the illustra-tion and press it in as far as possible.
CAUTION
Foreign objects in the ignition slot can impair function or cause damage.
Removing the remote keyThe remote key can be removed from the ignition slot by pulling it out.
Functions
The remote key has 3 modes:
0, I, and II that
can be used without starting the engine. The following table shows examples of whichfunctions are available in the respectivemodes.
NOTE
To access ignition modes I or II without
starting the engine, the brake pedal must not be depressed.
ModeFunction
0The odometer, clock and tem- perature gauge are illuminated.Power seats* can be adjustedand the infotainment system canbe used for a limited time (to min-imize battery drain seepage 226).
IThe Moonroof*, power windows, 12-volt sockets in the passengercompartment, navigation sys-tem*, climate system blower,windshield wipers can be used.
IIThe headlights/taillights illumi- nate. Warning/indicator lights illu-minate for 5 seconds. Other sys-tems are activated. However, theheated seats* and heated rearwindow function can only be acti-vated when the engine is running. Mode II should only be used for very short periods to help avoiddraining the battery.
1
Not necessary in vehicles with the optional keyless drive.
Page 89 of 386

03 Your driving environment
Ignition modes
03
87
Ignition modes
Ignition mode 0–The vehicle is unlocked.
Ignition mode I–With the remote key fully pressed into the ignition slot1
, press START/STOP
ENGINE briefly.
Ignition mode II–With the remote key fully pressed into the ignition slot 1
, press START/STOP
ENGINE for approximately 2 seconds.
Returning to mode 0To return to mode 0 from mode II or I, press
START/STOP ENGINE briefly.
Starting and stopping the engine
See page 118 for information on starting the engine and switching it off.
Emergency towing
See page 286 for important information about the remote key when the vehicle isbeing towed.
1
Not necessary in vehicles with the optional keyless drive.
Page 113 of 386
03 Your driving environment
Digial compass*
03
* Option/accessory, for more information, see Introduction.111
Operation
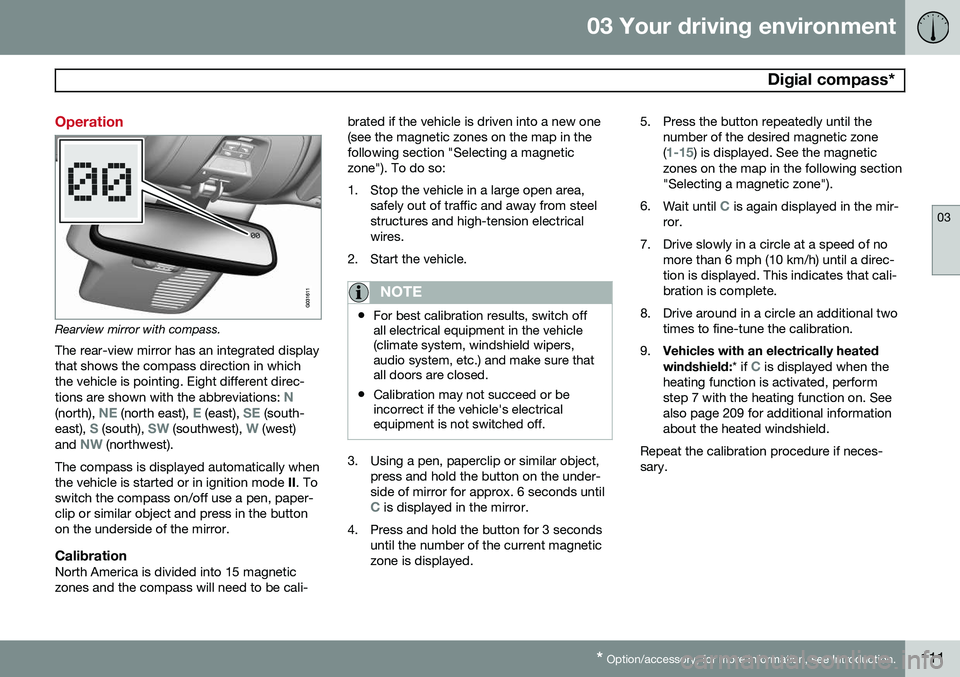
Rearview mirror with compass.
The rear-view mirror has an integrated display that shows the compass direction in whichthe vehicle is pointing. Eight different direc- tions are shown with the abbreviations:
N(north), NE (north east), E (east), SE (south-
east), S (south), SW (southwest), W (west)
and NW (northwest).
The compass is displayed automatically when the vehicle is started or in ignition mode II. To
switch the compass on/off use a pen, paper-clip or similar object and press in the buttonon the underside of the mirror.
CalibrationNorth America is divided into 15 magneticzones and the compass will need to be cali- brated if the vehicle is driven into a new one(see the magnetic zones on the map in thefollowing section "Selecting a magneticzone"). To do so:
1. Stop the vehicle in a large open area,
safely out of traffic and away from steel structures and high-tension electricalwires.
2. Start the vehicle.
NOTE
• For best calibration results, switch off all electrical equipment in the vehicle(climate system, windshield wipers,audio system, etc.) and make sure thatall doors are closed.
• Calibration may not succeed or beincorrect if the vehicle's electricalequipment is not switched off.
3. Using a pen, paperclip or similar object,
press and hold the button on the under- side of mirror for approx. 6 seconds until
C is displayed in the mirror.
4. Press and hold the button for 3 seconds until the number of the current magnetic zone is displayed. 5. Press the button repeatedly until the
number of the desired magnetic zone (
1-15) is displayed. See the magnetic
zones on the map in the following section "Selecting a magnetic zone").
6. Wait until
C is again displayed in the mir-
ror.
7. Drive slowly in a circle at a speed of no more than 6 mph (10 km/h) until a direc- tion is displayed. This indicates that cali-bration is complete.
8. Drive around in a circle an additional two times to fine-tune the calibration.
9. Vehicles with an electrically heated windshield:
* if
C is displayed when the
heating function is activated, perform step 7 with the heating function on. Seealso page 209 for additional informationabout the heated windshield.
Repeat the calibration procedure if neces-sary.
Page 120 of 386

03 Your driving environment
Starting the engine
03
118* Option/accessory, for more information, see Introduction.
Start
Ignition slot with remote key inserted ( see page 86 for more information on ignition modes)
WARNING
Before starting the engine:
• Fasten the seat belt.
• Check that the seat, steering wheel and mirrors are adjusted properly.
• Make sure the brake pedal can bedepressed completely. Adjust the seatif necessary.
WARNING
•Never use more than one floor mat at a time on the driver's floor. An extramat on the driver's floor can cause theaccelerator and/or brake pedal tocatch. Check that the movement ofthese pedals is not impeded.
• Volvo's floor mats are specially manu-factured for your car. They must befirmly secured in the clips on the floorso that they cannot slide and becometrapped under the pedals on the driv-er's side.
1. Press the remote key into the ignition slot
as far as possible, with the metallic key blade pointing outward (not inserted into the slot) 1
.
2. Depress the brake pedal 2
.
3. Press and release the START/STOP
ENGINE button. The autostart function
will operate the starter motor until the engine starts or until its overheating func-tion stops it. The starter motor operates for a maxi-mum of 10 seconds. If the engine has notstarted, repeat the procedure.
CAUTION
If the engine does not start after the third try, wait for approximately 3 minutesbefore trying to start it again to give thebattery time to recover its startingcapacity.
NOTE
Keyless drive
*
To start a vehicle equipped with the key- less drive feature, one of the remote keysmust be in the passenger compartment.Follow the instructions in steps 2 and 3 tostart the vehicle.
1 On vehicles with the optional keyless drive, it is only necessary to have a remote key in the passenger’s compartment.
2 If the vehicle is moving, it is only necessary to press the START/STOP ENGINE button to start the vehicle.