roof VOLVO S60 2015 Owner´s Manual
[x] Cancel search | Manufacturer: VOLVO, Model Year: 2015, Model line: S60, Model: VOLVO S60 2015Pages: 406, PDF Size: 11.26 MB
Page 5 of 406
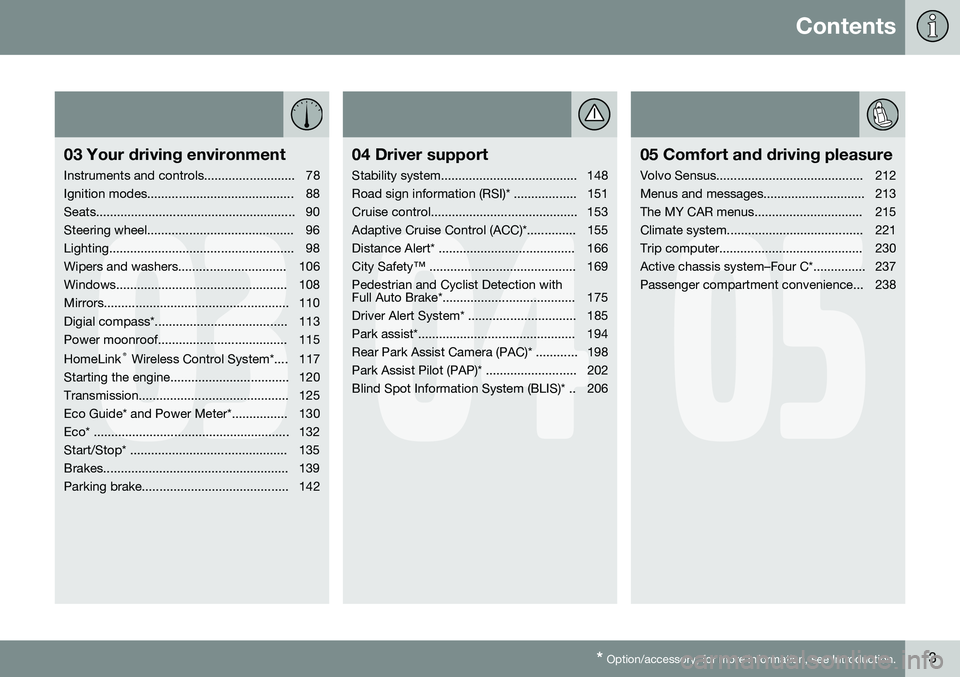
Contents
* Option/accessory, for more information, see Introduction.3
03
03 Your driving environment
Instruments and controls.......................... 78
Ignition modes.......................................... 88
Seats......................................................... 90
Steering wheel.......................................... 96
Lighting..................................................... 98
Wipers and washers............................... 106
Windows................................................. 108
Mirrors..................................................... 110
Digial compass*...................................... 113
Power moonroof..................................... 115 HomeLink ®
Wireless Control System*.... 117
Starting the engine.................................. 120
Transmission........................................... 125
Eco Guide* and Power Meter*................ 130
Eco* ........................................................ 132
Start/Stop* ............................................. 135
Brakes..................................................... 139
Parking brake.......................................... 142
04
04 Driver support
Stability system....................................... 148
Road sign information (RSI)* .................. 151
Cruise control.......................................... 153
Adaptive Cruise Control (ACC)*.............. 155
Distance Alert* ....................................... 166
City Safety™ .......................................... 169Pedestrian and Cyclist Detection with
Full Auto Brake*...................................... 175
Driver Alert System* ............................... 185
Park assist*............................................. 194
Rear Park Assist Camera (PAC)* ............ 198
Park Assist Pilot (PAP)* .......................... 202
Blind Spot Information System (BLIS)* .. 206
05
05 Comfort and driving pleasure
Volvo Sensus.......................................... 212
Menus and messages............................. 213
The MY CAR menus............................... 215
Climate system....................................... 221
Trip computer......................................... 230
Active chassis system–Four C*............... 237
Passenger compartment convenience... 238
Page 35 of 406
01 Safety
Inflatable Curtain (IC)01
33
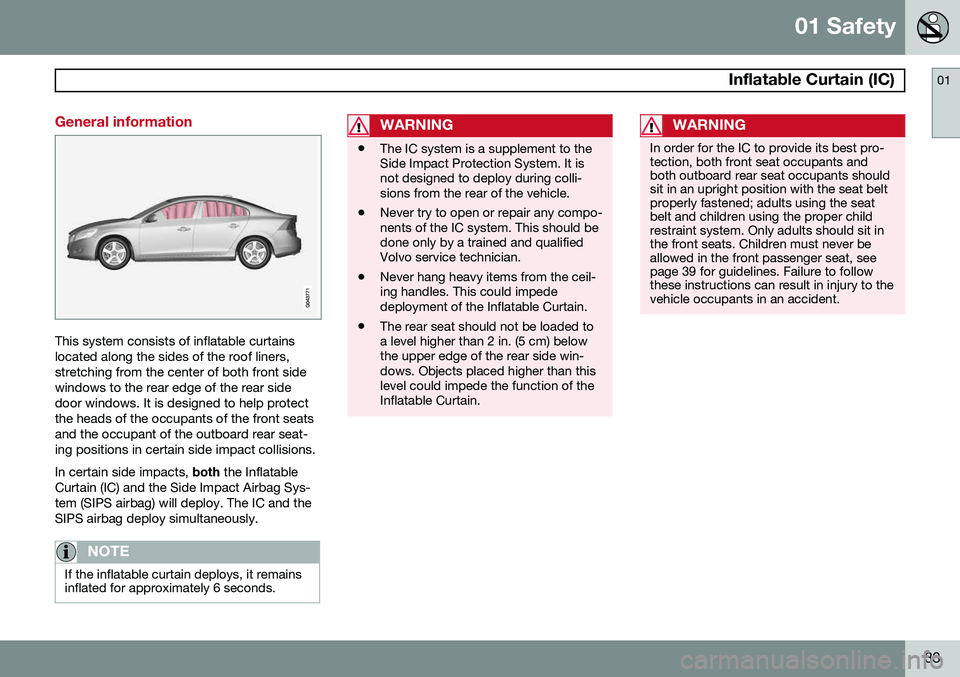
General information
This system consists of inflatable curtains located along the sides of the roof liners,stretching from the center of both front sidewindows to the rear edge of the rear sidedoor windows. It is designed to help protectthe heads of the occupants of the front seatsand the occupant of the outboard rear seat-ing positions in certain side impact collisions. In certain side impacts, both the Inflatable
Curtain (IC) and the Side Impact Airbag Sys- tem (SIPS airbag) will deploy. The IC and theSIPS airbag deploy simultaneously.
NOTE
If the inflatable curtain deploys, it remains inflated for approximately 6 seconds.
WARNING
• The IC system is a supplement to the Side Impact Protection System. It isnot designed to deploy during colli-sions from the rear of the vehicle.
• Never try to open or repair any compo-nents of the IC system. This should bedone only by a trained and qualifiedVolvo service technician.
• Never hang heavy items from the ceil-ing handles. This could impededeployment of the Inflatable Curtain.
• The rear seat should not be loaded toa level higher than 2 in. (5 cm) belowthe upper edge of the rear side win-dows. Objects placed higher than thislevel could impede the function of theInflatable Curtain.
WARNING
In order for the IC to provide its best pro- tection, both front seat occupants andboth outboard rear seat occupants shouldsit in an upright position with the seat beltproperly fastened; adults using the seatbelt and children using the proper childrestraint system. Only adults should sit inthe front seats. Children must never beallowed in the front passenger seat, seepage 39 for guidelines. Failure to followthese instructions can result in injury to thevehicle occupants in an accident.
Page 78 of 406
76* Option/accessory, for more information, see Introduction. Instruments and controls........................................................................ 78 Ignition modes........................................................................................ 88Seats....................................................................................................... 90Steering wheel........................................................................................ 96Lighting................................................................................................... 98
Wipers and washers.............................................................................. 106Windows............................................................................................... 108Mirrors................................................................................................... 110
Digial compass*.................................................................................... 113
Power moonroof................................................................................... 115 HomeLink
®
Wireless Control System*.................................................. 117
Starting the engine................................................................................ 120 Transmission......................................................................................... 125
Eco Guide* and Power Meter*.............................................................. 130Eco* ...................................................................................................... 132Start/Stop* ........................................................................................... 135Brakes................................................................................................... 139Parking brake........................................................................................ 142
Page 90 of 406
03 Your driving environment
Ignition modes
03
88* Option/accessory, for more information, see Introduction.
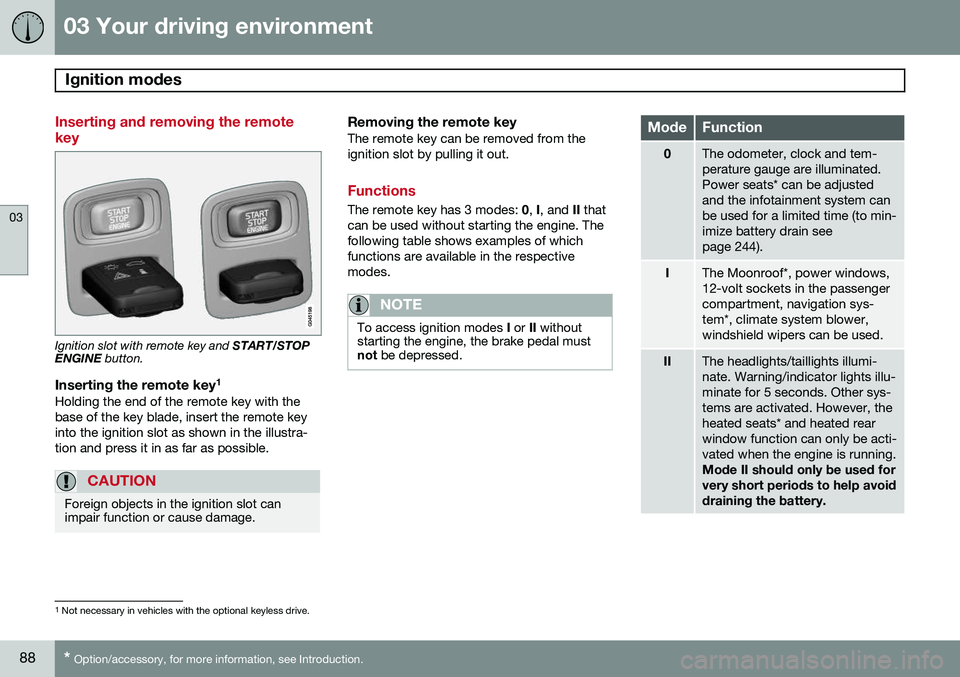
Inserting and removing the remote key
Ignition slot with remote key and START/STOP
ENGINE button.
Inserting the remote key 1Holding the end of the remote key with the base of the key blade, insert the remote keyinto the ignition slot as shown in the illustra-tion and press it in as far as possible.
CAUTION
Foreign objects in the ignition slot can impair function or cause damage.
Removing the remote keyThe remote key can be removed from the ignition slot by pulling it out.
Functions
The remote key has 3 modes:
0, I, and II that
can be used without starting the engine. The following table shows examples of whichfunctions are available in the respectivemodes.
NOTE
To access ignition modes I or II without
starting the engine, the brake pedal must not be depressed.
ModeFunction
0The odometer, clock and tem- perature gauge are illuminated.Power seats* can be adjustedand the infotainment system canbe used for a limited time (to min-imize battery drain seepage 244).
IThe Moonroof*, power windows, 12-volt sockets in the passengercompartment, navigation sys-tem*, climate system blower,windshield wipers can be used.
IIThe headlights/taillights illumi- nate. Warning/indicator lights illu-minate for 5 seconds. Other sys-tems are activated. However, theheated seats* and heated rearwindow function can only be acti-vated when the engine is running. Mode II should only be used for very short periods to help avoiddraining the battery.
1
Not necessary in vehicles with the optional keyless drive.
Page 104 of 406
03 Your driving environment
Lighting
03
102* Option/accessory, for more information, see Introduction.
The cornering lights are deactivated when the vehicle's speed exceeds approx. 25 mph(40 km/h).
Auxiliary lights*If the vehicle is fitted with auxiliary lights, thedriver can use the MY CAR menu system to
choose to deactivate and turn these lights on and off along with the high beam headlights 3
.
Instrument and "theater" lighting
Instrument lightingIllumination of the display and instrument lights will vary, depending on ignition mode(see page 88). The display lighting is automatically subdued in darkness and the sensitivity is set with thethumb wheel. The intensity of the instrument lighting is adjusted with the thumb wheel.
"Theater" lightingWhen the overhead courtesy lighting hasgone out and the engine is running, severalLEDs located near the roof console illuminateto provide faint lighting for the occupants ofthe front seats. This lighting goes out just after the overhead courtesy lighting when thevehicle is locked.
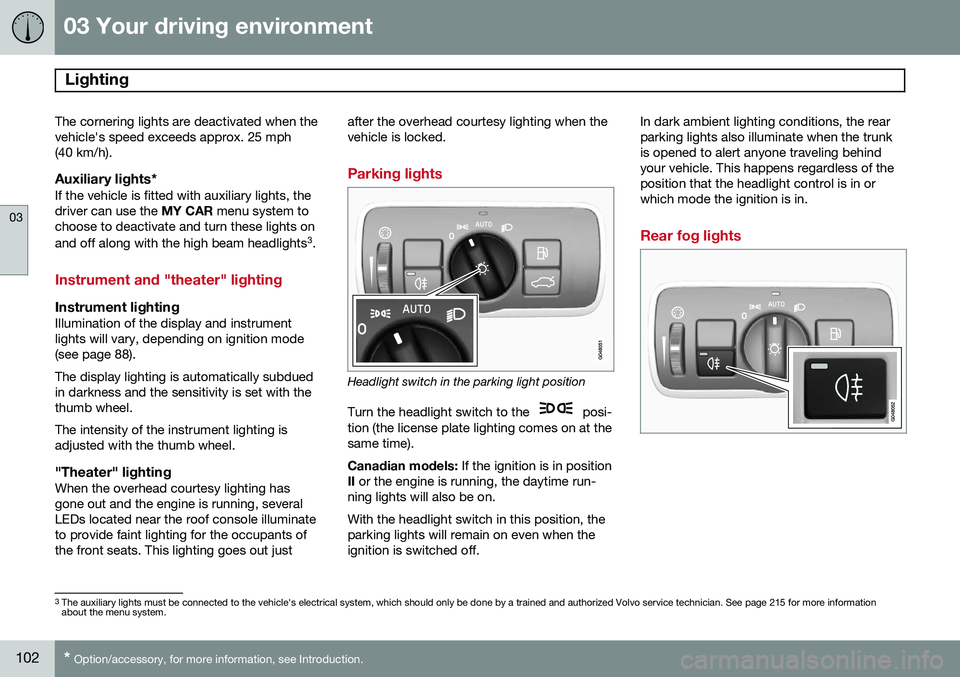
Parking lights
Headlight switch in the parking light position
Turn the headlight switch to the
posi-
tion (the license plate lighting comes on at the same time). Canadian models: If the ignition is in position
II or the engine is running, the daytime run-
ning lights will also be on.With the headlight switch in this position, the parking lights will remain on even when theignition is switched off. In dark ambient lighting conditions, the rearparking lights also illuminate when the trunkis opened to alert anyone traveling behindyour vehicle. This happens regardless of theposition that the headlight control is in orwhich mode the ignition is in.
Rear fog lights
3
The auxiliary lights must be connected to the vehicle's electrical system, which should only be done by a trained and authorized Volvo service technician. See page 215 for more information about the menu system.
Page 106 of 406
03 Your driving environment
Lighting
03
104* Option/accessory, for more information, see Introduction.
NOTE
• This automatic flashing sequence can be interrupted by immediately movingthe lever in the opposite direction.
• If the turn signal indicator flashesfaster than normal, check for aburned-out turn signal bulb.
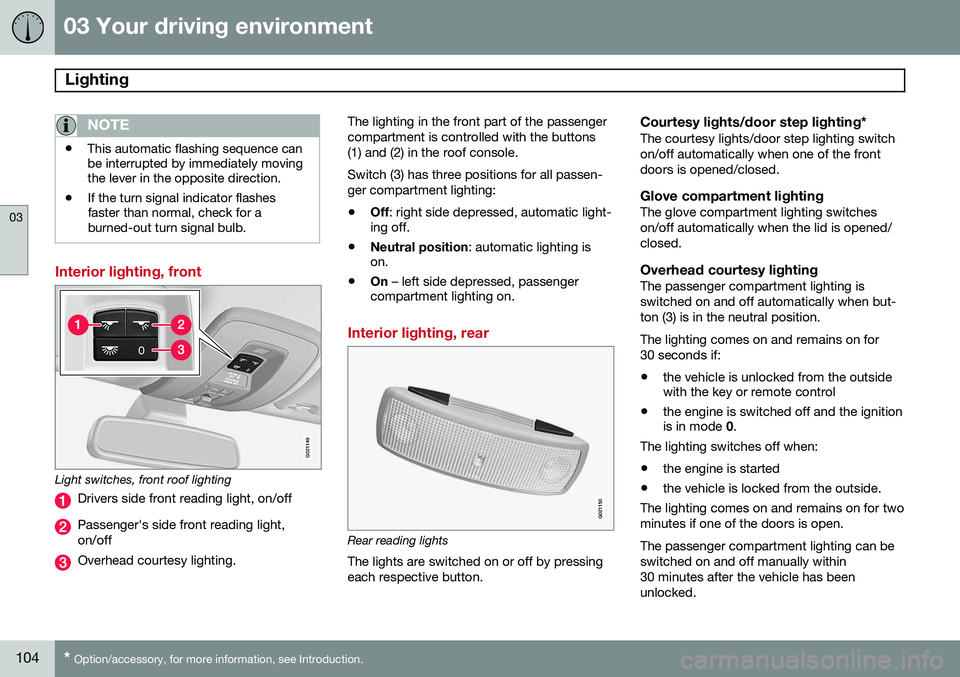
Interior lighting, front
G021149
Light switches, front roof lighting
Drivers side front reading light, on/off
Passenger's side front reading light, on/off
Overhead courtesy lighting. The lighting in the front part of the passenger compartment is controlled with the buttons(1) and (2) in the roof console. Switch (3) has three positions for all passen- ger compartment lighting:
• Off
: right side depressed, automatic light-
ing off.
• Neutral position
: automatic lighting is
on.
• On
– left side depressed, passenger
compartment lighting on.
Interior lighting, rear
G021150
Rear reading lights
The lights are switched on or off by pressing each respective button.
Courtesy lights/door step lighting*The courtesy lights/door step lighting switchon/off automatically when one of the frontdoors is opened/closed.
Glove compartment lightingThe glove compartment lighting switcheson/off automatically when the lid is opened/closed.
Overhead courtesy lightingThe passenger compartment lighting isswitched on and off automatically when but-ton (3) is in the neutral position. The lighting comes on and remains on for 30 seconds if:
• the vehicle is unlocked from the outside with the key or remote control
• the engine is switched off and the ignitionis in mode
0.
The lighting switches off when:
• the engine is started
• the vehicle is locked from the outside.
The lighting comes on and remains on for two minutes if one of the doors is open. The passenger compartment lighting can be switched on and off manually within30 minutes after the vehicle has beenunlocked.
Page 117 of 406
03 Your driving environment
Power moonroof
03
}}
115
Introduction
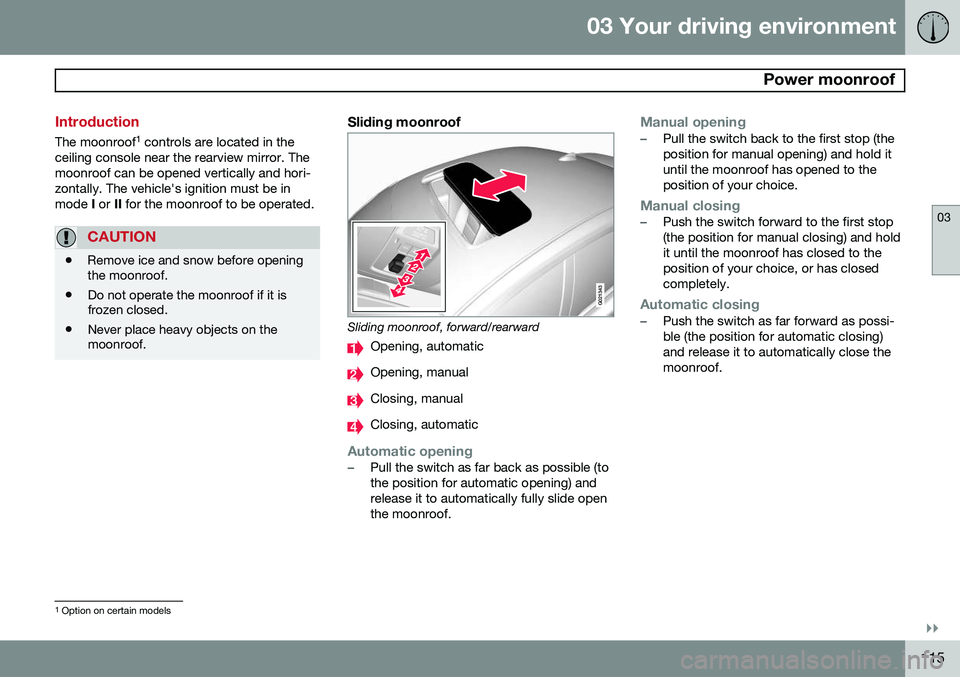
The moonroof1
controls are located in the
ceiling console near the rearview mirror. The moonroof can be opened vertically and hori-zontally. The vehicle's ignition must be inmode I or II for the moonroof to be operated.
CAUTION
• Remove ice and snow before opening the moonroof.
• Do not operate the moonroof if it isfrozen closed.
• Never place heavy objects on themoonroof.
Sliding moonroof
G021343
Sliding moonroof, forward/rearward
Opening, automatic
Opening, manual
Closing, manual
Closing, automatic
Automatic opening–Pull the switch as far back as possible (to the position for automatic opening) andrelease it to automatically fully slide openthe moonroof.
Manual opening–Pull the switch back to the first stop (the position for manual opening) and hold ituntil the moonroof has opened to theposition of your choice.
Manual closing–Push the switch forward to the first stop (the position for manual closing) and holdit until the moonroof has closed to theposition of your choice, or has closedcompletely.
Automatic closing–Push the switch as far forward as possi- ble (the position for automatic closing)and release it to automatically close themoonroof.
1
Option on certain models
Page 118 of 406
03 Your driving environment
Power moonroof
03
116* Option/accessory, for more information, see Introduction.
WARNING
• During manual closing, if the moonroof is obstructed, immediately open itagain.
• Never open or close the moonroof if itis obstructed in any way.
• Never allow a child to operate themoonroof.
• Never leave a child alone in a vehicle.
• When leaving the vehicle, ensure thatthe ignition is in mode
0 (see page 88
for information about the various igni-tion modes) to disable the moonroof.Never leave the remote key/PCC* inthe vehicle.
• Never extend any object or body partthough the open moonroof, even if thevehicle's ignition is completelyswitched off.
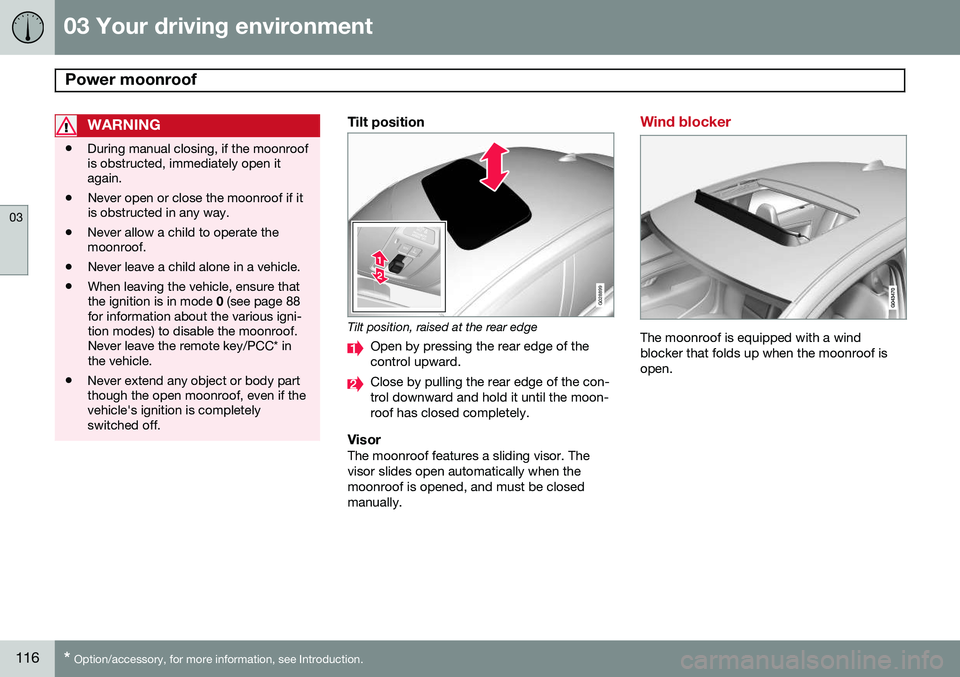
Tilt position
G028899
Tilt position, raised at the rear edge
Open by pressing the rear edge of the control upward.
Close by pulling the rear edge of the con- trol downward and hold it until the moon-roof has closed completely.
VisorThe moonroof features a sliding visor. Thevisor slides open automatically when themoonroof is opened, and must be closedmanually.
Wind blocker
The moonroof is equipped with a wind blocker that folds up when the moonroof isopen.
Page 173 of 406
04 Driver support
City Safety™
04
}}
171
Press
My Car in the center console control
panel and go to
SettingsCar settings
Driver support systemsCity Safety.
Select
Off.
If the engine is switched off, City Safety™ will reactivate when the engine is restarted.
WARNING
The laser sensor emits light when the igni- tion is in mode II or higher, even if City
Safety™ has been switched off.
To switch City Safety™ on again:
• Follow the same procedure as for switch- ing City Safety™ off but select
On.
Limitations
The sensor used by City Safety™ is designed to detect cars and other larger motor vehiclesahead of your vehicle in both daylight anddarkness.
WARNING
The laser sensor has certain limitations and its function may be reduced (or it maynot function at all) in conditions such asheavy rain or snowfall, or by dense fog orthick, blowing dust or snow. Condensa-tion, dirt, ice or snow on the windshieldmay also interfere with the sensor’s func-tion.
Objects such as warning flags hanging from long objects on the roof or accessories suchas auxiliary lights or protective arches on thefront of the vehicle that are higher than thehood may also impede the sensor’s function. Braking distance to the vehicle ahead increa- ses on slippery road surfaces, which mayreduce City Safety’s capacity to avoid a colli-sion. In situations like this, the DSTC system(see page 148) will help provide the best pos-sible braking capacity and stability. City Safety™ emits a laser beam and meas- ures the way in which the light is reflected.Therefore, vehicles or objects with low-reflec-tive surfaces may not be detected. Normally,the license plate and taillight reflectors givethe rear section of a vehicle ahead sufficientreflective surfaces to be detected.
NOTE
•Keep the windshield in front of the laser sensor free of ice, snow, dirt, etc.See page 170.
• Snow or ice on the hood deeper than2 inches (5 cm) may obstruct the sen-sor. Keep the hood free of ice andsnow.
• Do not mount or in any way attachanything on the windshield that couldobstruct the laser sensor.
Troubleshooting
If Windscreen Sensors blocked appears in
the information display, this indicates that the City Safety™ laser sensor is obstructed insome way and cannot detect vehicles aheadof you, which means that the system is notfunctioning. However, this message will not be displayed in all situations in which the sensor isobstructed. For this reason, the driver mustensure that the area of the windshield in frontof the sensor is always kept clean. The following table shows some of the situa- tions that can cause the message to be dis-played and suggested actions.
Page 223 of 406
05 Comfort and driving pleasure
Climate system
05
}}
* Option/accessory, for more information, see Introduction.221
Introduction
Air conditioningThe vehicle is equipped with Electronic Cli- mate Control (ECC). The climate control sys-tem cools, heats or dehumidifies the air in thepassenger compartment.
NOTE
• The air conditioning can be switched off, but to ensure the best possible cli-mate comfort in the passenger com-partment and to prevent the windowsfrom misting, it should always be on.
• In warm weather, a small amount ofwater may accumulate under the carwhen it has been parked. This water iscondensation from the A/C systemand is normal.
Sensor location
•
The sunlight sensor is located on the top side of the dashboard.
NOTE
The sunlight sensor monitors which side of the car that is most exposed to sunlight.This can mean that the temperature maydiffer between the right and left-side airvents, even if the temperatures set for bothsides of the passenger compartment arethe same.
•The temperature sensor for the passen- ger compartment is located below the cli-mate control panel.
• The outside (ambient) temperature sensoris located on the door mirror.
• The humidity sensor* is located in theinterior rearview mirror.
NOTE
Do not cover or block the sensors with clothing or other objects.
Side windows and moonroofTo ensure that the air conditioning works optimally, the side windows, and the optionalmoonroof should be closed.
Fog on the inside of the windowsThe defroster function should be used toremove fog or mist from the inside of the win-dows. Keeping the windows clean with acommercially available window washing spray will also help prevent fogging or mist-ing.
Vents in the parcel shelf
NOTE
The air vents at the rear of the parcel shelf should never be obstructed.
Temporary shut-off of the air conditioning
The air conditioning is momentarily disen- gaged during full acceleration or when drivinguphill with a trailer. This may result in a tem-porary increase in cabin temperature.
Ice and snowAlways keep the air intake grille at the base ofthe windshield free of snow.
Climate system maintenanceSpecial tools and equipment are required tomaintain and carry out repairs on the climatesystem. Work of this type should only bedone by a trained and qualified Volvo servicetechnician.
RefrigerantVolvo cares about the environment. The airconditioning system in your car contains aCFC-free refrigerant – R134a. This substancewill not deplete the ozone layer. See page