start stop button VOLVO S60 2015 Owner´s Manual
[x] Cancel search | Manufacturer: VOLVO, Model Year: 2015, Model line: S60, Model: VOLVO S60 2015Pages: 406, PDF Size: 11.26 MB
Page 69 of 406
02 Locks and alarm
Keyless drive
02
}}
67
Locking the vehicle
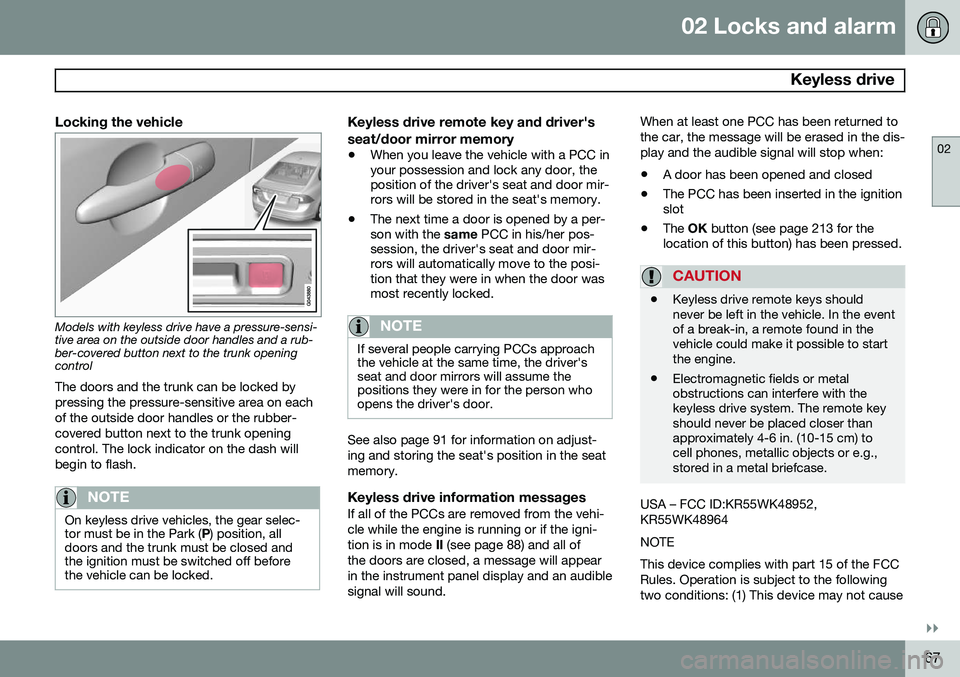
Models with keyless drive have a pressure-sensi- tive area on the outside door handles and a rub-ber-covered button next to the trunk openingcontrol
The doors and the trunk can be locked by pressing the pressure-sensitive area on eachof the outside door handles or the rubber-covered button next to the trunk openingcontrol. The lock indicator on the dash willbegin to flash.
NOTE
On keyless drive vehicles, the gear selec- tor must be in the Park ( P) position, all
doors and the trunk must be closed andthe ignition must be switched off beforethe vehicle can be locked.
Keyless drive remote key and driver's seat/door mirror memory
• When you leave the vehicle with a PCC in your possession and lock any door, theposition of the driver's seat and door mir-rors will be stored in the seat's memory.
• The next time a door is opened by a per-son with the
same PCC in his/her pos-
session, the driver's seat and door mir-rors will automatically move to the posi-tion that they were in when the door wasmost recently locked.
NOTE
If several people carrying PCCs approach the vehicle at the same time, the driver'sseat and door mirrors will assume thepositions they were in for the person whoopens the driver's door.
See also page 91 for information on adjust- ing and storing the seat's position in the seatmemory.
Keyless drive information messagesIf all of the PCCs are removed from the vehi-cle while the engine is running or if the igni-tion is in mode II (see page 88) and all of
the doors are closed, a message will appearin the instrument panel display and an audiblesignal will sound. When at least one PCC has been returned tothe car, the message will be erased in the dis-play and the audible signal will stop when:
• A door has been opened and closed
• The PCC has been inserted in the ignition slot
• The
OK button (see page 213 for the
location of this button) has been pressed.
CAUTION
• Keyless drive remote keys should never be left in the vehicle. In the eventof a break-in, a remote found in thevehicle could make it possible to startthe engine.
• Electromagnetic fields or metalobstructions can interfere with thekeyless drive system. The remote keyshould never be placed closer thanapproximately 4-6 in. (10-15 cm) tocell phones, metallic objects or e.g.,stored in a metal briefcase.
USA – FCC ID:KR55WK48952, KR55WK48964 NOTEThis device complies with part 15 of the FCC Rules. Operation is subject to the followingtwo conditions: (1) This device may not cause
Page 77 of 406
02 Locks and alarm
Alarm
02
75
Disarming the alarm
–Press the Unlock button on the remote key.
> Two short flashes from the car's direc-tion indicators confirm that the alarm has been deactivated and that alldoors are unlocked.
Turning off (stopping) the alarm
If the alarm is sounding, it can be stopped by pressing the Unlock button on the remote keyor by inserting the remote key in the ignitionslot. Two short flashes from the car's direc-tion indicators confirm that the alarm hasbeen turned off.
Other alarm-related functions
Automatic re-armingIf the doors are unlocked, the locks will auto- matically re-engage (re-lock) and the alarmwill re-arm after 2 minutes unless a door orthe trunk has been opened.
Audible/visual alarm signal
• An audible alarm signal is given by a bat- tery powered siren. The alarm cycle lastsfor 30 seconds.
• The visual alarm signal is given by flash-ing all turn signals for approximately5 minutes or until the alarm is turned off.
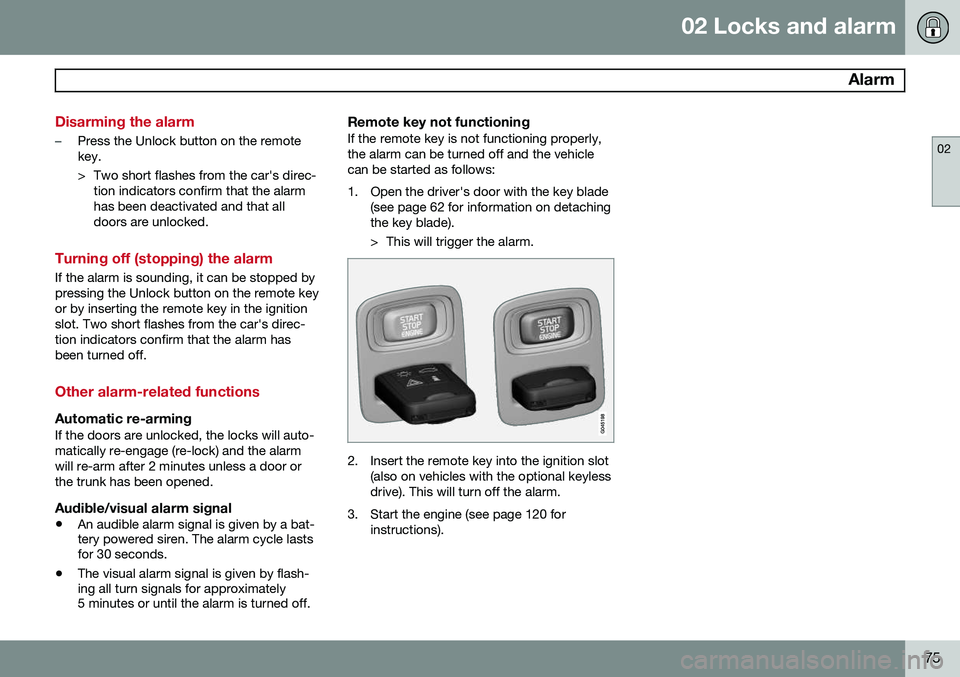
Remote key not functioningIf the remote key is not functioning properly, the alarm can be turned off and the vehiclecan be started as follows:
1. Open the driver's door with the key blade
(see page 62 for information on detaching the key blade).
> This will trigger the alarm.
2. Insert the remote key into the ignition slot(also on vehicles with the optional keyless drive). This will turn off the alarm.
3. Start the engine (see page 120 for instructions).
Page 81 of 406
03 Your driving environment
Instruments and controls
03
}}
* Option/accessory, for more information, see Introduction.79
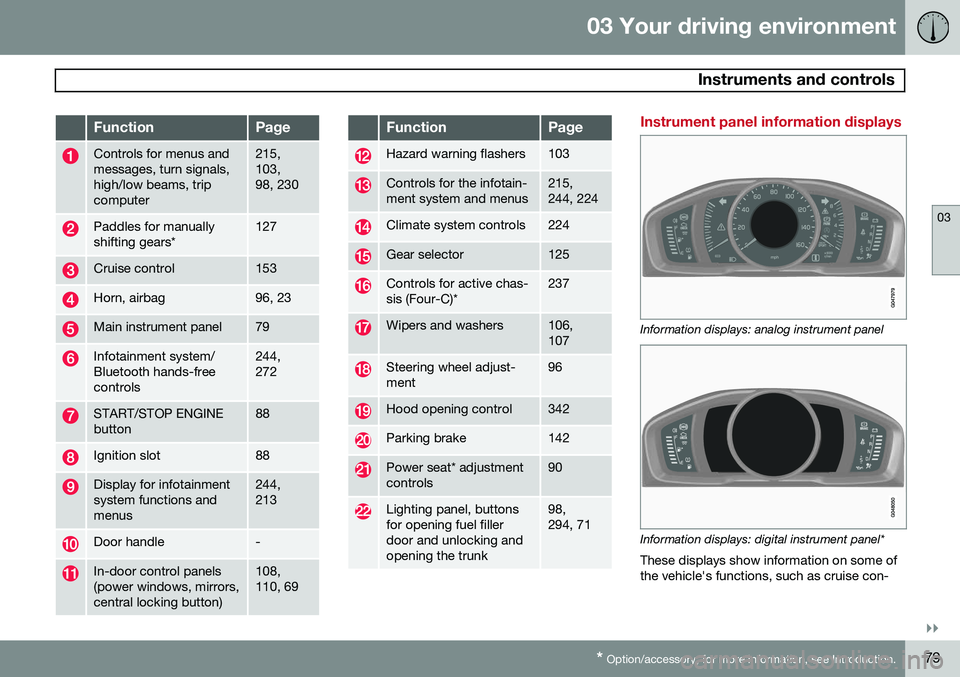
FunctionPage
Controls for menus and messages, turn signals,high/low beams, tripcomputer215, 103,98, 230
Paddles for manually shifting gears*127
Cruise control153
Horn, airbag96, 23
Main instrument panel79
Infotainment system/ Bluetooth hands-freecontrols244, 272
START/STOP ENGINE button88
Ignition slot88
Display for infotainment system functions andmenus244, 213
Door handle-
In-door control panels (power windows, mirrors,central locking button)108, 110, 69
FunctionPage
Hazard warning flashers103
Controls for the infotain- ment system and menus215, 244, 224
Climate system controls224
Gear selector125
Controls for active chas- sis (Four-C)*237
Wipers and washers106, 107
Steering wheel adjust- ment96
Hood opening control342
Parking brake142
Power seat* adjustment controls90
Lighting panel, buttons for opening fuel fillerdoor and unlocking andopening the trunk98, 294, 71
Instrument panel information displays
Information displays: analog instrument panel
Information displays: digital instrument panel* These displays show information on some of the vehicle's functions, such as cruise con-
Page 85 of 406
03 Your driving environment
Instruments and controls
03
}}
* Option/accessory, for more information, see Introduction.83
change in your car's behavior. Even so, an uncorrected condition could hurt fuel econ-omy, emission controls, and drivability.Extended driving without correcting the causecould even damage other components inyour vehicle. This light may illuminate if the fuel filler cap is not closed tightly or if the engine was runningwhile the vehicle was refueled.
Anti-lock Brake System (ABS)
If the warning light comes on, there may be a malfunction in the ABS system (the standardbraking system will still function). Check thesystem by:
1. Stopping in a safe place and switching off
the ignition.
2. Restart the engine.
3. If the warning light goes off, no further action is required.
If the indicator light remains on, the vehicle should be driven to a trained and qualifiedVolvo service technician for inspection, seepage 139 for additional information.
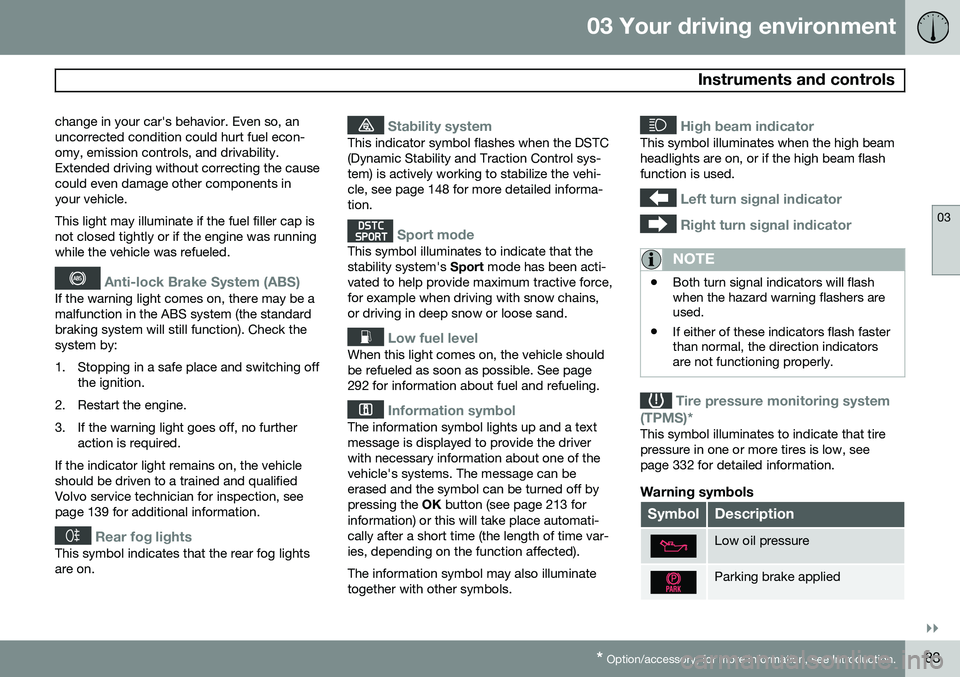
Rear fog lights
This symbol indicates that the rear fog lights are on.
Stability system
This indicator symbol flashes when the DSTC (Dynamic Stability and Traction Control sys-tem) is actively working to stabilize the vehi-cle, see page 148 for more detailed informa-tion.
Sport mode
This symbol illuminates to indicate that the stability system's Sport mode has been acti-
vated to help provide maximum tractive force,for example when driving with snow chains,or driving in deep snow or loose sand.
Low fuel level
When this light comes on, the vehicle should be refueled as soon as possible. See page292 for information about fuel and refueling.
Information symbol
The information symbol lights up and a text message is displayed to provide the driverwith necessary information about one of thevehicle's systems. The message can beerased and the symbol can be turned off bypressing the OK button (see page 213 for
information) or this will take place automati-cally after a short time (the length of time var-ies, depending on the function affected). The information symbol may also illuminate together with other symbols.
High beam indicator
This symbol illuminates when the high beam headlights are on, or if the high beam flashfunction is used.
Left turn signal indicator
Right turn signal indicator
NOTE
• Both turn signal indicators will flash when the hazard warning flashers areused.
• If either of these indicators flash fasterthan normal, the direction indicatorsare not functioning properly.
Tire pressure monitoring system
(TPMS)*
This symbol illuminates to indicate that tire pressure in one or more tires is low, seepage 332 for detailed information.
Warning symbols
SymbolDescription
Low oil pressure
Parking brake applied
Page 90 of 406
03 Your driving environment
Ignition modes
03
88* Option/accessory, for more information, see Introduction.
Inserting and removing the remote key
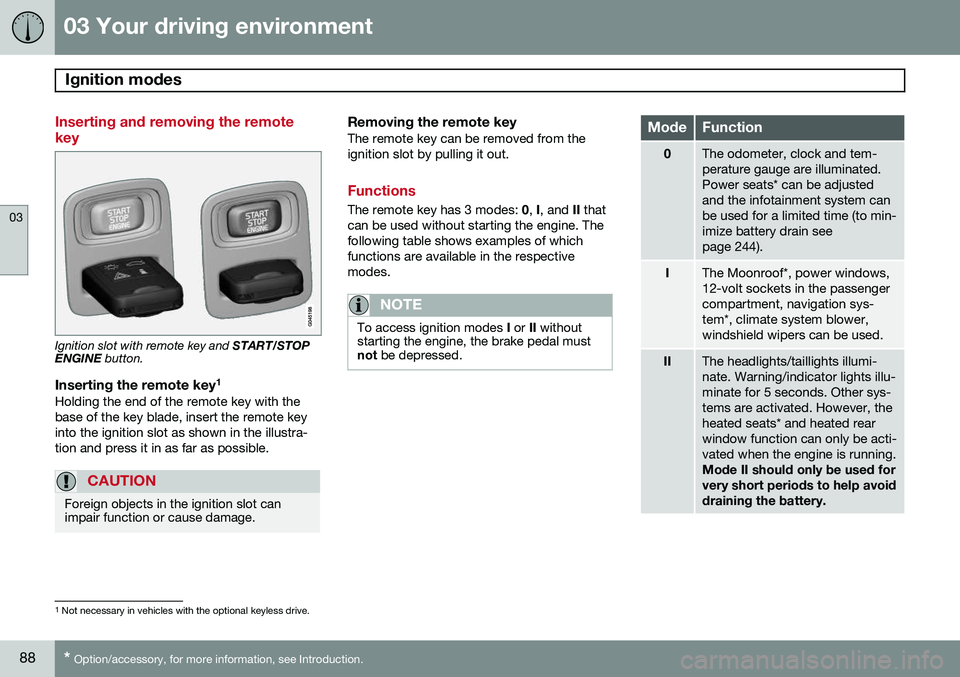
Ignition slot with remote key and START/STOP
ENGINE button.
Inserting the remote key 1Holding the end of the remote key with the base of the key blade, insert the remote keyinto the ignition slot as shown in the illustra-tion and press it in as far as possible.
CAUTION
Foreign objects in the ignition slot can impair function or cause damage.
Removing the remote keyThe remote key can be removed from the ignition slot by pulling it out.
Functions
The remote key has 3 modes:
0, I, and II that
can be used without starting the engine. The following table shows examples of whichfunctions are available in the respectivemodes.
NOTE
To access ignition modes I or II without
starting the engine, the brake pedal must not be depressed.
ModeFunction
0The odometer, clock and tem- perature gauge are illuminated.Power seats* can be adjustedand the infotainment system canbe used for a limited time (to min-imize battery drain seepage 244).
IThe Moonroof*, power windows, 12-volt sockets in the passengercompartment, navigation sys-tem*, climate system blower,windshield wipers can be used.
IIThe headlights/taillights illumi- nate. Warning/indicator lights illu-minate for 5 seconds. Other sys-tems are activated. However, theheated seats* and heated rearwindow function can only be acti-vated when the engine is running. Mode II should only be used for very short periods to help avoiddraining the battery.
1
Not necessary in vehicles with the optional keyless drive.
Page 115 of 406
03 Your driving environment
Digial compass*
03
}}
* Option/accessory, for more information, see Introduction.113
Operation
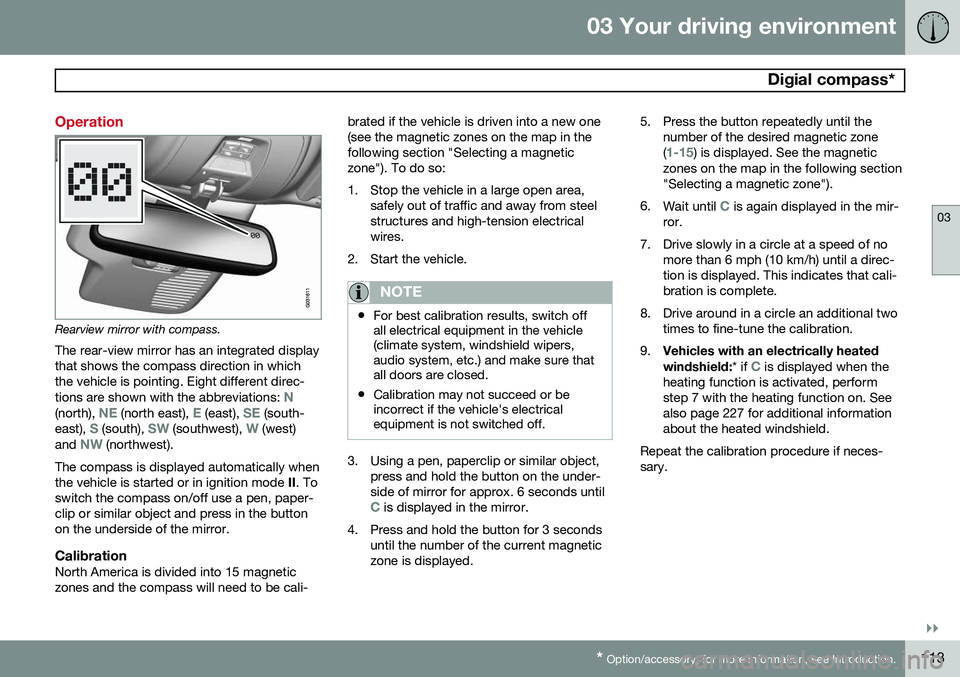
Rearview mirror with compass.
The rear-view mirror has an integrated display that shows the compass direction in whichthe vehicle is pointing. Eight different direc- tions are shown with the abbreviations:
N(north), NE (north east), E (east), SE (south-
east), S (south), SW (southwest), W (west)
and NW (northwest).
The compass is displayed automatically when the vehicle is started or in ignition mode II. To
switch the compass on/off use a pen, paper-clip or similar object and press in the buttonon the underside of the mirror.
CalibrationNorth America is divided into 15 magneticzones and the compass will need to be cali- brated if the vehicle is driven into a new one(see the magnetic zones on the map in thefollowing section "Selecting a magneticzone"). To do so:
1. Stop the vehicle in a large open area,
safely out of traffic and away from steel structures and high-tension electricalwires.
2. Start the vehicle.
NOTE
• For best calibration results, switch off all electrical equipment in the vehicle(climate system, windshield wipers,audio system, etc.) and make sure thatall doors are closed.
• Calibration may not succeed or beincorrect if the vehicle's electricalequipment is not switched off.
3. Using a pen, paperclip or similar object,
press and hold the button on the under- side of mirror for approx. 6 seconds until
C is displayed in the mirror.
4. Press and hold the button for 3 seconds until the number of the current magnetic zone is displayed. 5. Press the button repeatedly until the
number of the desired magnetic zone (
1-15) is displayed. See the magnetic
zones on the map in the following section "Selecting a magnetic zone").
6. Wait until
C is again displayed in the mir-
ror.
7. Drive slowly in a circle at a speed of no more than 6 mph (10 km/h) until a direc- tion is displayed. This indicates that cali-bration is complete.
8. Drive around in a circle an additional two times to fine-tune the calibration.
9. Vehicles with an electrically heated windshield:
* if
C is displayed when the
heating function is activated, perform step 7 with the heating function on. Seealso page 227 for additional informationabout the heated windshield.
Repeat the calibration procedure if neces-sary.
Page 122 of 406
03 Your driving environment
Starting the engine
03
120* Option/accessory, for more information, see Introduction.
Start
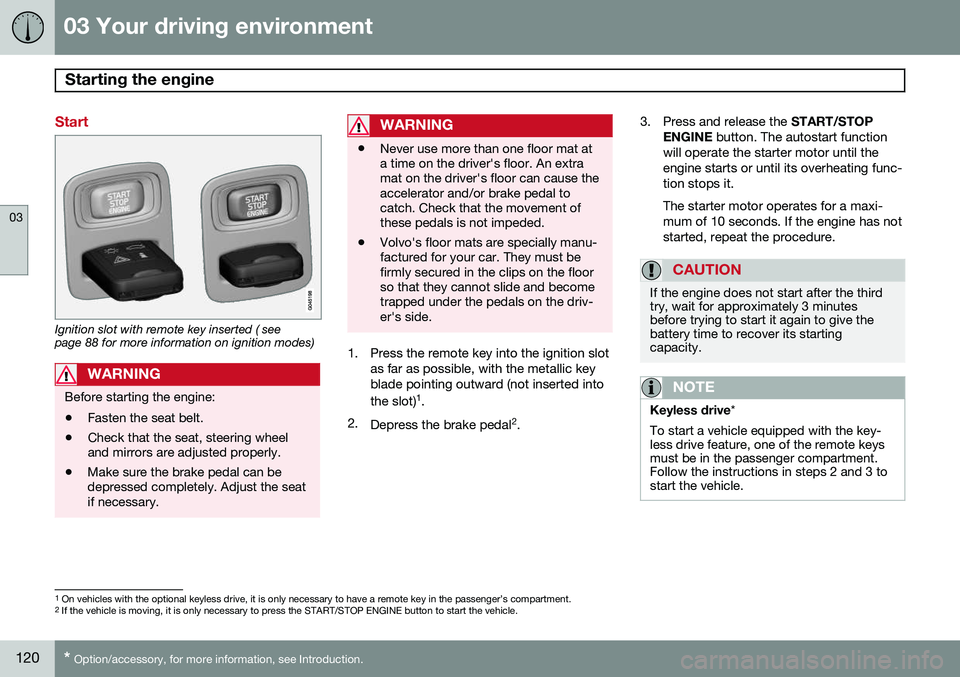
Ignition slot with remote key inserted ( see page 88 for more information on ignition modes)
WARNING
Before starting the engine:
• Fasten the seat belt.
• Check that the seat, steering wheel and mirrors are adjusted properly.
• Make sure the brake pedal can bedepressed completely. Adjust the seatif necessary.
WARNING
•Never use more than one floor mat at a time on the driver's floor. An extramat on the driver's floor can cause theaccelerator and/or brake pedal tocatch. Check that the movement ofthese pedals is not impeded.
• Volvo's floor mats are specially manu-factured for your car. They must befirmly secured in the clips on the floorso that they cannot slide and becometrapped under the pedals on the driv-er's side.
1. Press the remote key into the ignition slot
as far as possible, with the metallic key blade pointing outward (not inserted into the slot) 1
.
2. Depress the brake pedal 2
. 3. Press and release the
START/STOP
ENGINE button. The autostart function
will operate the starter motor until the engine starts or until its overheating func-tion stops it. The starter motor operates for a maxi- mum of 10 seconds. If the engine has notstarted, repeat the procedure.
CAUTION
If the engine does not start after the third try, wait for approximately 3 minutesbefore trying to start it again to give thebattery time to recover its startingcapacity.
NOTE
Keyless drive *
To start a vehicle equipped with the key- less drive feature, one of the remote keysmust be in the passenger compartment.Follow the instructions in steps 2 and 3 tostart the vehicle.
1 On vehicles with the optional keyless drive, it is only necessary to have a remote key in the passenger’s compartment.
2 If the vehicle is moving, it is only necessary to press the START/STOP ENGINE button to start the vehicle.
Page 125 of 406
03 Your driving environment
Starting the engine
03
}}
* Option/accessory, for more information, see Introduction.123
Models with a Personal Car
Communicator (PCC) remote key* (seepage 61)
The indicator light for approach lighting will flash several times andthen glow continuously if all of therequirements for ERS have been
met. However, this does not indicate thatERS has started the engine. To check if ERS has started the engine, press the information button (3). If the engine hasstarted, the indicator light for buttons(1) och (4) will illuminate.
Active functionsWhen the engine is started with ERS, the fol- lowing functions are activated: • The climate control system
• The infotainment system.
Deactivated functionsWhen the engine is started with ERS, the fol- lowing functions are deactivated: •Headlights
• Parking lights
• License plate lights
• Windshield wipers
Switching off an engine started with ERS
Any of the following will switch off the engine if it has been started with ERS:
• Pressing the lock button (1) or the unlock button (2) on the remote key
• Unlocking the vehicle
• Opening a door
• Depressing the accelerator or brake pedal
• Moving the gear selector from the
P posi-
tion
• If there are less than approx. 2.5 gallons(10 liters) of fuel in the tank
• More than 15 minutes have elapsed.
If the engine has been started with ERS and switches off, the turn signals will illuminate for3 seconds.
Message in the instrument panel
display
If ERS is interrupted, a text message will bedisplayed in the instrument panel.
Switching off the engine
With the engine running, press the START/
STOP ENGINE button.
If the gear selector is not in the P position or
if the vehicle is moving, press the START/
STOP ENGINE button twice or press and
hold it in until the engine switches off.
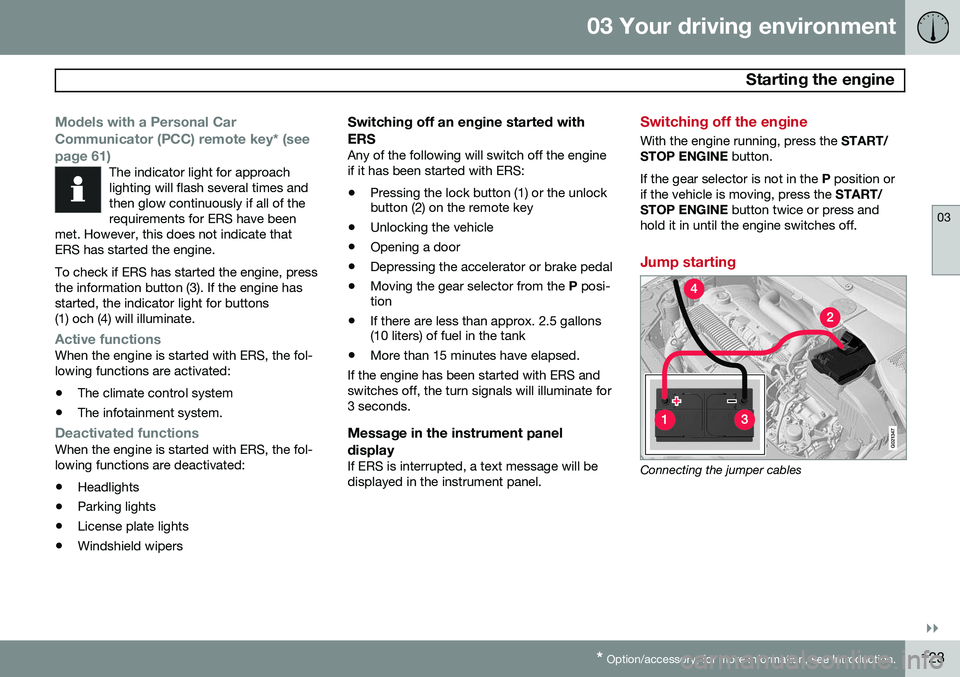
Jump starting
G021347
Connecting the jumper cables
Page 134 of 406
03 Your driving environment
Eco*
03
132* Option/accessory, for more information, see Introduction.
Introduction
Eco is a function 1
developed by Volvo to give
the driver the opportunity to actively drive more economically and to help reduce fuelconsumption.
When Eco is activated, thefollowing functions are modi-fied:
•The automatic transmission's shifting points
• The engine management system andaccelerator pedal response
• Stop/stop function (see page 135): theengine can auto-stop before the vehiclehas come to a full stop
• Eco Coast functionality is activated:engine braking is disabled
• Climate system settings: certain functions(e.g., air conditioning) will be temporarilyreduced or deactivated
NOTE
When Eco is activated, several climate system parameters are changed and thefunction of certain current-consuming sys-tems will be reduced. Pressing the
AC button will reset the cli-
mate system but at a reduced level.
Function
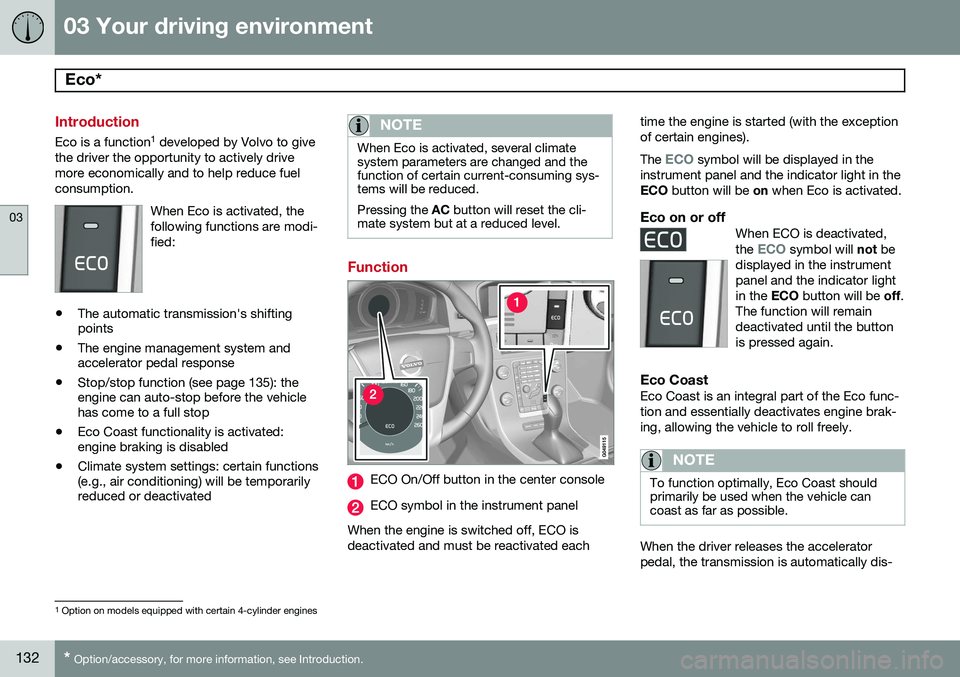
ECO On/Off button in the center console
ECO symbol in the instrument panel
When the engine is switched off, ECO is deactivated and must be reactivated each time the engine is started (with the exceptionof certain engines). The
ECO symbol will be displayed in the
instrument panel and the indicator light in the ECO button will be on when Eco is activated.
Eco on or offWhen ECO is deactivated, the ECO symbol will not be
displayed in the instrument panel and the indicator lightin the ECO button will be off.
The function will remaindeactivated until the buttonis pressed again.
Eco CoastEco Coast is an integral part of the Eco func- tion and essentially deactivates engine brak-ing, allowing the vehicle to roll freely.
NOTE
To function optimally, Eco Coast should primarily be used when the vehicle cancoast as far as possible.
When the driver releases the accelerator pedal, the transmission is automatically dis-
1 Option on models equipped with certain 4-cylinder engines
Page 137 of 406
03 Your driving environment
Start/Stop*
03
}}
* Option/accessory, for more information, see Introduction.135
Introduction
Start/Stop is a function that is available with certain engines/transmissions. It temporarilyswitches off the engine when the vehicle isnot moving, for instance in heavy traffic or ata traffic light to help reduce fuel consumption.
Function and use
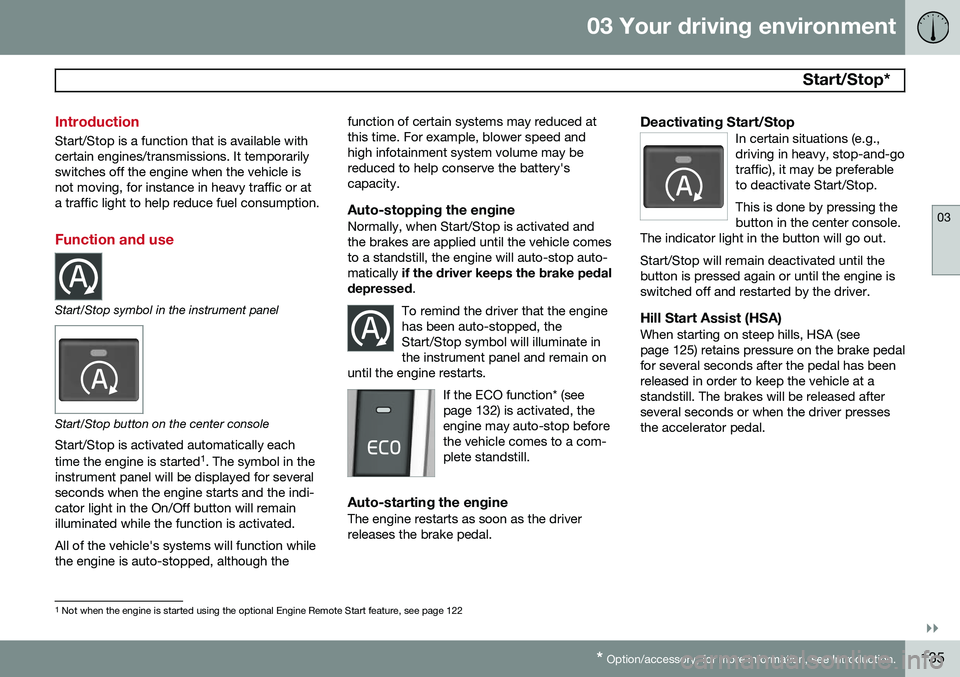
Start/Stop symbol in the instrument panel
Start/Stop button on the center console
Start/Stop is activated automatically each time the engine is started 1
. The symbol in the
instrument panel will be displayed for several seconds when the engine starts and the indi-cator light in the On/Off button will remainilluminated while the function is activated. All of the vehicle's systems will function while the engine is auto-stopped, although the function of certain systems may reduced atthis time. For example, blower speed andhigh infotainment system volume may bereduced to help conserve the battery'scapacity.
Auto-stopping the engineNormally, when Start/Stop is activated andthe brakes are applied until the vehicle comesto a standstill, the engine will auto-stop auto-matically
if the driver keeps the brake pedal
depressed .
To remind the driver that the enginehas been auto-stopped, theStart/Stop symbol will illuminate inthe instrument panel and remain on
until the engine restarts.
If the ECO function* (see page 132) is activated, theengine may auto-stop beforethe vehicle comes to a com-plete standstill.
Auto-starting the engineThe engine restarts as soon as the driver releases the brake pedal.
Deactivating Start/StopIn certain situations (e.g.,driving in heavy, stop-and-gotraffic), it may be preferableto deactivate Start/Stop. This is done by pressing the button in the center console.
The indicator light in the button will go out. Start/Stop will remain deactivated until the button is pressed again or until the engine isswitched off and restarted by the driver.
Hill Start Assist (HSA)When starting on steep hills, HSA (see page 125) retains pressure on the brake pedalfor several seconds after the pedal has beenreleased in order to keep the vehicle at astandstill. The brakes will be released afterseveral seconds or when the driver pressesthe accelerator pedal.
1 Not when the engine is started using the optional Engine Remote Start feature, see page 122