trailer VOLVO S60 INSCRIPTION 2016 Owner´s Manual
[x] Cancel search | Manufacturer: VOLVO, Model Year: 2016, Model line: S60 INSCRIPTION, Model: VOLVO S60 INSCRIPTION 2016Pages: 344, PDF Size: 7.24 MB
Page 225 of 344
08 Starting and driving
08
}}
* Option/accessory, for more information, see Introduction.223
Condition/situation
The driver is turning the steering wheel hard.
The road's incline is very steep.
A trailer's electrical system is connected to the vehicle.
The hood has been opened A
.
The transmission has not reached its nor- mal operating temperature.
Atmospheric pressure is below a level equivalent to an altitude of approx. 4,900–8,200 ft (1500–2500 m) above sea level.The actual pressure is also affected by cur-rent weather conditions.
The Adaptive Cruise Control's* Queue Assist feature is activated.
The gear selector is in the SB
or " +/–" posi-
tion.
A Certain engines only
B Sport mode (where applicable)
Related information
• Start/Stop – introduction (p. 221)
• Start/Stop – function (p. 221)
• Start/Stop – settings (p. 224)
• Start/Stop – Auto-start exceptions (p. 223) •
Start/Stop – Hill Start Assist (HSA)(p. 221)
• Start/Stop – symbols and messages(p. 225)
Start/Stop – Auto-start exceptions
In certain situations or conditions, the engine may auto-start
even though the driver is still
pressing the brake pedal, such as if:
Condition/situation
Condensation forms on the windows.
The climate system cannot keep the desired settings in the passenger compart-ment.
Electrical current consumption is tempo- rarily high or the main battery's charge isbelow the minimum level.
The brake pedal is pumped repeatedly.
The hood has been opened A
.
The vehicle begins to move or increases speed slightly (if the engine auto-stoppedbefore the vehicle was at a standstill (seeECO* (p. 226))).
The driver unbuckles his/her seat belt while the gear selector is in the D or N positions.
The steering wheel is turned A
.
Page 231 of 344
08 Starting and driving
08
}}
* Option/accessory, for more information, see Introduction.229
Brake pad inspectionOn vehicles equipped with a jack*, the condi- tion of the brake pads can be checked byraising the vehicle (see Changing a wheel –removing wheel (p. 252) for informationabout using the jack and removing a wheel)and performing a visual inspection of thebrake pads.
WARNING
• If the vehicle has been driven immedi- ately prior to a brake pad inspection,the wheel hub, brake components,etc., will be very hot. Allow time forthese components to cool before car-rying out the inspection.
• Apply the parking brake and put thegear selector in the Park (
P) position.
• Block the wheels standing on theground, use rigid wooden blocks orlarge stones.
WARNING
•Use the jack intended for the vehicle when changing a tire. For any otherjob, use stands to support the vehicle.
• The jack should be kept well-greasedand clean, and should not be dam-aged.
• Be sure the jack is on a firm, level,non-slippery surface.
• No objects should be placed betweenthe base of jack and the ground, orbetween the jack and the attachmentbar on the vehicle.
• The jack must correctly engage thejack attachment.
• Never allow any part of your body tobe extended under a vehicle suppor-ted by a jack.
Power brakes function only when the engine is running
The power brakes utilize vacuum pressure which is only created when the engine is run-ning. Never let the vehicle roll to a stop withthe engine switched off. If the power brakes are not working, consid- erably higher pressure will be required on thebrake pedal to compensate for the lack ofpower assistance. This can happen for exam-ple when towing your vehicle or if the engineis switched off when the vehicle is rolling. Thebrake pedal feels harder than usual.
Water on brake discs and brake pads affects braking
Driving in rain and slush or passing through an automatic car wash can cause water tocollect on the brake discs and pads. This willcause a delay in braking effect when thepedal is depressed. To avoid such a delaywhen the brakes are needed, depress thepedal occasionally when driving through rain,slush, etc. This will remove the water from thebrakes. Check that brake application feelsnormal. This should also be done after wash-ing or starting in very damp or cold weather.
Severe strain on the brake systemThe brakes will be subject to severe strainwhen driving in mountains or hilly areas, orwhen towing a trailer. Vehicle speed is usuallyslower, which means that the cooling of thebrakes is less efficient than when driving onlevel roads. To reduce the strain on thebrakes, shift into a lower gear and let theengine help with the braking. Do not forgetthat if you are towing a trailer, the brakes willbe subjected to a greater than normal load.
Cleaning the brake discsCoatings of dirt and water on the brake discsmay result in delayed brake function. Thisdelay is minimized by cleaning the brake lin-ings. Cleaning the brake pads is advisable in wet weather, prior to long-term parking, and afterthe vehicle has been washed. Do this by
Page 235 of 344
08 Starting and driving
08
}}
233
NOTE
•In an emergency the parking brake can be applied when the vehicle is movingby holding in the control. Braking willbe interrupted when the acceleratorpedal is depressed or the control isreleased.
• An audible signal will sound during thisprocedure if the vehicle is moving atspeeds above 6 mph (10 km/h).
Related information
•
Parking brake – general information (p. 232)
• Parking brake – releasing (p. 233)
• Parking brake – symbols and messages(p. 235)
• Brakes – general (p. 228)
Parking brake – releasing
Releasing the electric parking brake
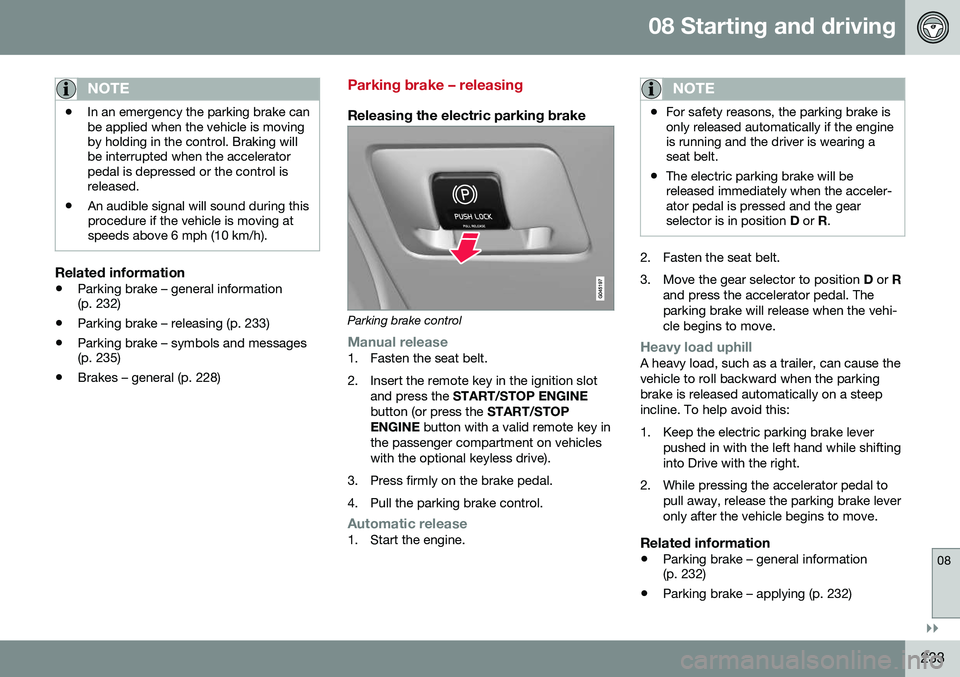
Parking brake control
Manual release1. Fasten the seat belt.
2. Insert the remote key in the ignition slot
and press the START/STOP ENGINE
button (or press the START/STOP
ENGINE button with a valid remote key in
the passenger compartment on vehicles with the optional keyless drive).
3. Press firmly on the brake pedal.
4. Pull the parking brake control.
Automatic release1. Start the engine.
NOTE
• For safety reasons, the parking brake is only released automatically if the engineis running and the driver is wearing aseat belt.
• The electric parking brake will bereleased immediately when the acceler-ator pedal is pressed and the gearselector is in position
D or R.
2. Fasten the seat belt.
3. Move the gear selector to position D or R
and press the accelerator pedal. The parking brake will release when the vehi-cle begins to move.
Heavy load uphillA heavy load, such as a trailer, can cause the vehicle to roll backward when the parkingbrake is released automatically on a steepincline. To help avoid this:
1. Keep the electric parking brake lever pushed in with the left hand while shifting into Drive with the right.
2. While pressing the accelerator pedal to pull away, release the parking brake leveronly after the vehicle begins to move.
Related information
• Parking brake – general information (p. 232)
• Parking brake – applying (p. 232)
Page 238 of 344
08 Starting and driving
08
236
Driving through water
The vehicle should be driven with extreme caution if it is necessary to drive throughstanding water. The vehicle can be driven through water up to a depth of approximately 10 in. (25 cm) atwalking speed to help prevent water fromentering the differential and the transmission.This reduces the oil's lubricating capacity andmay shorten the service life of these compo-nents.
• Take particular care when driving through flowing water.
• Clean the electrical connections for trailerwiring after driving in mud or water.
• When driving through water, maintain lowspeed and do not stop in the water.WARNING
• Avoid driving through standing or rushing water. Doing so can be dan-gerous and it may also be difficult todetermine the actual depth of thewater.
• If water cannot be avoided, after driv-ing through the water, press lightly onthe brake pedal to ensure that thebrakes are functioning normally. Wateror mud can make the brake liningsslippery, resulting in delayed brakingeffect.
CAUTION
•
Engine damage will occur if water is drawn into the air cleaner.
• If the vehicle is driven through waterdeeper than 10 in (25 cm), water mayenter the differential and the transmis-sion. This reduces the oil's lubricatingcapacity and may shorten the servicelife of these components.
• Damage to any components, theengine, transmission, turbo-charger,differential or its internal componentscaused by flooding, vapor lock orinsufficient oil is not covered underwarranty.
• Do not allow the vehicle to stand inwater up to the door sills longer thanabsolutely necessary. This could resultin electrical malfunctions.
• If the engine has been stopped whilethe vehicle is in water, do not attemptto restart it. Have the vehicle towedout of the water.
Related information
•
Towing the vehicle (p. 245)
• Towing by tow truck (p. 247)
Page 239 of 344
08 Starting and driving
08
}}
237
Engine and cooling system
Under special conditions, for example when driving in hilly terrain, extreme heat or withheavy loads, there is a risk that the engine andcooling system will overheat. Proceed as follows to avoid overheating the engine. •Maintain a low speed when driving with a trailer up long, steep hills. For informa-tion, see Towing a trailer (p. 243)
• Do not turn the engine off immediatelywhen stopping after a hard drive.
WARNING
The cooling fan may start or continue to operate (for up to 6 minutes) after theengine has been switched off.
•
Remove any auxiliary lights from in front of the grille when driving in hot weatherconditions.
• Do not exceed engine speeds of4500 rpm if driving with a trailer in hillyterrain. The oil temperature could becometoo high.
Conserving electrical current
Keep the following in mind to help minimize battery drain:
• When the engine is not running, avoid using ignition mode
II. Many electrical
systems (the audio system, the optionalnavigation system, power windows, etc)will function in ignition modes 0 and I.
These modes reduce drain on the battery.
• Please keep in mind that using systems,accessories, etc., that consume a greatdeal of current when the engine is notrunning could result in the battery beingcompletely drained. Driving or having theengine running for approximately15 minutes will help keep the batterycharged.
• The optional area provides electrical cur-rent even with the ignition switched off,which drains the battery.
Before a long distance trip
It is always worthwhile to have your vehicle checked by a trained and qualified Volvo serv-ice technician before driving long distances.Your retailer will also be able to supply youwith bulbs, fuses, spark plugs and wiperblades for your use in the event that problemsoccur. As a minimum, the following items should be checked before any long trip:
• Check that engine runs smoothly and that fuel consumption is normal.
• Check for fuel, oil, and fluid leakage.
• Have the transmission oil level (p. 325)checked.
• Check condition of drive belts.
• Check state of the battery's charge.
• Examine tires carefully (the spare tire aswell), and replace those that areworn (p. 251). Check tire pres-sure (p. 256).
• The brakes, front wheel alignment, andsteering gear should be checked by atrained and qualified Volvo service techni-cian only.
• Check all lights, including high beams.
• Reflective warning triangles are legallyrequired in some states/provinces.
• Have a word with a trained and qualifiedVolvo service technician if you intend to
Page 242 of 344
08 Starting and driving
08
240
Refueling – octane rating
Volvo recommends premium fuel for best per- formance, but using 87 octane11
or above will
not affect engine reliability.
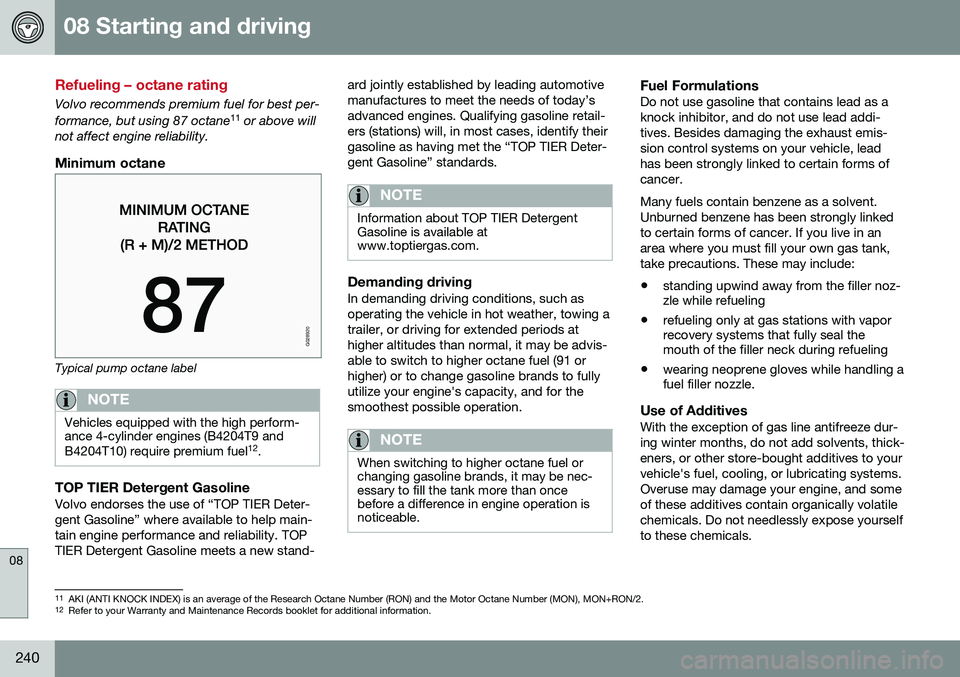
Minimum octane
G028920
Typical pump octane label
NOTE
Vehicles equipped with the high perform- ance 4-cylinder engines (B4204T9 and B4204T10) require premium fuel 12
.
TOP TIER Detergent GasolineVolvo endorses the use of “TOP TIER Deter- gent Gasoline” where available to help main-tain engine performance and reliability. TOPTIER Detergent Gasoline meets a new stand- ard jointly established by leading automotivemanufactures to meet the needs of today’sadvanced engines. Qualifying gasoline retail-ers (stations) will, in most cases, identify theirgasoline as having met the “TOP TIER Deter-gent Gasoline” standards.
NOTE
Information about TOP TIER Detergent Gasoline is available atwww.toptiergas.com.
Demanding drivingIn demanding driving conditions, such as operating the vehicle in hot weather, towing atrailer, or driving for extended periods athigher altitudes than normal, it may be advis-able to switch to higher octane fuel (91 orhigher) or to change gasoline brands to fullyutilize your engine's capacity, and for thesmoothest possible operation.
NOTE
When switching to higher octane fuel or changing gasoline brands, it may be nec-essary to fill the tank more than oncebefore a difference in engine operation isnoticeable.
Fuel FormulationsDo not use gasoline that contains lead as a knock inhibitor, and do not use lead addi-tives. Besides damaging the exhaust emis-sion control systems on your vehicle, leadhas been strongly linked to certain forms ofcancer. Many fuels contain benzene as a solvent. Unburned benzene has been strongly linkedto certain forms of cancer. If you live in anarea where you must fill your own gas tank,take precautions. These may include:
• standing upwind away from the filler noz- zle while refueling
• refueling only at gas stations with vaporrecovery systems that fully seal themouth of the filler neck during refueling
• wearing neoprene gloves while handling afuel filler nozzle.
Use of AdditivesWith the exception of gas line antifreeze dur- ing winter months, do not add solvents, thick-eners, or other store-bought additives to yourvehicle's fuel, cooling, or lubricating systems.Overuse may damage your engine, and someof these additives contain organically volatilechemicals. Do not needlessly expose yourselfto these chemicals.
11
AKI (ANTI KNOCK INDEX) is an average of the Research Octane Number (RON) and the Motor Octane Number (MON), MON+RON/2.
12 Refer to your Warranty and Maintenance Records booklet for additional information.
Page 245 of 344
08 Starting and driving
08
}}
243
Economical driving
Better driving economy may be obtained by thinking ahead, avoiding rapid starts andstops and adjusting the speed of your vehicleto immediate traffic conditions.
Handling and roadholding
•Vehicle load, tire design and inflation pressure all affect vehicle handling.Therefore, check that the tires are inflatedto the recommended pressure accordingto the vehicle load. Loads should be dis-tributed so that capacity weight or maxi-mum permissible axle loads are notexceeded.
Related information
•Climate – general information (p. 107)
Towing a trailer
When towing a trailer, always observe the legal requirements of the state/province.
NOTE
For the maximum trailer and tongue weights recommended by Volvo, seeWeights (p. 320).
•All Volvo models are equipped with energy-absorbing shock-mounted bump-ers. Trailer hitch installation should notinterfere with the proper operation of thisbumper system.
Trailer towing does not normally present any particular problems, but take into considera-tion: • Increase tire pressure to recommended full pressure, see Tire inflation – pressuretable (p. 260).
• When your vehicle is new, avoid towingheavy trailers during the first 620 miles(1,000 km).
• Maximum speed when towing a trailer:50 mph (80 km/h).
• Engine and transmission are subject toincreased loads. Therefore, engine cool-ant temperature should be closelywatched when driving in hot climates orhilly terrain. Use a lower gear and turn offthe air conditioner if the temperaturegauge needle enters the red range. •
If the automatic transmission begins tooverheat, a message will be displayed inthe text window.
• Avoid overload and other abusive opera-tion.
• Hauling a trailer affects handling, durabil-ity, and economy.
• It is necessary to balance trailer brakeswith the towing vehicle brakes to providea safe stop (check and observe state/local regulations).
• Do not connect the trailer's brake systemdirectly to the vehicle's brake system.
• More frequent vehicle maintenance isrequired.
• Remove the ball holder when the hitch isnot being used.
Page 246 of 344
||
08 Starting and driving
08
244
NOTE
•When parking the vehicle with a trailer on a hill, apply the parking brakebefore putting the gear selector in
P.
Always follow the trailer manufactur-er's recommendations for wheelchocking.
• When starting on a hill, put the gearselector in
D before releasing the park-
ing brake.
• If you use the manual (Geartronic) shiftpositions while towing a trailer, makesure the gear you select does not puttoo much strain on the engine (usingtoo high a gear).
• The drawbar assembly/trailer hitchmay be rated for trailers heavier thanthe vehicle is designed to tow. Pleaseadhere to Volvo's recommended trailerweights.
• Avoid driving with a trailer on inclinesof more than 15%.
CAUTION
The maximum trailer weights listed are only applicable for altitudes up to 3,280 ft(1000 m) above sea level. With increasingaltitude the engine power and thereforethe car's climbing ability are impairedbecause of the reduced air density, so themaximum trailer weight has to be reducedaccordingly. The weight of the vehicle andtrailer must be reduced by 10% for everyfurther 3,280 ft (1000 m) (or part thereof).When towing 5,950 lbs (2,700kg) hill incli-nation is restricted to 14%.
WARNING
•
Bumper-attached trailer hitches must not be used on Volvos, nor shouldsafety chains be attached to thebumper.
• Trailer hitches attaching to the vehiclerear axle must not be used.
• Never connect a trailer's hydraulicbrake system directly to the vehiclebrake system, nor a trailer's lightingsystem directly to the vehicle lightingsystem. Consult your nearest author-ized Volvo retailer for correct installa-tion.
• When towing a trailer, the trailer'ssafety chains or wire must be correctlyfastened to the attachment points pro-vided in the trailer hitch on the vehicle.The safety chain or wire must never befastened to or wound around the tow-ing ball.
Trailer cableAn adapter is required if the vehicle's trailer hitch has a 13-pin connector and the trailerhas 7 pins. Use an adapter cable approvedby Volvo. Make sure the cable does not dragon the ground.
Related information
•
Loading – general (p. 120)
Page 247 of 344
08 Starting and driving
08
}}
245
Trailer Stability Assist (TSA)
Trailer Stability Assist is a system designed to help stabilize a vehicle that is towing a trailerwhen the vehicle and trailer have begun tosway and is part of the stability system. Forinformation on the stability system, see Stabil-ity system – introduction (p. 141)
FunctionA vehicle towing a trailer may begin to swayfor various reasons. Normally this only occursat high speeds but, for example, if the traileris overloaded or if the load is unevenly dis-tributed in the trailer, there is risk of swayingat speeds between approximately 45-55 mph(70-90 km/h). Swaying may be caused by factors such as: •The vehicle and trailer are hit by a sud- den, strong crosswind
• The vehicle and trailer are traveling on anuneven road surface or drive over a bump
• Sudden movements of the steering wheel
Facts about TSA
• TSA intervenes at speeds above approxi-mately 40 mph (60 km/h)
• The stability system symbol in the instru-ment panel will flash when TSA is working
• If the driver switches off the stability sys-tem's Spin Control function, TSA will alsobe switched off (but will be on again thenext time the engine is started) •
TSA may not intervene when the vehicleand trailer begin to sway if the driver triesto compensate for the swaying motion bymoving the steering wheel rapidly
How TSA worksOnce swaying has begun, it can be very diffi- cult to stop, which makes it difficult to controlthe vehicle and trailer. The TSA system continuously monitors the vehicle's movements, particularly lateralmovement. If the system detects a tendencyto sway, the brakes are applied individuallyon the front wheels, which has a stabilizingeffect on the vehicle and trailer. This is oftenenough to enable the driver to regain controlof the vehicle. If this is not adequate to stop the swaying motion, the brakes are applied to all of thewheels on the vehicle and on the trailer if it isequipped with brakes, and engine power istemporarily reduced. As the swaying motionbegins to decrease and the vehicle-trailerhave once again become stable, TSA will nowstop regulating the brakes/engine power andthe driver regains control of the vehicle.
Related information
•Towing a trailer (p. 243)
• Loading – general (p. 120)
Towing the vehicle
Always check with state and local authorities before attempting to tow another vehiclebecause this type of towing is subject to reg-ulations regarding maximum towing speed,length and type of towing device, lighting, etc.
Page 263 of 344
09 Wheels and tires
09
}}
261
Loading specifications
Properly loading your vehicle will provide maximum return of vehicle design perform-ance. Before loading your vehicle, familiarize your- self with the following terms for determiningyour vehicle's weight ratings, with or withouta trailer, from the vehicle's Federal/CanadianMotor Vehicle Safety Standards (FMVSS/CMVSS) label, and the vehicle's tire informa-tion placard:
Curb weightThe weight of the vehicle including a full tankof fuel and all standard equipment. It doesnot include passengers, cargo, or optionalequipment.
Capacity weightAll weight added to the curb weight, includingcargo and optional equipment. When towing,trailer hitch tongue load is also part of cargoweight.
Permissible axle weightThe maximum allowable weight that can becarried by a single axle (front or rear). Thesenumbers are shown on the Federal/CanadianMotor Vehicle Safety Standards (FMVSS/CMVSS) label. The total load on each axlemust never exceed its maximum permissibleweight.
Gross vehicle weight (GVW)The vehicle's curb weight + cargo + passen-gers.
NOTE
•The location of the various labels in your vehicle, see Label information(p. 315).
• A table listing important weight limitsfor your vehicle, see Weights (p. 320).
Loading specifications – load limit
The load limit of your vehicle is the combined weight of the occupants and cargo.
Steps for Determining Correct Load
Limit
1. Locate the statement "the combined weight of occupants and cargo shouldnever exceed XXX pounds" on your vehi-cle's placard.
2. Determine the combined weight of the driver and passengers that will be ridingin your vehicle.
3. Subtract the combined weight of the driver and passengers from XXX kilo-grams or XXX pounds.
4. The resulting figure equals the available amount of cargo and luggage loadcapacity. For example, if the "XXX"amount equals 1400 lbs. and there will befive 150 lb. passengers in your vehicle,the amount of available cargo and lug-gage load capacity is 650 lbs. (1400 – 750 (5 × 150) = 650 lbs.)
5. Determine the combined weight of lug- gage and cargo being loaded on the vehi-cle. That weight may not safely exceedthe available cargo and luggage loadcapacity calculated in Step 4.