wiper fluid VOLVO S60 INSCRIPTION 2016 Owner´s Manual
[x] Cancel search | Manufacturer: VOLVO, Model Year: 2016, Model line: S60 INSCRIPTION, Model: VOLVO S60 INSCRIPTION 2016Pages: 344, PDF Size: 7.24 MB
Page 10 of 344
Contents
8
10
10 Maintenance and servicing
Maintenance – introduction.................... 281
Maintenance – owner maintenance........ 282
Maintenance – hoisting........................... 282
Onboard Diagnostic System................... 283
Booking service and repairs .................. 283
Maintenance – opening/closing hood..... 285
Engine compartment – overview............ 285
Engine compartment – engine oil........... 286
Engine compartment – coolant............... 288
Engine compartment – brake fluid.......... 289Engine compartment – power steering
fluid......................................................... 289
Bulbs – introduction................................ 290
Bulbs – headlight housing....................... 290
Bulbs – cover.......................................... 291
Bulbs – low beam, Halogen.................... 291
Bulbs – high beam, Halogen................... 291
Bulbs – extra high beam......................... 292
Bulbs – front turn signals........................ 292
Bulbs – license plate lighting.................. 292
Bulbs – vanity mirror lighting.................. 293
Bulbs – specifications............................. 293
Wiper blades – service position.............. 293
Wiper blades – windshield...................... 294
10
Engine compartment – washer fluid....... 295
Battery – symbols................................... 295
Battery – handling................................... 296
Battery – maintenance............................ 297
Battery – changing.................................. 298
Fuses – introduction............................... 299
Fuses – engine compartment................. 299
Fuses – glove compartment................... 302
Fuses – cargo area/trunk........................ 305Fuses – engine compartment cold zone
(Start/Stop only)...................................... 306
Washing the car...................................... 308
Automatic car wash................................ 309
Polishing and waxing.............................. 309
Cleaning the interior................................ 310
Touching up paintwork........................... 312
11
11 Specifications
Label information.................................... 315
Dimensions............................................. 318
Weights................................................... 320
Engine specifications.............................. 322
Oil specifications..................................... 323
Oil volume............................................... 323
Coolant – specification and volume........ 324Transmission oil – specification and vol-
umes....................................................... 324
Brake fluid – specification and volume... 324
Power steering – specification................ 325Fuel tank volume – specification and vol-
ume......................................................... 325 Air conditioning – specification and vol-
ume......................................................... 325
Battery specifications............................. 326
Symbols – general information............... 327
Warning symbols.................................... 327
Indicator symbols.................................... 328
Information symbols............................... 329
Information symbols – ceiling console.... 330
Information symbols – center console.... 330
Page 86 of 344
03 Instruments and controls
03
84* Option/accessory, for more information, see Introduction.
Windshield wipers
Move the lever toward the steering wheel to start the windshield and headlight washers.After the lever is released the wipers makeseveral extra sweeps.
CAUTION
• Use ample washer fluid when washing the windshield. The windshield shouldbe thoroughly wet when the wipers arein operation.
• Before using the wipers, ice and snowshould be removed from the wind-shield/rear window. Be sure the wiperblades are not frozen in place.
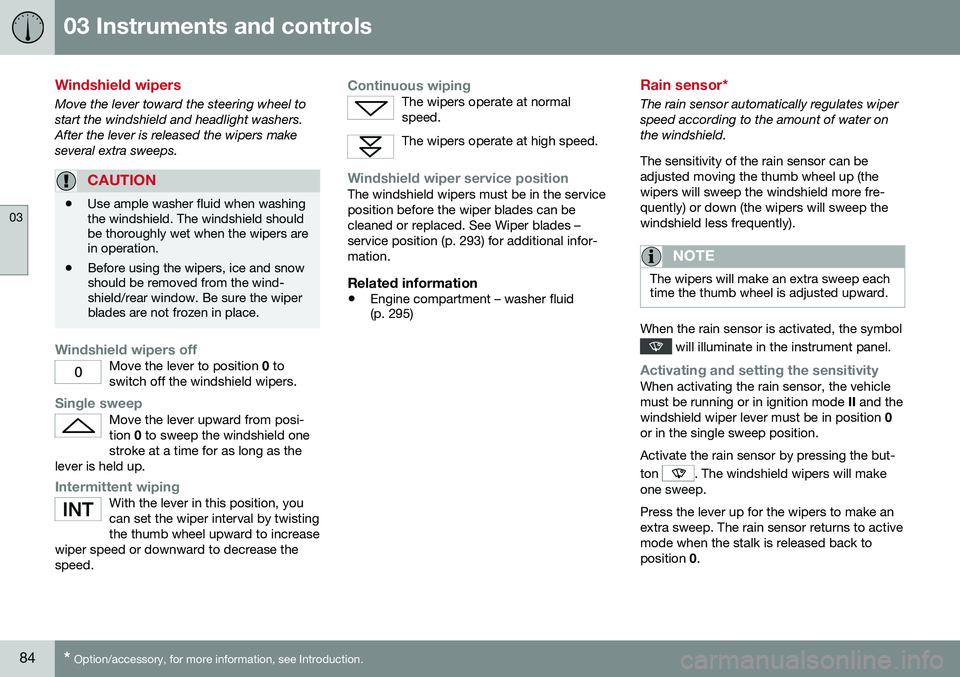
Windshield wipers offMove the lever to position
0 to
switch off the windshield wipers.
Single sweepMove the lever upward from posi- tion 0 to sweep the windshield one
stroke at a time for as long as the
lever is held up.
Intermittent wipingWith the lever in this position, you can set the wiper interval by twistingthe thumb wheel upward to increase
wiper speed or downward to decrease thespeed.
Continuous wipingThe wipers operate at normal speed.
The wipers operate at high speed.
Windshield wiper service positionThe windshield wipers must be in the service position before the wiper blades can becleaned or replaced. See Wiper blades –service position (p. 293) for additional infor-mation.
Related information
• Engine compartment – washer fluid (p. 295)
Rain sensor*
The rain sensor automatically regulates wiper speed according to the amount of water onthe windshield. The sensitivity of the rain sensor can be adjusted moving the thumb wheel up (thewipers will sweep the windshield more fre-quently) or down (the wipers will sweep thewindshield less frequently).
NOTE
The wipers will make an extra sweep each time the thumb wheel is adjusted upward.
When the rain sensor is activated, the symbol
will illuminate in the instrument panel.
Activating and setting the sensitivityWhen activating the rain sensor, the vehicle must be running or in ignition mode
II and the
windshield wiper lever must be in position 0
or in the single sweep position. Activate the rain sensor by pressing the but- ton
. The windshield wipers will make
one sweep. Press the lever up for the wipers to make an extra sweep. The rain sensor returns to activemode when the stalk is released back toposition 0.
Page 87 of 344
03 Instruments and controls
03
* Option/accessory, for more information, see Introduction.85
DeactivatingDeactivate the rain sensor by pressing the button
or press the lever down to
another wiper position. The rain sensor is automatically deactivated when the key is removed from the ignitionslot or five minutes after the ignition has beenswitched off.
CAUTION
The rain sensor should be deactivated when washing the car in an automatic carwash, etc. If the rain sensor function is lefton, the wipers will start inadvertently in thecar wash and could be damaged.
Windshield washer
Move the lever toward the steering wheel to start the windshield and headlight washers.After the lever is released the wipers makeseveral extra sweeps.
Heated washer nozzles*The washer nozzles are heated automaticallyin cold weather to help prevent the washerfluid from freezing.
High-pressure headlight washing*High-pressure headlight washing consumes alarge quantity of washer fluid. To save fluid,the headlights are washed using two alterna-tives:
• Low/high beam headlights on.
The
headlights will be washed the first time the windshield is washed. Thereafter, theheadlights will only be washed once forevery five times the windshield is washedwithin a 10-minute period.
• Parking lights on.
Optional Active Bend-
ing Lights will be washed once for everyfive times the windshield is washed. Nor-mal halogen headlights will not bewashed.
CAUTION
• Use ample washer fluid when washing the windshield. The windshield shouldbe thoroughly wet when the wipers arein operation.
• When approx. 1 US quart (1 liter) ofwasher fluid remains in the reservoir,the headlights will no longer bewashed. A text message will also bedisplayed to remind the driver to fill thewasher fluid reservoir.
Related information
•
Engine compartment – washer fluid (p. 295)
Page 88 of 344
03 Instruments and controls
03
86
Tailgate wiper/washer
The tailgate wiper operates at two speeds: intermittent and continuous.
NOTE
The rear wiper is equipped with a cut-off function, which means that it will not oper-ate if its electric motor overheats. Thewiper will function again after a cool-downperiod (30 seconds or longer, dependingon the heat of the motor and ambient tem-perature conditions).
Tailgate wiper and reverse gearIf the windshield wipers are on and the trans- mission is put into reverse gear, the tailgatewiper will go into intermittent wiping func- tion18
. This function is deactivated when a dif-
ferent gear is selected.
NOTE
On vehicles with the optional rain sensor, the tailgate wiper will be activated whenreverse is selected, if the rain sensor isactivated and it is raining.
If the tailgate wiper is in the normal (continu- ous) wiping mode, selecting different gearswill not affect its function.
Related information
• Engine compartment – washer fluid (p. 295)
Power windows
All power windows can be operated using the control panel in the driver's door. The controlpanels in the other doors only operate thewindow in the respective doors.
WARNING
•Always remove the ignition key when the vehicle is unattended to put theignition in mode
0 (see Ignition modes
(p. 69) for information about the igni-tion modes).
• Never leave children unattended in thevehicle.
• Make sure that the windows are com-pletely unobstructed before they areoperated.
OperatingFor the power windows to function, the igni- tion must be in at least mode
I. When the
vehicle has been running, the power windowscan be operated for several minutes after theremote key has been removed from the igni-tion slot, or until a door has been opened.
18 Consult your Volvo retailer if you would like to have this function deactivated.
Page 239 of 344
08 Starting and driving
08
}}
237
Engine and cooling system
Under special conditions, for example when driving in hilly terrain, extreme heat or withheavy loads, there is a risk that the engine andcooling system will overheat. Proceed as follows to avoid overheating the engine. •Maintain a low speed when driving with a trailer up long, steep hills. For informa-tion, see Towing a trailer (p. 243)
• Do not turn the engine off immediatelywhen stopping after a hard drive.
WARNING
The cooling fan may start or continue to operate (for up to 6 minutes) after theengine has been switched off.
•
Remove any auxiliary lights from in front of the grille when driving in hot weatherconditions.
• Do not exceed engine speeds of4500 rpm if driving with a trailer in hillyterrain. The oil temperature could becometoo high.
Conserving electrical current
Keep the following in mind to help minimize battery drain:
• When the engine is not running, avoid using ignition mode
II. Many electrical
systems (the audio system, the optionalnavigation system, power windows, etc)will function in ignition modes 0 and I.
These modes reduce drain on the battery.
• Please keep in mind that using systems,accessories, etc., that consume a greatdeal of current when the engine is notrunning could result in the battery beingcompletely drained. Driving or having theengine running for approximately15 minutes will help keep the batterycharged.
• The optional area provides electrical cur-rent even with the ignition switched off,which drains the battery.
Before a long distance trip
It is always worthwhile to have your vehicle checked by a trained and qualified Volvo serv-ice technician before driving long distances.Your retailer will also be able to supply youwith bulbs, fuses, spark plugs and wiperblades for your use in the event that problemsoccur. As a minimum, the following items should be checked before any long trip:
• Check that engine runs smoothly and that fuel consumption is normal.
• Check for fuel, oil, and fluid leakage.
• Have the transmission oil level (p. 325)checked.
• Check condition of drive belts.
• Check state of the battery's charge.
• Examine tires carefully (the spare tire aswell), and replace those that areworn (p. 251). Check tire pres-sure (p. 256).
• The brakes, front wheel alignment, andsteering gear should be checked by atrained and qualified Volvo service techni-cian only.
• Check all lights, including high beams.
• Reflective warning triangles are legallyrequired in some states/provinces.
• Have a word with a trained and qualifiedVolvo service technician if you intend to
Page 240 of 344
||
08 Starting and driving
08
238
drive in countries where it may be difficult to obtain the correct fuel.
• Consider your destination. If you will bedriving through an area where snow or iceare likely to occur, consider snowtires (p. 265).
Related information
•Changing a wheel – removing wheel(p. 252)
• Bulbs – introduction (p. 290)
Driving in cold weather
Check your vehicle before the approach of cold weather. The following advice is worth noting:
• Make sure that the engine cool- ant (p. 288) contains 50 percent anti-freeze. Any other mixture will reducefreeze protection. This gives protectionagainst freezing down to –31 °F (–35 °C).The use of "recycled" antifreeze is notapproved by Volvo. Different types ofantifreeze must not be mixed.
• Volvo recommends using only genuineVolvo antifreeze in your vehicle's radiator.
• Try to keep the fuel tank well filled – thishelps prevent the formation of condensa-tion in the tank. In addition, in extremelycold weather conditions it is worthwhileto add fuel line de-icer before refueling.
• The viscosity of the engine oil is impor-tant. Oil with low viscosity (thinner oil)improves cold-weather starting as well asdecreasing fuel consumption while theengine is warming up. Full synthetic0W-30 oil is recommended for driving inareas with sustained low temperatures.
• The load placed on the battery is greaterduring the winter since the windshieldwipers, lighting, etc., are used moreoften. Moreover, the capacity of the bat-tery decreases as the temperature drops.In very cold weather, a poorly chargedbattery can freeze and be damaged. It is therefore advisable to check the state ofcharge more frequently and spray an anti-rust oil on the battery posts.
• Volvo recommends the use of snow tireson all four wheels for winter driving, seeSnow tires/studded tires (p. 265).
• To prevent the washer fluid (p. 295)reser-voir from freezing, add washer solventscontaining antifreeze. This is importantsince dirt is often splashed on the wind-shield during winter driving, requiring thefrequent use of the washers and wipers.Volvo Washer Solvent should be dilutedas follows: Down to 14 °F (–10 °C): 1 partwasher solvent and 4 parts water Downto 5 °F (–15 °C): 1 part washer solventand 3 parts water Down to 0 °F (–18 °C):1 part washer solvent and 2 parts waterDown to –18 °F (–28 °C): 1 part washersolvent and 1 part water.
• Use Volvo Teflon Lock Spray in the locks.
• Avoid using de-icing sprays as they cancause damage to the locks.
Page 284 of 344
10 Maintenance and servicing
10
282
Maintenance – owner maintenance
Periodic maintenance requirements and inter- vals are described in your vehicle's Warrantyand Service Records Information booklet. The following points can be carried out between the normally scheduled maintenanceservices.
Owner maintenance
Each time the car is refueled:
•Check the engine oil level.
• Clean the windshield, windshield wipers, headlights, and taillights.
Monthly:
• Check cold tire pressure in all tires. Inspect the tires for wear.
• Check that engine coolant and other fluidlevels are between the indicated "min"and "max" markings.
• Clean interior glass surfaces with a glasscleaner and soft paper towels.
• Wipe driver information displays with asoft cloth.
• Visually inspect battery terminals for cor-rosion. Corrosion may indicate a looseterminal connector, or a battery near theend of its useful service life. Consult yourVolvo retailer for additional information.
As needed:Wash the car, including the undercarriage, to reduce wear that can be caused by a buildup of dirt, and corrosion that can be caused bysalt residues. Clean leaves and twigs from air intake vents at the base of the windshield, and from otherplaces where they may collect.
NOTE
Complete service information for qualified technicians is available online for purchaseor subscription at www.volvotechinfo.com.
Related information
•
Maintenance – opening/closing hood (p. 285)
• Engine compartment – overview (p. 285)
• Engine compartment – coolant (p. 288)
• Engine compartment – engine oil (p. 286)
• Engine compartment – power steeringfluid (p. 289)
• Engine compartment – washer fluid(p. 295)
• Cleaning the interior (p. 310)
• Washing the car (p. 308)
• Tire inflation – checking pressure (p. 256)
• Tires – tread wear indicator (p. 251)
Maintenance – hoisting
When the vehicle is hoisted, the jack or garage lift must be positioned in the correctlifting points.
Hoisting the vehicleIf a garage jack is used to lift the vehicle, itshould be placed: Front:
under either of the two reinforced
areas under the front section of the vehicle, not under to jack attachment points (the outermost points shown in the illustration) .
Rear : Under the jack attachment points.
Ensure that the jack is positioned so that the vehicle cannot slide off it. Always use axlestands or similar structures.
Related information
• Changing a wheel – removing wheel (p. 252)
Page 296 of 344
||
10 Maintenance and servicing
10
294
ENGINE button briefly to put the ignition in
mode I (or by starting the engine).
CAUTION
If the wiper arms have been folded out from the windshield while in the serviceposition, fold them back against the wind-shield before returning the wipers to thenormal position to help avoid scratchingthe paint on the hood.
Related information
• Engine compartment – washer fluid (p. 295)
Wiper blades – windshield
The wiper blades should be replaced regularly for best effect. The windshield wiper blades must be in the vertical (service) position for replacement,washing or to lift them away from the wind-shield when e.g., removing ice or snow.
Replacing the windshield wiper blades
NOTE
The windshield wiper blades are different lengths. The blade on the driver’s side islonger than the one on the passenger side.
With the wipers in the service position, fold out the wiper arm from the wind-shield. Press the button on the wiperblade attachment and pull the wiperblade straight out, parallel with the wiperarm.
Slide in the new wiper blade until it clicks into place.
Check that the blade is securely in place.
4. Press the wipers back against the wind- shield.
To return the wipers from the service position to the normal position, fold the wipers back
Page 297 of 344
10 Maintenance and servicing
10
}}
295
against the windshield and press the
START/
STOP ENGINE button briefly to put the igni-
tion in mode I (or start the engine).
CleaningKeeping the windshield and wiper blades clean helps improve visibility and prolongsthe service life of the wiper blades. Clean thewiper blades with a stiff-bristle brush andlukewarm soap solution or car washing deter-gent.
Related information
• Engine compartment – washer fluid (p. 295)
• Wiper blades – service position (p. 293)
Engine compartment – washer fluid
Washer fluid helps keep the windshield and headlights clean. During cold weather, thereservoir should be filled with windshieldwasher solvent containing antifreeze. UseVolvo Original Washer Fluid or the equivalentwith a recommended pH value between 6 and8. The windshield and headlight washers share a common reservoir. The washer fluid reservoir is located on the driver's side of the engine compartment. Forcapacities, see the printed Owner's Manual. Specification:
Use a washer antifreeze rec-
ommended by Volvo, mixed with water. Volume: • 6.8 US qts (6.5 liters)
• 4.7 US qts (4.5 liters 4
)
Related information
• Wiper blades – service position (p. 293)
Battery – symbols
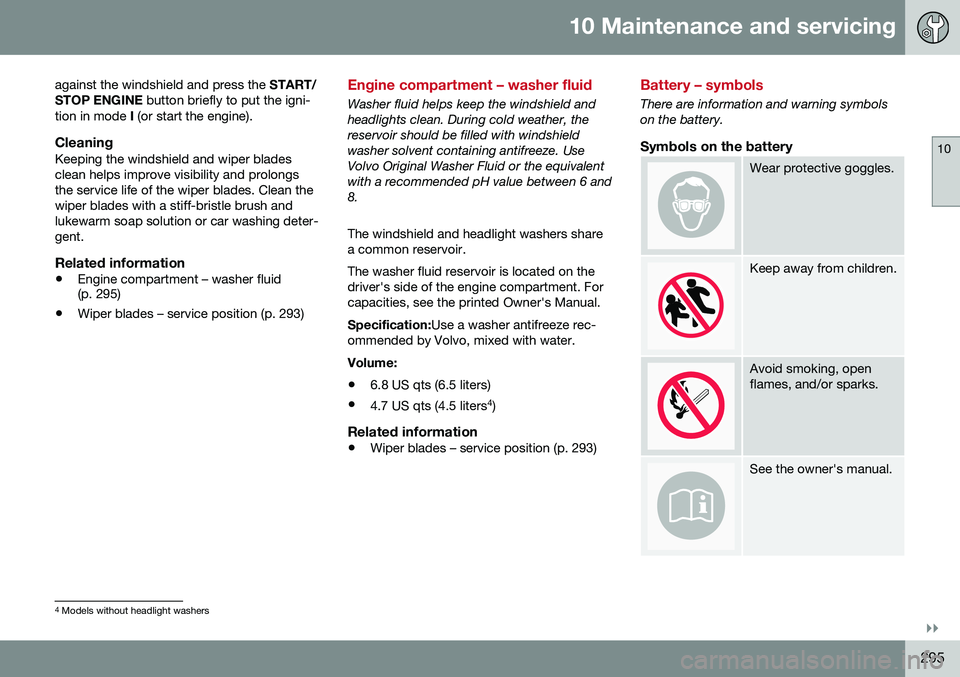
There are information and warning symbols on the battery.
Symbols on the battery
Wear protective goggles.
Keep away from children.
Avoid smoking, open flames, and/or sparks.
See the owner's manual.
4
Models without headlight washers
Page 341 of 344
12 Index
12
339
washers................................................ 85
wipers/washers..................................... 84
Windshield washer fluid........................... 295
Windshield wipers.................................... 293 service position................................... 293
Wiper blades replacing............................................. 293