tow VOLVO S60 INSCRIPTION 2017 Owner´s Manual
[x] Cancel search | Manufacturer: VOLVO, Model Year: 2017, Model line: S60 INSCRIPTION, Model: VOLVO S60 INSCRIPTION 2017Pages: 398, PDF Size: 9.45 MB
Page 193 of 398
DRIVER SUPPORT
}}
191
Distance Alert – introduction
Distance Alert is part of Adaptive Cruise Control and is a function that provides information aboutthe time interval to the vehicle ahead.
IntroductionDistance Alert is active at speeds above approxi- mately 18 mph (30 km/h). Time interval informa-tion is only given for a vehicle that is drivingahead of your vehicle in the same direction. Noinformation is provided for vehicles driving towardyou, moving very slowly, or at a standstill.
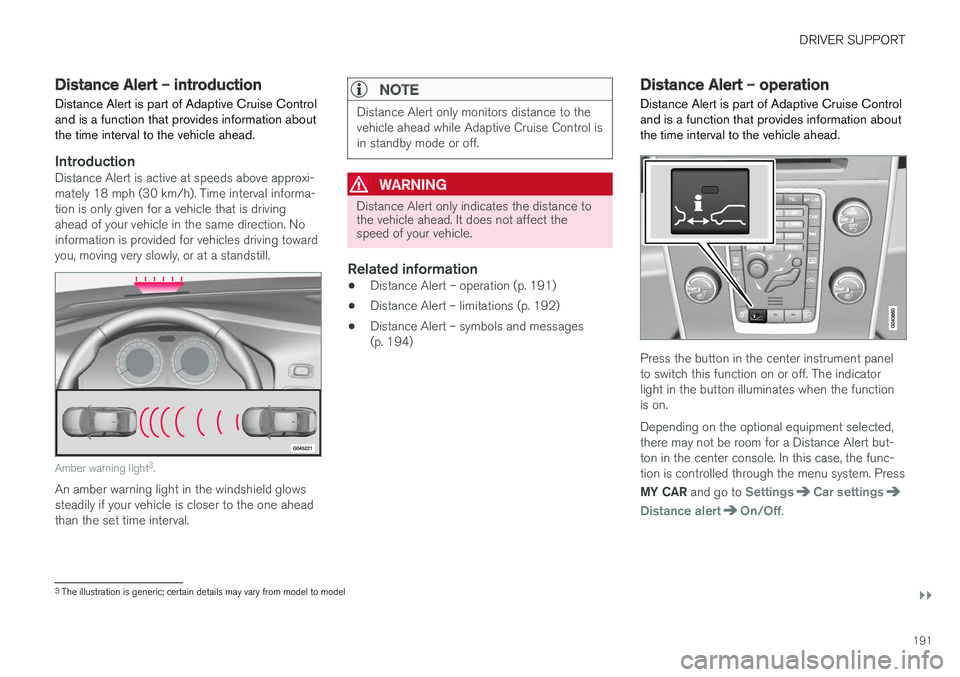
Amber warning light 3
.
An amber warning light in the windshield glows steadily if your vehicle is closer to the one aheadthan the set time interval.
NOTE
Distance Alert only monitors distance to the vehicle ahead while Adaptive Cruise Control isin standby mode or off.
WARNING
Distance Alert only indicates the distance to the vehicle ahead. It does not affect thespeed of your vehicle.
Related information
• Distance Alert – operation (p. 191)
• Distance Alert – limitations (p. 192)
• Distance Alert – symbols and messages (p. 194)
Distance Alert – operation
Distance Alert is part of Adaptive Cruise Control and is a function that provides information aboutthe time interval to the vehicle ahead.
Press the button in the center instrument panel to switch this function on or off. The indicatorlight in the button illuminates when the functionis on. Depending on the optional equipment selected, there may not be room for a Distance Alert but-ton in the center console. In this case, the func-tion is controlled through the menu system. Press MY CAR and go to
SettingsCar settings
Distance alertOn/Off.
3
The illustration is generic; certain details may vary from model to model
Page 204 of 398
DRIVER SUPPORT
202•
City Safety – troubleshooting (p. 198)
• City Safety – symbols and messages (p. 200)
Collision warning – introduction Pedestrian and Cyclist Detection with Full Auto Brake is designed to assist the driver if there is arisk of a collision with a pedestrian, a cyclist, avehicle ahead that is at a standstill or one that ismoving in the same direction as your vehicle.
This system consists of the following three func- tions:
• Collision Warning
warns the driver of a
potential collision situation.
• Brake Support
helps the driver brake effi-
ciently in a critical situation.
• Auto-brake
brakes the vehicle automatically
if a collision with a pedestrian, a cyclist oranother vehicle cannot be avoided and thedriver does not apply the brakes in time orsteer around the person/vehicle. Auto-brakecan help prevent a collision or reduce thespeed at which a collision occurs.
Since Pedestrian and Cyclist Detection with FullAuto Brake is activated in circumstances wherethe driver should have begun braking muchsooner, the system will not be able to assist thedriver in all situations. This system is designed to activate as late as possible to help avoid unnecessary intervention. The system should not be used in such a way that the driver changes his/her way of operatingthe vehicle. If the driver relies entirely on the sys- tem, the chances of an accident eventually occur-ring increase considerably. The Pedestrian and Cyclist Detection with Full Auto Brake and City Safety
™ systems supple-
ment each other. See City Safety – introduction (p. 195) for detailed information about City Safety ™.
WARNING
No automatic system can be guaranteed to function 100% correctly in all situations. Forthat reason, never test the Auto-brake systemby driving toward a person or object. Thiscould result in serious injury or death.
Page 234 of 398
||
DRIVER SUPPORT
232
Audible signal
The Park Assist system uses an intermittent tone that pulses faster as you come close to an object,and becomes constant when you are withinapproximately 1 ft (30 cm) of an object in front ofor behind the vehicle. If there are objects withinthis distance both behind and in front of the vehi-cle, the tone alternates between front and rearspeakers.
NOTE
The level of the audible signal can be low- ered/raised with the infotainment volumecontrol. The level can also be set in the MYCAR menu system. See My Car – introduction(p. 71) for a description of the menu system.
If the volume of another source from the audio system is high, this will be automatically lowered.
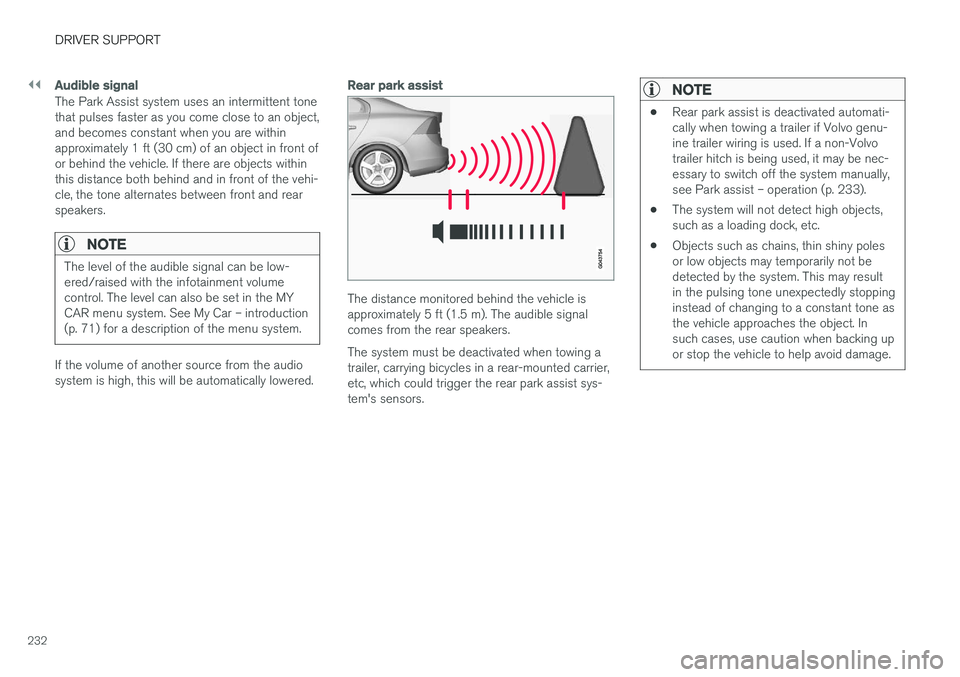
Rear park assist
The distance monitored behind the vehicle is approximately 5 ft (1.5 m). The audible signalcomes from the rear speakers. The system must be deactivated when towing a trailer, carrying bicycles in a rear-mounted carrier,etc, which could trigger the rear park assist sys-tem's sensors.
NOTE
•Rear park assist is deactivated automati- cally when towing a trailer if Volvo genu-ine trailer wiring is used. If a non-Volvotrailer hitch is being used, it may be nec-essary to switch off the system manually,see Park assist – operation (p. 233).
• The system will not detect high objects,such as a loading dock, etc.
• Objects such as chains, thin shiny polesor low objects may temporarily not bedetected by the system. This may resultin the pulsing tone unexpectedly stoppinginstead of changing to a constant tone asthe vehicle approaches the object. Insuch cases, use caution when backing upor stop the vehicle to help avoid damage.
Page 237 of 398
DRIVER SUPPORT
}}
* Option/accessory, for more information, see Introduction.235
Park Assist Pilot (PAP)* –
introduction
The Park Assist Pilot provides assistance when parallel parking by measuring the parking spaceand turning the steering wheel.
Introduction
The off/on button shown is located on the center con- sole
Park Assist Pilot (PAP) is a semi-automatic sys- tem that provides assistance when parallel park-ing by:
• Finding a parking space and determining if itis big enough for the vehicle
• Helping to steer the vehicle into the parkingspace
Information about the actions required of thedriver is provided in the instrument panel in theform of symbols, images and text.
NOTE
If a trailer hitch is configured in the vehicle's electrical system, PAP will take the trailerhitch into consideration when determining thenecessary size of a parking space.
WARNING
• PAP does not function in all situations and is only intended to assist the driverwhen parallel parking.
• As the driver, you have full responsibilityfor parking the vehicle in a safe manner.
Related information
•
Park Assist Pilot (PAP)
* – function (p. 235)
• Park Assist Pilot (PAP)
* – operation (p. 236)
• Park Assist Pilot (PAP)
* – limitations
(p. 238)
• Park Assist Pilot (PAP)
* – symbols and mes-
sages (p. 239)
• Park assist – introduction (p. 231)
• Rear Park Assist Camera (PAC) – introduc- tion (p. 240)
Park Assist Pilot (PAP)
* – function
PAP's function is to measure the parking space and to turn the steering wheel during the parallelparking procedure. The driver is responsible forfollowing the instructions shown in the instru- ment panel and for: shifting between R (Reverse)
and D (Drive) when required, regulating the vehi-
cle's speed, applying the brakes and stopping the vehicle. PAP can be activated in the following conditions:
• When the stability or ABS systems are not working actively
• The vehicle is not towing a trailer
• The vehicle's speed is below 30 mph(50 km/h)
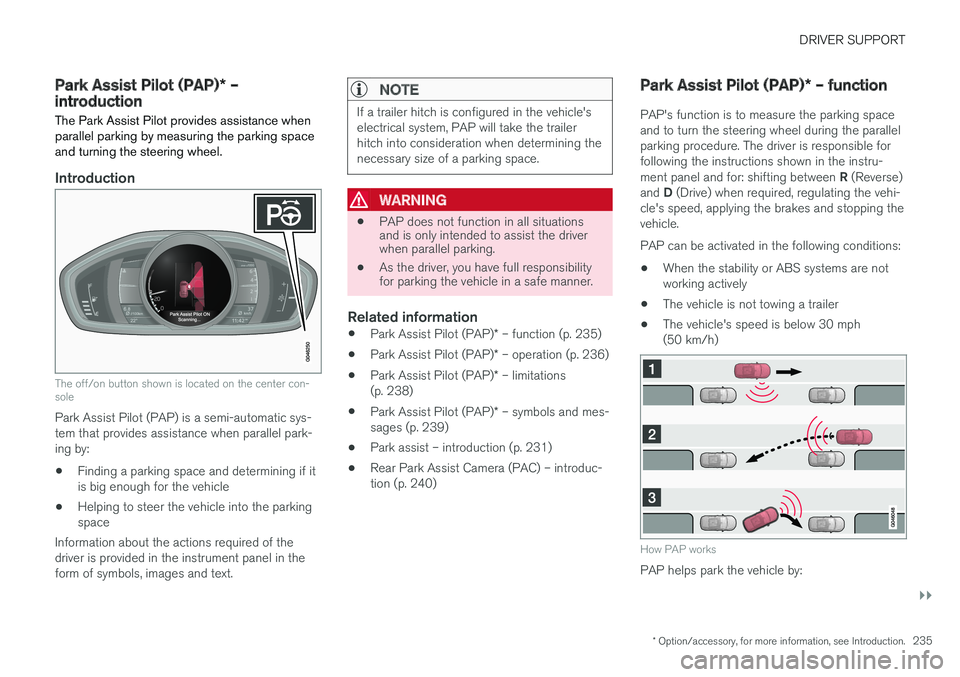
How PAP works
PAP helps park the vehicle by:
Page 240 of 398
DRIVER SUPPORT
* Option/accessory, for more information, see Introduction.
238
Park Assist Pilot (PAP) * – limitations
The PAP parking procedure will be cancelled if.
• The vehicle's speed goes above approxi- mately 4 mph 7 km/h
• The driver moves the steering wheel
• If the stability or ABS systems are activated(e.g., if a wheel starts to spin because of aslippery road surface
If the system has been switched off, this will beindicated by a text message in the instrumentpanel.
NOTE
• PAP will not function correctly if its sen- sors are obstructed by dirt, snow, etc.
• In certain situations, PAP may not be ableto measure a parking space. This couldbe due to external sources of sound (e.g.,a vehicle's horn, tires on wet asphalt,pneumatic brakes, noise from a motorcy-cle's exhaust, etc.) emitting ultrasoundusing approximately the same frequen-cies as PAP.
Information to keep in mind
PAP is only intended to provide parallel parking assistance but may not be able to function fully inall situations. •
PAP's function is based on the way that thevehicles are parked behind and in front ofyour parking space. If they are, for example,parked too close to the curb, there is a riskthat your vehicle's tires or wheel rims couldbe damaged by the curb during the parkingprocedure.
• PAP is intended to provide parking assis-tance on straight streets, not sections ofstreet with curved or irregular curbs. Be surethat your vehicle is parallel to the curb whenPAP measures the parking space.
• PAP may not be able to provide parkingassistance on narrow streets due to lack ofspace to maneuver the vehicle. In situationslike this, it may help to drive as close to theside of the road as possible where the park-ing space is located.
• Use only approved tires with the correct infla-tion pressure because this affects PAP'scapacity to provide parking assistance.Changing to a different approved tire sizemay affect PAP's parameters. Consult atrained and qualified Volvo service technician.
• Heavy rain or snow may inhibit PAP'scapacity to correctly measure a parkingspace.
• Do not use PAP if snow chains or a tempo-rary spare tire is being used.
• Do not use PAP if there are any objects pro-truding from the vehicle.
WARNING
• The front end of your vehicle may turn out toward oncoming traffic during the park-ing procedure.
• Objects located above the parking sen-sors' field of vision are not included whenPAP measures a parking space. For thisreason, PAP may turn into the parkingspace too soon. Avoid parking spaces ofthis type.
• The driver is always responsible for deter-mining if PAP has selected a suitableparking space.
Maintenance
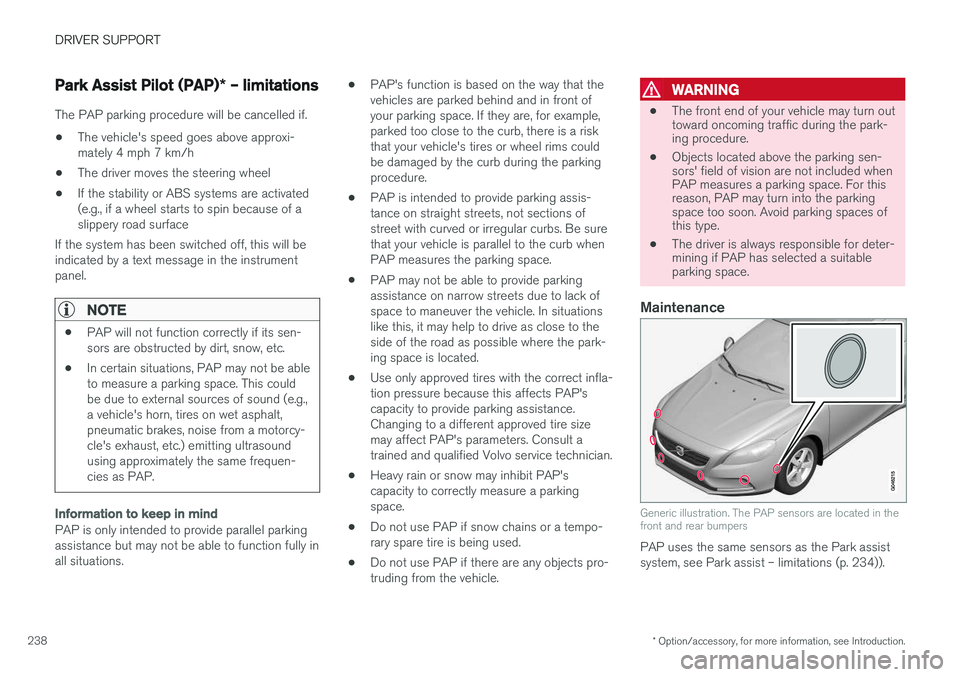
Generic illustration. The PAP sensors are located in the front and rear bumpers
PAP uses the same sensors as the Park assist system, see Park assist – limitations (p. 234)).
Page 243 of 398
DRIVER SUPPORT
}}
241
Ambient lighting conditions
The camera automatically monitors the ambient lighting conditions behind the vehicle and con-stantly adjusts sensitivity to light. This may causethe brightness and quality of the image on thescreen to vary slightly. Sensitivity to light isincreased in dark conditions or in bad weather,which may affect image quality. If the image on the screen seems too dark, brightness can be increased with the thumbwheel on the lighting panel.
NOTE
In order to function properly, the camera lens should always be kept clean. This is particu-larly important in bad weather. Keep the lensfree of dirt, ice or snow.
Related information
•Rear Park Assist Camera (PAC) – introduc- tion (p. 240)
• Rear Park Assist Camera (PAC) – operation(p. 241)
• Rear Park Assist Camera (PAC) – limitations(p. 244)
Rear Park Assist Camera (PAC) – operation
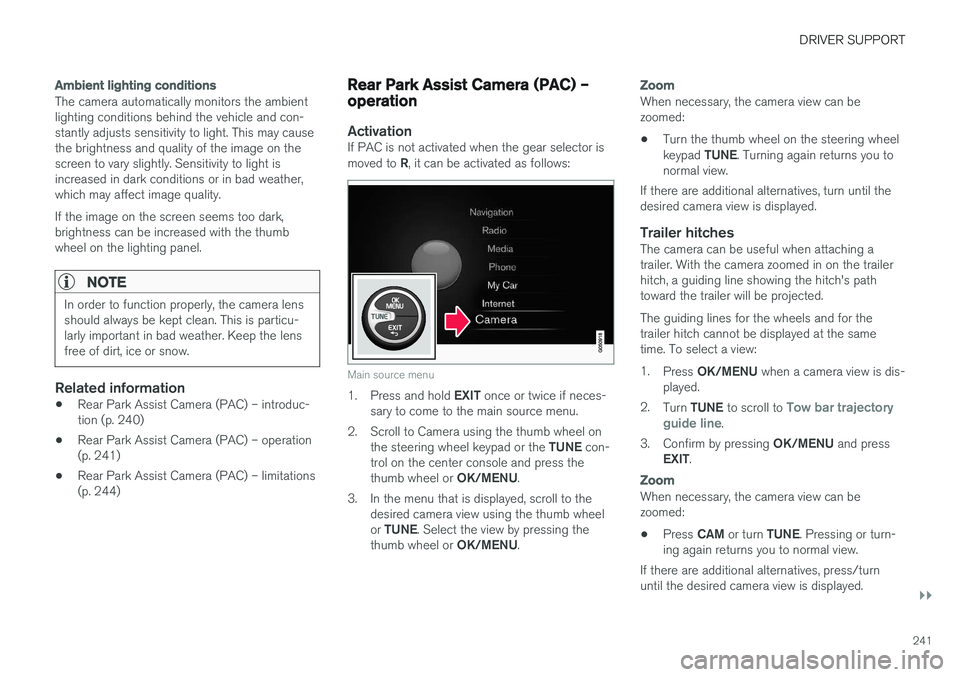
ActivationIf PAC is not activated when the gear selector is moved to
R, it can be activated as follows:
Main source menu
1.
Press and hold EXIT once or twice if neces-
sary to come to the main source menu.
2. Scroll to Camera using the thumb wheel on the steering wheel keypad or the TUNE con-
trol on the center console and press the thumb wheel or OK/MENU.
3. In the menu that is displayed, scroll to the desired camera view using the thumb wheelor TUNE . Select the view by pressing the
thumb wheel or OK/MENU.
Zoom
When necessary, the camera view can be zoomed:
• Turn the thumb wheel on the steering wheel keypad
TUNE. Turning again returns you to
normal view.
If there are additional alternatives, turn until the desired camera view is displayed.
Trailer hitchesThe camera can be useful when attaching atrailer. With the camera zoomed in on the trailerhitch, a guiding line showing the hitch's pathtoward the trailer will be projected. The guiding lines for the wheels and for the trailer hitch cannot be displayed at the sametime. To select a view: 1. Press OK/MENU when a camera view is dis-
played.
2. Turn TUNE to scroll to
Tow bar trajectory
guide line.
3. Confirm by pressing OK/MENU and press
EXIT .
Zoom
When necessary, the camera view can be zoomed:
• Press
CAM or turn TUNE. Pressing or turn-
ing again returns you to normal view.
If there are additional alternatives, press/turnuntil the desired camera view is displayed.
Page 255 of 398
STARTING AND DRIVING
253
WARNING
•Always remove the remote key from the ignition slot when leaving the vehicle and ensure that the ignition in mode
0 (see
Ignition modes (p. 74) for information about the ignition modes).
• On vehicles with the optional keylessdrive, never remove the remote key fromthe vehicle while it is being driven ortowed.
• Always place the gear selector in Parkand apply the parking brake before leav-ing the vehicle. Never leave the vehicleunattended with the engine running.
• Always open garage doors fully beforestarting the engine inside a garage toensure adequate ventilation. The exhaustgases contain carbon monoxide, which isinvisible and odorless but very poisonous.
NOTE
•After a cold start, idle speed may be noticeably higher than normal for a shortperiod. This is done to help bring compo-nents in the emission control system totheir normal operating temperature asquickly as possible, which enables themto control emissions and help reduce the vehicle's impact on the environment 3
.
CAUTION
• When starting in cold weather, the auto- matic transmission may shift up at slightlyhigher engine speeds than normal untilthe automatic transmission fluid reachesnormal operating temperature.
• Do not race a cold engine immediatelyafter starting. Oil flow may not reachsome lubrication points fast enough toprevent engine damage.
• The engine should be idling when youmove the gear selector. Never accelerateuntil after you feel the transmissionengage. Accelerating immediately afterselecting a gear will cause harsh engage-ment and premature transmission wear.
• Selecting
P or N when idling at a stand-
still for prolonged periods of time will helpprevent overheating of the automatictransmission fluid.
Related information
• Switching off the engine (p. 253)
Switching off the engine Switch off the engine by pressing the
START/
STOP ENGINE button.
If the gear selector is not in the P position or if
the vehicle is moving, press the START/STOP
ENGINE button twice or press and hold it in until
the engine switches off.
Related information
• Ignition modes (p. 74)
3
If the gear selector is in the D or R positions and the car is not moving, engine speed (rpm) will be lower and it will take longer for the engine to reach normal operating temperature.
Page 260 of 398
||
STARTING AND DRIVING
* Option/accessory, for more information, see Introduction.
258
Neutral: position NNo gear is engaged and the engine can be started with the gear selector in this position.Apply the parking brake if the vehicle is stationary with the gear selector in position N. In order to
move the gear selector from the N position, the
brake pedal must be depressed and the ignitionmust be in at least mode II.
Drive: position DD is the normal driving position. The car automat-
ically shifts between the various forward gears, based on the level of acceleration and speed.The car must be at a standstill when shifting from position R to position D.
Related information
• Transmission – general information (p. 256)
• Transmission – Geartronic (p. 258)
• Transmission – shiftlock override (p. 261)
• Fuel tank volume – specification and volume (p. 379)
Transmission – Geartronic
Geartronic allows you to manually shift among your vehicle's forward gears. The manual posi-tion ( +S–) can be selected at any time.
Geartronic: manual shifting (+S–)To shift gears manually, move the gear selector to the side from D toward
+S– . The +S– symbol in the instrument
panel will change from white to
orange and the number of the gear currently
being used (
1, 2, 3, etc.) will be displayed (see
the following illustration) 5
.
• To return to automatic shifting mode from +S–
, move the gear selector to the side
toward D.
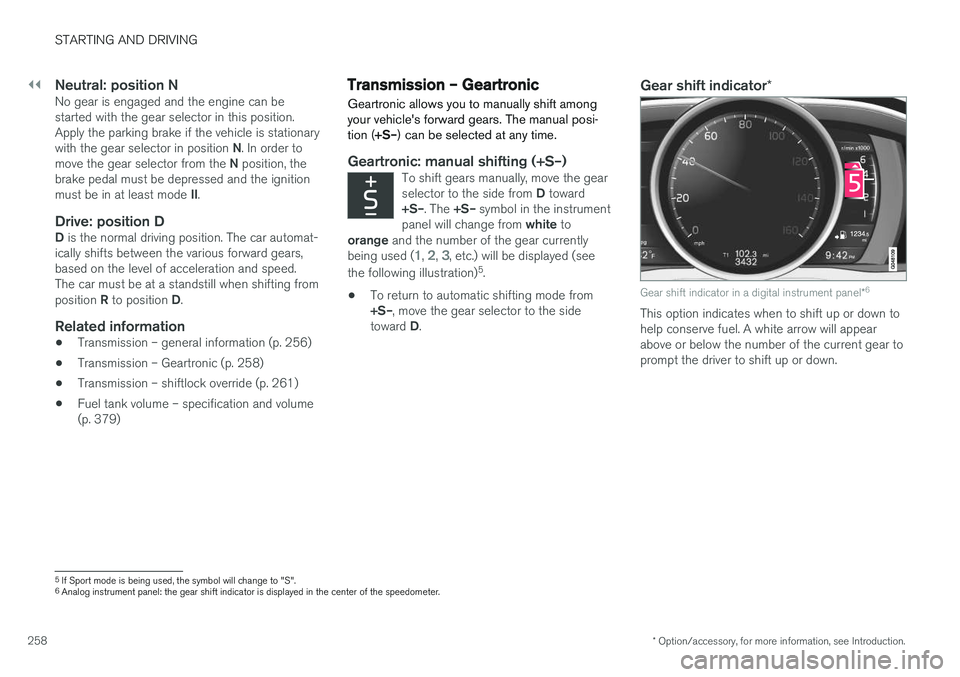
Gear shift indicator *
Gear shift indicator in a digital instrument panel *6
This option indicates when to shift up or down to help conserve fuel. A white arrow will appearabove or below the number of the current gear toprompt the driver to shift up or down.
5
If Sport mode is being used, the symbol will change to "S".
6 Analog instrument panel: the gear shift indicator is displayed in the center of the speedometer.
Page 261 of 398
STARTING AND DRIVING
}}}}
* Option/accessory, for more information, see Introduction.259
While driving
•If you select the manual shifting position while driving, the gear that was being used inthe Drive position will also initially beselected in the manual shifting position.
• Move the gear selector forward (toward
+) to
shift to a higher gear or rearward (toward –)
to shift to a lower gear.
• If you hold the gear selector toward "
–", the
transmission will downshift one gear at atime and will utilize the braking power of theengine. If the current speed is too high forusing a lower gear, the downshift will notoccur until the speed has decreased enoughto allow the lower gear to be used.
• If you slow to a very low speed, the transmis-sion will automatically shift down.
Shiftlock: Neutral (N)
If the gear selector is in the
N position and the
vehicle has been stationary for at least 3 seconds (irrespective of whether the engine is running)then the gear selector is locked. In order to move the gear selector from N to
another gear position, the brake pedal must be depressed and the ignition must be in at least position II, see Ignition modes (p. 74).
Geartronic : steering wheel paddles *
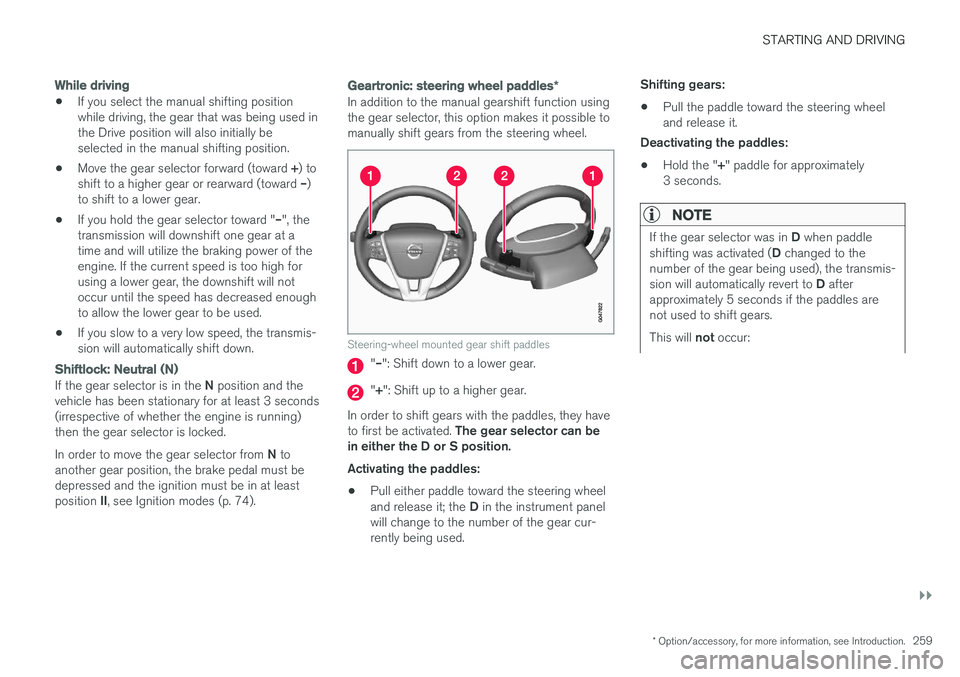
In addition to the manual gearshift function using the gear selector, this option makes it possible tomanually shift gears from the steering wheel.
Steering-wheel mounted gear shift paddles
"– ": Shift down to a lower gear.
"+ ": Shift up to a higher gear.
In order to shift gears with the paddles, they have to first be activated. The gear selector can be
in either the D or S position. Activating the paddles:
• Pull either paddle toward the steering wheel and release it; the
D in the instrument panel
will change to the number of the gear cur- rently being used. Shifting gears:
• Pull the paddle toward the steering wheeland release it.
Deactivating the paddles:
• Hold the "
+" paddle for approximately
3 seconds.
NOTE
If the gear selector was in D when paddle
shifting was activated ( D changed to the
number of the gear being used), the transmis- sion will automatically revert to D after
approximately 5 seconds if the paddles are not used to shift gears. This will not occur:
Page 262 of 398
||
STARTING AND DRIVING
260
•during active driving (e.g., on a winding road, while accelerating, etc)
• if the gear selector was in
S when the
paddles were activated
If the transmission reverts to D, the paddles
will have to be reactivated (pull either paddletoward the steering wheel and release it)before they can be used to shift gears again. The paddles can also be manually deactivated by pulling both paddles toward the steeringwheel and holding them until the gear num-ber shown in the instrument panel changes to D .
Geartronic : Sport mode ( S)7
This transmission mode provides sportier shifting characteristics and enables a more active drivingstyle by making it possible to drive at higher rpmin each gear before shifting up. The engine alsoresponds faster when the accelerator pedal ispressed. To access Sport mode from Drive (
D), move the
gear selector to the left. The transmission will not switch to manual shifting mode until the gearselector is moved forward or rearward toward +or –. Sport mode can be selected any time.
NOTE
• On vehicles equipped with Sport mode, the transmission symbol in the main instrument panel will change from
D to S
when the gear selector is moved to the manual shifting mode. If the gear selectoris moved toward "+" or "-", the number ofthe gear currently being used will be dis-played, see Information displays – intro-duction (p. 63).
• Please be aware that using Sport modemay result in a slight decrease in fuel economy. Driving in
D can help improve
fuel economy.
Geartronic : starting on slippery surfaces
Selecting 3rd gear in Geartronic