ignition VOLVO S60 TWIN ENGINE 2020 Workshop Manual
[x] Cancel search | Manufacturer: VOLVO, Model Year: 2020, Model line: S60 TWIN ENGINE, Model: VOLVO S60 TWIN ENGINE 2020Pages: 657, PDF Size: 13.6 MB
Page 452 of 657
AUDIO, MEDIA AND INTERNET
* Option/accessory.
450
Audio, media and Internet
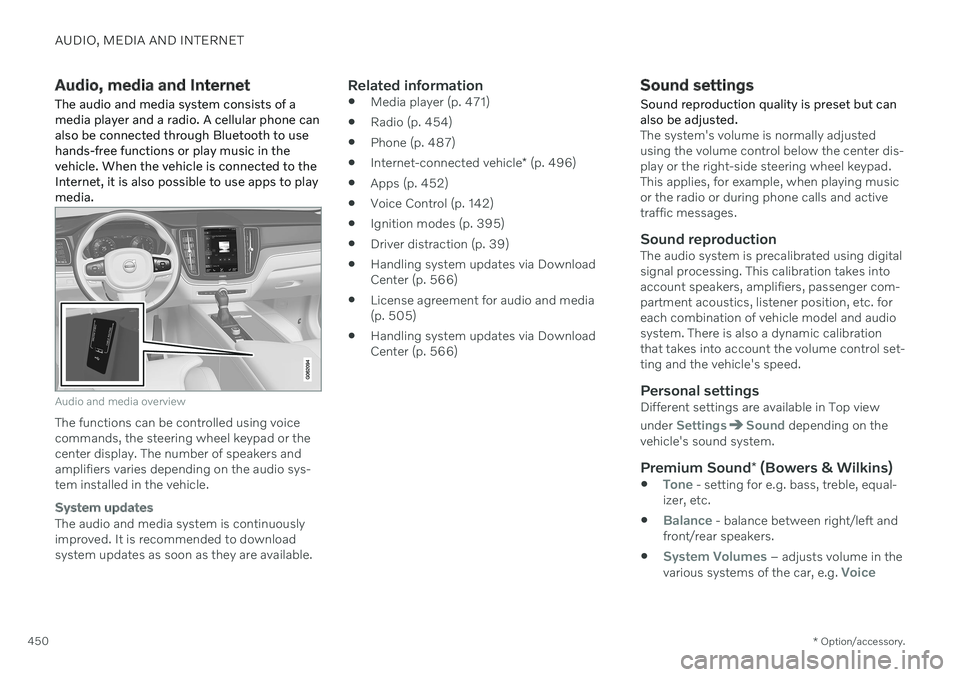
The audio and media system consists of a media player and a radio. A cellular phone canalso be connected through Bluetooth to usehands-free functions or play music in thevehicle. When the vehicle is connected to theInternet, it is also possible to use apps to playmedia.
Audio and media overview
The functions can be controlled using voice commands, the steering wheel keypad or thecenter display. The number of speakers andamplifiers varies depending on the audio sys-tem installed in the vehicle.
System updates
The audio and media system is continuously improved. It is recommended to download system updates as soon as they are available.
Related information
Media player (p. 471)
Radio (p. 454)
Phone (p. 487)
Internet-connected vehicle
* (p. 496)
Apps (p. 452)
Voice Control (p. 142)
Ignition modes (p. 395)
Driver distraction (p. 39)
Handling system updates via DownloadCenter (p. 566)
License agreement for audio and media(p. 505)
Handling system updates via DownloadCenter (p. 566)
Sound settings
Sound reproduction quality is preset but can also be adjusted.
The system's volume is normally adjusted using the volume control below the center dis-play or the right-side steering wheel keypad.This applies, for example, when playing musicor the radio or during phone calls and activetraffic messages.
Sound reproductionThe audio system is precalibrated using digitalsignal processing. This calibration takes intoaccount speakers, amplifiers, passenger com-partment acoustics, listener position, etc. foreach combination of vehicle model and audiosystem. There is also a dynamic calibrationthat takes into account the volume control set-ting and the vehicle's speed.
Personal settingsDifferent settings are available in Top view under
SettingsSound depending on the
vehicle's sound system.
Premium Sound * (Bowers & Wilkins)
Tone - setting for e.g. bass, treble, equal-
izer, etc.
Balance - balance between right/left and
front/rear speakers.
System Volumes – adjusts volume in the
various systems of the car, e.g. Voice
Page 480 of 657
AUDIO, MEDIA AND INTERNET
* Option/accessory.
478
Playing media via the USB port
External audio sources, such as an iPod ® or
MP3 player, can be connected to the audio system via the vehicle's USB port.
Devices with rechargeable batteries can be charged when they are connected via the USBport and the ignition is in mode I, II or the
engine is running. The content on the external source can be read faster if it only contains data of a compat-ible format. Video files can also be played viathe USB port. Some MP3 players have their own file system that the vehicle has support for.
Related information
Connecting a device via the USB port(p. 478)
Playing media (p. 472)
Video (p. 476)
Ignition modes (p. 395)
Technical specifications for USB devices(p. 479)
Apple ®
CarPlay ®
* (p. 480)
Android Auto
* (p. 484)
Connecting a device via the USB port
External audio sources, such as an iPod ®
or
MP3 player, can be connected to the audio system via any of the vehicle's USB ports.
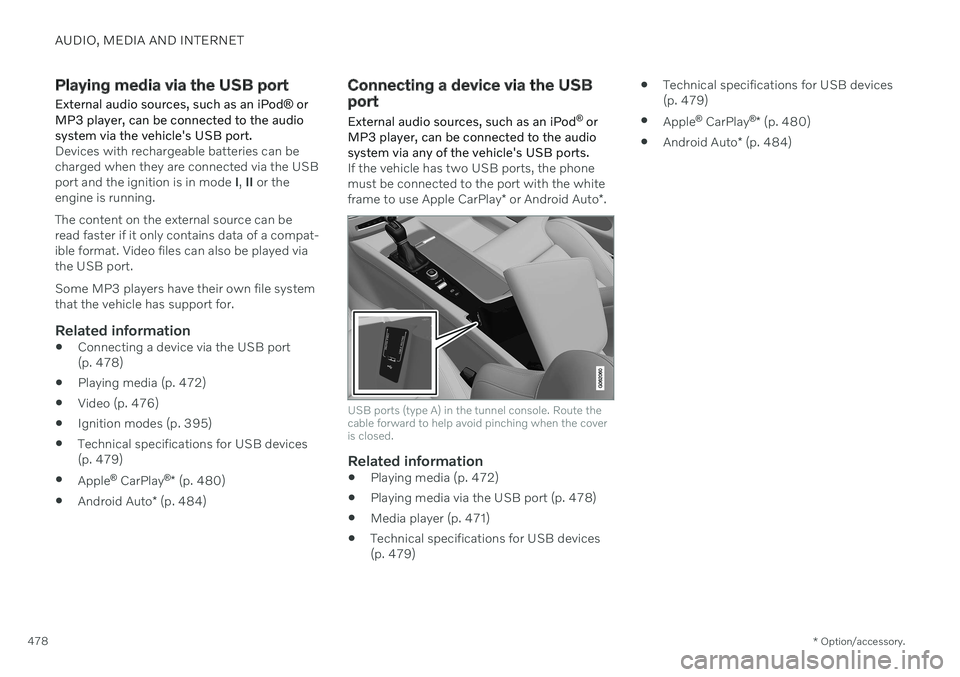
If the vehicle has two USB ports, the phone must be connected to the port with the white frame to use Apple CarPlay * or Android Auto *.
USB ports (type A) in the tunnel console. Route the cable forward to help avoid pinching when the coveris closed.
Related information
Playing media (p. 472)
Playing media via the USB port (p. 478)
Media player (p. 471)
Technical specifications for USB devices (p. 479)
Technical specifications for USB devices(p. 479)
Apple ®
CarPlay ®
* (p. 480)
Android Auto
* (p. 484)
Page 492 of 657

AUDIO, MEDIA AND INTERNET
* Option/accessory.
490
Connecting a phone to the car via Bluetooth automatically A phone can be automatically connected to the vehicle via Bluetooth. The phone musthave first been paired with the vehicle.
Only the two most recently connected phones can be connected automatically.
1. Activate Bluetooth in the phone before
turning the vehicle's ignition to mode I.
2. Turn the ignition to I or higher.
> The phone will be connected.
Related information
Phone (p. 487)
Connecting a phone to the car via Blue- tooth for the first time (p. 488)
Connecting a phone to the car via Blue-tooth manually (p. 490)
Disconnecting a Bluetooth-connectedphone (p. 490)
Switch between phones connected viaBluetooth (p. 491)
Disconnecting Bluetooth-connected devi-ces (p. 491)
Settings for Bluetooth devices (p. 495)
Internet-connected vehicle
* (p. 496)
Connecting the vehicle to the Internet viaa Bluetooth-connected phone (p. 497)
Ignition modes (p. 395)
Connecting a phone to the car via Bluetooth manually
A phone can be manually connected to the vehicle via Bluetooth. The phone must havefirst been paired with the vehicle.
1. Activate Bluetooth in the phone.
2. Open the phone tile.
> A list of available phones will be dis-played.
3. Tap the name of the phone you would like to connect.
> The phone will be connected.
Related information
Phone (p. 487)
Connecting a phone to the car via Blue- tooth for the first time (p. 488)
Connecting a phone to the car via Blue-tooth automatically (p. 490)
Disconnecting a Bluetooth-connectedphone (p. 490)
Switch between phones connected viaBluetooth (p. 491)
Disconnecting Bluetooth-connected devi-ces (p. 491)
Settings for Bluetooth devices (p. 495)
Internet-connected vehicle
* (p. 496)
Connecting the vehicle to the Internet viaa Bluetooth-connected phone (p. 497)
Disconnecting a Bluetooth- connected phone
A Bluetooth-connected phone can be discon- nected from the vehicle.
When the phone is out of range of the vehicle, it will be automatically discon-nected. If a call is in progress when thephone is disconnected from the vehicle,the call will be transferred from the vehi-cle's speakers and microphone to the cel-lular phone.
The phone can also be disconnected bymanually deactivating Bluetooth.
Related information
Phone (p. 487)
Phone settings (p. 494)
Switch between phones connected viaBluetooth (p. 491)
Disconnecting Bluetooth-connected devi-ces (p. 491)
Settings for Bluetooth devices (p. 495)
Page 531 of 657
WHEELS AND TIRES
* Option/accessory.529
Saving a new inflation pressure in the monitoring system *
In order for the tire pressure monitoring sys- tem 9
to function correctly, tire pressure refer-
ence values must be saved correctly. To help ensure that the system can correctly alert thedriver of low inflation pressure, this must bedone each time the tires are changed or theinflation pressure is adjusted.
For example, when driving with a heavy load or at high speeds (over 160 km/h (100 mph)),tire pressure should be adjusted to the Volvo-recommended tire pressure values. The sys-tem should then be reset by saving the newinflation pressure. To store the new inflation pressure as a refer- ence value in the system:
1. Switch off the ignition.
2. Inflate the tire to the correct inflation pres- sure; see the tire pressure placard on the driver's side B pillar for recommendedpressures for factory-mounted tires.
3. Start the vehicle. 4. Open the
Car Status app in App view.
5. Tap
TPMS.
NOTE
The vehicle must be stationary for theStore Pressure button to be selectable.
6.Tap Store Pressure.
7. Tap
OK to confirm that the tire pressure in
all four tires has been checked and adjusted.
8. Drive the vehicle until the new inflation pressure has been saved. The new infla-tion pressure is stored when the vehicle isdriven at speeds over 35 km/h (22 mph).
> When enough data has been collectedfor the system to detect low inflation pressure, the animation showing theprogress of the storing procedure willdisappear from the center display. Thesystem will not provide any further con-firmation that the new inflation pres-sure has been stored.
If storing cannot be performed,
Storing
pressure unsuccessful. Try again. will be
displayed. If the vehicle's ignition is switched off before the new inflation pressure has been saved, theprocedure must be performed again. To helpensure that the new inflation pressure is saved correctly, allow the storing procedure to com-plete during a single operating cycle.
WARNING
The exhaust gases contain carbon monox- ide, which is invisible and odorless but verypoisonous. The procedure for saving a newinflation pressure must therefore always beperformed outdoors or in a workshop withexhaust gas extraction.
Related information
Recommended tire pressure (p. 527)
Adjusting tire pressure (p. 526)
Viewing tire pressure status in the center display
* (p. 530)
Action when warned of low tire pressure (p. 531)
Tire pressure monitoring system
* (p. 527)
9
Tire Pressure Monitoring System (TPMS)
Page 533 of 657
WHEELS AND TIRES
* Option/accessory.531
Action when warned of low tire pressure When the inflation pressure monitoring sys- tem11
detects low inflation pressure in a tire,
immediate action is required.
If the system's indicator symbol illu- minates and the message Tire
pressure low is displayed, check
the tire pressure and inflate if neces-
sary.
1. Switch off the ignition.
2. Check the inflation pressure on all four tires using a tire pressure gauge.
3. Inflate the tire to the correct inflation pres- sure; see the tire pressure placard on the driver's side B pillar for recommendedpressures for factory-mounted tires.
4. After the inflation pressure has been adjusted, always save the new inflationpressure in the system via the center dis-play. Please be aware that the indicator symbol will not go out until the low tire pressurehas been corrected and a storing proce-dure has been started for the new inflationpressure.
NOTE
To help prevent incorrect inflation pressure, pressure should be checked when the tiresare cold. The tires are considered to becold when they have reached the sametemperature as the ambient temperature(about 3 hours after the vehicle was lastdriven). After driving for a few kilometers,the tires will warm up and the pressure willincrease.
NOTE
After inflating a tire, always replace the valve cap to help prevent valve damagecaused by gravel, dirt, etc.
Use plastic valve caps only. Metal capscould corrode and become difficult toremove.
WARNING
Incorrect inflation pressure could lead to tire failure, which could cause thedriver to lose control of the vehicle.
The system cannot predict sudden tiredamage.
Related information
Recommended tire pressure (p. 527)
Adjusting tire pressure (p. 526)
Saving a new inflation pressure in the monitoring system
* (p. 529)
Viewing tire pressure status in the centerdisplay
* (p. 530)
Tire pressure monitoring system
* (p. 527)
Inflate tires with the compressor included in the tire sealing system (p. 545)
11
Tire Pressure Monitoring System (TPMS)
Page 555 of 657

LOADING, STORAGE AND PASSENGER COMPARTMENT
553
Status indicator light CauseAction
Steady green light The outlet is providing electrical current to a connected device. None.
Flashing orange light The outlet's voltage converter is too hot (e.g. if the device draws too much current or if the temperature in the passenger compartment is very high). Unplug the device, let the voltage convertercool down and plug in the device again.
The connected device is drawing too much current (at the moment orconstantly) or is not functioning properly. None. The device cannot be used in the out-let.
Indicator light off The outlet has not detected a device plugged into the outlet. Make sure the device is correctly plugged into the outlet.
The outlet is not active. Make sure the vehicle's ignition is in at leastmode I.
The outlet has been active but has been deactivated. Start the engine and/or charge the start bat- tery.
Related information
Passenger compartment interior (p. 550)
Using the electrical outlets (p. 554)
Page 556 of 657

LOADING, STORAGE AND PASSENGER COMPARTMENT
* Option/accessory.
554
Using the electrical outlets
The 12 V outlet can be used for devices intended for this such as MP3 players, cool-ers and cellular phones. The high-voltage outlet * can be used for devi-
ces intended for this, such as chargers, lap- tops, etc.
The ignition must be in at least mode I for the
outlets to supply current. The outlets will then be active as long as there is sufficient chargein the start battery. If the engine is turned off and the vehicle is locked, the outlets will be deactivated. If theengine is turned off and the vehicle remainsunlocked, the sockets will remain active for upto 7 minutes.
NOTE
Bear in mind that using the electrical out- lets when the engine is off could cause thestarter battery to have too low of a chargelevel, which could limit other functionality. Accessories connected to the electrical outlets can be activated even when thevehicle electrical system is off or if precon-ditioning is used. For this reason, discon-nect plugs when they are not in use to pre-vent the starter battery from becoming dis-charged.
WARNING
Do not use accessories with large or heavy plugs – they could damage theoutlet or come loose while you are driv-ing.
Do not use accessories that couldcause disruptions to e.g. the vehicle'sradio receiver or electrical system.
Position the accessory so that there isno risk of it injuring the driver or pas-sengers in the event of heavy brakingor a collision.
Pay attention to connected accessoriesas they can generate heat that couldburn passengers or the interior.
Using 12 V outlets1. Remove the stopper (tunnel console) or
fold down the cover (trunk/cargo com-partment) over the socket and plug in thedevice.
2. Unplug the device and put the stopper back in (tunnel console) or fold up thecover (trunk/cargo compartment) whenthe socket is not in use or left unattended.
CAUTION
The maximum power is 120 W (10 A) per outlet.
Using high-voltage outletsThe ignition must be in at least mode I for the
outlets to supply current. The outlets will then be active as long as there is sufficient chargein the start battery. 1. Slide down the cover over the outlet and plug in the device. >
The LED 2
light on the outlet will indi-
cate its status.
2. The outlet is supplying electrical current when the light is glowing steadily green.
2LED (Light Emitting Diode)
Page 558 of 657

||
LOADING, STORAGE AND PASSENGER COMPARTMENT
* Option/accessory.
556
Storage compartment for the key. The illustration is generic – the design may vary.The illustration is generic – the design may vary.
To lock the glove compartment:
Insert the key into the lock on the glove compartment.
Turn the key 90 degrees clockwise.
Remove the key from the lock.
–To unlock, perform the above steps in reverse.
Using the glove box as a cooled area *The glove compartment can be used to cool e.g. drinks or food. Cooling is possible when the climate system is active (i.e. when the ignition is in mode II or when the engine is
running).
The illustration is generic – the design may vary.
Activate cooling.
Deactivate cooling.
–Activate or deactivate cooling by moving the control as far as possible toward thepassenger compartment/glove compart-ment.
Related information
Passenger compartment interior (p. 550)
Private Locking (p. 255)
Page 568 of 657
MAINTENANCE AND SERVICE
* Option/accessory.
566
Handling system updates via Download Center Functions for Internet-connected vehicles and infotainment can be updated via Down-load Center. Updates can be done one at atime or all at the same time.
Searching for updateIf an update is available, the message New software
updates available will be
displayed in the center dis- play's status field.
In order for system updates to be possible, the vehicle must have an Internet connection 2
.
–Go to Download Center in the center dis-
play's App view.
> If no search has been performed since the last time the infotainment system was started, a search will be initiated.No search will begin if a softwaredownload is in progress. A number in
System updates shows
how many updates are available. Tap to display a list of updates that can beinstalled in the vehicle.
NOTE
Data downloading can affect other services such as transfer data, e.g. web radio. If theaffect on other services is experienced asproblematic, the download can be interrup-ted. Alternatively, it may be appropriate toswitch off or cancel other services.
NOTE
An update can be interrupted when the ignition is switched off and the vehicle isleft. However, the update does not have to be completed before the vehicle is left as theupdate is resumed the next time the vehi-cle is used.
Updating all system software–Select Install all at the bottom of the list.
To avoid displaying a list, select
Install all viaSystem updates.
Updating individual system software–Select Install to choose the software you
would like to download.
Canceling software download–Tap the checkbox in the activity indicator that replaced Install when the download
began.
Note that only a download can be cancelled. An installation cannot be cancelled once it hasbegun.
Deactivating the background search for software update
Automatic searching for software updates is activated as the default factory setting, but thefunction can be deactivated. 1. Tap
Settings in the center display's Top
view.
2. Tap
SystemDownload Center.
3. Tap to deselect
Auto Software Update.
Related information
Download Center (p. 565)
Internet-connected vehicle
* (p. 496)
Navigating in the center display's views (p. 112)
2
There may be a charge for transmitting data over the Internet, depending on your service plan.
Page 575 of 657

MAINTENANCE AND SERVICE
}}
573
Engine compartment overview
This overview shows some service-related components.
Some of the components included in the vehi- cle's electric drive system are located in theengine compartment. Exercise caution whenaccessing the engine compartment and onlytouch what is required for normal mainte-nance.
WARNING
Orange wiring may only be handled by qualified personnel.
WARNING
A number of electrical components in Twin Engine Plug-in Hybrid vehicles use high-voltage current and can be extremely dan-gerous if handled incorrectly.
Do not touch anything that is not clearly described in this Owner's Man-ual.
Be careful when checking/filling fluidsin the engine compartment.
The layout of the engine compartment may vary depending on model and engine variant.
Coolant expansion tank
Brake fluid reservoir (located on the driv- er's side)
Washer fluid filler pipe 12
Fusebox
Air filter
Engine oil filler pipe
WARNING
Bear in mind that the cooling fan (located at the front of the engine compartmentbehind the radiator) may start or continuerunning automatically up to about6 minutes after the engine is turned off. Always entrust engine washing to a work- shop – an authorized Volvo workshop isrecommended. If the engine is hot, there isa risk of fire.
WARNING
The ignition system works with extremely high and dangerous voltages. The vehicleelectrical system should always be in igni-tion mode
0 when work in being per-
formed in the engine compartment. Do not touch any spark plugs or ignition coils when the vehicle electrical system isin ignition mode II or when the engine is
warm.
Related information
Opening and closing the hood (p. 571)
Filling washer fluid (p. 621)
Refilling coolant (p. 576)
Fuses in the engine compartment (p. 587)
12
Fill the washer fluid at regular intervals, e.g. when refueling.