check engine light VOLVO S80 2001 Owners Manual
[x] Cancel search | Manufacturer: VOLVO, Model Year: 2001, Model line: S80, Model: VOLVO S80 2001Pages: 106, PDF Size: 2.54 MB
Page 2 of 106
Chapter 2 - Instruments, switches and controls
Chapter 3 - Climate control system
Chapter 4 - Interior
Chapter 5 - Keys, Locks, Alarm
Chapter 6 - Starting and driving
Chapter 7 - Wheels and tires
Chapter 8 - Maintenance/Servicing
Chapter 9 - Specifications
Chapter 10 - Audio systems
HomeLink® Universal Transceiver (option)
Index
© 1998 Volvo Cars of North America Inc.
General information
Shiftlock
When your car is parked, the gear selector is locked in the (P)ark position. To release the selector from this position,
turn the ignition key to position II (or start the engine), depress the brake pedal, press the button on the front side of the
gear selector and move the selector from (P)ark.
Keylock
This means that when you switch off the ignition, the gear selector must be in the (P)ark position before the key can be
removed from the ignition switch.
Anti-lock Brake System (ABS)
The ABS system in your car performs a self -diagnostic test when the vehicle first reaches the speed of approximately
12 mph (20 km/h). The brake pedal will pulsate several times and a sound may be audible from the ABS control
module. This is normal.
Fuel tank cover The fuel tank cover, located on the right rear fender, is connected to your car's central locking system.
The driver's door must be unlocked before the fuel tank cover can be opened.
Fuel filler cap
After refueling, close the fuel filler cap by turning it clockwise until it clicks into place If this cap is not closed tightly
or if the engine is running when the car is refueled, the Malfunction Indicator Lamp ("Check Engine" light) may
indicate a fault.
Important
ProCarManuals.com
Page 9 of 106
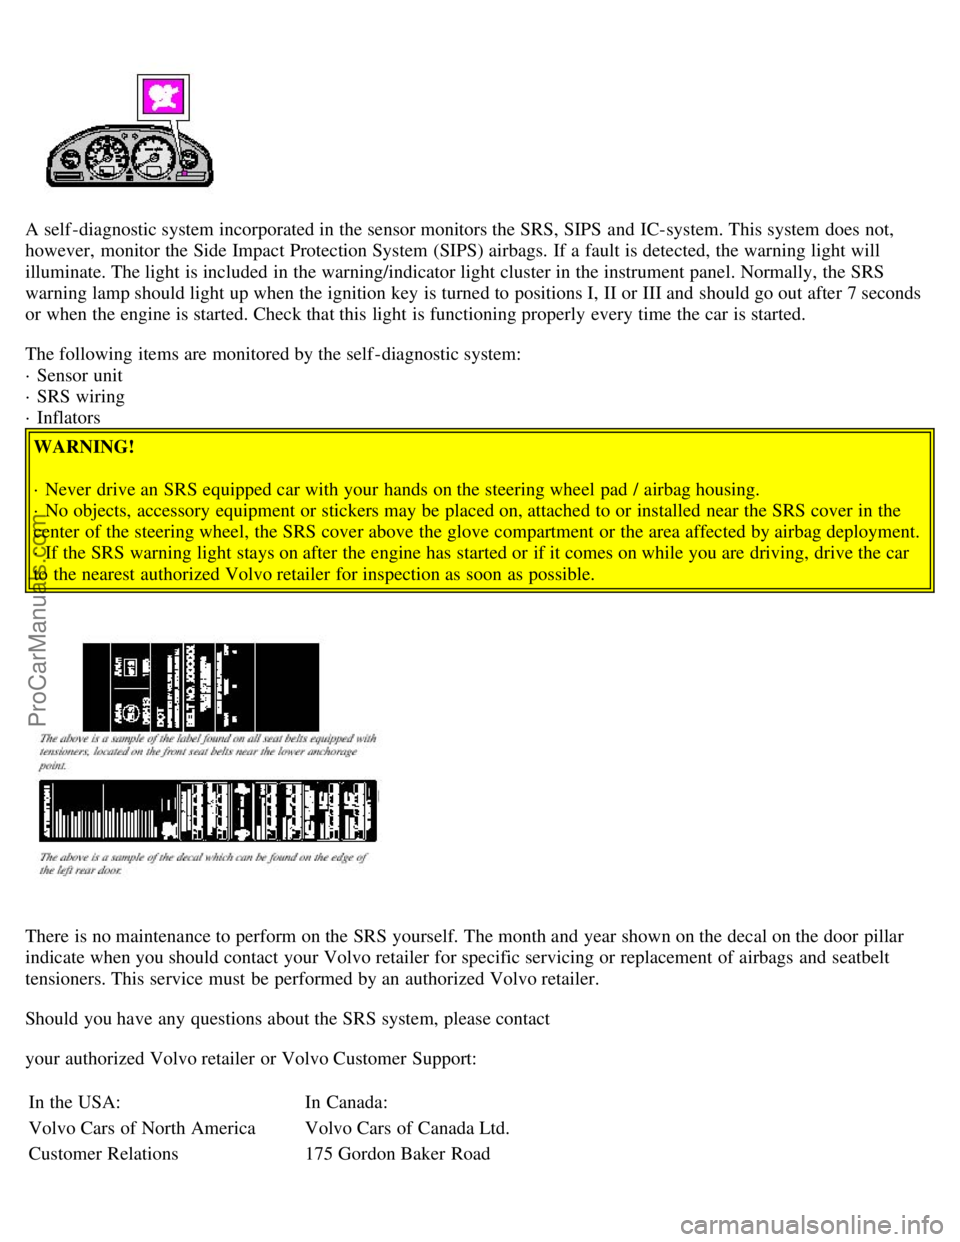
A self -diagnostic system incorporated in the sensor monitors the SRS, SIPS and IC-system. This system does not,
however, monitor the Side Impact Protection System (SIPS) airbags. If a fault is detected, the warning light will
illuminate. The light is included in the warning/indicator light cluster in the instrument panel. Normally, the SRS
warning lamp should light up when the ignition key is turned to positions I, II or III and should go out after 7 seconds
or when the engine is started. Check that this light is functioning properly every time the car is started.
The following items are monitored by the self -diagnostic system:
· Sensor unit
· SRS wiring
· InflatorsWARNING!
· Never drive an SRS equipped car with your hands on the steering wheel pad / airbag housing.
· No objects, accessory equipment or stickers may be placed on, attached to or installed near the SRS cover in the
center of the steering wheel, the SRS cover above the glove compartment or the area affected by airbag deployment.
· If the SRS warning light stays on after the engine has started or if it comes on while you are driving, drive the car
to the nearest authorized Volvo retailer for inspection as soon as possible.
There is no maintenance to perform on the SRS yourself. The month and year shown on the decal on the door pillar
indicate when you should contact your Volvo retailer for specific servicing or replacement of airbags and seatbelt
tensioners. This service must be performed by an authorized Volvo retailer.
Should you have any questions about the SRS system, please contact
your authorized Volvo retailer or Volvo Customer Support:
In the USA: In Canada:
Volvo Cars of North America Volvo Cars of Canada Ltd.
Customer Relations 175 Gordon Baker Road
ProCarManuals.com
Page 19 of 106
Instrument panel lighting30
pg. 23 Instrument panel
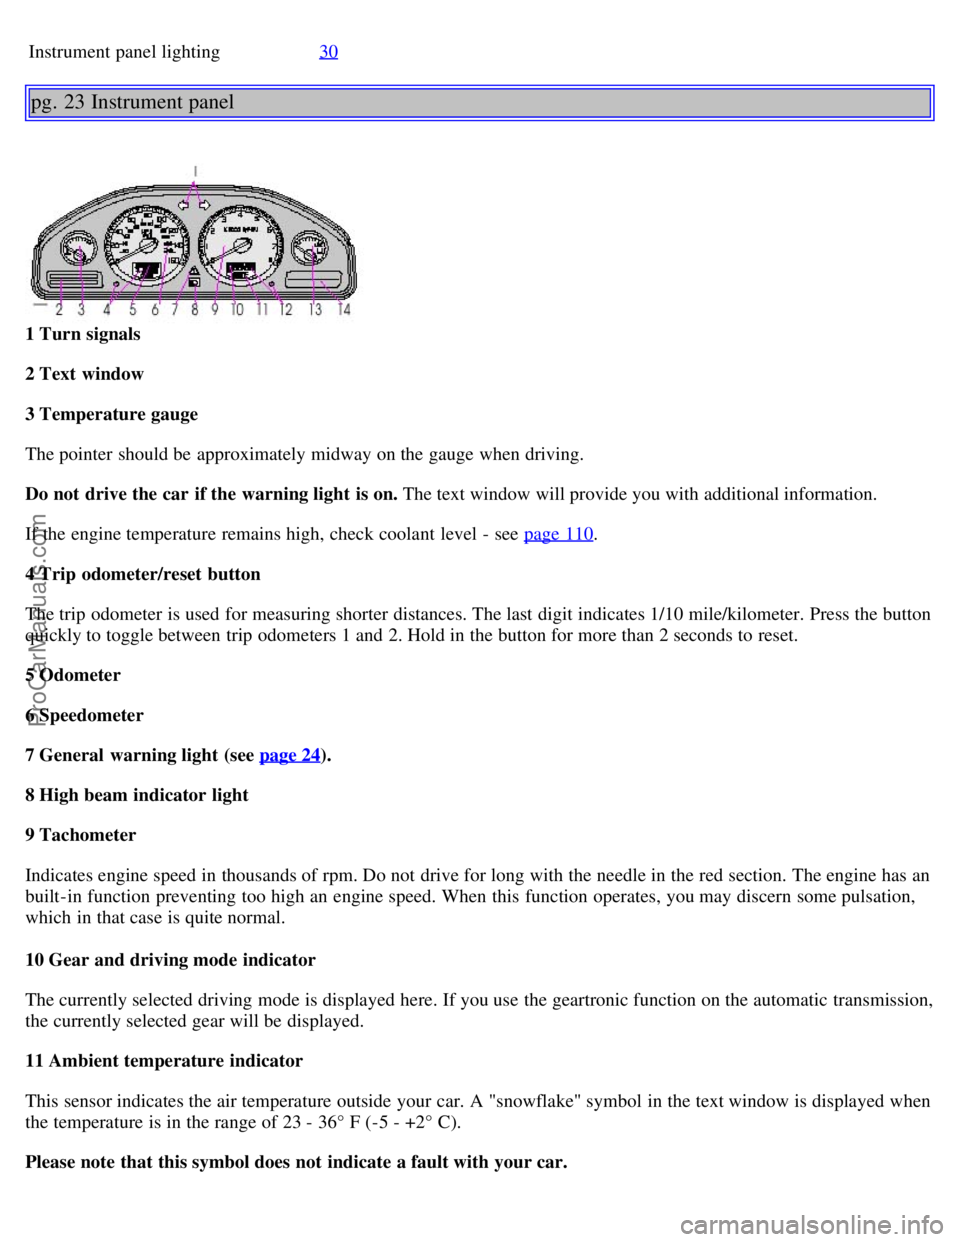
1 Turn signals
2 Text window
3 Temperature gauge
The pointer should be approximately midway on the gauge when driving.
Do not drive the car if the warning light is on. The text window will provide you with additional information.
If the engine temperature remains high, check coolant level - see page 110
.
4 Trip odometer/reset button
The trip odometer is used for measuring shorter distances. The last digit indicates 1/10 mile/kilometer. Press the button
quickly to toggle between trip odometers 1 and 2. Hold in the button for more than 2 seconds to reset.
5 Odometer
6 Speedometer
7 General warning light (see page 24
).
8 High beam indicator light
9 Tachometer
Indicates engine speed in thousands of rpm. Do not drive for long with the needle in the red section. The engine has an
built-in function preventing too high an engine speed. When this function operates, you may discern some pulsation,
which in that case is quite normal.
10 Gear and driving mode indicator
The currently selected driving mode is displayed here. If you use the geartronic function on the automatic transmission,
the currently selected gear will be displayed.
11 Ambient temperature indicator
This sensor indicates the air temperature outside your car. A "snowflake" symbol in the text window is displayed when
the temperature is in the range of 23 - 36° F (-5 - +2° C).
Please note that this symbol does not indicate a fault with your car.
ProCarManuals.com
Page 20 of 106
At low speeds or when the car is not moving, the temperature readings may be slightly higher than the actual ambient
temperature.
12 Clock/reset button
Turn the button to adjust the clock.
13 Fuel gauge
The fuel tank holds approximately 21.1 US gal. (80 liters).
When the warning light comes on there is approximately 1.8 US gal. (8 liters) of fuel remaining.
14 Indicator and warning lights
pg. 24 Indicator and warning lights
The indicator and warning lights described on pages 24 and 25 should never stay on when driving
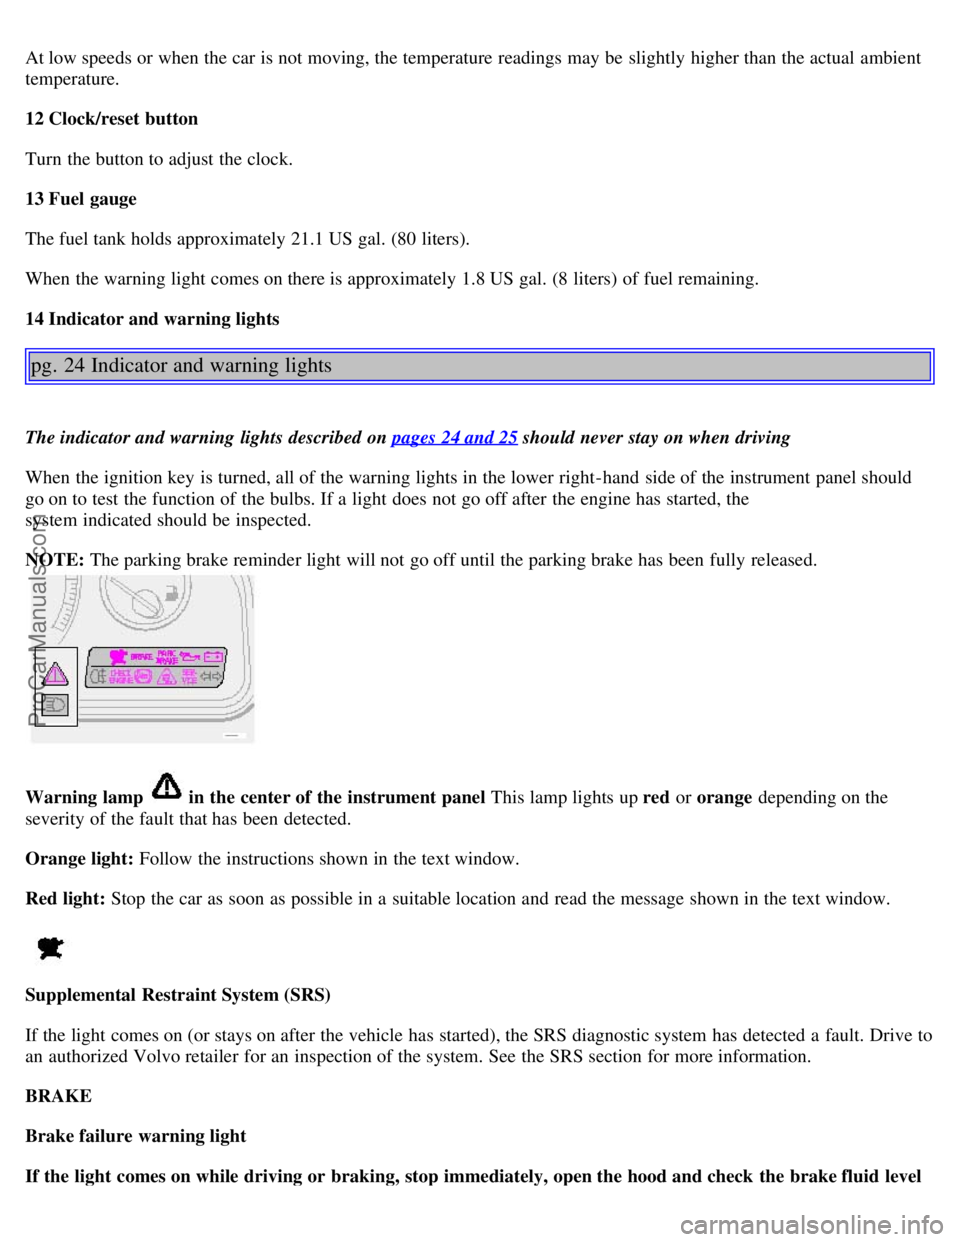
When the ignition key is turned, all of the warning lights in the lower right-hand side of the instrument panel should
go on to test the function of the bulbs. If a light does not go off after the engine has started, the
system indicated should be inspected.
NOTE: The parking brake reminder light will not go off until the parking brake has been fully released.
Warning lamp in the center of the instrument panel This lamp lights up red or orange depending on the
severity of the fault that has been detected.
Orange light: Follow the instructions shown in the text window.
Red light: Stop the car as soon as possible in a suitable location and read the message shown in the text window.
Supplemental Restraint System (SRS)
If the light comes on (or stays on after the vehicle has started), the SRS diagnostic system has detected a fault. Drive to
an authorized Volvo retailer for an inspection of the system. See the SRS section for more information.
BRAKE
Brake failure warning light
If the light comes on while driving or braking, stop immediately, open the hood and check the brake fluid level
ProCarManuals.com
Page 21 of 106
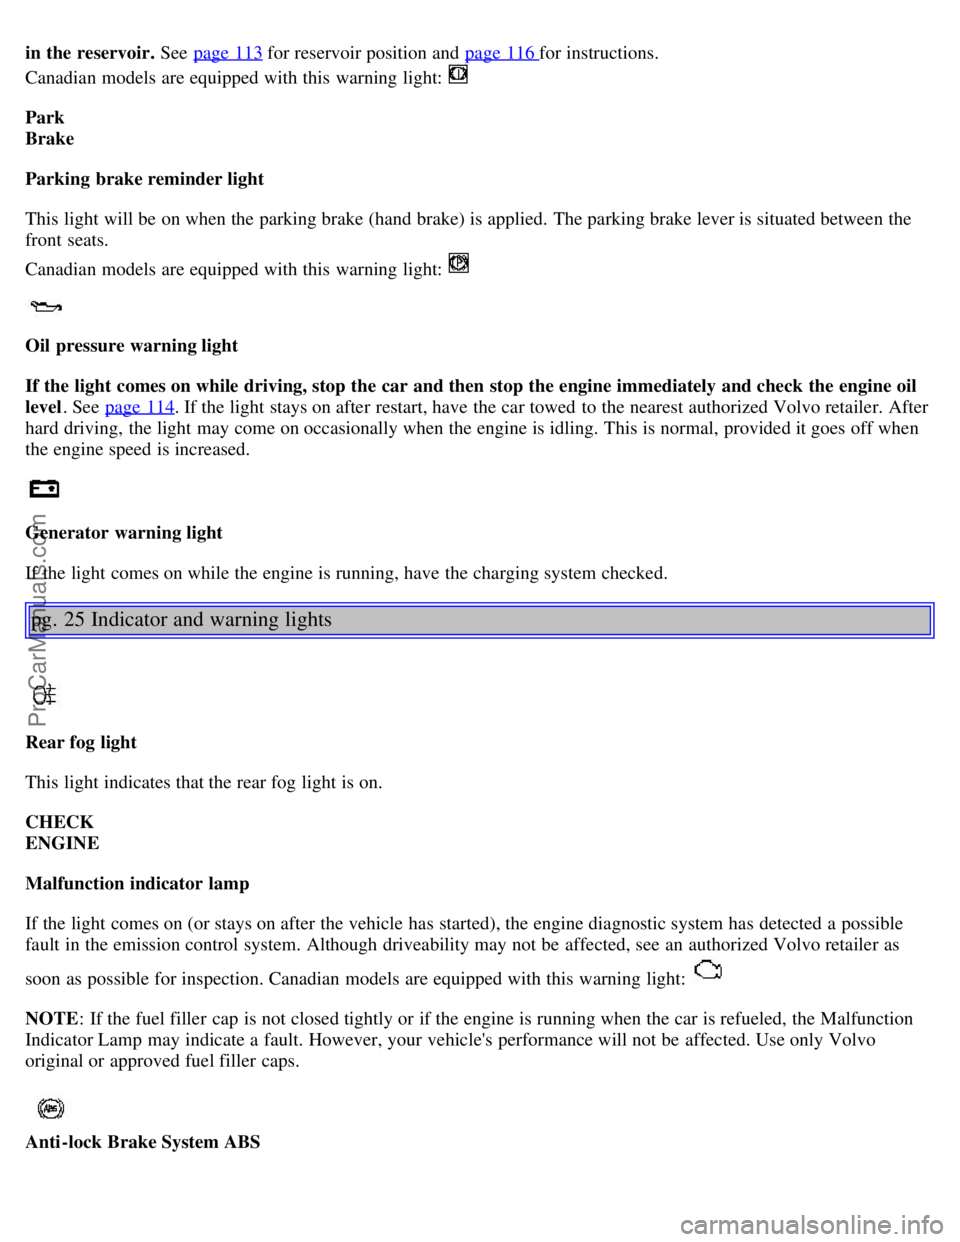
in the reservoir. See page 113 for reservoir position and page 116 for instructions.
Canadian models are equipped with this warning light:
Park
Brake
Parking brake reminder light
This light will be on when the parking brake (hand brake) is applied. The parking brake lever is situated between the
front seats.
Canadian models are equipped with this warning light:
Oil pressure warning light
If the light comes on while driving, stop the car and then stop the engine immediately and check the engine oil
level . See page 114
. If the light stays on after restart, have the car towed to the nearest authorized Volvo retailer. After
hard driving, the light may come on occasionally when the engine is idling. This is normal, provided it goes off when
the engine speed is increased.
Generator warning light
If the light comes on while the engine is running, have the charging system checked.
pg. 25 Indicator and warning lights
Rear fog light
This light indicates that the rear fog light is on.
CHECK
ENGINE
Malfunction indicator lamp
If the light comes on (or stays on after the vehicle has started), the engine diagnostic system has detected a possible
fault in the emission control system. Although driveability may not be affected, see an authorized Volvo retailer as
soon as possible for inspection. Canadian models are equipped with this warning light:
NOTE : If the fuel filler cap is not closed tightly or if the engine is running when the car is refueled, the Malfunction
Indicator Lamp may indicate a fault. However, your vehicle's performance will not be affected. Use only Volvo
original or approved fuel filler caps.
Anti-lock Brake System ABS
ProCarManuals.com
Page 49 of 106
Volvo engines are designed for optimum performance on unleaded premium gasoline with an octane rating. AKI of 91,
or above. AKI (ANTI KNOCK INDEX) is an average of the Research Octane Number, RON, and the Motor Octane
Number, MON. (RON + MON/2).
The minimum octane requirement is AKI 87 (RON 91).
Deposit control gasoline (detergent additives)
Volvo recommends the use of gasoline containing deposit control additives. These additives have shown to be efficient
in keeping injectors and intake valves clean. Consistent use of deposit control gasolines will help ensure good
driveability and fuel economy. If you are not sure whether the gasoline contains deposit control additives, check with
the service station operator.
Unleaded fuel
Each Volvo has a three-way catalytic converter and must use only unleaded gasoline. U.S. and Canadian regulations
require that pumps delivering unleaded gasoline be labelled "UNLEADED". Only these pumps have nozzles which fit
your car's filler inlet. It is unlawful to dispense leaded fuel into a vehicle labelled "unleaded gasoline only". Leaded
gasoline damages the three-way catalytic converter and the heated oxygen sensor system. Repeated use of leaded
gasoline will lessen the effectiveness of the emission control system and could result in loss of emission warranty
coverage. State and local vehicle inspection programs will make detection of misfueling easier, possibly resulting in
emission test failure for misfueled vehicles.
NOTE: Some U.S. and Canadian gasolines contain an octane enhancing additive called methyl-cyclopentadienyl
manganese tricarbonyl (MMT). If such fuels are used, your Emission Control System performance may be affected,
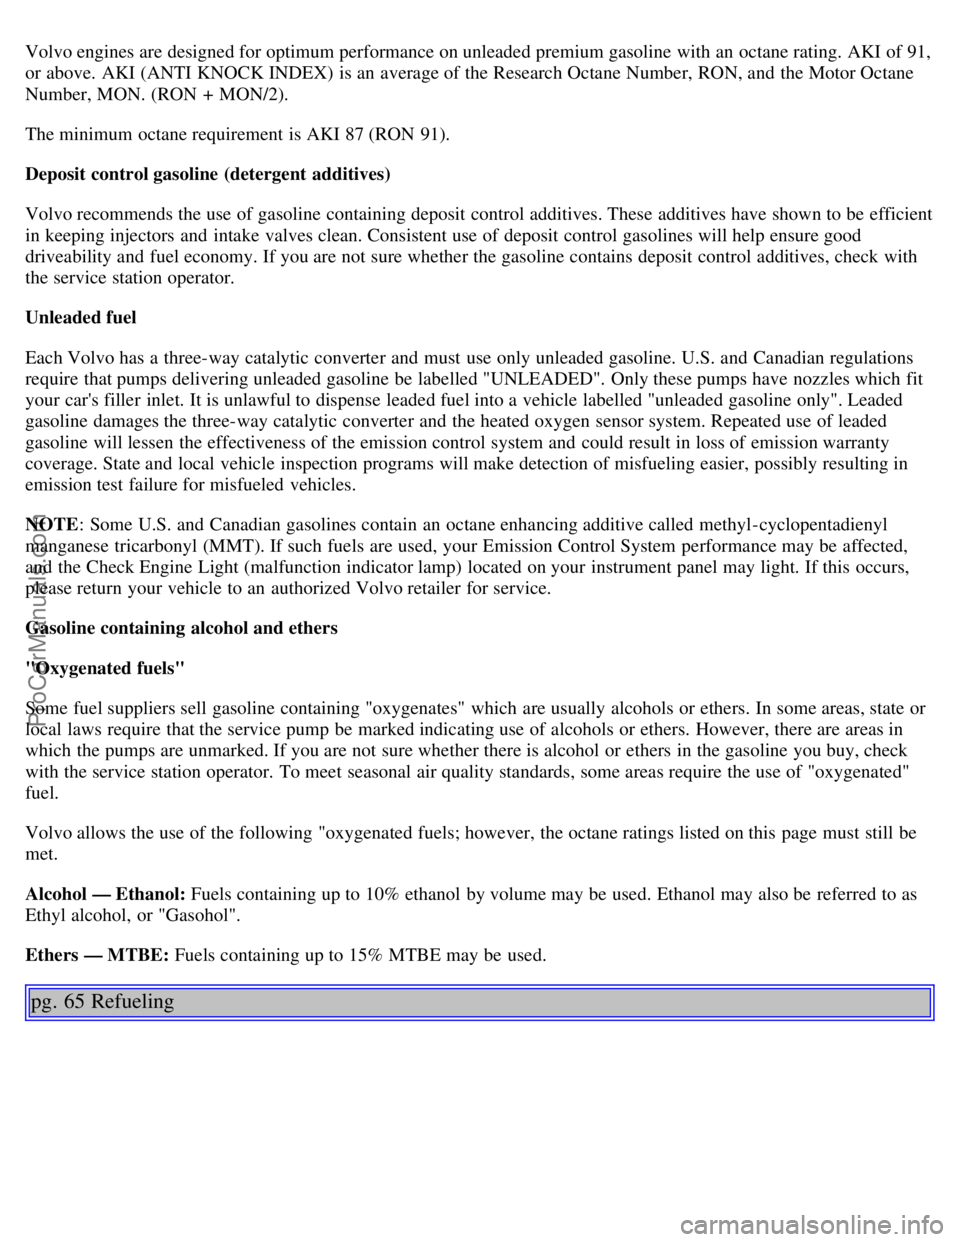
and the Check Engine Light (malfunction indicator lamp) located on your instrument panel may light. If this occurs,
please return your vehicle to an authorized Volvo retailer for service.
Gasoline containing alcohol and ethers
"Oxygenated fuels"
Some fuel suppliers sell gasoline containing "oxygenates" which are usually alcohols or ethers. In some areas, state or
local laws require that the service pump be marked indicating use of alcohols or ethers. However, there are areas in
which the pumps are unmarked. If you are not sure whether there is alcohol or ethers in the gasoline you buy, check
with the service station operator. To meet seasonal air quality standards, some areas require the use of "oxygenated"
fuel.
Volvo allows the use of the following "oxygenated fuels; however, the octane ratings listed on this page must still be
met.
Alcohol — Ethanol: Fuels containing up to 10% ethanol by volume may be used. Ethanol may also be referred to as
Ethyl alcohol, or "Gasohol".
Ethers — MTBE: Fuels containing up to 15% MTBE may be used.
pg. 65 Refueling
ProCarManuals.com
Page 50 of 106
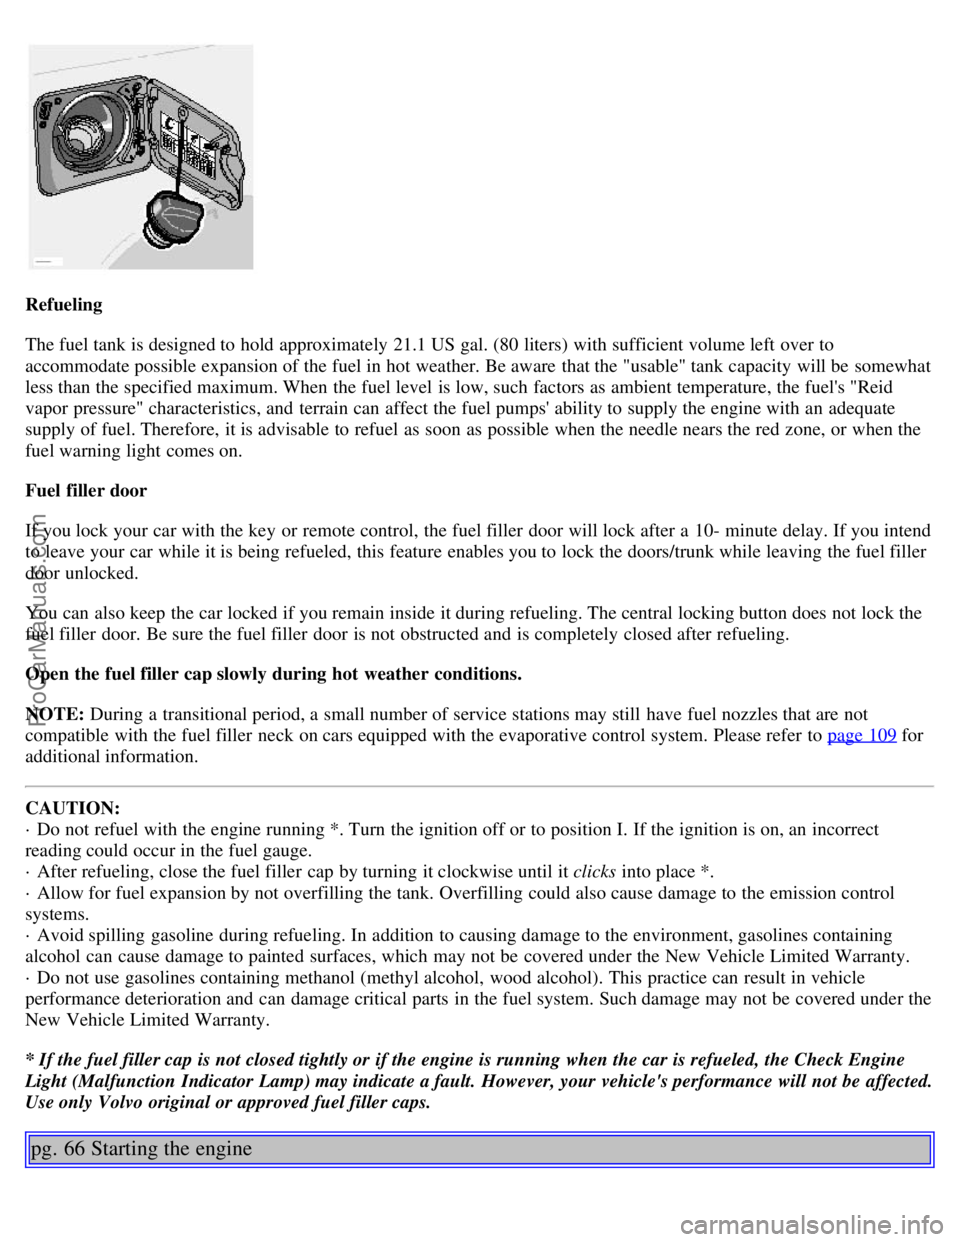
Refueling
The fuel tank is designed to hold approximately 21.1 US gal. (80 liters) with sufficient volume left over to
accommodate possible expansion of the fuel in hot weather. Be aware that the "usable" tank capacity will be somewhat
less than the specified maximum. When the fuel level is low, such factors as ambient temperature, the fuel's "Reid
vapor pressure" characteristics, and terrain can affect the fuel pumps' ability to supply the engine with an adequate
supply of fuel. Therefore, it is advisable to refuel as soon as possible when the needle nears the red zone, or when the
fuel warning light comes on.
Fuel filler door
If you lock your car with the key or remote control, the fuel filler door will lock after a 10- minute delay. If you intend
to leave your car while it is being refueled, this feature enables you to lock the doors/trunk while leaving the fuel filler
door unlocked.
You can also keep the car locked if you remain inside it during refueling. The central locking button does not lock the
fuel filler door. Be sure the fuel filler door is not obstructed and is completely closed after refueling.
Open the fuel filler cap slowly during hot weather conditions.
NOTE: During a transitional period, a small number of service stations may still have fuel nozzles that are not
compatible with the fuel filler neck on cars equipped with the evaporative control system. Please refer to page 109
for
additional information.
CAUTION:
· Do not refuel with the engine running *. Turn the ignition off or to position I. If the ignition is on, an incorrect
reading could occur in the fuel gauge.
· After refueling, close the fuel filler cap by turning it clockwise until it clicks into place *.
· Allow for fuel expansion by not overfilling the tank. Overfilling could also cause damage to the emission control
systems.
· Avoid spilling gasoline during refueling. In addition to causing damage to the environment, gasolines containing
alcohol can cause damage to painted surfaces, which may not be covered under the New Vehicle Limited Warranty.
· Do not use gasolines containing methanol (methyl alcohol, wood alcohol). This practice can result in vehicle
performance deterioration and can damage critical parts in the fuel system. Such damage may not be covered under the
New Vehicle Limited Warranty.
* If the fuel filler cap is not closed tightly or if the engine is running when the car is refueled, the Check Engine
Light (Malfunction Indicator Lamp) may indicate a fault. However, your vehicle's performance will not be affected.
Use only Volvo original or approved fuel filler caps.
pg. 66 Starting the engine
ProCarManuals.com
Page 51 of 106
Starting the engine
1. Fasten the seat belt.WARNING!
Before starting, check that the seat, steering wheel and mirrors are adjusted properly. Make sure the brake pedal can
be depressed completely. Adjust the seat if necessary. See page 48
.
2. Apply the parking brake, if not already set. The gear selector is locked in the (P)ark position (SHIFTLOCK).
3. Without touching the accelerator pedal, turn the ignition key* to the starting position. Allow the starter to operate
for up to 5 seconds (turbo: 10 seconds). Release the key as soon as the engine starts. If the engine fails to start, repeat
this step.
For cold starts at altitudes above 6000 ft (1800 meters), depress the accelerator pedal halfway and turn the key to the
starting position. Release the pedal slowly when the engine starts.
4. To release the gear selector from the (P)ark position, the engine must be running (or the ignition key must be in
position II) and the brake pedal must be depressed.
5. Select the desired gear. The gear engages after a very slight delay which is especially noticeable when selecting R.
NOTE:
· Your car is equipped with a KEYLOCK system. When the engine is switched off, the gear selector must be in the
( P )ark position before the key can be removed from the ignition switch.
· When starting in cold weather, the transmission may shift up at slightly higher engine speeds than normal until the
automatic transmission fluid reaches normal operating temperature.
CAUTION :
· The engine should be idling when you move the gear selector. Never accelerate until after you feel the transmission
engage! Accelerating immediately after selecting a gear will cause harsh gear engagement and premature transmission
wear.
· Selecting P or N when idling at a standstill for prolonged periods of time will help prevent overheating of the
automatic transmission fluid.
· Do not race a cold engine immediately after starting. Oil flow may not reach some lubrication points fast enough to
prevent engine damage.
WARNING!
· Always place the gear selector in Park and apply the parking brake before leaving the vehicle. Never leave the car
unattended with the engine running.
· Always open the garage doors fully before starting the engine inside a garage to ensure adequate ventilation. The
exhaust gases contain carbon monoxide, which is invisible and odorless but very
poisonous.
* Your car is equipped with an electronic start inhibitor (immobilizer). The keys you received with your car are
specially coded. The code in the key is transmitted to an antenna in the ignition switch where it is compared to the
code stored in the start inhibitor module. The car can only be started if a properly coded key is used.
ProCarManuals.com
Page 56 of 106
left to MAN.
· To return to the (D)rive position from MAN, move the gear selector to the right and push it forward to the (D)rive
position.
While driving
If you select the (MAN)ual position while driving, the gear that was being used in the (D)rive position will also
initially be selected in (MAN)ual position.
· Move the gear selector forward (toward "+") to shift to a higher gear or rearward (toward "-") to shift to a lower gear.
· If you hold the gear selector toward "-", the transmission will downshift, one gear at a time, and will utilize the
braking power of the engine. If the current speed is too high for using a lower gear, the downshift will not occur until
the speed has decreased enough to allow the lower gear to be used.
· If you slow down to a very low speed, the transmission will automatically shift down.
· When starting in the (MAN)ual position, 3rd gear is the highest gear that may be selected.
NOTE: Kickdown (see previous page) does not function when the transmission is in the manual shift (geartronic)
mode.
W Winter/Wet driving mode - enhanced vehicle traction
· Mode W will only function if the gear selector is in the (D)rive position.
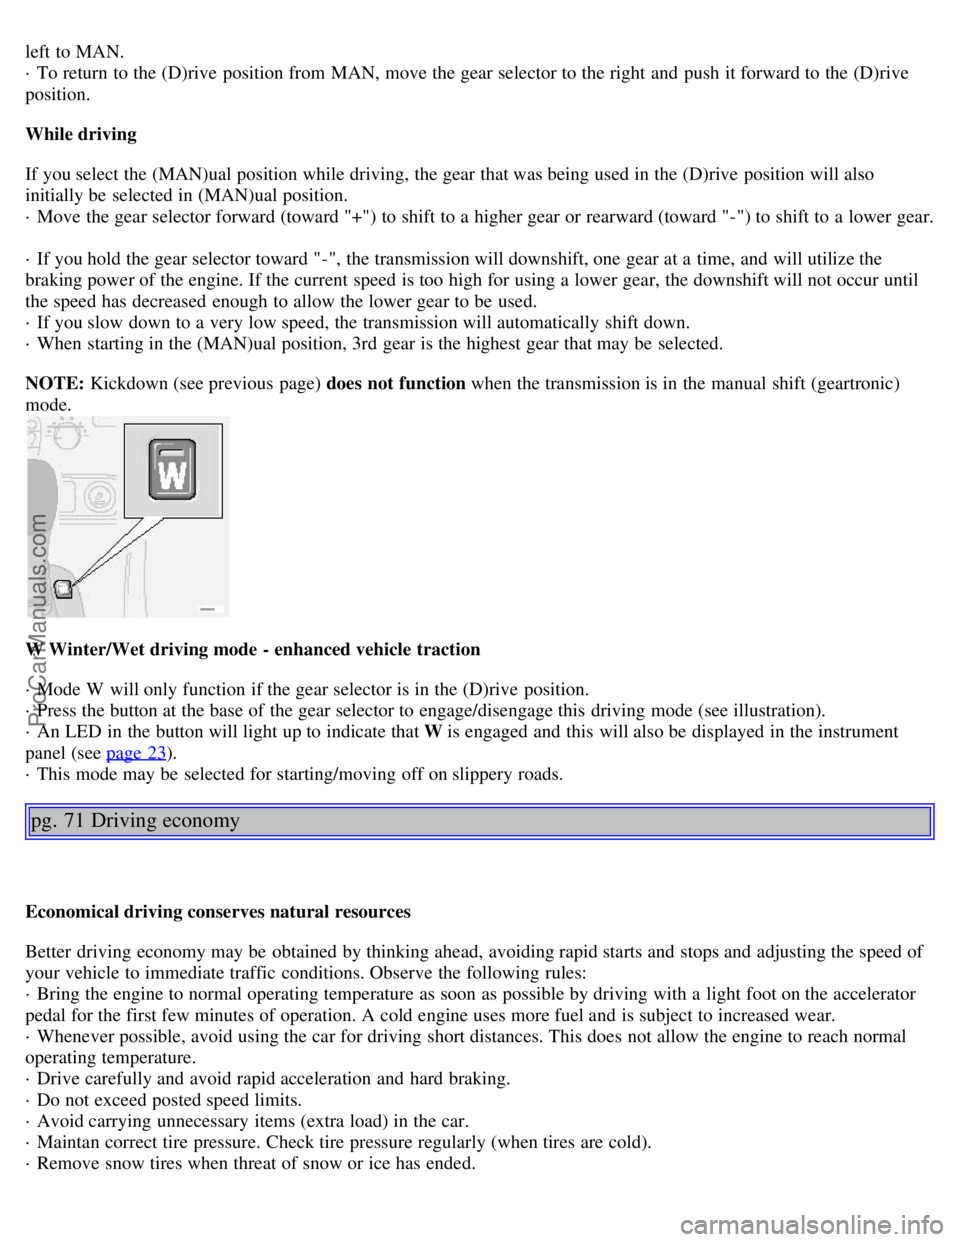
· Press the button at the base of the gear selector to engage/disengage this driving mode (see illustration).
· An LED in the button will light up to indicate that W is engaged and this will also be displayed in the instrument
panel (see page 23
).
· This mode may be selected for starting/moving off on slippery roads.
pg. 71 Driving economy
Economical driving conserves natural resources
Better driving economy may be obtained by thinking ahead, avoiding rapid starts and stops and adjusting the speed of
your vehicle to immediate traffic conditions. Observe the following rules:
· Bring the engine to normal operating temperature as soon as possible by driving with a light foot on the accelerator
pedal for the first few minutes of operation. A cold engine uses more fuel and is subject to increased wear.
· Whenever possible, avoid using the car for driving short distances. This does not allow the engine to reach normal
operating temperature.
· Drive carefully and avoid rapid acceleration and hard braking.
· Do not exceed posted speed limits.
· Avoid carrying unnecessary items (extra load) in the car.
· Maintan correct tire pressure. Check tire pressure regularly (when tires are cold).
· Remove snow tires when threat of snow or ice has ended.
ProCarManuals.com
Page 57 of 106
· Note that roof racks, ski racks, etc., increase air resistance and also fuel consumption.
· Avoid using automatic transmission kickdown feature unless necessary.
· However, at higher driving speeds, fuel consumption will be lower with the air conditioning on and the windows
closed than with the air conditioning off and the windows open.
· Using the onboard trip computer's fuel consumption modes can help you learn how to drive more economically.
Other factors which decrease gas mileage are:
· Worn or dirty spark plugs
· Incorrect spark plug gap
· Dirty air cleaner
· Dirty engine oil and clogged oil filter
· Dragging brakes
· Incorrect front end alignment
Some of the above mentioned items and others are checked at the standard Maintenance Service intervals.
NOTE: Vehicles equipped with automatic transmissions should use (D)rive as often as possible and avoid using
"kickdown" to help improve fuel economy.
Cooling system
The risk for engine overheating is greatest, especially in hot weather, when:
· Towing a trailer up steep inclines for prolonged periods at wide open throttle and low engine rpm.
· Stopping the engine suddenly after high speed driving (so-called "after-boiling" can occur).
· To avoid overheating, the following rules should be followed: Do not drive for prolonged periods at engine speeds
above 4500 rpm if you are towing a trailer in hilly terrain.
· Reduce speed when towing a trailer up long, steep inclines. The risk of overheat -ing can be reduced by switching off
the air conditioning system for a short time.
· Do not let the engine idle unnecessarily for prolonged periods.
· Do not mount auxiliary lamps in front of the grill. When the risk of overheating is imminent, or in the event of
overheating (the temperature gauge goes repeatedly into, or stays continual-ly in, the red section), the following
precau-tions should be taken:
· Switch off the air conditioning system.
· Pull off the road, away from traffic, stop the car and put the gear selector into Park. Do not stop the engine!
· Switch the heater to full (maximum) position. Increase the engine speed to approx. 2000 rpm (twice idling speed)
until the temperature begins to drop.
· If the warning light in the center of the instrument panel is red, and the message "Coolant level lo stop engine" is
displayed, switch off the engine as soon as possible.
WARNING!
Do not remove coolant expansion tank cap. The coolant will be extremely hot.
If necessary, see See page 110
for information on checking and topping-up the coolant level.
Contents | Top of Page
ProCarManuals.com