VOLVO S80 2005 Manual PDF
Manufacturer: VOLVO, Model Year: 2005, Model line: S80, Model: VOLVO S80 2005Pages: 123, PDF Size: 2.33 MB
Page 71 of 123
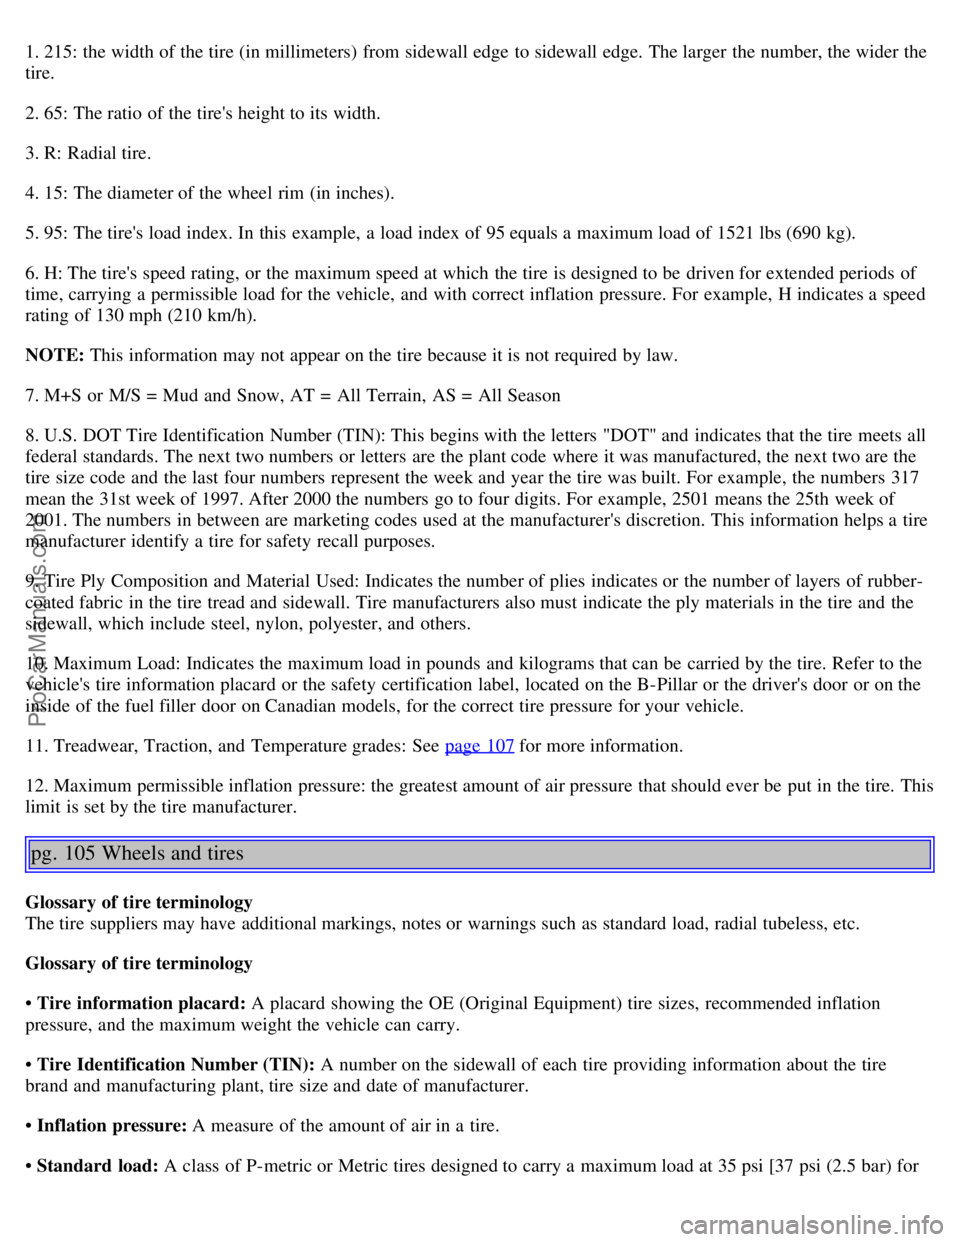
1. 215: the width of the tire (in millimeters) from sidewall edge to sidewall edge. The larger the number, the wider the
tire.
2. 65: The ratio of the tire's height to its width.
3. R: Radial tire.
4. 15: The diameter of the wheel rim (in inches).
5. 95: The tire's load index. In this example, a load index of 95 equals a maximum load of 1521 lbs (690 kg).
6. H: The tire's speed rating, or the maximum speed at which the tire is designed to be driven for extended periods of
time, carrying a permissible load for the vehicle, and with correct inflation pressure. For example, H indicates a speed
rating of 130 mph (210 km/h).
NOTE: This information may not appear on the tire because it is not required by law.
7. M+S or M/S = Mud and Snow, AT = All Terrain, AS = All Season
8. U.S. DOT Tire Identification Number (TIN): This begins with the letters "DOT" and indicates that the tire meets all
federal standards. The next two numbers or letters are the plant code where it was manufactured, the next two are the
tire size code and the last four numbers represent the week and year the tire was built. For example, the numbers 317
mean the 31st week of 1997. After 2000 the numbers go to four digits. For example, 2501 means the 25th week of
2001. The numbers in between are marketing codes used at the manufacturer's discretion. This information helps a tire
manufacturer identify a tire for safety recall purposes.
9. Tire Ply Composition and Material Used: Indicates the number of plies indicates or the number of layers of rubber-
coated fabric in the tire tread and sidewall. Tire manufacturers also must indicate the ply materials in the tire and the
sidewall, which include steel, nylon, polyester, and others.
10. Maximum Load: Indicates the maximum load in pounds and kilograms that can be carried by the tire. Refer to the
vehicle's tire information placard or the safety certification label, located on the B-Pillar or the driver's door or on the
inside of the fuel filler door on Canadian models, for the correct tire pressure for your vehicle.
11. Treadwear, Traction, and Temperature grades: See page 107
for more information.
12. Maximum permissible inflation pressure: the greatest amount of air pressure that should ever be put in the tire. This
limit is set by the tire manufacturer.
pg. 105 Wheels and tires
Glossary of tire terminology
The tire suppliers may have additional markings, notes or warnings such as standard load, radial tubeless, etc.
Glossary of tire terminology
• Tire information placard: A placard showing the OE (Original Equipment) tire sizes, recommended inflation
pressure, and the maximum weight the vehicle can carry.
• Tire Identification Number (TIN): A number on the sidewall of each tire providing information about the tire
brand and manufacturing plant, tire size and date of manufacturer.
• Inflation pressure: A measure of the amount of air in a tire.
• Standard load: A class of P-metric or Metric tires designed to carry a maximum load at 35 psi [37 psi (2.5 bar) for
ProCarManuals.com
Page 72 of 123
![VOLVO S80 2005 Manual PDF Metric tires]. Increasing the inflation pressure beyond this pressure will not increase the tires load carrying capability.
• Extra load: A class of P-metric or Metric tires designed to carry a VOLVO S80 2005 Manual PDF Metric tires]. Increasing the inflation pressure beyond this pressure will not increase the tires load carrying capability.
• Extra load: A class of P-metric or Metric tires designed to carry a](/img/45/58528/w960_58528-71.png)
Metric tires]. Increasing the inflation pressure beyond this pressure will not increase the tires load carrying capability.
• Extra load: A class of P-metric or Metric tires designed to carry a heavier maximum load at 41 psi [43 psi (2.9 bar)
for Metric tires]. Increasing the inflation pressure beyond this pressure will not increase the tires load carrying
capability.
• kPa: Kilopascal, a metric unit of air pressure.
• PSI: Pounds per square inch, a standard unit of air pressure.
• B-pillar: The structural member at the side of the vehicle behind the front door.
• Bead area of the tire: Area of the tire next to the rim.
• Sidewall of the tire: Area between the bead area and the tread.
• Tread area of the tire: Area of the perimeter of the tire that contacts the road when mounted on the vehicle.
• Rim: The metal support (wheel) for a tire or a tire and tube assembly upon which the tire beads are seated.
• Maximum load rating: a figure indicating the maximum load in pounds and kilograms that can be carried by the
tire. This rating is established by the tire manufacturer.
• Maximum permissible inflation pressure: the greatest amount of air pressure that should ever be put in the tire.
This limit is set by the tire manufacturer.
• Recommended tire inflation pressure: inflation pressure, established by Volvo, which is based on the type of tires
that are mounted on a vehicle at the factory. This inflation pressure is affected by the number of occupants in the car,
the amount of cargo, and the speed at which the vehicle will be driven for a prolonged period. This information can be
found on the tire inflation placard(s) located on the driver's side B-pillar or on the inside of the fuel filler door on
Canadian models, and in the tire inflation table in this chapter.
• Cold tires: The tires are considered to be cold when they have the same temperature as the surrounding (ambient)
air. This temperature is normally reached after the car has been parked for at least 3 hours.
pg. 106 Wheels and tires
Vehicle loading
Properly loading your vehicle will provide maximum return of vehicle design performance.
Before loading your vehicle, familiarize yourself with the following terms for determining your vehicle's weight
ratings, with or without a trailer, from the vehicle's Federal/Canadian Motor Vehicle Safety Standards
(FMVSS/CMVSS) label, and the vehicle's tire information placard:
Curb weight
The weight of the vehicle including a full tank of fuel and all standard equipment. It does not include passengers,
cargo, or optional equipment.
Capacity weight
All weight added to the curb weight, including cargo and optional equipment. When towing, trailer hitch tongue load
is also part of cargo weight.
ProCarManuals.com
Page 73 of 123
NOTE: For trailer towing information, please refer to the section "Towing a trailer" on page 89.
Permissible axle weight
The maximum allowable weight that can be carried by a single axle (front or rear). These numbers are shown on the
Federal/Canadian Motor Vehicle Safety Standards (FMVSS/CMVSS) label. The total load on each axle must never
exceed its maximum permissible weight.
Gross vehicle weight (GVW)
The vehicle's curb weight + cargo + passengers.
NOTE:
• The location of the various labels in your vehicle can be found on page 144
.
• A table listing important weight limits for your vehicle can be found on page 145
.
Steps for Determining Correct Load Limit
(1) Locate the statement "the combined weight of occupants and cargo should never exceed XXX pounds" on your
vehicle's placard.
(2) Determine the combined weight of the driver and passengers that will be riding in your vehicle.
(3) Subtract the combined weight of the driver and passengers from XXX kilograms or XXX pounds.
(4) The resulting figure equals the available amount of cargo and luggage load capacity. For example, if the "XXX"
amount equals 1400 lbs. and there will be five 150 lb. passengers in your vehicle, the amount of available cargo and
luggage load capacity is 650 lbs. (1400-750 (5 x 150) = 650 lbs.)
(5) Determine the combined weight of luggage and cargo being loaded on the vehicle. That weight may not safely
exceed the available cargo and luggage load capacity calculated in Step 4.
(6) If your vehicle will be towing a trailer, load from your trailer will be transferred to your vehicle. Consult this
manual
1 to determine how this reduces the available cargo and luggage load capacity of your vehicle.
WARNING!
- Exceeding the permissible axle weight, gross vehicle weight, or any other weight rating limits can cause tire
overheating resulting in permanent deformation or catastrophic failure.
- Do not use replacement tires with lower load carrying capacities than the tires that were original equipment on the
vehicle because this will lower the vehicle's GVW rating. Replacement tires with a higher limit than the originals do
not increase the vehicle's GVW rating limitations.
1 See "Towing a trailer" on page 89.
pg. 107 Wheels and tires
Uniform tire quality grading
ALL PASSENGER VEHICLE TIRES MUST CONFORM TO FEDERAL SAFETY REQUIREMENTS IN
ProCarManuals.com
Page 74 of 123
ADDITION TO THESE GRADES
Quality grades can be found, where applicable, on the tire sidewall between the tread should and maximum section
width. For example:
Treadwear 200 Traction AA Temperature A
TREADWEAR
The treadwear grade is a comparative rating based on the wear rate of the tire when tested under controlled conditions
on a specified government test course. For example, a tire graded 150 would wear one and one half (1 1/2) times as
well on the government course as a tire graded 100. The relative performance of tires depends upon the actual
conditions of their use, however, and many depart significantly from the norm due to variation in driving habits,
service practices and differences in road characteristics and climate.
TRACTION
The traction grades, from highest to lowest, are AA, A, B, and C, as measured under controlled conditions on specified
government test surfaces of asphalt and concrete. A tire marked C may have poor traction performance.
WARNING!
The traction grade assigned to this tire is based on braking (straight-ahead) traction tests and does not include
cornering (turning) traction.
TEMPERATURE
The temperature grades are AA (the highest), A, B, and C, representing the tire's resistance to the generation of heat
and its ability to dissipate heat when tested under controlled conditions on a specified indoor laboratory test wheel.
Sustained high temperature can cause the material of the tire to degenerate and reduce tire life, and excessive
temperature can lead to sudden tire failure. The grade C corresponds to a minimum level of performance that all
passenger car tires must meet under the Federal Motor Safety Standard No. 109. Grades B and A represent higher
levels of performance on the laboratory test wheel than the minimum required by law.
WARNING!
The temperature grade for this tire is established for a tire that is properly inflated and not overloaded. Excessive
speed, under-inflation, or excessive loading, either separately or in combination, can cause heat buildup and possible
tire failure.
pg. 108 Wheels and tires
Snow chains, snow tire, studded tires
Snow chains
Snow chains can be used on your Volvo with the following restrictions:
• Snow chains should be installed on front wheels only. Use only Volvo approved snow chains.
• If accessory, aftermarket or "custom" tires and wheels are installed and are of a size different than the original tires
and wheels, chains in some cases CANNOT be used. Sufficient clearances between chains and brakes, suspension and
body components must be maintained.
• Some strap -on type chains will interfere with brake components and therefore CANNOT be used.
• All Wheel Drive models: Snow chains should only be installed on the front wheels. Only chains adapted for AWD
models should be used.
ProCarManuals.com
Page 75 of 123
Consult your Volvo retailer for additional snow chain information.
CAUTION!
• Check local regulations regarding the use of snow chains before installing.
• Always follow the chain manufacturer's installation instructions carefully. Install chains as tightly as possible and
retighten periodically.
• Never exceed the chain manufacturer's specified maximum speed limit. (Under no circumstances should you exceed
31 mph (50 km/h)).
• Avoid bumps, holes or sharp turns when driving with snow chains.
• The handling of the vehicle can be adversely affected when driving with chains. Avoid fast or sharp turns as well as
locked wheel braking.
Snow tires, studded tires
1
Tires for winter use:
• Owners who live in or regularly commute through areas with sustained periods of snow or icy driving conditions are
strongly advised to fit suitable winter tires to help retain the highest degree of traction.
• It is important to install winter tires on all four wheels to help retain traction during cornering, braking, and
accelerating. Failure to do so could reduce traction to an unsafe level or adversely affect handling.
• Do not mix tires of different design as this could also negatively affect overall tire road grip.
• Winter tires wear more quickly on dry roads in warm weather. They should be removed when the winter driving
season has ended.
• Studded tires should be run-in 300-600 miles (500-1000 km) during which the car should be driven as smoothly as
possible to give the studs the opportunity to seat properly in the tires. The tires should have the same rotational
direction throughout their entire lifetime.
NOTE: Please consult state or provincial regulations restricting the use of studded winter tires before installing such
tires.
1 Where permitted
pg. 109 Wheels and tires
Temporary Spare
The spare tire in your car is called a "Temporary Spare".
Recommended tire pressure (see the placard on the B-pillar or on the fuel filler door) should be maintained irrespective
of which position on the car the temporary spare tire is used on.
In the event of damage to this tire, a new one can be purchased from your Volvo retailer.
WARNING!
Current legislation prohibits the use of the "Temporary Spare" tire other than as a temporary replacement for a
punctured tire. It must be replaced as soon as possible by a standard tire. Road holding and handling may be affected
with the "Temporary Spare" in use. Do not exceed 50 mph (80 km/h). Do not drive farther than 50 miles (80 km) on
ProCarManuals.com
Page 76 of 123
a temporary spare tire.
CAUTION!
The car must not be driven with wheels of different dimensions or with a spare tire other than the one that came with
the car. The use of different size wheels can seriously damage your car's transmission.
pg. 110 Changing wheels
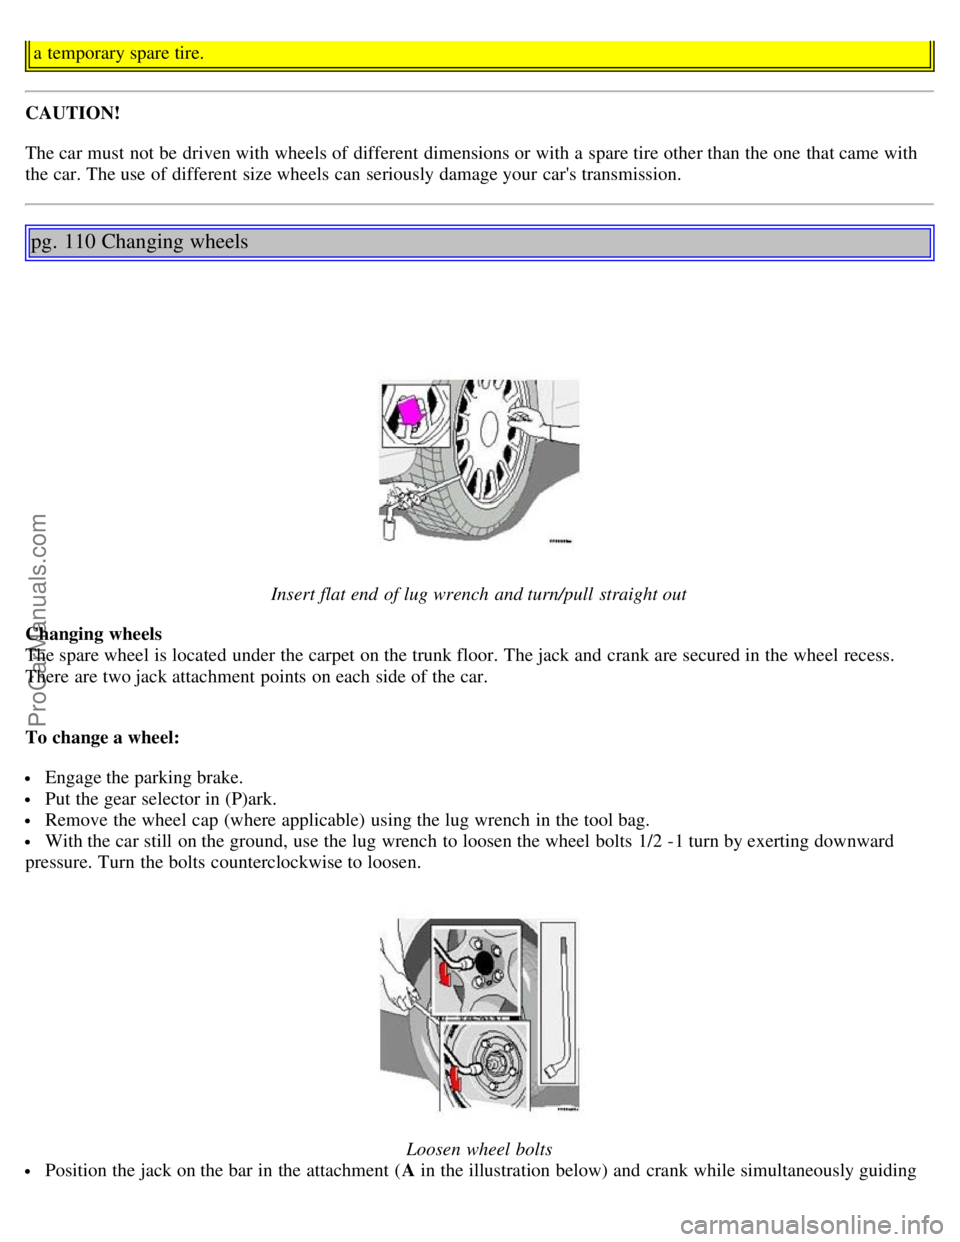
Insert flat end of lug wrench and turn/pull straight out
Changing wheels
The spare wheel is located under the carpet on the trunk floor. The jack and crank are secured in the wheel recess.
There are two jack attachment points on each side of the car.
To change a wheel:
Engage the parking brake.
Put the gear selector in (P)ark.
Remove the wheel cap (where applicable) using the lug wrench in the tool bag.
With the car still on the ground, use the lug wrench to loosen the wheel bolts 1/2 -1 turn by exerting downward
pressure. Turn the bolts counterclockwise to loosen.
Loosen wheel bolts
Position the jack on the bar in the attachment ( A in the illustration below) and crank while simultaneously guiding
ProCarManuals.com
Page 77 of 123
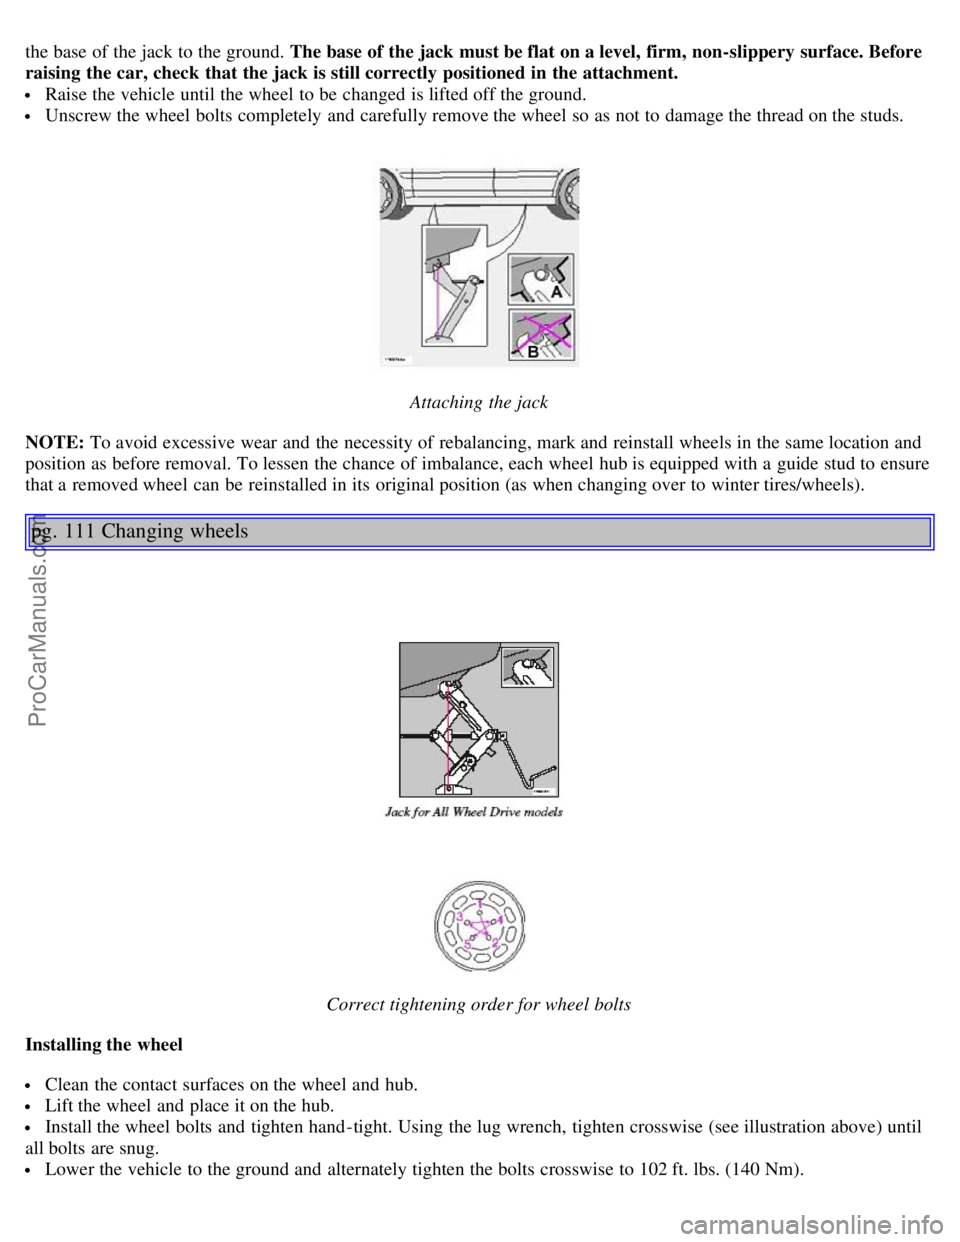
the base of the jack to the ground. The base of the jack must be flat on a level, firm, non-slippery surface. Before
raising the car, check that the jack is still correctly positioned in the attachment.
Raise the vehicle until the wheel to be changed is lifted off the ground.
Unscrew the wheel bolts completely and carefully remove the wheel so as not to damage the thread on the studs.
Attaching the jack
NOTE: To avoid excessive wear and the necessity of rebalancing, mark and reinstall wheels in the same location and
position as before removal. To lessen the chance of imbalance, each wheel hub is equipped with a guide stud to ensure
that a removed wheel can be reinstalled in its original position (as when changing over to winter tires/wheels).
pg. 111 Changing wheels
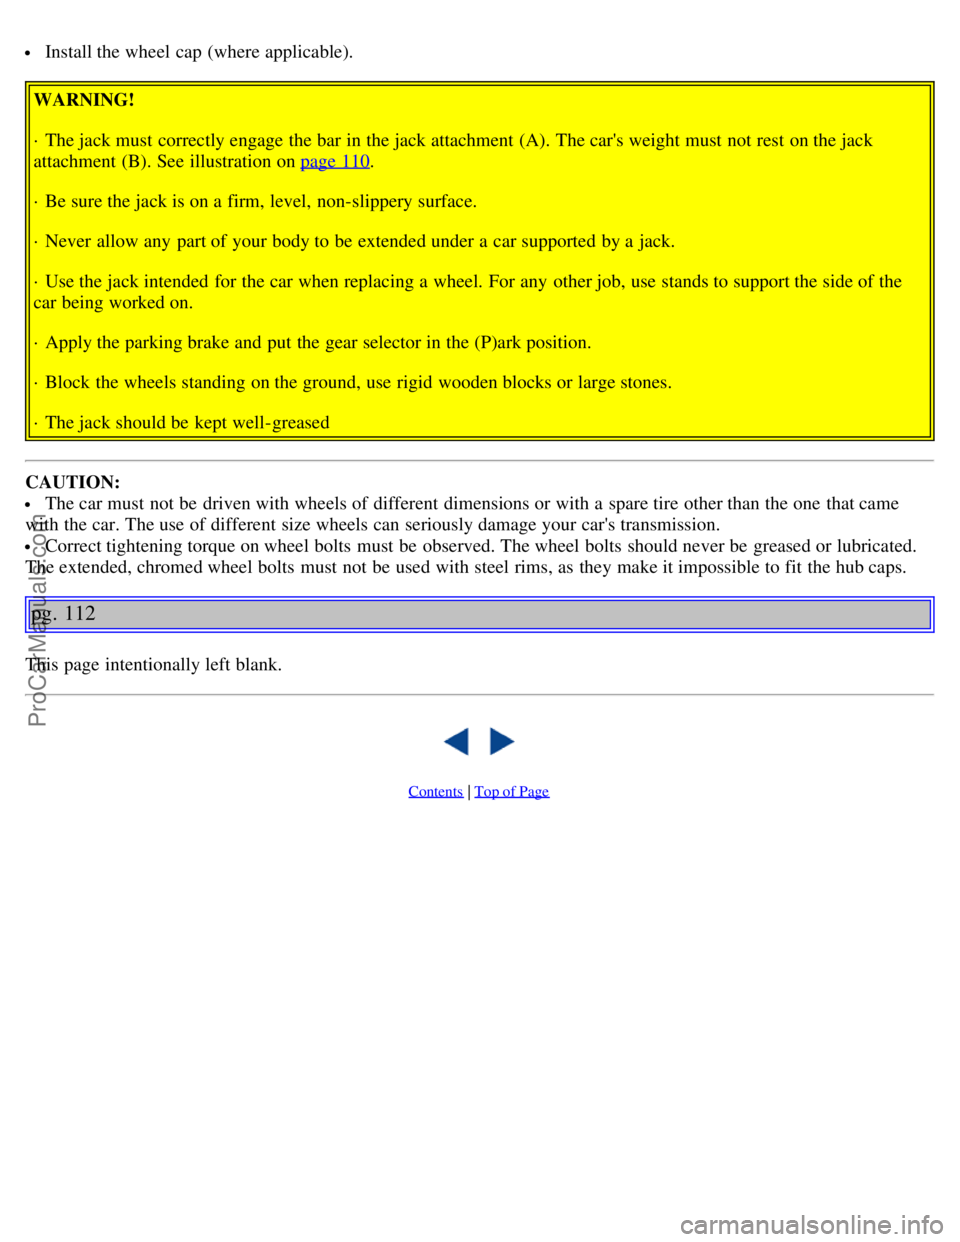
Correct tightening order for wheel bolts
Installing the wheel
Clean the contact surfaces on the wheel and hub.
Lift the wheel and place it on the hub.
Install the wheel bolts and tighten hand -tight. Using the lug wrench, tighten crosswise (see illustration above) until
all bolts are snug.
Lower the vehicle to the ground and alternately tighten the bolts crosswise to 102 ft. lbs. (140 Nm).
ProCarManuals.com
Page 78 of 123
Install the wheel cap (where applicable).
WARNING!
· The jack must correctly engage the bar in the jack attachment (A). The car's weight must not rest on the jack
attachment (B). See illustration on page 110
.
· Be sure the jack is on a firm, level, non-slippery surface.
· Never allow any part of your body to be extended under a car supported by a jack.
· Use the jack intended for the car when replacing a wheel. For any other job, use stands to support the side of the
car being worked on.
· Apply the parking brake and put the gear selector in the (P)ark position.
· Block the wheels standing on the ground, use rigid wooden blocks or large stones.
· The jack should be kept well-greased
CAUTION:
The car must not be driven with wheels of different dimensions or with a spare tire other than the one that came
with the car. The use of different size wheels can seriously damage your car's transmission.
Correct tightening torque on wheel bolts must be observed. The wheel bolts should never be greased or lubricated.
The extended, chromed wheel bolts must not be used with steel rims, as they make it impossible to fit the hub caps.
pg. 112
This page intentionally left blank.
Contents | Top of Page
ProCarManuals.com
Page 79 of 123
2 0 0 5
VOLVO S80
Chapter 8 - Maintenance/Servicing
pg. 113 Maintenance/Servicing
Fuses114
Replacing bulbs119
Paint touch up126
Washing the car127
Cleaning the upholstery129
Maintenance service, Warranty130
Fuel/emissions systems131
Drive belt, Coolant132
Emissions maintenance133
Washer fluid, Hoisting the car134
Opening the hood, Engine compartment135
Engine oil136
Power steering/Brake fluid reservoirs138
Replacing the battery139
Battery maintenance140
Replacing wiper blades141
pg. 114 Fuses
ProCarManuals.com
Page 80 of 123
Replacing fuses
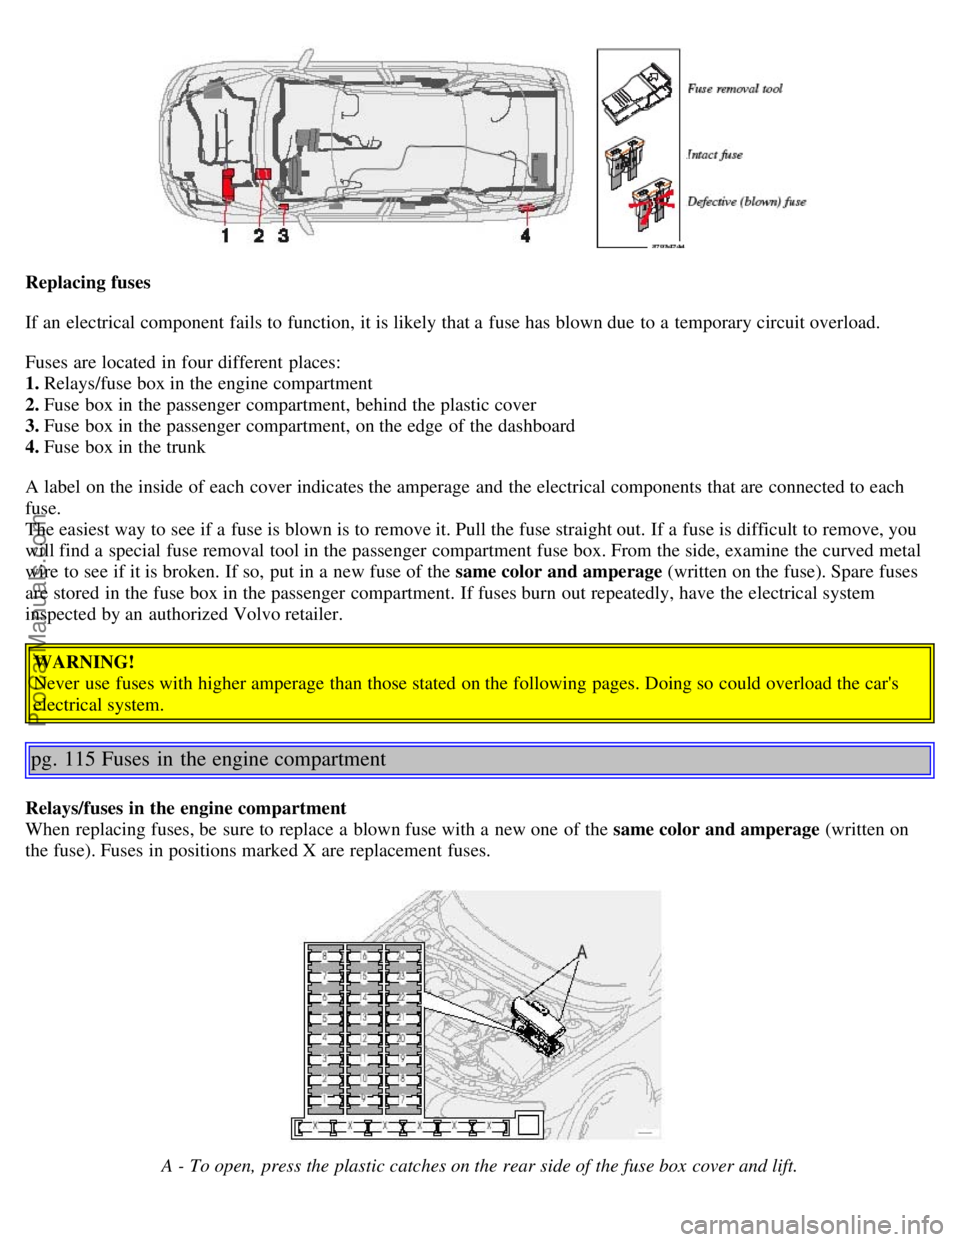
If an electrical component fails to function, it is likely that a fuse has blown due to a temporary circuit overload.
Fuses are located in four different places:
1. Relays/fuse box in the engine compartment
2. Fuse box in the passenger compartment, behind the plastic cover
3. Fuse box in the passenger compartment, on the edge of the dashboard
4. Fuse box in the trunk
A label on the inside of each cover indicates the amperage and the electrical components that are connected to each
fuse.
The easiest way to see if a fuse is blown is to remove it. Pull the fuse straight out. If a fuse is difficult to remove, you
will find a special fuse removal tool in the passenger compartment fuse box. From the side, examine the curved metal
wire to see if it is broken. If so, put in a new fuse of the same color and amperage (written on the fuse). Spare fuses
are stored in the fuse box in the passenger compartment. If fuses burn out repeatedly, have the electrical system
inspected by an authorized Volvo retailer.
WARNING!
Never use fuses with higher amperage than those stated on the following pages. Doing so could overload the car's
electrical system.
pg. 115 Fuses in the engine compartment
Relays/fuses in the engine compartment
When replacing fuses, be sure to replace a blown fuse with a new one of the same color and amperage (written on
the fuse). Fuses in positions marked X are replacement fuses.
A - To open, press the plastic catches on the rear side of the fuse box cover and lift.
ProCarManuals.com