sensor VOLVO S80 2006 User Guide
[x] Cancel search | Manufacturer: VOLVO, Model Year: 2006, Model line: S80, Model: VOLVO S80 2006Pages: 122, PDF Size: 2.33 MB
Page 19 of 122
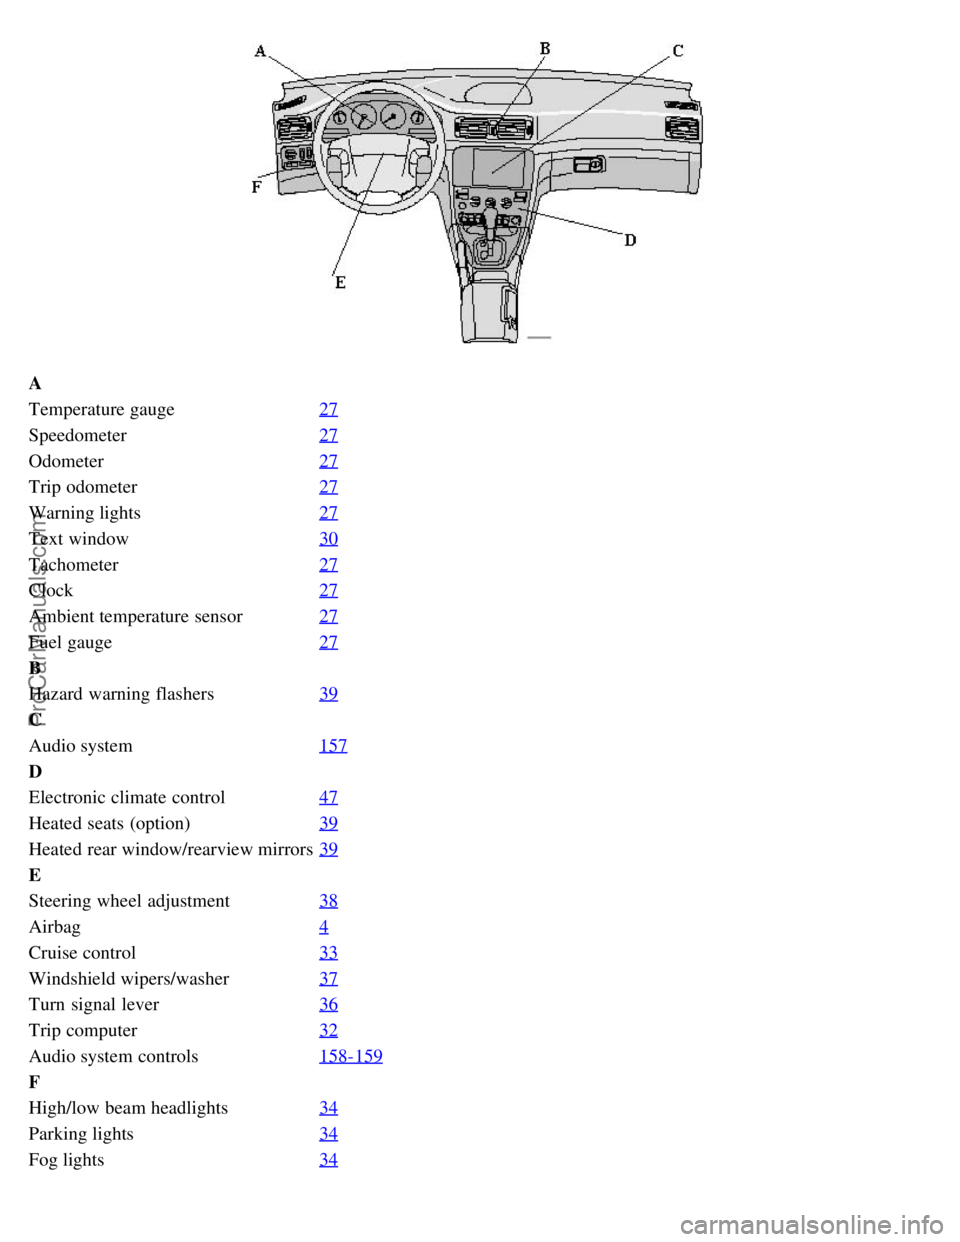
A
Temperature gauge27
Speedometer27
Odometer27
Trip odometer27
Warning lights27
Text window30
Tachometer27
Clock27
Ambient temperature sensor27
Fuel gauge27
B
Hazard warning flashers39
C
Audio system157
D
Electronic climate control47
Heated seats (option)39
Heated rear window/rearview mirrors39
E
Steering wheel adjustment38
Airbag4
Cruise control33
Windshield wipers/washer37
Turn signal lever36
Trip computer32
Audio system controls158-159
F
High/low beam headlights34
Parking lights34
Fog lights34
ProCarManuals.com
Page 20 of 122
Instrument panel lighting34
Button to unlock fuel filler door34
pg. 27 Instrument panel
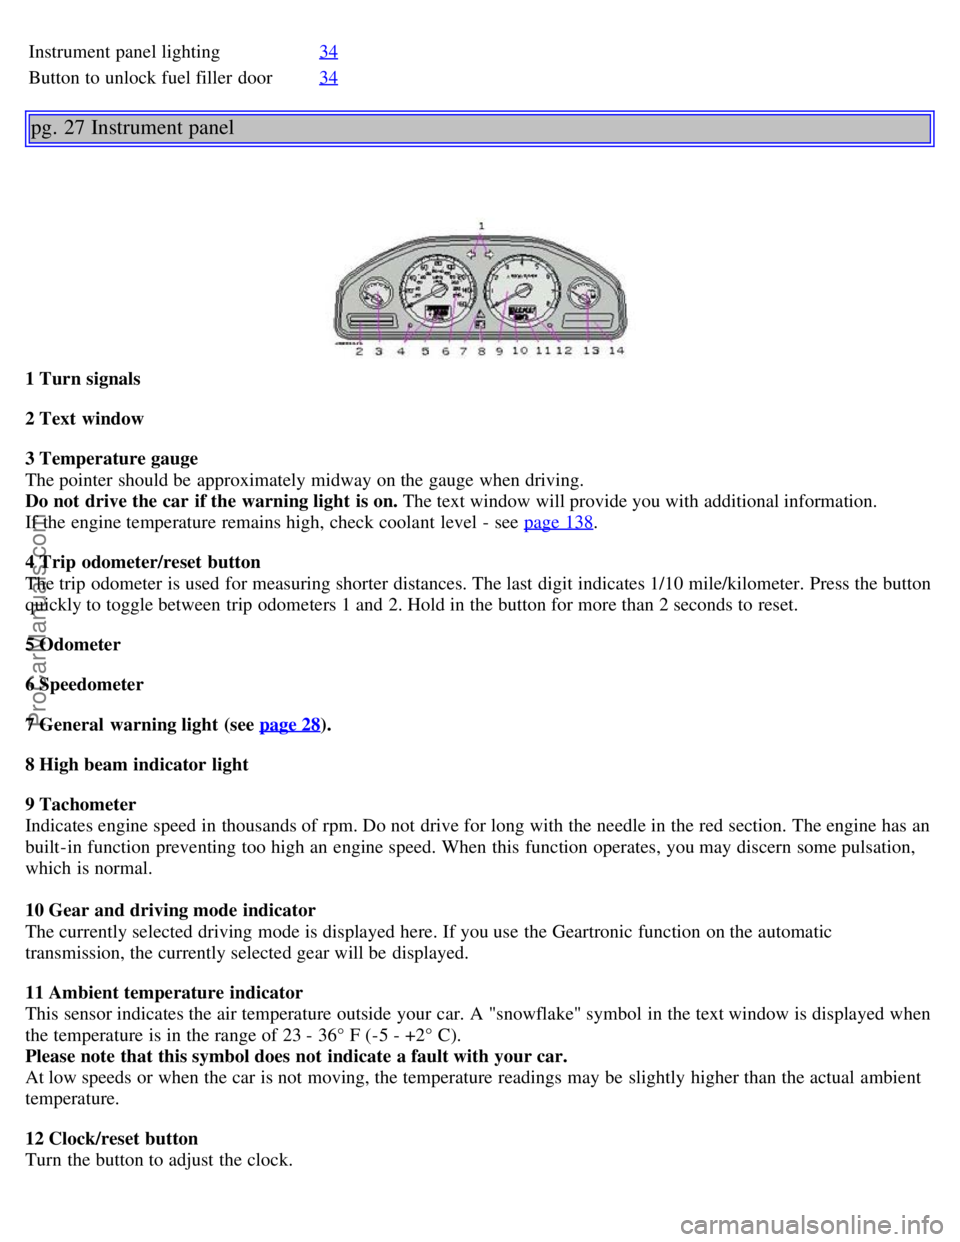
1 Turn signals
2 Text window
3 Temperature gauge
The pointer should be approximately midway on the gauge when driving.
Do not drive the car if the warning light is on. The text window will provide you with additional information.
If the engine temperature remains high, check coolant level - see page 138
.
4 Trip odometer/reset button
The trip odometer is used for measuring shorter distances. The last digit indicates 1/10 mile/kilometer. Press the button
quickly to toggle between trip odometers 1 and 2. Hold in the button for more than 2 seconds to reset.
5 Odometer
6 Speedometer
7 General warning light (see page 28
).
8 High beam indicator light
9 Tachometer
Indicates engine speed in thousands of rpm. Do not drive for long with the needle in the red section. The engine has an
built-in function preventing too high an engine speed. When this function operates, you may discern some pulsation,
which is normal.
10 Gear and driving mode indicator
The currently selected driving mode is displayed here. If you use the Geartronic function on the automatic
transmission, the currently selected gear will be displayed.
11 Ambient temperature indicator
This sensor indicates the air temperature outside your car. A "snowflake" symbol in the text window is displayed when
the temperature is in the range of 23 - 36° F (-5 - +2° C).
Please note that this symbol does not indicate a fault with your car.
At low speeds or when the car is not moving, the temperature readings may be slightly higher than the actual ambient
temperature.
12 Clock/reset button
Turn the button to adjust the clock.
ProCarManuals.com
Page 28 of 122
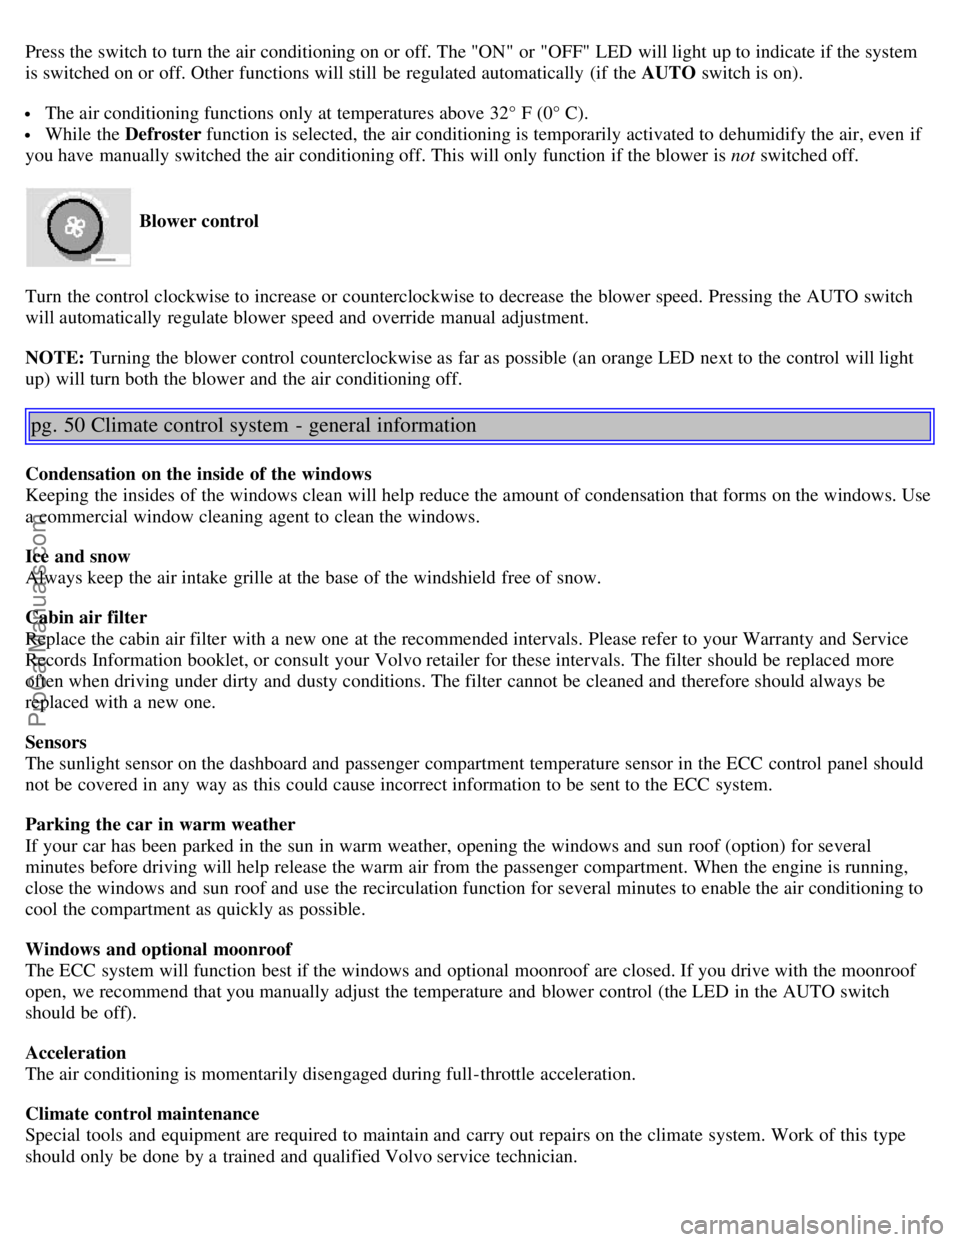
Press the switch to turn the air conditioning on or off. The "ON" or "OFF" LED will light up to indicate if the system
is switched on or off. Other functions will still be regulated automatically (if the AUTO switch is on).
The air conditioning functions only at temperatures above 32° F (0° C).
While the Defroster function is selected, the air conditioning is temporarily activated to dehumidify the air, even if
you have manually switched the air conditioning off. This will only function if the blower is not switched off.
Blower control
Turn the control clockwise to increase or counterclockwise to decrease the blower speed. Pressing the AUTO switch
will automatically regulate blower speed and override manual adjustment.
NOTE: Turning the blower control counterclockwise as far as possible (an orange LED next to the control will light
up) will turn both the blower and the air conditioning off.
pg. 50 Climate control system - general information
Condensation on the inside of the windows
Keeping the insides of the windows clean will help reduce the amount of condensation that forms on the windows. Use
a commercial window cleaning agent to clean the windows.
Ice and snow
Always keep the air intake grille at the base of the windshield free of snow.
Cabin air filter
Replace the cabin air filter with a new one at the recommended intervals. Please refer to your Warranty and Service
Records Information booklet, or consult your Volvo retailer for these intervals. The filter should be replaced more
often when driving under dirty and dusty conditions. The filter cannot be cleaned and therefore should always be
replaced with a new one.
Sensors
The sunlight sensor on the dashboard and passenger compartment temperature sensor in the ECC control panel should
not be covered in any way as this could cause incorrect information to be sent to the ECC system.
Parking the car in warm weather
If your car has been parked in the sun in warm weather, opening the windows and sun roof (option) for several
minutes before driving will help release the warm air from the passenger compartment. When the engine is running,
close the windows and sun roof and use the recirculation function for several minutes to enable the air conditioning to
cool the compartment as quickly as possible.
Windows and optional moonroof
The ECC system will function best if the windows and optional moonroof are closed. If you drive with the moonroof
open, we recommend that you manually adjust the temperature and blower control (the LED in the AUTO switch
should be off).
Acceleration
The air conditioning is momentarily disengaged during full-throttle acceleration.
Climate control maintenance
Special tools and equipment are required to maintain and carry out repairs on the climate system. Work of this type
should only be done by a trained and qualified Volvo service technician.
ProCarManuals.com
Page 29 of 122
Refrigerant
Volvo cares about the environment. The air conditioning system in your car contains a CFC-free refrigerant - R134a
(HFC134a). This substance will not deplete the ozone layer. The system contains 2.2 lbs (1000 g) R134a and uses
PAG oil.
Climate system blower
The climate system blower will be automatically switched off when the engine is not running (even if the ignition key
is in position I or II) to avoid unnecessary battery drain. To activate the blower, turn the control to the desired setting.
Passenger compartment blower
Approximately 50 minutes after the ignition is turned off, the blower may come on automatically, and run for five
minutes, to remove condensation in the A/C evaporator.
pg. 51 Interior Air Quality system (option)
Interior Air Quality system (option)
Some cars are equipped with a multifilter and air quality sensor. The filter separates gases and particles, thereby
reducing the amounts of odors and contaminants entering the car. The air quality sensor detects increased levels of
contaminants in the outside air. When the air quality sensor detects contaminated outside air, the air intake closes and
the air inside the passenger compartment is recirculated, i.e. no outside air enters the car. The filter also cleans
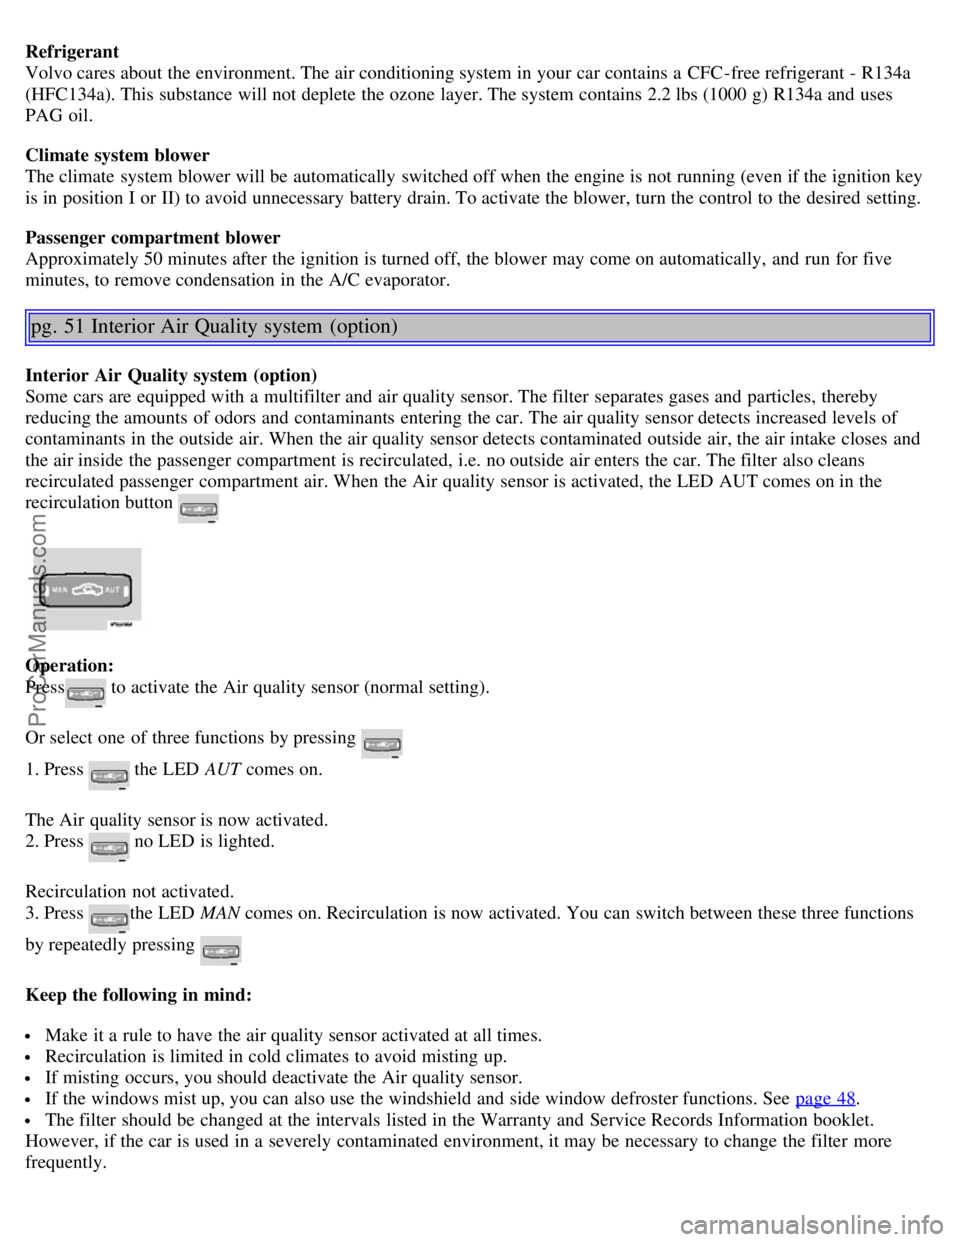
recirculated passenger compartment air. When the Air quality sensor is activated, the LED AUT comes on in the
recirculation button
Operation:
Press
to activate the Air quality sensor (normal setting).
Or select one of three functions by pressing
1. Press
the LED AUT comes on.
The Air quality sensor is now activated.
2. Press
no LED is lighted.
Recirculation not activated.
3. Press
the LED MAN comes on. Recirculation is now activated. You can switch between these three functions
by repeatedly pressing
Keep the following in mind:
Make it a rule to have the air quality sensor activated at all times.
Recirculation is limited in cold climates to avoid misting up.
If misting occurs, you should deactivate the Air quality sensor.
If the windows mist up, you can also use the windshield and side window defroster functions. See page 48.
The filter should be changed at the intervals listed in the Warranty and Service Records Information booklet.
However, if the car is used in a severely contaminated environment, it may be necessary to change the filter more
frequently.
ProCarManuals.com
Page 44 of 122
WARNING!
Never use the transmitter to lock the doors from inside the car.
Doing so would ACTIVATE:
the break-in alarm, which would sound if one of the doors were opened.
the interior motion and inclination alarm sensors, if equipped.
Doing so would DEACTIVATE:
the moonroof and interior courtesy light controls.
the central locking buttons on the front door armrests, although the interior door handles would still function to
allow occupants to leave the car.
Disabled features would remain disabled until the remote were used again to unlock the car.
In addition, locking an occupied vehicle would hinder rapid access to the occupants in an accident or emergency.
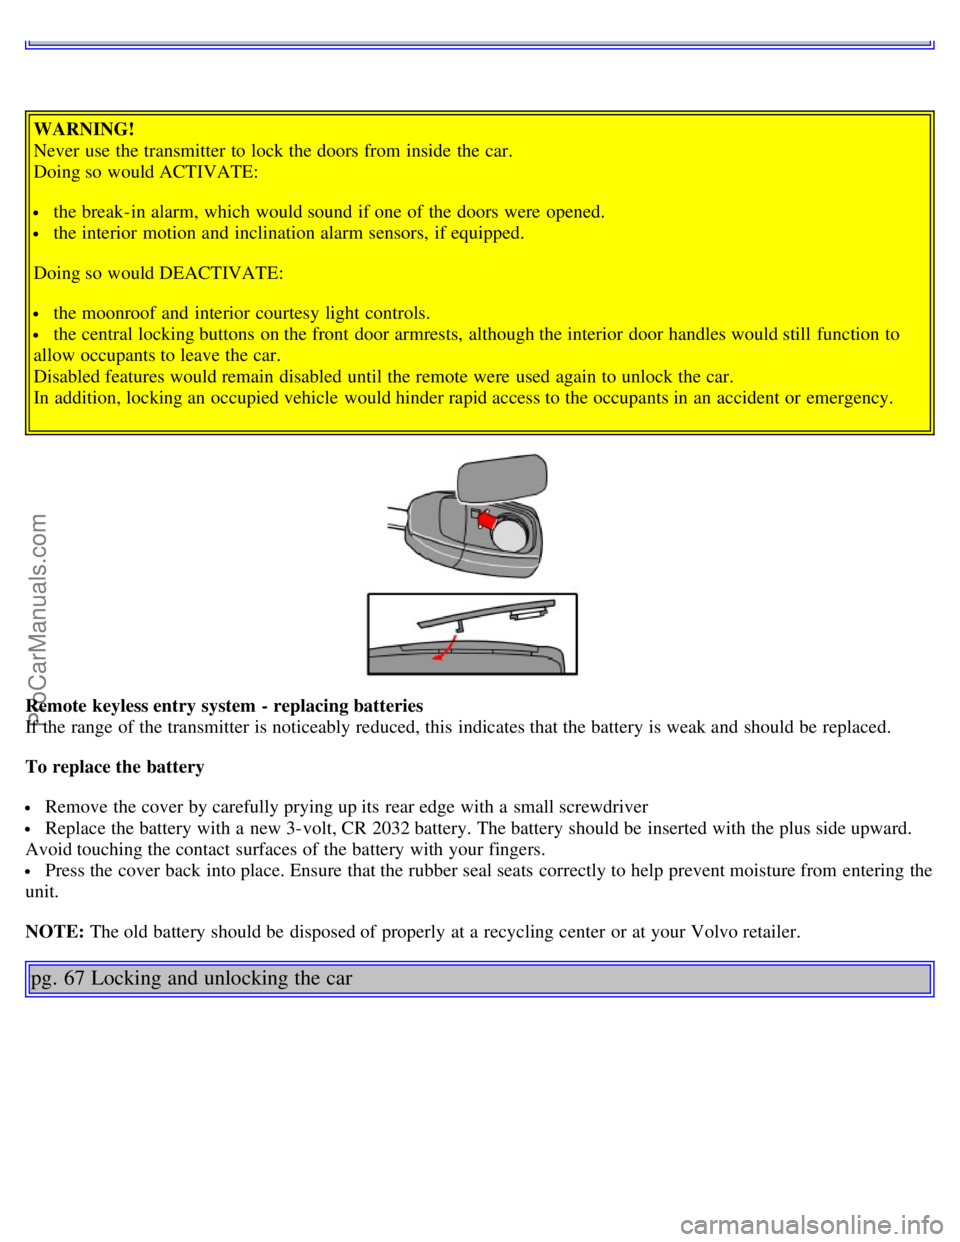
Remote keyless entry system - replacing batteries
If the range of the transmitter is noticeably reduced, this indicates that the battery is weak and should be replaced.
To replace the battery
Remove the cover by carefully prying up its rear edge with a small screwdriver
Replace the battery with a new 3-volt, CR 2032 battery. The battery should be inserted with the plus side upward.
Avoid touching the contact surfaces of the battery with your fingers.
Press the cover back into place. Ensure that the rubber seal seats correctly to help prevent moisture from entering the
unit.
NOTE: The old battery should be disposed of properly at a recycling center or at your Volvo retailer.
pg. 67 Locking and unlocking the car
ProCarManuals.com
Page 47 of 122
button again (the LED in the button will go out and VALET LOCK OFF" will be displayed in the text window).
* The position of this button may vary, depending on the specifications of your car.
pg. 69 Alarm
Alarm
The alarm is automatically armed whenever you lock your car.
When armed, the alarm continuously monitors a number of points on the car. The following conditions will set off the
alarm:
The hood is forced opened.
The trunk is forced opened.
A door is forced opened.
The ignition switch is tampered with.
If there is movement in the passenger compartment (if the car is equipped with the optional movement sensor).
The car is lifted or towed (if the car is equipped with the optional inclination sensor).
The battery is disconnected (while the alarm is armed).
Arming the alarm
Press the LOCK button on the remote control, lock the car using the key in the driver's door or press the central lock
button on one of the front doors with the door open. One long flash of the turn signals will confirm that the alarm is
armed.
Disarming the alarm
Press the UNLOCK button on the remote control or unlock the doors with the key.
Turning off (stopping) the alarm
If the alarm is sounding, it can be stopped by pressing the UNLOCK button on the remote control or by unlocking the
driver's door with the key.
Visual alarm signal
The visual alarm signal is given by flashing all turn signals and turning on the interior lighting for approximately 5
minutes.
Audible alarm signal
An audible alarm signal is given by a battery powered siren. One alarm cycle lasts for 25 seconds.
"Panic" button
In an emergency situation, this feature can be used to attract attention.
Activate the "panic" button by pressing the red button on the remote control (see illustration on page 65
) for at least 3
seconds or by pressing this button twice within 3 seconds. The turn signals will flash, and the car's horn will sound.
The function can be turned off by pressing any of the buttons on the remote control or will stop automatically
after 25 seconds. When a button is pressed, there is a 5 second delay before the panic alarm is deactivated.
NOTE: This button will NOT unlock the car.
pg. 70 Alarm
ProCarManuals.com
Page 48 of 122
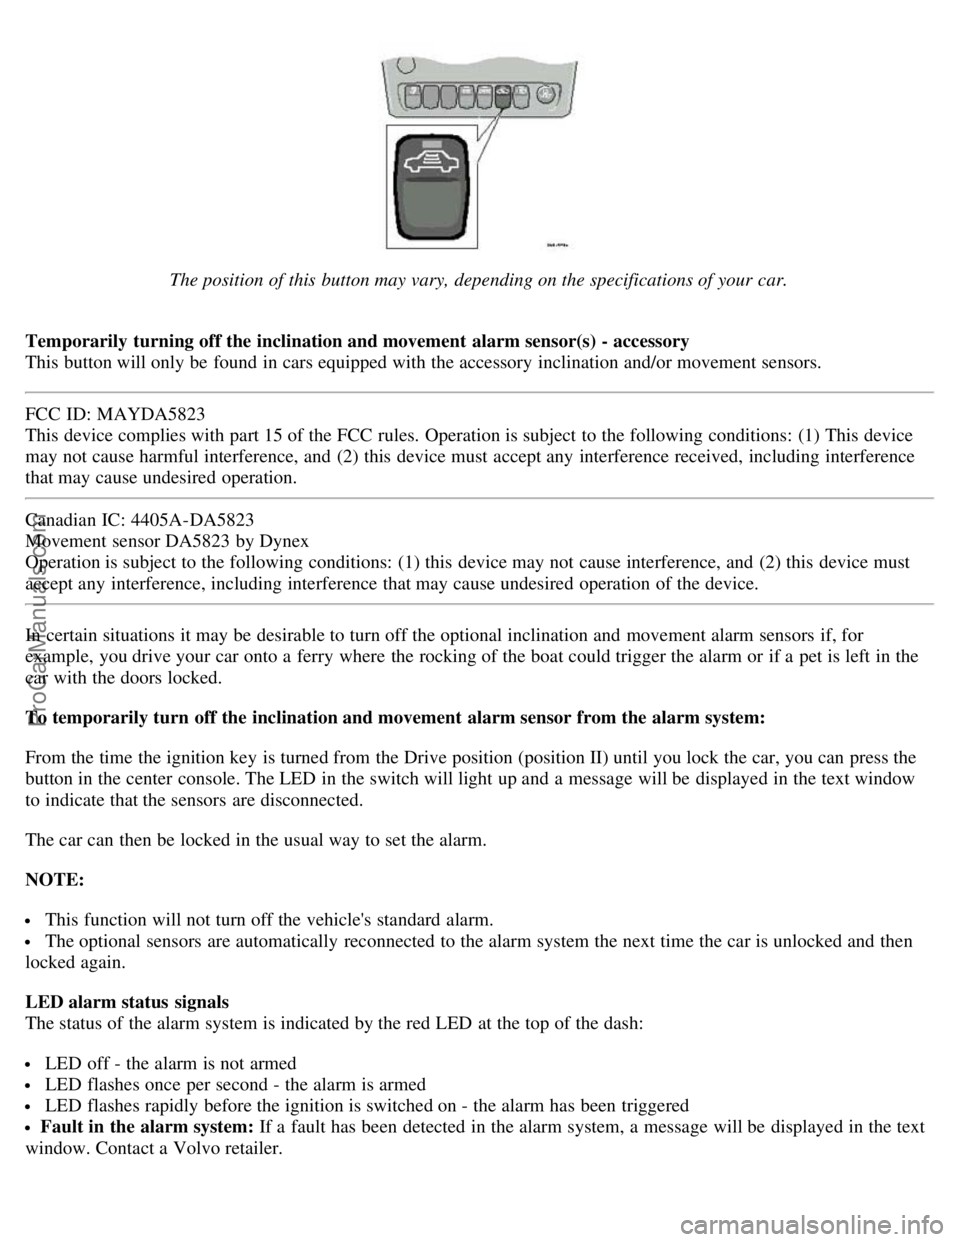
The position of this button may vary, depending on the specifications of your car.
Temporarily turning off the inclination and movement alarm sensor(s) - accessory
This button will only be found in cars equipped with the accessory inclination and/or movement sensors.
FCC ID: MAYDA5823
This device complies with part 15 of the FCC rules. Operation is subject to the following conditions: (1) This device
may not cause harmful interference, and (2) this device must accept any interference received, including interference
that may cause undesired operation.
Canadian IC: 4405A-DA5823
Movement sensor DA5823 by Dynex
Operation is subject to the following conditions: (1) this device may not cause interference, and (2) this device must
accept any interference, including interference that may cause undesired operation of the device.
In certain situations it may be desirable to turn off the optional inclination and movement alarm sensors if, for
example, you drive your car onto a ferry where the rocking of the boat could trigger the alarm or if a pet is left in the
car with the doors locked.
To temporarily turn off the inclination and movement alarm sensor from the alarm system:
From the time the ignition key is turned from the Drive position (position II) until you lock the car, you can press the
button in the center console. The LED in the switch will light up and a message will be displayed in the text window
to indicate that the sensors are disconnected.
The car can then be locked in the usual way to set the alarm.
NOTE:
This function will not turn off the vehicle's standard alarm.
The optional sensors are automatically reconnected to the alarm system the next time the car is unlocked and then
locked again.
LED alarm status signals
The status of the alarm system is indicated by the red LED at the top of the dash:
LED off - the alarm is not armed
LED flashes once per second - the alarm is armed
LED flashes rapidly before the ignition is switched on - the alarm has been triggered
Fault in the alarm system: If a fault has been detected in the alarm system, a message will be displayed in the text
window. Contact a Volvo retailer.
ProCarManuals.com
Page 51 of 122
pg. 74 Fuel requirements
Fuel requirements
Octane rating
Volvo engines are designed for optimum performance on unleaded premium gasoline with an octane rating AKI of 91,
or above. AKI (ANTI KNOCK INDEX) is an average of the Research Octane Number, RON, and the Motor Octane
Number, MON. (RON + MON/2).
The minimum octane requirement is AKI 87 (RON 91).
Deposit control gasoline (detergent additives)
Volvo recommends the use of gasoline containing deposit control additives. These additives have shown to be
effective in keeping injectors and intake valves clean. Consistent use of deposit control gasolines will help ensure good
driveability and fuel economy. If you are not sure whether the gasoline contains deposit control additives, check with
the service station operator.
Unleaded fuel
Each Volvo has a three-way catalytic converter and must use only unleaded gasoline. U.S. and Canadian regulations
require that pumps delivering unleaded gasoline be labelled "UNLEADED". Only these pumps have nozzles which fit
your car's filler inlet. It is unlawful to dispense leaded fuel into a vehicle labelled "unleaded gasoline only". Leaded
gasoline damages the three-way catalytic converter and the heated oxygen sensor system. Repeated use of leaded
gasoline will lessen the effectiveness of the emission control system and could result in loss of emission warranty
coverage. State and local vehicle inspection programs will make detection of misfueling easier, possibly resulting in
emission test failure for misfueled vehicles.
NOTE: Some U.S. and Canadian gasolines contain an octane enhancing additive called methyl-cyclopentadienyl
manganese tricarbonyl (MMT). If such fuels are used, your Emission Control System performance may be affected,
and the Check Engine light (malfunction indicator lamp) located on your instrument panel may light. If this occurs,
please return your vehicle to an authorized Volvo retailer for service.
Gasoline containing alcohol and ethers
"Oxygenated fuels"
Some fuel suppliers sell gasoline containing "oxygenates" which are usually alcohols or ethers. In some areas, state or
local laws require that the service pump be marked indicating use of alcohols or ethers. However, there are areas in
which the pumps are unmarked. If you are not sure whether there is alcohol or ethers in the gasoline you buy, check
with the service station operator. To meet seasonal air quality standards, some areas require the use of "oxygenated"
fuel.
Volvo allows the use of the following "oxygenated" fuels; however, the octane ratings listed on this page must still be
met.
Alcohol - Ethanol: Fuels containing up to 10% ethanol by volume may be used. Ethanol may also be referred to as
Ethyl alcohol, or "Gasohol".
Ethers - MTBE: Fuels containing up to 15% MTBE may be used.
CAUTION!
Do not use gasolines containing methanol (methyl alcohol, wood alcohol). This practice can result in vehicle
performance deterioration and can damage critical parts in the fuel system. Such damage may not be covered under the
New Vehicle Limited Warranty.
pg. 75 Fuel requirements
Carbon Monoxide - Important Warning
ProCarManuals.com
Page 58 of 122
If you slow down to a very low speed, the transmission will automatically shift down.
When starting in the (MAN)ual position, 3rd gear is the highest gear that may be selected.
NOTE: Kickdown (see previous page) does not function when the transmission is in the manual shift (geartronic)
mode. The gear selector must be in D (Drive) position.
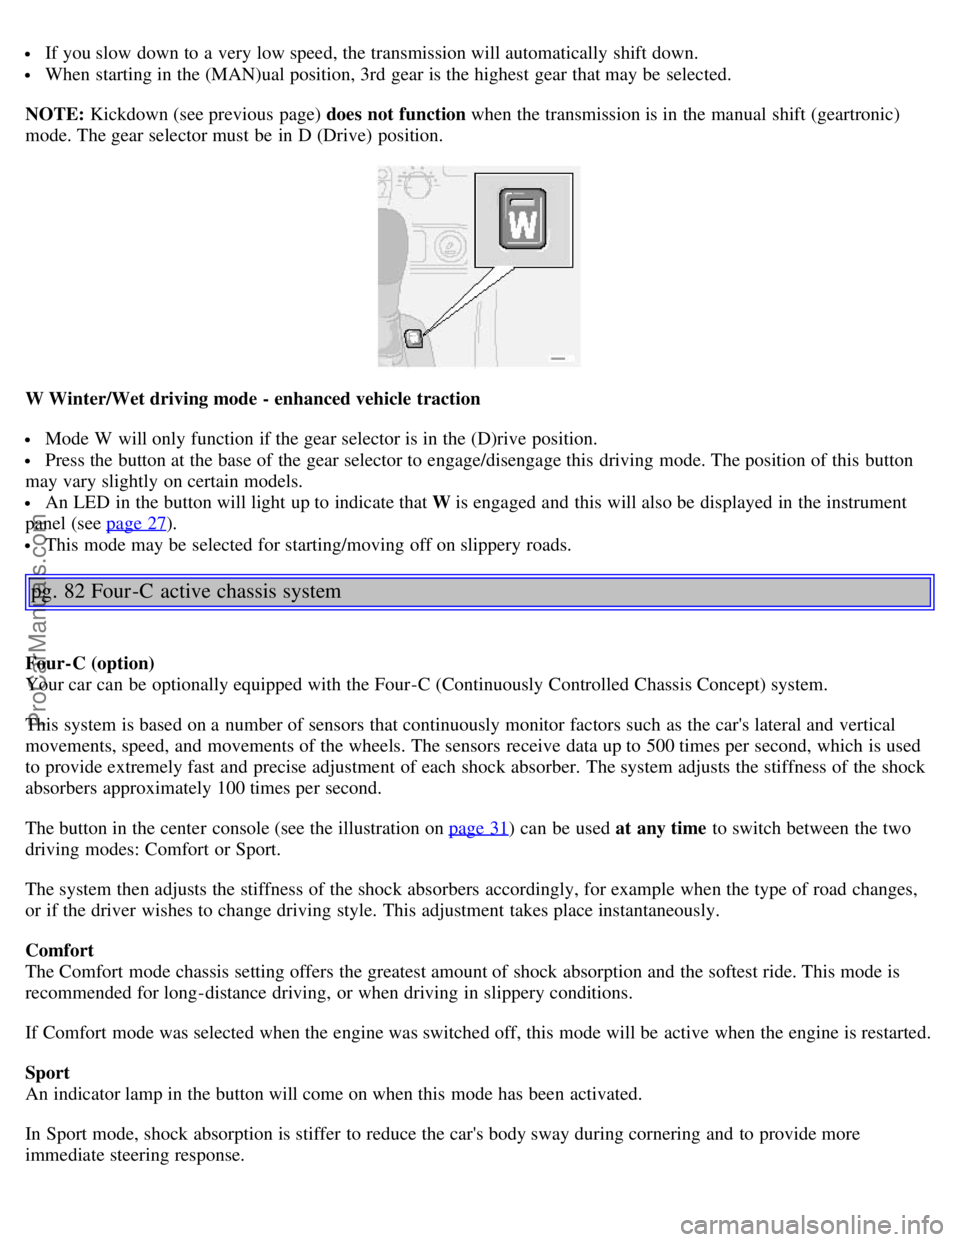
W Winter/Wet driving mode - enhanced vehicle traction
Mode W will only function if the gear selector is in the (D)rive position.
Press the button at the base of the gear selector to engage/disengage this driving mode. The position of this button
may vary slightly on certain models.
An LED in the button will light up to indicate that W is engaged and this will also be displayed in the instrument
panel (see page 27
).
This mode may be selected for starting/moving off on slippery roads.
pg. 82 Four -C active chassis system
Four-C (option)
Your car can be optionally equipped with the Four-C (Continuously Controlled Chassis Concept) system.
This system is based on a number of sensors that continuously monitor factors such as the car's lateral and vertical
movements, speed, and movements of the wheels. The sensors receive data up to 500 times per second, which is used
to provide extremely fast and precise adjustment of each shock absorber. The system adjusts the stiffness of the shock
absorbers approximately 100 times per second.
The button in the center console (see the illustration on page 31
) can be used at any time to switch between the two
driving modes: Comfort or Sport.
The system then adjusts the stiffness of the shock absorbers accordingly, for example when the type of road changes,
or if the driver wishes to change driving style. This adjustment takes place instantaneously.
Comfort
The Comfort mode chassis setting offers the greatest amount of shock absorption and the softest ride. This mode is
recommended for long-distance driving, or when driving in slippery conditions.
If Comfort mode was selected when the engine was switched off, this mode will be active when the engine is restarted.
Sport
An indicator lamp in the button will come on when this mode has been activated.
In Sport mode, shock absorption is stiffer to reduce the car's body sway during cornering and to provide more
immediate steering response.
ProCarManuals.com
Page 59 of 122
If this setting was selected when the engine was switched off, Sport mode will be active when the engine is restarted.
pg. 83 Front/rear park assist (option/accessory)
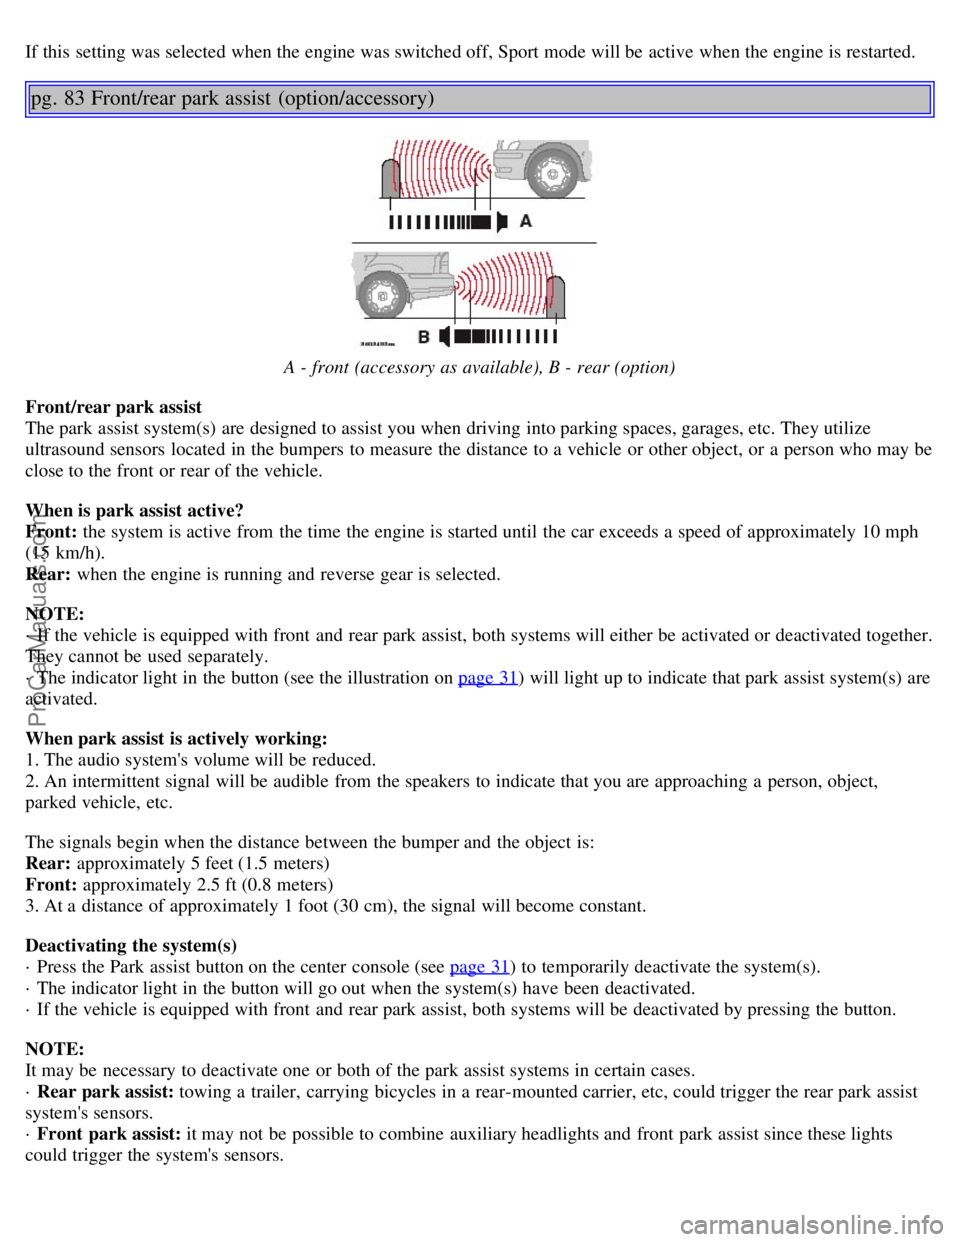
A - front (accessory as available), B - rear (option)
Front/rear park assist
The park assist system(s) are designed to assist you when driving into parking spaces, garages, etc. They utilize
ultrasound sensors located in the bumpers to measure the distance to a vehicle or other object, or a person who may be
close to the front or rear of the vehicle.
When is park assist active?
Front: the system is active from the time the engine is started until the car exceeds a speed of approximately 10 mph
(15 km/h).
Rear: when the engine is running and reverse gear is selected.
NOTE:
· If the vehicle is equipped with front and rear park assist, both systems will either be activated or deactivated together.
They cannot be used separately.
· The indicator light in the button (see the illustration on page 31
) will light up to indicate that park assist system(s) are
activated.
When park assist is actively working:
1. The audio system's volume will be reduced.
2. An intermittent signal will be audible from the speakers to indicate that you are approaching a person, object,
parked vehicle, etc.
The signals begin when the distance between the bumper and the object is:
Rear: approximately 5 feet (1.5 meters)
Front: approximately 2.5 ft (0.8 meters)
3. At a distance of approximately 1 foot (30 cm), the signal will become constant.
Deactivating the system(s)
· Press the Park assist button on the center console (see page 31
) to temporarily deactivate the system(s).
· The indicator light in the button will go out when the system(s) have been deactivated.
· If the vehicle is equipped with front and rear park assist, both systems will be deactivated by pressing the button.
NOTE:
It may be necessary to deactivate one or both of the park assist systems in certain cases.
· Rear park assist: towing a trailer, carrying bicycles in a rear-mounted carrier, etc, could trigger the rear park assist
system's sensors.
· Front park assist: it may not be possible to combine auxiliary headlights and front park assist since these lights
could trigger the system's sensors.
ProCarManuals.com