sensor VOLVO S80 2008 User Guide
[x] Cancel search | Manufacturer: VOLVO, Model Year: 2008, Model line: S80, Model: VOLVO S80 2008Pages: 275, PDF Size: 7.17 MB
Page 28 of 275
This SIPS airbag system consists of a gas generator, the side airbag modules built into
26 01 Safety
Safety in the passenger compartment
the outboard sides of both front seat backrests, and electronic sensors/wiring.
WARNING
The SIPS airbag system is a supplement to the structural Side Impact Protection System and the three-point seat
belt system. It is not designed to deploy during collisions from the front or rear of the vehicle or in rollover
situations.
The use of seat covers on the front seats may impede SIPS airbag deployment.
No objects, accessory equipment or stickers may be placed on, attached to or installed near the SIPS airbag system
or in the area affected by SIPS airbag deployment.
Never try to open or repair any components of the SIPS airbag system. This should be done only by a trained and
qualified Volvo service technician.
In order for the SIPS airbag to provide its best protection, both front seat occupants should sit in an upright
position with the seat belt properly fastened.
Failure to follow these instructions can result in injury to the occupants of the vehicle in the event of an accident.
27 01 Safety
Safety in the passenger compartment
Volvo Inflatable Curtain (VIC)
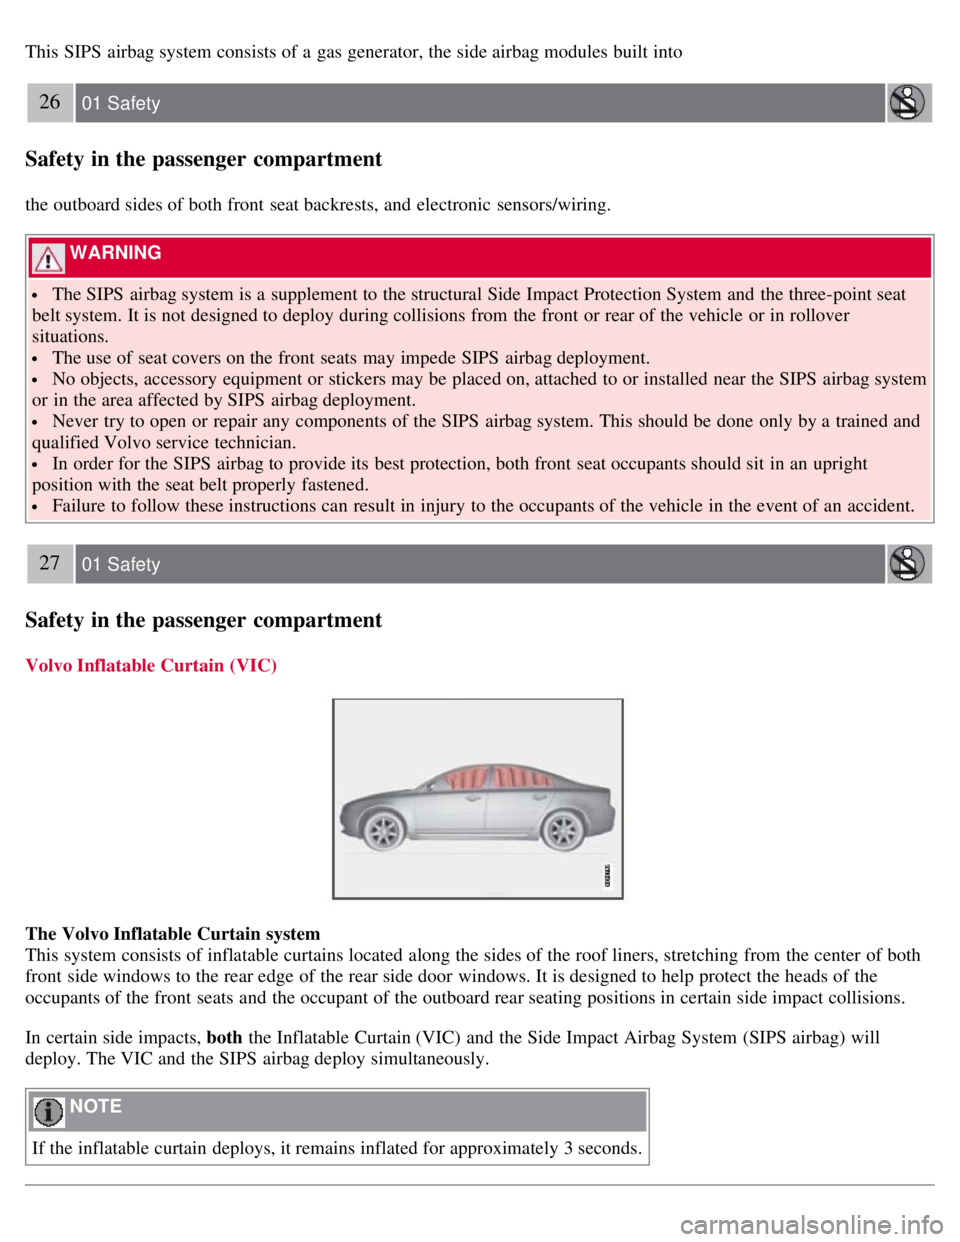
The Volvo Inflatable Curtain system
This system consists of inflatable curtains located along the sides of the roof liners, stretching from the center of both
front side windows to the rear edge of the rear side door windows. It is designed to help protect the heads of the
occupants of the front seats and the occupant of the outboard rear seating positions in certain side impact collisions.
In certain side impacts, both the Inflatable Curtain (VIC) and the Side Impact Airbag System (SIPS airbag) will
deploy. The VIC and the SIPS airbag deploy simultaneously.
NOTE
If the inflatable curtain deploys, it remains inflated for approximately 3 seconds.
Page 31 of 275
WARNING
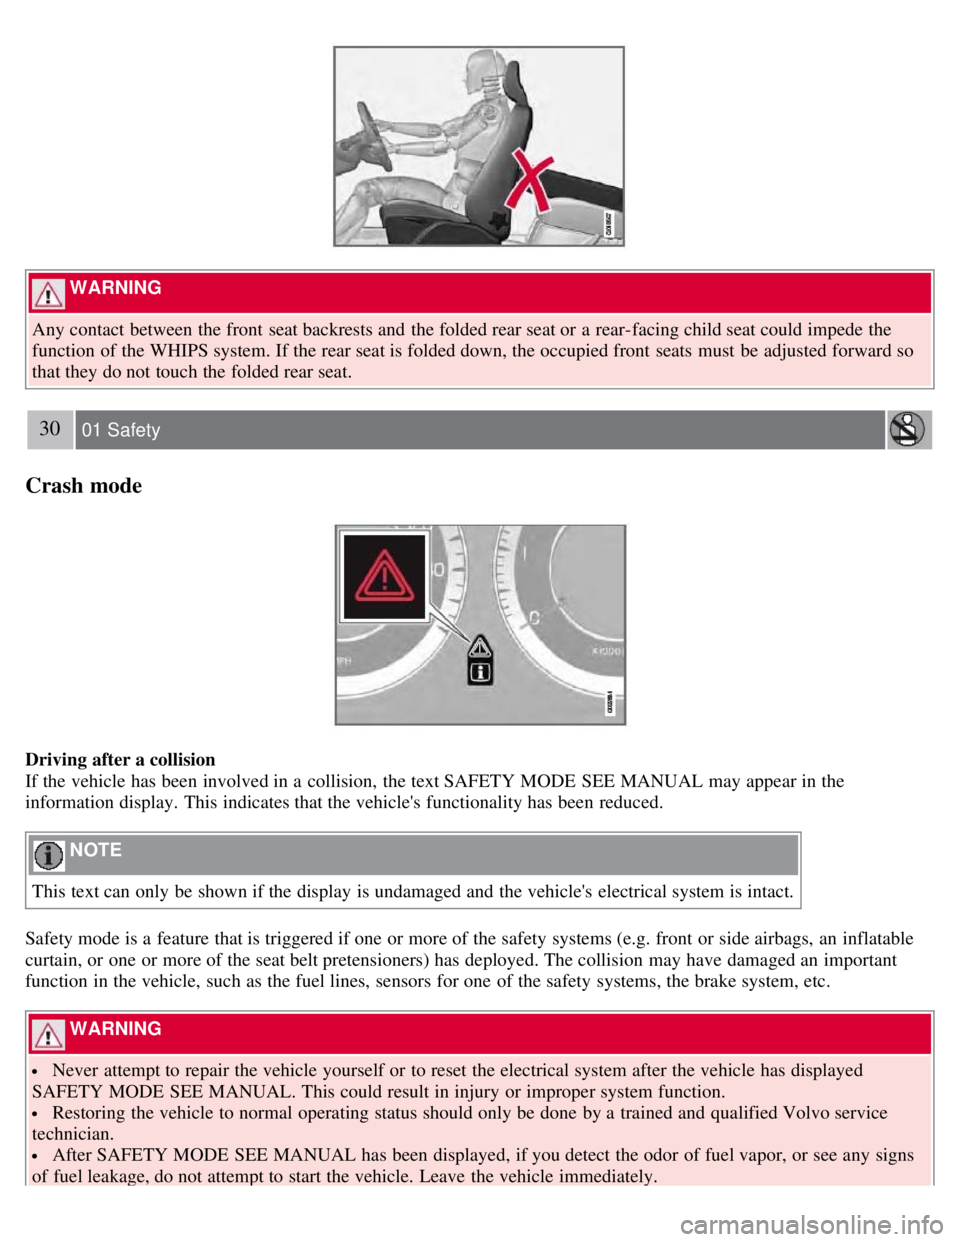
Any contact between the front seat backrests and the folded rear seat or a rear-facing child seat could impede the
function of the WHIPS system. If the rear seat is folded down, the occupied front seats must be adjusted forward so
that they do not touch the folded rear seat.
30 01 Safety
Crash mode
Driving after a collision
If the vehicle has been involved in a collision, the text SAFETY MODE SEE MANUAL may appear in the
information display. This indicates that the vehicle's functionality has been reduced.
NOTE
This text can only be shown if the display is undamaged and the vehicle's electrical system is intact.
Safety mode is a feature that is triggered if one or more of the safety systems (e.g. front or side airbags, an inflatable
curtain, or one or more of the seat belt pretensioners) has deployed. The collision may have damaged an important
function in the vehicle, such as the fuel lines, sensors for one of the safety systems, the brake system, etc.
WARNING
Never attempt to repair the vehicle yourself or to reset the electrical system after the vehicle has displayed
SAFETY MODE SEE MANUAL. This could result in injury or improper system function.
Restoring the vehicle to normal operating status should only be done by a trained and qualified Volvo service
technician.
After SAFETY MODE SEE MANUAL has been displayed, if you detect the odor of fuel vapor, or see any signs
of fuel leakage, do not attempt to start the vehicle. Leave the vehicle immediately.
Page 35 of 275
WARNING
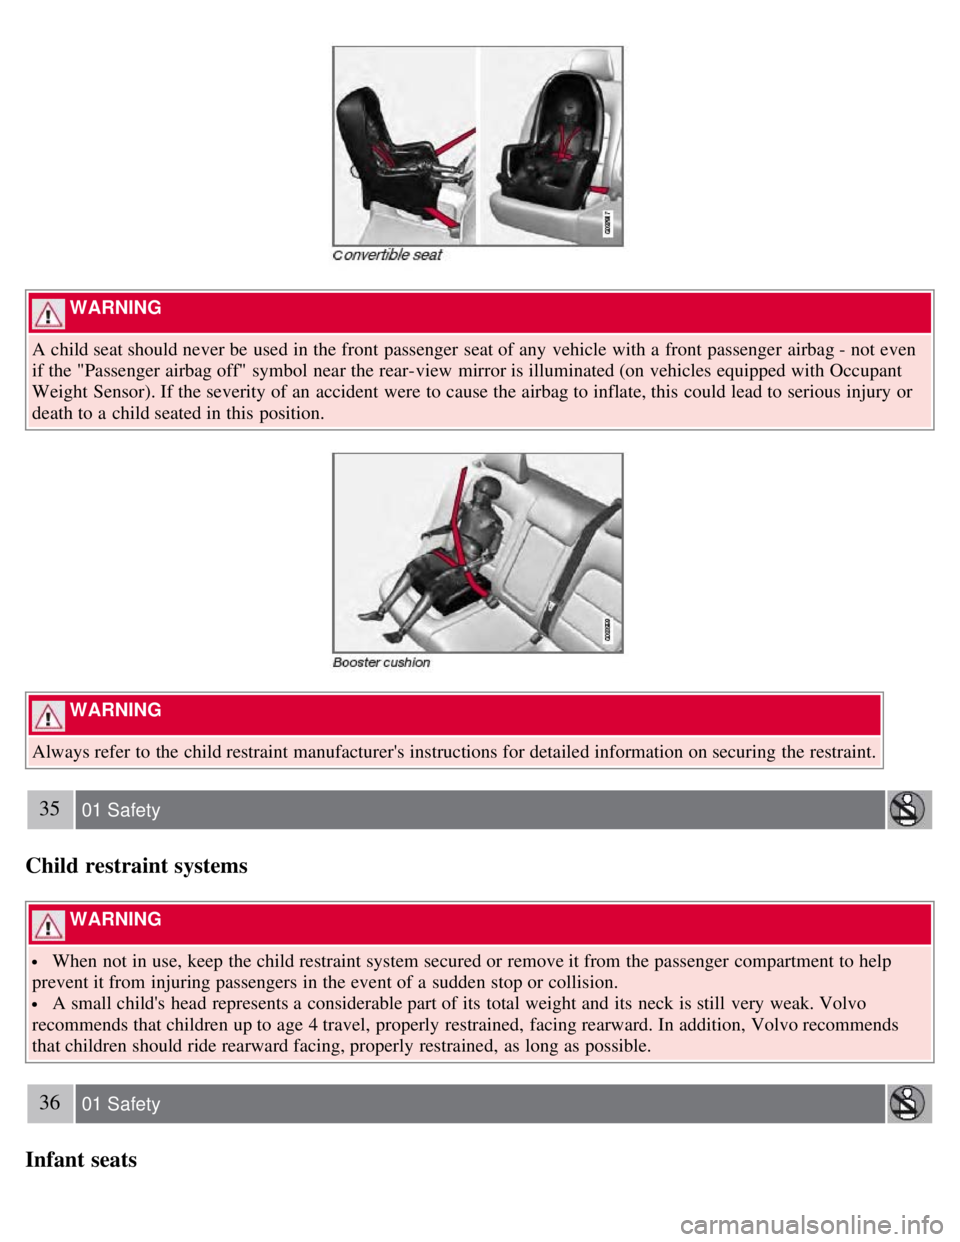
A child seat should never be used in the front passenger seat of any vehicle with a front passenger airbag - not even
if the "Passenger airbag off" symbol near the rear-view mirror is illuminated (on vehicles equipped with Occupant
Weight Sensor). If the severity of an accident were to cause the airbag to inflate, this could lead to serious injury or
death to a child seated in this position.
WARNING
Always refer to the child restraint manufacturer's instructions for detailed information on securing the restraint.
35 01 Safety
Child restraint systems
WARNING
When not in use, keep the child restraint system secured or remove it from the passenger compartment to help
prevent it from injuring passengers in the event of a sudden stop or collision.
A small child's head represents a considerable part of its total weight and its neck is still very weak. Volvo
recommends that children up to age 4 travel, properly restrained, facing rearward. In addition, Volvo recommends
that children should ride rearward facing, properly restrained, as long as possible.
36 01 Safety
Infant seats
Page 37 of 275
WARNING
A child seat should never be used in the front passenger seat of any vehicle with a front passenger airbag - not even
if the "Passenger airbag off" symbol near the rear-view mirror is illuminated (on vehicles equipped with Occupant
Weight Sensor). If the severity of an accident were to cause the airbag to inflate, this could lead to serious injury or
death to a child seated in this position.
37 01 Safety
Infant seats
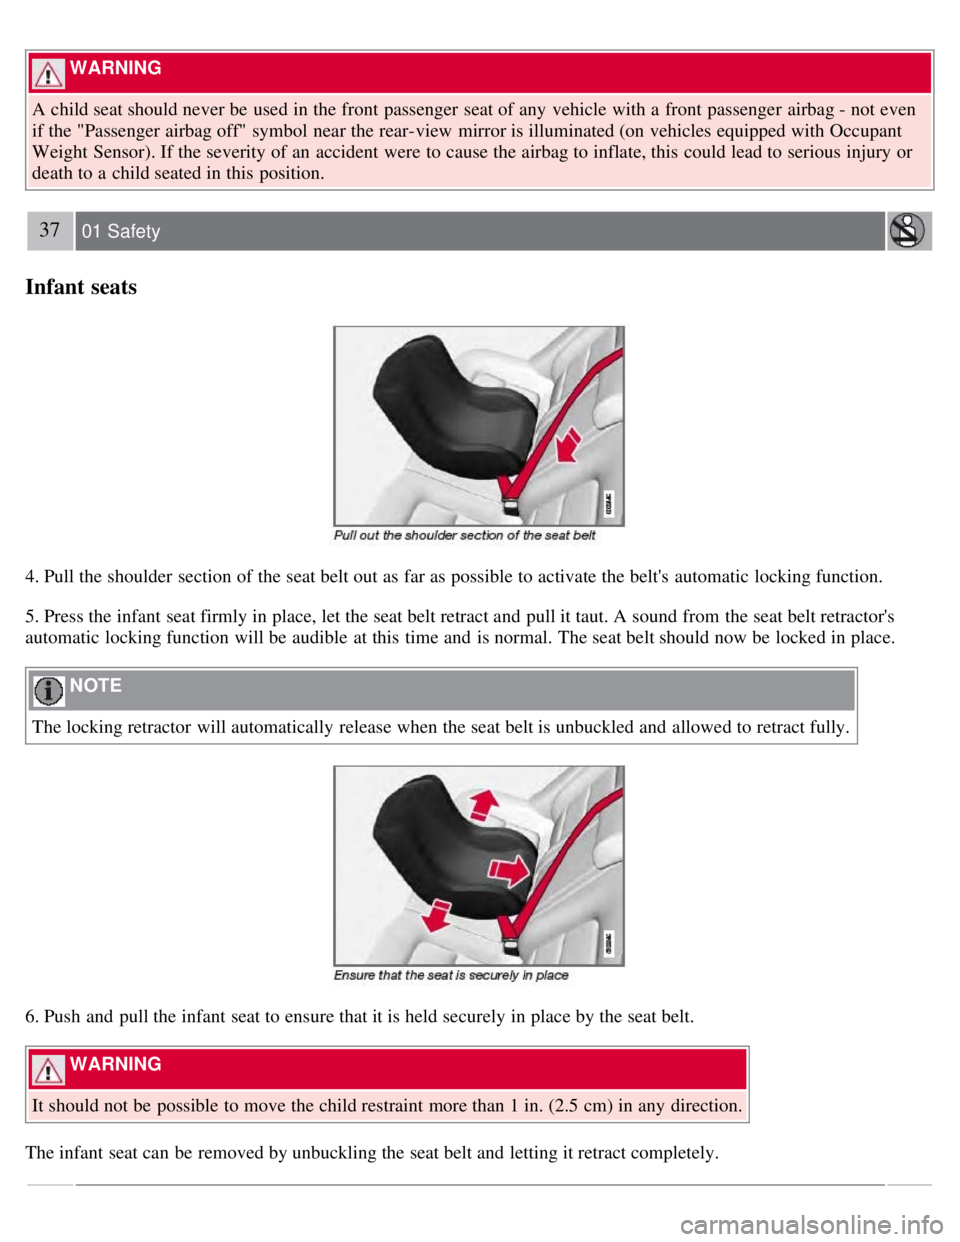
4. Pull the shoulder section of the seat belt out as far as possible to activate the belt's automatic locking function.
5. Press the infant seat firmly in place, let the seat belt retract and pull it taut. A sound from the seat belt retractor's
automatic locking function will be audible at this time and is normal. The seat belt should now be locked in place.
NOTE
The locking retractor will automatically release when the seat belt is unbuckled and allowed to retract fully.
6. Push and pull the infant seat to ensure that it is held securely in place by the seat belt.
WARNING
It should not be possible to move the child restraint more than 1 in. (2.5 cm) in any direction.
The infant seat can be removed by unbuckling the seat belt and letting it retract completely.
Page 40 of 275
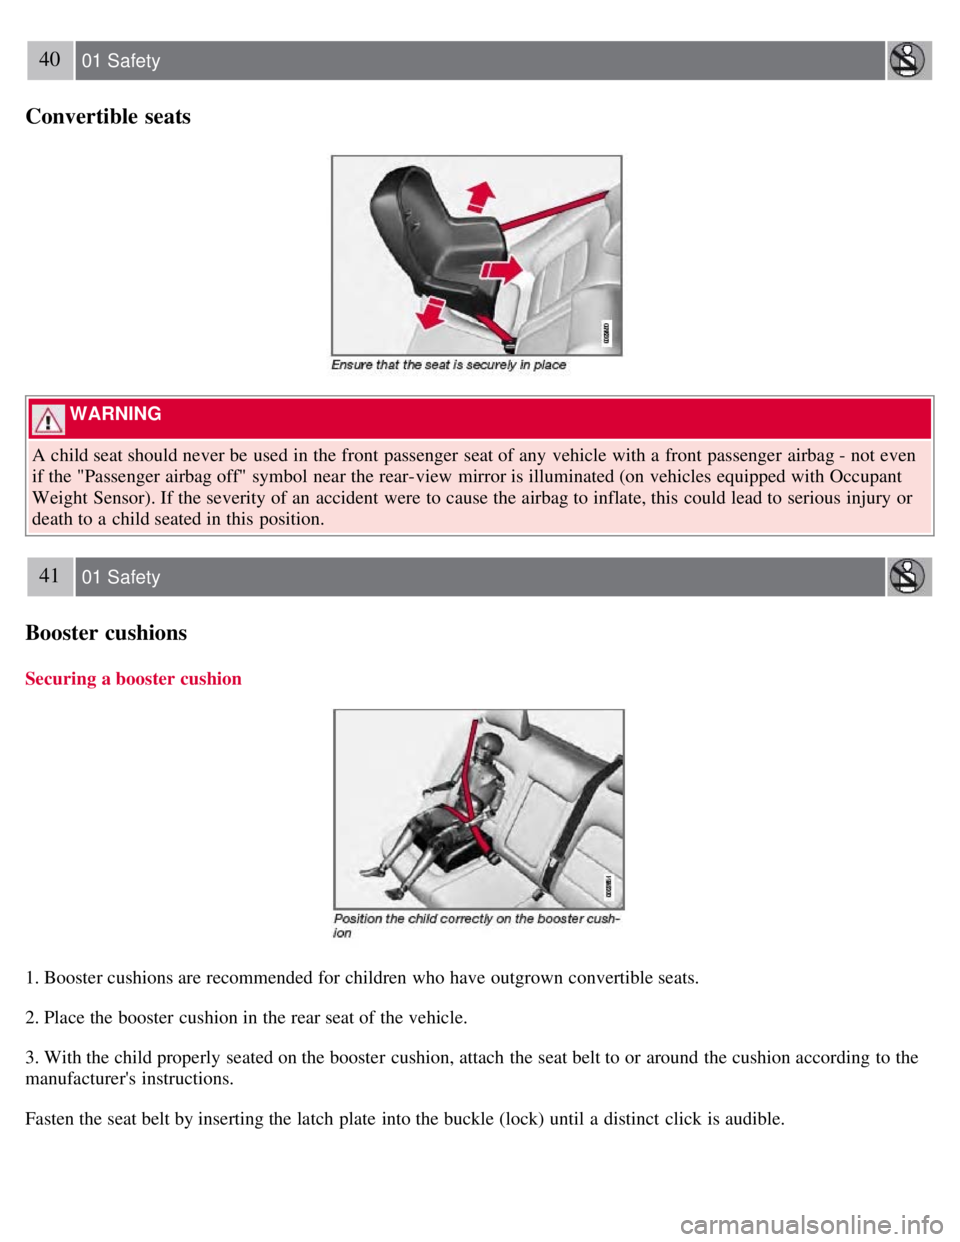
40 01 Safety
Convertible seats
WARNING
A child seat should never be used in the front passenger seat of any vehicle with a front passenger airbag - not even
if the "Passenger airbag off" symbol near the rear-view mirror is illuminated (on vehicles equipped with Occupant
Weight Sensor). If the severity of an accident were to cause the airbag to inflate, this could lead to serious injury or
death to a child seated in this position.
41 01 Safety
Booster cushions
Securing a booster cushion
1. Booster cushions are recommended for children who have outgrown convertible seats.
2. Place the booster cushion in the rear seat of the vehicle.
3. With the child properly seated on the booster cushion, attach the seat belt to or around the cushion according to the
manufacturer's instructions.
Fasten the seat belt by inserting the latch plate into the buckle (lock) until a distinct click is audible.
Page 52 of 275
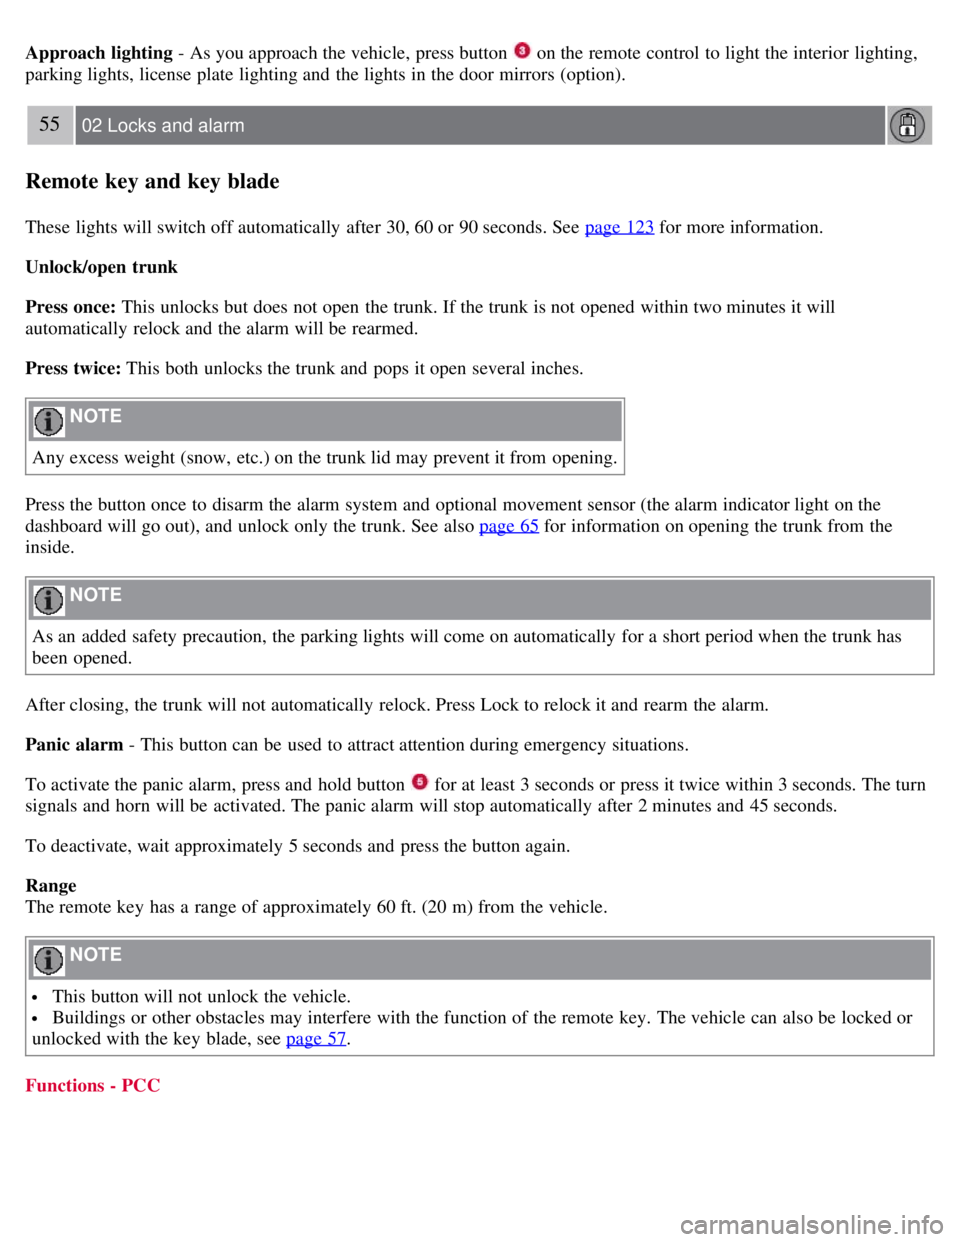
Approach lighting - As you approach the vehicle, press button on the remote control to light the interior lighting,
parking lights, license plate lighting and the lights in the door mirrors (option).
55 02 Locks and alarm
Remote key and key blade
These lights will switch off automatically after 30, 60 or 90 seconds. See page 123 for more information.
Unlock/open trunk
Press once: This unlocks but does not open the trunk. If the trunk is not opened within two minutes it will
automatically relock and the alarm will be rearmed.
Press twice: This both unlocks the trunk and pops it open several inches.
NOTE
Any excess weight (snow, etc.) on the trunk lid may prevent it from opening.
Press the button once to disarm the alarm system and optional movement sensor (the alarm indicator light on the
dashboard will go out), and unlock only the trunk. See also page 65
for information on opening the trunk from the
inside.
NOTE
As an added safety precaution, the parking lights will come on automatically for a short period when the trunk has
been opened.
After closing, the trunk will not automatically relock. Press Lock to relock it and rearm the alarm.
Panic alarm - This button can be used to attract attention during emergency situations.
To activate the panic alarm, press and hold button
for at least 3 seconds or press it twice within 3 seconds. The turn
signals and horn will be activated. The panic alarm will stop automatically after 2 minutes and 45 seconds.
To deactivate, wait approximately 5 seconds and press the button again.
Range
The remote key has a range of approximately 60 ft. (20 m) from the vehicle.
NOTE
This button will not unlock the vehicle.
Buildings or other obstacles may interfere with the function of the remote key. The vehicle can also be locked or
unlocked with the key blade, see page 57
.
Functions - PCC
Page 54 of 275
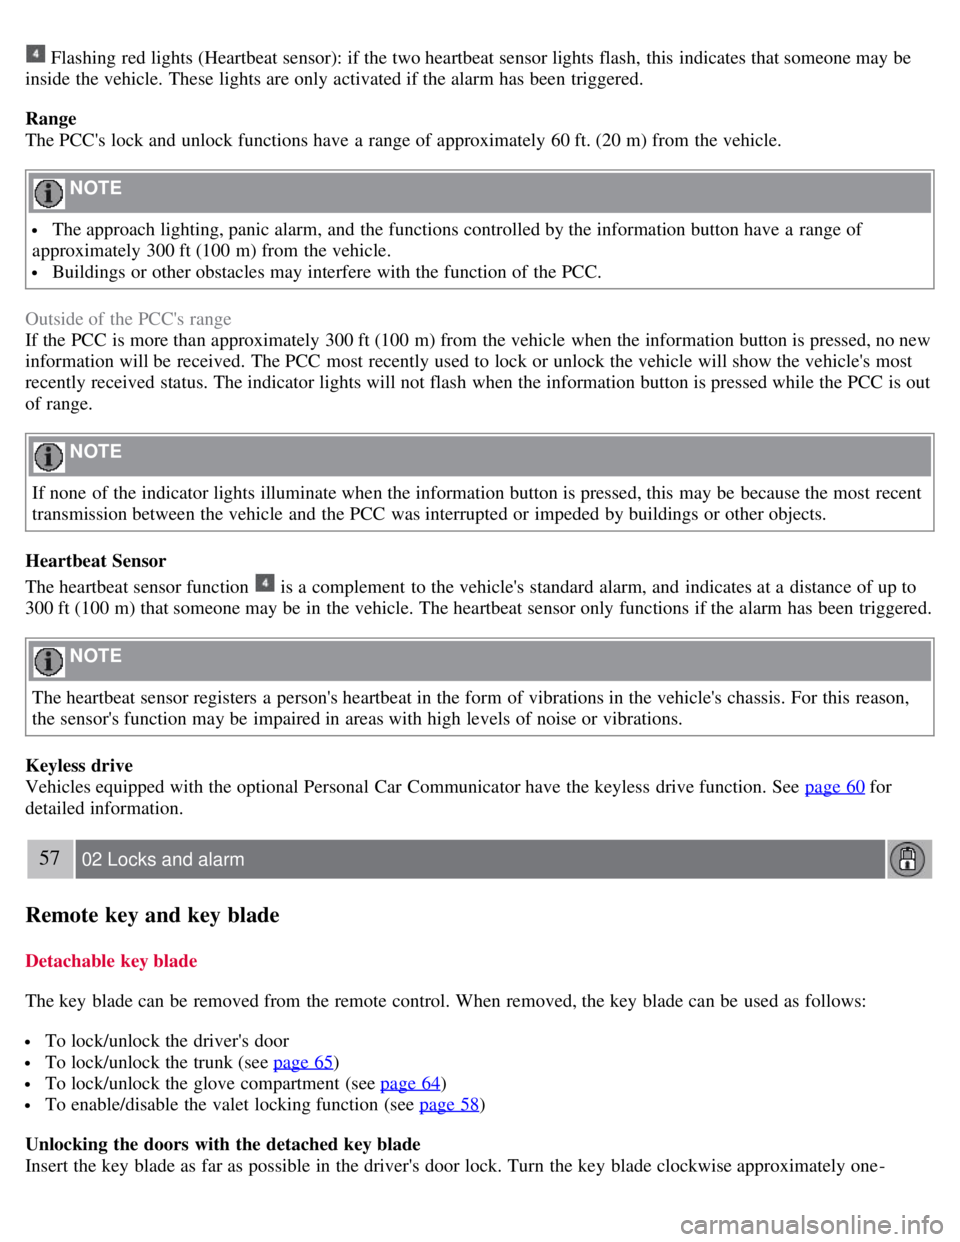
Flashing red lights (Heartbeat sensor): if the two heartbeat sensor lights flash, this indicates that someone may be
inside the vehicle. These lights are only activated if the alarm has been triggered.
Range
The PCC's lock and unlock functions have a range of approximately 60 ft. (20 m) from the vehicle.
NOTE
The approach lighting, panic alarm, and the functions controlled by the information button have a range of
approximately 300 ft (100 m) from the vehicle.
Buildings or other obstacles may interfere with the function of the PCC.
Outside of the PCC's range
If the PCC is more than approximately 300 ft (100 m) from the vehicle when the information button is pressed, no new
information will be received. The PCC most recently used to lock or unlock the vehicle will show the vehicle's most
recently received status. The indicator lights will not flash when the information button is pressed while the PCC is out
of range.
NOTE
If none of the indicator lights illuminate when the information button is pressed, this may be because the most recent
transmission between the vehicle and the PCC was interrupted or impeded by buildings or other objects.
Heartbeat Sensor
The heartbeat sensor function
is a complement to the vehicle's standard alarm, and indicates at a distance of up to
300 ft (100 m) that someone may be in the vehicle. The heartbeat sensor only functions if the alarm has been triggered.
NOTE
The heartbeat sensor registers a person's heartbeat in the form of vibrations in the vehicle's chassis. For this reason,
the sensor's function may be impaired in areas with high levels of noise or vibrations.
Keyless drive
Vehicles equipped with the optional Personal Car Communicator have the keyless drive function. See page 60
for
detailed information.
57 02 Locks and alarm
Remote key and key blade
Detachable key blade
The key blade can be removed from the remote control. When removed, the key blade can be used as follows:
To lock/unlock the driver's door
To lock/unlock the trunk (see page 65)
To lock/unlock the glove compartment (see page 64)
To enable/disable the valet locking function (see page 58)
Unlocking the doors with the detached key blade
Insert the key blade as far as possible in the driver's door lock. Turn the key blade clockwise approximately one -
Page 63 of 275
Lock the glove compartment by turning the key a quarter of a turn (90°) clockwise. The key slot is horizontal when
the glove compartment is locked.
Locking/unlocking the trunk
Unlocking and opening the trunk with the remote key
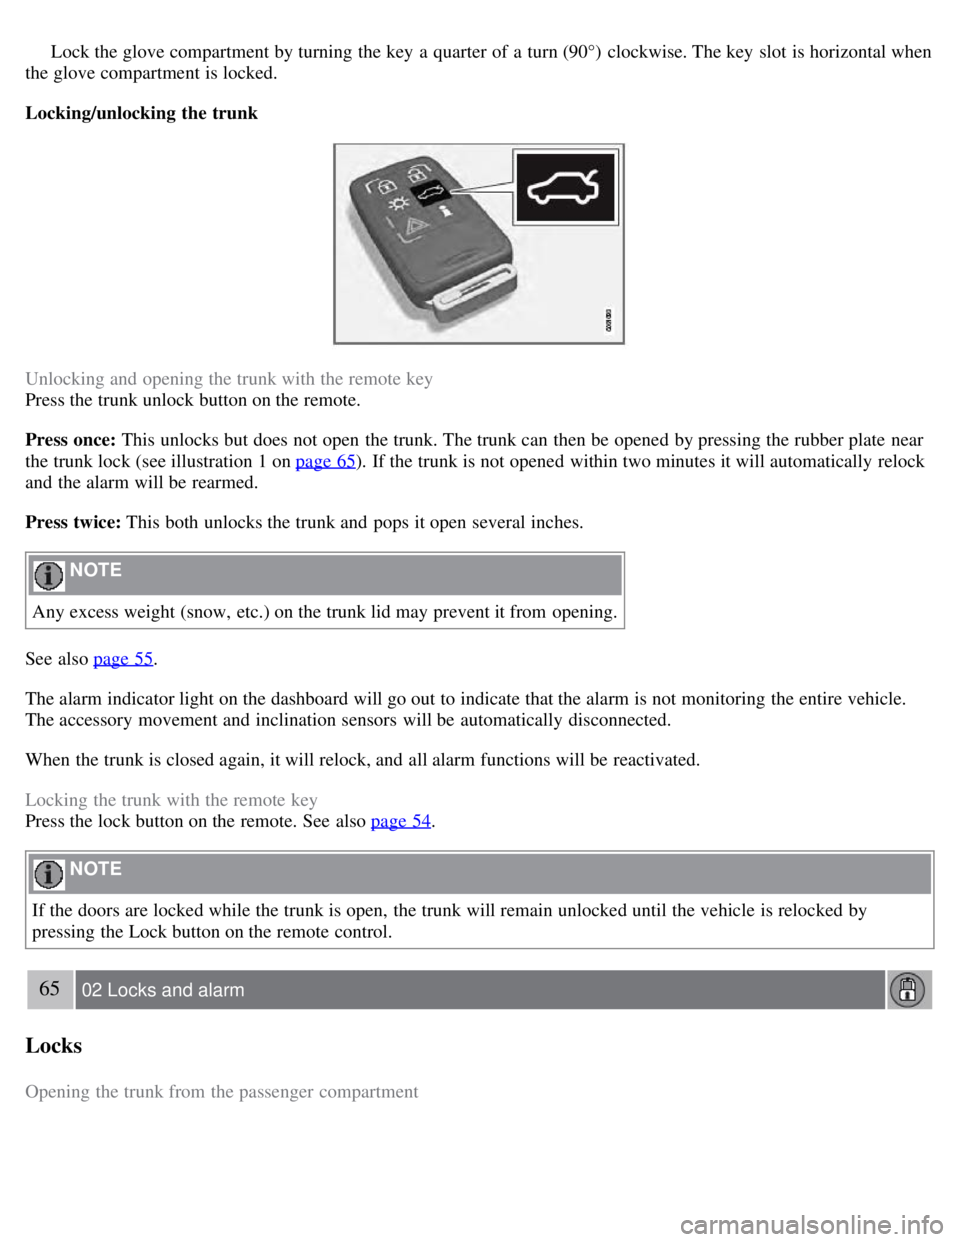
Press the trunk unlock button on the remote.
Press once: This unlocks but does not open the trunk. The trunk can then be opened by pressing the rubber plate near
the trunk lock (see illustration 1 on page 65
). If the trunk is not opened within two minutes it will automatically relock
and the alarm will be rearmed.
Press twice: This both unlocks the trunk and pops it open several inches.
NOTE
Any excess weight (snow, etc.) on the trunk lid may prevent it from opening.
See also page 55
.
The alarm indicator light on the dashboard will go out to indicate that the alarm is not monitoring the entire vehicle.
The accessory movement and inclination sensors will be automatically disconnected.
When the trunk is closed again, it will relock, and all alarm functions will be reactivated.
Locking the trunk with the remote key
Press the lock button on the remote. See also page 54
.
NOTE
If the doors are locked while the trunk is open, the trunk will remain unlocked until the vehicle is relocked by
pressing the Lock button on the remote control.
65 02 Locks and alarm
Locks
Opening the trunk from the passenger compartment
Page 65 of 275
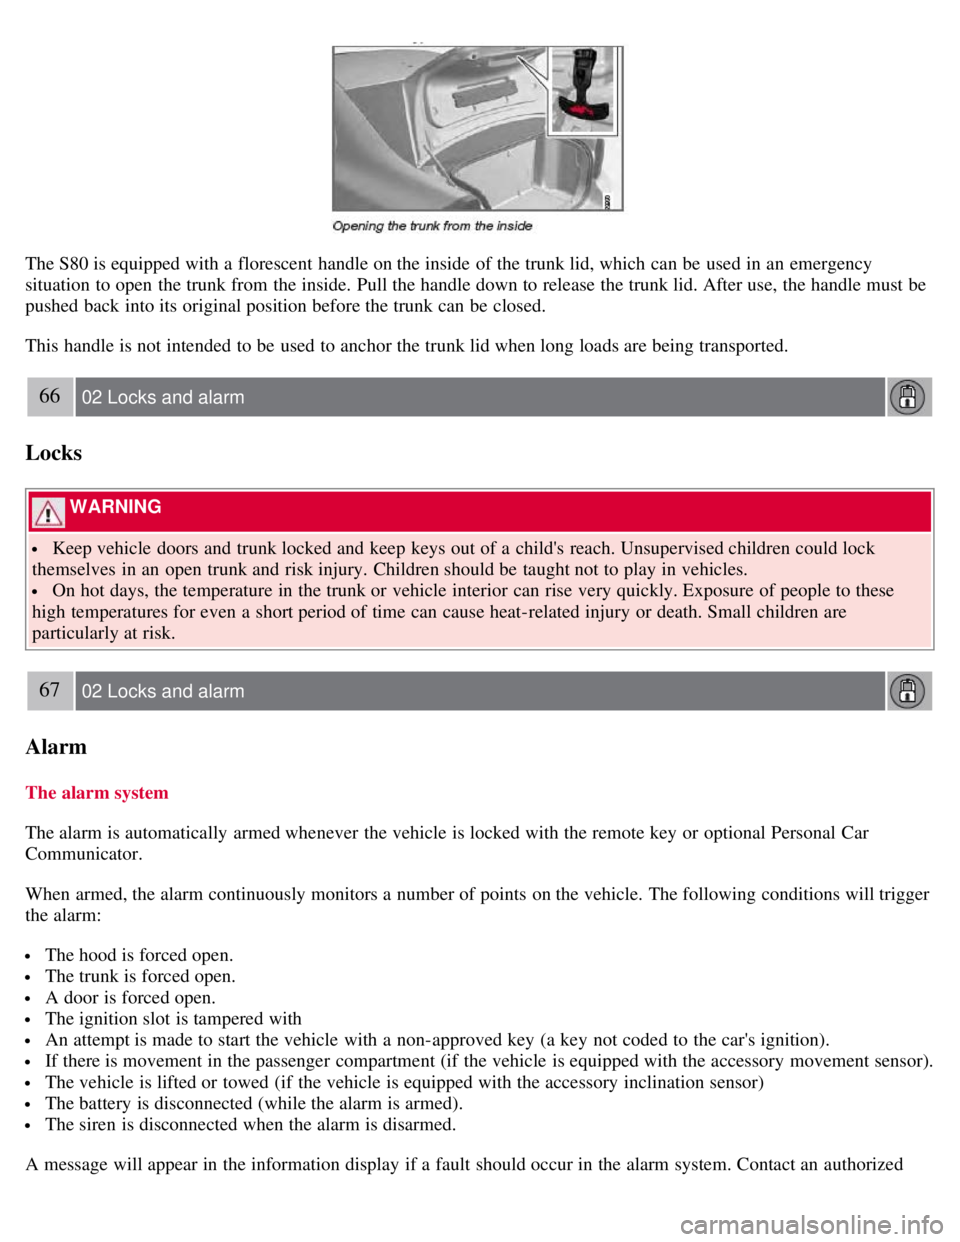
The S80 is equipped with a florescent handle on the inside of the trunk lid, which can be used in an emergency
situation to open the trunk from the inside. Pull the handle down to release the trunk lid. After use, the handle must be
pushed back into its original position before the trunk can be closed.
This handle is not intended to be used to anchor the trunk lid when long loads are being transported.
66 02 Locks and alarm
Locks
WARNING
Keep vehicle doors and trunk locked and keep keys out of a child's reach. Unsupervised children could lock
themselves in an open trunk and risk injury. Children should be taught not to play in vehicles.
On hot days, the temperature in the trunk or vehicle interior can rise very quickly. Exposure of people to these
high temperatures for even a short period of time can cause heat-related injury or death. Small children are
particularly at risk.
67 02 Locks and alarm
Alarm
The alarm system
The alarm is automatically armed whenever the vehicle is locked with the remote key or optional Personal Car
Communicator.
When armed, the alarm continuously monitors a number of points on the vehicle. The following conditions will trigger
the alarm:
The hood is forced open.
The trunk is forced open.
A door is forced open.
The ignition slot is tampered with
An attempt is made to start the vehicle with a non-approved key (a key not coded to the car's ignition).
If there is movement in the passenger compartment (if the vehicle is equipped with the accessory movement sensor).
The vehicle is lifted or towed (if the vehicle is equipped with the accessory inclination sensor)
The battery is disconnected (while the alarm is armed).
The siren is disconnected when the alarm is disarmed.
A message will appear in the information display if a fault should occur in the alarm system. Contact an authorized
Page 66 of 275

Volvo service technician.
NOTE
Do not attempt to repair any of the components in the alarm system yourself. This could affect the insurance policy
on the vehicle.
The alarm indicator light
The status of the alarm system is indicated by the indicator light on the dashboard (see illustration):
Indicator light off - the alarm is not armed
The indicator light flashes at one -second intervals - the alarm is armed
The indicator light flashes rapidly before the remote key is inserted in the ignition slot - the alarm has been
triggered.
Arming the alarm
Press the Lock button on the remote key. One long flash of the turn signals will confirm that the alarm is armed.
Alarm confirmation settings can be changed under Car settings
Lock settings Keyless entry . See page 123 for a
description of the menu system.
USA FCC ID: MAYDA 5823(3)
This device complies with part 15 of the FCC rules. Operation is subject to the following conditions: (1) This device
may not cause harmful interference, and (2) this device must accept any interference received, including interference
that may cause undesired operation.
Canada IC: 4405A-DA 5823(3)
Movement sensor DA5823 by Dynex Operation is subject to the following conditions: (1) this device may not cause
interference, and (2) this device must accept any interference, including interference that may cause undesired
operation of the device.
68 02 Locks and alarm
Alarm
Disarming the alarm