dashboard VOLVO S80 2008 Owners Manual
[x] Cancel search | Manufacturer: VOLVO, Model Year: 2008, Model line: S80, Model: VOLVO S80 2008Pages: 275, PDF Size: 7.17 MB
Page 23 of 275
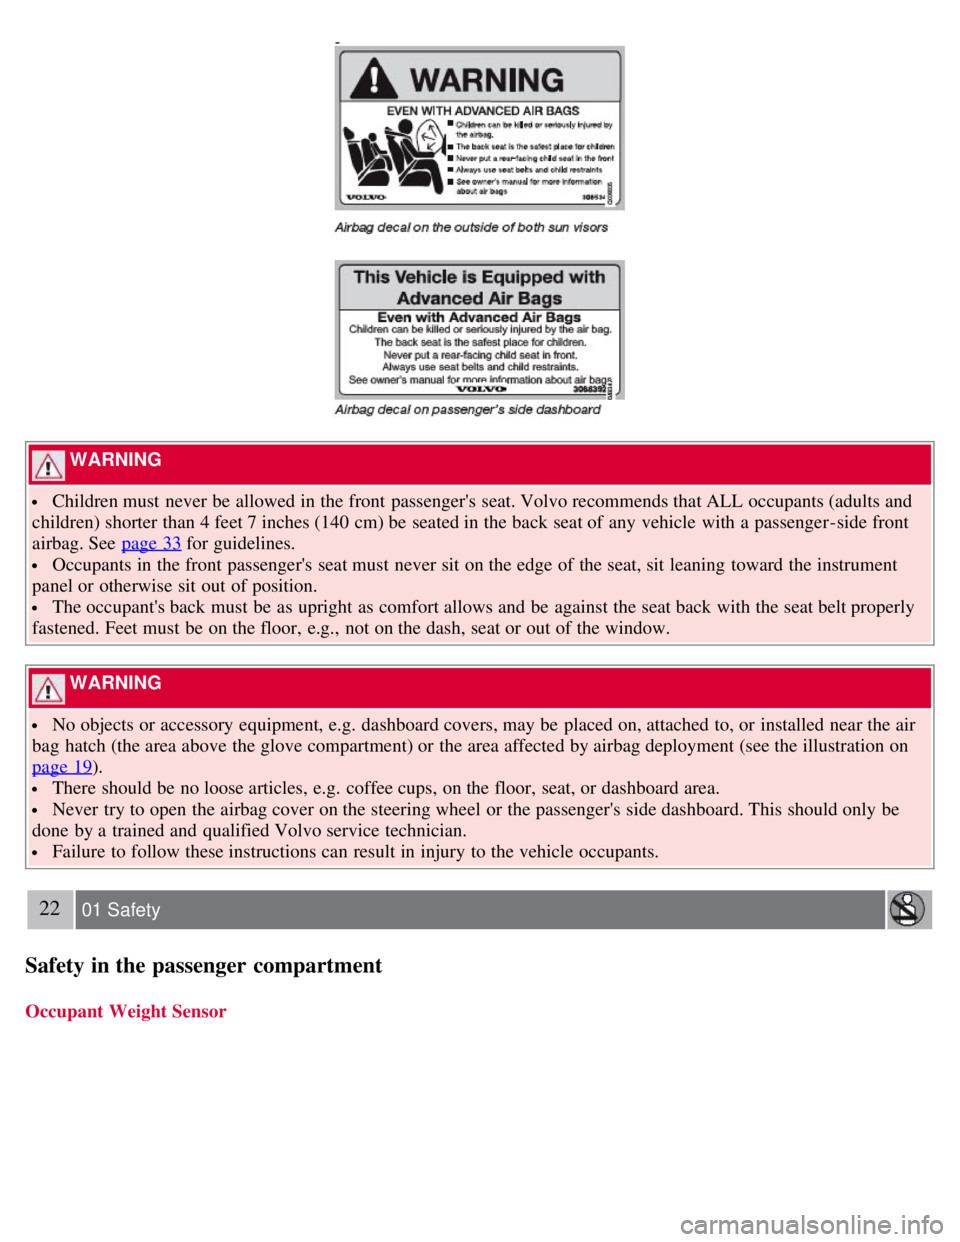
WARNING
Children must never be allowed in the front passenger's seat. Volvo recommends that ALL occupants (adults and
children) shorter than 4 feet 7 inches (140 cm) be seated in the back seat of any vehicle with a passenger -side front
airbag. See page 33
for guidelines.
Occupants in the front passenger's seat must never sit on the edge of the seat, sit leaning toward the instrument
panel or otherwise sit out of position.
The occupant's back must be as upright as comfort allows and be against the seat back with the seat belt properly
fastened. Feet must be on the floor, e.g., not on the dash, seat or out of the window.
WARNING
No objects or accessory equipment, e.g. dashboard covers, may be placed on, attached to, or installed near the air
bag hatch (the area above the glove compartment) or the area affected by airbag deployment (see the illustration on
page 19
).
There should be no loose articles, e.g. coffee cups, on the floor, seat, or dashboard area.
Never try to open the airbag cover on the steering wheel or the passenger's side dashboard. This should only be
done by a trained and qualified Volvo service technician.
Failure to follow these instructions can result in injury to the vehicle occupants.
22 01 Safety
Safety in the passenger compartment
Occupant Weight Sensor
Page 52 of 275
Approach lighting - As you approach the vehicle, press button on the remote control to light the interior lighting,
parking lights, license plate lighting and the lights in the door mirrors (option).
55 02 Locks and alarm
Remote key and key blade
These lights will switch off automatically after 30, 60 or 90 seconds. See page 123 for more information.
Unlock/open trunk
Press once: This unlocks but does not open the trunk. If the trunk is not opened within two minutes it will
automatically relock and the alarm will be rearmed.
Press twice: This both unlocks the trunk and pops it open several inches.
NOTE
Any excess weight (snow, etc.) on the trunk lid may prevent it from opening.
Press the button once to disarm the alarm system and optional movement sensor (the alarm indicator light on the
dashboard will go out), and unlock only the trunk. See also page 65
for information on opening the trunk from the
inside.
NOTE
As an added safety precaution, the parking lights will come on automatically for a short period when the trunk has
been opened.
After closing, the trunk will not automatically relock. Press Lock to relock it and rearm the alarm.
Panic alarm - This button can be used to attract attention during emergency situations.
To activate the panic alarm, press and hold button
for at least 3 seconds or press it twice within 3 seconds. The turn
signals and horn will be activated. The panic alarm will stop automatically after 2 minutes and 45 seconds.
To deactivate, wait approximately 5 seconds and press the button again.
Range
The remote key has a range of approximately 60 ft. (20 m) from the vehicle.
NOTE
This button will not unlock the vehicle.
Buildings or other obstacles may interfere with the function of the remote key. The vehicle can also be locked or
unlocked with the key blade, see page 57
.
Functions - PCC
Page 63 of 275
Lock the glove compartment by turning the key a quarter of a turn (90°) clockwise. The key slot is horizontal when
the glove compartment is locked.
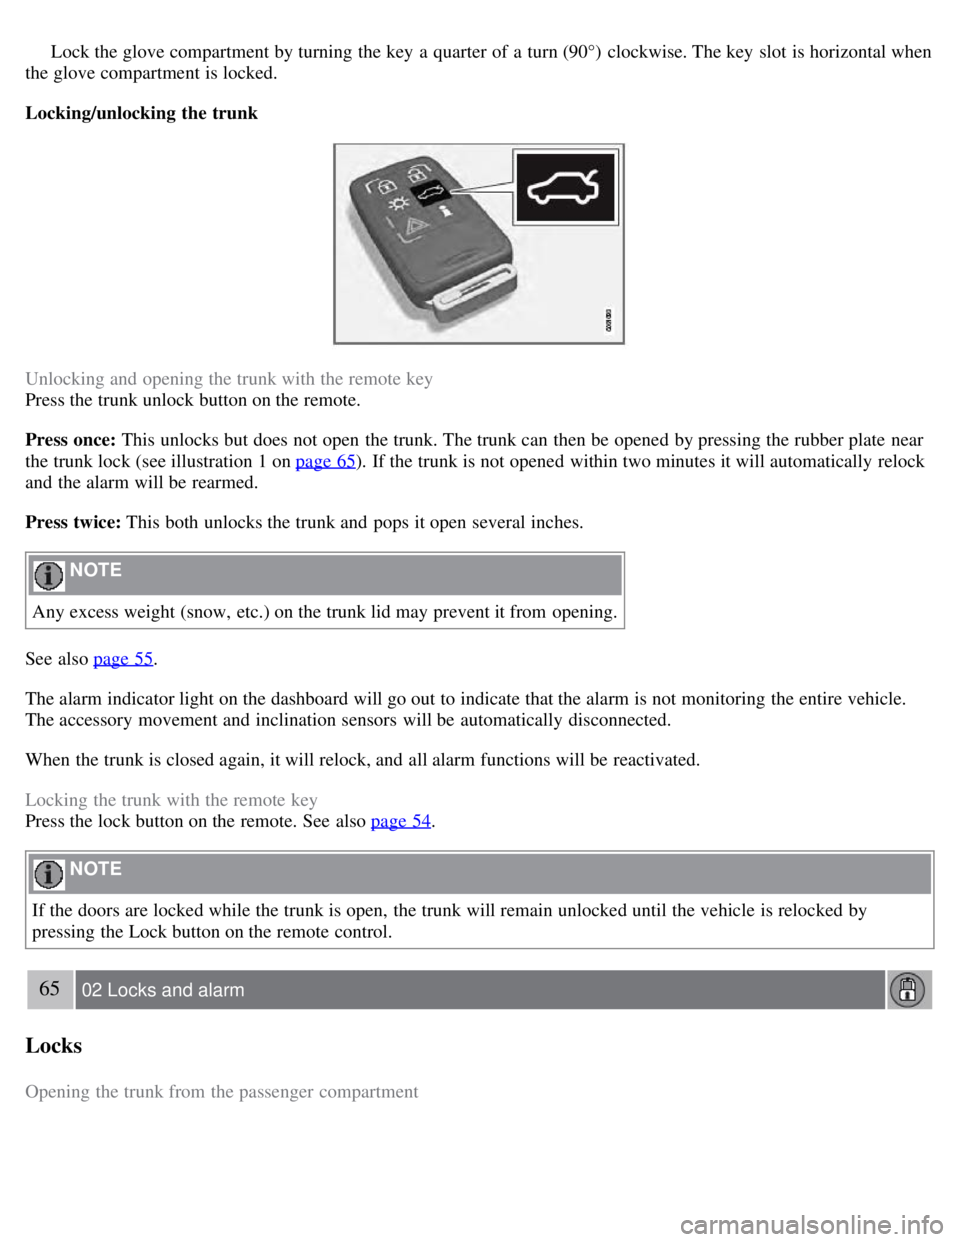
Locking/unlocking the trunk
Unlocking and opening the trunk with the remote key
Press the trunk unlock button on the remote.
Press once: This unlocks but does not open the trunk. The trunk can then be opened by pressing the rubber plate near
the trunk lock (see illustration 1 on page 65
). If the trunk is not opened within two minutes it will automatically relock
and the alarm will be rearmed.
Press twice: This both unlocks the trunk and pops it open several inches.
NOTE
Any excess weight (snow, etc.) on the trunk lid may prevent it from opening.
See also page 55
.
The alarm indicator light on the dashboard will go out to indicate that the alarm is not monitoring the entire vehicle.
The accessory movement and inclination sensors will be automatically disconnected.
When the trunk is closed again, it will relock, and all alarm functions will be reactivated.
Locking the trunk with the remote key
Press the lock button on the remote. See also page 54
.
NOTE
If the doors are locked while the trunk is open, the trunk will remain unlocked until the vehicle is relocked by
pressing the Lock button on the remote control.
65 02 Locks and alarm
Locks
Opening the trunk from the passenger compartment
Page 66 of 275

Volvo service technician.
NOTE
Do not attempt to repair any of the components in the alarm system yourself. This could affect the insurance policy
on the vehicle.
The alarm indicator light
The status of the alarm system is indicated by the indicator light on the dashboard (see illustration):
Indicator light off - the alarm is not armed
The indicator light flashes at one -second intervals - the alarm is armed
The indicator light flashes rapidly before the remote key is inserted in the ignition slot - the alarm has been
triggered.
Arming the alarm
Press the Lock button on the remote key. One long flash of the turn signals will confirm that the alarm is armed.
Alarm confirmation settings can be changed under Car settings
Lock settings Keyless entry . See page 123 for a
description of the menu system.
USA FCC ID: MAYDA 5823(3)
This device complies with part 15 of the FCC rules. Operation is subject to the following conditions: (1) This device
may not cause harmful interference, and (2) this device must accept any interference received, including interference
that may cause undesired operation.
Canada IC: 4405A-DA 5823(3)
Movement sensor DA5823 by Dynex Operation is subject to the following conditions: (1) this device may not cause
interference, and (2) this device must accept any interference, including interference that may cause undesired
operation of the device.
68 02 Locks and alarm
Alarm
Disarming the alarm
Page 113 of 275
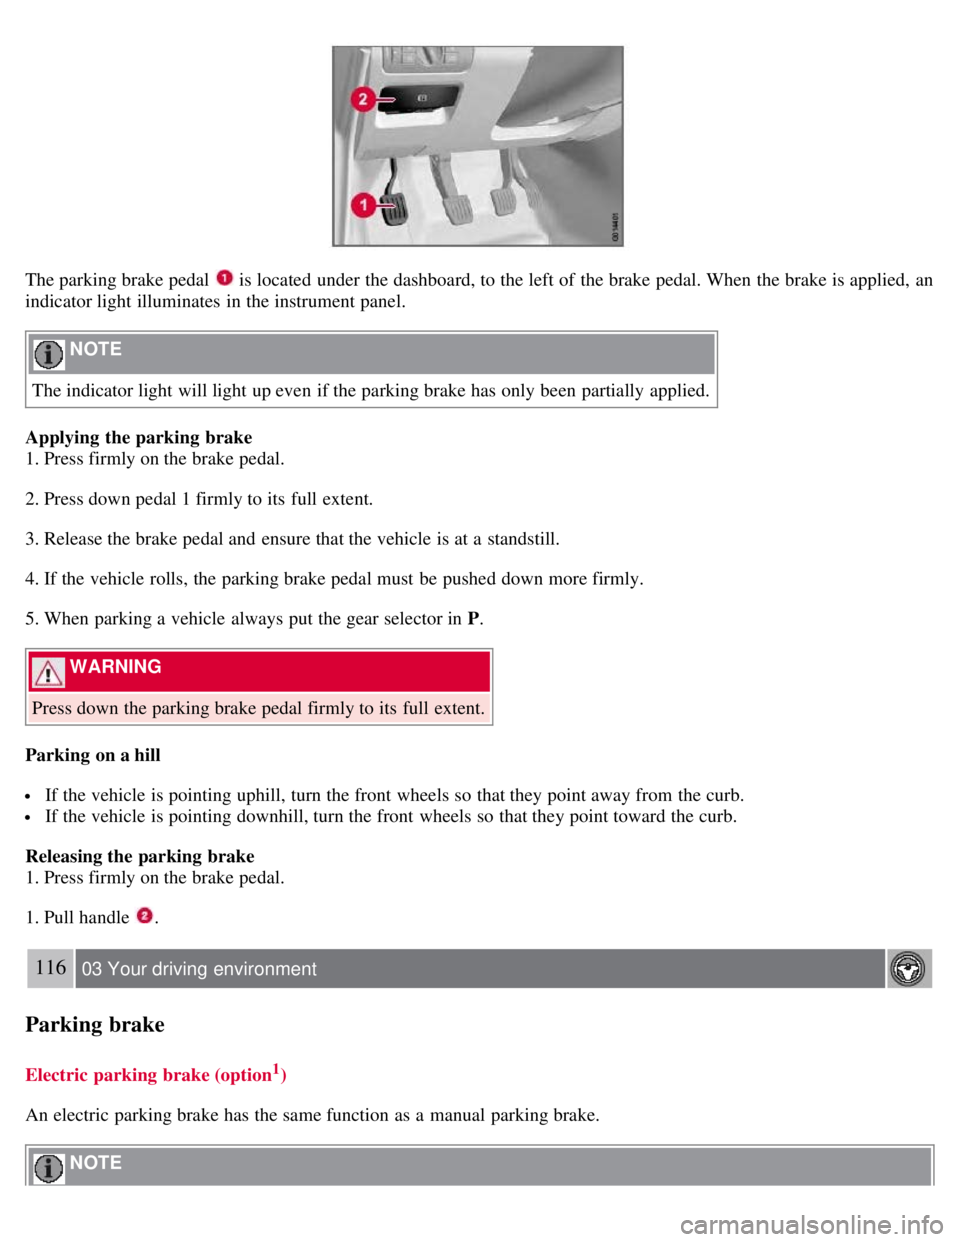
The parking brake pedal is located under the dashboard, to the left of the brake pedal. When the brake is applied, an
indicator light illuminates in the instrument panel.
NOTE
The indicator light will light up even if the parking brake has only been partially applied.
Applying the parking brake
1. Press firmly on the brake pedal.
2. Press down pedal 1 firmly to its full extent.
3. Release the brake pedal and ensure that the vehicle is at a standstill.
4. If the vehicle rolls, the parking brake pedal must be pushed down more firmly.
5. When parking a vehicle always put the gear selector in P .
WARNING
Press down the parking brake pedal firmly to its full extent.
Parking on a hill
If the vehicle is pointing uphill, turn the front wheels so that they point away from the curb.
If the vehicle is pointing downhill, turn the front wheels so that they point toward the curb.
Releasing the parking brake
1. Press firmly on the brake pedal.
1. Pull handle
.
116 03 Your driving environment
Parking brake
Electric parking brake (option1)
An electric parking brake has the same function as a manual parking brake.
NOTE
Page 123 of 275
126 04 Comfort and driving pleasure
Climate system
Introduction
Air conditioning
The vehicle is equipped with Electronic Climate Control (ECC). The climate control system cools, heats or
dehumidifies the air in the passenger compartment.
NOTE
The air conditioning can be switched off, but to ensure the best possible climate comfort in the passenger
compartment and to prevent the windows from misting, it should always be on.
In warm weather, a small amount of water may accumulate under the car when it has been parked. This water is
condensation from the A/C system and is normal.
Sensor location
The sunlight sensor is located on the top side of the dashboard.
NOTE
The sunlight sensor monitors which side of the car that is most exposed to sunlight. This can mean that the
temperature may differ between the right and left-side air vents, even if the temperatures set for both sides of the
passenger compartment are the same.
Page 125 of 275
There are different types of cabin air filters. Ensure that the correct type is installed.
Interior Air Quality System (IAQS)
A multifilter helps reduce gases and particles in the incoming air, thereby reducing the levels of odors and
contaminants entering the vehicle. The air quality sensor detects increased levels of contaminants in the outside air.
When the air quality sensor detects contaminated outside air, the air intake closes and the air inside the passenger
compartment is recirculated, i.e. no outside air enters the vehicle. The filter also cleans recirculated passenger
compartment air.
NOTE
Contact your Volvo retailer for IAQS air filter replacement intervals.
Menu settings
The default settings for three of the climate system's functions can be changed in the menu system, see page 123
:
Blower speed in automatic mode, see page 130.
Recirculation timer for passenger compartment air, see page 130.
Automatic rear window defrosting, see page 100.
The functions can also be returned to factory settings in the menu system.
128 04 Comfort and driving pleasure
Climate system
Air distribution
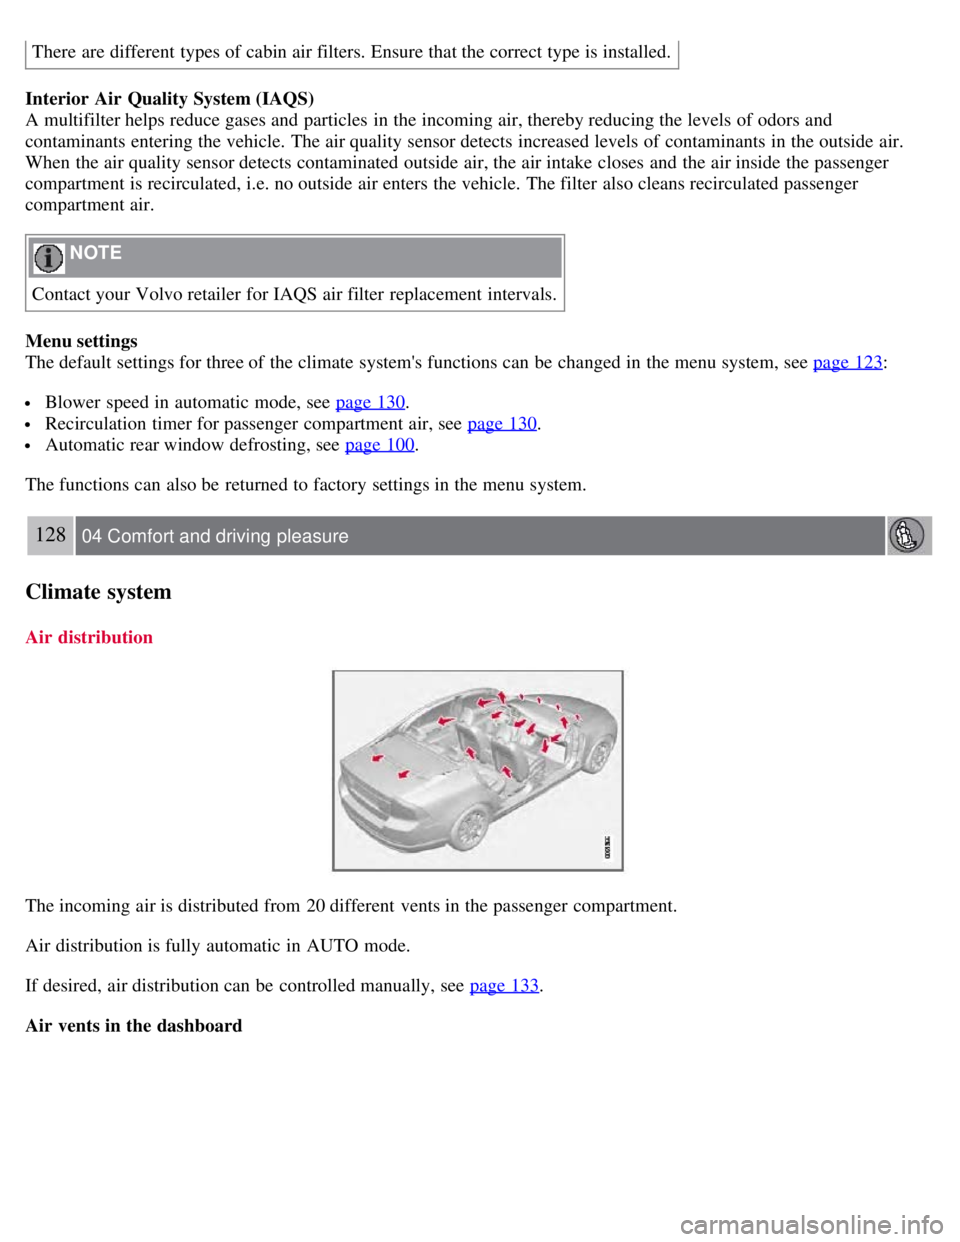
The incoming air is distributed from 20 different vents in the passenger compartment.
Air distribution is fully automatic in AUTO mode.
If desired, air distribution can be controlled manually, see page 133
.
Air vents in the dashboard
Page 258 of 275
Federal Motor Vehicle Safety Standards (FMVSS) specifications (USA) and Ministry of Transport (CMVSS)
standards (Canada)
Your Volvo is designed to meet all applicable safety standards, as evidenced by the certification label on the facing
side of the driver's door. For further information regarding these regulations, please consult your Volvo retailer.
Loads and Tire Pressures
The appearance of the decal will vary, depending on the market for which the vehicle is intended. See also page 237
.
Vehicle Identification Number (VIN)
The VIN plate is located on the top left surface of the dashboard. The Vehicle Identification Number (VIN) should
always be quoted in all correspondence concerning your vehicle with the retailer and when ordering parts.
Vehicle Emission Control Information
Your Volvo is designed to meet all applicable emission standards, as evidenced by the certification label on the
underside of the hood. For further information regarding these regulations, please consult your Volvo retailer.
269 06 Maintenance and specifications
Specifications
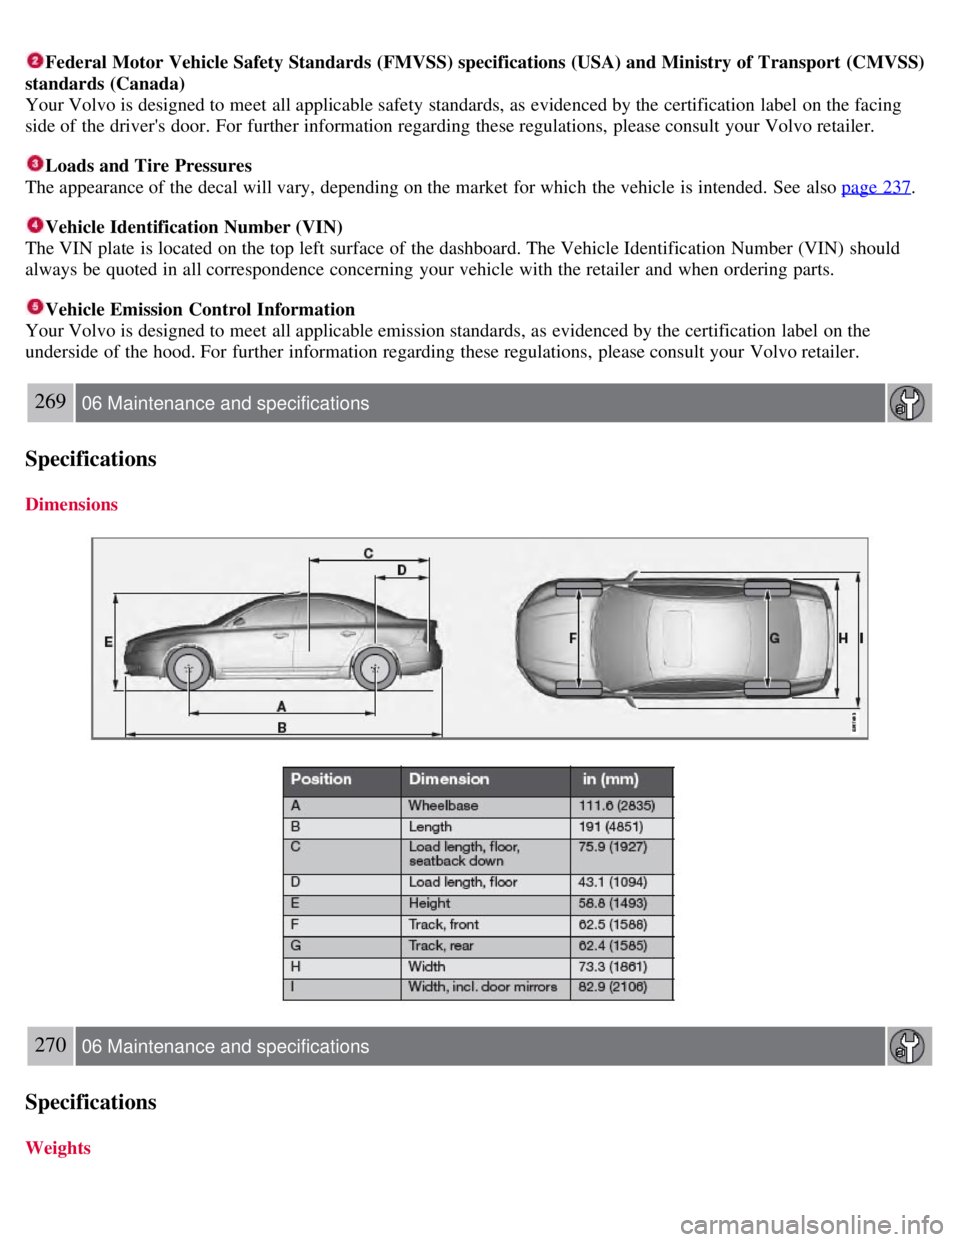
Dimensions
270 06 Maintenance and specifications
Specifications
Weights