wipers VOLVO S80 2015 Owner´s Manual
[x] Cancel search | Manufacturer: VOLVO, Model Year: 2015, Model line: S80, Model: VOLVO S80 2015Pages: 392, PDF Size: 10.66 MB
Page 5 of 392
Contents
* Option/accessory, for more information, see Introduction.3
03
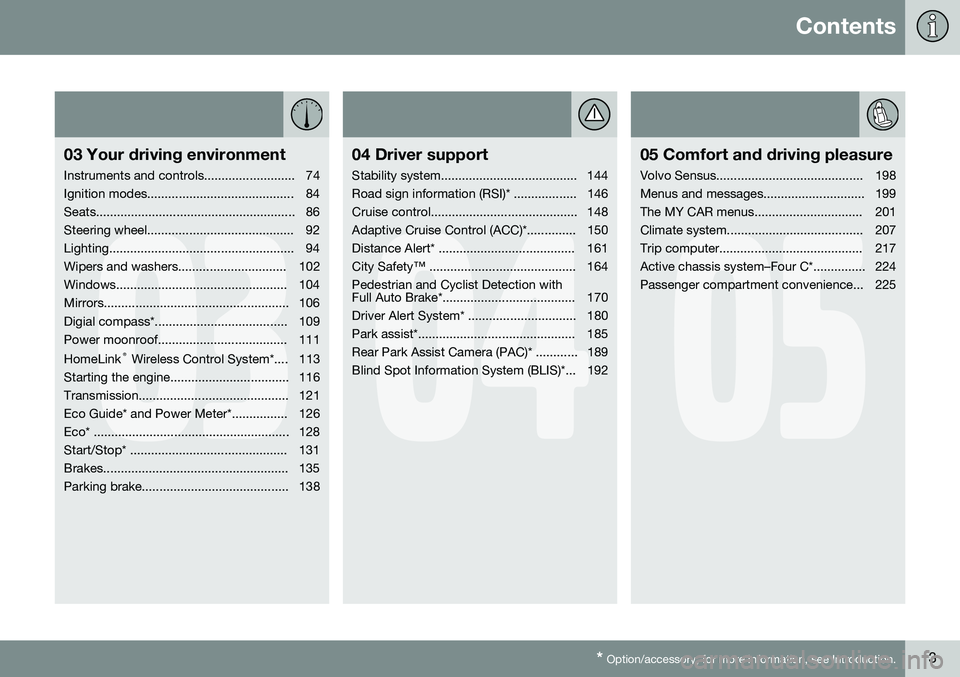
03 Your driving environment
Instruments and controls.......................... 74
Ignition modes.......................................... 84
Seats......................................................... 86
Steering wheel.......................................... 92
Lighting..................................................... 94
Wipers and washers............................... 102
Windows................................................. 104
Mirrors..................................................... 106
Digial compass*...................................... 109
Power moonroof..................................... 111 HomeLink ®
Wireless Control System*.... 113
Starting the engine.................................. 116
Transmission........................................... 121
Eco Guide* and Power Meter*................ 126
Eco* ........................................................ 128
Start/Stop* ............................................. 131
Brakes..................................................... 135
Parking brake.......................................... 138
04
04 Driver support
Stability system....................................... 144
Road sign information (RSI)* .................. 146
Cruise control.......................................... 148
Adaptive Cruise Control (ACC)*.............. 150
Distance Alert* ....................................... 161
City Safety™ .......................................... 164Pedestrian and Cyclist Detection with
Full Auto Brake*...................................... 170
Driver Alert System* ............................... 180
Park assist*............................................. 185
Rear Park Assist Camera (PAC)* ............ 189
Blind Spot Information System (BLIS)*... 192
05
05 Comfort and driving pleasure
Volvo Sensus.......................................... 198
Menus and messages............................. 199
The MY CAR menus............................... 201
Climate system....................................... 207
Trip computer......................................... 217
Active chassis system–Four C*............... 224
Passenger compartment convenience... 225
Page 74 of 392
72* Option/accessory, for more information, see Introduction. Instruments and controls........................................................................ 74 Ignition modes........................................................................................ 84Seats....................................................................................................... 86Steering wheel........................................................................................ 92Lighting................................................................................................... 94
Wipers and washers.............................................................................. 102Windows............................................................................................... 104Mirrors................................................................................................... 106
Digial compass*.................................................................................... 109
Power moonroof................................................................................... 111 HomeLink
®
Wireless Control System*.................................................. 113
Starting the engine................................................................................ 116 Transmission......................................................................................... 121
Eco Guide* and Power Meter*.............................................................. 126Eco* ...................................................................................................... 128Start/Stop* ........................................................................................... 131Brakes................................................................................................... 135Parking brake........................................................................................ 138
Page 77 of 392
03 Your driving environment
Instruments and controls
03
}}
* Option/accessory, for more information, see Introduction.75
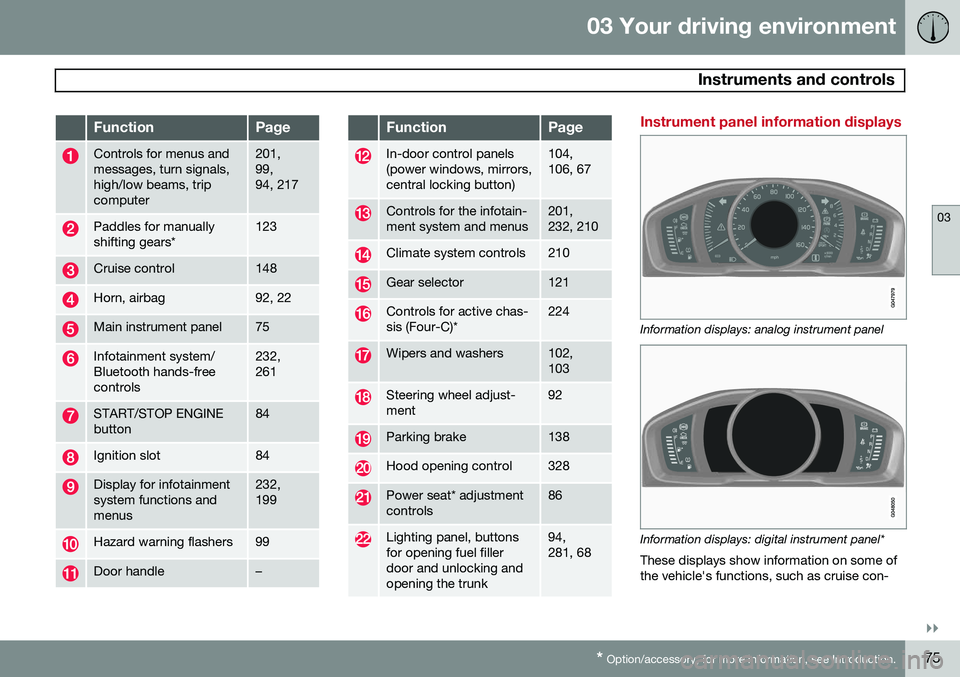
FunctionPage
Controls for menus and messages, turn signals,high/low beams, tripcomputer201, 99,94, 217
Paddles for manually shifting gears*123
Cruise control148
Horn, airbag92, 22
Main instrument panel75
Infotainment system/ Bluetooth hands-freecontrols232, 261
START/STOP ENGINE button84
Ignition slot84
Display for infotainment system functions andmenus232, 199
Hazard warning flashers99
Door handle–
FunctionPage
In-door control panels (power windows, mirrors,central locking button)104, 106, 67
Controls for the infotain- ment system and menus201, 232, 210
Climate system controls210
Gear selector121
Controls for active chas- sis (Four-C)*224
Wipers and washers102, 103
Steering wheel adjust- ment92
Parking brake138
Hood opening control328
Power seat* adjustment controls86
Lighting panel, buttons for opening fuel fillerdoor and unlocking andopening the trunk94, 281, 68
Instrument panel information displays
Information displays: analog instrument panel
Information displays: digital instrument panel* These displays show information on some of the vehicle's functions, such as cruise con-
Page 86 of 392
03 Your driving environment
Ignition modes
03
84* Option/accessory, for more information, see Introduction.
Inserting and removing the remote key
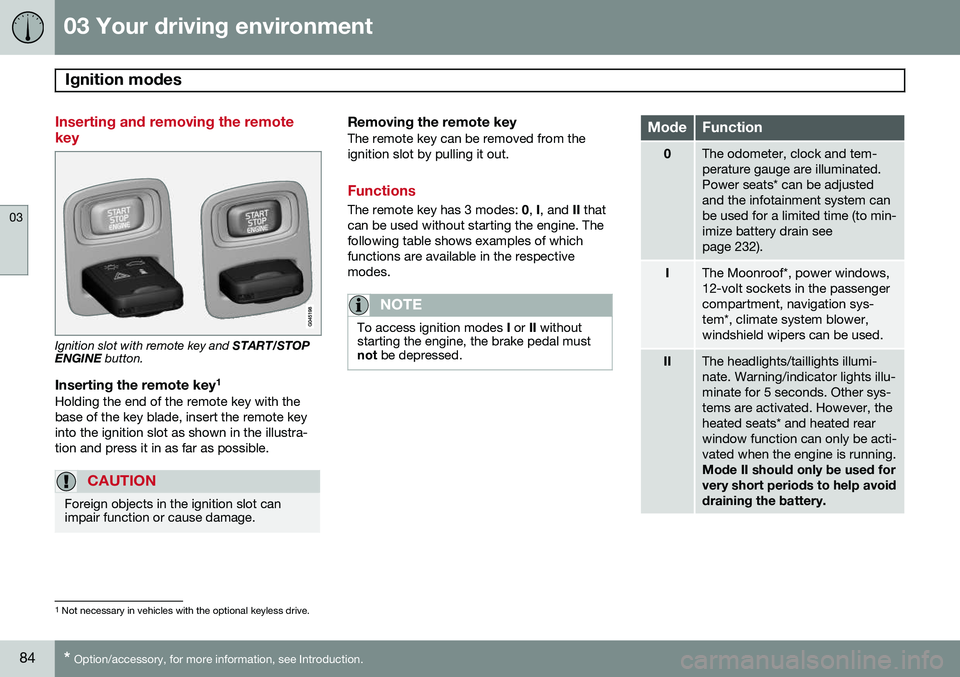
Ignition slot with remote key and START/STOP
ENGINE button.
Inserting the remote key 1Holding the end of the remote key with the base of the key blade, insert the remote keyinto the ignition slot as shown in the illustra-tion and press it in as far as possible.
CAUTION
Foreign objects in the ignition slot can impair function or cause damage.
Removing the remote keyThe remote key can be removed from the ignition slot by pulling it out.
Functions
The remote key has 3 modes:
0, I, and II that
can be used without starting the engine. The following table shows examples of whichfunctions are available in the respectivemodes.
NOTE
To access ignition modes I or II without
starting the engine, the brake pedal must not be depressed.
ModeFunction
0The odometer, clock and tem- perature gauge are illuminated.Power seats* can be adjustedand the infotainment system canbe used for a limited time (to min-imize battery drain seepage 232).
IThe Moonroof*, power windows, 12-volt sockets in the passengercompartment, navigation sys-tem*, climate system blower,windshield wipers can be used.
IIThe headlights/taillights illumi- nate. Warning/indicator lights illu-minate for 5 seconds. Other sys-tems are activated. However, theheated seats* and heated rearwindow function can only be acti-vated when the engine is running. Mode II should only be used for very short periods to help avoiddraining the battery.
1
Not necessary in vehicles with the optional keyless drive.
Page 104 of 392

03 Your driving environment
Wipers and washers
03
102* Option/accessory, for more information, see Introduction.
Windshield wipers/washers
Windshield wipers and washers
Rain sensor* on/off
Thumb wheel sensitivity/frequency
CAUTION
• Use ample washer fluid when washing the windshield. The windshield shouldbe thoroughly wet when the wipers arein operation.
• Before using the wipers, ice and snowshould be removed from the wind-shield/rear window. Be sure the wiperblades are not frozen in place.
Windshield wipers offMove the lever to position
0 to
switch off the windshield wipers.
Single sweepMove the lever upward from posi- tion 0 to sweep the windshield one
stroke at a time for as long as the
lever is held up.
Intermittent wipingWith the lever in this position, you can set the wiper interval by twistingthe thumb wheel upward to increase
wiper speed or downward to decrease thespeed.
Continuous wipingThe wipers operate at normal speed.
The wipers operate at high speed.
Windshield wiper service positionThe windshield wipers must be in the service position before the wiper blades can becleaned or replaced. See page 341 for addi-tional information.
Rain sensor*The rain sensor automatically regulates wiperspeed according to the amount of water onthe windshield. The sensitivity of the rain sen-sor can be adjusted moving the thumb wheelup (the wipers will sweep the windshield morefrequently) or down (the wipers will sweep thewindshield less frequently).
NOTE
The wipers will make an extra sweep each time the thumb wheel is adjusted upward.
When the rain sensor is activated, the symbol
will illuminate in the instrument panel.
Activating and setting the sensitivityWhen activating the rain sensor, the vehicle must be running or in ignition mode II and the
windshield wiper lever must be in position 0
or in the single sweep position. Activate the rain sensor by pressing the but- ton
. The windshield wipers will make
one sweep. Press the lever up for the wipers to make an extra sweep. The rain sensor returns to activemode when the stalk is released back toposition 0.
Page 105 of 392
03 Your driving environment
Wipers and washers
03
* Option/accessory, for more information, see Introduction.103
DeactivatingDeactivate the rain sensor by pressing the button
or press the lever down to
another wiper position. The rain sensor is automatically deactivated when the key is removed from the ignitionslot or five minutes after the ignition has beenswitched off.
CAUTION
The rain sensor should be deactivated when washing the car in an automatic carwash, etc. If the rain sensor function is lefton, the wipers will start inadvertently in thecar wash and could be damaged.
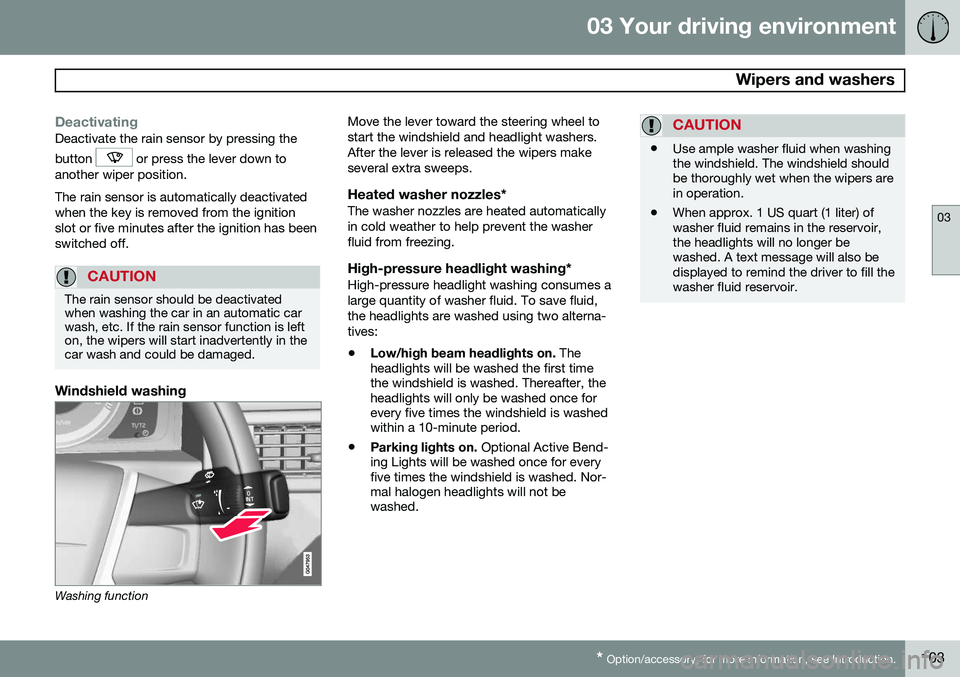
Windshield washing
Washing function Move the lever toward the steering wheel to start the windshield and headlight washers.After the lever is released the wipers makeseveral extra sweeps.
Heated washer nozzles*The washer nozzles are heated automaticallyin cold weather to help prevent the washerfluid from freezing.
High-pressure headlight washing*High-pressure headlight washing consumes alarge quantity of washer fluid. To save fluid,the headlights are washed using two alterna-tives:
• Low/high beam headlights on.
The
headlights will be washed the first time the windshield is washed. Thereafter, theheadlights will only be washed once forevery five times the windshield is washedwithin a 10-minute period.
• Parking lights on.
Optional Active Bend-
ing Lights will be washed once for everyfive times the windshield is washed. Nor-mal halogen headlights will not bewashed.
CAUTION
• Use ample washer fluid when washing the windshield. The windshield shouldbe thoroughly wet when the wipers arein operation.
• When approx. 1 US quart (1 liter) ofwasher fluid remains in the reservoir,the headlights will no longer bewashed. A text message will also bedisplayed to remind the driver to fill thewasher fluid reservoir.
Page 111 of 392
03 Your driving environment
Digial compass*
03
}}
* Option/accessory, for more information, see Introduction.109
Operation
G029737
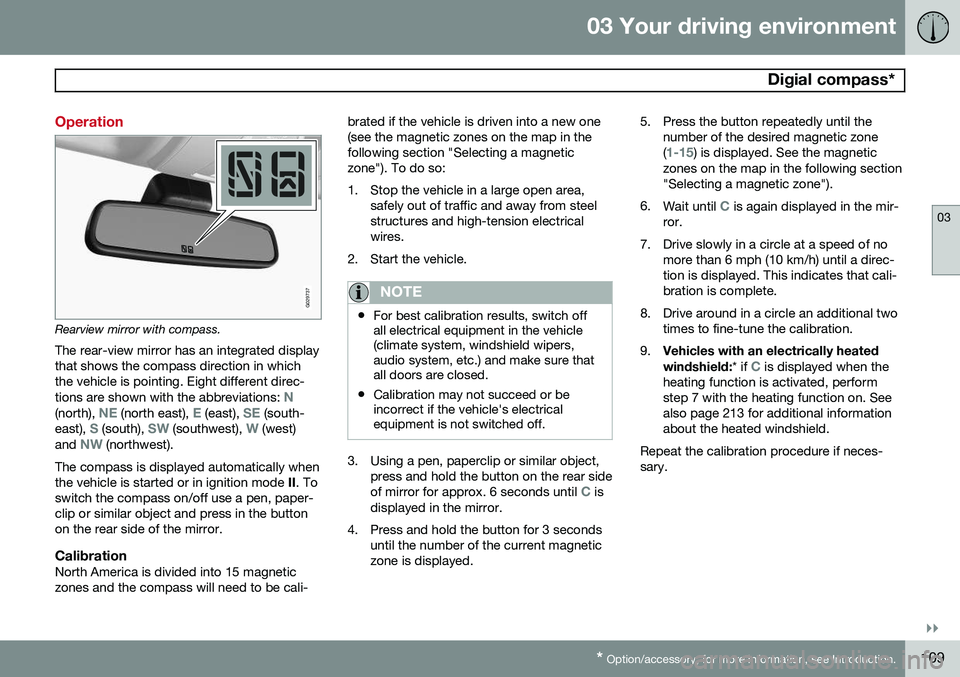
Rearview mirror with compass.
The rear-view mirror has an integrated display that shows the compass direction in whichthe vehicle is pointing. Eight different direc- tions are shown with the abbreviations:
N(north), NE (north east), E (east), SE (south-
east), S (south), SW (southwest), W (west)
and NW (northwest).
The compass is displayed automatically when the vehicle is started or in ignition mode II. To
switch the compass on/off use a pen, paper-clip or similar object and press in the buttonon the rear side of the mirror.
CalibrationNorth America is divided into 15 magneticzones and the compass will need to be cali- brated if the vehicle is driven into a new one(see the magnetic zones on the map in thefollowing section "Selecting a magneticzone"). To do so:
1. Stop the vehicle in a large open area,
safely out of traffic and away from steel structures and high-tension electricalwires.
2. Start the vehicle.
NOTE
• For best calibration results, switch off all electrical equipment in the vehicle(climate system, windshield wipers,audio system, etc.) and make sure thatall doors are closed.
• Calibration may not succeed or beincorrect if the vehicle's electricalequipment is not switched off.
3. Using a pen, paperclip or similar object,
press and hold the button on the rear side of mirror for approx. 6 seconds until
C is
displayed in the mirror.
4. Press and hold the button for 3 seconds until the number of the current magnetic zone is displayed. 5. Press the button repeatedly until the
number of the desired magnetic zone (
1-15) is displayed. See the magnetic
zones on the map in the following section "Selecting a magnetic zone").
6. Wait until
C is again displayed in the mir-
ror.
7. Drive slowly in a circle at a speed of no more than 6 mph (10 km/h) until a direc- tion is displayed. This indicates that cali-bration is complete.
8. Drive around in a circle an additional two times to fine-tune the calibration.
9. Vehicles with an electrically heated windshield:
* if
C is displayed when the
heating function is activated, perform step 7 with the heating function on. Seealso page 213 for additional informationabout the heated windshield.
Repeat the calibration procedure if neces-sary.
Page 121 of 392
03 Your driving environment
Starting the engine
03
}}
* Option/accessory, for more information, see Introduction.119
Models with a Personal Car
Communicator (PCC) remote key* (seepage 58)
The indicator light for approach lighting will flash several times andthen glow continuously if all of therequirements for ERS have been
met. However, this does not indicate thatERS has started the engine. To check if ERS has started the engine, press the information button (3). If the engine hasstarted, the indicator light for buttons(1) och (4) will illuminate.
Active functionsWhen the engine is started with ERS, the fol- lowing functions are activated: • The climate control system
• The infotainment system.
Deactivated functionsWhen the engine is started with ERS, the fol- lowing functions are deactivated: •Headlights
• Parking lights
• License plate lights
• Windshield wipers
Switching off an engine started with ERS
Any of the following will switch off the engine if it has been started with ERS:
• Pressing the lock button (1) or the unlock button (2) on the remote key
• Unlocking the vehicle
• Opening a door
• Depressing the accelerator or brake pedal
• Moving the gear selector from the
P posi-
tion
• If there are less than approx. 2.5 gallons(10 liters) of fuel in the tank
• More than 15 minutes have elapsed.
If the engine has been started with ERS and switches off, the turn signals will illuminate for3 seconds.
Message in the instrument panel
display
If ERS is interrupted, a text message will bedisplayed in the instrument panel.
Switching off the engine
With the engine running, press the START/
STOP ENGINE button.
If the gear selector is not in the P position or
if the vehicle is moving, press the START/
STOP ENGINE button twice or press and
hold it in until the engine switches off.
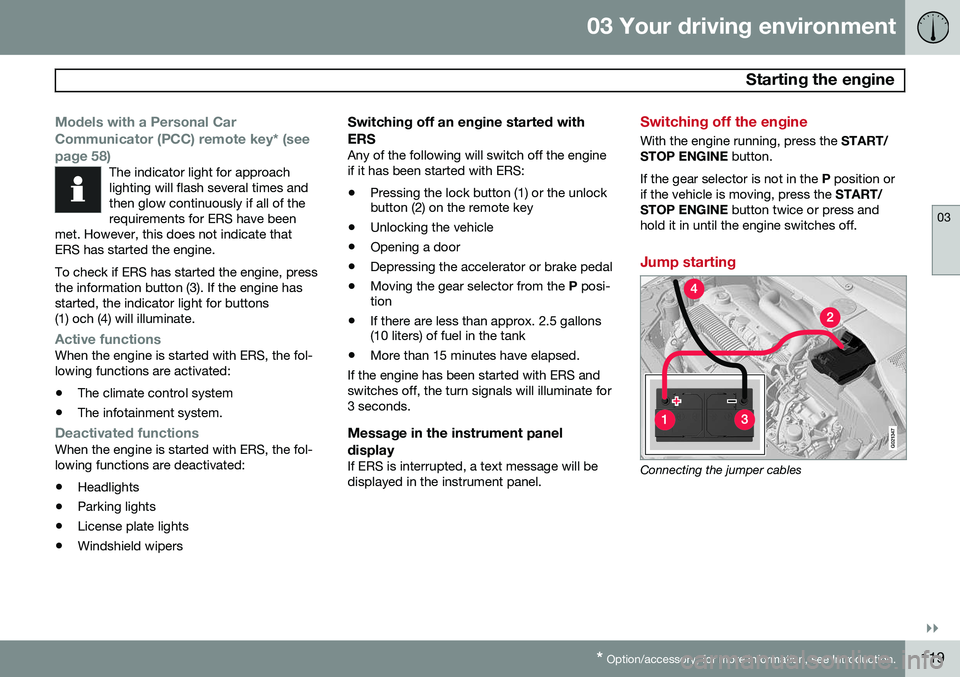
Jump starting
G021347
Connecting the jumper cables
Page 169 of 392
04 Driver support
City Safety™
04
}}
167
CauseAction
The area of the wind- shield in front of the sen-sor is dirty or covered byice or snow.Clean the windshield orremove the ice/snow.
The laser sensor's field of view is obstructed.Remove the obstruction.
CAUTION
If a crack, scratch or stone chip should occur in the section of the windshield infront the laser sensor, contact a trainedand qualified Volvo service technician torepair or replace the windshield (see theillustration showing the location of the sen-sor on page 165). Failing to do so mayresult in reduced City Safety™ functional-ity. To help prevent limited or reduced func- tionality, please also observe the following:
• Volvo recommends that cracks, scratches or stone chips on the wind-shield in front of the laser sensorshould not
be repaired; in such cases,
the entire windshield should bereplaced.
• Before the windshield is replaced,contact a Volvo retailer to ensure thatthe correct windshield is ordered andinstalled. If the wrong type of wind-shield is used, this may cause CitySafety™ to function improperly or notat all. Volvo recommends the use ofonly Genuine Volvo ReplacementWindshields.
• When replacing windshield wipers, usethe same type or ones approved byVolvo.
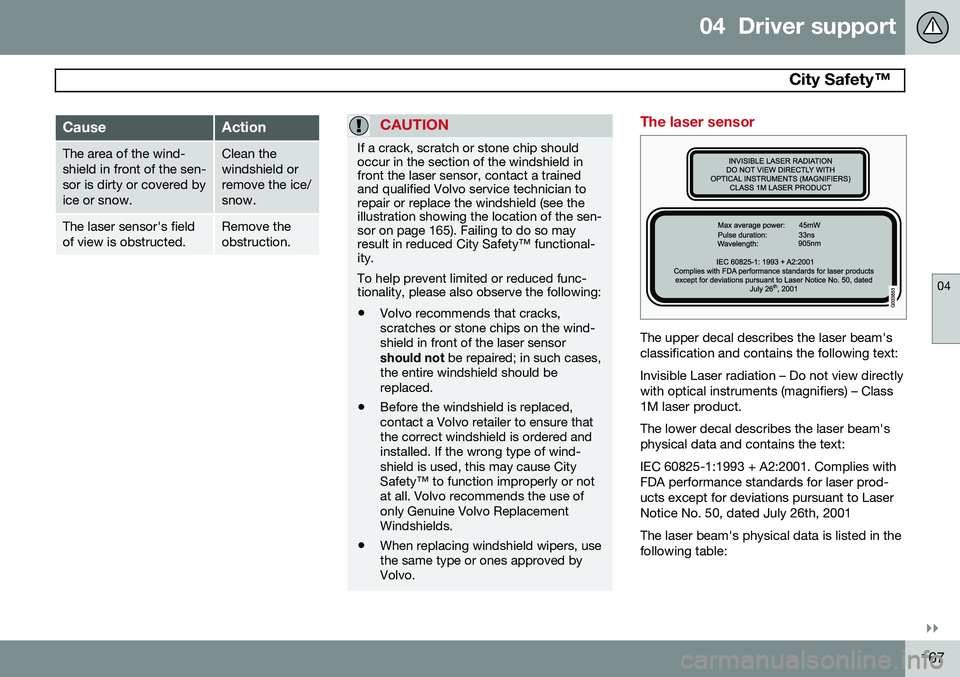
The laser sensor
The upper decal describes the laser beam's classification and contains the following text: Invisible Laser radiation – Do not view directly with optical instruments (magnifiers) – Class1M laser product. The lower decal describes the laser beam's physical data and contains the text: IEC 60825-1:1993 + A2:2001. Complies with FDA performance standards for laser prod-ucts except for deviations pursuant to LaserNotice No. 50, dated July 26th, 2001 The laser beam's physical data is listed in the following table:
Page 280 of 392
07 During your trip
Driving recommendations
07
278
Before a long distance tripIt is always worthwhile to have your vehicle checked by a trained and qualified Volvoservice technician before driving long dis-tances. Your retailer will also be able to sup-ply you with bulbs, fuses, spark plugs andwiper blades for your use in the event thatproblems occur. As a minimum, the following items should be checked before any long trip:• Check that engine runs smoothly and that fuel consumption is normal.
• Check for fuel, oil, and fluid leakage
• Have the transmission oil level checked.
• Check condition of drive belts.
• Check state of the battery's charge.
• Examine tires carefully (the spare tire aswell), and replace those that are worn.Check tire pressures.
• The brakes, front wheel alignment, andsteering gear should be checked by atrained and qualified Volvo service techni-cian only.
• Check all lights, including high beams.
• Reflective warning triangles are legallyrequired in some states/provinces.
• Have a word with a trained and qualifiedVolvo service technician if you intend to drive in countries where it may be difficultto obtain the correct fuel.
• Consider your destination. If you will bedriving through an area where snow or iceare likely to occur, consider snow tires.
Cold weather precautionsIf you wish to check your vehicle before the approach of cold weather, the followingadvice is worth noting:
• Make sure that the engine coolant con- tains 50 percent antifreeze. Any othermixture will reduce freeze protection. Thisgives protection against freezing down to–31 °F (–35 °C). The use of "recycled"antifreeze is not approved by Volvo. Dif-ferent types of antifreeze must not bemixed.
• Volvo recommends using only genuineVolvo antifreeze in your vehicle's radiator.
• Try to keep the fuel tank well filled – thishelps prevent the formation of condensa-tion in the tank. In addition, in extremelycold weather conditions it is worthwhileto add fuel line de-icer before refueling.
• The viscosity of the engine oil is impor-tant. Oil with low viscosity (thinner oil)improves cold-weather starting as well asdecreasing fuel consumption while theengine is warming up. Full synthetic0W-30 oil is recommended for driving inareas with sustained low temperatures. •
The load placed on the battery is greaterduring the winter since the windshieldwipers, lighting, etc., are used moreoften. Moreover, the capacity of the bat-tery decreases as the temperature drops.In very cold weather, a poorly chargedbattery can freeze and be damaged. It istherefore advisable to check the state ofcharge more frequently and spray an anti-rust oil on the battery posts.
• Volvo recommends the use of snow tireson all four wheels for winter driving, seepage 307.
• To prevent the washer fluid reservoir fromfreezing, add washer solvents containingantifreeze. This is important since dirt isoften splashed on the windshield duringwinter driving, requiring the frequent useof the washers and wipers. Volvo WasherSolvent should be diluted as follows:Down to 14 °F (–10 °C): 1 part washersolvent and 4 parts water Down to 5 °F(–15 °C): 1 part washer solvent and3 parts water Down to 0 °F (–18 °C):1 part washer solvent and 2 parts waterDown to –18 °F (–28 °C): 1 part washersolvent and 1 part water.
• Use Volvo Teflon Lock Spray in the locks.
• Avoid using de-icing sprays as they cancause damage to the locks.