heating VOLVO S80 2016 Owner´s Manual
[x] Cancel search | Manufacturer: VOLVO, Model Year: 2016, Model line: S80, Model: VOLVO S80 2016Pages: 380, PDF Size: 9.45 MB
Page 71 of 380
03 Instruments and controls
03
}}
69
Generator not chargingThis symbol comes on during driving if a fault has occurred in the electrical system. Contactan authorized Volvo workshop.
Engine temperatureEngine overheating can result from low oil or coolant levels, towing or hard driving at highheat and altitude, or mechanical malfunction.Engine overheating will be signaled with textand a red warning triangle in the middle of theinstrument display. The exact text will dependon the degree of overheating. It may range from
High engine temp Reduce speed toHigh engine temp Stop engine. If appropri-
ate, other messages, such as Coolant level
low, Stop safely will also be displayed. If
your engine does overheat so that you must stop the engine, always allow the engine tocool before attempting to check oil and cool-ant levels. See Engine compartment – coolant (p. 316) for more information.
Fault in brake systemIf this symbol lights, the brake fluid level may be too low. Stop the vehicle in a safe placeand check the level in the brake fluid reser-voir, see Engine compartment – brake fluid(p. 317). If the level in the reservoir is belowMIN , the vehicle should be transported to an
authorized Volvo workshop to have the brakesystem checked. If the
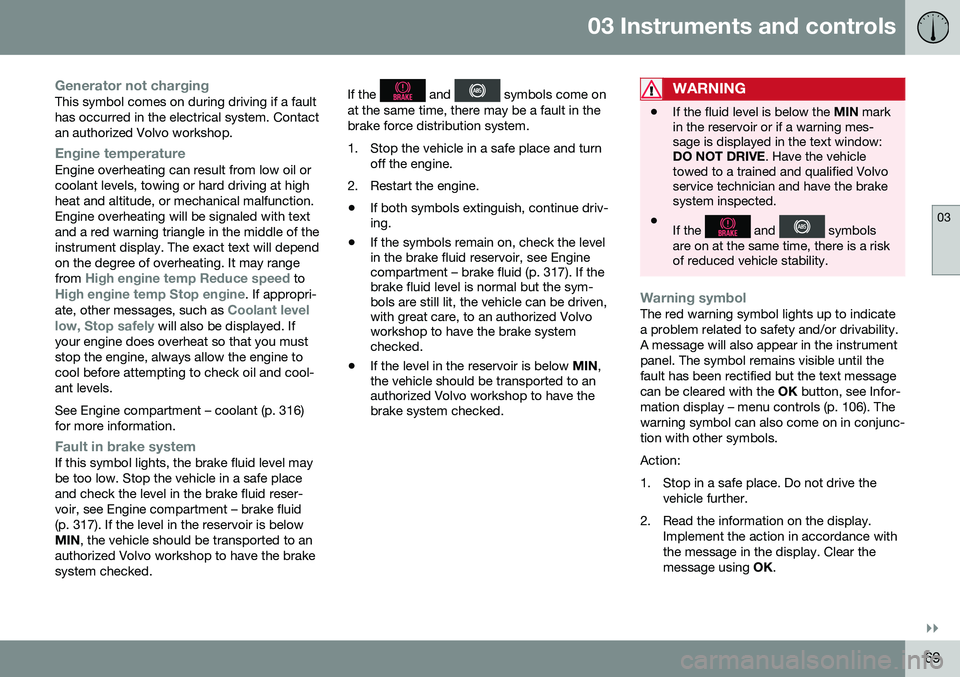
and symbols come on
at the same time, there may be a fault in the brake force distribution system.
1. Stop the vehicle in a safe place and turn off the engine.
2. Restart the engine.
• If both symbols extinguish, continue driv- ing.
• If the symbols remain on, check the levelin the brake fluid reservoir, see Enginecompartment – brake fluid (p. 317). If thebrake fluid level is normal but the sym-bols are still lit, the vehicle can be driven,with great care, to an authorized Volvoworkshop to have the brake systemchecked.
• If the level in the reservoir is below
MIN,
the vehicle should be transported to anauthorized Volvo workshop to have thebrake system checked.WARNING
• If the fluid level is below the
MIN mark
in the reservoir or if a warning mes- sage is displayed in the text window:DO NOT DRIVE . Have the vehicle
towed to a trained and qualified Volvoservice technician and have the brakesystem inspected.
• If the
and symbols
are on at the same time, there is a risk of reduced vehicle stability.
Warning symbolThe red warning symbol lights up to indicate a problem related to safety and/or drivability.A message will also appear in the instrumentpanel. The symbol remains visible until thefault has been rectified but the text messagecan be cleared with the OK button, see Infor-
mation display – menu controls (p. 106). Thewarning symbol can also come on in conjunc-tion with other symbols. Action:
1. Stop in a safe place. Do not drive the vehicle further.
2. Read the information on the display. Implement the action in accordance with the message in the display. Clear themessage using OK.
Page 84 of 380
03 Instruments and controls
03
82* Option/accessory, for more information, see Introduction.
Electrically heated* steering wheel
The steering wheel can be heated electrically.
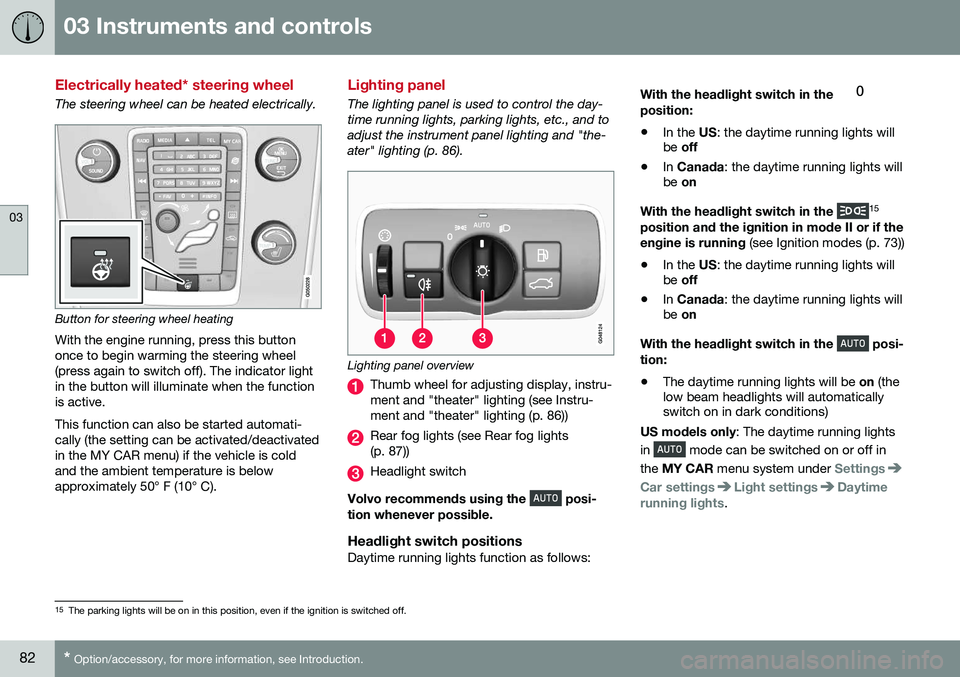
Button for steering wheel heating
With the engine running, press this button once to begin warming the steering wheel(press again to switch off). The indicator lightin the button will illuminate when the functionis active. This function can also be started automati- cally (the setting can be activated/deactivatedin the MY CAR menu) if the vehicle is coldand the ambient temperature is belowapproximately 50° F (10° C).
Lighting panel
The lighting panel is used to control the day- time running lights, parking lights, etc., and toadjust the instrument panel lighting and "the-ater" lighting (p. 86).
Lighting panel overview
Thumb wheel for adjusting display, instru- ment and "theater" lighting (see Instru-ment and "theater" lighting (p. 86))
Rear fog lights (see Rear fog lights (p. 87))
Headlight switch
Volvo recommends using the
posi-
tion whenever possible.
Headlight switch positionsDaytime running lights function as follows: With the headlight switch in the
position:
• In the
US: the daytime running lights will
be off
• In
Canada : the daytime running lights will
be on
With the headlight switch in the
15
position and the ignition in mode II or if the engine is running (see Ignition modes (p. 73))
• In the
US: the daytime running lights will
be off
• In
Canada : the daytime running lights will
be on
With the headlight switch in the
posi-
tion:
• The daytime running lights will be
on (the
low beam headlights will automatically switch on in dark conditions)
US models only : The daytime running lights
in
mode can be switched on or off in
the MY CAR menu system under
Settings
Car settingsLight settingsDaytime
running lights.
15 The parking lights will be on in this position, even if the ignition is switched off.
Page 100 of 380
03 Instruments and controls
03
98* Option/accessory, for more information, see Introduction.
Heated windshield*, rear window and door mirror defrosters
The heating function is used to defrost/de-ice the windshield and/or the rear window anddoor mirrors.
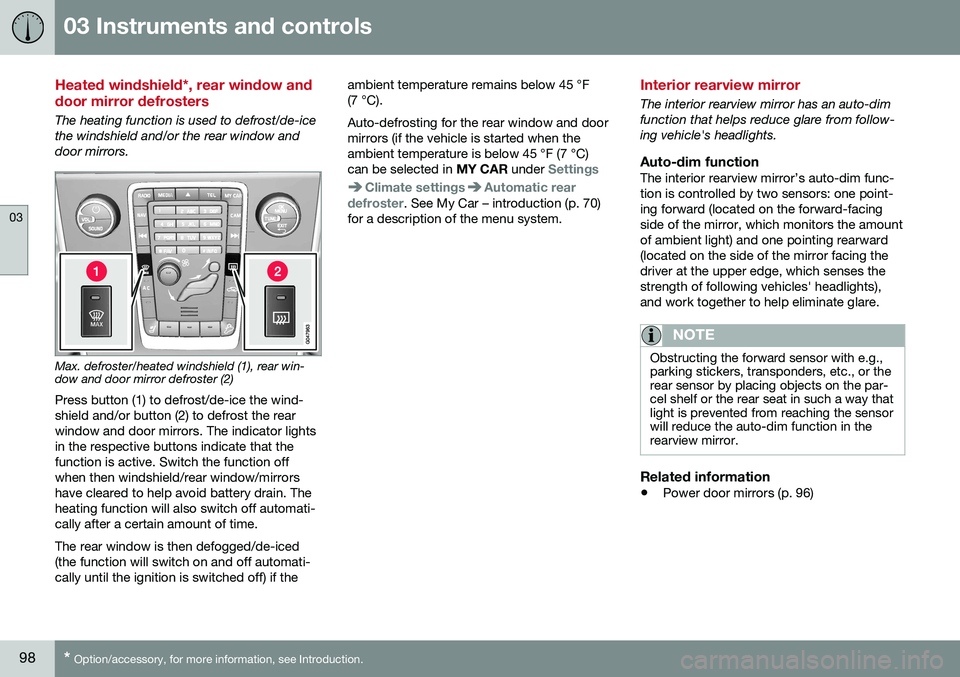
Max. defroster/heated windshield (1), rear win- dow and door mirror defroster (2)
Press button (1) to defrost/de-ice the wind- shield and/or button (2) to defrost the rearwindow and door mirrors. The indicator lightsin the respective buttons indicate that thefunction is active. Switch the function offwhen then windshield/rear window/mirrorshave cleared to help avoid battery drain. Theheating function will also switch off automati-cally after a certain amount of time. The rear window is then defogged/de-iced (the function will switch on and off automati-cally until the ignition is switched off) if the ambient temperature remains below 45 °F(7 °C). Auto-defrosting for the rear window and door mirrors (if the vehicle is started when theambient temperature is below 45 °F (7 °C)can be selected in
MY CAR under
Settings
Climate settingsAutomatic rear
defroster. See My Car – introduction (p. 70)
for a description of the menu system.
Interior rearview mirror
The interior rearview mirror has an auto-dim function that helps reduce glare from follow-ing vehicle's headlights.
Auto-dim functionThe interior rearview mirror’s auto-dim func-tion is controlled by two sensors: one point-ing forward (located on the forward-facingside of the mirror, which monitors the amountof ambient light) and one pointing rearward(located on the side of the mirror facing thedriver at the upper edge, which senses thestrength of following vehicles' headlights),and work together to help eliminate glare.
NOTE
Obstructing the forward sensor with e.g., parking stickers, transponders, etc., or therear sensor by placing objects on the par-cel shelf or the rear seat in such a way thatlight is prevented from reaching the sensorwill reduce the auto-dim function in therearview mirror.
Related information
• Power door mirrors (p. 96)
Page 101 of 380
03 Instruments and controls
03
}}
* Option/accessory, for more information, see Introduction.99
Digital compass*
The rear-view mirror has an integrated display that shows the compass direction in whichthe vehicle is traveling.
Operation
G029737
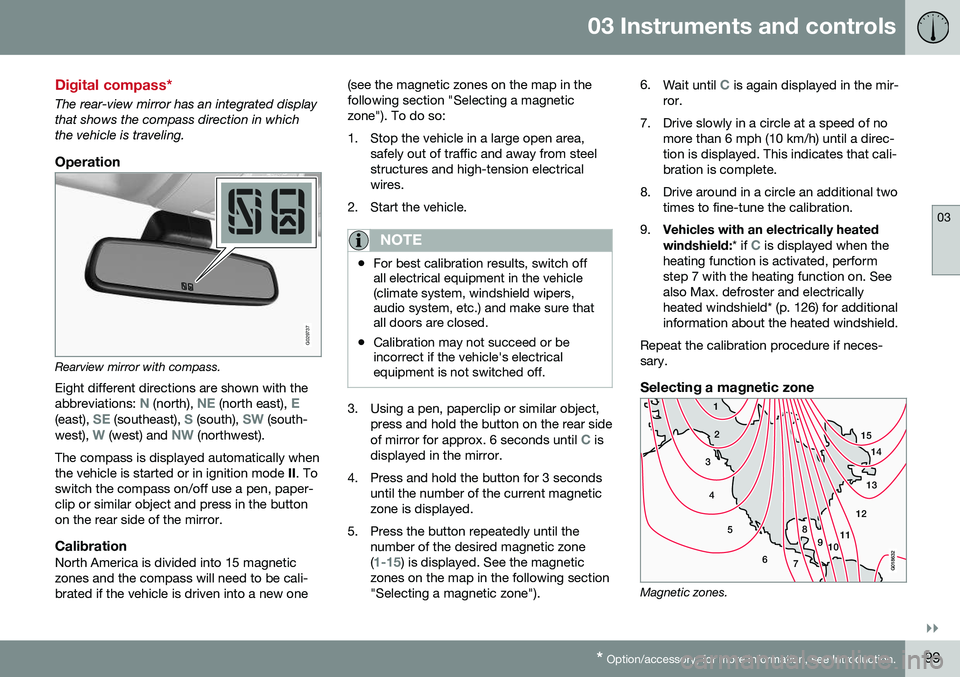
Rearview mirror with compass.
Eight different directions are shown with the abbreviations:
N (north), NE (north east), E(east), SE (southeast), S (south), SW (south-
west), W (west) and NW (northwest).
The compass is displayed automatically when the vehicle is started or in ignition mode II. To
switch the compass on/off use a pen, paper-clip or similar object and press in the buttonon the rear side of the mirror.
CalibrationNorth America is divided into 15 magneticzones and the compass will need to be cali-brated if the vehicle is driven into a new one (see the magnetic zones on the map in thefollowing section "Selecting a magneticzone"). To do so:
1. Stop the vehicle in a large open area,
safely out of traffic and away from steel structures and high-tension electricalwires.
2. Start the vehicle.
NOTE
• For best calibration results, switch off all electrical equipment in the vehicle(climate system, windshield wipers,audio system, etc.) and make sure thatall doors are closed.
• Calibration may not succeed or beincorrect if the vehicle's electricalequipment is not switched off.
3. Using a pen, paperclip or similar object,
press and hold the button on the rear side of mirror for approx. 6 seconds until
C is
displayed in the mirror.
4. Press and hold the button for 3 seconds until the number of the current magnetic zone is displayed.
5. Press the button repeatedly until the number of the desired magnetic zone (
1-15) is displayed. See the magnetic
zones on the map in the following section "Selecting a magnetic zone"). 6.
Wait until
C is again displayed in the mir-
ror.
7. Drive slowly in a circle at a speed of no more than 6 mph (10 km/h) until a direc- tion is displayed. This indicates that cali-bration is complete.
8. Drive around in a circle an additional two times to fine-tune the calibration.
9. Vehicles with an electrically heated windshield:
* if
C is displayed when the
heating function is activated, perform step 7 with the heating function on. Seealso Max. defroster and electricallyheated windshield* (p. 126) for additionalinformation about the heated windshield.
Repeat the calibration procedure if neces-sary.
Selecting a magnetic zone
15 14
13
12
11
9
8
7
6
5
4
3
2
1
10
G018632
Magnetic zones.
Page 125 of 380
04 Climate
04
* Option/accessory, for more information, see Introduction.123
Heated seats
The front seat heating has three levels to increase comfort for the driver and passengerin cold weather. The rear outboard seat heating has three lev- els to increase comfort for the passengers incold weather.
Heated front seats*
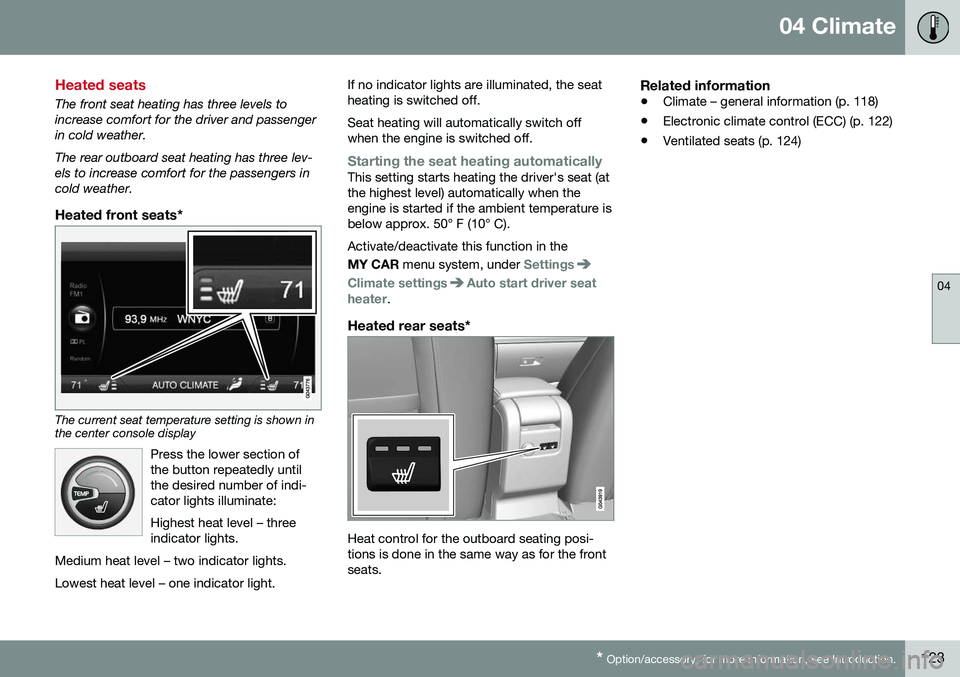
The current seat temperature setting is shown in the center console display
Press the lower section of the button repeatedly untilthe desired number of indi-cator lights illuminate: Highest heat level – three indicator lights.
Medium heat level – two indicator lights. Lowest heat level – one indicator light.
If no indicator lights are illuminated, the seat heating is switched off. Seat heating will automatically switch off when the engine is switched off.
Starting the seat heating automaticallyThis setting starts heating the driver's seat (at the highest level) automatically when theengine is started if the ambient temperature isbelow approx. 50° F (10° C). Activate/deactivate this function in the MY CAR menu system, under
Settings
Climate settingsAuto start driver seat
heater.
Heated rear seats*
Heat control for the outboard seating posi- tions is done in the same way as for the frontseats.
Related information
• Climate – general information (p. 118)
• Electronic climate control (ECC) (p. 122)
• Ventilated seats (p. 124)
Page 126 of 380
04 Climate
04
124* Option/accessory, for more information, see Introduction.
Ventilated seats
Seat ventilation can be used at the same time as seat heating (p. 123) to e.g., help remove
dampness from the seat occupant's clothing.
Ventilated front seats*The ventilation system consists of fans in theseats and backrests that draw air through theseat upholstery. The cooling effect increasesas the air in the passenger compartmentbecomes cooler. The ventilation is controlled by the ECC sys- tem (p. 122), which takes into account theseat temperature, sunlight in the passengercompartment, and the ambient temperature. The ventilation can be used at the same time as seat heating. The ventilation system can be activated when the engine is running. There are three comfortlevels that produce different cooling anddehumidifying effects:
• Level three: press the button once for maximum output – three indicator lightscome on.
• Level two: press the button twice for alower output – two indicator lights comeon.
• Level one: press the button three timesfor the lowest output – one indicator lightcomes on. •
Press the button a fourth time to switchoff the function – the indicator light will goout.
Related information
•Climate – general information (p. 118)
Temperature and blower control
When the vehicle is started, the most recent setting is resumed. The blower should always be activated to help avoid condensation and fogging on thewindows.
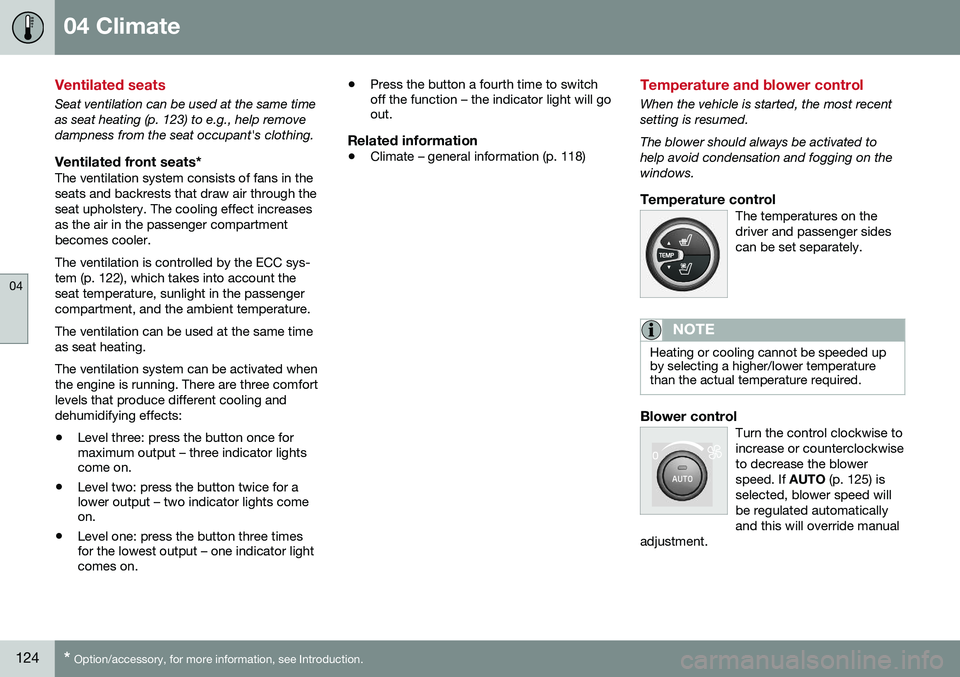
Temperature controlThe temperatures on thedriver and passenger sidescan be set separately.
NOTE
Heating or cooling cannot be speeded up by selecting a higher/lower temperaturethan the actual temperature required.
Blower controlTurn the control clockwise to increase or counterclockwiseto decrease the blowerspeed. If
AUTO (p. 125) is
selected, blower speed willbe regulated automaticallyand this will override manual
adjustment.
Page 128 of 380
04 Climate
04
126* Option/accessory, for more information, see Introduction.
Max. defroster and electrically heated windshield*
The heated windshield and max. defroster functions are used to clear the windshield andfront side windows of condensation and iceas quickly as possible.
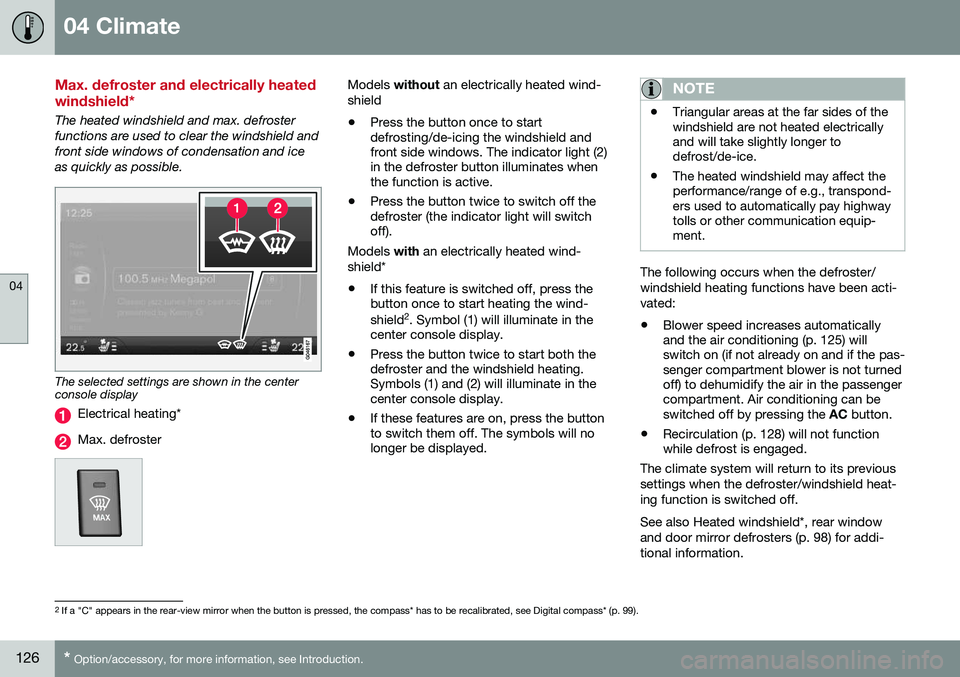
The selected settings are shown in the center console display
Electrical heating*
Max. defroster
Models without an electrically heated wind-
shield • Press the button once to start defrosting/de-icing the windshield andfront side windows. The indicator light (2)in the defroster button illuminates whenthe function is active.
• Press the button twice to switch off thedefroster (the indicator light will switchoff).
Models with an electrically heated wind-
shield*
• If this feature is switched off, press thebutton once to start heating the wind- shield 2
. Symbol (1) will illuminate in the
center console display.
• Press the button twice to start both the defroster and the windshield heating.Symbols (1) and (2) will illuminate in thecenter console display.
• If these features are on, press the buttonto switch them off. The symbols will nolonger be displayed.NOTE
•Triangular areas at the far sides of the windshield are not heated electricallyand will take slightly longer todefrost/de-ice.
• The heated windshield may affect theperformance/range of e.g., transpond-ers used to automatically pay highwaytolls or other communication equip-ment.
The following occurs when the defroster/ windshield heating functions have been acti-vated: •
Blower speed increases automatically and the air conditioning (p. 125) willswitch on (if not already on and if the pas-senger compartment blower is not turnedoff) to dehumidify the air in the passengercompartment. Air conditioning can beswitched off by pressing the
AC button.
• Recirculation (p. 128) will not functionwhile defrost is engaged.
The climate system will return to its previous
settings when the defroster/windshield heat- ing function is switched off. See also Heated windshield*, rear window and door mirror defrosters (p. 98) for addi-tional information.
2 If a "C" appears in the rear-view mirror when the button is pressed, the compass* has to be recalibrated, see Digital compass* (p. 99).
Page 235 of 380
08 Starting and driving
08
}}
* Option/accessory, for more information, see Introduction.233
Starting the engine
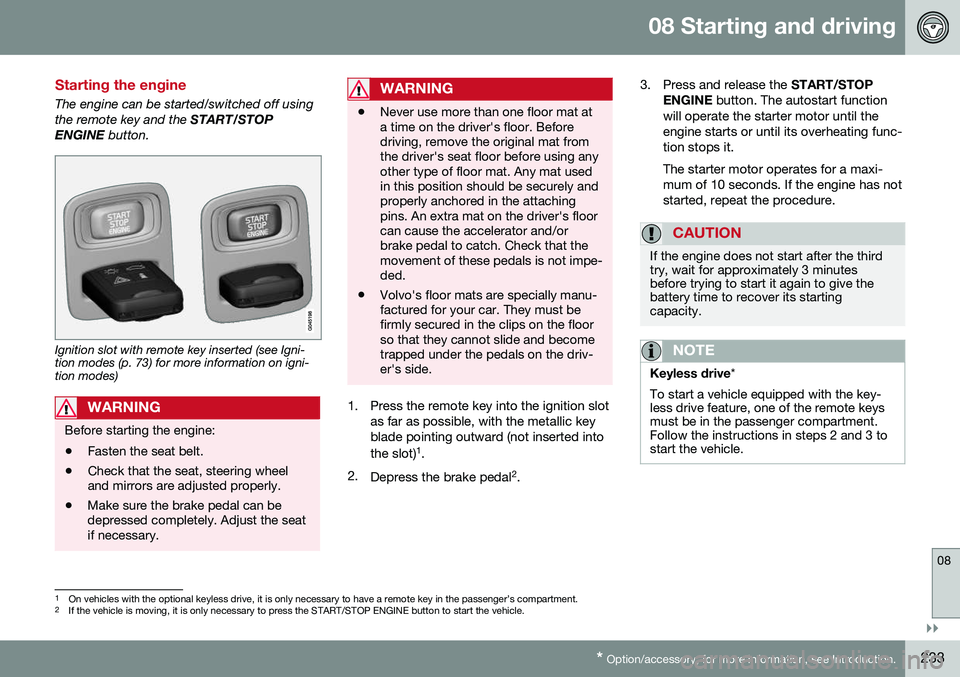
The engine can be started/switched off using the remote key and the START/STOP
ENGINE button.
Ignition slot with remote key inserted (see Igni- tion modes (p. 73) for more information on igni-tion modes)
WARNING
Before starting the engine:
• Fasten the seat belt.
• Check that the seat, steering wheel and mirrors are adjusted properly.
• Make sure the brake pedal can bedepressed completely. Adjust the seatif necessary.
WARNING
•Never use more than one floor mat at a time on the driver's floor. Beforedriving, remove the original mat fromthe driver's seat floor before using anyother type of floor mat. Any mat usedin this position should be securely andproperly anchored in the attachingpins. An extra mat on the driver's floorcan cause the accelerator and/orbrake pedal to catch. Check that themovement of these pedals is not impe-ded.
• Volvo's floor mats are specially manu-factured for your car. They must befirmly secured in the clips on the floorso that they cannot slide and becometrapped under the pedals on the driv-er's side.
1. Press the remote key into the ignition slot
as far as possible, with the metallic key blade pointing outward (not inserted into the slot) 1
.
2. Depress the brake pedal 2
. 3. Press and release the
START/STOP
ENGINE button. The autostart function
will operate the starter motor until the engine starts or until its overheating func-tion stops it. The starter motor operates for a maxi- mum of 10 seconds. If the engine has notstarted, repeat the procedure.
CAUTION
If the engine does not start after the third try, wait for approximately 3 minutesbefore trying to start it again to give thebattery time to recover its startingcapacity.
NOTE
Keyless drive *
To start a vehicle equipped with the key- less drive feature, one of the remote keysmust be in the passenger compartment.Follow the instructions in steps 2 and 3 tostart the vehicle.
1 On vehicles with the optional keyless drive, it is only necessary to have a remote key in the passenger’s compartment.
2 If the vehicle is moving, it is only necessary to press the START/STOP ENGINE button to start the vehicle.
Page 236 of 380
||
08 Starting and driving
08
234
WARNING
•Always remove the remote key from the ignition slot when leaving the vehi-cle and ensure that the ignition inmode
0 (see Ignition modes (p. 73) for
information about the ignition modes).
• On vehicles with the optional keylessdrive, never remove the remote keyfrom the vehicle while it is being drivenor towed.
• Always place the gear selector in Parkand apply the parking brake beforeleaving the vehicle. Never leave thevehicle unattended with the enginerunning.
• Always open garage doors fully beforestarting the engine inside a garage toensure adequate ventilation. Theexhaust gases contain carbon monox-ide, which is invisible and odorless butvery poisonous.
NOTE
•
After a cold start, idle speed may be noticeably higher than normal for ashort period. This is done to help bringcomponents in the emission controlsystem to their normal operating tem-perature as quickly as possible, whichenables them to control emissions andhelp reduce the vehicle's impact on the environment 3
.
CAUTION
• When starting in cold weather, the automatic transmission may shift up atslightly higher engine speeds than nor-mal until the automatic transmissionfluid reaches normal operating tem-perature.
• Do not race a cold engine immediatelyafter starting. Oil flow may not reachsome lubrication points fast enough toprevent engine damage.
• The engine should be idling when youmove the gear selector. Never acceler-ate until after you feel the transmissionengage. Accelerating immediately afterselecting a gear will cause harshengagement and premature transmis-sion wear.
• Selecting
P or N when idling at a
standstill for prolonged periods of timewill help prevent overheating of theautomatic transmission fluid.
Related information
• Switching off the engine (p. 235)
3
If the gear selector is in the D or R positions and the car is not moving, engine speed (rpm) will be lower and it will take longer for the engine to reach normal operating temperature.
Page 240 of 380
08 Starting and driving
08
238
Transmission – general information
The transmission automatically shifts between the various forward gears, based on the levelof acceleration and speed.
G021351
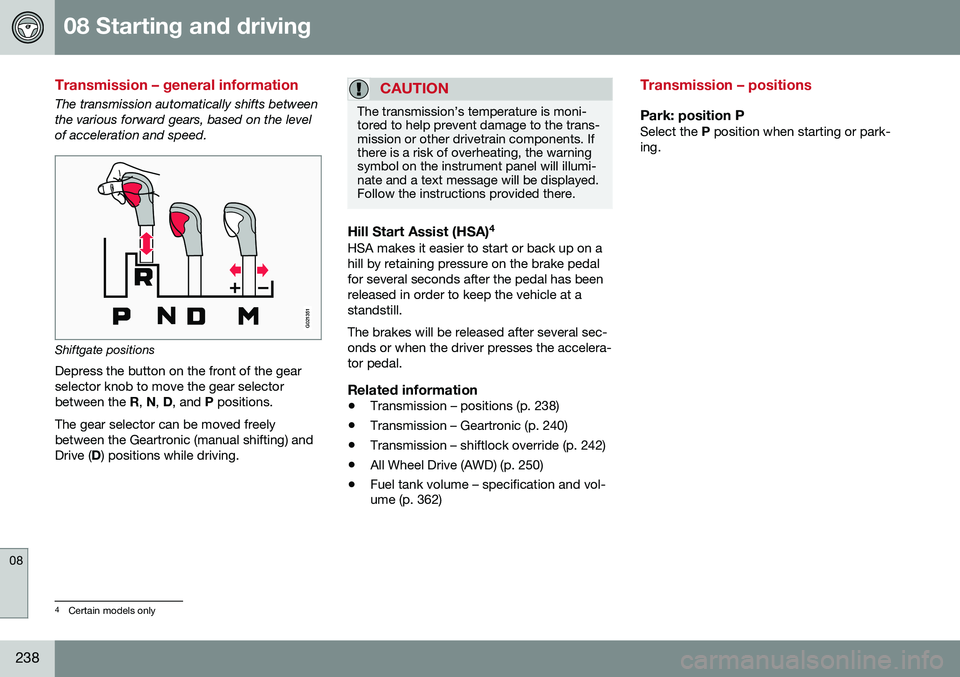
Shiftgate positions
Depress the button on the front of the gear selector knob to move the gear selectorbetween the R, N , D , and P positions.
The gear selector can be moved freelybetween the Geartronic (manual shifting) andDrive ( D) positions while driving.
CAUTION
The transmission’s temperature is moni- tored to help prevent damage to the trans-mission or other drivetrain components. Ifthere is a risk of overheating, the warningsymbol on the instrument panel will illumi-nate and a text message will be displayed.Follow the instructions provided there.
Hill Start Assist (HSA) 4HSA makes it easier to start or back up on a hill by retaining pressure on the brake pedalfor several seconds after the pedal has beenreleased in order to keep the vehicle at astandstill. The brakes will be released after several sec- onds or when the driver presses the accelera-tor pedal.
Related information
•
Transmission – positions (p. 238)
• Transmission – Geartronic (p. 240)
• Transmission – shiftlock override (p. 242)
• All Wheel Drive (AWD) (p. 250)
• Fuel tank volume – specification and vol- ume (p. 362)
Transmission – positions
Park: position PSelect the
P position when starting or park-
ing.
4 Certain models only