child seat VOLVO S90 2017 Owner´s Manual
[x] Cancel search | Manufacturer: VOLVO, Model Year: 2017, Model line: S90, Model: VOLVO S90 2017Pages: 548, PDF Size: 11.42 MB
Page 86 of 548
SAFETY
84
ISOFIX/LATCH lower anchors Lower anchors for ISOFIX/LATCH-equipped child seats are located in the rear, outboardseats, hidden below the backrest cushions.
Using the ISOFIX/LATCH lower child seat anchors
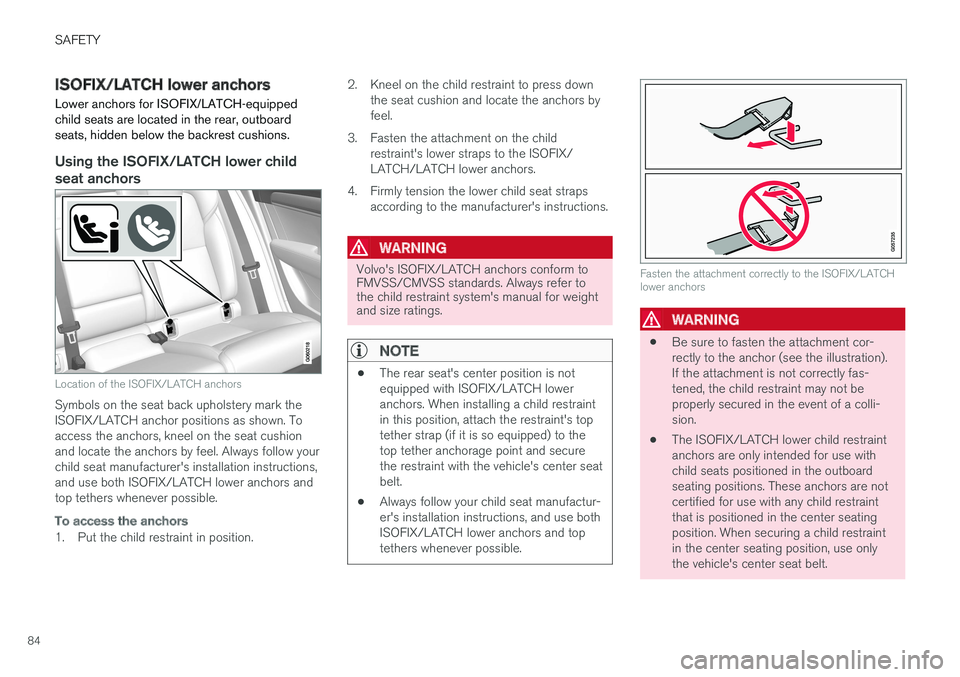
Location of the ISOFIX/LATCH anchors
Symbols on the seat back upholstery mark the ISOFIX/LATCH anchor positions as shown. Toaccess the anchors, kneel on the seat cushionand locate the anchors by feel. Always follow yourchild seat manufacturer's installation instructions,and use both ISOFIX/LATCH lower anchors andtop tethers whenever possible.
To access the anchors
1. Put the child restraint in position.2. Kneel on the child restraint to press down
the seat cushion and locate the anchors by feel.
3. Fasten the attachment on the child restraint's lower straps to the ISOFIX/LATCH/LATCH lower anchors.
4. Firmly tension the lower child seat straps according to the manufacturer's instructions.
WARNING
Volvo's ISOFIX/LATCH anchors conform to FMVSS/CMVSS standards. Always refer tothe child restraint system's manual for weightand size ratings.
NOTE
• The rear seat's center position is not equipped with ISOFIX/LATCH loweranchors. When installing a child restraintin this position, attach the restraint's toptether strap (if it is so equipped) to thetop tether anchorage point and securethe restraint with the vehicle's center seatbelt.
• Always follow your child seat manufactur-er's installation instructions, and use bothISOFIX/LATCH lower anchors and toptethers whenever possible.
Fasten the attachment correctly to the ISOFIX/LATCH lower anchors
WARNING
• Be sure to fasten the attachment cor- rectly to the anchor (see the illustration).If the attachment is not correctly fas-tened, the child restraint may not beproperly secured in the event of a colli-sion.
• The ISOFIX/LATCH lower child restraintanchors are only intended for use withchild seats positioned in the outboardseating positions. These anchors are notcertified for use with any child restraintthat is positioned in the center seatingposition. When securing a child restraintin the center seating position, use onlythe vehicle's center seat belt.
Page 87 of 548
SAFETY
}}
85
Related information
•Top tether anchors (p. 86)Lower child seat attachment points 1
The vehicle is equipped with lower attachment points for child seats in the rear seat.
The lower attachment points are intended for use with rear-facing child restraints. Always follow the child restraint manufacturer's installation instructions when attaching a childrestraint to these attachment points.
Location
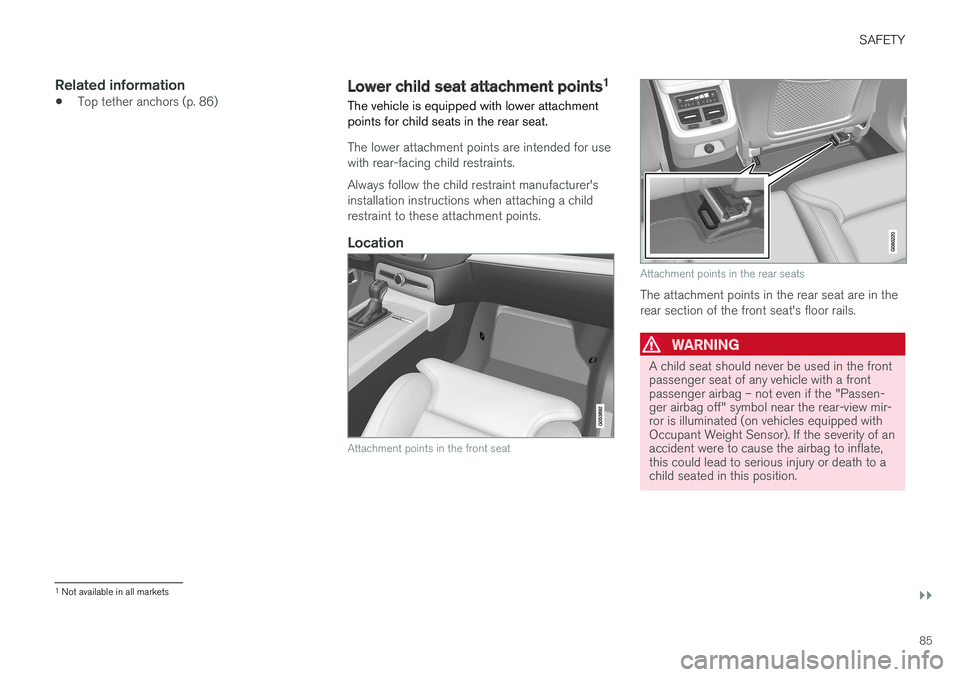
Attachment points in the front seat
Attachment points in the rear seats
The attachment points in the rear seat are in the rear section of the front seat's floor rails.
WARNING
A child seat should never be used in the front passenger seat of any vehicle with a frontpassenger airbag – not even if the "Passen-ger airbag off" symbol near the rear-view mir-ror is illuminated (on vehicles equipped withOccupant Weight Sensor). If the severity of anaccident were to cause the airbag to inflate,this could lead to serious injury or death to achild seated in this position.
1 Not available in all markets
Page 88 of 548
||
SAFETY
86
Related information
•Child restraints (p. 77)
• ISOFIX/LATCH lower anchors (p. 84)
• Occupant weight sensor (p. 68)
Top tether anchors
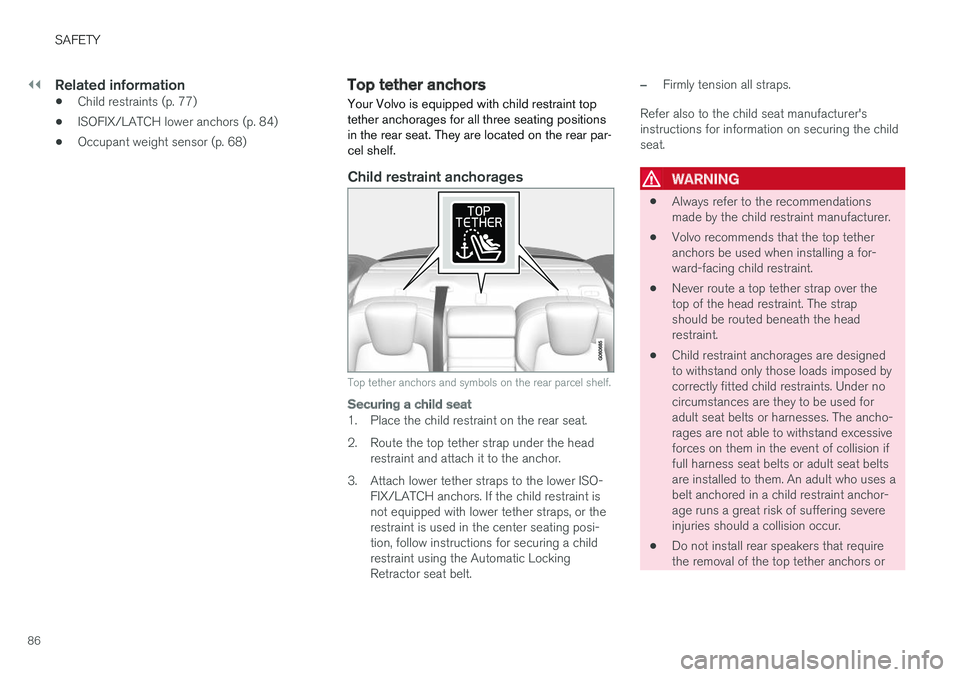
Your Volvo is equipped with child restraint top tether anchorages for all three seating positionsin the rear seat. They are located on the rear par-cel shelf.
Child restraint anchorages
Top tether anchors and symbols on the rear parcel shelf.
Securing a child seat
1. Place the child restraint on the rear seat.
2. Route the top tether strap under the head restraint and attach it to the anchor.
3. Attach lower tether straps to the lower ISO- FIX/LATCH anchors. If the child restraint is not equipped with lower tether straps, or therestraint is used in the center seating posi-tion, follow instructions for securing a childrestraint using the Automatic LockingRetractor seat belt.
–Firmly tension all straps.
Refer also to the child seat manufacturer's instructions for information on securing the childseat.
WARNING
• Always refer to the recommendations made by the child restraint manufacturer.
• Volvo recommends that the top tetheranchors be used when installing a for-ward-facing child restraint.
• Never route a top tether strap over thetop of the head restraint. The strapshould be routed beneath the headrestraint.
• Child restraint anchorages are designedto withstand only those loads imposed bycorrectly fitted child restraints. Under nocircumstances are they to be used foradult seat belts or harnesses. The ancho-rages are not able to withstand excessiveforces on them in the event of collision iffull harness seat belts or adult seat beltsare installed to them. An adult who uses abelt anchored in a child restraint anchor-age runs a great risk of suffering severeinjuries should a collision occur.
• Do not install rear speakers that requirethe removal of the top tether anchors or
Page 89 of 548
SAFETY
}}
* Option/accessory.87
interfere with the proper use of the top tether strap.
Related information
•Child safety (p. 75)
• Child restraints (p. 77)
Integrated booster cushion
*
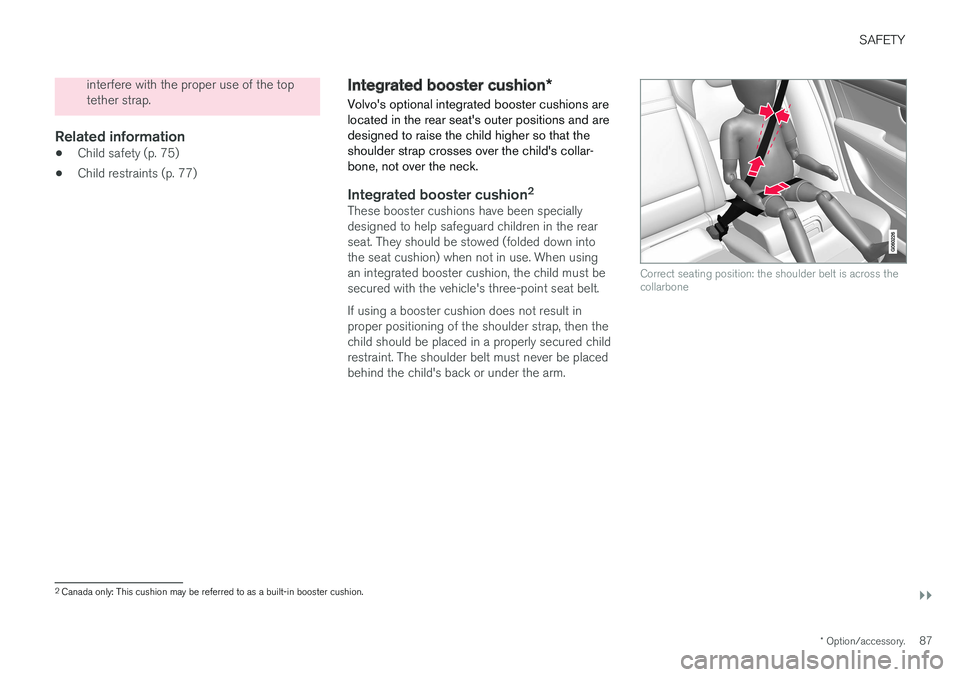
Volvo's optional integrated booster cushions are located in the rear seat's outer positions and aredesigned to raise the child higher so that theshoulder strap crosses over the child's collar-bone, not over the neck.
Integrated booster cushion 2These booster cushions have been specially designed to help safeguard children in the rearseat. They should be stowed (folded down intothe seat cushion) when not in use. When usingan integrated booster cushion, the child must besecured with the vehicle's three-point seat belt. If using a booster cushion does not result in proper positioning of the shoulder strap, then thechild should be placed in a properly secured childrestraint. The shoulder belt must never be placedbehind the child's back or under the arm.
Correct seating position: the shoulder belt is across the collarbone
2
Canada only: This cushion may be referred to as a built-in booster cushion.
Page 91 of 548
SAFETY
}}
* Option/accessory.89
Raising the integrated booster cushion*
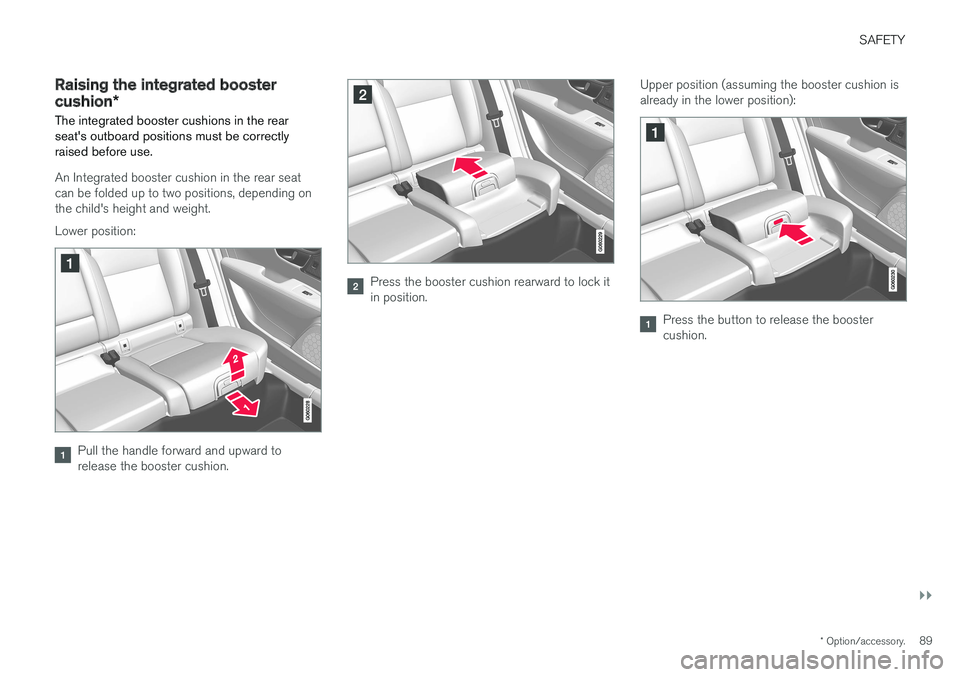
The integrated booster cushions in the rear seat's outboard positions must be correctlyraised before use.
An Integrated booster cushion in the rear seat can be folded up to two positions, depending onthe child's height and weight. Lower position:
Pull the handle forward and upward to release the booster cushion.
Press the booster cushion rearward to lock it in position. Upper position (assuming the booster cushion isalready in the lower position):
Press the button to release the booster cushion.
Page 93 of 548
SAFETY
}}
* Option/accessory.91
Stowing the integrated booster cushion*
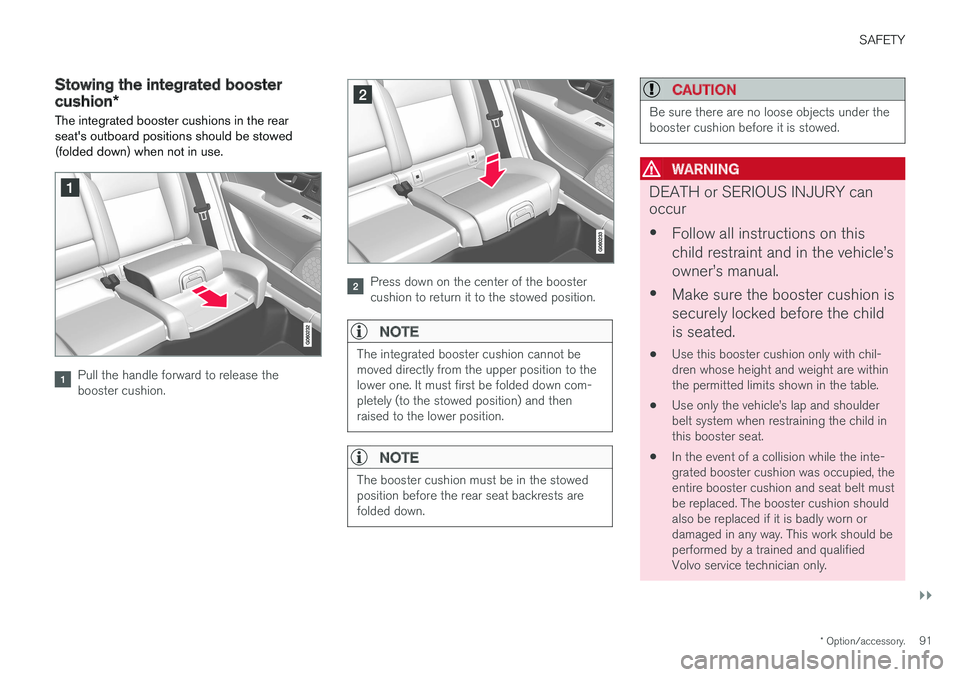
The integrated booster cushions in the rear seat's outboard positions should be stowed(folded down) when not in use.
Pull the handle forward to release the booster cushion.
Press down on the center of the booster cushion to return it to the stowed position.
NOTE
The integrated booster cushion cannot be moved directly from the upper position to thelower one. It must first be folded down com-pletely (to the stowed position) and thenraised to the lower position.
NOTE
The booster cushion must be in the stowed position before the rear seat backrests arefolded down.
CAUTION
Be sure there are no loose objects under the booster cushion before it is stowed.
WARNING
DEATH or SERIOUS INJURY can occur • Follow all instructions on this child restraint and in the vehicle
Page 109 of 548

INSTRUMENTS AND CONTROLS
}}
107
For the power windows to function, the ignition must be in at least mode
I. When the vehicle has
been running, the power windows can be oper- ated for several minutes after the ignition hasbeen switched off, or until a door has beenopened.
NOTE
• Movement of the windows will stop if they are obstructed in any way. If this happenstwice in succession, the automatic func-tion will not work for several minutes andthe window can be closed by holding thebutton up.
• To reduce buffeting wind noise if the rearwindows are opened, also open the frontwindows slightly.
Manual up/down
–Move one of the controls up/down slightly.
> The power windows move up/down as
long as the control is held in position.
Auto up/down
–Move one of the controls up/down as far as possible and release it.
> The window will open or close completely.
ResettingIf the battery has been disconnected, the auto open function must be reset so that it will workproperly
1. Gently raise the front section of the button to close the window and hold it for one second.
2. Release the button briefly.
3. Raise the front section of the button again for one second.
Related information
• Child safety locks (p. 238)
Rearview mirror The interior rearview mirror has an auto-dim function that helps reduce glare from followingvehicle's headlights.
Auto-dim functionThe auto-dim function is controlled by two sen- sors: one pointing forward (located on the for-ward-facing side of the mirror, which monitors theamount of ambient light) and one pointing rear-ward (located on the side of the mirror facing thedriver at the upper edge, which senses thestrength of following vehicles' headlights), andwork together to help eliminate glare.
NOTE
Obstructing the sensors with e.g., parking stickers, transponders, etc., or by placingobjects on the seats or parcel shelf in such away that light is prevented from reaching thesensors will reduce the auto-dim function inthe interior rearview mirror and optional auto-dim function in the door mirrors.
The auto-dim function is always active while the vehicle is being driven except when the reversegear has been selected. The level of sensitivityfor this function can be set to three levels, whichaffect the rearview mirror and door mirrors.
Page 167 of 548
INSTRUMENTS AND CONTROLS
* Option/accessory.165
Front door closed
–Press and hold one of the buttons ( 1 or 2)
until the seat, door mirrors and head-up dis- play have moved to the positions stored inthat button.
The seat, door mirrors and head-up display willstop automatically if the button is released beforethe they have reached the stored positions.
WARNING
• Because the driver's seat can be adjusted with the ignition off, children should neverbe left unattended in the vehicle.
• Movement of the seat can be STOPPEDat any time by pressing any button on thepower seat control panel.
• Do not adjust the seat while driving. Theseat should be adjusted so that the brakepedal can be depressed fully. In addition,position the seat as far rearward as com-fort and control allow.
• The seat rails on the floor must not beobstructed in any way when the seat is inmotion.
Related information
•
Adjusting power front seats
* (p. 163)
• Power front seats
* (p. 162)
Multifunctional front seats *
In addition to the adjustment settings offered by the power seat controls, the multifunction controlprovides additional possibilities for convenienceand comfort.
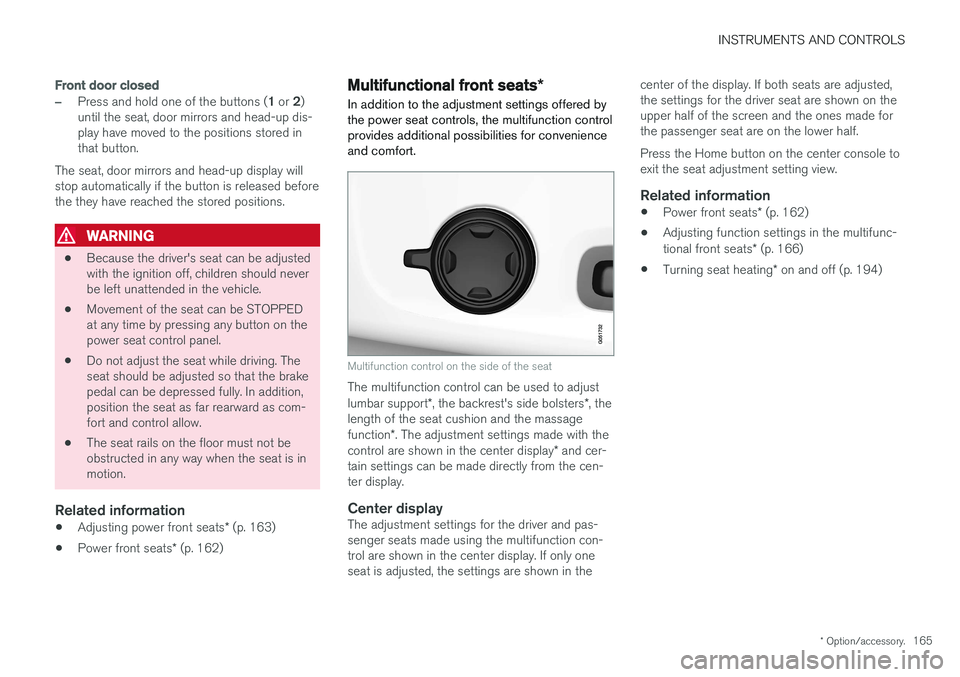
Multifunction control on the side of the seat
The multifunction control can be used to adjust lumbar support *, the backrest's side bolsters *, the
length of the seat cushion and the massagefunction *. The adjustment settings made with the
control are shown in the center display * and cer-
tain settings can be made directly from the cen- ter display.
Center displayThe adjustment settings for the driver and pas-senger seats made using the multifunction con-trol are shown in the center display. If only oneseat is adjusted, the settings are shown in the center of the display. If both seats are adjusted,the settings for the driver seat are shown on theupper half of the screen and the ones made forthe passenger seat are on the lower half. Press the Home button on the center console to exit the seat adjustment setting view.
Related information
•
Power front seats
* (p. 162)
• Adjusting function settings in the multifunc- tional front seats
* (p. 166)
• Turning seat heating
* on and off (p. 194)
Page 211 of 548
LOADING AND STORAGE
}}}}
* Option/accessory.209
Electrical sockets There are two 12-volt sockets in the tunnel con- sole, a 120-volt socket on the rear side of thetunnel console, and one 12-volt socket in the trunk*.
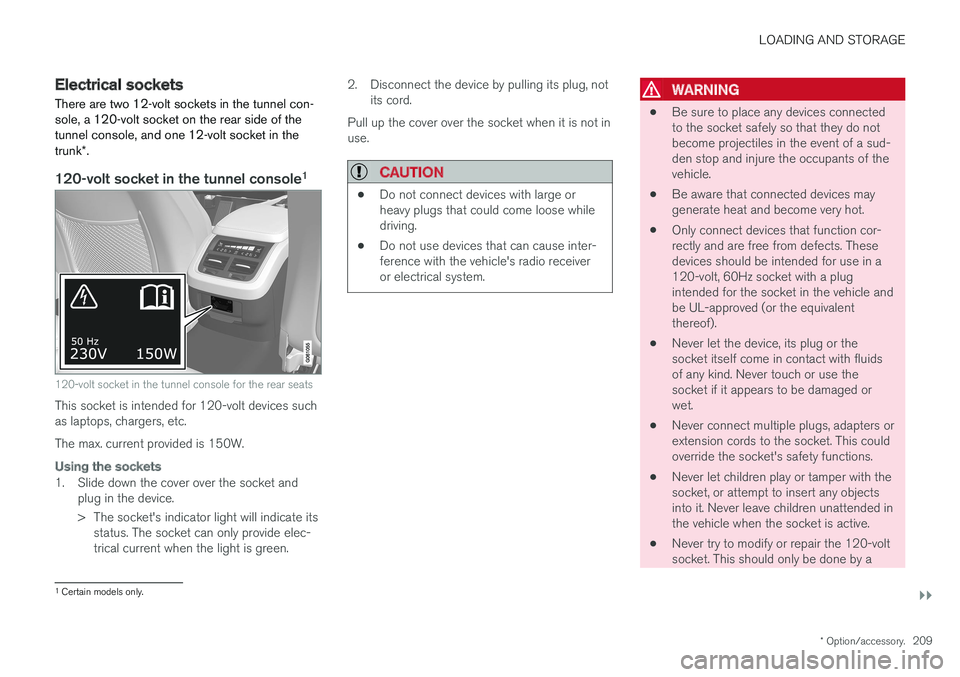
120-volt socket in the tunnel console 1
120-volt socket in the tunnel console for the rear seats
This socket is intended for 120-volt devices such as laptops, chargers, etc. The max. current provided is 150W.
Using the sockets
1. Slide down the cover over the socket and
plug in the device.
> The socket's indicator light will indicate itsstatus. The socket can only provide elec- trical current when the light is green. 2. Disconnect the device by pulling its plug, not
its cord.
Pull up the cover over the socket when it is not inuse.
CAUTION
• Do not connect devices with large or heavy plugs that could come loose whiledriving.
• Do not use devices that can cause inter-ference with the vehicle's radio receiveror electrical system.
WARNING
•
Be sure to place any devices connected to the socket safely so that they do notbecome projectiles in the event of a sud-den stop and injure the occupants of thevehicle.
• Be aware that connected devices maygenerate heat and become very hot.
• Only connect devices that function cor-rectly and are free from defects. Thesedevices should be intended for use in a120-volt, 60Hz socket with a plugintended for the socket in the vehicle andbe UL-approved (or the equivalentthereof).
• Never let the device, its plug or thesocket itself come in contact with fluidsof any kind. Never touch or use thesocket if it appears to be damaged orwet.
• Never connect multiple plugs, adapters orextension cords to the socket. This couldoverride the socket's safety functions.
• Never let children play or tamper with thesocket, or attempt to insert any objectsinto it. Never leave children unattended inthe vehicle when the socket is active.
• Never try to modify or repair the 120-voltsocket. This should only be done by a
1
Certain models only.
Page 538 of 548
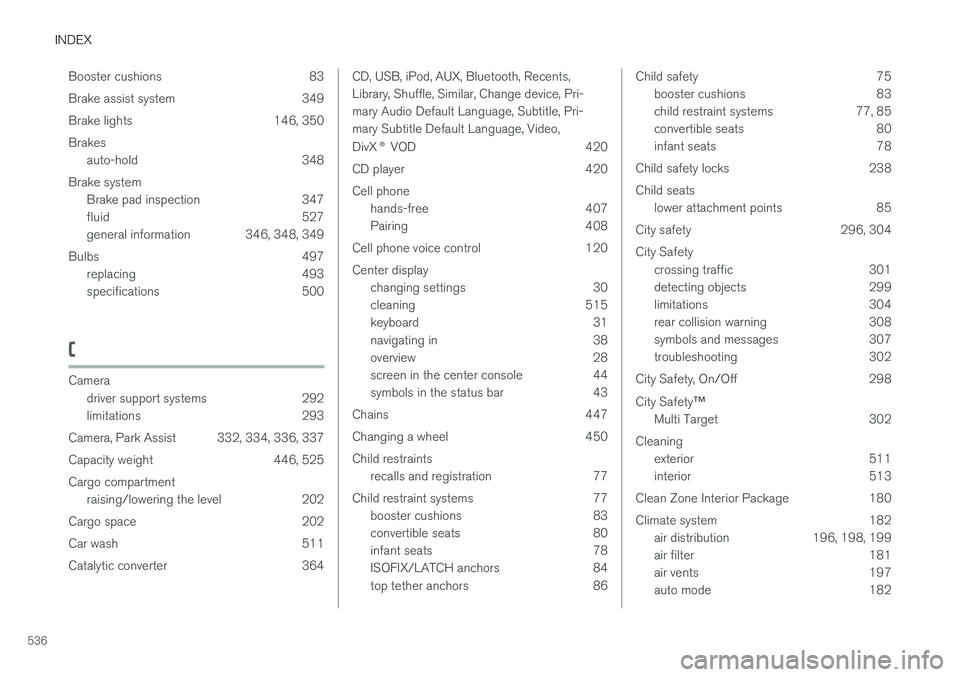
INDEX
536Booster cushions 83
Brake assist system 349
Brake lights 146, 350Brakes
auto-hold 348
Brake system Brake pad inspection 347
fluid 527
general information 346, 348, 349
Bulbs 497 replacing 493
specifications 500
C
Cameradriver support systems 292
limitations 293
Camera, Park Assist 332, 334, 336, 337
Capacity weight 446, 525Cargo compartment raising/lowering the level 202
Cargo space 202
Car wash 511
Catalytic converter 364
CD, USB, iPod, AUX, Bluetooth, Recents, Library, Shuffle, Similar, Change device, Pri-mary Audio Default Language, Subtitle, Pri-mary Subtitle Default Language, Video, DivX ® VOD 420
CD player 420 Cell phone hands-free 407
Pairing 408
Cell phone voice control 120 Center display changing settings 30
cleaning 515
keyboard 31
navigating in 38
overview 28
screen in the center console 44
symbols in the status bar 43
Chains 447
Changing a wheel 450Child restraints recalls and registration 77
Child restraint systems 77 booster cushions 83
convertible seats 80
infant seats 78
ISOFIX/LATCH anchors 84
top tether anchors 86Child safety 75
booster cushions 83
child restraint systems 77, 85
convertible seats 80
infant seats 78
Child safety locks 238 Child seats lower attachment points 85
City safety 296, 304City Safety crossing traffic 301
detecting objects 299
limitations 304
rear collision warning 308
symbols and messages 307
troubleshooting 302
City Safety, On/Off 298 City Safety ™
Multi Target 302
Cleaning exterior 511
interior 513
Clean Zone Interior Package 180
Climate system 182 air distribution 196, 198, 199
air filter 181
air vents 197
auto mode 182