VOLVO S90 2017 Owner´s Manual
Manufacturer: VOLVO, Model Year: 2017, Model line: S90, Model: VOLVO S90 2017Pages: 548, PDF Size: 11.42 MB
Page 381 of 548
STARTING AND DRIVING
}}
* Option/accessory.379
•
A low reading in the green area indicates economical driving.
• A higher reading indicates higher fuel con-sumption.
The ECO gauge also has an indicator showinghow a "reference" driver would drive in the samesituation. This is indicated by a diamond in thegauge.
Eco climate
In the Eco drive mode, eco climate is automati-
cally activated in the passenger compartment to help minimize energy consumption. To restart the climate system functions that may have been reduced, press the
AUTO or defroster
buttons. In order to return to full functionality for all of the systems that may have been reduced to helpimprove economical driving, select another drivemode or adapt the climate system functions using the
Individual mode to full functionality.
Related information
• Driving economically (p. 354)
• Drive modes
* (p. 374)
• Start/Stop (p. 379)
Start/Stop
Start/Stop is a function that temporarily switches off the engine when the vehicle is not moving,for instance in heavy traffic or at a traffic light, tohelp reduce fuel consumption. The engine startsagain automatically when the brake pedal isreleased.
Start/Stop is one of several fuel-conserving fea- tures that also help reduce emissions. This feature helps make it possible to drive more economically by allowing the engine to auto-stopin certain situations.
Related information
• Conditions for Start/Stop (p. 381)
• Using the Start/Stop function (p. 379)
• ECO drive mode (p. 377)
Using the Start/Stop function Start/Stop is a function that temporarily switches off the engine when the vehicle is not moving,for instance in heavy traffic or at a traffic light, tohelp reduce fuel consumption. The engine startsagain automatically when the brake pedal isreleased.
Start/Stop is available when the engine has been started. The instrument panel will indicate if thefunction is available/unavailable/active. All of the vehicle's normal systems such as light- ing, infotainment, etc., function normally when theengine has auto-stopped. However, certain func-tions, such as climate system blower speed orvery high infotainment system volume, will betemporarily reduced.
Auto-stopThe following conditions must be met for theengine to auto-stop:
• Stop the vehicle by applying the brakes andkeep the brake pedal depressed. The engine will auto-stop. If the COMFORT 5
or ECO driv-
ing modes are activated, the engine can auto-stop before the vehicle has come to astandstill.
If the
Adaptive cruise or Pilot Assist functions
are activated, the engine will auto-stop after
5 The default driving mode.
Page 382 of 548
||
STARTING AND DRIVING
380approx. 3 seconds. See also the article "Condi- tions for Start/Stop."
Auto-startThe following conditions must be met for theengine to auto-start:
• Release the brake pedal; the engine willautomatically restart. When starting on anuphill incline, the Hill Start Assist (HSA)function will be activated to help prevent thevehicle from rolling backward.
• When the brake system's Auto Hold functionis activated, the engine will not auto-startuntil the accelerator pedal is pressed.
• When
Adaptive cruise or Pilot Assist are
activated, the engine will auto-start when the accelerator pedal is pressed or if the
button is pressed on the left-side steering wheel keypad.
• Keep the brake pedal depressed but pressthe accelerator pedal. The engine will auto-start.
• On a downhill incline, release the brake pedalso that the vehicle begins to roll. The enginewill auto-start after a slight increase in speed.
Symbols in the instrument panel
12" instrument panel
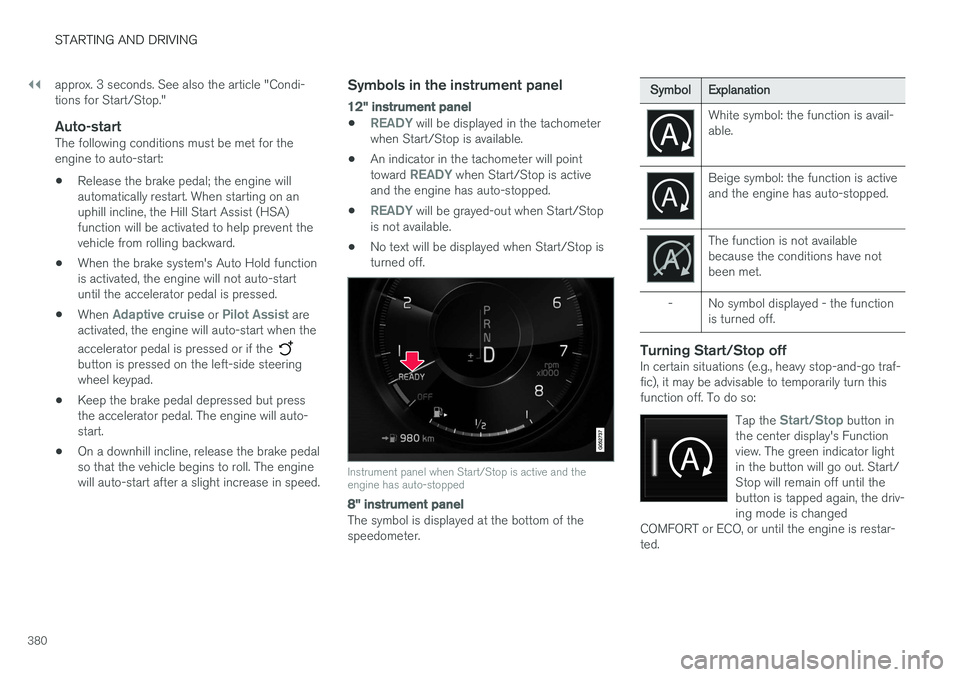
•READY will be displayed in the tachometer
when Start/Stop is available.
• An indicator in the tachometer will point toward
READY when Start/Stop is active
and the engine has auto-stopped.
•
READY will be grayed-out when Start/Stop
is not available.
• No text will be displayed when Start/Stop is turned off.
Instrument panel when Start/Stop is active and the engine has auto-stopped
8" instrument panel
The symbol is displayed at the bottom of the speedometer.
Symbol
Explanation
White symbol: the function is avail- able.
Beige symbol: the function is active and the engine has auto-stopped.
The function is not available because the conditions have notbeen met.
- No symbol displayed - the function is turned off.
Turning Start/Stop offIn certain situations (e.g., heavy stop-and-go traf- fic), it may be advisable to temporarily turn thisfunction off. To do so:
Tap the
Start/Stop button in
the center display's Function view. The green indicator lightin the button will go out. Start/Stop will remain off until thebutton is tapped again, the driv-ing mode is changed
COMFORT or ECO, or until the engine is restar-ted.
Page 383 of 548
STARTING AND DRIVING
}}
* Option/accessory.381
Related information
•Conditions for Start/Stop (p. 381)
• Start/Stop (p. 379)
Conditions for Start/Stop
Certain conditions must be met for the Start/ Stop feature to function. If a condition is not met,this will be indicated in the instrument panel.
The engine does not auto-stopIn certain situations or conditions, the engine may not auto-stop when the vehicle comes to a
standstill, such as when:
• the vehicle has not reached a speed of approx. 8 mph (12 km/h) after starting.
• after several auto-stops, the speed mustagain exceed approx. 8 mph (12 km/h)before the next auto-stop.
• the driver's seat belt is unbuckled.
• the main battery's charge is below the mini-mum level.
• the engine has not reached its normal oper-ating temperature.
• the ambient temperature is below approx.23°F (-5°C) or above approx. 85°F (30°C).
• the windshield's heating function
* is acti-
vated.
• the climate system cannot keep the desiredsettings in the passenger compartment.
• the vehicle is backing up.
• the main battery's temperature is above orbelow the permitted limits.
• the driver is turning the steering wheel hard. •
the road's incline is very steep.
• the hood is opened.
• the transmission has not reached its normaloperating temperature.
• driving at high altitude and the engine hasnot reached its normal operating tempera-ture.
• the gear selector is in the manual shiftingposition.
• the ABS brakes have activated.
• hard braking (even if the ABS brakes havenot activated).
• many starts during a short time period havetriggered the starter motor's overheating pro-tection.
• a trailer's electrical system is connected tothe vehicle's electrical system.
The engine does not auto-startIn certain situations or conditions, the engine may not auto-start
after an auto-stop, such as:
• if the driver is not wearing a seat belt
• the gear selector is in the
P position and the
driver's door is open. The engine must be started normally.
The engine auto-starts while the brake pedal is depressed
In the following situations, the engine will auto-
start even though the brake pedal is depressed:
Page 384 of 548
||
STARTING AND DRIVING
382•
condensation forms on the inside of the win- dows.
• the climate system cannot keep the desiredsettings in the passenger compartment.
• electrical current consumption is temporarilyhigh or the main battery's charge is belowthe minimum level.
• the brake pedal is pumped repeatedly.
• the hood is opened.
• the vehicle begins to move or increasesspeed slightly (if the engine auto-stoppedbefore the vehicle was at a standstill).
• the driver's seat belt is unbuckled while the gear selector is in the
D or N positions.
• the gear selector is moved from
D to R or ±.
• the driver's door is opened with the gearselector in
D: an audible signal and a text
message will inform the driver that the igni- tion is on.
WARNING
Do not open the hood if the engine has auto- stopped. The engine could suddenly auto-start. Before opening the hood:
• Switch off the ignition by turning the start knob in the tunnel console toward
STOP.
• Be aware that if the engine has been run- ning, components in the engine compart-ment will be very hot.
Related information
• Using the Start/Stop function (p. 379)
Automatic transmission
The automatic transmission has 8 forward gears and shifts up or down based on the level ofacceleration, speed and engine speed (meas-ured in revolutions per minute - rpm). Manualshifting is also possible. The gear indicator in theinstrument panel shows the gear currently beingused or gear shift mode.
CAUTION
The transmission
Page 385 of 548
STARTING AND DRIVING
}}
* Option/accessory.383
Related information
•Gear selector positions (p. 384)
• Gear shift indicator (p. 384)
• Shiftlock (p. 383)
• Steering wheel paddles
* (p. 386)
• All Wheel Drive (AWD) (p. 387)
Shiftlock The automatic transmission's shiftlock feature helps prevent inadvertently moving the gearselector between different positions.
There are two different types of shiftlock: mechanical and automatic.
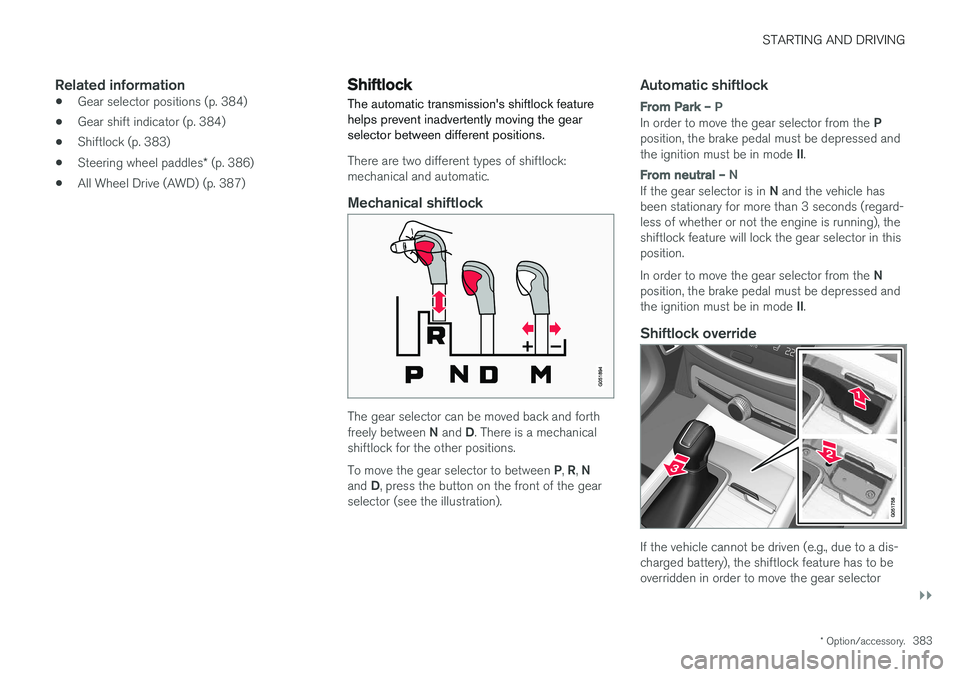
Mechanical shiftlock
The gear selector can be moved back and forth freely between
N and D. There is a mechanical
shiftlock for the other positions. To move the gear selector to between P, R , N
and D, press the button on the front of the gear
selector (see the illustration).
Automatic shiftlock
From Park – P
In order to move the gear selector from the P
position, the brake pedal must be depressed and the ignition must be in mode II.
From neutral – N
If the gear selector is in N and the vehicle has
been stationary for more than 3 seconds (regard- less of whether or not the engine is running), theshiftlock feature will lock the gear selector in thisposition. In order to move the gear selector from the N
position, the brake pedal must be depressed and the ignition must be in mode II.
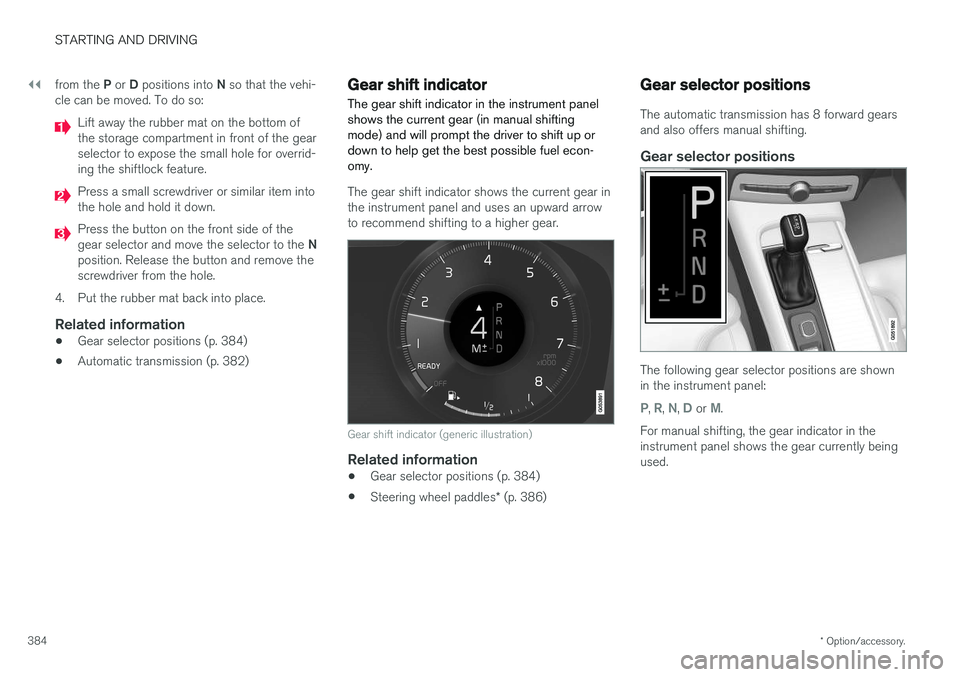
Shiftlock override
If the vehicle cannot be driven (e.g., due to a dis- charged battery), the shiftlock feature has to beoverridden in order to move the gear selector
Page 386 of 548
||
STARTING AND DRIVING
* Option/accessory.
384 from the
P or D positions into N so that the vehi-
cle can be moved. To do so:
Lift away the rubber mat on the bottom of the storage compartment in front of the gearselector to expose the small hole for overrid-ing the shiftlock feature.
Press a small screwdriver or similar item into the hole and hold it down.
Press the button on the front side of the gear selector and move the selector to the N
position. Release the button and remove the screwdriver from the hole.
4. Put the rubber mat back into place.
Related information
• Gear selector positions (p. 384)
• Automatic transmission (p. 382)
Gear shift indicator
The gear shift indicator in the instrument panel shows the current gear (in manual shiftingmode) and will prompt the driver to shift up ordown to help get the best possible fuel econ-omy.
The gear shift indicator shows the current gear in the instrument panel and uses an upward arrowto recommend shifting to a higher gear.
Gear shift indicator (generic illustration)
Related information
• Gear selector positions (p. 384)
• Steering wheel paddles
* (p. 386)
Gear selector positions
The automatic transmission has 8 forward gears and also offers manual shifting.
Gear selector positions
The following gear selector positions are shown in the instrument panel:
P, R, N, D or M.
For manual shifting, the gear indicator in the instrument panel shows the gear currently beingused.
Page 387 of 548
STARTING AND DRIVING
}}
385
Park – P
Park is activated using a switch located next to the gear selector. Select P when the vehicle is parked or when the
starting the engine. The vehicle must be station- ary when P is selected.
The ignition must be in mode II and the brake
pedal must be depressed before the gear selec-tor can be moved from P.
In position P, the transmission is mechanically
locked. Always apply the parking brake when the vehicle is parked.
NOTE
The gear selector must be in the P position
before the vehicle can be locked and the alarm set.
WARNING
Always apply the parking brake when the vehicle is parked, particularly when parking on a hill. The transmission's P mode may not be
able to keep the vehicle stationary if it is parked on an incline.
Reverse – R
The vehicle must be stationary before R can be
selected.
Neutral – N
No gear is selected and the engine can be started. Always apply the parking brake if thevehicle is not moving and the gear selector is in the N position.
The ignition must be in mode II and the brake
pedal must be depressed before the gear selec-tor can be moved from N.
Drive – D
D is the normal driving position and gear shifting
is fully automatic. The vehicle must be stationary when the gear selector is moved from R to D.
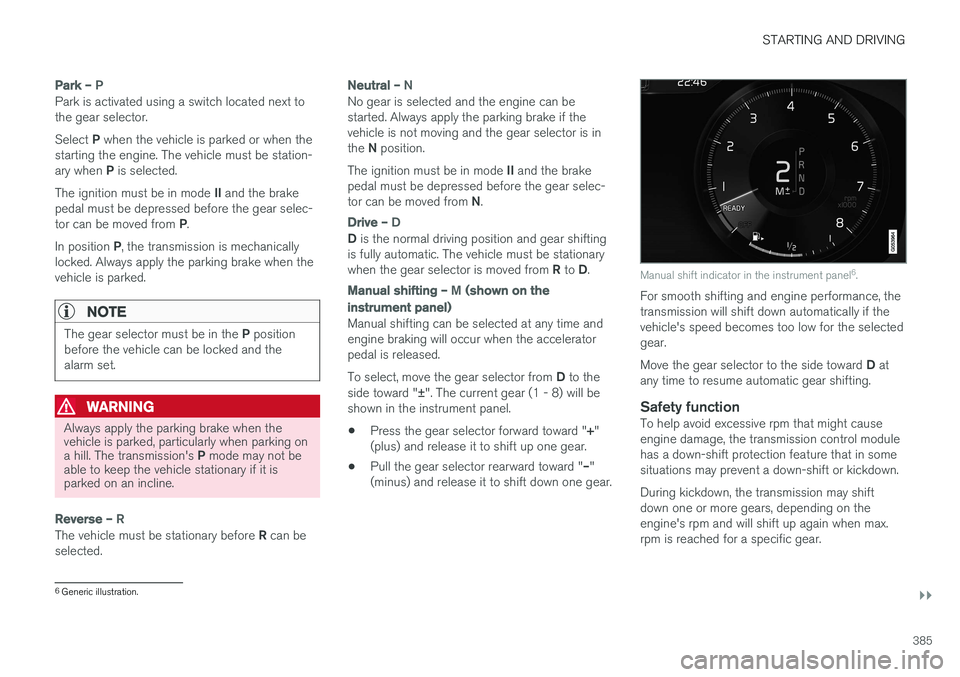
Manual shifting – M (shown on the
instrument panel)
Manual shifting can be selected at any time and engine braking will occur when the acceleratorpedal is released. To select, move the gear selector from D to the
side toward " ±". The current gear (1 - 8) will be
shown in the instrument panel.
• Press the gear selector forward toward "
+"
(plus) and release it to shift up one gear.
• Pull the gear selector rearward toward "
–"
(minus) and release it to shift down one gear.
Manual shift indicator in the instrument panel 6
.
For smooth shifting and engine performance, the transmission will shift down automatically if thevehicle's speed becomes too low for the selectedgear. Move the gear selector to the side toward D at
any time to resume automatic gear shifting.
Safety functionTo help avoid excessive rpm that might cause engine damage, the transmission control modulehas a down-shift protection feature that in somesituations may prevent a down-shift or kickdown. During kickdown, the transmission may shift down one or more gears, depending on theengine's rpm and will shift up again when max.rpm is reached for a specific gear.
6 Generic illustration.
Page 388 of 548
||
STARTING AND DRIVING
* Option/accessory.
386
Related information
• Steering wheel paddles
* (p. 386)
• Shiftlock (p. 383)
• Gear shift indicator (p. 384)
Steering wheel paddles
*
In addition to the manual gearshift function using the gear selector, the paddles make it possibleto manually shift gears from the steering wheel.
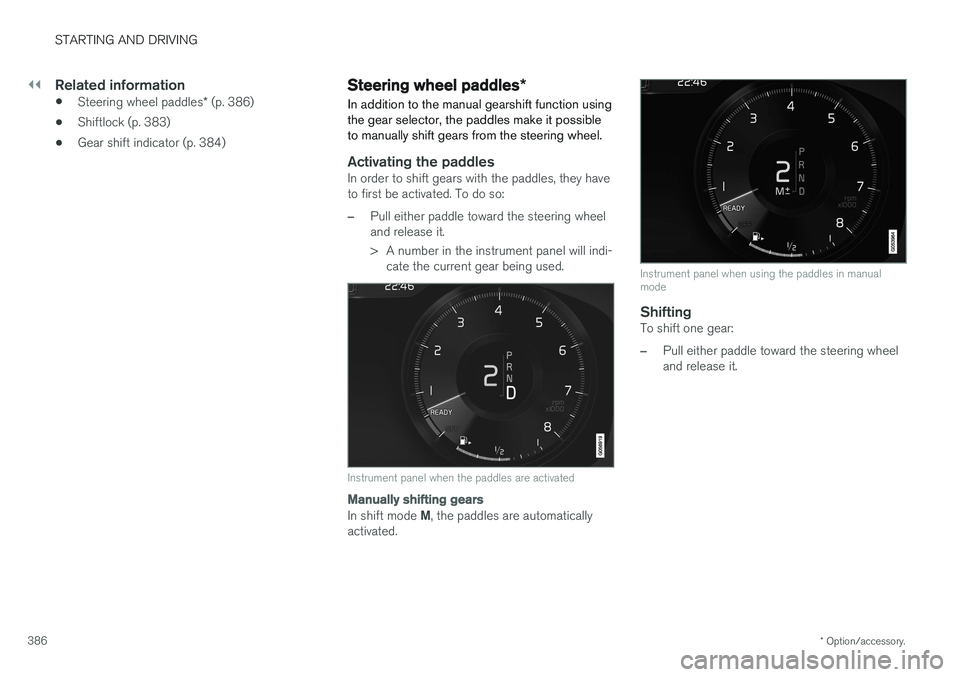
Activating the paddlesIn order to shift gears with the paddles, they have to first be activated. To do so:
–Pull either paddle toward the steering wheel and release it.
> A number in the instrument panel will indi- cate the current gear being used.
Instrument panel when the paddles are activated
Manually shifting gears
In shift mode M, the paddles are automatically
activated.
Instrument panel when using the paddles in manual mode
ShiftingTo shift one gear:
–Pull either paddle toward the steering wheel and release it.
Page 389 of 548
STARTING AND DRIVING
* Option/accessory.387
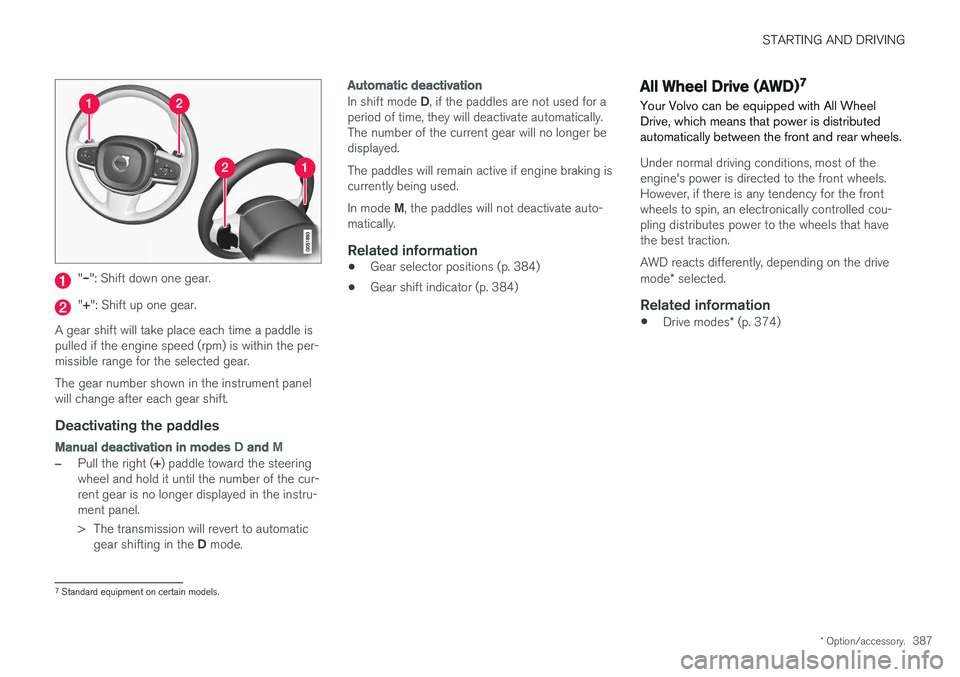
"– ": Shift down one gear.
"+ ": Shift up one gear.
A gear shift will take place each time a paddle is pulled if the engine speed (rpm) is within the per-missible range for the selected gear. The gear number shown in the instrument panel will change after each gear shift.
Deactivating the paddles
Manual deactivation in modes D and M
–Pull the right ( +) paddle toward the steering
wheel and hold it until the number of the cur- rent gear is no longer displayed in the instru-ment panel.
> The transmission will revert to automatic
gear shifting in the D mode.
Automatic deactivation
In shift mode D, if the paddles are not used for a
period of time, they will deactivate automatically. The number of the current gear will no longer bedisplayed. The paddles will remain active if engine braking is currently being used. In mode M, the paddles will not deactivate auto-
matically.
Related information
• Gear selector positions (p. 384)
• Gear shift indicator (p. 384)
All Wheel Drive (AWD) 7
Your Volvo can be equipped with All Wheel Drive, which means that power is distributedautomatically between the front and rear wheels.
Under normal driving conditions, most of the engine's power is directed to the front wheels.However, if there is any tendency for the frontwheels to spin, an electronically controlled cou-pling distributes power to the wheels that havethe best traction. AWD reacts differently, depending on the drive mode * selected.
Related information
• Drive modes
* (p. 374)
7
Standard equipment on certain models.
Page 390 of 548
STARTING AND DRIVING
* Option/accessory.
388
Leveling control * and suspension
Self-leveling and suspension functions are con- trolled automatically.
Self-leveling controlThis function keeps the rear section of the vehi- cle level regardless of the load being transportedand also remains active for a certain period afterthe vehicle has been parked.
Active chassis (Four-C)This function regulates the characteristics of theshock absorbers according to the selected drivemode and the vehicle's speed. The default set-ting is for optimal comfort and is regulated con-tinuously depending on factors such as road sur-face, acceleration, braking and cornering.
Suspension settings
Deactivating suspension and leveling control
In certain situations, this function has to be turned off, for example when lifting the vehicle ona jack to help avoid problems created by the dif-ference in levels in the pneumatic suspensionwhen the vehicle is raised. 1. Tap
Settings in the center display's Top
view.
2. Tap
My CarSuspension .
3. Select
Deactivate Suspension & Leveling
Control.
Changing the suspension control level 8
Models equipped with the Four-C active chassis system but without the drive mode control
*, sus-
pension control is adjusted from the center dis- play. 1. Tap
Settings in Top view.
2. Tap
My CarDrive ModeSuspension
Control and select the desired level.
TransportWhen transporting the vehicle on a ferry, train or a tow truck, it may only be secured (lashed)around the tires, not using any other chassiscomponents. Changes in the pneumatic suspen-sion may occur during transport that could nega-tively affect the lashing and result in damage.
Related information
• Drive modes
* (p. 374)
• Driving with a trailer (p. 366)
• Loading (p. 202)
8
Depending on the equipment installed in the vehicle'