radio antenna VOLVO S90 2017 Owner´s Manual
[x] Cancel search | Manufacturer: VOLVO, Model Year: 2017, Model line: S90, Model: VOLVO S90 2017Pages: 548, PDF Size: 11.42 MB
Page 102 of 548
||
INSTRUMENTS AND CONTROLS
1004.
Press the programmed HomeLink ®
button
and check the indicator light. Indicator light glows steadily green: pro-
gramming has been completed. The garage door, gate, etc., should now be activatedwhen the programmed button is pressed. Indicator light flashes 10 times a second: press the HomeLink ®
button that is being
programmed. Hold it for 2 seconds and release it. Repeat the “press/hold/release”sequence a second time, and, depending onthe brand of the garage door opener, repeatthis sequence a third time to complete theprogramming process. Programming shouldnow be completed and the garage door,gate, etc., should now be activated when theprogrammed button is pressed. If the garage door, etc. still does not react: continue with steps 6-8 to complete
programming.
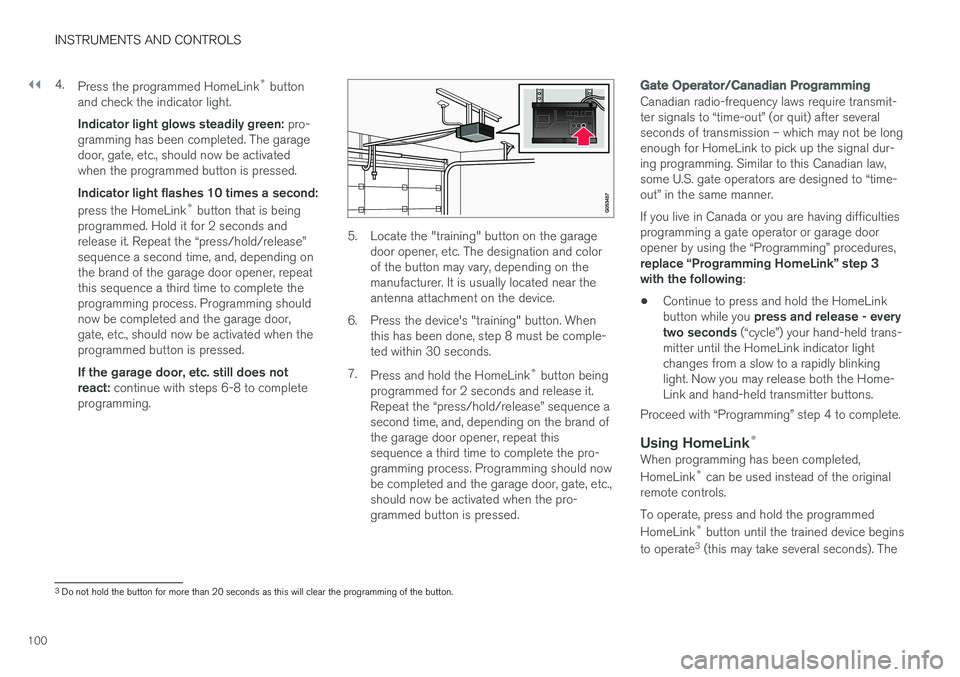
5. Locate the "training" button on the garage door opener, etc. The designation and color of the button may vary, depending on themanufacturer. It is usually located near theantenna attachment on the device.
6. Press the device's "training" button. When this has been done, step 8 must be comple-ted within 30 seconds.
7. Press and hold the HomeLink ®
button being
programmed for 2 seconds and release it.Repeat the “press/hold/release” sequence asecond time, and, depending on the brand ofthe garage door opener, repeat thissequence a third time to complete the pro-gramming process. Programming should nowbe completed and the garage door, gate, etc.,should now be activated when the pro-grammed button is pressed.
Gate Operator/Canadian Programming
Canadian radio-frequency laws require transmit- ter signals to “time-out” (or quit) after severalseconds of transmission – which may not be longenough for HomeLink to pick up the signal dur-ing programming. Similar to this Canadian law,some U.S. gate operators are designed to “time-out” in the same manner. If you live in Canada or you are having difficulties programming a gate operator or garage dooropener by using the “Programming” procedures, replace “Programming HomeLink” step 3 with the following :
• Continue to press and hold the HomeLink button while you
press and release - every
two seconds (“cycle”) your hand-held trans-
mitter until the HomeLink indicator light changes from a slow to a rapidly blinkinglight. Now you may release both the Home-Link and hand-held transmitter buttons.
Proceed with “Programming” step 4 to complete.
Using HomeLink ®When programming has been completed, HomeLink
®
can be used instead of the original
remote controls. To operate, press and hold the programmed HomeLink ®
button until the trained device begins
to operate 3
(this may take several seconds). The
3 Do not hold the button for more than 20 seconds as this will clear the programming of the button.
Page 222 of 548
||
LOCKS AND ALARM
* Option/accessory.
220
Keyless use 3
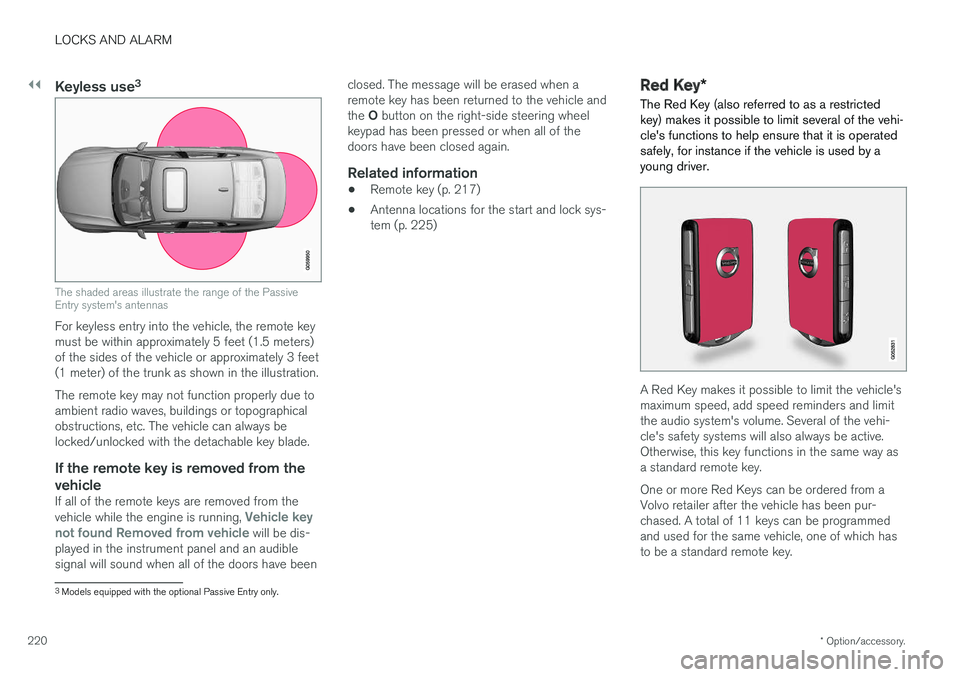
The shaded areas illustrate the range of the Passive Entry system's antennas
For keyless entry into the vehicle, the remote key must be within approximately 5 feet (1.5 meters)of the sides of the vehicle or approximately 3 feet(1 meter) of the trunk as shown in the illustration. The remote key may not function properly due to ambient radio waves, buildings or topographicalobstructions, etc. The vehicle can always belocked/unlocked with the detachable key blade.
If the remote key is removed from the
vehicle
If all of the remote keys are removed from the vehicle while the engine is running, Vehicle key
not found Removed from vehicle will be dis-
played in the instrument panel and an audible signal will sound when all of the doors have been closed. The message will be erased when aremote key has been returned to the vehicle and the
O button on the right-side steering wheel
keypad has been pressed or when all of the doors have been closed again.
Related information
• Remote key (p. 217)
• Antenna locations for the start and lock sys-tem (p. 225)
Red Key
*
The Red Key (also referred to as a restricted key) makes it possible to limit several of the vehi-cle's functions to help ensure that it is operatedsafely, for instance if the vehicle is used by ayoung driver.
A Red Key makes it possible to limit the vehicle's maximum speed, add speed reminders and limitthe audio system's volume. Several of the vehi-cle's safety systems will also always be active.Otherwise, this key functions in the same way asa standard remote key. One or more Red Keys can be ordered from a Volvo retailer after the vehicle has been pur-chased. A total of 11 keys can be programmedand used for the same vehicle, one of which hasto be a standard remote key.
3 Models equipped with the optional Passive Entry only.
Page 399 of 548
INFOTAINMENT
397
Selecting sub-channels
To listen to a station's sub-channel(s), tap the station on the screen or press the forward/backarrow keys on the right-side steering wheel key-pad or below the screen. Sub-channels can also be stored as favorites, see the article "Changing and searching for radio sta-tions". If you tap a sub-channel favorite, it may take up to 6 seconds before the channel becomes audi-
ble. If you tap a station while you are out of digital range of the transmitter,
No reception will be
displayed.
Related information
• HD Radio
™reception (p. 394)
• Switching HD Radio on and off (p. 396)
• Changing and searching for radio stations (p. 393)
HD Radio limitations
Limitations
•
Main channel vs. sub-channels (FM only)
:
The main channel is the only channel that can receive in hybrid mode (both digital andanalogue). If a frequency has sub-channels,they are broadcast in digital mode only. Themain FM channel will be displayed as, forexample, "WRIF-FM HD1". The sub-FMchannels will be displayed as"WRIF-FMHD2", "WRIF-FM HD3", etc.
• Reception coverage area
: Due to current
IBOC transmitter power limitations, thereception coverage area in digital mode issomewhat more limited than the station'sanalogue coverage area. Please be awarethat as with any radio broadcast technology,terrain, time of day, foliage level and buildinglocation can have positive or negative effectson radio reception.
• Analogue to digital/digital to analogueblending
: Analogue to digital blending will
occur as the signal strength reaches a presetthreshold in the receiver. This will be noticea-ble in fringe areas (areas with weak recep-tion) and is normal.
NOTE
There may be a noticeable difference in sound quality when a change from analogueto digital or digital to analogue occurs, suchas:
• Volume increase or decrease
• Equalizer settings, i.e., Bass/ Midrange/Treble cut or boost
• Time alignment (Digital program materialin extreme cases can be as much as 8seconds behind the analogue). This willnoticeable as a "stuttering" effect.
The above items are dependant on thebroadcaster's equipment settings and donot indicate a fault in the vehicle's radioreceiver or antenna systems .
Related information
•HD Radio sub-channels (p. 396)
• HD Radio
™reception (p. 394)
Page 400 of 548

INFOTAINMENT
* Option/accessory.
398
SiriusXM ®
Satellite radio *
The SiriusXM ®
Satellite system broadcasts from
of a number of high elevation satellites in geo- synchronous orbit.
Listening to satellite radioThe digital signals from the satellites are line-of- sight, which means that physical obstructionssuch as bridges, tunnels, etc, may temporarilyinterfere with signal reception. Avoid any obstructions, such as metallic objects transported on roof racks or in a ski box, or otherantennas that may impede signals from the SiriusXM ®
satellites.
Selecting SiriusXM ®
Satellite radio
mode
1. From the center display's Home view, swipe from right to left to come to App view.
2.Tap the SiriusXM ®
Satellite radio icon.
Home view with SiriusXM ®
Satellite radio activated
If there is no subscription activated, tap channel 1, where you will be prompted on the screen to phone SiriusXM ®
.
If a cell phone is paired and connected to the vehicle, you can also subscribe by:
1. From Home view, pull down the Settings menu.
2. Open the settings menu for SiriusXM ®
Satel-
lite radio.
3. Tap
Unsubscribed Services
4.
Tap the phone number to call SiriusXM ®
,
who will activate the subscription of your choice. This may take several minutes.
When the subscription has been activated, tap the SiriusXM ®
Satellite radio icon to start the function and display the channel list included in your subscription.
Related information
•
Using SiriusXM ®
Satellite radio * (p. 399)
• SiriusXM Travel Link
* (p. 401)
Page 431 of 548
INFOTAINMENT
}}
429
Bluetooth settingsThe following settings apply to a Bluetooth-con- nected cell phone or other device.
Bluetooth1. Tap Settings in the center display's Top
view.
2. Tap
CommunicationBluetooth and
select among the following settings:
•
Previously paired devices: lists the
devices that are paired and connected to the vehicle.
•
Internet connection: select to connect
to the Internet using the device's Bluetooth connection.
•
Add device: begin the procedure to pair
a new device.
•
Remove device: remove a paired device.
•
Allowed services for this device: select
what the device will be used for: make calls, send/receive messages, streammedia, Internet connection.
Bluetooth complianceUnited States FCC CAUTION Changes or modifications not expressly approved by the party responsible for compliance couldvoid the user's authority to operate the equip-ment. This transmitter must not be co-located or operated in conjunction with any other antennaor transmitter. Canada This device complies with Industry Canada licence-exempt RSS standard(s). Operation issubject to the following two conditions: (1) this device may not cause interference, and(2) this device must accept any interference, including interference that may cause undesiredoperation of the device.
Related information
•
Internet connected vehicle (p. 427)
• Pairing a cell phone (p. 408)
• Phone (p. 407)
• Media player (p. 415)
• Connecting/disconnecting a cell phone(p. 409)
Downloading, updating and uninstalling apps
When the vehicle is connected to the Internet, apps can be added (downloaded), kept up-to-date or deleted.
NOTE
Downloading data may affect other services that transfer data such as web radio, stream-ing music, etc. If this occurs, a download inprogress can be cancelled or the other serv-ice can be temporarily turned off.
Apps are managed via theDownload Center in the cen-
ter display's App view. To download, update or delete apps, the vehicle must be con-nected to the Internet.
Downloading an app
1. Open the Download Center app.
2. Select
New apps to open a list of apps that
are available but which are not installed in the vehicle. Tap anywhere in a line for an appto expand the list for additional information.
Page 543 of 548
INDEX
541
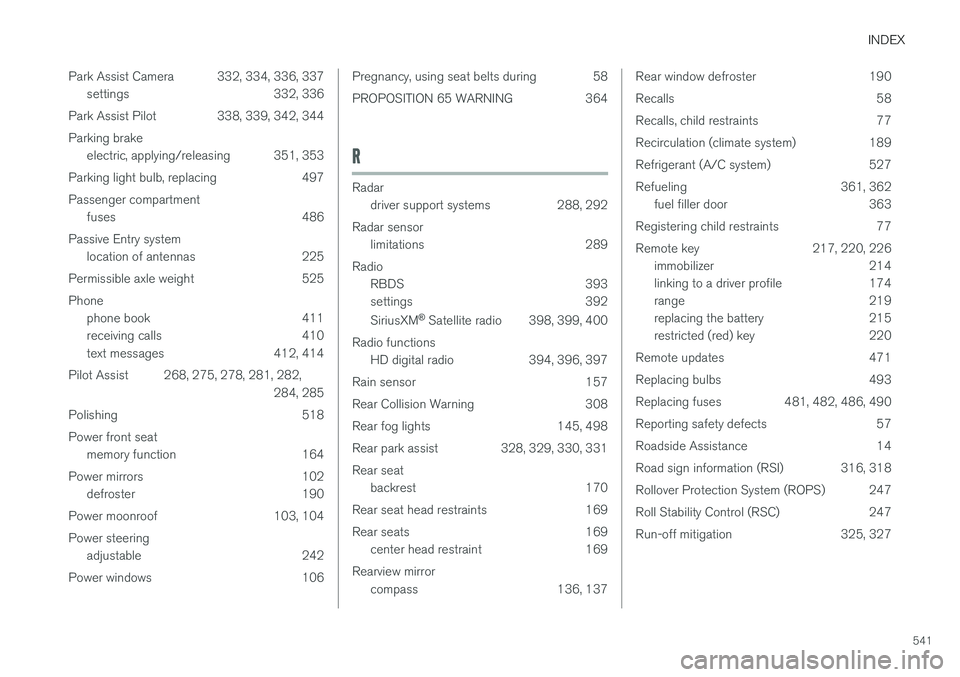
Park Assist Camera 332, 334, 336, 337
settings 332, 336
Park Assist Pilot 338, 339, 342, 344 Parking brake electric, applying/releasing 351, 353
Parking light bulb, replacing 497Passenger compartment fuses 486
Passive Entry system location of antennas 225
Permissible axle weight 525Phone phone book 411
receiving calls 410
text messages 412, 414
Pilot Assist 268, 275, 278, 281, 282, 284, 285
Polishing 518 Power front seat memory function 164
Power mirrors 102 defroster 190
Power moonroof 103, 104Power steering adjustable 242
Power windows 106
Pregnancy, using seat belts during 58
PROPOSITION 65 WARNING 364
R
Radar driver support systems 288, 292
Radar sensor limitations 289
Radio RBDS 393
settings 392 SiriusXM ®
Satellite radio 398, 399, 400
Radio functions HD digital radio 394, 396, 397
Rain sensor 157
Rear Collision Warning 308
Rear fog lights 145, 498
Rear park assist 328, 329, 330, 331Rear seat backrest 170
Rear seat head restraints 169
Rear seats 169 center head restraint 169
Rearview mirror compass 136, 137
Rear window defroster 190
Recalls 58
Recalls, child restraints 77
Recirculation (climate system) 189
Refrigerant (A/C system) 527
Refueling 361, 362
fuel filler door 363
Registering child restraints 77
Remote key 217, 220, 226 immobilizer 214
linking to a driver profile 174
range 219
replacing the battery 215
restricted (red) key 220
Remote updates 471
Replacing bulbs 493
Replacing fuses 481, 482, 486, 490
Reporting safety defects 57
Roadside Assistance 14
Road sign information (RSI) 316, 318
Rollover Protection System (ROPS) 247
Roll Stability Control (RSC) 247
Run-off mitigation 325, 327