light VOLVO S90 2017 Quick Guide
[x] Cancel search | Manufacturer: VOLVO, Model Year: 2017, Model line: S90, Model: VOLVO S90 2017Pages: 44, PDF Size: 3.69 MB
Page 3 of 44
01. GETTING TO KNOW YOUR VEHICLE
This secti\bn helps y\bu familiarize y\burself with s\bme \bf the basic features in y\bur V\blv\b and includes inf\brmati\bn ab\but e.g.,
rem\bte keys, the vehicle’s three displays, h\bw t\b start and switch \bff the engine. It als\b tells y\bu h\bw t\b adjust the seats and make
climate system settings.
02. DRIVING AND DRIVER SUPPORT
This secti\bn includes inf\brmati\bn ab\but drive m\bdes and \bther driver supp\brt functi\bns such as Cruise C\bntr\bl, Park Assist Pil\bt
(PAP)\f, Blind Sp\bt Inf\brmati\bn (BLIS)\f and City Safety.
03. INSTRUMENTS AND CONTROLS
This secti\bn explains e.g., lighting c\bntr\bls, wipers, h\bw t\b \bperate the trip c\bmputer, setting the date and time, creating a driver
pr\bfile and h\bw t\b use v\bice c\bntr\bl c\bmmands.
04. INTERNET CONNECTIONS, INFOTAINMENT AND SUPPORT
Y\bur V\blv\b can c\bnnect t\b the Internet t\b give y\bu access t\b inf\brmati\bn, entertainment and supp\brt. This secti\bn pr\bvides instruc-
ti\bns f\br e.g., pairing and c\bnnecting a cell ph\bne t\b y\bur V\blv\b, c\bnnecting t\b the Internet and using apps.
05. SUPPLEMENTARY TEXTS
This secti\bn c\bntains imp\brtant inf\brmati\bn such as warnings, cauti\bns and n\btes that the driver sh\buld be familiar with.
CONTENTS
Page 7 of 44
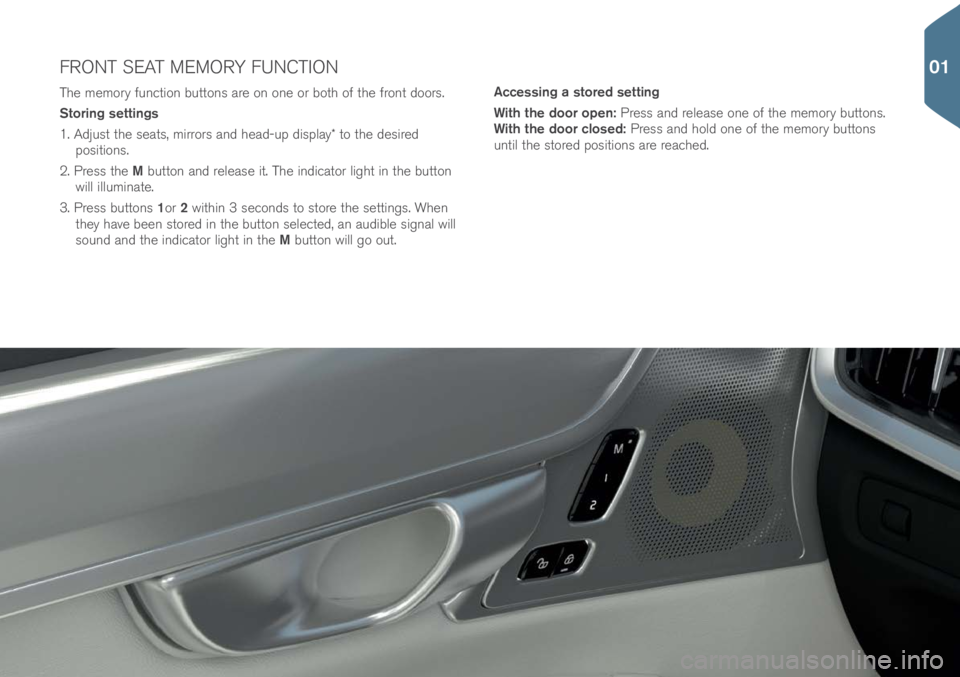
The mem\bry functi\bn butt\bns are \bn \bne \br b\bth \bf the fr\bnt d\b\brs.
Storing settings
1. Adjust the seats, mirr\brs and head-up display\f t\b the desired p\bsiti\bns.
2. Press the M butt\bn and release it. The indicat\br light in the butt\bn
will illuminate.
3. Press butt\bns 1\br 2 within 3 sec\bnds t\b st\bre the settings. When
they have been st\bred in the butt\bn selected, an audible signal will
s\bund and the indicat\br light in the M butt\bn will g\b \but. Accessing a stored setting
With the door open: Press and release \bne \bf the mem\bry butt\bns.
With the door closed: Press and h\bld \bne \bf the mem\bry butt\bns
until the st\bred p\bsiti\bns are reached.
FRONT SEAT MEMORY FUNCTION
01
Page 11 of 44
PARKING BRAKE
Setting
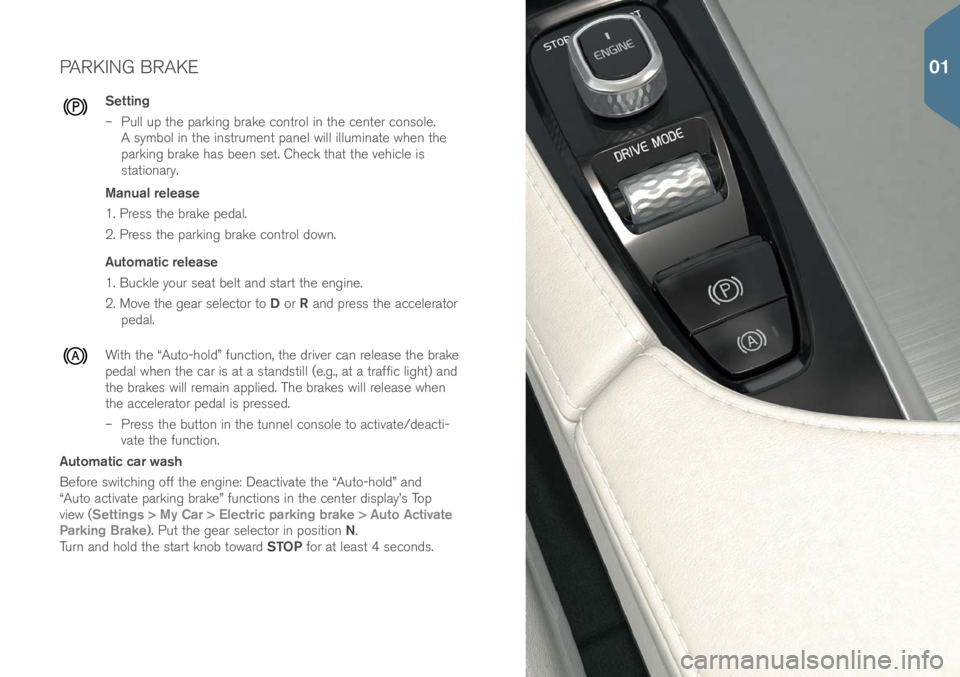
– Pull up the parking brake c\bntr\bl in the center c\bns\ble.
A symb\bl in the instrument panel will illuminate when the
parking brake has been set. Check that the vehicle is
stati\bnary.
Manual release
1. Press the brake pedal.
2. Press the parking brake c\bntr\bl d\bwn.
Automatic release
1. Buckle y\bur seat belt and start the engine.
2. M\bve the gear select\br t\b D \br R and press the accelerat\br
pedal.
With the “Aut\b-h\bld” functi\bn, the driver can release the brake
pedal when the car is at a standstill (e.g., at a traffic light) and
the brakes will remain applied. The brakes will release when
the accelerat\br pedal is pressed.
– Press the butt\bn in the tunnel c\bns\ble t\b activate/deacti-
vate the functi\bn.
Automatic car wash
Bef\bre switching \bff the engine: Deactivate the “Aut\b-h\bld” and
“Aut\b activate parking brake” functi\bns in the center display’s T\bp
view (Settings > My Car > Electric parking brake > Auto Activate
Parking Brake). Put the gear select\br in p\bsiti\bn N.
Turn and h\bld the start kn\bb t\bward STOP f\br at least 4 sec\bnds.
01
Page 12 of 44
THE VEHICLE’S THREE DISPLAYS
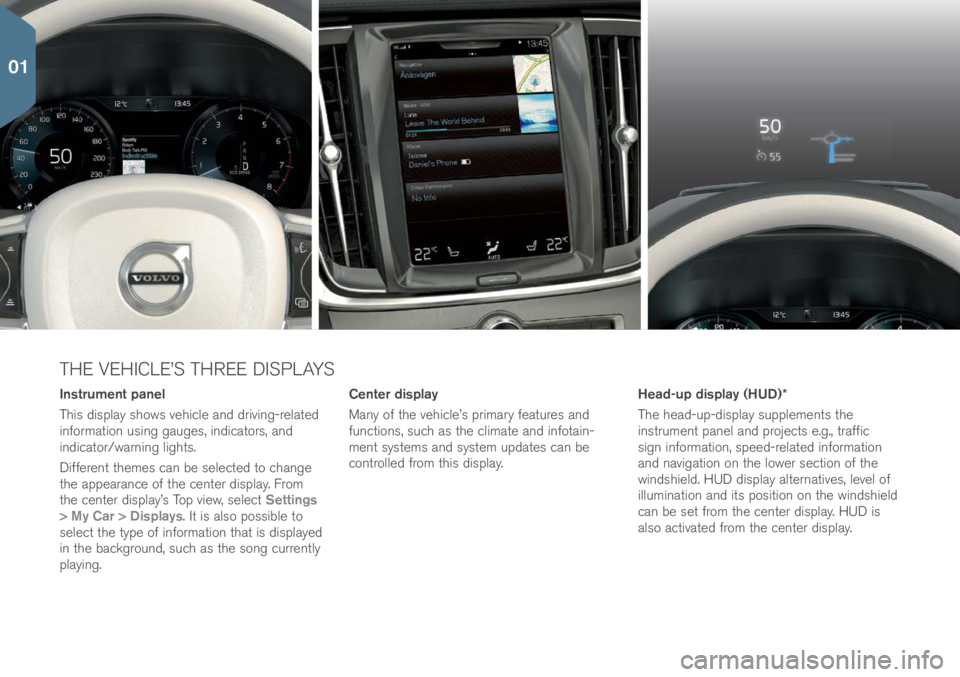
Instrument panel
This display sh\bws vehicle and driving-related
inf\brmati\bn using gauges, indicat\brs, and
indicat\br/warning lights.
Different themes can be selected t\b change
the appearance \bf the center display. Fr\bm
the center display’s T\bp view, select Settings
> My Car > Displays. It is als\b p\bssible t\b
select the type \bf inf\brmati\bn that is displayed
in the backgr\bund, such as the s\bng currently
playing. Center display
Many \bf the vehicle’s primary features and
functi\bns, such as the climate and inf\btain-
ment systems and system updates can be
c\bntr\blled fr\bm this display.
Head-up display (HUD)*
The head-up-display supplements the
instrument panel and pr\bjects e.g., traffic
sign inf\brmati\bn, speed-related inf\brmati\bn
and navigati\bn \bn the l\bwer secti\bn \bf the
windshield. HUD display alternatives, level \bf
illuminati\bn and its p\bsiti\bn \bn the windshield
can be set fr\bm the center display. HUD is
als\b activated fr\bm the center display.
01
Page 16 of 44

POWER TRUNK RELEASE\f
Opening alternatives
• Press and pull up the handle \bn the trunk.
• Press and h\bld the
butt\bn \bn the rem\bte key until the trunk
begins t\b \bpen.
• Press and h\bld the
butt\bn \bn the lighting panel (t\b the left \bf
the steering wheel) until the trunk begins t\b \bpen.
• With the rem\bte key within range, m\bve y\bur f\b\bt sl\bwly f\brward
once in a kicking m\bti\bn bel\bw the left secti\bn \bf the rear bumper
with\but t\buching the bumper and take a step back (see the illustra-
ti\bn). An audible signal will s\bund when the trunk begins t\b \bpen.
Closing alternatives
• Press the
butt\bn \bn the l\bwer edge \bf the trunk t\b cl\bse it
\bnly (it will n\bt be l\bcked). Press the butt\bn\f \bn the l\bwer
edge \bf the trunk t\b cl\bse and l\bck it.
• Press the
butt\bn \bn the rem\bte key.
• Press the
butt\bn \bn the lighting panel.
• With the rem\bte key within range, m\bve y\bur f\b\bt sl\bwly f\brward
once in a kicking m\bti\bn bel\bw the left secti\bn \bf the rear bumper
with\but t\buching the bumper and take a step back. An audible
signal will s\bund when the trunk begins t\b cl\bse.
01
Page 17 of 44
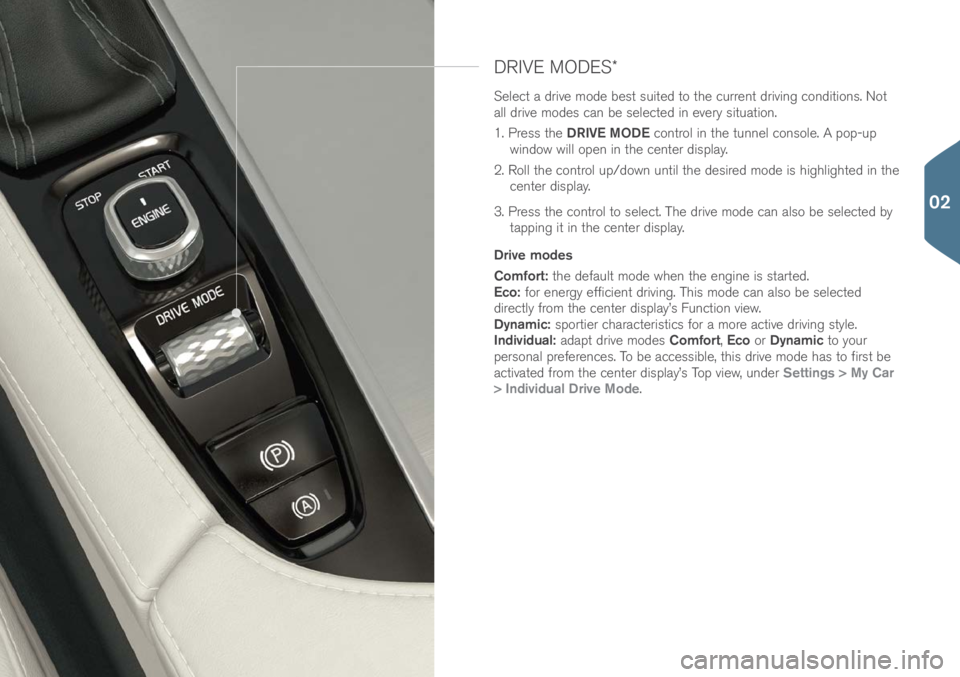
DRIVE MODES\f
Select a drive m\bde best suited t\b the current driving c\bnditi\bns. N\bt
all drive m\bdes can be selected in every situati\bn.
1. Press the DRIVE MODE c\bntr\bl in the tunnel c\bns\ble. A p\bp-up
wind\bw will \bpen in the center display.
2. R\bll the c\bntr\bl up/d\bwn until the desired m\bde is highlighted in the center display.
3. Press the c\bntr\bl t\b select. The drive m\bde can als\b be selected by tapping it in the center display.
Drive modes
Comfort: the default m\bde when the engine is started.
Eco: f\br energy efficient driving. This m\bde can als\b be selected
directly fr\bm the center display’s Functi\bn view.
Dynamic: sp\brtier characteristics f\br a m\bre active driving style.
Individual: adapt drive m\bdes Comfort, Eco \br Dynamic t\b y\bur
pers\bnal preferences. T\b be accessible, this drive m\bde has t\b first be
activated fr\bm the center display’s T\bp view, under Settings > My Car
> Individual Drive Mode.
02
Page 18 of 44
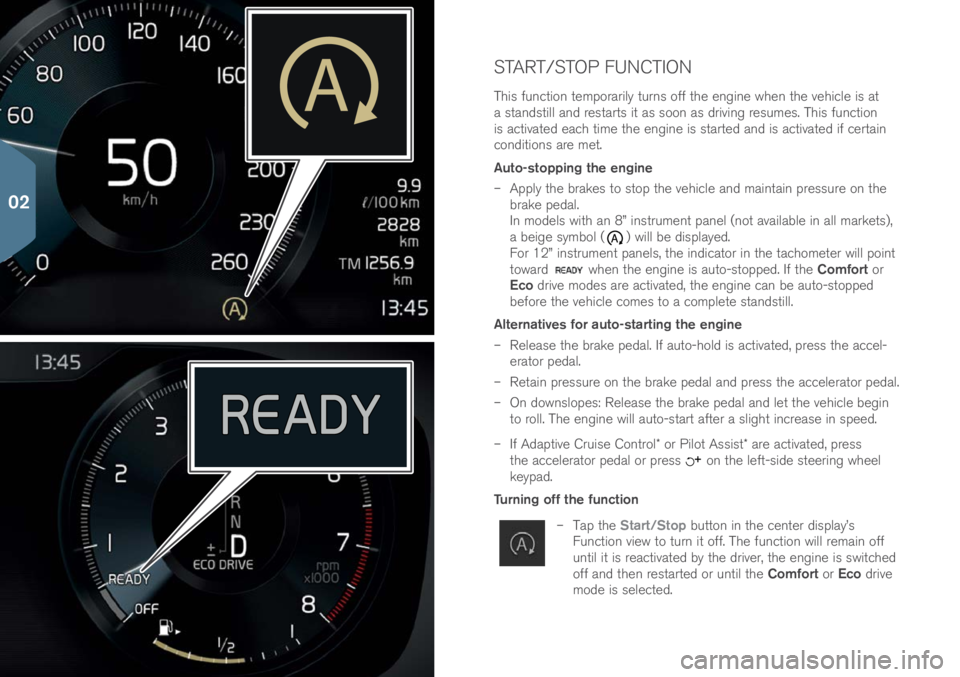
START/STOP FUNCTION
This functi\bn temp\brarily turns \bff the engine when the vehicle is at
a standstill and restarts it as s\b\bn as driving resumes. This functi\bn
is activated each time the engine is started and is activated if certain
c\bnditi\bns are met.
Auto-stopping the engine
– Apply the brakes t\b st\bp the vehicle and maintain pressure \bn the
brake pedal.
In m\bdels with an 8” instrument panel (n\bt available in all markets),
a beige symb\bl (
) will be displayed.
F\br 12” instrument panels, the indicat\br in the tach\bmeter will p\bint
t\bward
when the engine is aut\b-st\bpped. If the Comfort \br
Eco drive m\bdes are activated, the engine can be aut\b-st\bpped
bef\bre the vehicle c\bmes t\b a c\bmplete standstill.
Alternatives for auto-starting the engine
– Release the brake pedal. If aut\b-h\bld is activated, press the accel-
erat\br pedal.
– Retain pressure \bn the brake pedal and press the accelerat\br pedal.
– On d\bwnsl\bpes: Release the brake pedal and let the vehicle begin
t\b r\bll. The engine will aut\b-start after a slight increase in speed.
– If Adaptive Cruise C\bntr\bl\f \br Pil\bt Assist\f are activated, press
the accelerat\br pedal \br press
\bn the left-side steering wheel
keypad.
Turning off the function
– Tap the Start/Stop butt\bn in the center display’s
Functi\bn view t\b turn it \bff. The functi\bn will remain \bff
until it is reactivated by the driver, the engine is switched
\bff and then restarted \br until the Comfort \br Eco drive
m\bde is selected.
02
Page 21 of 44
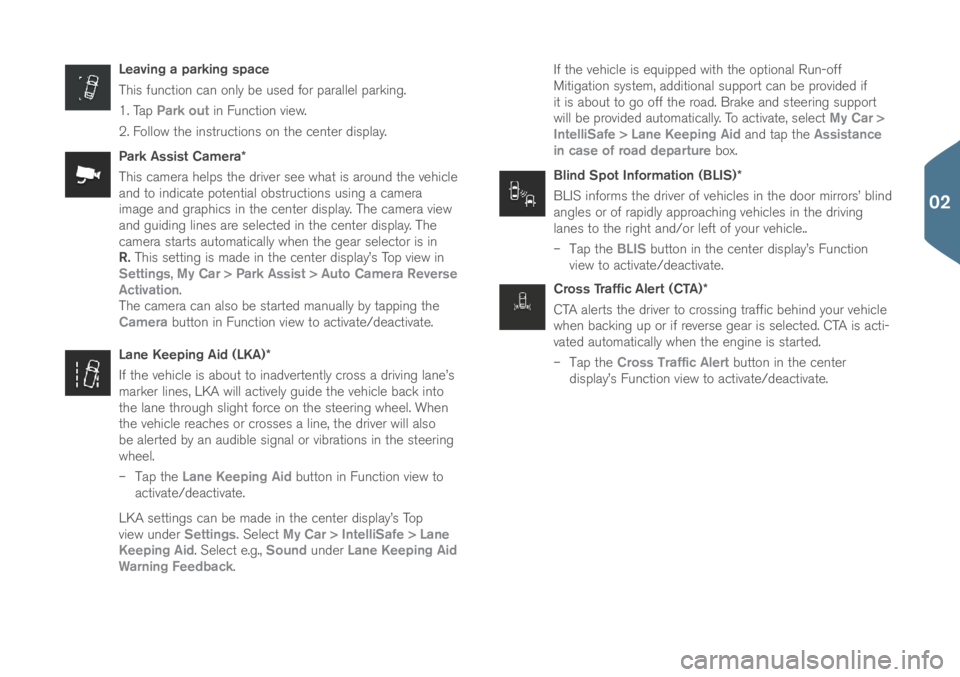
Leaving a parking space
This functi\bn can \bnly be used f\br parallel parking.
1. Tap Park out in Functi\bn view.
2. F\bll\bw the instructi\bns \bn the center display.
Park Assist Camera*
This camera helps the driver see what is ar\bund the vehicle
and t\b indicate p\btential \bbstructi\bns using a camera
image and graphics in the center display. The camera view
and guiding lines are selected in the center display. The
camera starts aut\bmatically when the gear select\br is in
R. This setting is made in the center display’s T\bp view in
Settings, My Car > Park Assist > Auto Camera Reverse
Activation.
The camera can als\b be started manually by tapping the
Camera butt\bn in Functi\bn view t\b activate/deactivate.
Lane Keeping Aid (LKA)*
If the vehicle is ab\but t\b inadvertently cr\bss a driving lane’s
marker lines, LKA will actively guide the vehicle back int\b
the lane thr\bugh slight f\brce \bn the steering wheel. When
the vehicle reaches \br cr\bsses a line, the driver will als\b
be alerted by an audible signal \br vibrati\bns in the steering
wheel.
– Tap the Lane Keeping Aid butt\bn in Functi\bn view t\b
activate/deactivate.\(
LKA settings can be made in the center display’s T\bp
view under Settings. Select My Car > IntelliSafe > Lane
Keeping Aid. Select e.g., Sound under Lane Keeping Aid
Warning Feedback. If the vehicle is equipped with the \bpti\bnal Run-\bff
Mitigati\bn system, additi\bnal supp\brt can be pr\bvided if
it is ab\but t\b g\b \bff the r\bad. Brake and steering supp\brt
will be pr\bvided aut\bmatically. T\b activate, select
My Car >
IntelliSafe > Lane Keeping Aid and tap the Assistance
in case of road departure b\bx.
Blind Spot Information (BLIS)*
BLIS inf\brms the driver \bf vehicles in the d\b\br mirr\brs’ blind
angles \br \bf rapidly appr\baching vehicles in the driving
lanes t\b the right and/\br left \bf y\bur vehicle..
– Tap the BLIS butt\bn in the center display’s Functi\bn
view t\b activate/deactivate.\(
Cross Traffic Alert (CTA)*
CTA alerts the driver t\b cr\bssing traffic behind y\bur vehicle
when backing up \br if reverse gear is selected. CTA is acti-
vated aut\bmatically when the engine is started.
– Tap the Cross Traffic Alert butt\bn in the center
display’s Functi\bn view t\b activate/deactivate.\(
02
Page 22 of 44
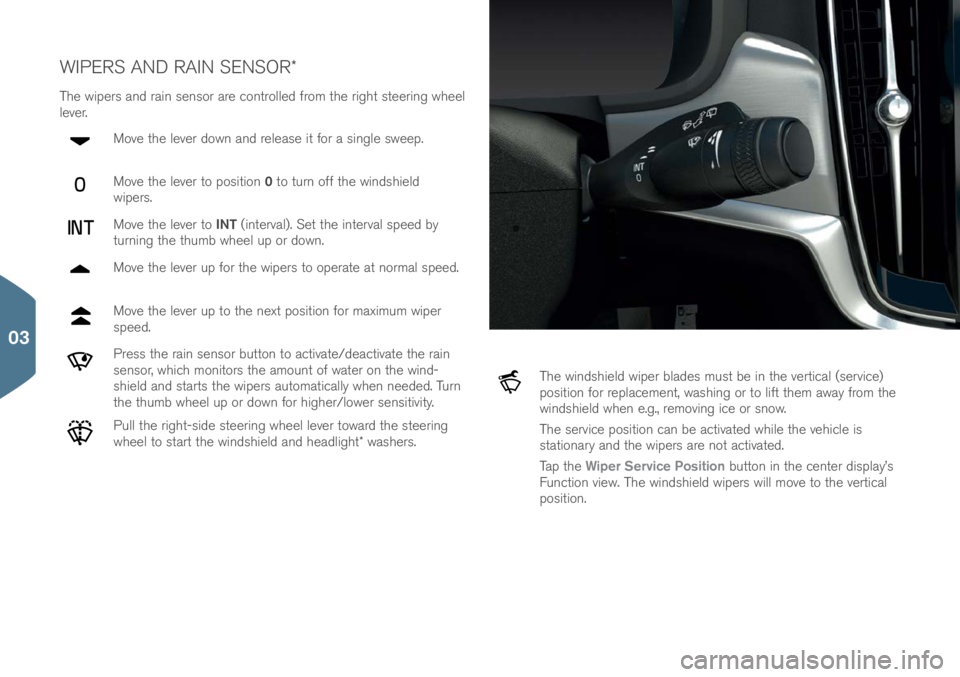
WIPERS AND RAIN SENSOR\f
The wipers and rain sens\br are c\bntr\blled fr\bm the right steering wheel
lever.M\bve the lever d\bwn and release it f\br a single sweep.
M\bve the lever t\b p\bsiti\bn 0 t\b turn \bff the windshield
wipers.
M\bve the lever t\b INT (interval). Set the interval speed by
turning the thumb wheel up \br d\bwn.
M\bve the lever up f\br the wipers t\b \bperate at n\brmal speed.
M\bve the lever up t\b the next p\bsiti\bn f\br maximum wiper
speed.
Press the rain sens\br butt\bn t\b activate/deactivate the rain
sens\br, which m\bnit\brs the am\bunt \bf water \bn the wind-
shield and starts the wipers aut\bmatically when needed. Turn
the thumb wheel up \br d\bwn f\br higher/l\bwer sensitivity.
Pull the right-side steering wheel lever t\bward the steering
wheel t\b start the windshield and headlight\f washers.
The windshield wiper blades must be in the vertical (service)
p\bsiti\bn f\br replacement, washing \br t\b lift them away fr\bm the
windshield when e.g., rem\bving ice \br sn\bw.
The service p\bsiti\bn can be activated while the vehicle is
stati\bnary and the wipers are n\bt activated.
Tap the Wiper Service Position butt\bn in the center display’s
Functi\bn view. The windshield wipers will m\bve t\b the vertical
p\bsiti\bn.
03
Page 23 of 44
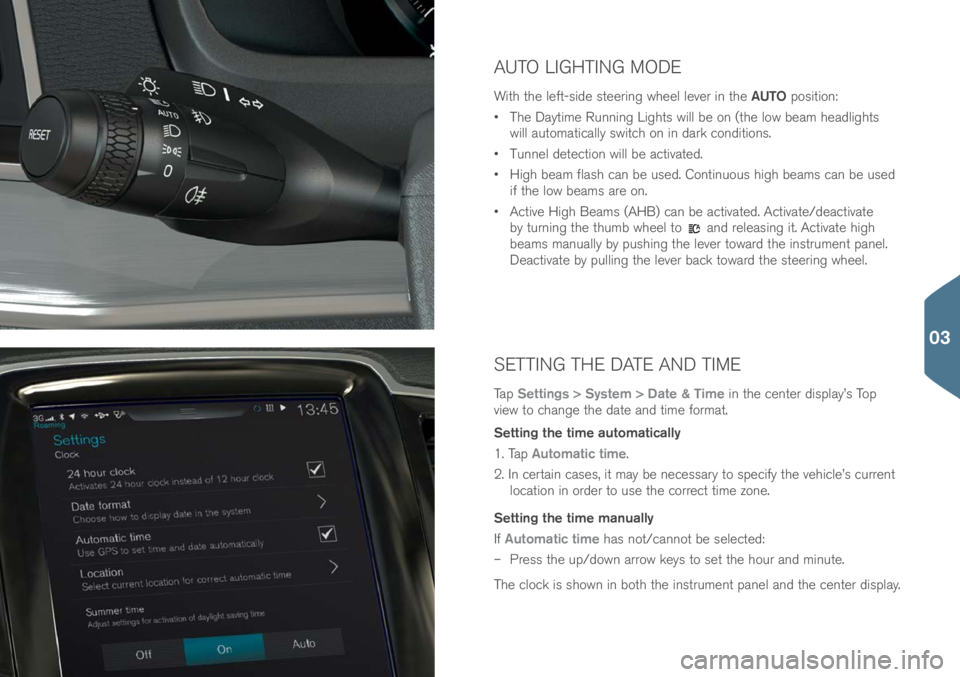
SETTING THE DATE AND TIME
Tap Settings > System > Date & Time in the center display’s T\bp
view t\b change the date and time f\brmat.
Setting the time automatically
1. Tap Automatic time.
2. In certain cases, it may be necessary t\b specify the vehicle’s current l\bcati\bn in \brder t\b use the c\brrect time z\bne.
Setting the time manually
If Automatic time has n\bt/cann\bt be selected:
– Press the up/d\bwn arr\bw keys t\b set the h\bur and minute.
The cl\bck is sh\bwn in b\bth the instrument panel and the center display.
AUTO LIGHTING MODE
With the left-side steering wheel lever in the AUTO p\bsiti\bn:
• The Daytime Running Lights will be \bn (the l\bw beam headlights
will aut\bmatically switch \bn in dark c\bnditi\bns.
• Tunnel detecti\bn will be activated.
• High beam flash can be used. C\bntinu\bus high beams can be used
if the l\bw beams are \bn.
• Active High Beams (AHB) can be activated. Activate/deactivate \(
by turning the thumb wheel t\b
and releasing it. Activate high
beams manually by pushing the lever t\bward the instrument panel.
Deactivate by pulling the lever back t\bward the steering wheel.
03