trip computer VOLVO S90 2018 Owner´s Manual
[x] Cancel search | Manufacturer: VOLVO, Model Year: 2018, Model line: S90, Model: VOLVO S90 2018Pages: 640, PDF Size: 11.37 MB
Page 5 of 640
3
Top tether anchors72
Lower child seat attachment points 73
ISOFIX/LATCH lower anchors 74
DISPLAYS AND VOICE CONTROL
Instruments and controls in left-hand drive vehicles78
Instrument panel 80
Instrument panel settings 84
Fuel gauge 85
Trip computer 85
Displaying trip data in the instrumentpanel 87
Resetting the trip odometer 88
Displaying trip statistics in the centerdisplay 88
Trip statistics settings 89
Date and time 90
Ambient temperature sensor 90
Indicator symbols in the instrument panel 91
Warning symbols in the instrument panel 93
Instrument panel licenses 94
App menu in instrument panel 100
Handling the App menu in the instru-ment panel 101
Messages in the instrument panel 102
Handling messages in the instru-ment panel 103
Handling messages saved from theinstrument panel 105
Center display overview 107
Handling the center display110
Activating and deactivating the cen- ter display 113
Navigating in the center display's views 113
Handling tiles in the center display 117
Function view in the center display 120
Moving apps and buttons in the cen-ter display 122
Symbols in the center display status bar 122
Using the center display keyboard 124
Changing keyboard language in thecenter display 127
Entering characters, letters andwords by hand in the center display 127
Changing the appearance of thecenter display 129
Turning off and adjusting the volumeof the center display system sounds 129
Changing system units of measurement 130
Changing system language 130
Opening settings in the center display 130
Opening contextual setting in thecenter display 131
Changing settings in the center display 132
Resetting user data when the vehiclechanges owners 132
Resetting center display settings 133
Page 80 of 640

DISPLAYS AND VOICE CONTROL
* Option/accessory.
78
Instruments and controls in left-hand drive vehicles
The overviews show the location of the vehicle's
displays and controls.
Steering wheel and dashboard
Parking lights, daytime running lights, low beams, high beams, turn signals, front fog lights/cornering illumination *, rear fog light,
trip computer reset
Steering wheel paddles for manual shifting *
Head-up display*
Instrument panel
Wipers and washers, rain sensor *
Right-side steering wheel keypad
Steering wheel adjustment
Horn
Left-side steering wheel keypad
Hood open
Display lighting, trunk lid unlock/open */
close *, halogen headlight height adjustment
Ceiling console
Front reading lights and courtesy lighting
Panoramic roof *
Ceiling console display
HomeLink®
*
Center and tunnel console
Center display
Hazard warning flashers, defrosting, media
Gear selector
Start knob
Drive modes *
Parking brake
Auto-hold brakes
Driver's door
Page 85 of 640
DISPLAYS AND VOICE CONTROL
83
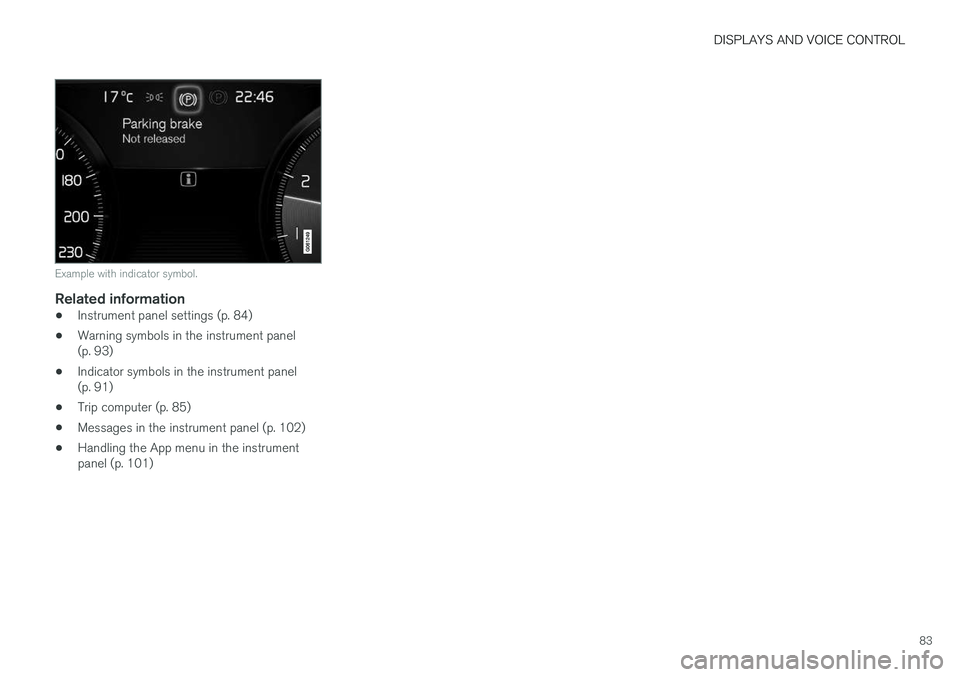
Example with indicator symbol.
Related information
•Instrument panel settings (p. 84)
• Warning symbols in the instrument panel (p. 93)
• Indicator symbols in the instrument panel(p. 91)
• Trip computer (p. 85)
• Messages in the instrument panel (p. 102)
• Handling the App menu in the instrumentpanel (p. 101)
Page 86 of 640
DISPLAYS AND VOICE CONTROL
* Option/accessory.
84
Instrument panel settings
Display settings for the instrument panel can be set in the instrument panel's app menu and inthe center display's Settings menu.
Settings in instrument panel's app menu
The app menu can be used to set what informa- tion will be displayed in the instrument panel:
• trip computer
• media player
• phone
• navigation system
*.
Center display settings
Selecting type of information
1.
Tap Settings in the center display's Top
view.
2. Tap
My CarDisplaysDriver Display
Information.
3. Select a background:
•
Show no information in the background
•Show information for current playing media
•Show navigation even if no route is set1.
Select theme
1. Tap Settings in the center display's Top
view.
2. Tap
My CarDisplaysDisplay
Themes
3. Select a theme (appearance) for the instru- ment panel:
•
Glass
•Minimalistic
•Performance
•Chrome Rings.
Select language
1. Tap Settings in the center display's Top
view.
2. Tap
SystemSystem Languages and
Units
System Language to select lan-
guage.
> A change made here will affect the lan- guage in all displays.
The settings are personal and saved automati- cally in the active driver profile.
Related information
• Instrument panel (p. 80)
• Handling the App menu in the instrumentpanel (p. 101) •
Changing settings in the center display(p. 132)
1
The map is only shown with the 12" instrument panel *. With the 8" instrument panel, only guidance is shown.
Page 87 of 640
DISPLAYS AND VOICE CONTROL
}}
85
Fuel gauge
The fuel gauge in the instrument panel shows the fuel level in the tank.
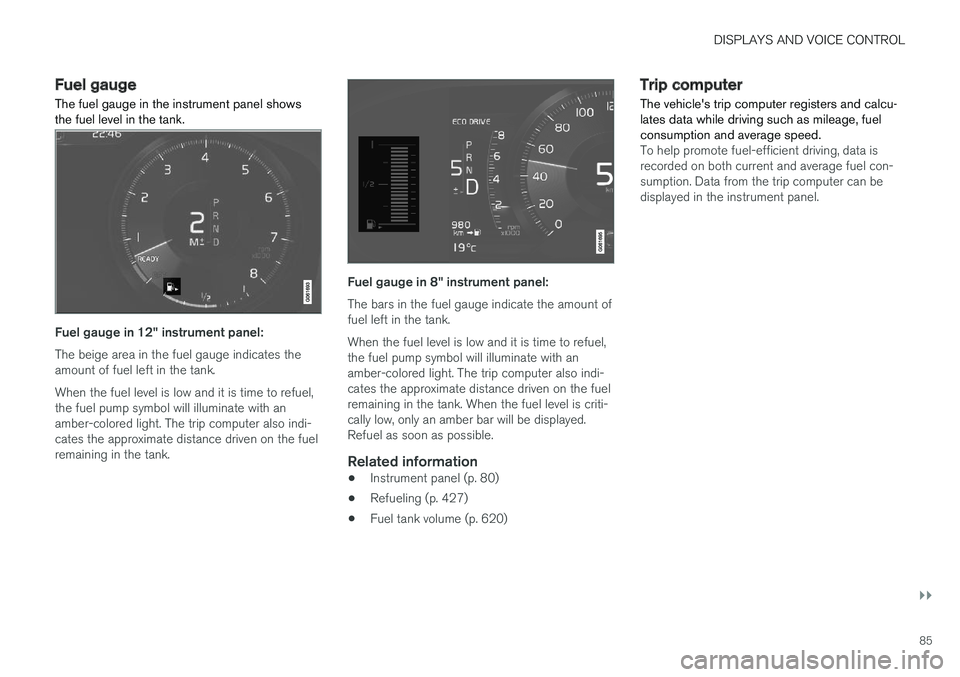
Fuel gauge in 12" instrument panel: The beige area in the fuel gauge indicates the amount of fuel left in the tank. When the fuel level is low and it is time to refuel, the fuel pump symbol will illuminate with anamber-colored light. The trip computer also indi-cates the approximate distance driven on the fuelremaining in the tank.
Fuel gauge in 8" instrument panel: The bars in the fuel gauge indicate the amount of fuel left in the tank. When the fuel level is low and it is time to refuel, the fuel pump symbol will illuminate with anamber-colored light. The trip computer also indi-cates the approximate distance driven on the fuelremaining in the tank. When the fuel level is criti-cally low, only an amber bar will be displayed.Refuel as soon as possible.
Related information
• Instrument panel (p. 80)
• Refueling (p. 427)
• Fuel tank volume (p. 620)
Trip computer The vehicle's trip computer registers and calcu- lates data while driving such as mileage, fuelconsumption and average speed.
To help promote fuel-efficient driving, data is recorded on both current and average fuel con-sumption. Data from the trip computer can bedisplayed in the instrument panel.
Page 88 of 640
||
DISPLAYS AND VOICE CONTROL
* Option/accessory.
86
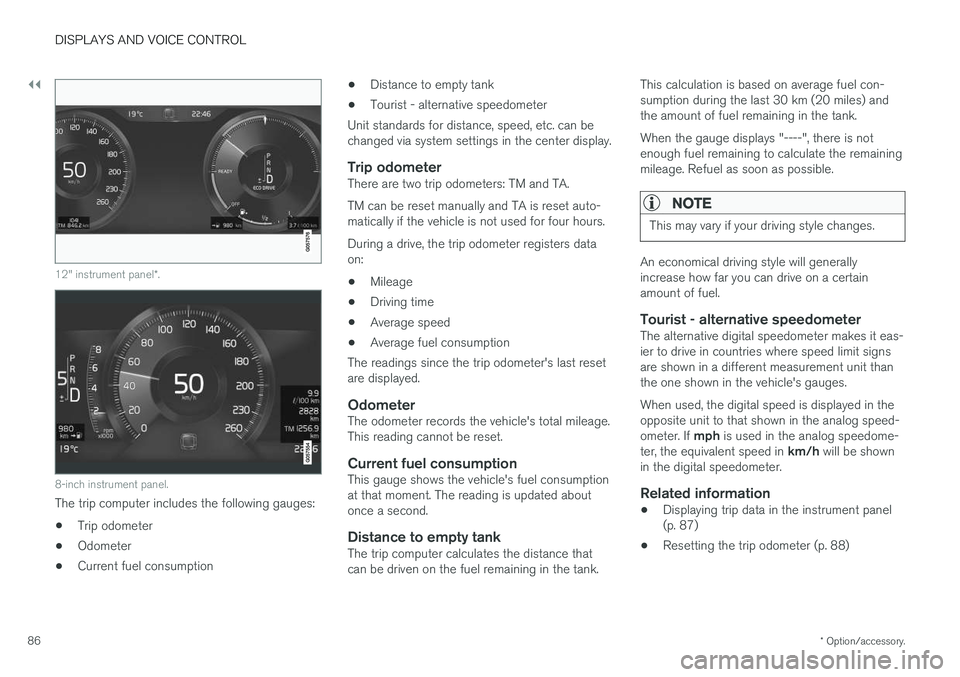
12" instrument panel *.
8-inch instrument panel.
The trip computer includes the following gauges:
• Trip odometer
• Odometer
• Current fuel consumption •
Distance to empty tank
• Tourist - alternative speedometer
Unit standards for distance, speed, etc. can be changed via system settings in the center display.
Trip odometerThere are two trip odometers: TM and TA. TM can be reset manually and TA is reset auto- matically if the vehicle is not used for four hours. During a drive, the trip odometer registers data on:
• Mileage
• Driving time
• Average speed
• Average fuel consumption
The readings since the trip odometer's last resetare displayed.
OdometerThe odometer records the vehicle's total mileage.This reading cannot be reset.
Current fuel consumptionThis gauge shows the vehicle's fuel consumptionat that moment. The reading is updated aboutonce a second.
Distance to empty tankThe trip computer calculates the distance thatcan be driven on the fuel remaining in the tank. This calculation is based on average fuel con-sumption during the last 30 km (20 miles) andthe amount of fuel remaining in the tank. When the gauge displays "----", there is not enough fuel remaining to calculate the remainingmileage. Refuel as soon as possible.
NOTE
This may vary if your driving style changes.
An economical driving style will generally increase how far you can drive on a certainamount of fuel.
Tourist - alternative speedometerThe alternative digital speedometer makes it eas-ier to drive in countries where speed limit signsare shown in a different measurement unit thanthe one shown in the vehicle's gauges. When used, the digital speed is displayed in the opposite unit to that shown in the analog speed- ometer. If
mph is used in the analog speedome-
ter, the equivalent speed in km/h will be shown
in the digital speedometer.
Related information
• Displaying trip data in the instrument panel (p. 87)
• Resetting the trip odometer (p. 88)
Page 89 of 640
DISPLAYS AND VOICE CONTROL
}}
87
•
Displaying trip statistics in the center display (p. 88)
• Instrument panel (p. 80)
Displaying trip data in theinstrument panel
Data recorded and calculated by the trip com- puter can be displayed on the instrument panel.
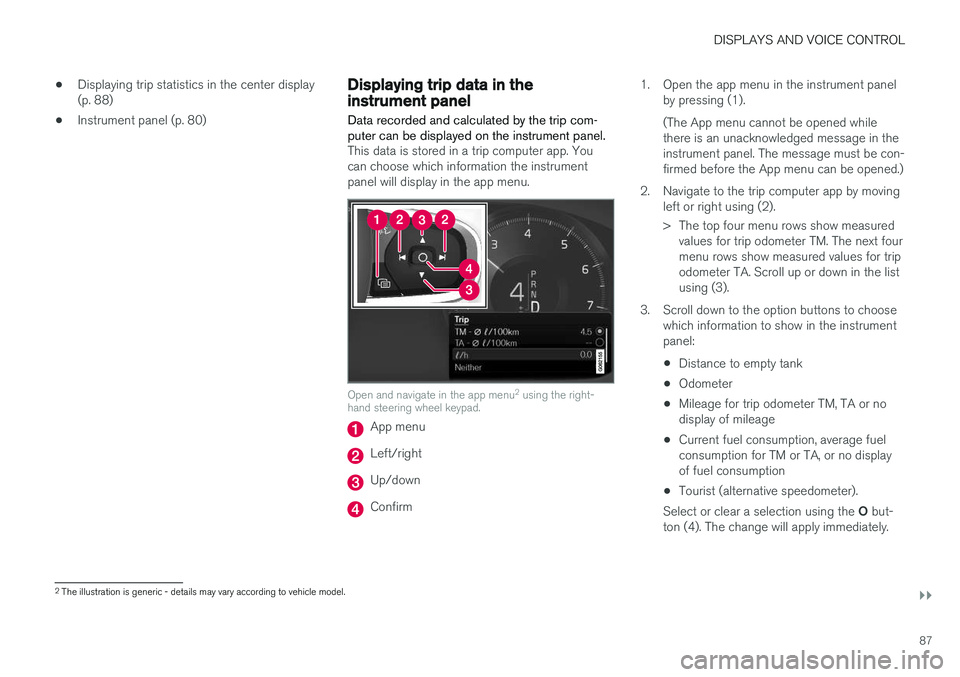
This data is stored in a trip computer app. You can choose which information the instrumentpanel will display in the app menu.
Open and navigate in the app menu 2
using the right-
hand steering wheel keypad.
App menu
Left/right
Up/down
Confirm 1. Open the app menu in the instrument panel
by pressing (1). (The App menu cannot be opened while there is an unacknowledged message in theinstrument panel. The message must be con-firmed before the App menu can be opened.)
2. Navigate to the trip computer app by moving left or right using (2).
> The top four menu rows show measuredvalues for trip odometer TM. The next four menu rows show measured values for tripodometer TA. Scroll up or down in the listusing (3).
3. Scroll down to the option buttons to choose which information to show in the instrumentpanel:
• Distance to empty tank
• Odometer
• Mileage for trip odometer TM, TA or nodisplay of mileage
• Current fuel consumption, average fuelconsumption for TM or TA, or no displayof fuel consumption
• Tourist (alternative speedometer).
Select or clear a selection using the O but-
ton (4). The change will apply immediately.
2 The illustration is generic - details may vary according to vehicle model.
Page 90 of 640
||
DISPLAYS AND VOICE CONTROL
88
Related information
•Trip computer (p. 85)
• Resetting the trip odometer (p. 88)
Resetting the trip odometer
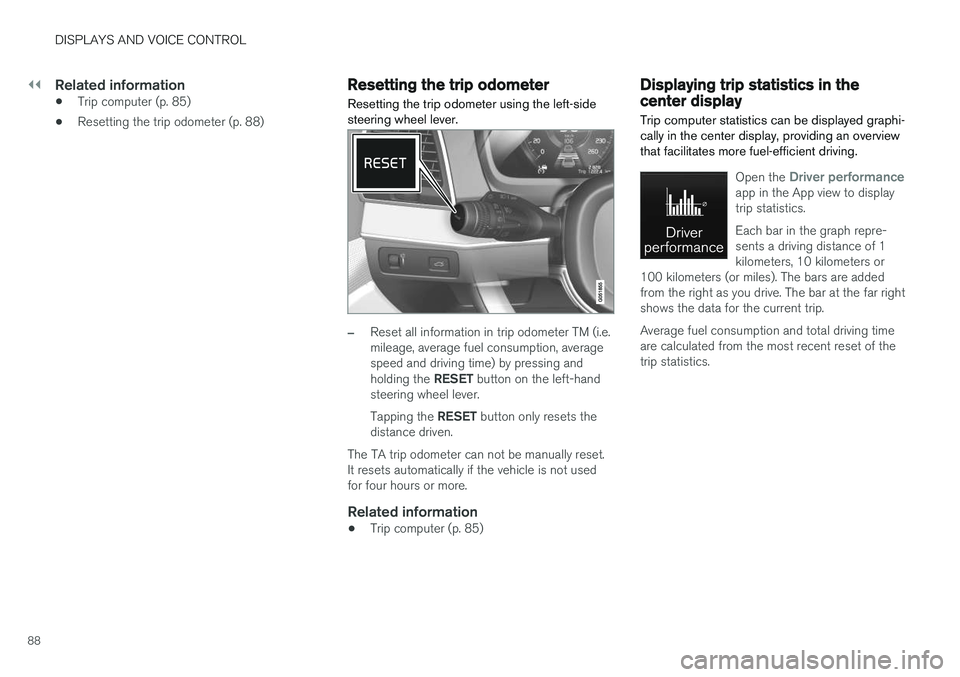
Resetting the trip odometer using the left-side steering wheel lever.
–Reset all information in trip odometer TM (i.e. mileage, average fuel consumption, averagespeed and driving time) by pressing and holding the RESET button on the left-hand
steering wheel lever. Tapping the RESET button only resets the
distance driven.
The TA trip odometer can not be manually reset. It resets automatically if the vehicle is not usedfor four hours or more.
Related information
• Trip computer (p. 85)
Displaying trip statistics in thecenter display
Trip computer statistics can be displayed graphi- cally in the center display, providing an overviewthat facilitates more fuel-efficient driving.
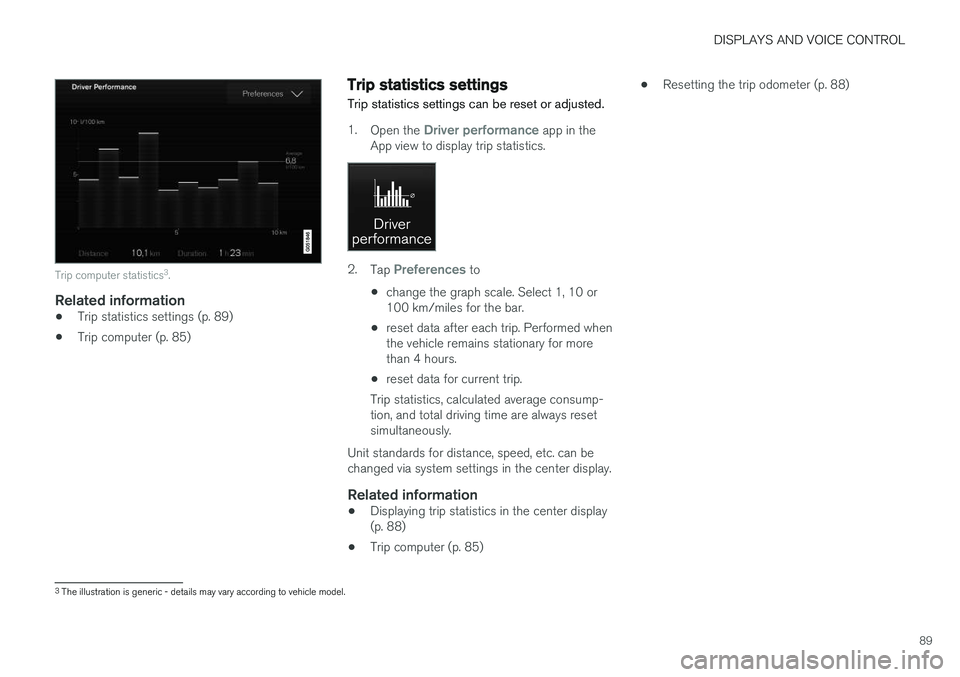
Open the Driver performanceapp in the App view to display trip statistics. Each bar in the graph repre- sents a driving distance of 1kilometers, 10 kilometers or
100 kilometers (or miles). The bars are addedfrom the right as you drive. The bar at the far rightshows the data for the current trip. Average fuel consumption and total driving time are calculated from the most recent reset of thetrip statistics.
Page 91 of 640
DISPLAYS AND VOICE CONTROL
89
Trip computer statistics3
.
Related information
• Trip statistics settings (p. 89)
• Trip computer (p. 85)
Trip statistics settings
Trip statistics settings can be reset or adjusted.
1. Open the Driver performance app in the
App view to display trip statistics.
2. Tap Preferences to
• change the graph scale. Select 1, 10 or 100 km/miles for the bar.
• reset data after each trip. Performed whenthe vehicle remains stationary for morethan 4 hours.
• reset data for current trip.
Trip statistics, calculated average consump-tion, and total driving time are always resetsimultaneously.
Unit standards for distance, speed, etc. can bechanged via system settings in the center display.
Related information
• Displaying trip statistics in the center display(p. 88)
• Trip computer (p. 85) •
Resetting the trip odometer (p. 88)
3
The illustration is generic - details may vary according to vehicle model.
Page 426 of 640
STARTING AND DRIVING
* Option/accessory.
424
Leveling control settings *
Turn off leveling control before lifting the vehicle with a jack to help avoid problems with thepneumatic suspension.
Center display settings
Disable Leveling Control
In certain situations, this function must be turned off, e.g. before the vehicle is raised using a jack *.
The level difference caused by raising the vehicle with a jack could cause problems with the pneu-matic suspension. Turning off the function in the center display:1. Tap
Settings in the Top view.
2. Tap
My CarParking Brake and
Suspension.
3. Select
Disable Leveling Control.
Related information
• Leveling control
* and suspension (p. 422)
• Loading recommendations (p. 543)
Economical driving
Drive economically and environmentally con- scious by thinking ahead, avoiding rapid startsand stops and adapting driving style and speedto the current traffic conditions.
Driving economically conserves natural resources
Observe the following rules:
• Do not warm up the engine by idling. It is better to begin driving normally immediately after starting the engine. A cold engine uses more fuel than a warm engine and is subject to increased wear.
• Whenever possible, avoid using the vehicle todrive short distances. The engine does nothave time to reach a normal operating tem-perature and this leads to increased fuelconsumption.
• Maintain a steady speed and a generous fol-lowing distance to traffic ahead to minimizebraking.
• For lower fuel consumption, activate Ecodrive mode.
• Use the Eco Coast function in drive mode Eco - engine braking is deactivated, allowing the vehicle's kinetic energy to be used to rollgreater distances.
• Use gear
D as often as possible and avoid
using the kick-down function. •
Fuel consumption is increased at highspeeds - air resistance increases with speed.
• Remove unnecessary items from the vehicle- the heavier the load, the higher the fuelconsumption.
• Maintain the correct pressure in the tires andcheck pressure regularly.
• The type of tires used could affect fuel con-sumption - consult a retailer for advice onsuitable tires.
• Do not use winter tires after the winter sea-son has ended.
• Roof loads increase air resistance andincrease fuel consumption. Remove roofboxes, ski racks, etc. that are not in use.
• Avoid driving with the windows open.
• Using the trip computer's fuel consumptionindicators can help you learn how to drivemore economically.
Other factors that decrease fuel
consumption
• Dirty air cleaner.
• Dirty engine oil and clogged oil filter.
• Incorrect front-end alignment.
• Incorrect wheel alignment.
Some of the above items and others are checked as part of Volvo's standard maintenance sched-ule.