ECO mode VOLVO S90 2020 Quick Guide
[x] Cancel search | Manufacturer: VOLVO, Model Year: 2020, Model line: S90, Model: VOLVO S90 2020Pages: 643, PDF Size: 13.68 MB
Page 65 of 643

SAFETY
}}
63
WARNING
When the vehicle is in safety mode, it should not be towed behind another vehi-cle. It should be towed from the site on atow truck. Volvo recommends towing thevehicle directly to an authorized Volvoworkshop.
Related information
Safety mode (p. 61)
Starting the vehicle (p. 378)
Recovery (p. 425)
Child safety Children should always be seated safely when traveling in the vehicle.
General informationVolvo recommends the proper use of restraint systems for all occupants including children.Remember that, regardless of age and size, achild should always be properly restrained in avehicle. Your vehicle is also equipped with ISOFIX/ LATCH attachments, which make it more con-venient to install child seats. Some restraint systems for children are designed to be secured in the vehicle by lapbelts or the lap portion of a lap-shoulder belt.Such child restraint systems can help protectchildren in vehicles in the event of an accidentonly if they are used properly. However, chil-dren could be endangered in a crash if thechild restraints are not properly secured in thevehicle. Failure to follow the installationinstructions for your child restraint can resultin your child striking the vehicle's interior in asudden stop. Holding a child in your arms is NOT a suitable substitute for a child restraint system. In anaccident, a child held in a person's arms canbe crushed between the vehicle's interior andan unrestrained person. The child could alsobe injured by striking the interior, or by being ejected from the vehicle during a suddenmaneuver or impact. The same can also hap-pen if the infant or child rides unrestrained onthe seat. Other occupants should also beproperly restrained to help reduce the chanceof injuring or increasing the injury of a child. All states and provinces have legislation gov- erning how and where children should be car-ried in a vehicle. Find out the regulations exist-ing in your state or province. Recent accidentstatistics have shown that children are safer inrear seating positions than front seating posi-tions when properly restrained. A childrestraint system can help protect a child in avehicle. Here's what to look for when selectinga child restraint system: It should have a label certifying that it meets applicable Federal Motor Vehicle SafetyStandards (FMVSS 213) - or in Canada,CMVSS 213. Make sure the child restraint system is approved for the child's height, weight anddevelopment - the label required by the stand-ard or regulation, or instructions for infantrestraints, typically provide this information. In using any child restraint system, we urge you to carefully look over the instructions thatare provided with the restraint. Be sure youunderstand them and can use the device prop-erly and safely in this vehicle. A misused childrestraint system can result in increased inju-
Page 66 of 643
||
SAFETY
64ries for both the infant or child and other occu- pants in the vehicle. When a child has outgrown the child safety seat, you should use the rear seat with thestandard seat belt fastened. The best way tohelp protect the child here is to place the childon a cushion so that the seat belt is properlylocated on the hips. Legislation in your state orprovince may mandate the use of a child seator cushion in combination with the seat belt,depending on the child's age and/or size.Please check local regulations. A specially designed and tested booster cush- ion and backrest can be obtained from yourVolvo retailer. See also the article "Integratedbooster cushion."
WARNING
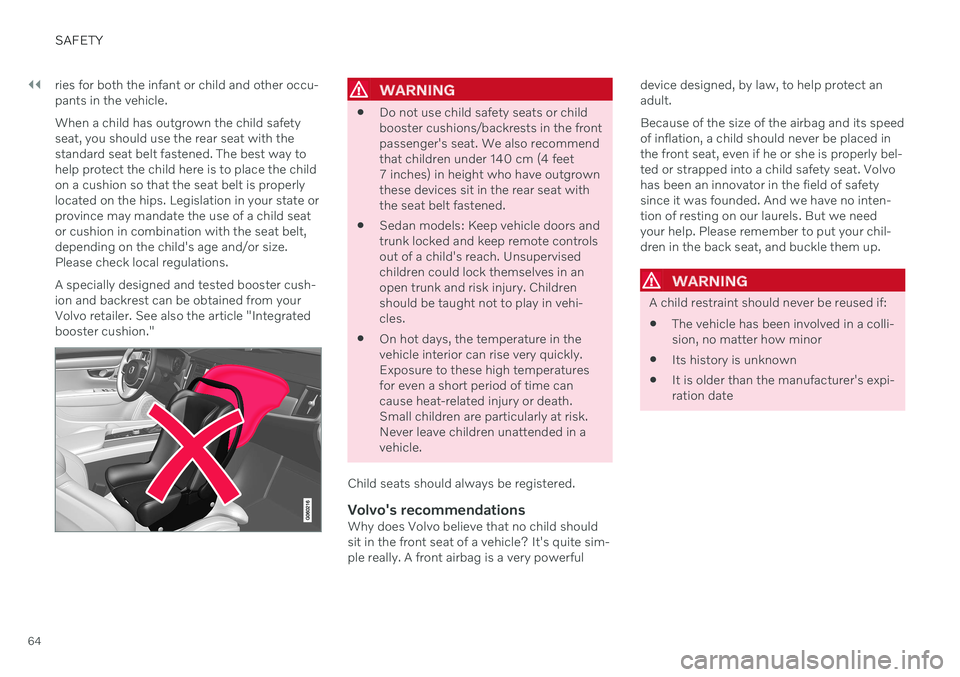
Do not use child safety seats or child booster cushions/backrests in the frontpassenger's seat. We also recommendthat children under 140 cm (4 feet7 inches) in height who have outgrownthese devices sit in the rear seat withthe seat belt fastened.
Sedan models: Keep vehicle doors andtrunk locked and keep remote controlsout of a child's reach. Unsupervisedchildren could lock themselves in anopen trunk and risk injury. Childrenshould be taught not to play in vehi-cles.
On hot days, the temperature in thevehicle interior can rise very quickly.Exposure to these high temperaturesfor even a short period of time cancause heat-related injury or death.Small children are particularly at risk.Never leave children unattended in avehicle.
Child seats should always be registered.
Volvo's recommendationsWhy does Volvo believe that no child shouldsit in the front seat of a vehicle? It's quite sim-ple really. A front airbag is a very powerful device designed, by law, to help protect anadult. Because of the size of the airbag and its speed of inflation, a child should never be placed inthe front seat, even if he or she is properly bel-ted or strapped into a child safety seat. Volvohas been an innovator in the field of safetysince it was founded. And we have no inten-tion of resting on our laurels. But we needyour help. Please remember to put your chil-dren in the back seat, and buckle them up.
WARNING
A child restraint should never be reused if:
The vehicle has been involved in a colli- sion, no matter how minor
Its history is unknown
It is older than the manufacturer's expi-ration date
Page 82 of 643
DISPLAYS AND VOICE CONTROL
* Option/accessory.
80
Instrument panel The instrument panel displays information related to the vehicle and driving.
The instrument panel contains gauges, indica- tors and monitoring and warning symbols.What is shown in the instrument panel variesdepending on the equipment, settings andfunctions currently active. The instrument panel is activated as soon as a door is opened, i.e. in ignition mode 0. The
panel will power down after a short period oftime if it is not used. To reactivate it, do one ofthe following:
Depress the brake pedal.
Activate ignition mode
I.
Open one of the doors. The instrument panel is available in two ver- sions: 8" and 12"
*.WARNING
If the instrument panel turns off, does not activate when the ignition is switched on,or part/all of the panel cannot be read, donot drive the vehicle. Consult a workshopimmediately. Volvo recommends anauthorized Volvo workshop.
WARNING
If the instrument panel is not functioning properly, information about brakes, airbagsor other safety-related systems may not bedisplayed. The driver will then not be ableto check the status of the vehicle systemsor receive relevant warnings and informa-tion.
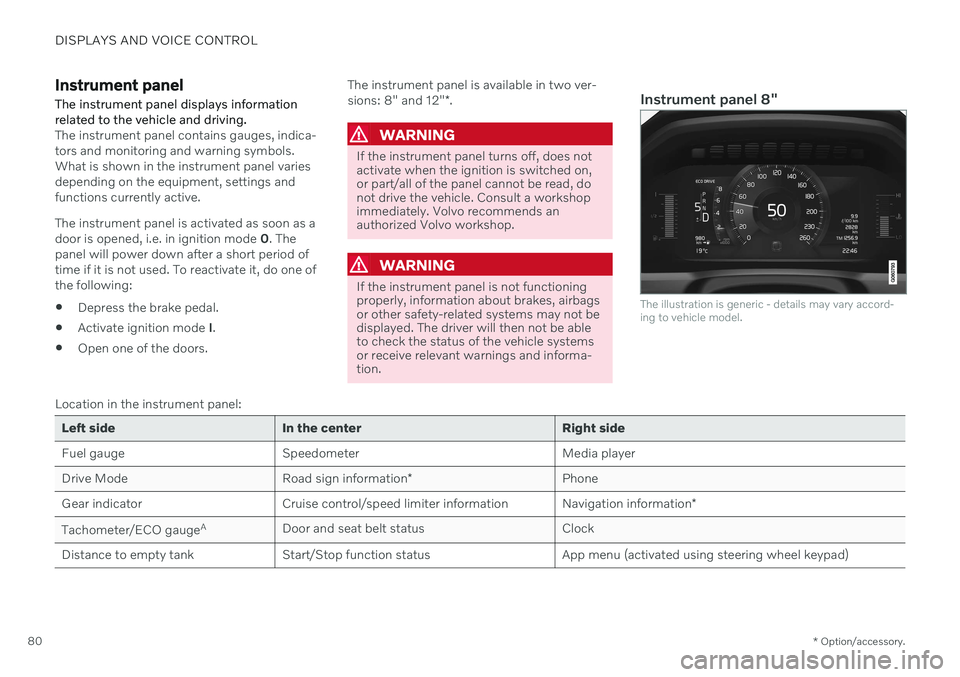
Instrument panel 8"
The illustration is generic - details may vary accord- ing to vehicle model.
Location in the instrument panel:
Left side In the center Right side
Fuel gauge Speedometer Media player Drive Mode
Road sign information* Phone
Gear indicator Cruise control/speed limiter information Navigation information*
Tachometer/ECO gauge A
Door and seat belt status Clock
Distance to empty tank Start/Stop function status App menu (activated using steering wheel keypad)
Page 84 of 643
||
DISPLAYS AND VOICE CONTROL
* Option/accessory.
82 Location in the instrument panel:
Left side In the center Right side
Speedometer Indicator and warning symbols
Tachometer/ECO gaugeA
Trip odometer Ambient temperature sensor Gear indicator Odometer B
Clock Drive Mode
Cruise control/speed limiter information Message (also graphics in some cases) Fuel gauge Road sign information * Door and seat belt status Start/Stop function status
– Media player Distance to empty tank
– Navigation system map*Current fuel consumption
– PhoneApp menu (activated using steering wheel keypad)
– Voice Control –
A
Depends on selected drive mode.
B Total distance.
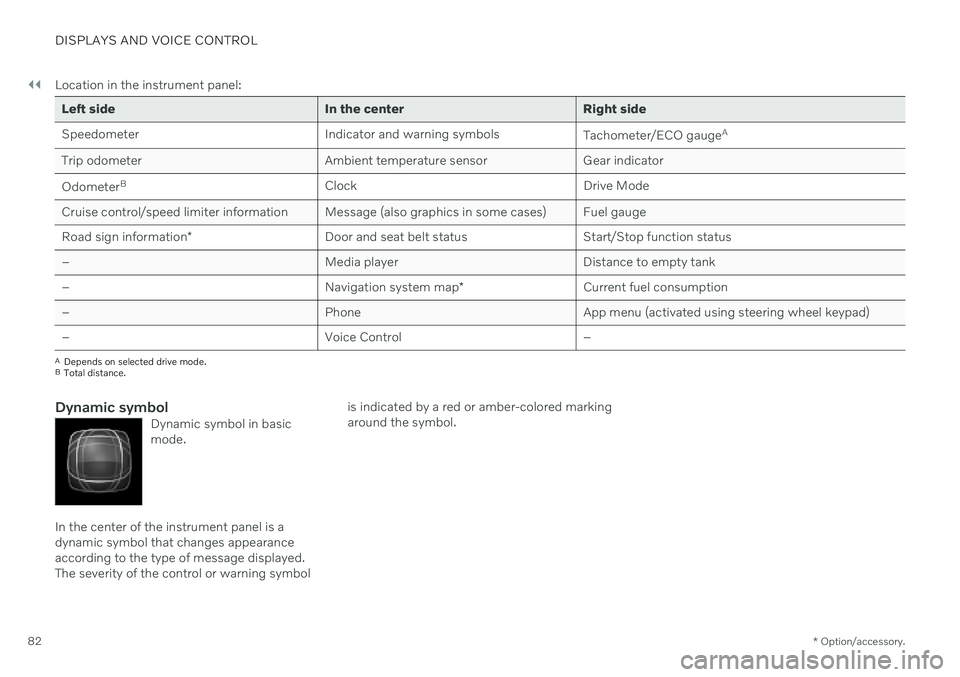
Dynamic symbolDynamic symbol in basic mode.
In the center of the instrument panel is a dynamic symbol that changes appearanceaccording to the type of message displayed.The severity of the control or warning symbol is indicated by a red or amber-colored markingaround the symbol.
Page 87 of 643
DISPLAYS AND VOICE CONTROL
}}
85
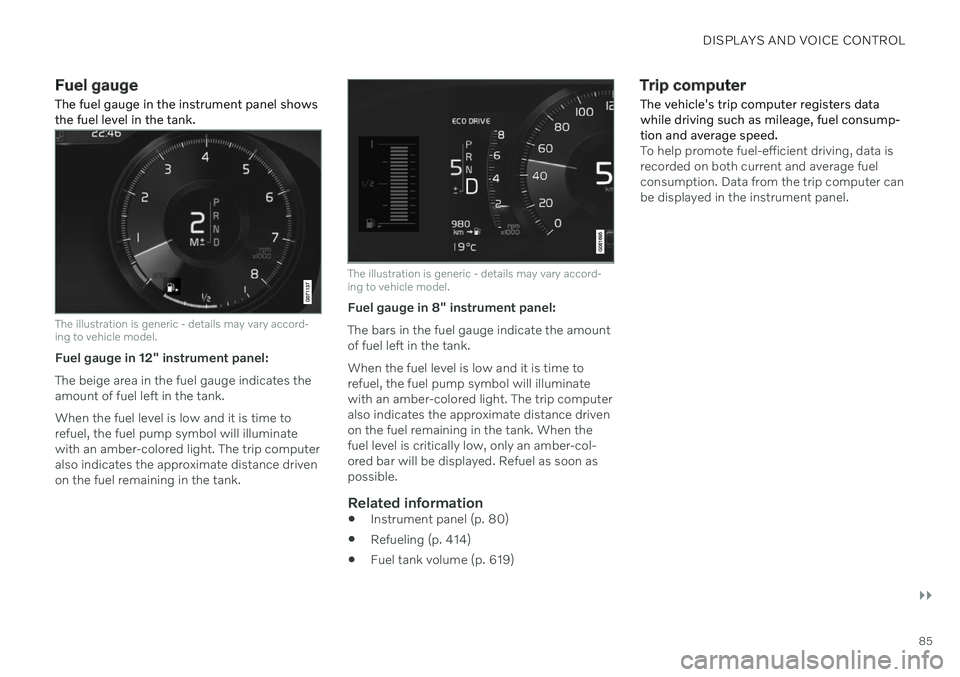
Fuel gauge The fuel gauge in the instrument panel shows the fuel level in the tank.
The illustration is generic - details may vary accord- ing to vehicle model.
Fuel gauge in 12" instrument panel: The beige area in the fuel gauge indicates the amount of fuel left in the tank. When the fuel level is low and it is time to refuel, the fuel pump symbol will illuminatewith an amber-colored light. The trip computeralso indicates the approximate distance drivenon the fuel remaining in the tank.
The illustration is generic - details may vary accord- ing to vehicle model.
Fuel gauge in 8" instrument panel: The bars in the fuel gauge indicate the amount of fuel left in the tank. When the fuel level is low and it is time to refuel, the fuel pump symbol will illuminatewith an amber-colored light. The trip computeralso indicates the approximate distance drivenon the fuel remaining in the tank. When thefuel level is critically low, only an amber-col-ored bar will be displayed. Refuel as soon aspossible.
Related information
Instrument panel (p. 80)
Refueling (p. 414)
Fuel tank volume (p. 619)
Trip computer
The vehicle's trip computer registers data while driving such as mileage, fuel consump-tion and average speed.
To help promote fuel-efficient driving, data is recorded on both current and average fuelconsumption. Data from the trip computer canbe displayed in the instrument panel.
Page 88 of 643
||
DISPLAYS AND VOICE CONTROL
* Option/accessory.
86
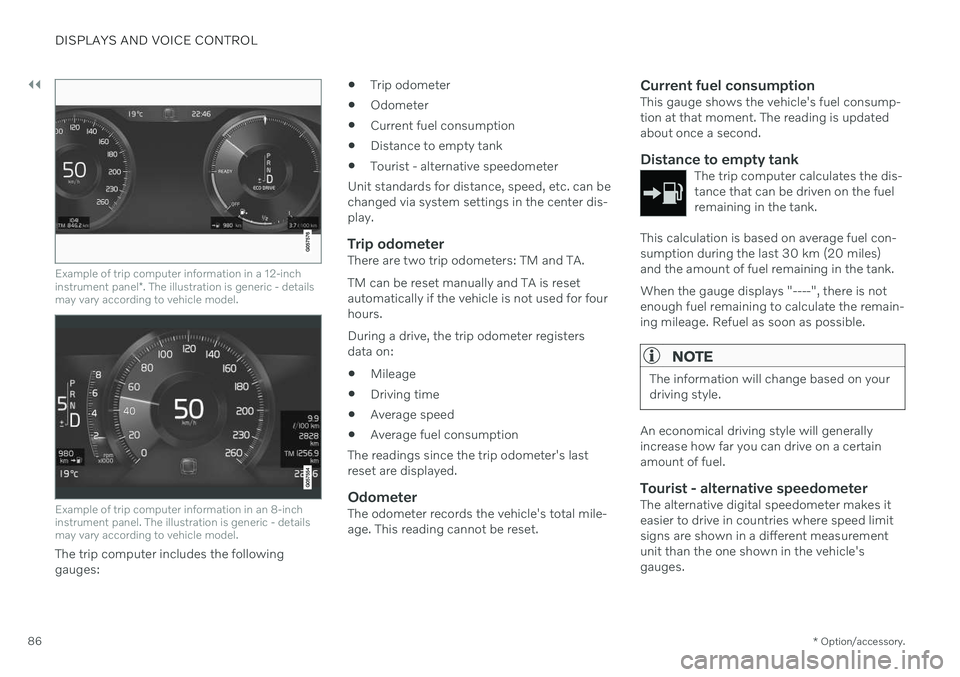
Example of trip computer information in a 12-inch instrument panel *. The illustration is generic - details
may vary according to vehicle model.
Example of trip computer information in an 8-inch instrument panel. The illustration is generic - detailsmay vary according to vehicle model.
The trip computer includes the following gauges:
Trip odometer
Odometer
Current fuel consumption
Distance to empty tank
Tourist - alternative speedometer
Unit standards for distance, speed, etc. can bechanged via system settings in the center dis-play.
Trip odometerThere are two trip odometers: TM and TA. TM can be reset manually and TA is reset automatically if the vehicle is not used for fourhours. During a drive, the trip odometer registers data on:
Mileage
Driving time
Average speed
Average fuel consumption
The readings since the trip odometer's lastreset are displayed.
OdometerThe odometer records the vehicle's total mile-age. This reading cannot be reset.
Current fuel consumptionThis gauge shows the vehicle's fuel consump-tion at that moment. The reading is updatedabout once a second.
Distance to empty tankThe trip computer calculates the dis-tance that can be driven on the fuelremaining in the tank.
This calculation is based on average fuel con- sumption during the last 30 km (20 miles)and the amount of fuel remaining in the tank. When the gauge displays "----", there is not enough fuel remaining to calculate the remain-ing mileage. Refuel as soon as possible.
NOTE
The information will change based on your driving style.
An economical driving style will generally increase how far you can drive on a certainamount of fuel.
Tourist - alternative speedometerThe alternative digital speedometer makes iteasier to drive in countries where speed limitsigns are shown in a different measurementunit than the one shown in the vehicle'sgauges.
Page 89 of 643
DISPLAYS AND VOICE CONTROL
}}
87
When used, the digital speed is displayed in the opposite unit to that shown in the analogspeedometer. If
mph is used in the analog
speedometer, the equivalent speed in km/h
will be shown in the digital speedometer.
Related information
Displaying trip data in the instrumentpanel (p. 87)
Resetting the trip odometer (p. 88)
Displaying trip statistics in the center dis-play (p. 88)
Instrument panel (p. 80)
Changing system units of measurement(p. 129)
Displaying trip data in the instrument panel
Data recorded and calculated by the trip computer can be displayed on the instrumentpanel.
This data is stored in a trip computer app. You can choose which information the instrumentpanel will display in the app menu.
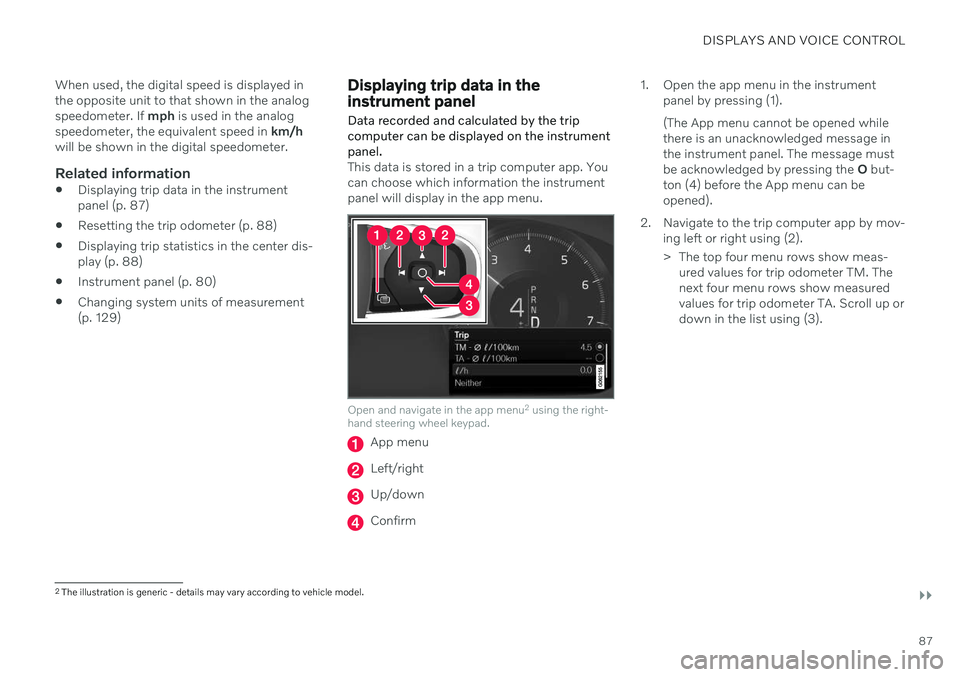
Open and navigate in the app menu 2
using the right-
hand steering wheel keypad.
App menu
Left/right
Up/down
Confirm 1. Open the app menu in the instrument
panel by pressing (1). (The App menu cannot be opened while there is an unacknowledged message inthe instrument panel. The message mustbe acknowledged by pressing the O but-
ton (4) before the App menu can beopened).
2. Navigate to the trip computer app by mov- ing left or right using (2).
> The top four menu rows show meas-ured values for trip odometer TM. The next four menu rows show measuredvalues for trip odometer TA. Scroll up ordown in the list using (3).
2The illustration is generic - details may vary according to vehicle model.
Page 96 of 643

||
DISPLAYS AND VOICE CONTROL
94
Symbol Meaning
Airbags If this symbol remains illumi- nated or comes on while driving,a fault has been detected in oneof the vehicle's safety systems.Read the message in the instru-ment panel. Volvo recommendscontacting an authorized Volvoworkshop.
A
BFault in brake system If this symbol illuminates, the brake fluid level may be too low.Contact your nearest authorizedworkshop to have the brake fluidlevel checked and adjusted.
Symbol Meaning
A
B
Parking brake on This symbol glows steadily when the parking brake is applied. A flashing symbol indicates that a fault has occurred. Read themessage in the instrument panel.
Low oil pressure If this symbol illuminates while driving when the engine oil pres-sure is too low. Stop the engineimmediately and check theengine oil level. Add oil if neces-sary. If the symbol illuminatesand the oil level is normal, con-tact a workshop. Volvo recom-mends contacting an authorizedVolvo workshop.
Generator not charging This symbol illuminates during driving if a fault is detected in theelectrical system. Contact aworkshop. Volvo recommendscontacting an authorized Volvoworkshop.
Symbol Meaning
Collision risk City Safety warns the driver if there is a risk of a collision withanother vehicle, pedestrian,cyclist or large animal.
High engine temperature The symbol will illuminate while driving when the engine tem-perature is too high. An explana-tory message will be simultane-ously displayed in the instrumentpanel.
A
Canadian models.
B US models.
Related information
Indicator symbols in the instrument panel (p. 91)
Instrument panel (p. 80)
Page 115 of 643
DISPLAYS AND VOICE CONTROL
}}
* Option/accessory.113
NOTE
In Home view's standard mode – short press on the Home button. An animationdescribing access to the various views isshown on the screen.
NOTE
When the vehicle is moving:
Certain functions (e.g. using the center display's keyboard) may be deacti-vated.
Certain texts (e.g. those generated byapps) will be shortened to three rows. Tap the
Read out button to have the
entire message read aloud.
Text messages will be shortened to one row. Tap the
Read out button to
have the entire message read aloud.
Status barCurrent vehicle activities are shown at the top of the screen in the status bar. Network andconnection information is shown to the left ofthe status bar. Media-related information, theclock and information about background activ-ities are shown to the right.
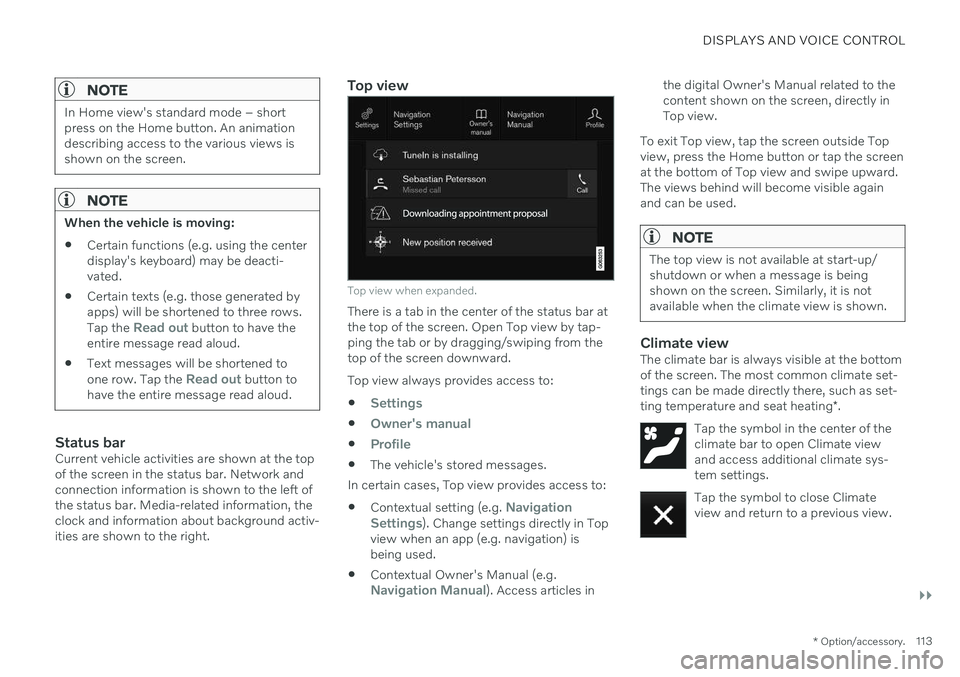
Top view
Top view when expanded.
There is a tab in the center of the status bar at the top of the screen. Open Top view by tap-ping the tab or by dragging/swiping from thetop of the screen downward. Top view always provides access to:
Settings
Owner's manual
Profile
The vehicle's stored messages.
In certain cases, Top view provides access to: Contextual setting (e.g.
Navigation
Settings). Change settings directly in Top
view when an app (e.g. navigation) is being used.
Contextual Owner's Manual (e.g.
Navigation Manual). Access articles in the digital Owner's Manual related to the content shown on the screen, directly inTop view.
To exit Top view, tap the screen outside Topview, press the Home button or tap the screenat the bottom of Top view and swipe upward.The views behind will become visible againand can be used.
NOTE
The top view is not available at start-up/ shutdown or when a message is beingshown on the screen. Similarly, it is notavailable when the climate view is shown.
Climate viewThe climate bar is always visible at the bottom of the screen. The most common climate set-tings can be made directly there, such as set- ting temperature and seat heating *.
Tap the symbol in the center of the climate bar to open Climate viewand access additional climate sys-tem settings.
Tap the symbol to close Climate view and return to a previous view.
Page 122 of 643
||
DISPLAYS AND VOICE CONTROL
120
Button modes
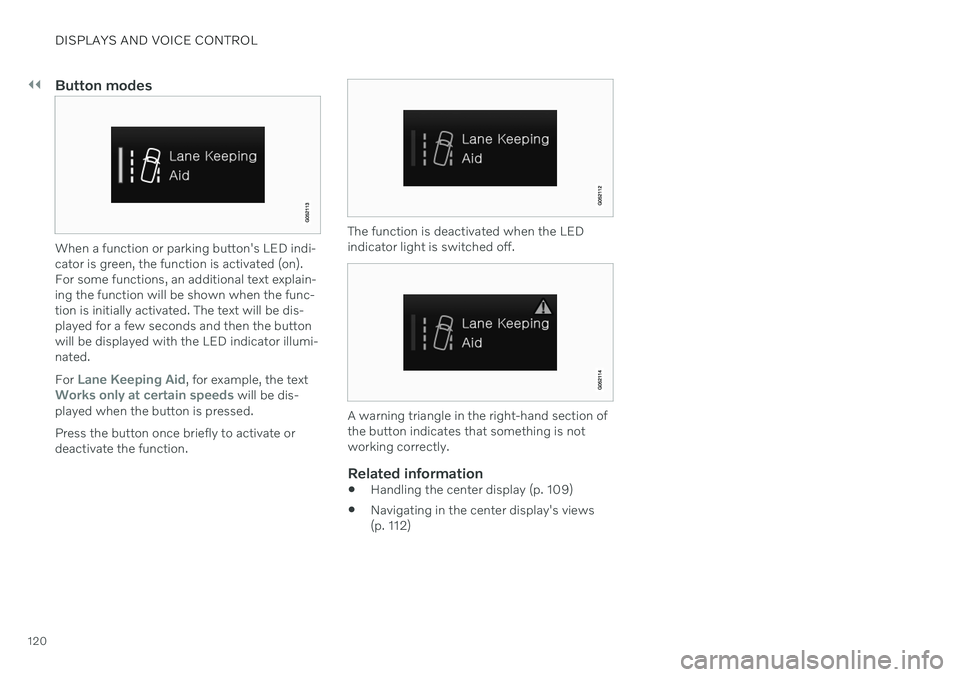
When a function or parking button's LED indi- cator is green, the function is activated (on).For some functions, an additional text explain-ing the function will be shown when the func-tion is initially activated. The text will be dis-played for a few seconds and then the buttonwill be displayed with the LED indicator illumi-nated. For
Lane Keeping Aid, for example, the textWorks only at certain speeds will be dis-
played when the button is pressed. Press the button once briefly to activate or deactivate the function.
The function is deactivated when the LED indicator light is switched off.
A warning triangle in the right-hand section of the button indicates that something is notworking correctly.
Related information
Handling the center display (p. 109)
Navigating in the center display's views (p. 112)