lock VOLVO S90 2020 Quick Guide
[x] Cancel search | Manufacturer: VOLVO, Model Year: 2020, Model line: S90, Model: VOLVO S90 2020Pages: 643, PDF Size: 13.68 MB
Page 144 of 643
||
DISPLAYS AND VOICE CONTROL
* Option/accessory.
142
Calibrating the horizontal positionIf the windshield or display unit has been replaced, the head-up display's horizontalposition may need to be calibrated. Calibrationmeans that the projected image is rotatedclockwise or counterclockwise. 1.
Tap
Settings in the center display's Top
view.
2. Select
My CarDisplaysHead-Up
Display Options
Head-Up Display
Calibration.
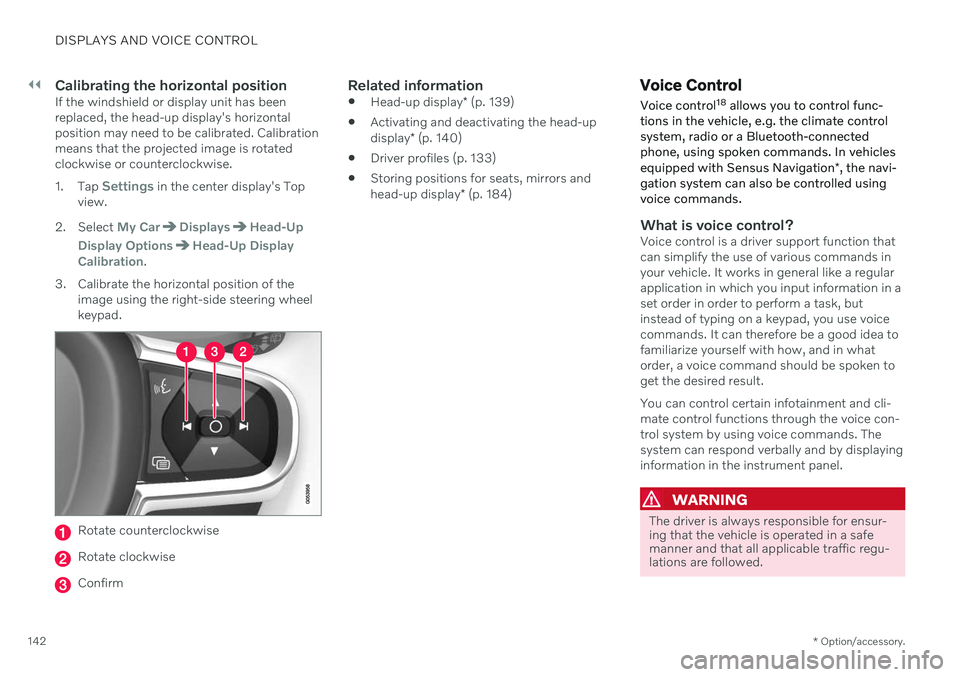
3. Calibrate the horizontal position of the image using the right-side steering wheel keypad.
Rotate counterclockwise
Rotate clockwise
Confirm
Related information
Head-up display
* (p. 139)
Activating and deactivating the head-up display
* (p. 140)
Driver profiles (p. 133)
Storing positions for seats, mirrors andhead-up display
* (p. 184)
Voice Control
Voice control 18
allows you to control func-
tions in the vehicle, e.g. the climate control system, radio or a Bluetooth-connectedphone, using spoken commands. In vehicles equipped with Sensus Navigation *, the navi-
gation system can also be controlled using voice commands.
What is voice control?Voice control is a driver support function that can simplify the use of various commands inyour vehicle. It works in general like a regularapplication in which you input information in aset order in order to perform a task, butinstead of typing on a keypad, you use voicecommands. It can therefore be a good idea tofamiliarize yourself with how, and in whatorder, a voice command should be spoken toget the desired result. You can control certain infotainment and cli- mate control functions through the voice con-trol system by using voice commands. Thesystem can respond verbally and by displayinginformation in the instrument panel.
WARNING
The driver is always responsible for ensur- ing that the vehicle is operated in a safemanner and that all applicable traffic regu-lations are followed.
Page 155 of 643
LIGHTING
153
Active high beam
Active high beams is a function that uses camera sensors in the upper edge of thewindshield to detect the headlights ofapproaching vehicles or the taillights of thevehicle directly ahead. When either of theseis detected, the vehicle's headlights will auto-matically switch from high beams to lowbeams.
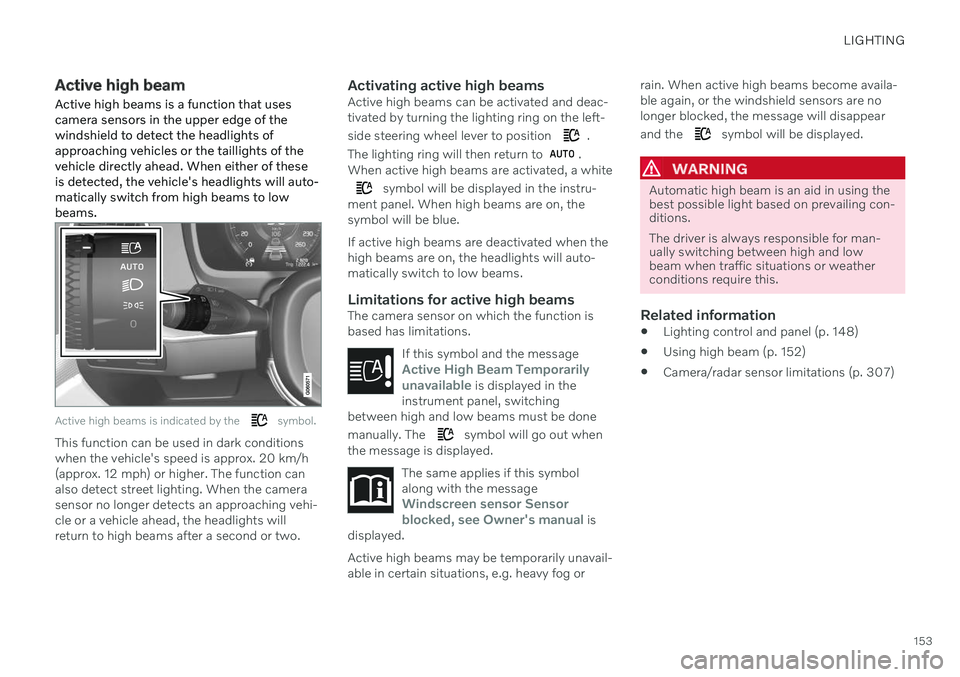
Active high beams is indicated by the symbol.
This function can be used in dark conditions when the vehicle's speed is approx. 20 km/h(approx. 12 mph) or higher. The function canalso detect street lighting. When the camerasensor no longer detects an approaching vehi-cle or a vehicle ahead, the headlights willreturn to high beams after a second or two.
Activating active high beamsActive high beams can be activated and deac-tivated by turning the lighting ring on the left- side steering wheel lever to position
.
The lighting ring will then return to
.
When active high beams are activated, a white
symbol will be displayed in the instru-
ment panel. When high beams are on, the symbol will be blue. If active high beams are deactivated when the high beams are on, the headlights will auto-matically switch to low beams.
Limitations for active high beamsThe camera sensor on which the function isbased has limitations.
If this symbol and the message
Active High Beam Temporarily
unavailable is displayed in the
instrument panel, switching
between high and low beams must be done manually. The
symbol will go out when
the message is displayed.
The same applies if this symbol along with the message
Windscreen sensor Sensor
blocked, see Owner's manual is
displayed.
Active high beams may be temporarily unavail- able in certain situations, e.g. heavy fog or rain. When active high beams become availa-ble again, or the windshield sensors are nolonger blocked, the message will disappear and the
symbol will be displayed.
WARNING
Automatic high beam is an aid in using the best possible light based on prevailing con-ditions. The driver is always responsible for man- ually switching between high and lowbeam when traffic situations or weatherconditions require this.
Related information
Lighting control and panel (p. 148)
Using high beam (p. 152)
Camera/radar sensor limitations (p. 307)
Page 160 of 643
LIGHTING
* Option/accessory.
158
Using home safe lighting
Some of the exterior lights remain on to illu- minate the area around the vehicle. This iscalled home safe lighting.
To activate home safe lighting:
1. Switch off the ignition.
2. Push the left-side steering wheel lever toward the dashboard and release.
3. Exit the vehicle and lock the doors. > A symbol in the instrument panel illumi-nates to indicate that the function is activated and exterior lighting switcheson: Parking lights, headlights, licenseplate lighting and outer door handle lighting *.
The length of time home safe lighting remains illuminated can be set in the center display.
Related information
Adjusting light functions via the centerdisplay (p. 149)
Welcome Light (p. 158)
Welcome Light
Approach lighting is activated when the vehi- cle is unlocked and can be used to providelight as you walk toward the vehicle.
The function is activated when the remote key is used for unlocking. The parking lights, ceil-ing lights, footwell lights and trunk/cargocompartment lights are activated in daylightconditions. In weak daylight or dark condi-tions, the license plate lighting and outer door handle lighting * will also be activated, with the
light directed toward the ground. If no door is opened, the lights will remain illu- minated for approx. 2 minutes. If a door isopened while the function is activated, the interior lighting and outer door handle lighting *
will remain on for a longer period of time. This function can be activated and deactivated in the center display.
Related information
Adjusting light functions via the centerdisplay (p. 149)
Using home safe lighting (p. 158)
Remote key (p. 234)
Interior Lighting
The passenger compartment is equipped with several different types of lighting, e.g.general lighting, adjustable ambient lightingand reading lights.
All lighting in the passenger compartment can be turned on and off manually within5 minutes after:
the engine has been switched off and theignition is in mode
0.
the vehicle is unlocked but has not yetbeen started.
Front ceiling lighting
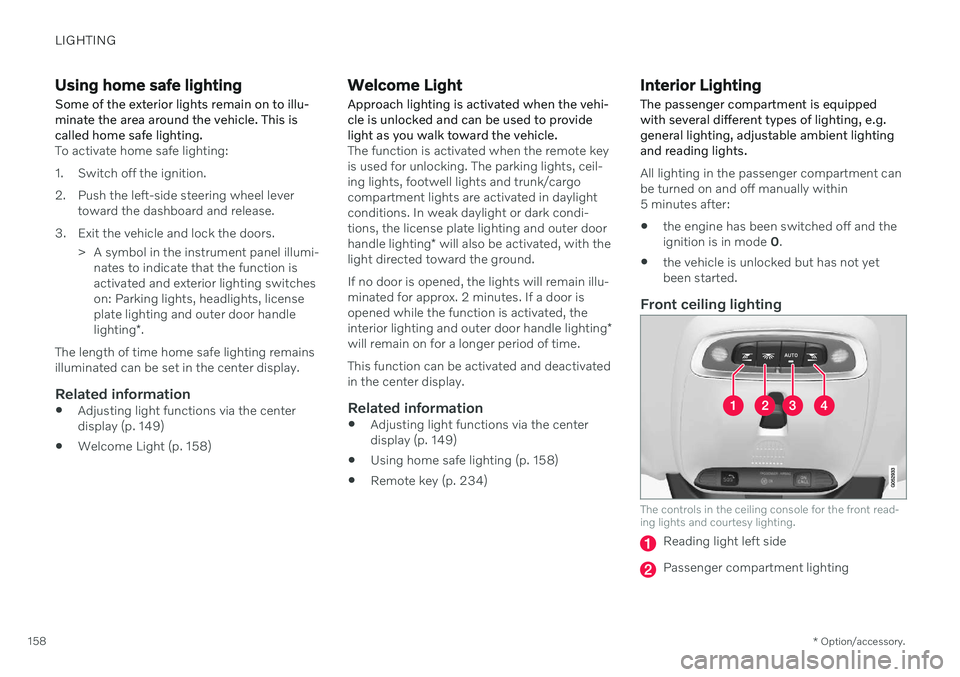
The controls in the ceiling console for the front read- ing lights and courtesy lighting.
Reading light left side
Passenger compartment lighting
Page 161 of 643

LIGHTING
}}
* Option/accessory.159
Courtesy lighting auto switch
Reading light right side
Reading lights
The reading lights on the right and left sides are switched on and off by briefly pressing thebuttons in the ceiling console. To adjust thebrightness, press and hold the button.
Passenger compartment lighting
Briefly press the button in the ceiling console to switch on or off the footwell lighting andceiling lighting.
Courtesy lighting auto switch
Activate the auto switch by briefly pressing the AUTO button in the ceiling console. With
Auto activated, the indicator light in the buttonand the courtesy lighting come on and areturned off as follows. Courtesy lighting is switched on when:
The vehicle is unlocked
The vehicle is switched off
A side door is opened.
Courtesy lighting is switched off when: The vehicle is locked
The engine is started
A side door is closed
A side door has been open for approx. 2 minutes.
Rear roof lightingReading lights are located in the rear sectionof the vehicle and can also be used as passen-ger compartment lighting.
In vehicles with panoramic roofs
*, there are two lamp
units, one on each side of the ceiling.
Briefly press the button on the light to turn on or off the reading lights. To adjust the bright-ness, press and hold the button.
Glove compartment lightingThe glove compartment lighting comes on orgoes off when the glove compartment isopened or closed.
Vanity mirror lighting *The vanity mirror lighting comes on or goes offwhen the cover over the mirror is opened orclosed.
Ground lighting*The ground lighting comes on or goes offwhen a door is opened or closed.
Doorsill lightingThe doorsill lighting comes on or goes offwhen a door is opened or closed.
Trunk lightingThe trunk lighting comes on or goes off whenthe trunk lid is opened or closed.
Ambient LightingThe ambient lighting comes on when thedoors are opened and goes out when the vehi-cle is locked. Ambient lighting brightness canbe adjusted in the center display and also fine-tuned using the thumb wheel in the dash-board.
Mood lighting*The vehicle is equipped with LEDs that pro-vide faint lighting in various colors. This light-ing is on when the engine is running. Moodlighting can be adjusted in the center displayand also fine-tuned using the thumb wheel inthe dashboard.
Lighting in the door storage compartments
Lighting in the door storage compartments comes on when the doors are opened andgoes out when the vehicle is locked. The
Page 162 of 643
||
LIGHTING
* Option/accessory.
160 brightness can be adjusted using the thumb wheel in the dashboard.
Lighting in the tunnel console's front
cup holder
The lighting in front console cup holdersswitches on when the vehicle is unlocked andoff when the vehicle is locked. The brightnesscan be adjusted using the thumb wheel in thedashboard.
Related information
Adjusting interior lighting (p. 160)
Lighting control and panel (p. 148)
Ignition modes (p. 381)
Passenger compartment interior (p. 532)
Adjusting interior lighting
Illumination in the vehicle varies depending on ignition mode. The interior lighting can beadjusted with a thumb wheel in the dash-board and certain light functions can also beadjusted via the center display.
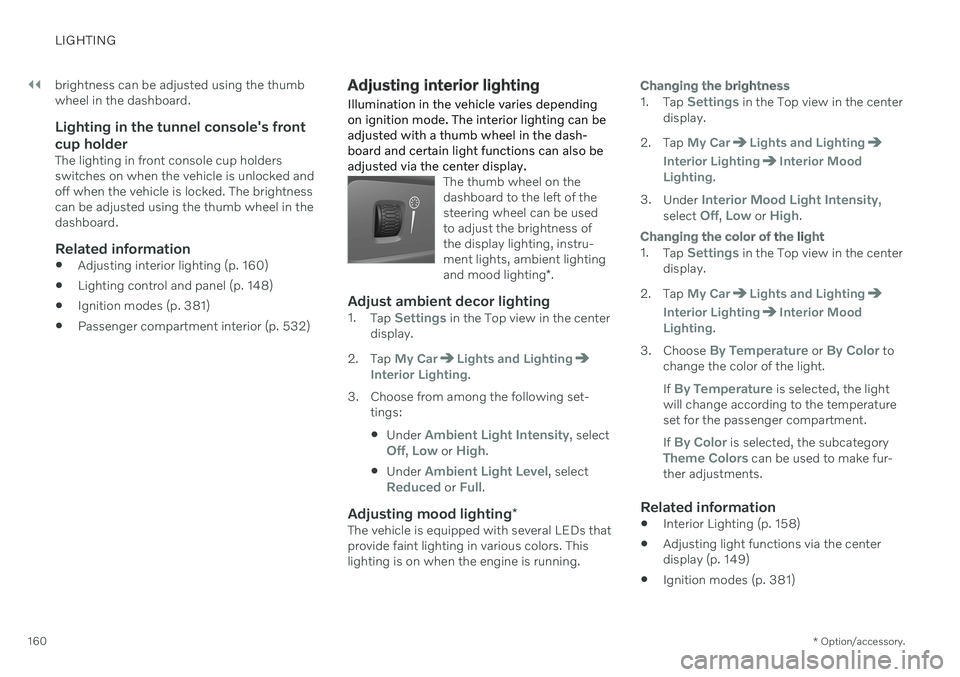
The thumb wheel on the dashboard to the left of thesteering wheel can be usedto adjust the brightness ofthe display lighting, instru-ment lights, ambient lighting and mood lighting *.
Adjust ambient decor lighting1.
Tap Settings in the Top view in the center
display.
2. Tap
My CarLights and LightingInterior Lighting.
3. Choose from among the following set- tings:
Under
Ambient Light Intensity, selectOff, Low or High.
Under
Ambient Light Level, selectReduced or Full.
Adjusting mood lighting
*The vehicle is equipped with several LEDs that provide faint lighting in various colors. Thislighting is on when the engine is running.
Changing the brightness
1.
Tap Settings in the Top view in the center
display.
2. Tap
My CarLights and Lighting
Interior LightingInterior Mood
Lighting.
3. Under
Interior Mood Light Intensity,
select Off, Low or High.
Changing the color of the light
1. Tap Settings in the Top view in the center
display.
2. Tap
My CarLights and Lighting
Interior LightingInterior Mood
Lighting.
3. Choose
By Temperature or By Color to
change the color of the light. If
By Temperature is selected, the light
will change according to the temperature set for the passenger compartment. If
By Color is selected, the subcategoryTheme Colors can be used to make fur-
ther adjustments.
Related information
Interior Lighting (p. 158)
Adjusting light functions via the center display (p. 149)
Ignition modes (p. 381)
Page 164 of 643

WINDOWS, GLASS AND MIRRORS
* Option/accessory.
162
Windows, glass and mirrors The vehicle is equipped with several different types of windows, glass and mirrors. Some ofthe windows in the car are laminated.
The windshield has laminated glass. Lamina- ted glass is also available as on option forsome other glass surfaces. Laminated glass isreinforced, which provides better protectionagainst break-ins and improved soundproofingin the passenger compartment. The panoramic roof * also has laminated glass.
The symbol shows the windows containing lamina- ted glass. 1
Related information
Pinch protection for windows and sun cur- tains (p. 162)
Panoramic roof (p. 170)
Power windows (p. 164)
Rearview/door mirrors (p. 168)
Using sun curtains
* (p. 166)
Head-up display
* (p. 139)
Using the windshield wipers (p. 176)
Using the windshield and headlight wash-ers (p. 178)
Activating and deactivating the heatedrear window and door mirrors (p. 216)
Pinch protection for windows and sun curtains All power windows and sun curtains
* have a
pinch protection function that is triggered if anything blocks them while they are openingor closing.
If pinch protection is activated, movement will stop and then retract automatically to approx.50 mm (2 inches) from the point at which itwas blocked (or to full ventilation position). It is still possible to override pinch protection when closing is interrupted (e.g. due to ice) bypressing and holding down the control in thesame direction. If there is any problem with the pinch protec- tion, a rest procedure can be tested.
WARNING
If the starter battery is disconnected, the function for automatic opening and closingmust be reset to function correctly. A resetis required in order for the pinch protectionto work.
Related information
Reset procedure for pinch protection (p. 163)
Operating the power windows (p. 165)
1
Does not apply to windshield and panoramic roof *, which are always laminated and therefore do not have this symbol.
Page 166 of 643
WINDOWS, GLASS AND MIRRORS
* Option/accessory.
164
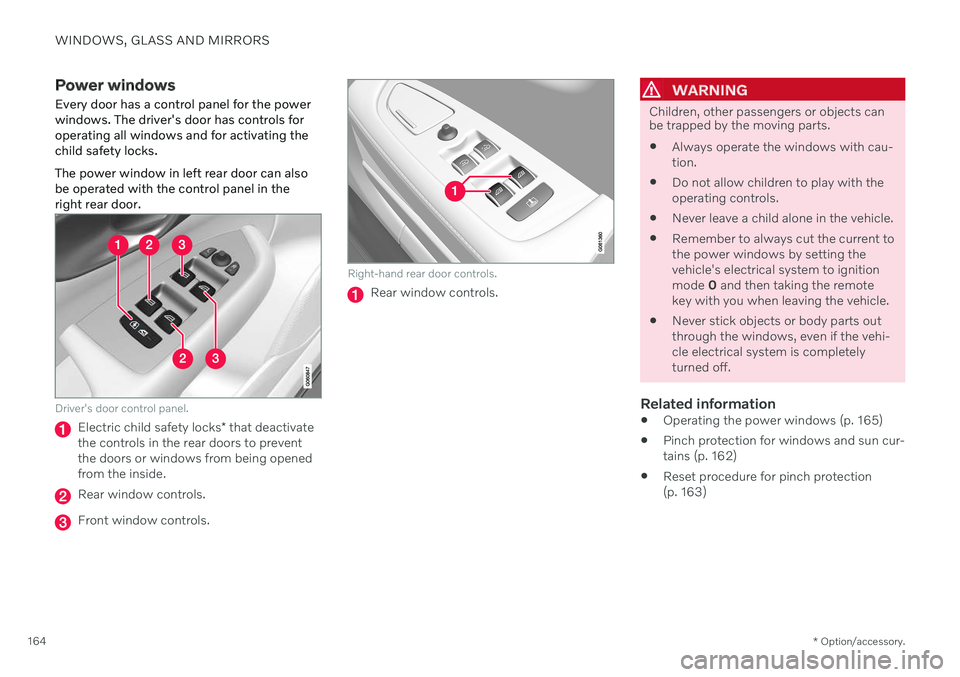
Power windows Every door has a control panel for the power windows. The driver's door has controls foroperating all windows and for activating thechild safety locks. The power window in left rear door can also be operated with the control panel in theright rear door.
Driver's door control panel.
Electric child safety locks * that deactivate
the controls in the rear doors to prevent the doors or windows from being openedfrom the inside.
Rear window controls.
Front window controls.
Right-hand rear door controls.
Rear window controls.
WARNING
Children, other passengers or objects can be trapped by the moving parts.
Always operate the windows with cau- tion.
Do not allow children to play with theoperating controls.
Never leave a child alone in the vehicle.
Remember to always cut the current tothe power windows by setting thevehicle's electrical system to ignitionmode
0 and then taking the remote
key with you when leaving the vehicle.
Never stick objects or body parts outthrough the windows, even if the vehi-cle electrical system is completelyturned off.
Related information
Operating the power windows (p. 165)
Pinch protection for windows and sun cur-tains (p. 162)
Reset procedure for pinch protection(p. 163)
Page 168 of 643
WINDOWS, GLASS AND MIRRORS
* Option/accessory.
166
Keyless locking and unlocking
* (p. 249)
Locking and unlocking using the remote key (p. 236)
Using sun curtains
*
There are integrated sun curtains in each rear door and in the parcel shelf in the rear win-dow.
Rear door – electrically operated
Each of the sun shades can be fully retracted or fully extended. The sun curtains are equipped with pinch pro- tection. If you experience any problems oper-ating in the sun curtains, a reset sequence canbe tested.
Control for power sun curtain
Control: Controls:
Driver's door Right and left rear door
Passenger door None
Control: Controls:
Left rear door Left rear door
Right rear door Right and left rear door
To operate the power windows and sun cur- tains, the ignition must be in at least mode I or
II .
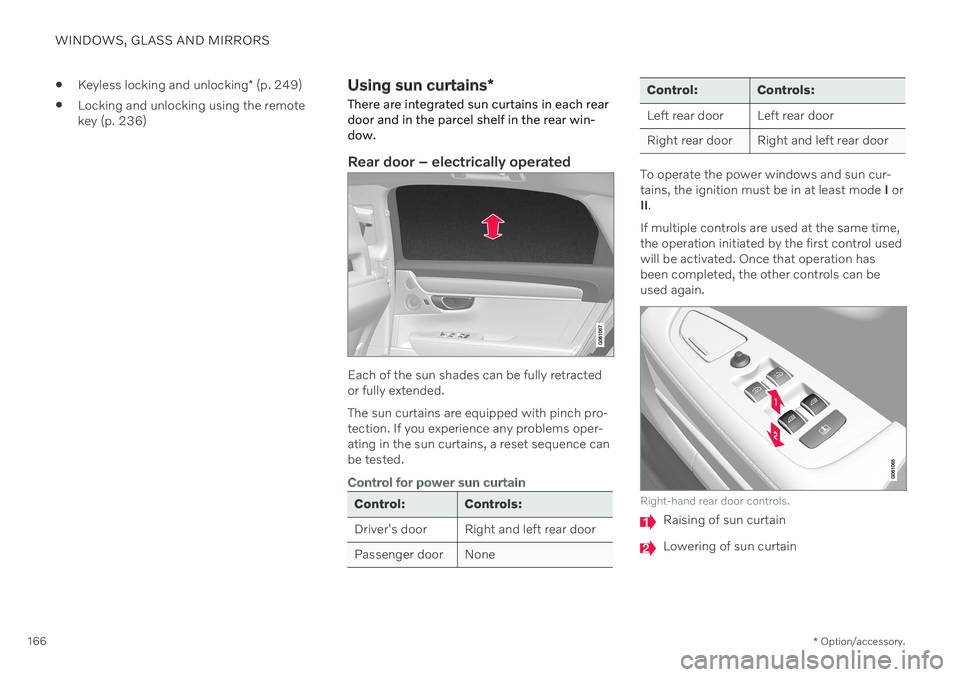
If multiple controls are used at the same time,the operation initiated by the first control usedwill be activated. Once that operation hasbeen completed, the other controls can beused again.
Right-hand rear door controls.
Raising of sun curtain
Lowering of sun curtain
Page 172 of 643

||
WINDOWS, GLASS AND MIRRORS
* Option/accessory.
170
Tilting when parking 3The door mirrors can be tilted down to help give the driver a better view along the sides ofthe vehicle, e.g. of the curb when parking.
–Select reverse gear and press the
L or R
mirror button.
Please note that the button may need to be pressed twice depending on settings. Whenthe door mirror is tilted down, the light in thebutton will flash. When reverse gear isengaged, the door mirrors will automaticallystart to move after 3 seconds and will reachtheir original position after about 8 seconds.
Automatically tilting when parking 3With this setting, the door mirrors will auto-matically tilt down when reverse gear isengaged. The folded position is preset andcannot be adjusted. 1.
Tap
Settings in the center display's Top
view.
2. Tap
My CarMirrors and Convenience.
3. Under
Exterior Mirror Tilt at Reverse,
select Off, Driver, Passenger or Both to
activate/deactivate and to select which mirror to tilt.
To immediately return the door mirrors to theiroriginal position, press the L or R button
twice.
Automatic folding when the vehicle is locked *
The door mirrors can automatically fold in when the vehicle is locked and open when thevehicle is unlocked using the remote key. Ifthe mirrors have been folded in manually, theymust be folded out manually as well. 1.
Tap
Settings in the center display's Top
view.
2. Tap
My CarMirrors and Convenience.
3. Select
Fold Mirror When Locked to acti-
vate/deactivate.
Related information
Rearview/door mirrors (p. 168)
Adjusting the rearview mirror dimming function (p. 168)
Storing positions for seats, mirrors and head-up display
* (p. 184)
Activating and deactivating the heated rear window and door mirrors (p. 216)
Panoramic roof The panoramic roof is divided into two glass sections. The front section can be openedvertically at the rear edge (ventilation posi-tion) or horizontally (open position). The rearsection cannot be moved. The panoramic roof has a wind deflector and sun curtain made of perforated fabric (locatedbeneath the glass sections) for extra protec-tion in e.g. bright sunlight.
The panoramic roof and sun curtain are oper- ated using the controls in the ceiling.
3
Only on models equipped with a power driver's seat with memory buttons *.
Page 173 of 643

WINDOWS, GLASS AND MIRRORS
}}
171
The panoramic roof and sun curtain can also be operated with the controls in the right-siderear door. To operate the panoramic roof and sun cur- tain, the ignition must be in mode I or II.
WARNING
Children, other passengers or objects can be trapped by the moving parts.
Always operate the windows with cau- tion.
Do not allow children to play with theoperating controls.
Never leave a child alone in the vehicle.
Remember to always cut the current tothe power windows by setting thevehicle's electrical system to ignitionmode
0 and then taking the remote
key with you when leaving the vehicle.
Never stick objects or body parts outthrough the windows, even if the vehi-cle electrical system is completelyturned off.
CAUTION
Do not open the panoramic roof when load carriers are installed.
Never place heavy objects on the pan-oramic roof.
CAUTION
Remove ice and snow before opening the panoramic roof. Be careful not toscratch any surfaces or damage thetrim.
Do not operate the panoramic roof if itis frozen in place.
Wind blocker
The panoramic roof is equipped with a wind blocker that folds up when the roof is open.
Related information
Operating the panoramic roof (p. 172)
Auto closing the panoramic roof sun cur-tain (p. 175)
Pinch protection for windows and sun cur- tains (p. 162)