high beam VOLVO S90 2020 Quick Guide
[x] Cancel search | Manufacturer: VOLVO, Model Year: 2020, Model line: S90, Model: VOLVO S90 2020Pages: 643, PDF Size: 13.68 MB
Page 6 of 643
4
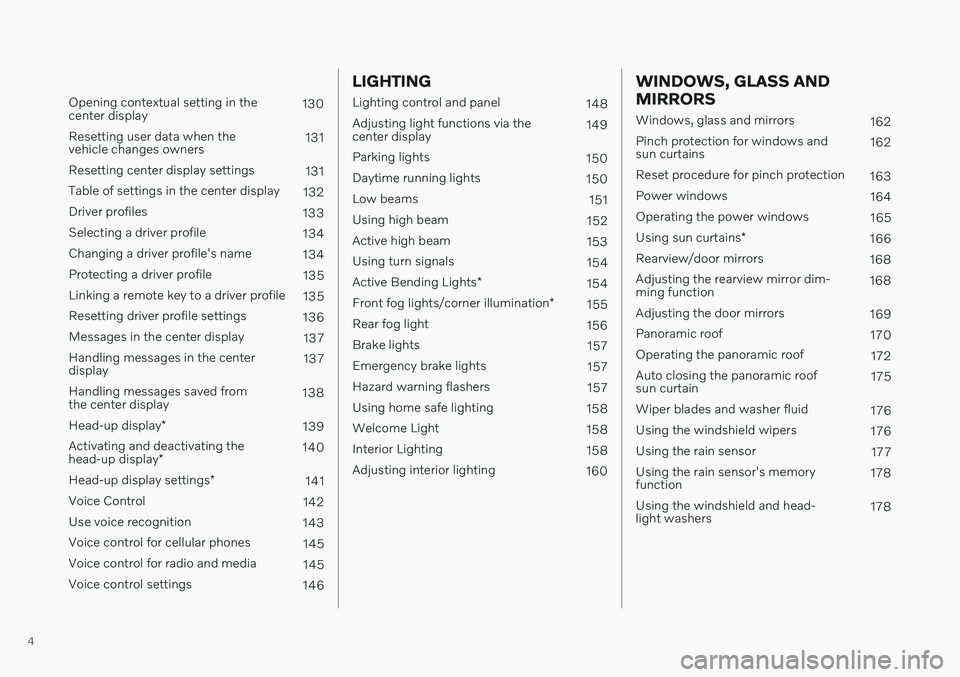
Opening contextual setting in the center display130
Resetting user data when thevehicle changes owners 131
Resetting center display settings 131
Table of settings in the center display 132
Driver profiles 133
Selecting a driver profile 134
Changing a driver profile's name 134
Protecting a driver profile 135
Linking a remote key to a driver profile 135
Resetting driver profile settings 136
Messages in the center display 137
Handling messages in the centerdisplay 137
Handling messages saved fromthe center display 138
Head-up display *
139
Activating and deactivating the head-up display * 140
Head-up display settings *
141
Voice Control 142
Use voice recognition 143
Voice control for cellular phones 145
Voice control for radio and media 145
Voice control settings 146
LIGHTING
Lighting control and panel148
Adjusting light functions via the center display 149
Parking lights 150
Daytime running lights 150
Low beams 151
Using high beam 152
Active high beam 153
Using turn signals 154
Active Bending Lights *
154
Front fog lights/corner illumination *
155
Rear fog light 156
Brake lights 157
Emergency brake lights 157
Hazard warning flashers 157
Using home safe lighting 158
Welcome Light 158
Interior Lighting 158
Adjusting interior lighting 160
WINDOWS, GLASS AND MIRRORS
Windows, glass and mirrors 162
Pinch protection for windows and sun curtains 162
Reset procedure for pinch protection 163
Power windows 164
Operating the power windows 165
Using sun curtains *
166
Rearview/door mirrors 168
Adjusting the rearview mirror dim-ming function 168
Adjusting the door mirrors 169
Panoramic roof 170
Operating the panoramic roof 172
Auto closing the panoramic roofsun curtain 175
Wiper blades and washer fluid 176
Using the windshield wipers 176
Using the rain sensor 177
Using the rain sensor's memoryfunction 178
Using the windshield and head-light washers 178
Page 14 of 643
12
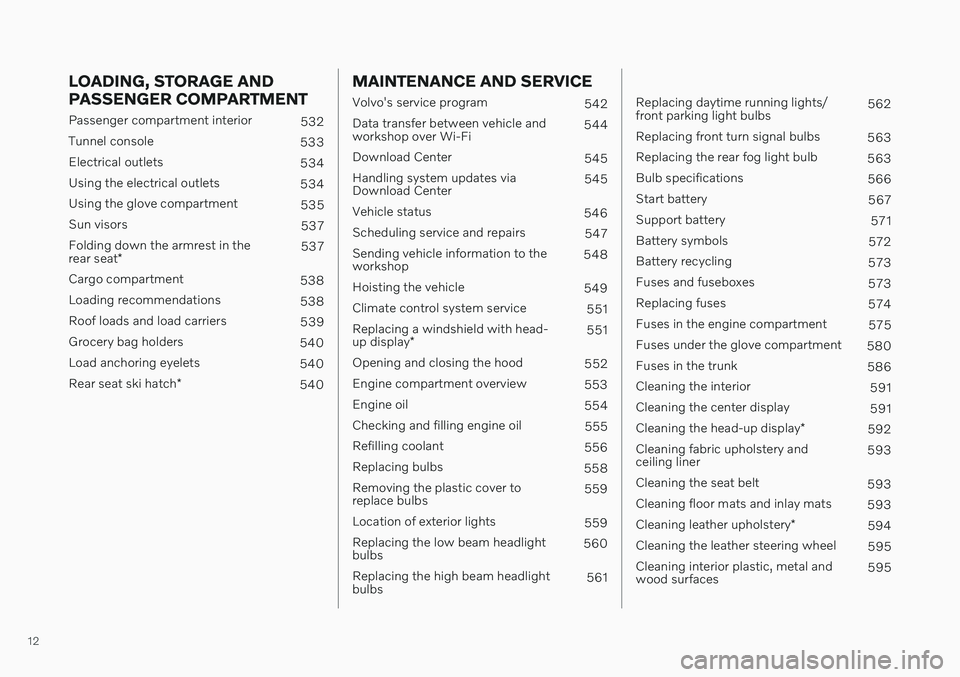
LOADING, STORAGE AND PASSENGER COMPARTMENT
Passenger compartment interior532
Tunnel console 533
Electrical outlets 534
Using the electrical outlets 534
Using the glove compartment 535
Sun visors 537
Folding down the armrest in the rear seat * 537
Cargo compartment 538
Loading recommendations 538
Roof loads and load carriers 539
Grocery bag holders 540
Load anchoring eyelets 540
Rear seat ski hatch *
540
MAINTENANCE AND SERVICE
Volvo's service program
542
Data transfer between vehicle and workshop over Wi-Fi 544
Download Center 545
Handling system updates viaDownload Center 545
Vehicle status 546
Scheduling service and repairs 547
Sending vehicle information to theworkshop 548
Hoisting the vehicle 549
Climate control system service 551
Replacing a windshield with head- up display * 551
Opening and closing the hood 552
Engine compartment overview 553
Engine oil 554
Checking and filling engine oil 555
Refilling coolant 556
Replacing bulbs 558
Removing the plastic cover to replace bulbs 559
Location of exterior lights 559
Replacing the low beam headlightbulbs 560
Replacing the high beam headlightbulbs 561
Replacing daytime running lights/ front parking light bulbs562
Replacing front turn signal bulbs 563
Replacing the rear fog light bulb 563
Bulb specifications 566
Start battery 567
Support battery 571
Battery symbols 572
Battery recycling 573
Fuses and fuseboxes 573
Replacing fuses 574
Fuses in the engine compartment 575
Fuses under the glove compartment 580
Fuses in the trunk 586
Cleaning the interior 591
Cleaning the center display 591
Cleaning the head-up display *
592
Cleaning fabric upholstery andceiling liner 593
Cleaning the seat belt 593
Cleaning floor mats and inlay mats 593
Cleaning leather upholstery *
594
Cleaning the leather steering wheel 595
Cleaning interior plastic, metal andwood surfaces 595
Page 31 of 643

YOUR VOLVO
* Option/accessory.29
IntelliSafe – driver support and safety
IntelliSafe is Volvo Cars' philosophy regarding vehicle safety. IntelliSafe consists of a num- ber of systems 2
that are designed to help
make driving safer, prevent accidents and protect passengers and other road users.
WARNING
The functions are supplementary aids – they cannot manage all situations in allconditions. The driver is always responsible for ensur- ing that the vehicle is driven in a safe man-ner and in accordance with applicable traf-fic rules and regulations.
SupportIntelliSafe has the following functions designed to help the driver operate the vehiclemore safely.
Active high beam
Tunnel detection
Pilot Assist
*
Cross Traffic Alert
*
Blind Spot Information
Park Assist
*
Park Assist Pilot
*
Park Assist Camera
*
Road Sign Information
*
Electronic Stability Control
Roll Stability Control
Cruise control
Adaptive Cruise Control
*
Rear Collision Warning
Driver Alert Control
All Wheel Drive (AWD) 3
PreventionIntelliSafe has the following functionsdesigned to help the driver prevent accidents.
City Safety
Distance Alert
*
Lane Keeping Aid
Collision Avoid. Assistance
ProtectionIntelliSafe has the following interacting func- tions to help protect the driver and passengersin certain situations in the event of an acci-dent.
Whiplash Protection System
Seat belt with seat belt tensioner
Airbags
NOTE
Read the individual parts about each sys- tem to fully understand the functions andbe notified of important warnings.
Related information
Active high beam (p. 153)
Safety (p. 42)
Driver support systems (p. 266)
2
Some of these systems are standard, while others are options. This may vary depending on market, vehicle model and model year.
3 All Wheel Drive
Page 80 of 643
DISPLAYS AND VOICE CONTROL
* Option/accessory.
78
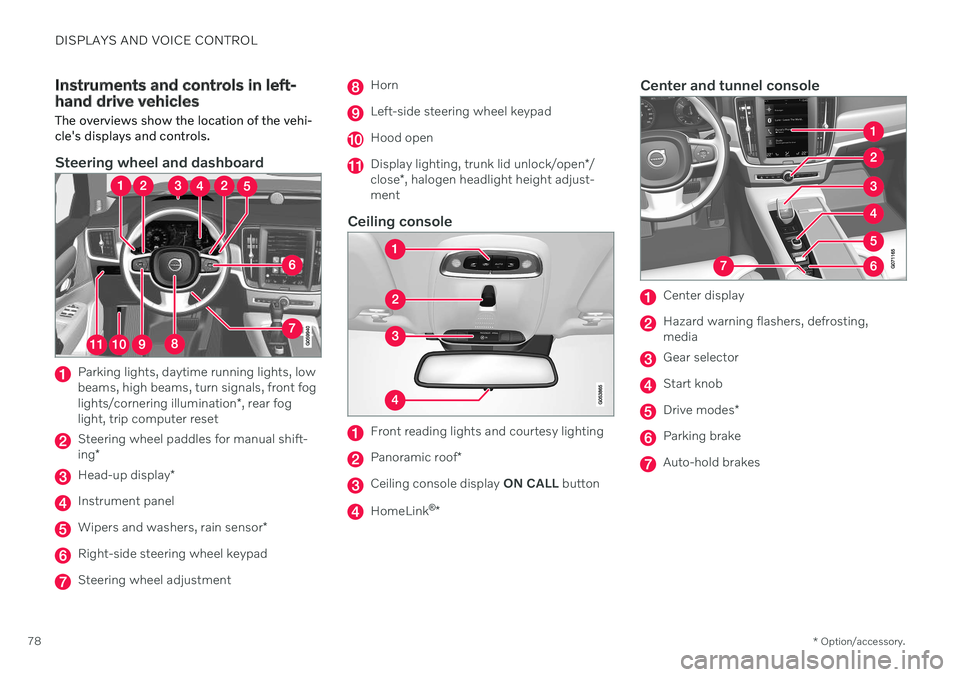
Instruments and controls in left- hand drive vehicles The overviews show the location of the vehi- cle's displays and controls.
Steering wheel and dashboard
Parking lights, daytime running lights, low beams, high beams, turn signals, front fog lights/cornering illumination *, rear fog
light, trip computer reset
Steering wheel paddles for manual shift- ing *
Head-up display *
Instrument panel
Wipers and washers, rain sensor *
Right-side steering wheel keypad
Steering wheel adjustment
Horn
Left-side steering wheel keypad
Hood open
Display lighting, trunk lid unlock/open */
close *, halogen headlight height adjust-
ment
Ceiling console
Front reading lights and courtesy lighting
Panoramic roof *
Ceiling console display ON CALL button
HomeLink ®
*
Center and tunnel console
Center display
Hazard warning flashers, defrosting, media
Gear selector
Start knob
Drive modes *
Parking brake
Auto-hold brakes
Page 94 of 643
||
DISPLAYS AND VOICE CONTROL
92
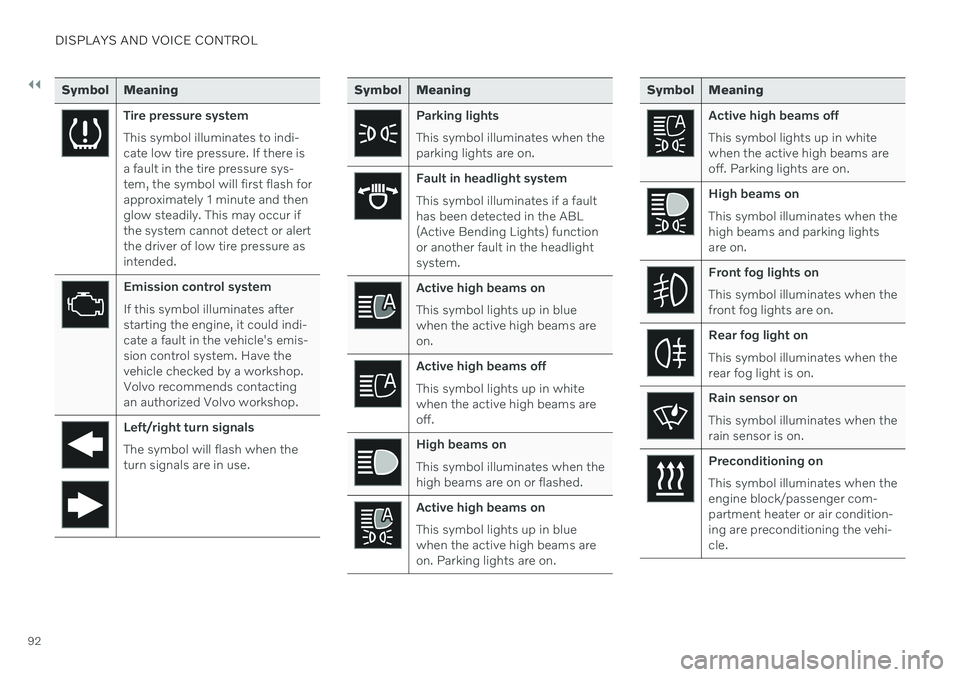
Symbol Meaning
Tire pressure system This symbol illuminates to indi- cate low tire pressure. If there isa fault in the tire pressure sys-tem, the symbol will first flash forapproximately 1 minute and thenglow steadily. This may occur ifthe system cannot detect or alertthe driver of low tire pressure asintended.
Emission control system If this symbol illuminates after starting the engine, it could indi-cate a fault in the vehicle's emis-sion control system. Have thevehicle checked by a workshop.Volvo recommends contactingan authorized Volvo workshop.
Left/right turn signals The symbol will flash when the turn signals are in use.
Symbol Meaning
Parking lights This symbol illuminates when the parking lights are on.
Fault in headlight system This symbol illuminates if a fault has been detected in the ABL(Active Bending Lights) functionor another fault in the headlightsystem.
Active high beams on This symbol lights up in blue when the active high beams areon.
Active high beams off This symbol lights up in white when the active high beams areoff.
High beams on This symbol illuminates when the high beams are on or flashed.
Active high beams on This symbol lights up in blue when the active high beams areon. Parking lights are on.
Symbol Meaning
Active high beams off This symbol lights up in white when the active high beams areoff. Parking lights are on.
High beams on This symbol illuminates when the high beams and parking lightsare on.
Front fog lights on This symbol illuminates when the front fog lights are on.
Rear fog light on This symbol illuminates when the rear fog light is on.
Rain sensor on This symbol illuminates when the rain sensor is on.
Preconditioning on This symbol illuminates when the engine block/passenger com-partment heater or air condition-ing are preconditioning the vehi-cle.
Page 150 of 643
LIGHTING
* Option/accessory.
148
Lighting control and panel
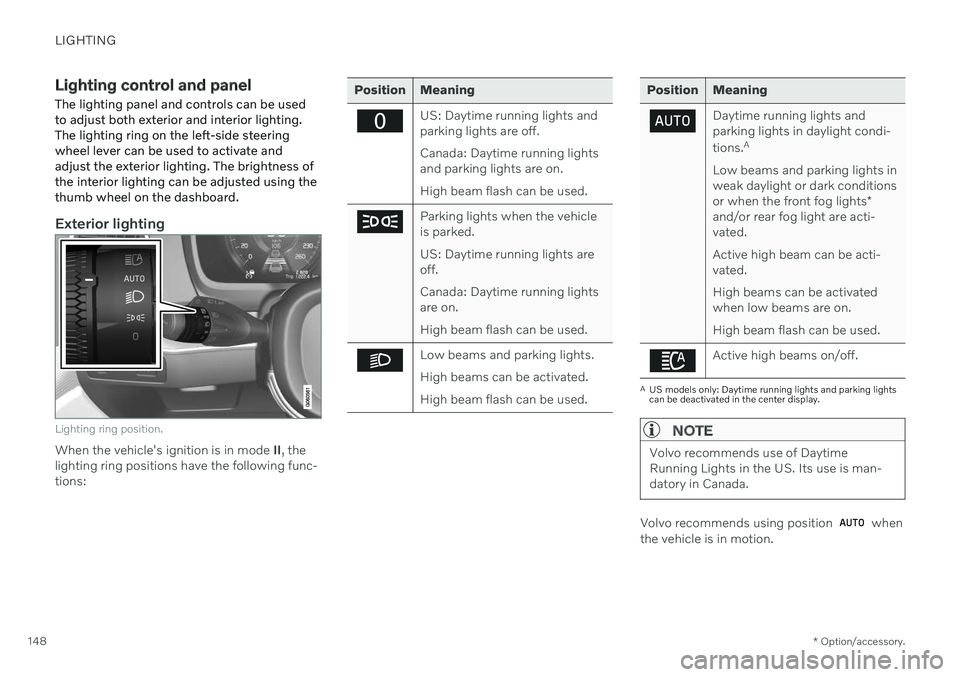
The lighting panel and controls can be used to adjust both exterior and interior lighting.The lighting ring on the left-side steeringwheel lever can be used to activate andadjust the exterior lighting. The brightness ofthe interior lighting can be adjusted using thethumb wheel on the dashboard.
Exterior lighting
Lighting ring position.
When the vehicle's ignition is in mode II, the
lighting ring positions have the following func- tions:
Position Meaning
US: Daytime running lights and parking lights are off. Canada: Daytime running lights and parking lights are on. High beam flash can be used.
Parking lights when the vehicle is parked. US: Daytime running lights are off. Canada: Daytime running lights are on. High beam flash can be used.
Low beams and parking lights. High beams can be activated.High beam flash can be used.
Position Meaning
Daytime running lights and parking lights in daylight condi- tions. A
Low beams and parking lights in weak daylight or dark conditions or when the front fog lights *
and/or rear fog light are acti- vated. Active high beam can be acti- vated. High beams can be activated when low beams are on. High beam flash can be used.
Active high beams on/off.
A US models only: Daytime running lights and parking lights can be deactivated in the center display.
NOTE
Volvo recommends use of Daytime Running Lights in the US. Its use is man-datory in Canada.
Volvo recommends using position when
the vehicle is in motion.
Page 151 of 643
LIGHTING
* Option/accessory.149
WARNING
The vehicle lighting system cannot in all sit- uations determine when the daylight is tooweak or not strong enough, e.g. whenthere is fog or rain. The driver is always responsible for driving the vehicle with lighting that is safe for thetraffic conditions and as specified by appli-cable traffic regulations.
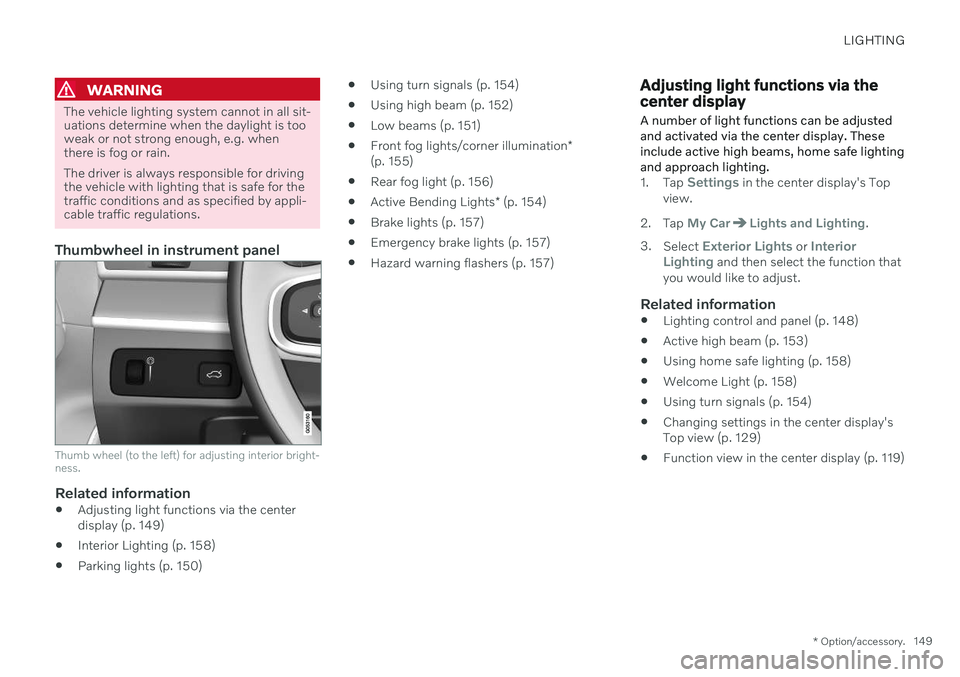
Thumbwheel in instrument panel
Thumb wheel (to the left) for adjusting interior bright- ness.
Related information
Adjusting light functions via the center display (p. 149)
Interior Lighting (p. 158)
Parking lights (p. 150)
Using turn signals (p. 154)
Using high beam (p. 152)
Low beams (p. 151)
Front fog lights/corner illumination
*
(p. 155)
Rear fog light (p. 156)
Active Bending Lights
* (p. 154)
Brake lights (p. 157)
Emergency brake lights (p. 157)
Hazard warning flashers (p. 157)
Adjusting light functions via the center display A number of light functions can be adjusted and activated via the center display. Theseinclude active high beams, home safe lightingand approach lighting.
1.
Tap Settings in the center display's Top
view.
2. Tap
My CarLights and Lighting.
3. Select
Exterior Lights or Interior
Lighting and then select the function that
you would like to adjust.
Related information
Lighting control and panel (p. 148)
Active high beam (p. 153)
Using home safe lighting (p. 158)
Welcome Light (p. 158)
Using turn signals (p. 154)
Changing settings in the center display's Top view (p. 129)
Function view in the center display (p. 119)
Page 154 of 643

||
LIGHTING
152
Tunnel detection
The vehicle will detect if it enters a tunnel and shift from daytime running lights to lowbeams. Note that the left-hand steering wheel lever must be in
position for tunnel detection
to work.
Related information
Lighting control and panel (p. 148)
Ignition modes (p. 381)
Daytime running lights (p. 150)
Replacing the low beam headlight bulbs (p. 560)
Using high beam
High beam is operated via the left-hand steering wheel lever. High beam is the vehi-cle's strongest lighting and should be usedwhen driving in dark conditions, provided itdoes not blind other road users, to improvevisibility.
Steering wheel lever with lighting ring.
High beam flashMove the steering wheel lever slightly backward to the high beam flash mode.The high beams will illuminate until thelever is released.
High beamsThe high beams can be activated when the lighting ring is in mode 2 or
. Activate high beams by moving the
steering wheel lever forward.
Deactivate by moving the steering wheel lever backward.
When the high beams are activated, the
symbol will be illuminated in the instrument panel.
Related information
Lighting control and panel (p. 148)
Active high beam (p. 153)
Replacing the high beam headlight bulbs(p. 561)
2
When the low beams are on.
Page 155 of 643
LIGHTING
153
Active high beam
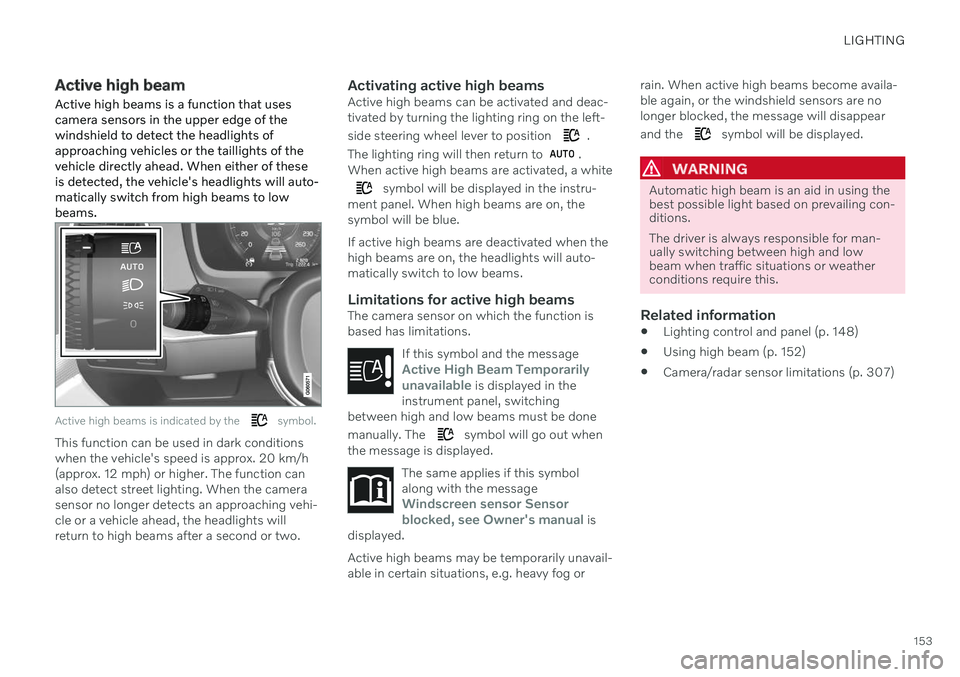
Active high beams is a function that uses camera sensors in the upper edge of thewindshield to detect the headlights ofapproaching vehicles or the taillights of thevehicle directly ahead. When either of theseis detected, the vehicle's headlights will auto-matically switch from high beams to lowbeams.
Active high beams is indicated by the symbol.
This function can be used in dark conditions when the vehicle's speed is approx. 20 km/h(approx. 12 mph) or higher. The function canalso detect street lighting. When the camerasensor no longer detects an approaching vehi-cle or a vehicle ahead, the headlights willreturn to high beams after a second or two.
Activating active high beamsActive high beams can be activated and deac-tivated by turning the lighting ring on the left- side steering wheel lever to position
.
The lighting ring will then return to
.
When active high beams are activated, a white
symbol will be displayed in the instru-
ment panel. When high beams are on, the symbol will be blue. If active high beams are deactivated when the high beams are on, the headlights will auto-matically switch to low beams.
Limitations for active high beamsThe camera sensor on which the function isbased has limitations.
If this symbol and the message
Active High Beam Temporarily
unavailable is displayed in the
instrument panel, switching
between high and low beams must be done manually. The
symbol will go out when
the message is displayed.
The same applies if this symbol along with the message
Windscreen sensor Sensor
blocked, see Owner's manual is
displayed.
Active high beams may be temporarily unavail- able in certain situations, e.g. heavy fog or rain. When active high beams become availa-ble again, or the windshield sensors are nolonger blocked, the message will disappear and the
symbol will be displayed.
WARNING
Automatic high beam is an aid in using the best possible light based on prevailing con-ditions. The driver is always responsible for man- ually switching between high and lowbeam when traffic situations or weatherconditions require this.
Related information
Lighting control and panel (p. 148)
Using high beam (p. 152)
Camera/radar sensor limitations (p. 307)
Page 181 of 643

WINDOWS, GLASS AND MIRRORS
* Option/accessory.179
CAUTION
Avoid activating the washer system when it is frozen or the fluid reservoir is empty.Otherwise, there is a risk of damaging thepump.
Headlight washer *To save washer fluid, the headlights are washed automatically according to a definedinterval when the headlights are on.
Reduced washingWhen there is about 1 liter (1 qt) of washer fluid left in the reservoir and the Washer fluid
Level low, refill message is displayed in the
instrument panel together with the
sym-
bol, the washer fluid supply to the headlights is cut off. This is to prioritize windshield clean-ing and visibility through it. The headlights areonly washed if high or low beam is on.
Related information
Using the rain sensor (p. 177)
Wiper blades and washer fluid (p. 176)
Using the rain sensor's memory function(p. 178)
Filling washer fluid (p. 607)
Putting the wiper blades in service posi-tion (p. 606)
Replacing windshield wiper blades(p. 605)
Using the windshield wipers (p. 176)