brake VOLVO V50 2009 Owner´s Manual
[x] Cancel search | Manufacturer: VOLVO, Model Year: 2009, Model line: V50, Model: VOLVO V50 2009Pages: 286, PDF Size: 7.12 MB
Page 56 of 286

02 Instruments and controlsSymbols – instrument panel
0256
Symbols – right side
G026438
1. Turn signal indicator for trailer (certain
markets only)
If you are towing a trailer, this light
will flash simultaneously with the
turn signals on the trailer. If the
light does not flash when signaling,
one of the turn signals on the trailer
or on the car are not functioning properly.
2. Parking brake applied
This light is on when the parking
brake (hand brake) is applied. The
parking brake lever is situated
between the front seats, see
page 74 for more information.
NOTE
Canadian models are equipped with the
second symbol.3. SRS system warning light
If this light comes on while the car
is being driven, or remains on for
longer than approximately 10 sec-
onds after the car has been
started, the SRS system's diag-
nostic functions have detected a fault in a seat
belt lock or pretensioner, a front airbag, side
impact airbag, and/or an inflatable curtain.
Have the system(s) inspected by a trained and
qualified Volvo service technician as soon as
possible.
4. Oil pressure warning light
1
If the light comes on while driving,
the car, stop the engine immedi-
ately, and check the engine oil
level. If the oil level is normal and
the light stays on after restart, have
the car towed to the nearest trained and quali-
fied Volvo service technician. After hard driv-
ing, the light may come on occasionally when
the engine is idling. This is normal, provided it
goes off when the engine speed is increased.
5. Seat belt reminder
This symbol (and the seat belt
reminder light above the rear view
mirror) will light up if either front
seat occupant has not buckled his/
her seat belt. If the car is not mov-
ing, the symbols will go out after approximately
6 seconds.
6. Generator warning light
If the light comes on while the
engine is running, have the charg-
ing system checked by an author-
ized Volvo workshop.
1On certain engines, this symbol is not used to indicate low oil pressure. Instead, a text warning is provided in the information display, see also page 216.
Page 57 of 286

02 Instruments and controls
Symbols – instrument panel
0257
7. Brake failure warning light
If this light comes on while driving
or braking, stop the car as quickly
as possible in a safe place, open
the hood, and check the brake fluid
level in the reservoir, see
page 215 for the location of the reservoir.
NOTE
Canadian models are equipped with the
second symbol.
WARNING
If the fluid level is below the MIN mark in the
reservoir or if a
Brake failure – Service
urgent
message is displayed in the infor-
mation display: DO NOT DRIVE. Have the
car towed to a trained and qualified Volvo
service technician and have the brake sys-
tem inspected.
If the BRAKES and ABS warning lights come
on at the same time, this could indicate a fault
in the brake system.In this case:
1. Stop the car in a suitable place and switch
off the engine.
2. Restart the engine.
3. If both warning lights go off, no further
action is required and the car can be
driven.
4. If both lights remain on after the engine has
been restarted, switch off the engine again
and check the brake fluid level, see
page 215 for the location of the reservoir.
Door open warningThe driver will be alerted if one of the doors, the
hood or the tailgate are open or ajar.At low speeds
If the car is moving at a speed of
less than approximately 3 mph
(5 km/h), the Information symbol in
the instrument panel will light up
and a message will be shown in the
information display indicating which door(s),
etc is not completely closed.
At higher speeds
If the car is moving at a speed
above approximately 6 mph
(10 km/h), the Warning symbol in
the instrument panel will light up
and a message will be shown in the
information display indicating which door(s),
etc is not completely closed.
Hood and tailgate
If the hood and/or tailgate is not
completely closed, the Information
symbol in the instrument panel will
light up and a message will be dis-
played, regardless of the vehicle's
speed.
Page 62 of 286

02 Instruments and controlsLighting panel
0262
G020789
Headlight pattern with ABL deactivated (left) and
activated (right)
NOTE
•
This function can only be activated in
twilight or dark conditions, and only
when the vehicle is in motion.
•
If the indicator light flashes, this indi-
cates a fault in the ABL system. A text
message will also be displayed.
Brake lightsThe brake lights come on automatically when
the brakes are applied.Fog lightsFront fog lights (option)The front fog lights can be used in combination
with either the headlights or the parking lights.
1.
Turn the ignition key to position II.
2. Press button (3) to turn on the front fog
lights.
An indicator light in the button illuminates when
the front fog lights are on.Rear fog lightThe single rear fog light is located in the driver's
side taillight cluster.
The rear fog light will only function in combi-
nation with the high/low beam headlights or the
optional front fog lights.
1.
Turn the ignition key to position II.
2. Press button (5) to turn on the rear fog light.
An indicator light in the button illuminates when
the rear fog light is on.
NOTE
The rear fog light is considerably brighter
than the normal taillights and should be
used only when conditions such as fog, rain,
snow, smoke or dust reduce visibility for
other vehicles to less than 500 ft.
(150 meters).Instrument panel lightingThe instrument panel lighting illuminates when
the ignition is in position II and the light switch
(1) is in either position
or
.
NOTE
To make it easier to read the odometer, trip
odometer, clock, and ambient temperature,
these gauges illuminate when the vehicle is
unlocked and when the key has been
removed from the ignition switch. The light-
ing will go out when the vehicle is locked.Move the thumb wheel (2) up to increase
brightness or down to decrease brightness.
Page 68 of 286
02 Instruments and controlsCruise control (option)
0268
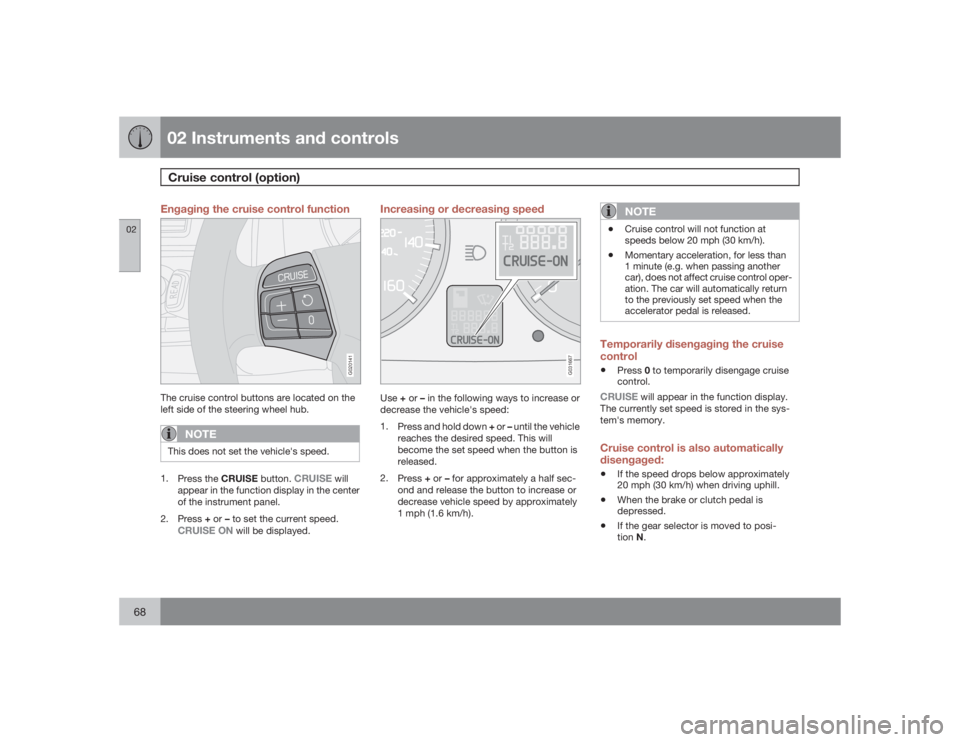
Engaging the cruise control function
G020141
The cruise control buttons are located on the
left side of the steering wheel hub.
NOTE
This does not set the vehicle's speed.1.
Press the CRUISE button.
CRUISE
will
appear in the function display in the center
of the instrument panel.
2.
Press+ or – to set the current speed.
CRUISE ON
will be displayed.
Increasing or decreasing speed
G031667
Use+ or – in the following ways to increase or
decrease the vehicle's speed:
1.
Press and hold down + or – until the vehicle
reaches the desired speed. This will
become the set speed when the button is
released.
2.
Press+ or – for approximately a half sec-
ond and release the button to increase or
decrease vehicle speed by approximately
1 mph (1.6 km/h).
NOTE
•
Cruise control will not function at
speeds below 20 mph (30 km/h).
•
Momentary acceleration, for less than
1 minute (e.g. when passing another
car), does not affect cruise control oper-
ation. The car will automatically return
to the previously set speed when the
accelerator pedal is released.
Temporarily disengaging the cruise
control•
Press0 to temporarily disengage cruise
control.
CRUISE
will appear in the function display.
The currently set speed is stored in the sys-
tem's memory.
Cruise control is also automatically
disengaged:•
If the speed drops below approximately
20 mph (30 km/h) when driving uphill.
•
When the brake or clutch pedal is
depressed.
•
If the gear selector is moved to posi-
tionN.
Page 74 of 286
02 Instruments and controlsParking brake
0274
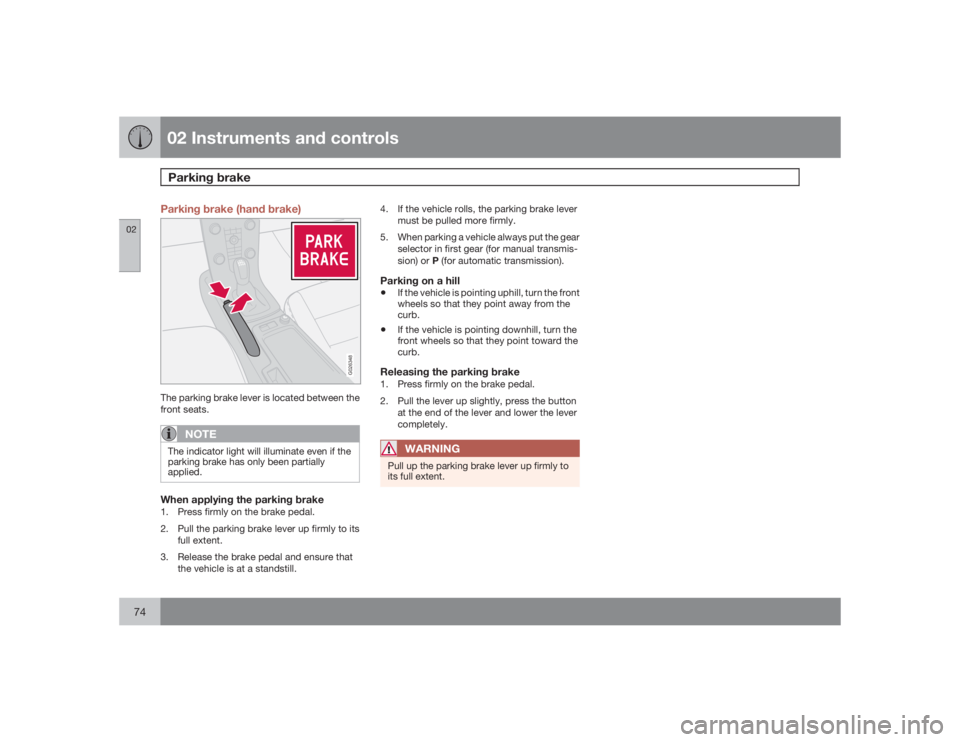
Parking brake (hand brake)
G026348
The parking brake lever is located between the
front seats.
NOTE
The indicator light will illuminate even if the
parking brake has only been partially
applied.When applying the parking brake1. Press firmly on the brake pedal.
2. Pull the parking brake lever up firmly to its
full extent.
3. Release the brake pedal and ensure that
the vehicle is at a standstill.4. If the vehicle rolls, the parking brake lever
must be pulled more firmly.
5. When parking a vehicle always put the gear
selector in first gear (for manual transmis-
sion) or P (for automatic transmission).
Parking on a hill•
If the vehicle is pointing uphill, turn the front
wheels so that they point away from the
curb.
•
If the vehicle is pointing downhill, turn the
front wheels so that they point toward the
curb.
Releasing the parking brake1. Press firmly on the brake pedal.
2. Pull the lever up slightly, press the button
at the end of the lever and lower the lever
completely.
WARNING
Pull up the parking brake lever up firmly to
its full extent.
Page 102 of 286
04 InteriorFront seats
04102
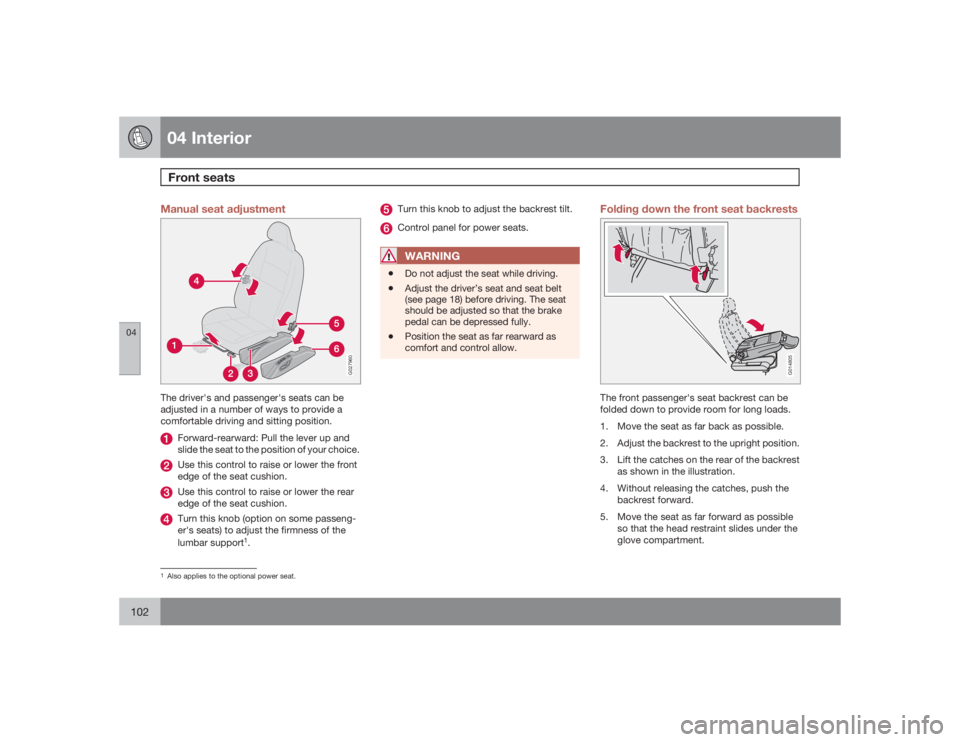
Manual seat adjustment
G027960
The driver's and passenger's seats can be
adjusted in a number of ways to provide a
comfortable driving and sitting position.
Forward-rearward: Pull the lever up and
slide the seat to the position of your choice.Use this control to raise or lower the front
edge of the seat cushion.Use this control to raise or lower the rear
edge of the seat cushion.Turn this knob (option on some passeng-
er's seats) to adjust the firmness of the
lumbar support
1.
Turn this knob to adjust the backrest tilt.Control panel for power seats.WARNING
•
Do not adjust the seat while driving.
•
Adjust the driver’s seat and seat belt
(see page 18) before driving. The seat
should be adjusted so that the brake
pedal can be depressed fully.
•
Position the seat as far rearward as
comfort and control allow.
Folding down the front seat backrests
G014805
The front passenger's seat backrest can be
folded down to provide room for long loads.
1. Move the seat as far back as possible.
2. Adjust the backrest to the upright position.
3. Lift the catches on the rear of the backrest
as shown in the illustration.
4. Without releasing the catches, push the
backrest forward.
5. Move the seat as far forward as possible
so that the head restraint slides under the
glove compartment.
1Also applies to the optional power seat.
Page 104 of 286
04 InteriorFront seats
04104
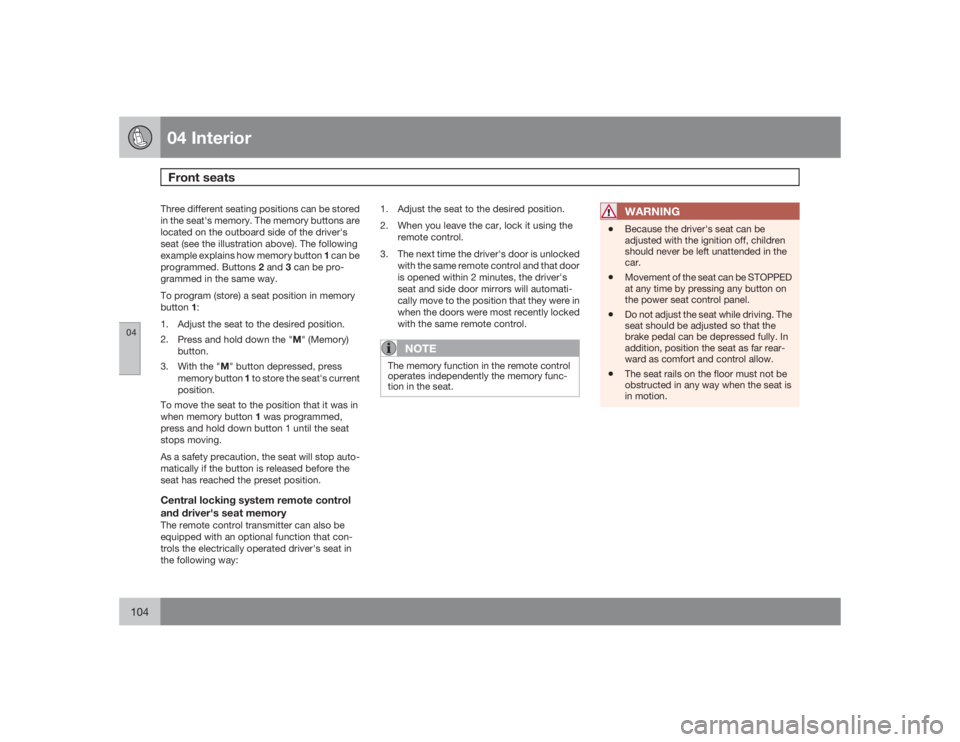
Three different seating positions can be stored
in the seat's memory. The memory buttons are
located on the outboard side of the driver's
seat (see the illustration above). The following
example explains how memory button 1 can be
programmed. Buttons 2 and 3 can be pro-
grammed in the same way.
To program (store) a seat position in memory
button1:
1. Adjust the seat to the desired position.
2.
Press and hold down the "M" (Memory)
button.
3.
With the "M" button depressed, press
memory button 1 to store the seat's current
position.
To move the seat to the position that it was in
when memory button 1 was programmed,
press and hold down button 1 until the seat
stops moving.
As a safety precaution, the seat will stop auto-
matically if the button is released before the
seat has reached the preset position.Central locking system remote control
and driver's seat memoryThe remote control transmitter can also be
equipped with an optional function that con-
trols the electrically operated driver's seat in
the following way:1. Adjust the seat to the desired position.
2. When you leave the car, lock it using the
remote control.
3. The next time the driver's door is unlocked
with the same remote control and that door
is opened within 2 minutes, the driver's
seat and side door mirrors will automati-
cally move to the position that they were in
when the doors were most recently locked
with the same remote control.
NOTE
The memory function in the remote control
operates independently the memory func-
tion in the seat.
WARNING
•
Because the driver's seat can be
adjusted with the ignition off, children
should never be left unattended in the
car.
•
Movement of the seat can be STOPPED
at any time by pressing any button on
the power seat control panel.
•
Do not adjust the seat while driving. The
seat should be adjusted so that the
brake pedal can be depressed fully. In
addition, position the seat as far rear-
ward as comfort and control allow.
•
The seat rails on the floor must not be
obstructed in any way when the seat is
in motion.
Page 134 of 286
G020912
134
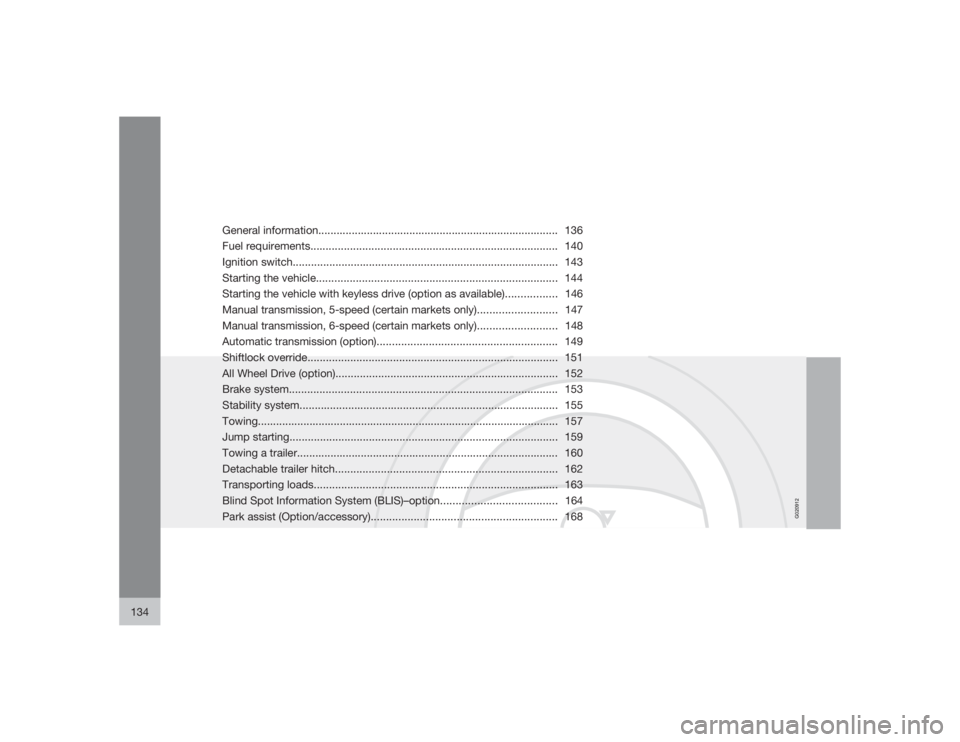
General information............................................................................... 136
Fuel requirements................................................................................. 140
Ignition switch....................................................................................... 143
Starting the vehicle............................................................................... 144
Starting the vehicle with keyless drive (option as available).................146
Manual transmission, 5-speed (certain markets only)..........................147
Manual transmission, 6-speed (certain markets only)..........................148
Automatic transmission (option)........................................................... 149
Shiftlock override.................................................................................. 151
All Wheel Drive (option)......................................................................... 152
Brake system........................................................................................ 153
Stability system..................................................................................... 155
Towing................................................................................................... 157
Jump starting........................................................................................ 159
Towing a trailer...................................................................................... 160
Detachable trailer hitch......................................................................... 162
Transporting loads................................................................................ 163
Blind Spot Information System (BLIS)–option......................................164
Park assist (Option/accessory)............................................................. 168
Page 136 of 286

06 Starting and drivingGeneral information
06136
Economical driving conserves natural
resourcesBetter driving economy may be obtained by
thinking ahead, avoiding rapid starts and stops
and adjusting the speed of your vehicle to
immediate traffic conditions.
Observe the following rules:•
Bring the engine to normal operating tem-
perature as soon as possible by driving
with a light foot on the accelerator pedal for
the first few minutes of operation. A cold
engine uses more fuel and is subject to
increased wear.
•
Whenever possible, avoid using the vehicle
for driving short distances. This does not
allow the engine to reach normal operating
temperature.
•
Drive carefully and avoid rapid acceleration
and hard braking.
•
Use the transmission's Drive (D) position
as often as possible and avoid using kick-
down.
•
Do not exceed posted speed limits.
•
Avoid carrying unnecessary items (extra
load) in the vehicle.
•
Maintain correct tire pressure. Check tire
pressure regularly (when tires are cold).
•
Remove snow tires when threat of snow or
ice has ended.
•
Note that roof racks, ski racks, etc,
increase air resistance and also fuel con-
sumption.
•
At highway driving speeds, fuel consump-
tion will be lower with the air conditioning
on and the windows closed than with the
air conditioning off and the windows open.
•
Using the onboard trip computer's fuel
consumption modes can help you learn
how to drive more economically.
Other factors that decrease gas mileage
are:•
Dirty air cleaner
•
Dirty engine oil and clogged oil filter
•
Dragging brakes
•
Incorrect front end alignment
Some of the above mentioned items and others
are checked at the standard maintenance
intervals.
WARNING
Driving with the tailgate open: Driving with
the tailgate open could lead to poisonous
exhaust gases entering the passenger com-
partment. If the tailgate must be kept open
for any reason, proceed as follows:
1. Close the windows.
2. Set the ventilation system control to air
flow to floor, windshield and side win-
dows and the blower control to its high-
est setting.Weight distribution affects handlingAt the specified curb weight your vehicle has a
tendency to understeer, which means that the
steering wheel has to be turned more than
might seem appropriate for the curvature of a
bend. This ensures good stability and reduces
the risk of rear wheel skid. Remember that
these properties can alter with the vehicle load.
The heavier the load in the cargo area, the less
the tendency to understeer.
Page 137 of 286

06 Starting and driving
General information
06�`�`137 Handling, roadholding
Vehicle load, tire design and inflation pressure
all affect vehicle handling. Therefore, check
that the tires are inflated to the recommended
pressure according to the vehicle load. See the
"Tire pressure" section. Loads should be dis-
tributed so that capacity weight or maximum
permissible axle loads are not exceeded.Driving through waterThe vehicle can be driven through water up to
a depth of approximately 9 in. (25 cm), at a
maximum speed of 6 mph (10 km/h).•
Take particular care when driving through
flowing water.
•
Clean the electrical connections for trailer
wiring after driving in mud or water
•
When driving through water, maintain low
speed and do not stop in the water.WARNING
After driving through water, press lightly on
the brake pedal to ensure that the brakes
are functioning normally. Water or mud can
make the brake linings slippery, resulting in
delayed braking effect.
CAUTION
•
Engine damage will occur if water is
drawn into the air cleaner.
•
If the vehicle is driven through water
deeper than 9 in (25 cm), water may
enter the differential and the transmis-
sion. This reduces the oil's lubricating
capacity and may shorten the service
life of these components.
•
Do not allow the vehicle to stand in
water up to the door sills longer than
absolutely necessary. This could result
in electrical malfunctions.
•
If the engine has been stopped while the
car is in water, do not attempt to restart
the engine. Have the car towed out of
the water.
Cold weather precautionsIf you wish to check your vehicle before the
approach of cold weather, the following advice
is worth noting:•
Make sure that the engine coolant contains
50 percent antifreeze. Any other mixture
will reduce freeze protection. This gives
protection against freezing down to –31 °F
(–35 °C). See section "Coolant". The use of
"recycled" antifreeze is not approved byVolvo. Different types of antifreeze must
not be mixed.
•
Volvo recommends using only genuine
Volvo antifreeze in your vehicle's radiator.
Your Volvo retailer stocks plenty of Volvo
engine coolant to help protect your vehicle
during cold weather.
•
Try to keep the fuel tank well filled – this
prevents the formation of condensation in
the tank. In addition, in extremely cold
weather conditions it is worthwhile to add
fuel line de-icer before refueling.
•
The viscosity of the engine oil is important.
Oil with low viscosity (thinner oil) improves
cold-weather starting as well as decreas-
ing fuel consumption while the engine is
warming up. For winter use, 5W-30 oil, par-
ticularly the synthetic type
1, is recom-
mended. Be sure to use good quality oil but
do not use cold-weather oil for hard driving
or in warm weather, see page 269 for more
information.
•
The load placed on the battery is greater
during the winter since the windshield wip-
ers, lighting, etc. are used more often.
Moreover, the capacity of the battery
decreases as the temperature drops. In
very cold weather, a poorly charged bat-
tery can freeze and be damaged. It is there-
fore advisable to check the state of charge
1Synthetic oil is not used when the oil is changed at the normal maintenance intervals except at owner request and at additional charge. Please consult your Volvo retailer.