color VOLVO V50 2010 Owner´s Manual
[x] Cancel search | Manufacturer: VOLVO, Model Year: 2010, Model line: V50, Model: VOLVO V50 2010Pages: 292, PDF Size: 6.8 MB
Page 88 of 292
02 Instruments and controls
HomeLink® Wireless Control System*
02
88* Option/accessory, for more information, see Introduction.
NOTE
Some devices may require you to replace
this Programming Step 2 with procedures
noted in the “Gate Operator / Canadian Pro-
gramming” section. If the HomeLink indica-
tor light does not change to a rapidly blink-
ing light after performing these steps, con-
tact HomeLink at www.homelink.com.
3.
Firmly press, hold for five seconds and
release the programmed HomeLink but-
ton up to two separate times to activate the
door. If the door does not activate, press
and hold the just-trained HomeLink button
and observe the indicator light.
•If the indicator light stays on con-
stantly, programming is complete
and your device should activate when
the HomeLink button is pressed and
released.
•If the indicator light blinks rapidly for
two seconds and then turns to a con-
stant light continue with “Program-
ming” steps 4-6 to complete the pro-
gramming of a rolling code equipped
device (most commonly a garage door
opener).
4. At the garage door opener receiver (motor-
head unit) in the garage, locate the “learn”
or “smart” button. This can usually befound where the hanging antenna wire is
attached to the motor-head unit.
5. Firmly press and release the “learn” or
“smart” button. (The name and color of the
button may vary by manufacturer.) There
are 30 seconds to initiate step 6.
6. Return to the vehicle and firmly press, hold
for two seconds and release the pro-
grammed HomeLink button. Repeat the
“press/hold/release” sequence a second
time, and, depending on the brand of the
garage door opener (or other rolling code
equipped device), repeat this sequence a
third time to complete the programming
process.
HomeLink should now activate your rolling
code equipped device.
Gate Operator/Canadian ProgrammingCanadian radio-frequency laws require trans-
mitter signals to “time-out” (or quit) after sev-
eral seconds of transmission – which may not
be long enough for HomeLink to pick up the
signal during programming. Similar to this
Canadian law, some U.S. gate operators are
designed to “time-out” in the same manner.
If you live in Canada or you are having difficul-
ties programming a gate operator or garage
door opener by using the “Programming” pro-cedures, replace “Programming HomeLink”
step 2 with the following:
•Continue to press and hold the HomeLink
button while you press and release -
every two seconds (“cycle”) your hand-
held transmitter until the HomeLink indica-
tor light changes from a slow to a rapidly
blinking light. Now you may release both
the HomeLink and hand-held transmitter
buttons.
Proceed with “Programming” step 3 to com-
plete.
Using HomeLink
To operate, simply press and release the pro-
grammed HomeLink button. Activation will
now occur for the trained device (i.e., garage
door opener, gate operator, security system,
entry door lock, home/office lighting, etc.). For
convenience, the hand-held transmitter of the
device may also be used at any time. In the
event that there are still programming difficul-
ties or questions, contact HomeLink at:
www.homelink.com.
Page 142 of 292
06 Starting and driving
Fuel requirements
06
142
Octane rating
Minimum octane
G028920
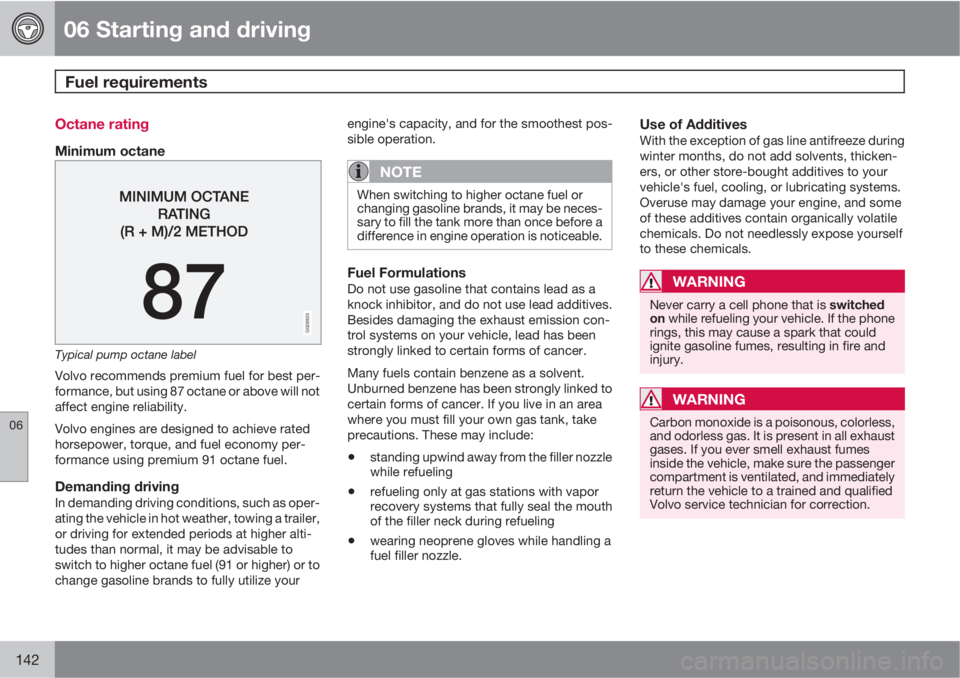
Typical pump octane label
Volvo recommends premium fuel for best per-
formance, but using 87 octane or above will not
affect engine reliability.
Volvo engines are designed to achieve rated
horsepower, torque, and fuel economy per-
formance using premium 91 octane fuel.
Demanding drivingIn demanding driving conditions, such as oper-
ating the vehicle in hot weather, towing a trailer,
or driving for extended periods at higher alti-
tudes than normal, it may be advisable to
switch to higher octane fuel (91 or higher) or to
change gasoline brands to fully utilize yourengine's capacity, and for the smoothest pos-
sible operation.
NOTE
When switching to higher octane fuel or
changing gasoline brands, it may be neces-
sary to fill the tank more than once before a
difference in engine operation is noticeable.
Fuel FormulationsDo not use gasoline that contains lead as a
knock inhibitor, and do not use lead additives.
Besides damaging the exhaust emission con-
trol systems on your vehicle, lead has been
strongly linked to certain forms of cancer.
Many fuels contain benzene as a solvent.
Unburned benzene has been strongly linked to
certain forms of cancer. If you live in an area
where you must fill your own gas tank, take
precautions. These may include:
•standing upwind away from the filler nozzle
while refueling
•refueling only at gas stations with vapor
recovery systems that fully seal the mouth
of the filler neck during refueling
•wearing neoprene gloves while handling a
fuel filler nozzle.
Use of AdditivesWith the exception of gas line antifreeze during
winter months, do not add solvents, thicken-
ers, or other store-bought additives to your
vehicle's fuel, cooling, or lubricating systems.
Overuse may damage your engine, and some
of these additives contain organically volatile
chemicals. Do not needlessly expose yourself
to these chemicals.
WARNING
Never carry a cell phone that is switched
on while refueling your vehicle. If the phone
rings, this may cause a spark that could
ignite gasoline fumes, resulting in fire and
injury.
WARNING
Carbon monoxide is a poisonous, colorless,
and odorless gas. It is present in all exhaust
gases. If you ever smell exhaust fumes
inside the vehicle, make sure the passenger
compartment is ventilated, and immediately
return the vehicle to a trained and qualified
Volvo service technician for correction.
Page 176 of 292
07 Wheels and tires
General information
07
176
Introduction
Your vehicle is equipped with tires according
to the vehicle's tire information placard on the
B-pillar (the structural member at the side of
the vehicle, at the rear of the driver's door
opening), or on the inside of the fuel filler door
on Canadian models.
CAUTION
Some Volvo models are equipped with an
Ultra High Performance tire and wheel com-
bination designed to provide maximum dry
pavement performance with consideration
for hydroplaning resistance. As such, they
may be more susceptible to road hazard
damage and, depending on driving condi-
tions, may achieve a tread life of less than
20,000 miles (30,000 km). Even if this vehi-
cle is equipped with Volvo’s advanced AWD
or DSTC system, these tires are not
designed for winter driving, and should be
replaced with winter tires when weather
conditions dictate.
The tires have good road holding characteris-
tics and offer good handling on dry and wet
surfaces. It should be noted however that the
tires have been developed to give these fea-
tures on snow/ice-free surfaces.
Certain models are equipped with "all-season"
tires, which provide a somewhat higher degreeof road holding on slippery surfaces than tires
without the "all-season" rating. However, for
optimum road holding on icy or snow-covered
roads, we recommend suitable winter tires on
all four wheels.
When replacing tires, be sure that the new tires
are the same size designation, type (radial) and
preferably from the same manufacturer, on all
four wheels. Otherwise there is a risk of altering
the car's roadholding and handling characte-
ristics.
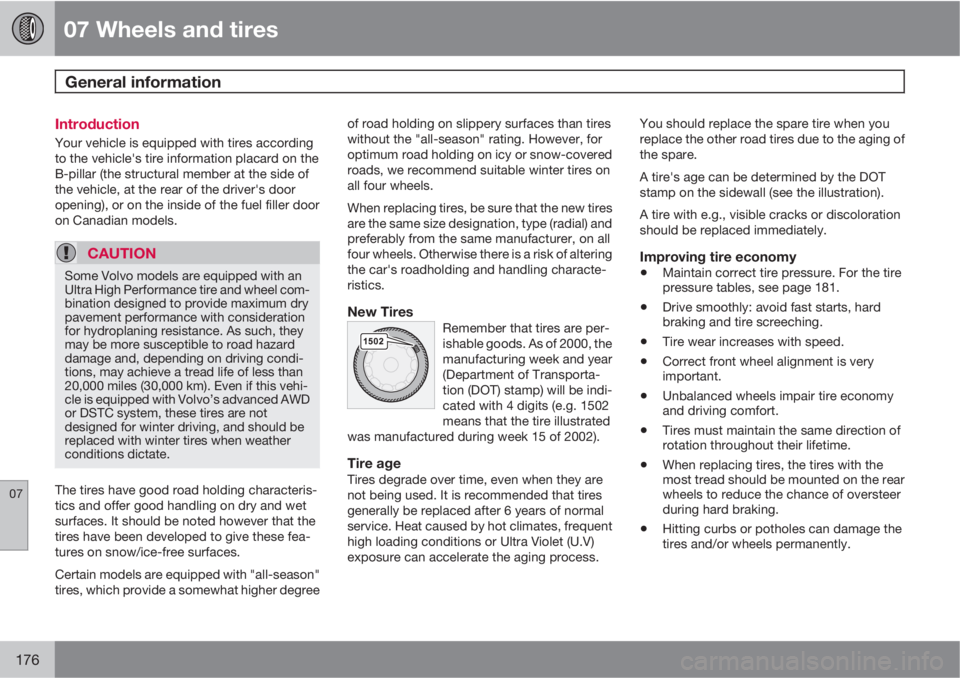
New TiresRemember that tires are per-
ishable goods. As of 2000, the
manufacturing week and year
(Department of Transporta-
tion (DOT) stamp) will be indi-
cated with 4 digits (e.g. 1502
means that the tire illustrated
was manufactured during week 15 of 2002).
Tire ageTires degrade over time, even when they are
not being used. It is recommended that tires
generally be replaced after 6 years of normal
service. Heat caused by hot climates, frequent
high loading conditions or Ultra Violet (U.V)
exposure can accelerate the aging process.You should replace the spare tire when you
replace the other road tires due to the aging of
the spare.
A tire's age can be determined by the DOT
stamp on the sidewall (see the illustration).
A tire with e.g., visible cracks or discoloration
should be replaced immediately.
Improving tire economy
•Maintain correct tire pressure. For the tire
pressure tables, see page 181.
•Drive smoothly: avoid fast starts, hard
braking and tire screeching.
•Tire wear increases with speed.
•Correct front wheel alignment is very
important.
•Unbalanced wheels impair tire economy
and driving comfort.
•Tires must maintain the same direction of
rotation throughout their lifetime.
•When replacing tires, the tires with the
most tread should be mounted on the rear
wheels to reduce the chance of oversteer
during hard braking.
•Hitting curbs or potholes can damage the
tires and/or wheels permanently.
Page 204 of 292
08 Car care
Washing and cleaning the car
08
204* Option/accessory, for more information, see Introduction.
Washing the car
The following points should be kept in mind
when washing and cleaning the car:
•The car should be washed at regular inter-
vals since dirt, dust, insects and tar spots
adhere to the paint and may cause dam-
age. To help prevent corrosion, it is partic-
ularly important to wash the car frequently
in the wintertime when salt has been used
on the roads.
•Avoid washing your car in direct sunlight.
Doing so may cause detergents and wax
to dry out and become abrasive. To avoid
scratching, use lukewarm water to soften
the dirt before you wash with a soft
sponge, and plenty of sudsy water.
•Bird droppings: Remove from paintwork
as soon as possible. Otherwise the finish
may be permanently damaged.
•A detergent can be used to facilitate the
softening of dirt and oil.
•Dry the car with a clean chamois and
remember to clean the drain holes in the
doors and rocker panels.
•Tar spots can be removed with tar remover
after the car has been washed.
•A stiff-bristle brush and lukewarm soapy
water can be used to clean the wiper
blades. Frequent cleaning of the wind-
shield and wiper blades improves visibilityconsiderably and also helps prolong the
service life of the wiper blades.
•Wash off the dirt from the underside (wheel
housings, fenders, etc).
•In areas of high industrial fallout, more fre-
quent washing is recommended.
NOTE
When washing the car, remember to remove
dirt from the drain holes in the doors and
sills.
Exterior componentsVolvo recommends the use of special cleaning
products, available at your Volvo retailer, for
cleaning colored plastic, rubber, or ornamental
components such as chromed strips on the
exterior of your vehicle. The instructions for
using these products should be followed care-
fully. Solvents or stain removers should not be
used.
CAUTION
•Avoid waxing or polishing plastic or rub-
ber components
•Polishing chromed strips can wear
away or damage the surface
•Polishes containing abrasive sub-
stances should not be used
CAUTION
•During high pressure washing, the
spray mouthpiece must never be closer
to the vehicle than 13" (30 cm). Do not
spray into the locks.
•Dirt, snow, etc., on the headlights can
reduce lighting capacity considerably.
Clean the headlights regularly, for
example when refueling.
Special moonroof cautions:
•Always close the moonroof* and sun
shade before washing your vehicle.
•Never use wax on the rubber seals
around the moonroof.
•Never use abrasive cleaning agents on
the moonroof.
•
Page 206 of 292
08 Car care
Washing and cleaning the car
08
206
Upholstery care
FabricClean with soapy water or a detergent. For
more difficult spots caused by oil, ice cream,
shoe polish, grease, etc., use a clothing/fabric
stain remover. Consult your Volvo retailer.
Interior plastic componentsCleaning interior plastic components should
be done with a cleaning agent specially
designed for this purpose. Consult your Volvo
retailer.
Alcantera™ suede-like materialSuede-like upholstery can be cleaned with a
soft cloth and mild soap solution.
Leather careVolvo's leather upholstery is manufactured
with a protectant to repel soiling. Over time,
sunlight, grease and dirt can break down the
protection. Staining, cracking, scuffing, and
fading can result.
Volvo offers an easy-to-use, non-greasy
leather care kit formulated to clean and beau-
tify your vehicle's leather, and to renew the
protective qualities of its finish. The cleaner
removes dirt and oil buildup. The light cream
protectant restores a barrier against soil and
sunlight.Volvo also offers a special leather softener that
should be applied after the cleaner and pro-
tectant. It leaves leather soft and smooth, and
reduces friction between leather and other fin-
ishes in the vehicle.
Volvo recommends cleaning, protecting and
conditioning your vehicle's leather two to four
times a year. Ask your Volvo retailer about
Leather Care Kit 951 0251 and Leather Soft-
ener 943 7429.
Cleaning leather upholstery1. Pour leather cleaner on a damp sponge
and squeeze it until the cleaner foams.
2. Apply the foam to the stain by moving the
sponge with circular movements.
3. Dampen the stain thoroughly with the
sponge. Let the sponge absorb the stain,
do not rub.
4. Dry the stain with soft paper towels or a
towel, and allow the leather to dry com-
pletely.
Protecting leather upholstery1. Put a small amount of protectant cream on
a cloth and apply a thin coating of cream
to the upholstery with light circular move-
ments.
2. Allow the leather to dry for 20 minutes.This will help the leather resist staining and
protect against sunlight's harmful UV rays.
CAUTION
•Under no circumstances should gaso-
line, naphtha or similar cleaning agents
be used on the plastic or the leather
since these can cause damage.
•Take extra care when removing stains
such as ink or lipstick since the coloring
can spread.
•Use solvents sparingly. Too much sol-
vent can damage the seat padding.
•Start from the outside of the stain and
work toward the center.
•Sharp objects (e.g. pencils or pens in a
pocket) or Velcro fasteners on clothing
may damage the textile upholstery.
•Clothing that is not colorfast, such as
new jeans or suede garments, may stain
the upholstery.
Page 208 of 292
08 Car care
Paint touch up
08
208
Touching up minor paint damage
Paint damage requires immediate attention to
avoid rusting. Make it a habit to check the finish
regularly - when washing the vehicle for
instance. Touch-up if necessary.
Paint repairs require special equipment and
skill. Contact a trained and authorized Volvo
service technician for any extensive damage.
Minor scratches can be repaired by using
Volvo touch-up paint.
Color code
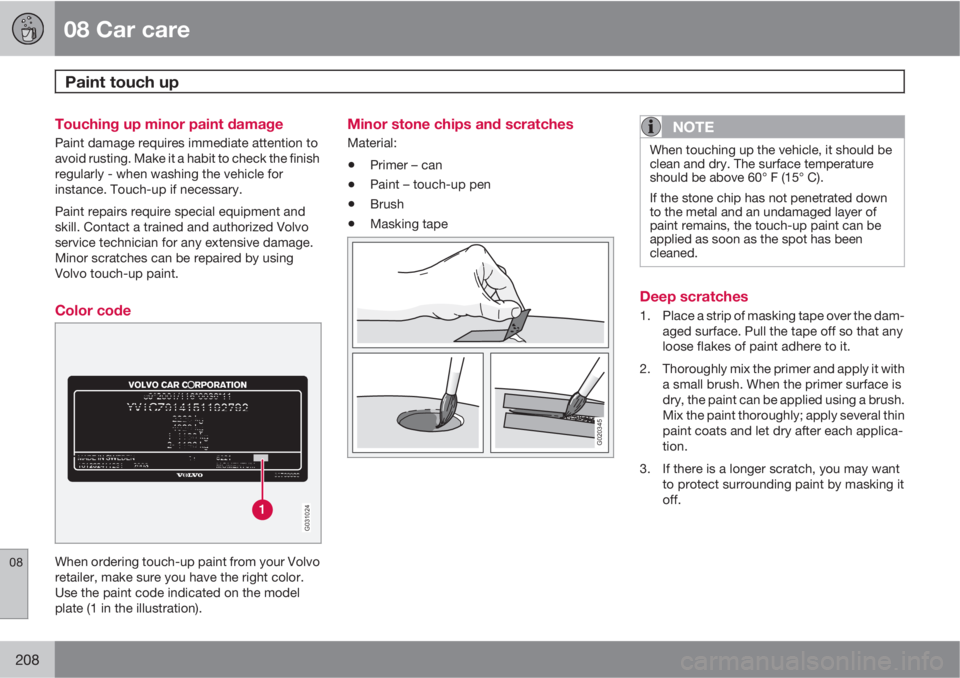
G031024
When ordering touch-up paint from your Volvo
retailer, make sure you have the right color.
Use the paint code indicated on the model
plate (1 in the illustration).
Minor stone chips and scratches
Material:
•Primer – can
•Paint – touch-up pen
•Brush
•Masking tape
G020345
NOTE
When touching up the vehicle, it should be
clean and dry. The surface temperature
should be above 60° F (15° C).
If the stone chip has not penetrated down
to the metal and an undamaged layer of
paint remains, the touch-up paint can be
applied as soon as the spot has been
cleaned.
Deep scratches
1. Place a strip of masking tape over the dam-
aged surface. Pull the tape off so that any
loose flakes of paint adhere to it.
2. Thoroughly mix the primer and apply it with
a small brush. When the primer surface is
dry, the paint can be applied using a brush.
Mix the paint thoroughly; apply several thin
paint coats and let dry after each applica-
tion.
3. If there is a longer scratch, you may want
to protect surrounding paint by masking it
off.
Page 232 of 292
09 Maintenance and servicing
Fuses 09
232
Replacing fuses
There are relay/fuse boxes located in the
engine compartment and the passenger com-
partment.
If an electrical component fails to function, this
may be due to a blown fuse. The easiest way
to see if a fuse is blown is to remove it.
To do so:
1. Pull the fuse straight out. If a fuse is difficult
to remove, special fuse removal tools are
located on the inside of the fuse box cov-
ers.
2. From the side, examine the curved metal
wire in the fuse to see if it is intact.
3. If the wire is broken, insert a new fuse of
the same color and amperage (written on
the fuse).
If fuses burn out repeatedly, have the electrical
system inspected by a trained and qualified
Volvo service technician.
WARNING
Never use metal objects or fuses with higher
amperage than those stated on the follow-
ing pages. Doing so could seriously damage
or overload the vehicle's electrical system.
Page 269 of 292
11 Specifications
Label information
11
269
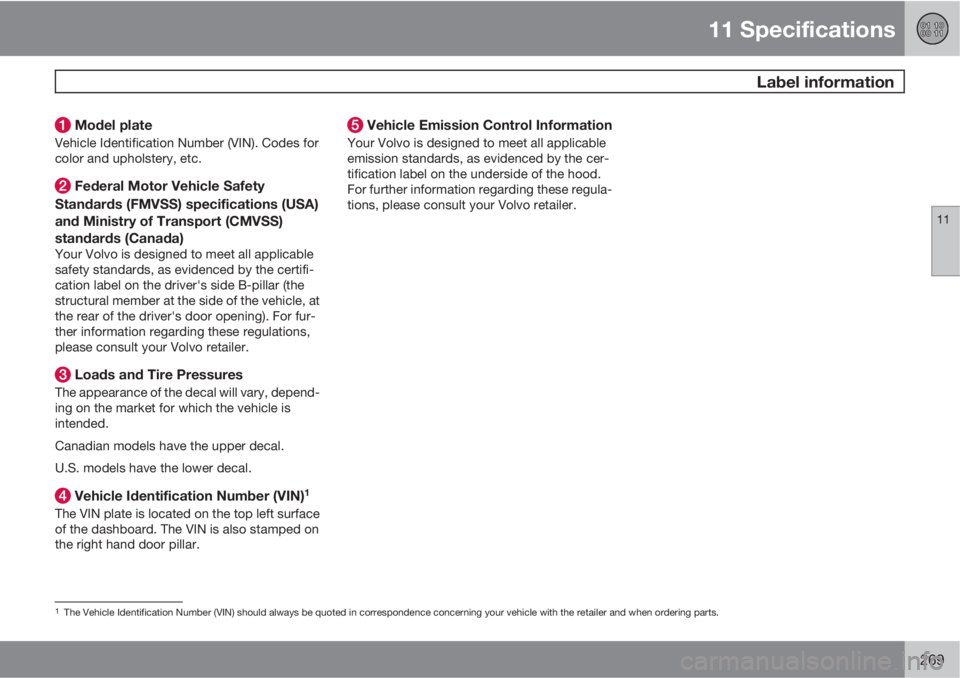
Model plate
Vehicle Identification Number (VIN). Codes for
color and upholstery, etc.
Federal Motor Vehicle Safety
Standards (FMVSS) specifications (USA)
and Ministry of Transport (CMVSS)
standards (Canada)
Your Volvo is designed to meet all applicable
safety standards, as evidenced by the certifi-
cation label on the driver's side B-pillar (the
structural member at the side of the vehicle, at
the rear of the driver's door opening). For fur-
ther information regarding these regulations,
please consult your Volvo retailer.
Loads and Tire Pressures
The appearance of the decal will vary, depend-
ing on the market for which the vehicle is
intended.
Canadian models have the upper decal.
U.S. models have the lower decal.
Vehicle Identification Number (VIN)1
The VIN plate is located on the top left surface
of the dashboard. The VIN is also stamped on
the right hand door pillar.
Vehicle Emission Control Information
Your Volvo is designed to meet all applicable
emission standards, as evidenced by the cer-
tification label on the underside of the hood.
For further information regarding these regula-
tions, please consult your Volvo retailer.
1The Vehicle Identification Number (VIN) should always be quoted in correspondence concerning your vehicle with the retailer and when ordering parts.