power steering VOLVO V60 2013 Owners Manual
[x] Cancel search | Manufacturer: VOLVO, Model Year: 2013, Model line: V60, Model: VOLVO V60 2013Pages: 422, PDF Size: 9.59 MB
Page 5 of 422
Table of contents
* Option/accessory, for more information, see Introduction.3
03
03 Your driving environment
Instruments and controls.......................... 68
Volvo Sensus ........................................... 77
Key positions............................................ 78
Seats......................................................... 80
Steering wheel.......................................... 85
Lighting..................................................... 86
Wipers and washing.................................. 98
Windows, rearview and door mirrors...... 101
Compass*............................................... 106
Power sunroof*....................................... 107
Alcolock*................................................. 109
Starting the engine.................................. 113
Starting the engine – Flexifuel.................118
Starting the engine – external battery..... 120
Gearboxes............................................... 121
DRIVe Start/Stop*................................... 127
All-wheel drive – AWD*...........................134
Foot brake............................................... 135
Parking brake.......................................... 137
HomeLink
�Ÿ *............................................ 141
04
04 Driver support
DSTC – Stability and traction control sys-
tem.......................................................... 146
Road sign information - RSI*.................. 148
Speed limiter*.......................................... 150
Cruise control*........................................ 152
Adaptive cruise control*.......................... 154
Distance Warning*..................................165
City Safety™........................................... 168
Collision Warning with Auto Brake &
Pedestrian Protection*............................ 173
Driver Alert System*................................ 181
Driver Alert System - DAC*.....................182
Driver Alert System - LDW*..................... 185
Park assist syst*...................................... 188
Park assist camera*................................ 191
BLIS* – Blind Spot Information System. . 194
05
05 Comfort and driving pleasure
Menus and messages............................. 200
Menu source MY CAR............................202
Climate control........................................ 210
Fuel-driven engine block heater and pas-
senger compartment heater*.................. 220
Additional heater*.................................... 223
Trip computer......................................... 224
Adapting driving characteristics............. 226
Comfort inside the passenger compart-
ment........................................................ 227
ProCarManuals.com
Page 57 of 422
02 Locks and alarm
Keyless drive*
02
* Option/accessory, for more information, see Introduction.55
is pushed straight up and into the open-
ing.
2. Then insert the key blade in the lock cylin-
der and unlock the door.
3. Refit the plastic cover after unlocking.
NOTE
When the driver's door is unlocked using the
key blade and is opened, the alarm is trig-
gered. It is switched off by inserting the PCC
in the ignition switch, see page 64.
Key memory2 – driver's seat and door
mirrors
PCC memory function
If several people each with a PCC approach the
car, then the settings for seat and mirrors are
implemented for the person who opens the
driver's door.
After the driver's door has been opened by
person A with PCC-A, but person B with PCC-
B shall drive, the settings can be changed in
three ways:
•Standing by the driver's door, or sitting
behind the steering wheel, person Bpresses their PCC's unlock button, see
page 45.
•Select one of three possible memories for
seat adjustment with seat button 1-3, see
page 81.
•Adjust seat and mirrors manually, see
page 81 and 103.
Lock settingsThe Keyless function can be adapted by indi-
cating in the menu system MY CAR which
doors shall be unlocked, under Car settings
Lock settingsKeyless entry - there
select between
All doors unlock, Any door,Doors on same side and Both front doors.
For a description of the menu system, see
page 202.
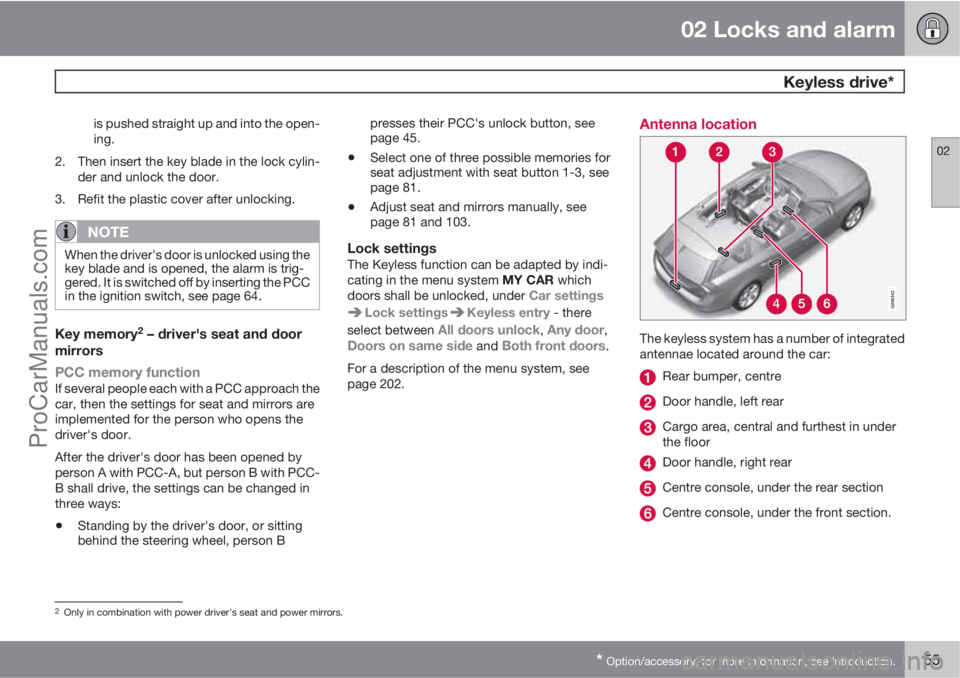
Antenna location
The keyless system has a number of integrated
antennae located around the car:
Rear bumper, centre
Door handle, left rear
Cargo area, central and furthest in under
the floor
Door handle, right rear
Centre console, under the rear section
Centre console, under the front section.
2Only in combination with power driver's seat and power mirrors.
ProCarManuals.com
Page 68 of 422
66* Option/accessory, for more information, see Introduction.
Instruments and controls........................................................................ 68
Volvo Sensus ......................................................................................... 77
Key positions.......................................................................................... 78
Seats....................................................................................................... 80
Steering wheel........................................................................................ 85
Lighting................................................................................................... 86
Wipers and washing................................................................................ 98
Windows, rearview and door mirrors....................................................101
Compass*.............................................................................................. 106
Power sunroof*..................................................................................... 107
Alcolock*............................................................................................... 109
Starting the engine................................................................................ 113
Starting the engine – Flexifuel............................................................... 118
Starting the engine – external battery................................................... 120
Gearboxes............................................................................................. 121
DRIVe Start/Stop*................................................................................. 127
All-wheel drive – AWD*.........................................................................134
Foot brake............................................................................................. 135
Parking brake........................................................................................ 137
HomeLink
�Ÿ *.......................................................................................... 141
ProCarManuals.com
Page 82 of 422
03 Your driving environment
Seats
03
80* Option/accessory, for more information, see Introduction.
Front seats
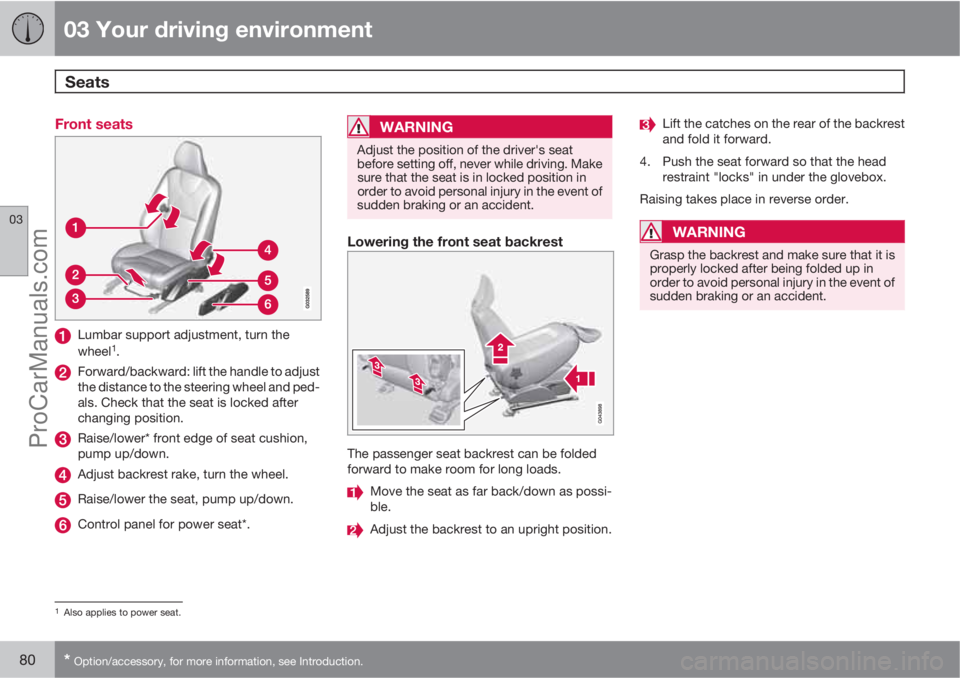
Lumbar support adjustment, turn the
wheel1.
Forward/backward: lift the handle to adjust
the distance to the steering wheel and ped-
als. Check that the seat is locked after
changing position.
Raise/lower* front edge of seat cushion,
pump up/down.
Adjust backrest rake, turn the wheel.
Raise/lower the seat, pump up/down.
Control panel for power seat*.
WARNING
Adjust the position of the driver's seat
before setting off, never while driving. Make
sure that the seat is in locked position in
order to avoid personal injury in the event of
sudden braking or an accident.
Lowering the front seat backrest
The passenger seat backrest can be folded
forward to make room for long loads.
Move the seat as far back/down as possi-
ble.
Adjust the backrest to an upright position.
Lift the catches on the rear of the backrest
and fold it forward.
4. Push the seat forward so that the head
restraint "locks" in under the glovebox.
Raising takes place in reverse order.
WARNING
Grasp the backrest and make sure that it is
properly locked after being folded up in
order to avoid personal injury in the event of
sudden braking or an accident.
1Also applies to power seat.
ProCarManuals.com
Page 87 of 422
03 Your driving environment
Steering wheel
03
* Option/accessory, for more information, see Introduction.85 Adjusting
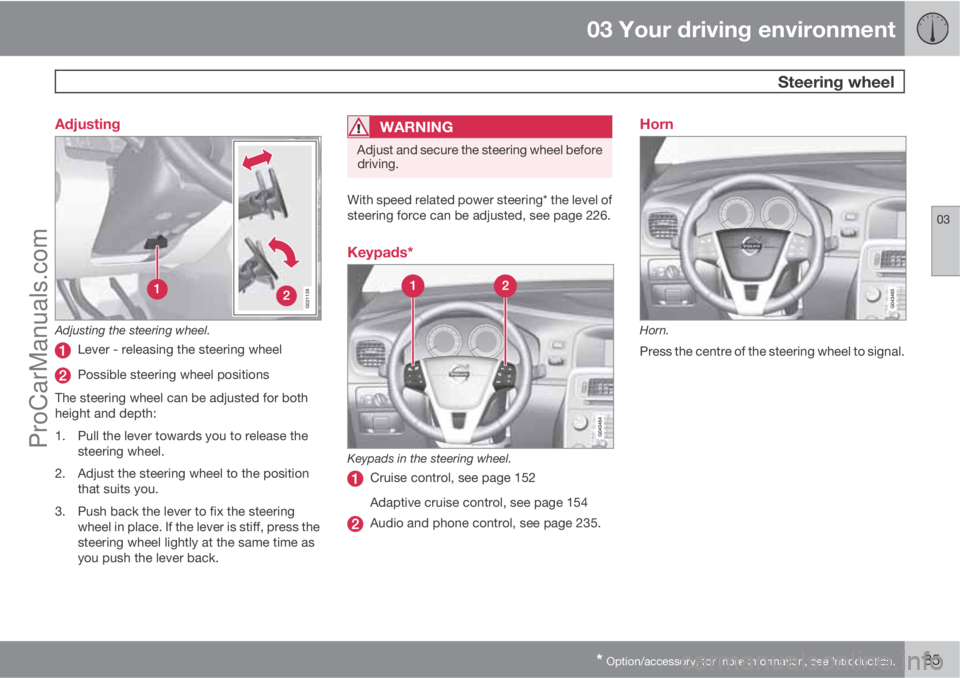
G021138
Adjusting the steering wheel.
Lever - releasing the steering wheel
Possible steering wheel positions
The steering wheel can be adjusted for both
height and depth:
1. Pull the lever towards you to release the
steering wheel.
2. Adjust the steering wheel to the position
that suits you.
3. Push back the lever to fix the steering
wheel in place. If the lever is stiff, press the
steering wheel lightly at the same time as
you push the lever back.
WARNING
Adjust and secure the steering wheel before
driving.
With speed related power steering* the level of
steering force can be adjusted, see page 226.
Keypads*
Keypads in the steering wheel.
Cruise control, see page 152
Adaptive cruise control, see page 154
Audio and phone control, see page 235.
Horn
Horn.
Press the centre of the steering wheel to signal.
ProCarManuals.com
Page 148 of 422
04 Driver support
DSTC – Stability and traction control system
04
146* Option/accessory, for more information, see Introduction.
General information on DSTC
The stability and traction control system, DSTC
(Dynamic Stability & Traction Control) helps the
driver to avoid skidding and improves the car's
traction.
The activation of the system during braking
may be noticed as a throbbing sound. The car
may accelerate slower than expected when the
accelerator pedal is depressed.
Active Yaw ControlThe function limits the driving and brake force
of the wheels individually in order to stabilise
the car.
Spin ControlThe function prevents the driving wheels from
spinning against the road surface during accel-
eration.
Traction control systemThe function is active at low speed and trans-
fers power from the driving wheel that is spin-
ning to the one that is not.
Engine drag control - EDCEDC (Engine Drag Control) prevents involun-
tary wheel locking, e.g. after shifting down or
engine braking when driving in low gears on
slippery road surfaces.Involuntary wheel locking while driving can,
amongst other things, impair the driver's ability
to steer the car.
Corner Traction Control – CTCCTC compensates for understeer and allows
higher than normal acceleration in a bend with-
out wheelspin on the inner wheel, e.g. on an
arcing motorway entrance road to quickly
reach the prevailing traffic speed.
Trailer Stability Assist* - TSAThe function serves to stabilise the car and
trailer combination if it begins to snake, see
page 303.
NOTE
The function is deactivated if the driver
selects Sport mode.
Operation
Selection of level - Sport modeThe DSTC system is always activated - it can-
not be deactivated.
However, the driver can select the Sport mode,
which allows for a more active driving experi-
ence. In Sport mode the system detects
whether the accelerator pedal, steering wheel
movements and cornering are more active thanin normal driving and then allows controlled
skidding with the rear section up to a certain
level before it intervenes and stabilises the car.
If the driver stops a controlled skid by releasing
the accelerator pedal then the DSTC system
intervenes and stabilises the car.
With Sport mode, maximum traction is
obtained if the car has become stuck, or when
driving on a loose surface - e.g. sand or deep
snow.
Proceed as follows to select Sport mode:
1.
Press the centre console button MY CAR
and search in the display screen's menu
system and locate My V60
DSTC. (For
information on the menu system, see
page 202).
2. Uncheck the box and back out of the menu
system with EXIT.
> The system then allows a more sporty
driving style.
The Sport mode is active until the driver dese-
lects it or until the engine is switched off - after
the engine is started the next time the DSTC
system is back in its normal mode again.
ProCarManuals.com
Page 228 of 422
05 Comfort and driving pleasure
Adapting driving characteristics
05
226* Option/accessory, for more information, see Introduction.
Active chassis - Four-C*
Active chassis, Four-C (Continously Controlled
Chassis Concept), regulates the characteris-
tics of the shock absorbers so that the car's
driving characteristics can be adjusted. There
are three settings: Comfort, Sport and
Advanced.
ComfortThis setting means that the car is perceived as
being more comfortable on rough and uneven
road surfaces. Shock absorption is soft and the
movement of the body is smooth and gentle.
SportThis setting means that the car is perceived as
being more sporty and is recommended for
more active driving. Steering response is faster
than in the Comfort mode. Shock absorption is
harder and the body follows the road in order
to reduce rolling during cornering.
AdvancedThis setting is only recommended on very even
and smooth road surfaces.
The shock absorbers are optimised for maxi-
mum roadholding and rolling in bends is further
minimised.
Operation
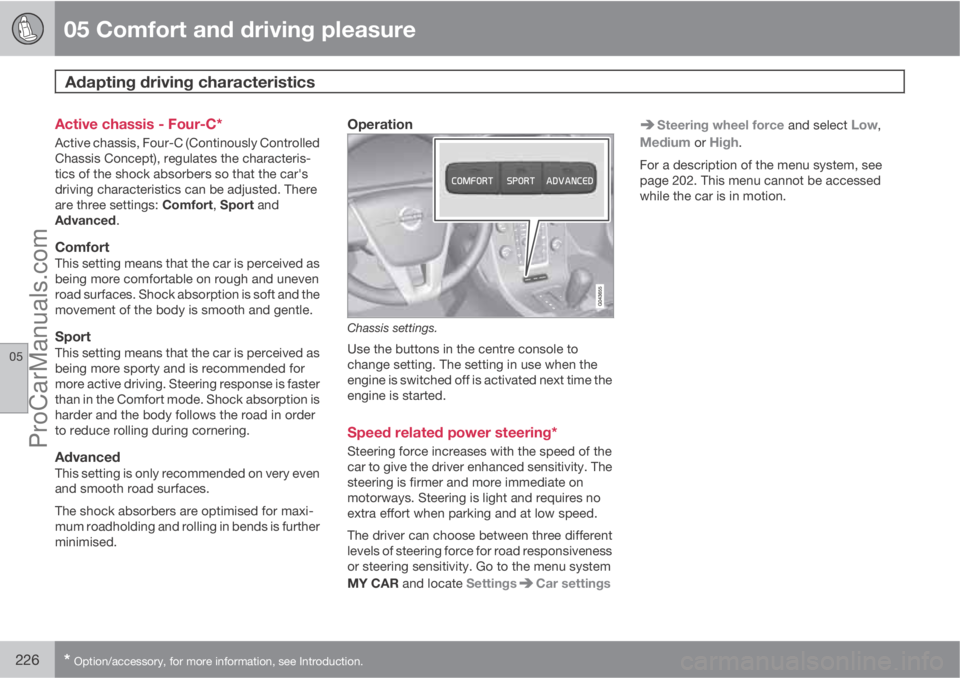
Chassis settings.
Use the buttons in the centre console to
change setting. The setting in use when the
engine is switched off is activated next time the
engine is started.
Speed related power steering*
Steering force increases with the speed of the
car to give the driver enhanced sensitivity. The
steering is firmer and more immediate on
motorways. Steering is light and requires no
extra effort when parking and at low speed.
The driver can choose between three different
levels of steering force for road responsiveness
or steering sensitivity. Go to the menu system
MY CAR and locate Settings
Car settings
Steering wheel force and select Low,
Medium or High.
For a description of the menu system, see
page 202. This menu cannot be accessed
while the car is in motion.
ProCarManuals.com
Page 258 of 422
06 Infotainment system
External audio source via AUX/USB* input
06
256* Option/accessory, for more information, see Introduction.
General
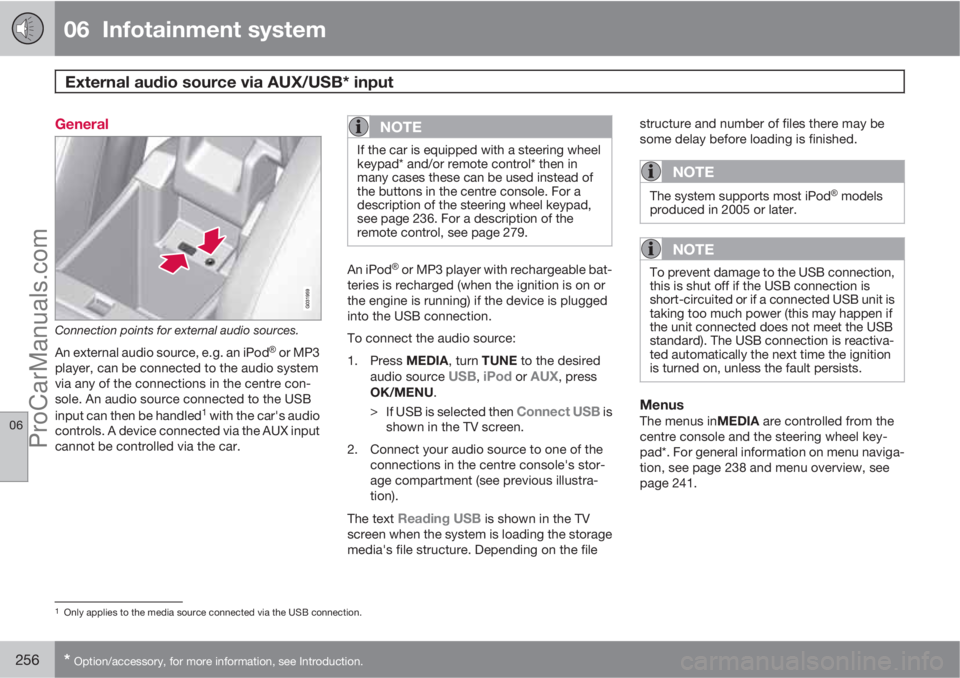
Connection points for external audio sources.
An external audio source, e.g. an iPod�Ÿ or MP3
player, can be connected to the audio system
via any of the connections in the centre con-
sole. An audio source connected to the USB
input can then be handled
1 with the car's audio
controls. A device connected via the AUX input
cannot be controlled via the car.
NOTE
If the car is equipped with a steering wheel
keypad* and/or remote control* then in
many cases these can be used instead of
the buttons in the centre console. For a
description of the steering wheel keypad,
see page 236. For a description of the
remote control, see page 279.
An iPod�Ÿ or MP3 player with rechargeable bat-
teries is recharged (when the ignition is on or
the engine is running) if the device is plugged
into the USB connection.
To connect the audio source:
1.
Press MEDIA, turn TUNE to the desired
audio source
USB, iPod or AUX, press
OK/MENU.
>
If USB is selected then
Connect USB is
shown in the TV screen.
2. Connect your audio source to one of the
connections in the centre console's stor-
age compartment (see previous illustra-
tion).
The text
Reading USB is shown in the TV
screen when the system is loading the storage
media's file structure. Depending on the filestructure and number of files there may be
some delay before loading is finished.
NOTE
The system supports most iPod�Ÿ models
produced in 2005 or later.
NOTE
To prevent damage to the USB connection,
this is shut off if the USB connection is
short-circuited or if a connected USB unit is
taking too much power (this may happen if
the unit connected does not meet the USB
standard). The USB connection is reactiva-
ted automatically the next time the ignition
is turned on, unless the fault persists.
MenusThe menus inMEDIA are controlled from the
centre console and the steering wheel key-
pad*. For general information on menu naviga-
tion, see page 238 and menu overview, see
page 241.
1Only applies to the media source connected via the USB connection.
ProCarManuals.com
Page 286 of 422
07 During your journey
Recommendations during driving
07
284
General
Economical drivingDriving economically means driving smoothly
while thinking ahead and adjusting your driving
style and speed to the prevailing conditions.
•Drive in the highest gear possible, adapted
to the current traffic situation and road -
lower engine speeds result in lower fuel
consumption.
•Avoid driving with open windows.
•Avoid sudden unnecessary acceleration
and heavy braking.
•Remove unnecessary items from the car -
the greater the load the higher the fuel con-
sumption.
•Use engine braking to slow down, when it
can take place without risk to other road
users.
•A roof load and ski box increase air resis-
tance, leading to higher fuel consumption
- remove the load carriers when not in use.
•Do not run the engine to operating tem-
perature at idling speed, but rather drive
with a light load as soon as possible - a
cold engine consumes more fuel than a
warm one.
•A car with D2, D3, D4 or D5 engine in com-
bination with a 6-speed manual gearbox is
started in 2nd gear.For more information and further advice, see
the pages 12 and 384.
WARNING
Never switch off the engine while moving,
such as downhill, this deactivates important
systems such as the power steering and
brake servo.
Driving in waterThe car can be driven through water at a maxi-
mum depth of 25 cm at a maximum speed of
10 km/h. Extra caution should be exercised
when passing through flowing water.
During driving in water, maintain a low speed
and do not stop the car. When the water has
been passed, depress the brake pedal lightly
and check that full brake function is achieved.
Water and mud for example can make the
brake linings wet resulting in delayed brake
function.
•Clean the electric contacts of the electric
engine block heater and trailer coupling
after driving in water and mud.
•Do not let the car stand with water over the
sills for any long period of time - this could
cause electrical malfunctions.
IMPORTANT
Engine damage can occur if water enters
the air filter.
In depths greater than 25 cm, water could
enter the transmission. This reduces the
lubricating ability of the oils and shortens
the service life of these systems.
In the event of the engine stalling in water,
do not try restart - tow the car from the water
to a workshop - an authorised Volvo work-
shop is recommended. Risk of engine
breakdown.
Engine, gearbox and cooling systemUnder special conditions, for example hard
driving in hilly terrain and hot climate, there is
a risk that the engine and drive system may
overheat - in particular with a heavy load.
For information about overheating when driv-
ing with a trailer, see page 298.
•Remove any auxiliary lamps from in front
of the grille when driving in hot climates.
•If the temperature in the engine's cooling
system is too high the instrument panel's
warning symbol is illuminated and there is
a text message displayed there
High
engine temp Stop safely - stop the car in
a safe way and allow the engine to run at
idling speed for several minutes to cool
down.
ProCarManuals.com
Page 305 of 422
07 During your journey
Driving with a trailer
07
* Option/accessory, for more information, see Introduction.303
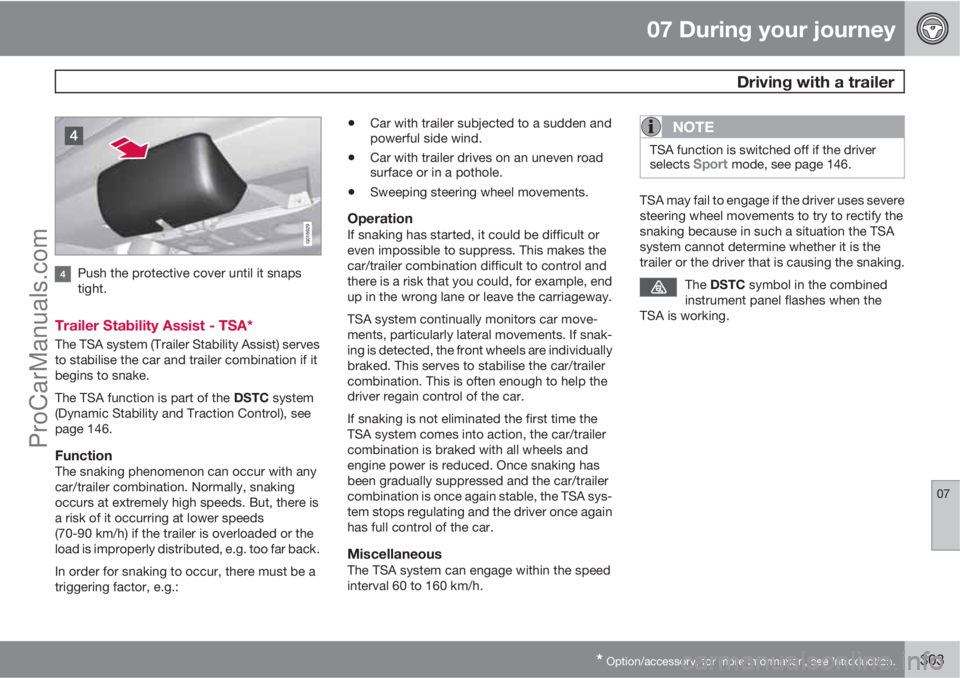
G018929
Push the protective cover until it snaps
tight.
Trailer Stability Assist - TSA*
The TSA system (Trailer Stability Assist) serves
to stabilise the car and trailer combination if it
begins to snake.
The TSA function is part of the DSTC system
(Dynamic Stability and Traction Control), see
page 146.
FunctionThe snaking phenomenon can occur with any
car/trailer combination. Normally, snaking
occurs at extremely high speeds. But, there is
a risk of it occurring at lower speeds
(70-90 km/h) if the trailer is overloaded or the
load is improperly distributed, e.g. too far back.
In order for snaking to occur, there must be a
triggering factor, e.g.:
•Car with trailer subjected to a sudden and
powerful side wind.
•Car with trailer drives on an uneven road
surface or in a pothole.
•Sweeping steering wheel movements.
OperationIf snaking has started, it could be difficult or
even impossible to suppress. This makes the
car/trailer combination difficult to control and
there is a risk that you could, for example, end
up in the wrong lane or leave the carriageway.
TSA system continually monitors car move-
ments, particularly lateral movements. If snak-
ing is detected, the front wheels are individually
braked. This serves to stabilise the car/trailer
combination. This is often enough to help the
driver regain control of the car.
If snaking is not eliminated the first time the
TSA system comes into action, the car/trailer
combination is braked with all wheels and
engine power is reduced. Once snaking has
been gradually suppressed and the car/trailer
combination is once again stable, the TSA sys-
tem stops regulating and the driver once again
has full control of the car.
MiscellaneousThe TSA system can engage within the speed
interval 60 to 160 km/h.
NOTE
TSA function is switched off if the driver
selects Sport mode, see page 146.
TSA may fail to engage if the driver uses severe
steering wheel movements to try to rectify the
snaking because in such a situation the TSA
system cannot determine whether it is the
trailer or the driver that is causing the snaking.
The DSTC symbol in the combined
instrument panel flashes when the
TSA is working.
ProCarManuals.com