length VOLVO V60 2017 Owner´s Manual
[x] Cancel search | Manufacturer: VOLVO, Model Year: 2017, Model line: V60, Model: VOLVO V60 2017Pages: 406, PDF Size: 9.65 MB
Page 76 of 406
||
INSTRUMENTS AND CONTROLS
* Option/accessory, for more information, see Introduction.
74
Malfunction Indicator Light
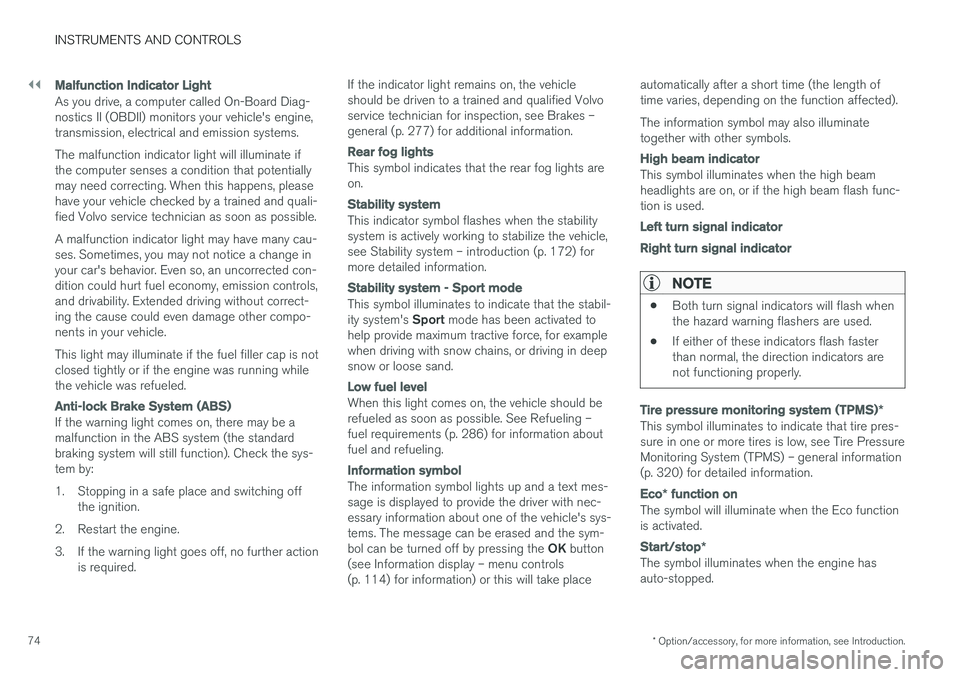
As you drive, a computer called On-Board Diag- nostics II (OBDII) monitors your vehicle's engine,transmission, electrical and emission systems. The malfunction indicator light will illuminate if the computer senses a condition that potentiallymay need correcting. When this happens, pleasehave your vehicle checked by a trained and quali-fied Volvo service technician as soon as possible. A malfunction indicator light may have many cau- ses. Sometimes, you may not notice a change inyour car's behavior. Even so, an uncorrected con-dition could hurt fuel economy, emission controls,and drivability. Extended driving without correct-ing the cause could even damage other compo-nents in your vehicle. This light may illuminate if the fuel filler cap is not closed tightly or if the engine was running whilethe vehicle was refueled.
Anti-lock Brake System (ABS)
If the warning light comes on, there may be a malfunction in the ABS system (the standardbraking system will still function). Check the sys-tem by:
1. Stopping in a safe place and switching off
the ignition.
2. Restart the engine.
3. If the warning light goes off, no further action is required. If the indicator light remains on, the vehicle should be driven to a trained and qualified Volvoservice technician for inspection, see Brakes –general (p. 277) for additional information.
Rear fog lights
This symbol indicates that the rear fog lights are on.
Stability system
This indicator symbol flashes when the stability system is actively working to stabilize the vehicle,see Stability system – introduction (p. 172) formore detailed information.
Stability system - Sport mode
This symbol illuminates to indicate that the stabil- ity system's
Sport mode has been activated to
help provide maximum tractive force, for example when driving with snow chains, or driving in deepsnow or loose sand.
Low fuel level
When this light comes on, the vehicle should be refueled as soon as possible. See Refueling –fuel requirements (p. 286) for information aboutfuel and refueling.
Information symbol
The information symbol lights up and a text mes- sage is displayed to provide the driver with nec-essary information about one of the vehicle's sys-tems. The message can be erased and the sym- bol can be turned off by pressing the OK button
(see Information display – menu controls (p. 114) for information) or this will take place automatically after a short time (the length oftime varies, depending on the function affected). The information symbol may also illuminate together with other symbols.
High beam indicator
This symbol illuminates when the high beam headlights are on, or if the high beam flash func-tion is used.
Left turn signal indicator Right turn signal indicator
NOTE
•
Both turn signal indicators will flash when the hazard warning flashers are used.
• If either of these indicators flash fasterthan normal, the direction indicators arenot functioning properly.
Tire pressure monitoring system (TPMS)
*
This symbol illuminates to indicate that tire pres- sure in one or more tires is low, see Tire PressureMonitoring System (TPMS) – general information(p. 320) for detailed information.
Eco* function on
The symbol will illuminate when the Eco function is activated.
Start/stop *
The symbol illuminates when the engine has auto-stopped.
Page 137 of 406
CLIMATE
135
Air distribution – recirculation Recirculation can be used to shut out exhaust fumes, smoke, etc., from the passenger com-partment.
The air in the passenger com- partment is then recirculated,i.e., no air from outside the caris taken into the car when thisfunction is activated. The indi-cator light in the button will illu-minate when recirculation is
selected. If the air in the car recirculates for too long, there is a risk of condensation forming on the insidesof the windows, especially in winter.
TimerThe timer function minimizes the risk of fogging, or stale air when the recirculation function isselected by automatically switching off the func-tion after a certain length of time, depending onthe ambient temperature. Activate/deactivate the function under
Climate settingsRecirculation timer. See My Car – introduction
(p. 77) for a description of the menu system.
NOTE
When Defroster is selected, recirculation is always deactivated.
Related information
• Climate – general information (p. 126)
• Air distribution – general (p. 129)
• Air distribution – function (p. 134)
• Air distribution – table (p. 136)
Page 209 of 406
DRIVER SUPPORT
}}
207
City Safety – Laser sensor
The laser sensor
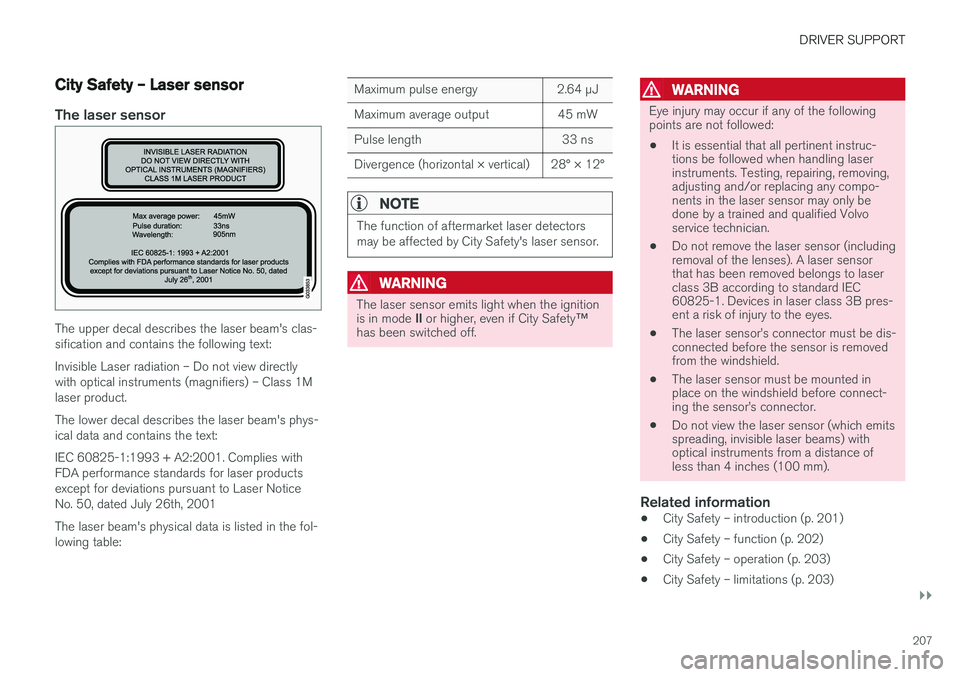
The upper decal describes the laser beam's clas- sification and contains the following text: Invisible Laser radiation – Do not view directly with optical instruments (magnifiers) – Class 1Mlaser product. The lower decal describes the laser beam's phys- ical data and contains the text: IEC 60825-1:1993 + A2:2001. Complies with FDA performance standards for laser productsexcept for deviations pursuant to Laser NoticeNo. 50, dated July 26th, 2001 The laser beam's physical data is listed in the fol- lowing table:
Maximum pulse energy2.64 μJ
Maximum average output45 mW
Pulse length33 ns
Divergence (horizontal × vertical)28° × 12°
NOTE
The function of aftermarket laser detectors may be affected by City Safety's laser sensor.
WARNING
The laser sensor emits light when the ignition is in mode II or higher, even if City Safety ™
has been switched off.
WARNING
Eye injury may occur if any of the following points are not followed:
• It is essential that all pertinent instruc-tions be followed when handling laserinstruments. Testing, repairing, removing,adjusting and/or replacing any compo-nents in the laser sensor may only bedone by a trained and qualified Volvoservice technician.
• Do not remove the laser sensor (includingremoval of the lenses). A laser sensorthat has been removed belongs to laserclass 3B according to standard IEC60825-1. Devices in laser class 3B pres-ent a risk of injury to the eyes.
• The laser sensor
Page 297 of 406
STARTING AND DRIVING
}}
295
Towing the vehicle Always check with state and local authorities before attempting to tow another vehiclebecause this type of towing is subject to regula-tions regarding maximum towing speed, lengthand type of towing device, lighting, etc.
1. With the remote key fully pressed into theignition slot 13
, press START/STOP ENGINE
for approximately 2 seconds to activate igni- tion mode II.
2. The remote key must remain in the ignition slot14
for the entire time that the vehicle is
being towed.
3. Keep the tow rope taut when the towing vehicle slows down by applying light pressure on the brake pedal. This will help prevent jar-ring movements of the vehicle being towed.
4. Be prepared to apply the brakes to stop the vehicle being towed.
CAUTION
General towing precautions:
• Please check with state and local author- ities before attempting this type of tow-ing, as vehicles being towed are subjectto regulations regarding maximum towingspeed, length and type of towing device,lighting, etc.
• If the vehicle's battery is dead, see Jumpstarting (p. 261) to provide current forreleasing the electric parking brake and to move the gear selector from the
P
position to N. If this is not possible, see
Transmission – shiftlock override (p. 267) for information about manually overridingthe shiftlock system to move the gear selector from P to N.
• Maximum speed: 50 mph (80 km/h). Do not exceed the maximum allowable tow-ing speed.
• Maximum distance with front wheels onground: 50 miles (80 km).
• The vehicle should only be towed in theforward direction.
Related information
• Towing eyelet (p. 295)
• Remote key – functions (p. 153)
Towing eyelet
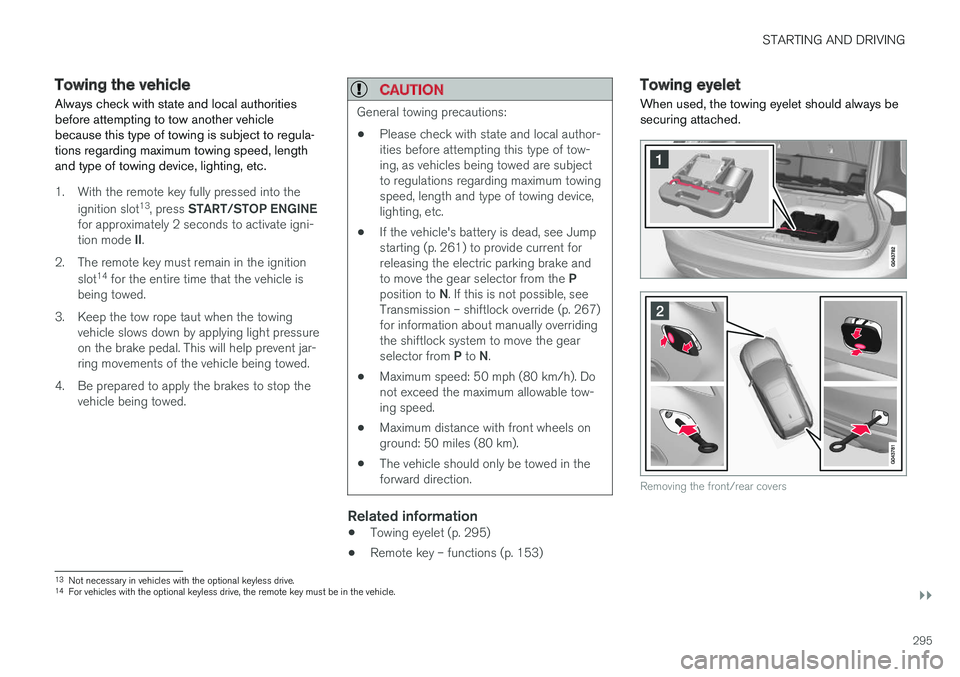
When used, the towing eyelet should always be securing attached.
Removing the front/rear covers
13 Not necessary in vehicles with the optional keyless drive.
14 For vehicles with the optional keyless drive, the remote key must be in the vehicle.
Page 353 of 406
MAINTENANCE AND SERVICING
}}
* Option/accessory, for more information, see Introduction.351
Bulbs – specifications The following bulbs can be replaced by the vehi- cles owner. All other bulbs should only bereplaced by a trained and qualified Volvo servicetechnician.
Lighting functionWat-
tageBulb
Low beam (halo- gen)55H11 LL
High beam (halo- gen)65H9
Extra high beam (models withActive Bending Lights *)55H7 LL
Front turn signals24PY24W
License plate light- ing5C5W LL
Vanity mirror light- ing1.2W2x4.6d type
T5
Glove compart- ment lighting5SV8.5 (length43mm)
Rear turn signals21PY21W LL
Rear fog light21H21W LL
Lighting functionWat-
tageBulb
Backup light21H21W LL
Brake light21P21W LL
Cargo area lighting5SV8.5 (length 43mm)
Front footwell lighting3W2, 1x9.5dtype T10
NOTE
Please consult a Volvo retailer
Page 354 of 406
||
MAINTENANCE AND SERVICING
352To put the windshiield wipers in the service posi- tion: 1.
Insert the remote key into the ignition slot 3
and press the START/STOP ENGINE but-
ton briefly to put the ignition in mode I (see
Ignition modes (p. 80) for detailed informa- tion about the ignition modes).
2. Press the START/STOP ENGINE button
again briefly to switch the ignition off.
3. Within 3 seconds, move the right steering wheel lever up and hold it for at least 1 sec-ond.
> The wipers will then move to the vertical(service) position on the windshield.
The wipers can be returned to the normal posi- tion by pressing the START/STOP ENGINE but-
ton briefly to put the ignition in mode I (or by
starting the engine).
CAUTION
If the wiper arms have been folded out from the windshield while in the service position,fold them back against the windshield beforereturning the wipers to the normal position tohelp avoid scratching the paint on the hood.
Related information
• Engine compartment – washer fluid (p. 354)
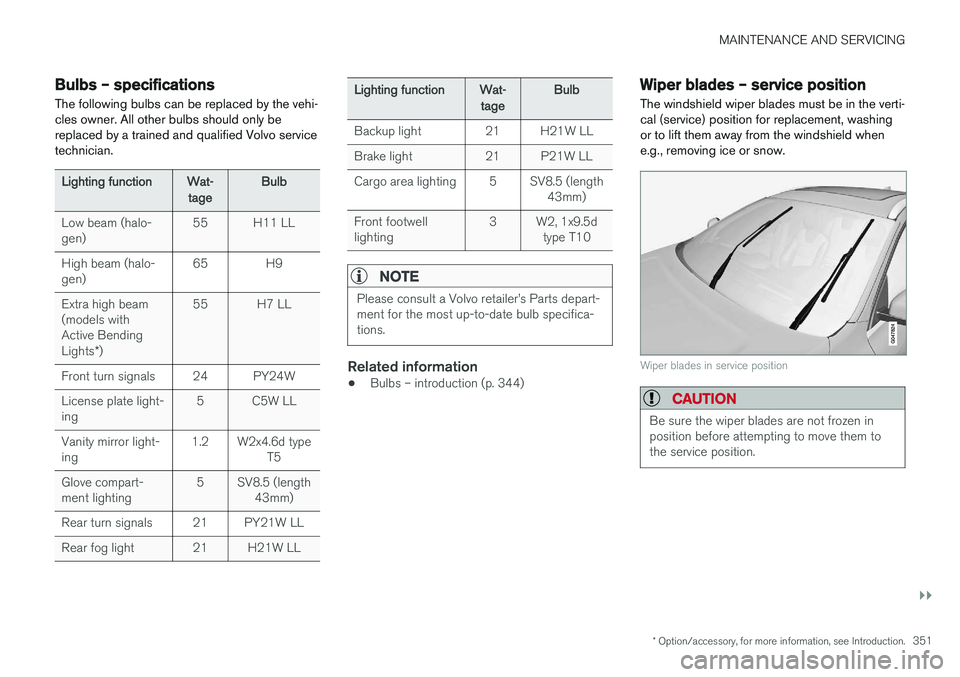
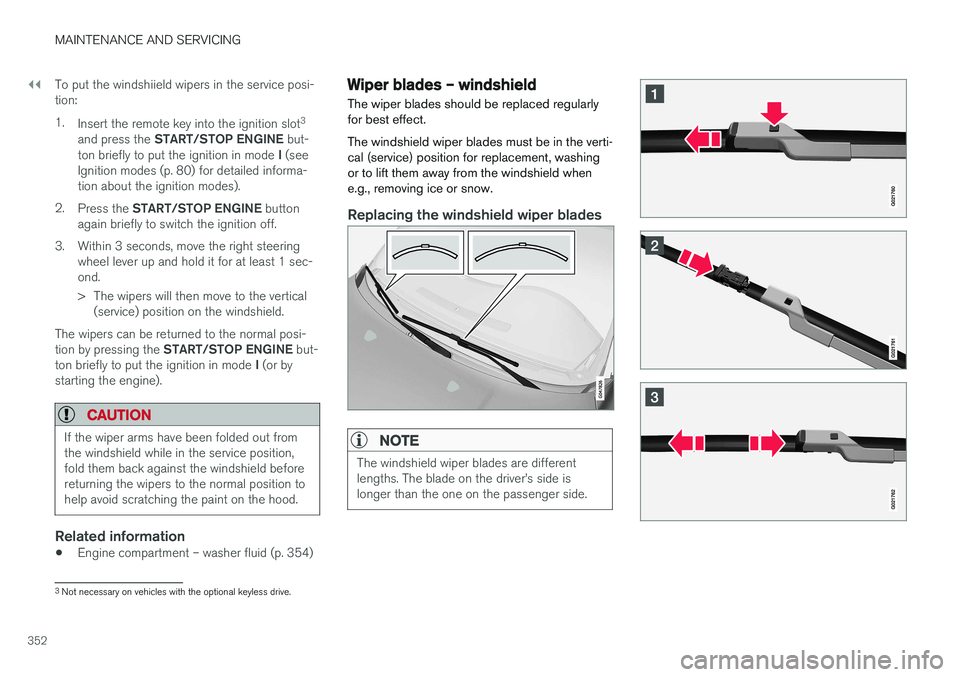
Wiper blades – windshield The wiper blades should be replaced regularly for best effect. The windshield wiper blades must be in the verti- cal (service) position for replacement, washingor to lift them away from the windshield whene.g., removing ice or snow.
Replacing the windshield wiper blades
NOTE
The windshield wiper blades are different lengths. The blade on the driver
Page 382 of 406
||
SPECIFICATIONS
380
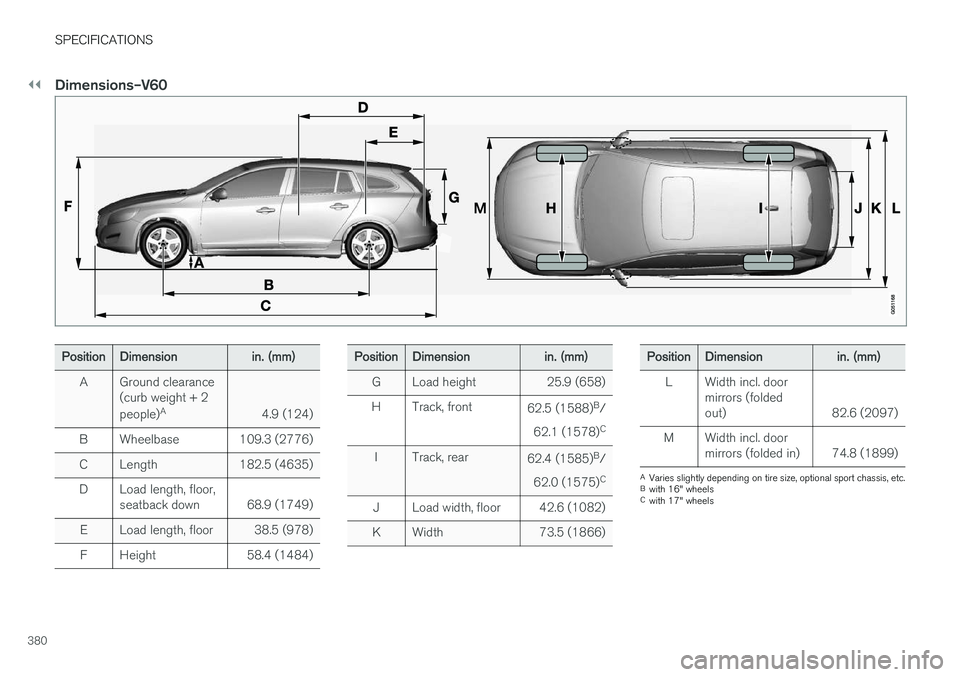
Dimensions–V60
PositionDimensionin. (mm)
AGround clearance (curb weight + 2 people)A
4.9 (124)
BWheelbase109.3 (2776)
CLength182.5 (4635)
DLoad length, floor, seatback down68.9 (1749)
ELoad length, floor38.5 (978)
FHeight58.4 (1484)
PositionDimensionin. (mm)
GLoad height25.9 (658)
HTrack, front62.5 (1588)
B
/
62.1 (1578) C
ITrack, rear62.4 (1585)B
/
62.0 (1575) C
JLoad width, floor42.6 (1082)
KWidth73.5 (1866)
PositionDimensionin. (mm)
LWidth incl. door mirrors (foldedout)
82.6 (2097)
MWidth incl. door mirrors (folded in)74.8 (1899)
A
Varies slightly depending on tire size, optional sport chassis, etc.
B with 16" wheels
C with 17" wheels