remote start VOLVO V60 2017 Owner´s Manual
[x] Cancel search | Manufacturer: VOLVO, Model Year: 2017, Model line: V60, Model: VOLVO V60 2017Pages: 406, PDF Size: 9.65 MB
Page 6 of 406
4
CLIMATE
Climate – general information126
Climate – sensors 126
Air quality 127
Interior Air Quality System (IAQS) *
128
Climate – menu settings 128
Air distribution – general 129
Electronic climate control (ECC) 130
Heated seats 131
Temperature and blower control 132
Automatic climate control 132
Air conditioning 133
Max. defroster and electrically heated windshield * 133
Air distribution – function 134
Air distribution – recirculation 135
Air distribution – table 136
LOADING AND STORAGE
Storage spaces140
Tunnel console 142
Tunnel console – 12-volt sockets 142
Glove compartment 143
Vanity mirror 143
12-volt socket in the cargo area *
143
Loading – general 144
Loading – roof load carriers 144
Load anchoring eyelets 145
Grocery bag holder 146
Cargo net – mounting/removing 146
Cargo area cover 147
Steel cargo grid 148
LOCKS AND ALARM
Remote key and key blade150
Remote key – loss 150
Key memory 151
Locking/unlocking confirmation 152
Immobilizer (start inhibitor) 152
Remote key – functions 153
Remote key – range 154
Detachable key blade – general information 155
Detachable key blade – detaching/reinserting 155
Detachable key blade – unlocking 156
Private locking 156
Remote key – replacing the battery 157
Keyless drive *– locking/unlocking
159
Keyless drive * – unlocking with key blade
160
Keyless drive * – key memory
161
Keyless drive * – messages
161
Keyless drive * – antenna locations
162
Locking/unlocking – from the outside 163
Manual locking 164
Locking/unlocking – from inside 164
Locking/unlocking – glove compartment 166
Locking/unlocking – tailgate 166
Alarm – general information 168
Page 8 of 406
6
Collision warning – symbols and messages219
Driver Alert System 221
Driver Alert Control (DAC) – introduction 221
Driver Alert Control (DAC) – operation 222
Driver Alert Control (DAC) – function 223
Driver Alert Control (DAC) – limitations 223
Driver Alert Control (DAC) – symbolsand messages 225
Lane Departure Warning (LDW) –introduction 227
Lane Departure Warning (LDW) –operation 228
Lane Departure Warning (LDW) -limitations 229
Lane Departure Warning (LDW) –symbols and messages 230
Lane Keeping Aid (LKA) – introduction 232
Lane Keeping Aid (LKA) – operation 233
Lane Keeping Aid (LKA) – limitations 235
Lane Keeping Aid (LKA) – symbolsand messages 236
Park assist – introduction 237
Park assist – function 237
Park assist – operation 239
Park assist – limitations 240
Park Assist Pilot (PAP) * – introduction
241
Park Assist Pilot (PAP) * – function
241
Park Assist Pilot (PAP) * – operation
242
Park Assist Pilot (PAP) * – limitations
244
Park Assist Pilot (PAP) * – symbols
and messages 245
Park assist – troubleshooting 245
Rear Park Assist Camera (PAC) – introduction 246
Rear Park Assist Camera (PAC) –function 246
Rear Park Assist Camera (PAC) –operation 247
Rear Park Assist Camera (PAC) –guiding and marker lines 248
Rear Park Assist Camera (PAC) –limitations 250
BLIS * – introduction
250
BLIS * – function
251
BLIS * – operation
252
BLIS * – Cross Traffic Alert (CTA)
253
BLIS * – limitations
254
BLIS * – messages
255
STARTING AND DRIVING
Starting the engine
258
Switching off the engine 259
Engine Remote Start (ERS) * – intro-
duction 260
Engine Remote Start (ERS) * – star-
ting the engine 260
Engine Remote Start (ERS) * –
switching off the engine 261
Jump starting 261
Transmission – general information 262
Transmission – positions 263
Transmission – Geartronic 264
Transmission – shiftlock override 267
Start/Stop – Hill Start Assist (HSA) 267
Start/Stop – introduction 268
Start/Stop – function 268
Start/Stop – Auto-stop exceptions 269
Start/Stop – Auto-start exceptions 270
Start/Stop – settings 271
Start/Stop – symbols and messages 272
ECO *
273
All Wheel Drive (AWD) 275
Hill Descent Control (HDC) – intro- duction 275
Hill Descent Control (HDC) – operation 276
Brakes – general 277
Page 36 of 406
||
SAFETY
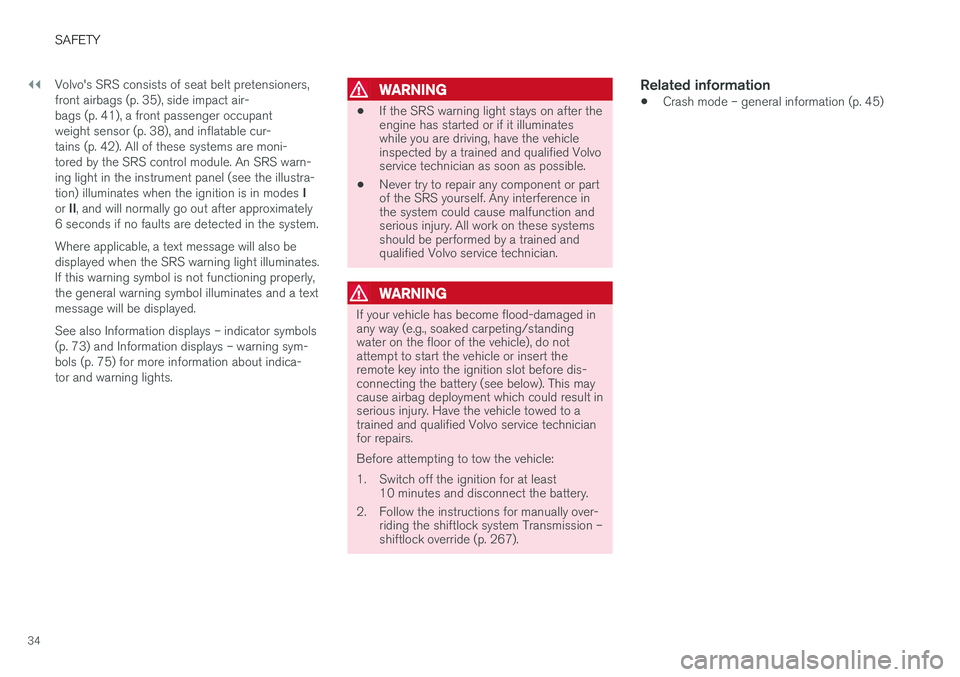
34Volvo's SRS consists of seat belt pretensioners, front airbags (p. 35), side impact air-bags (p. 41), a front passenger occupantweight sensor (p. 38), and inflatable cur-tains (p. 42). All of these systems are moni-tored by the SRS control module. An SRS warn-ing light in the instrument panel (see the illustra- tion) illuminates when the ignition is in modes
I
or II, and will normally go out after approximately
6 seconds if no faults are detected in the system. Where applicable, a text message will also be displayed when the SRS warning light illuminates.If this warning symbol is not functioning properly,the general warning symbol illuminates and a textmessage will be displayed. See also Information displays – indicator symbols (p. 73) and Information displays – warning sym-bols (p. 75) for more information about indica-tor and warning lights.
WARNING
• If the SRS warning light stays on after the engine has started or if it illuminateswhile you are driving, have the vehicleinspected by a trained and qualified Volvoservice technician as soon as possible.
• Never try to repair any component or partof the SRS yourself. Any interference inthe system could cause malfunction andserious injury. All work on these systemsshould be performed by a trained andqualified Volvo service technician.
WARNING
If your vehicle has become flood-damaged in any way (e.g., soaked carpeting/standingwater on the floor of the vehicle), do notattempt to start the vehicle or insert theremote key into the ignition slot before dis-connecting the battery (see below). This maycause airbag deployment which could result inserious injury. Have the vehicle towed to atrained and qualified Volvo service technicianfor repairs. Before attempting to tow the vehicle:
1. Switch off the ignition for at least
10 minutes and disconnect the battery.
2. Follow the instructions for manually over- riding the shiftlock system Transmission – shiftlock override (p. 267).
Related information
•Crash mode – general information (p. 45)
Page 48 of 406
||
SAFETY
46If the vehicle has been involved in a collision, the text
Safety mode See manual may appear in
the information display.
NOTE
This text can only be shown if the display is undamaged and the vehicle's electrical sys-tem is intact.
Crash mode is a feature that is triggered if one or more of the safety systems (e.g. front (p. 35) orside airbags (p. 41), an inflatable curtain (p. 42),or one or more of the seat belt pretensioners)has deployed. The collision may have damagedan important function in the vehicle, such as thefuel lines, sensors for one of the safety systems,the brake system, etc.
WARNING
• Never attempt to repair the vehicle your- self or to reset the electrical system after the vehicle has displayed
Safety mode
See manual. This could result in injury or
improper system function.
• Restoring the vehicle to normal operating status should only be done by a trainedand qualified Volvo service technician.
• After
Safety mode See manual has
been displayed, if you detect the odor of fuel vapor, or see any signs of fuel leak-age, do not attempt to start the vehicle.Leave the vehicle immediately.
Related information
• Crash mode – starting the vehicle (p. 46)
• Crash mode – moving the vehicle (p. 47)
Crash mode – starting the vehicle
If Crash mode has been set Crash mode (p. 45)) and damage to the vehicle isminor and there is no fuel leakage, you mayattempt to start the engine.
To do so:
1. Remove the remote key from the ignition slot and open the driver's door. If a message is displayed that the ignition is on, press thestart button.
2. Close the driver's door and reinsert the remote key in the ignition slot.
3. Try to start the vehicle.
WARNING
If the message Safety mode See manual is
still displayed, the vehicle should not be driven and must be towed. Concealed faults maymake the vehicle difficult to control.
Related information
• Crash mode – general information (p. 45)
• Crash mode – moving the vehicle (p. 47)
Page 66 of 406
||
SAFETY
* Option/accessory, for more information, see Introduction.
64
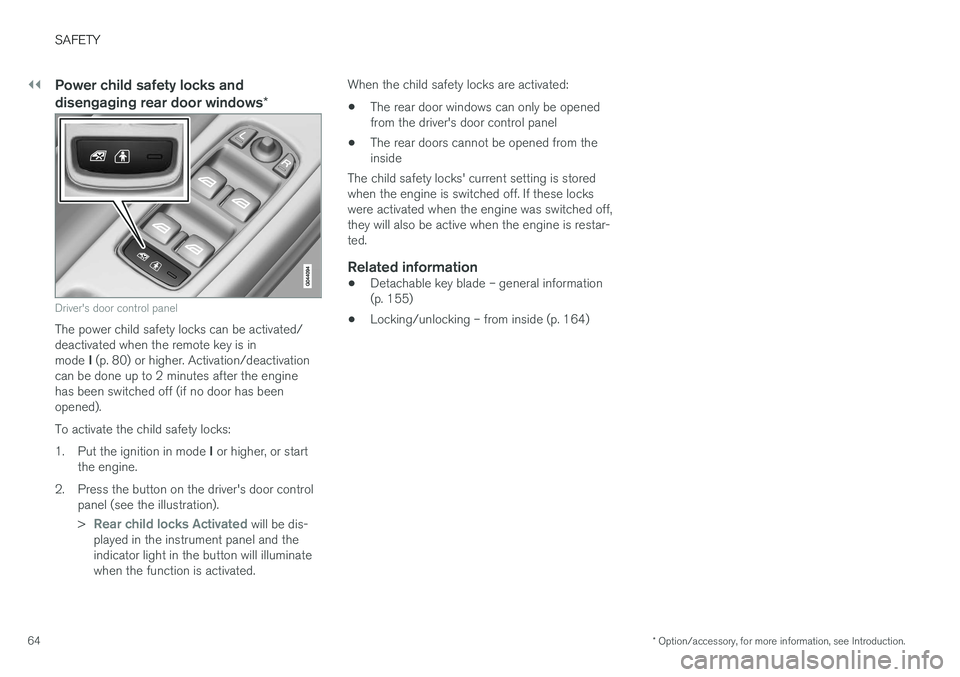
Power child safety locks and disengaging rear door windows *
Driver's door control panel
The power child safety locks can be activated/ deactivated when the remote key is in mode I (p. 80) or higher. Activation/deactivation
can be done up to 2 minutes after the engine has been switched off (if no door has beenopened). To activate the child safety locks:1. Put the ignition in mode I or higher, or start
the engine.
2. Press the button on the driver's door control panel (see the illustration). >
Rear child locks Activated will be dis-
played in the instrument panel and the indicator light in the button will illuminatewhen the function is activated. When the child safety locks are activated: •
The rear door windows can only be opened from the driver's door control panel
• The rear doors cannot be opened from theinside
The child safety locks' current setting is storedwhen the engine is switched off. If these lockswere activated when the engine was switched off,they will also be active when the engine is restar-ted.
Related information
• Detachable key blade – general information(p. 155)
• Locking/unlocking – from inside (p. 164)
Page 81 of 406
INSTRUMENTS AND CONTROLS
}}
* Option/accessory, for more information, see Introduction.79
Information displays – trip odometer and clock The trip odometers
T1 and T2 and clock are dis-
played in the instrument panel.
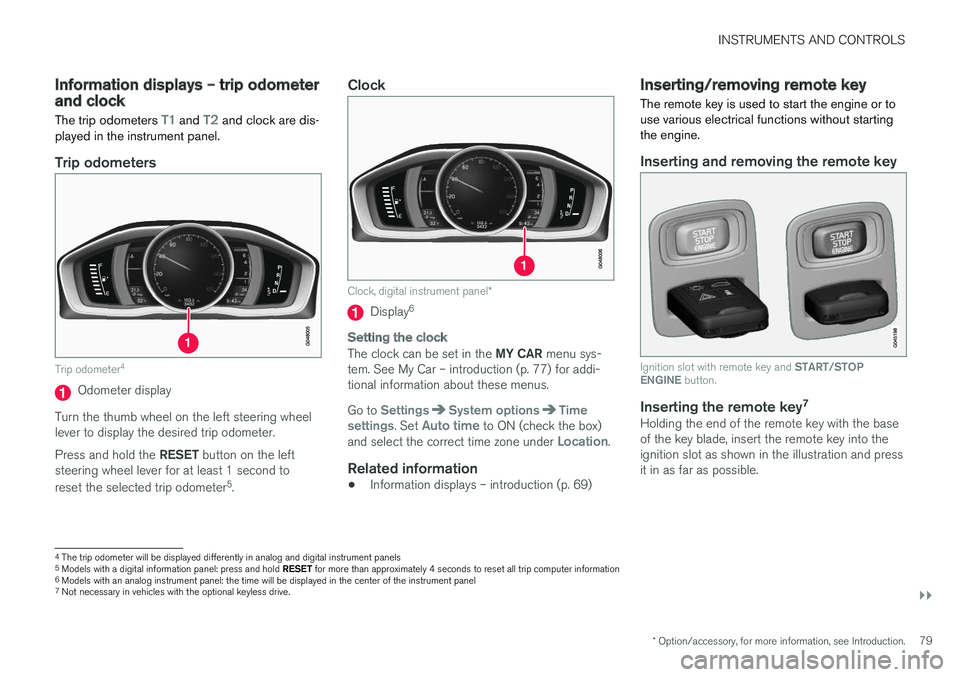
Trip odometers
Trip odometer 4
Odometer display
Turn the thumb wheel on the left steering wheel lever to display the desired trip odometer. Press and hold the RESET button on the left
steering wheel lever for at least 1 second to reset the selected trip odometer 5
.
Clock
Clock, digital instrument panel *
Display6
Setting the clock
The clock can be set in the
MY CAR menu sys-
tem. See My Car – introduction (p. 77) for addi- tional information about these menus. Go to
SettingsSystem optionsTime
settings. Set Auto time to ON (check the box)
and select the correct time zone under Location.
Related information
• Information displays – introduction (p. 69)
Inserting/removing remote key The remote key is used to start the engine or to use various electrical functions without startingthe engine.
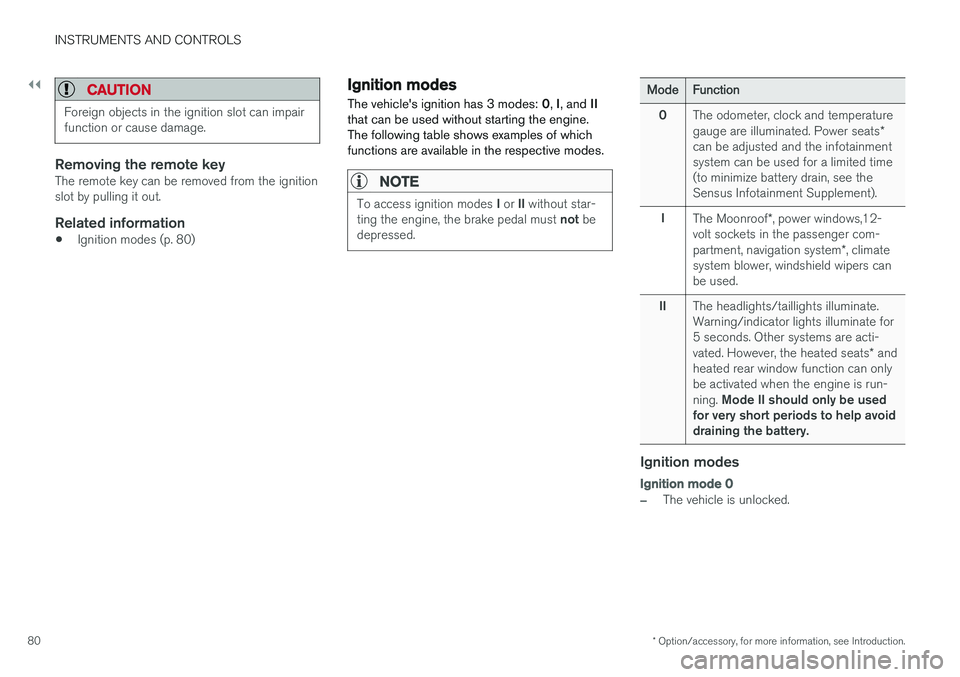
Inserting and removing the remote key
Ignition slot with remote key and
START/STOP
ENGINE button.
Inserting the remote key 7Holding the end of the remote key with the base of the key blade, insert the remote key into theignition slot as shown in the illustration and pressit in as far as possible.
4
The trip odometer will be displayed differently in analog and digital instrument panels
5 Models with a digital information panel: press and hold RESET for more than approximately 4 seconds to reset all trip computer information
6 Models with an analog instrument panel: the time will be displayed in the center of the instrument panel
7
Not necessary in vehicles with the optional keyless drive.
Page 82 of 406
||
INSTRUMENTS AND CONTROLS
* Option/accessory, for more information, see Introduction.
80
CAUTION
Foreign objects in the ignition slot can impair function or cause damage.
Removing the remote keyThe remote key can be removed from the ignition slot by pulling it out.
Related information
• Ignition modes (p. 80)
Ignition modes
The vehicle's ignition has 3 modes: 0, I, and II
that can be used without starting the engine. The following table shows examples of whichfunctions are available in the respective modes.
NOTE
To access ignition modes I or II without star-
ting the engine, the brake pedal must not be
depressed.
ModeFunction
0The odometer, clock and temperature gauge are illuminated. Power seats *
can be adjusted and the infotainment system can be used for a limited time(to minimize battery drain, see theSensus Infotainment Supplement).
IThe Moonroof *, power windows,12-
volt sockets in the passenger com- partment, navigation system *, climate
system blower, windshield wipers can be used.
IIThe headlights/taillights illuminate. Warning/indicator lights illuminate for5 seconds. Other systems are acti- vated. However, the heated seats * and
heated rear window function can only be activated when the engine is run- ning. Mode II should only be used
for very short periods to help avoid draining the battery.
Ignition modes
Ignition mode 0
–The vehicle is unlocked.
Page 83 of 406
INSTRUMENTS AND CONTROLS
* Option/accessory, for more information, see Introduction.81
Ignition mode I
–With the remote key fully pressed into the ignition slot8
, press START/STOP ENGINE
briefly.
Ignition mode II
–With the remote key fully pressed into the ignition slot 8
, press START/STOP ENGINE
for approximately 2 seconds.
Returning to mode 0
To return to mode 0 from mode II or I, press
START/STOP ENGINE briefly.
Starting and stopping the engineSee Starting the engine (p. 258) and Switching off the engine (p. 259) for information on star-ting the engine and switching it off.
Emergency towingSee Towing the vehicle (p. 295) for importantinformation about the remote key when the vehi-cle is being towed.
Related information
•Inserting/removing remote key (p. 79)
Front seats
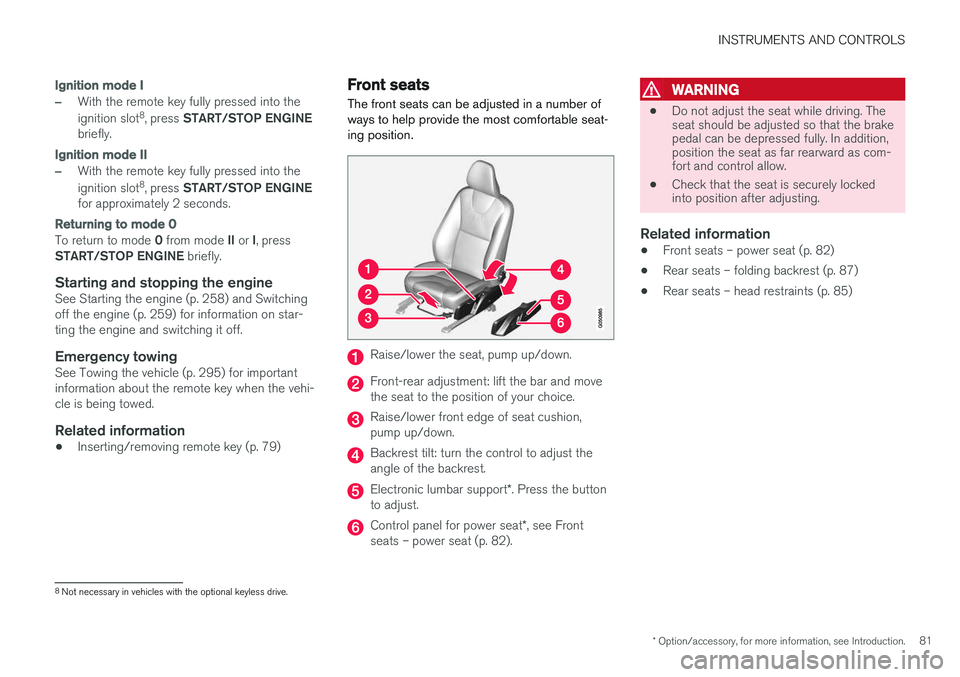
The front seats can be adjusted in a number of ways to help provide the most comfortable seat-ing position.
Raise/lower the seat, pump up/down.
Front-rear adjustment: lift the bar and move the seat to the position of your choice.
Raise/lower front edge of seat cushion, pump up/down.
Backrest tilt: turn the control to adjust the angle of the backrest.
Electronic lumbar support *. Press the button
to adjust.
Control panel for power seat *, see Front
seats – power seat (p. 82).
WARNING
• Do not adjust the seat while driving. The seat should be adjusted so that the brakepedal can be depressed fully. In addition,position the seat as far rearward as com-fort and control allow.
• Check that the seat is securely lockedinto position after adjusting.
Related information
• Front seats – power seat (p. 82)
• Rear seats – folding backrest (p. 87)
• Rear seats – head restraints (p. 85)
8
Not necessary in vehicles with the optional keyless drive.
Page 100 of 406
INSTRUMENTS AND CONTROLS
* Option/accessory, for more information, see Introduction.
98
Front interior lighting
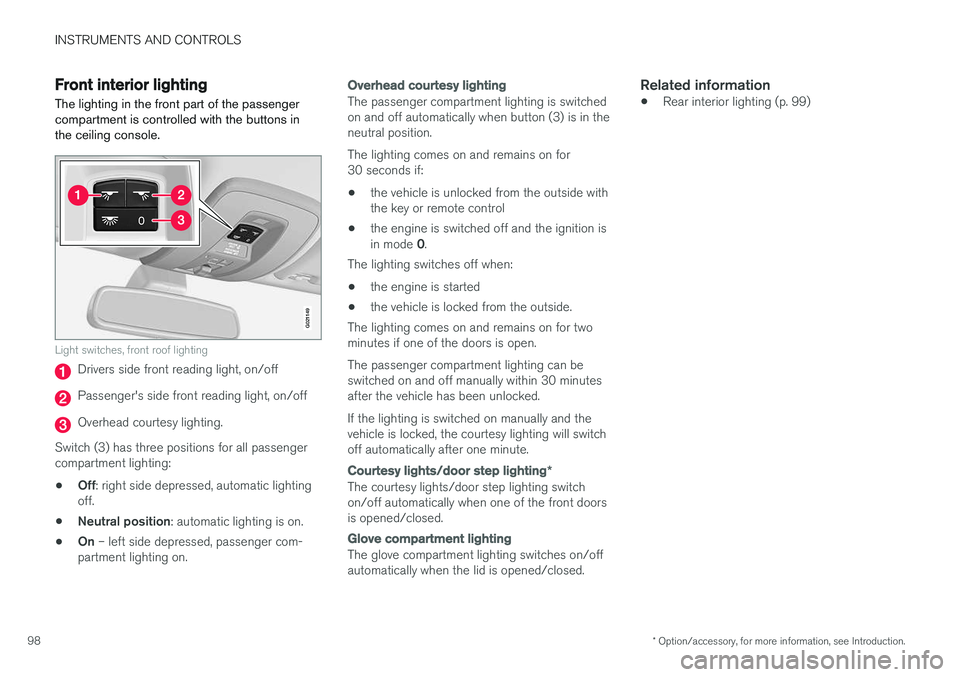
The lighting in the front part of the passenger compartment is controlled with the buttons inthe ceiling console.
G021149
Light switches, front roof lighting
Drivers side front reading light, on/off
Passenger's side front reading light, on/off
Overhead courtesy lighting.
Switch (3) has three positions for all passenger compartment lighting: • Off
: right side depressed, automatic lighting
off.
• Neutral position
: automatic lighting is on.
• On
– left side depressed, passenger com-
partment lighting on.
Overhead courtesy lighting
The passenger compartment lighting is switched on and off automatically when button (3) is in theneutral position. The lighting comes on and remains on for 30 seconds if:
• the vehicle is unlocked from the outside withthe key or remote control
• the engine is switched off and the ignition is in mode
0.
The lighting switches off when:
• the engine is started
• the vehicle is locked from the outside.
The lighting comes on and remains on for two minutes if one of the doors is open. The passenger compartment lighting can be switched on and off manually within 30 minutesafter the vehicle has been unlocked. If the lighting is switched on manually and the vehicle is locked, the courtesy lighting will switchoff automatically after one minute.
Courtesy lights/door step lighting *
The courtesy lights/door step lighting switch on/off automatically when one of the front doorsis opened/closed.
Glove compartment lighting
The glove compartment lighting switches on/off automatically when the lid is opened/closed.
Related information
•Rear interior lighting (p. 99)
Page 108 of 406
INSTRUMENTS AND CONTROLS
* Option/accessory, for more information, see Introduction.
106
Heated windshield *, rear window
and door mirror defrosters
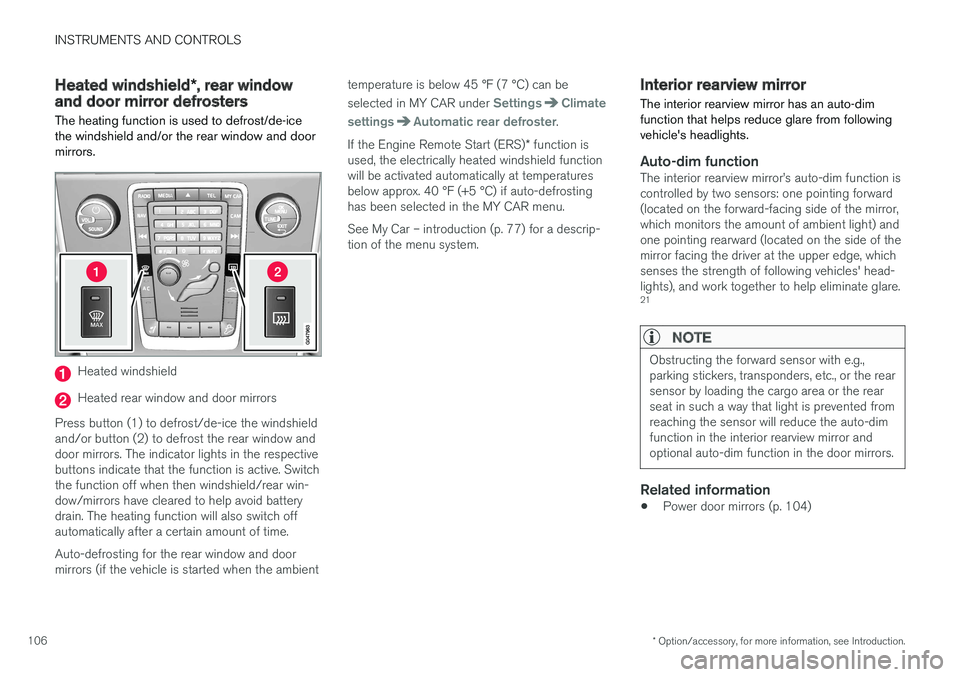
The heating function is used to defrost/de-ice the windshield and/or the rear window and doormirrors.
Heated windshield
Heated rear window and door mirrors
Press button (1) to defrost/de-ice the windshield and/or button (2) to defrost the rear window anddoor mirrors. The indicator lights in the respectivebuttons indicate that the function is active. Switchthe function off when then windshield/rear win-dow/mirrors have cleared to help avoid batterydrain. The heating function will also switch offautomatically after a certain amount of time. Auto-defrosting for the rear window and door mirrors (if the vehicle is started when the ambient temperature is below 45 °F (7 °C) can be selected in MY CAR under
SettingsClimate
settings
Automatic rear defroster.
If the Engine Remote Start (ERS) * function is
used, the electrically heated windshield function will be activated automatically at temperaturesbelow approx. 40 °F (+5 °C) if auto-defrostinghas been selected in the MY CAR menu. See My Car – introduction (p. 77) for a descrip- tion of the menu system.
Interior rearview mirror The interior rearview mirror has an auto-dim function that helps reduce glare from followingvehicle's headlights.
Auto-dim functionThe interior rearview mirror