key VOLVO V60 2021 Owners Manual
[x] Cancel search | Manufacturer: VOLVO, Model Year: 2021, Model line: V60, Model: VOLVO V60 2021Pages: 661, PDF Size: 12.68 MB
Page 428 of 661
STARTING AND DRIVING
426
Refueling
The fuel tank is equipped with a fuel filling system without a cover.
Refueling the vehicle at a service station
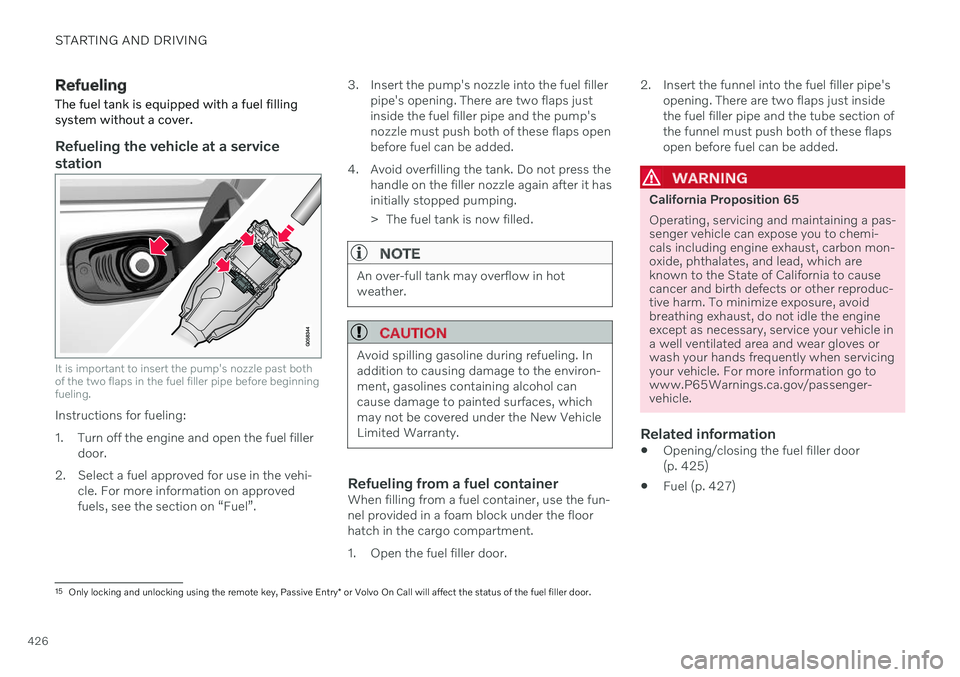
It is important to insert the pump's nozzle past both of the two flaps in the fuel filler pipe before beginningfueling.
Instructions for fueling:
1. Turn off the engine and open the fuel filler door.
2. Select a fuel approved for use in the vehi- cle. For more information on approved fuels, see the section on “Fuel”. 3. Insert the pump's nozzle into the fuel filler
pipe's opening. There are two flaps justinside the fuel filler pipe and the pump'snozzle must push both of these flaps openbefore fuel can be added.
4. Avoid overfilling the tank. Do not press the handle on the filler nozzle again after it hasinitially stopped pumping.
> The fuel tank is now filled.
NOTE
An over-full tank may overflow in hot weather.
CAUTION
Avoid spilling gasoline during refueling. In addition to causing damage to the environ-ment, gasolines containing alcohol cancause damage to painted surfaces, whichmay not be covered under the New VehicleLimited Warranty.
Refueling from a fuel containerWhen filling from a fuel container, use the fun- nel provided in a foam block under the floorhatch in the cargo compartment.
1. Open the fuel filler door. 2. Insert the funnel into the fuel filler pipe's
opening. There are two flaps just inside the fuel filler pipe and the tube section ofthe funnel must push both of these flapsopen before fuel can be added.
WARNING
California Proposition 65 Operating, servicing and maintaining a pas- senger vehicle can expose you to chemi-cals including engine exhaust, carbon mon-oxide, phthalates, and lead, which areknown to the State of California to causecancer and birth defects or other reproduc-tive harm. To minimize exposure, avoidbreathing exhaust, do not idle the engineexcept as necessary, service your vehicle ina well ventilated area and wear gloves orwash your hands frequently when servicingyour vehicle. For more information go towww.P65Warnings.ca.gov/passenger-vehicle.
Related information
Opening/closing the fuel filler door (p. 425)
Fuel (p. 427)
15
Only locking and unlocking using the remote key, Passive Entry * or Volvo On Call will affect the status of the fuel filler door.
Page 439 of 661
STARTING AND DRIVING
* Option/accessory.437
Checking trailer lights
When connecting a trailer, make sure that all of the lights on the trailer are functioningbefore starting to drive.
Trailer turn signals and brake lightsIf one or more of the turn signals or brake lights on the trailer is not working, a symboland message will be displayed in the instru-ment panel. The other lights on the trailermust be checked manually by the driver beforethe vehicle is driven.
Symbol Message
Trailer turn indicator Right
turn indicator malfunction
Trailer turn indicator Left
turn indicator malfunction
Trailer brake light Malfunc-
tion
If any of the trailer's turn signal lights is not working, the turn signal symbol in the instru-ment panel will also flash more quickly thannormal.
Trailer rear fog lightWhen a trailer is connected, the vehicle's rearfog light may not illuminate and rear fog lightfunctionality is instead transferred to the trailer. If this is the case, check to see if thetrailer is equipped with a rear fog light beforeactivating the vehicle's fog lights when drivingwith a trailer to help ensure safe operation.
Checking trailer lights
*
Automatic check
When the trailer has been connected to the vehicle's electrical system, its lights can bechecked by automatically activating them.This function helps the driver check that thetrailer's lights are functioning correctly beforestarting to drive. In order to perform this check, the vehicle must be switched off.
1. When a trailer is connected to the towbar,
the message
Automatic Trailer Lamp
Check will appear in the instrument panel.
2. Acknowledge the message by pressing the O button on the right-side steering
wheel keypad.
> The light check will begin.
3. Get out of the vehicle to perform the check.
> All of the lights on the trailer will beginflashing, and then illuminate separately one at a time.
4. Visually check that all of the trailer's lights are functioning correctly. 5. After a short time, all of the trailer's lights
will start flashing again.
> The light check is completed.
Disabling the automatic check
The automatic light check can be disabled in the center display. 1.Tap
Settings in the Top view.
2. Tap
My CarLights and Lighting.
3. Deselect
Automatic Trailer Lamp
Check.
Manual check
If the automatic check has been disabled, the check can be started manually. 1. Tap
Settings in the Top view.
2. Tap
My CarLights and Lighting.
3. Select
Manual Trailer Lamp Check.
> The light check will begin. Get out of the vehicle to perform the check.
Related information
Driving with a trailer (p. 434)
Page 440 of 661
STARTING AND DRIVING
438
Towing using a towline
This section refers to one vehicle being towed behind another using a towline.
Before towing another vehicle, check applica- ble speed limit regulations.
Preparations and towing
CAUTION
For some transmission variants, it is not possible to shift from P position if theengine is switched off. Contact an author-ized Volvo workshop for assistance towingor call a professional towing service.
CAUTION
Note that the vehicle must always be towed with the wheels rolling forward.
Do not tow a vehicle with automatictransmission at a speed greater than80 km/h (50 mph) or for a distancegreater than 80 km (50 miles).
WARNING
Ignition mode
II must be active – all
airbags are deactivated in ignition mode I.
Always have the remote key in thevehicle when it is towed.
WARNING
The brake and steering servos do not work when the engine is off – it takesabout 5 times more pressure on the brakepedal and steering requires much moreeffort than normal.
1. Turn on the hazard warning flashers.
2. Attach the towline to the towing eyelet.
3. Put the vehicle in ignition mode II – with-
out pressing the brake pedal, turn the start knob clockwise and hold it there for about4 seconds. Release the knob, which willautomatically return to its original position.
4. Move the gear selector to neutral (N) and release the parking brake. If the battery charge level is too low, it may not be possible to release the parkingbrake. Connect an auxiliary battery to thevehicle if the battery is discharged.
> The towing vehicle can now start driv-ing. 5. Keep the towline taut when the towing
vehicle slows down by applying light pres- sure to the brake pedal. This will helpavoid jarring movements.
6. Be prepared to apply the brakes to stop the vehicle.
Jump startingDo not tow the vehicle to start the engine. Usean auxiliary battery if the start battery's chargelevel is so low that the engine cannot bestarted.
CAUTION
Attempting to tow with the engine running could result in damage to the three-waycatalytic converter.
Related information
Attaching and removing the towing eyelet (p. 439)
Hazard warning flashers (p. 159)
Recovery (p. 440)
Jump starting using another battery(p. 431)
Selecting ignition mode (p. 396)
Transmission (p. 406)
Page 450 of 661
AUDIO, MEDIA AND INTERNET
* Option/accessory.
448
Audio, media and Internet
The audio and media system consists of a media player and a radio. A cellular phone canalso be connected through Bluetooth to usehands-free functions or play music in thevehicle. When the vehicle is connected to theInternet, it is also possible to use apps to playmedia.
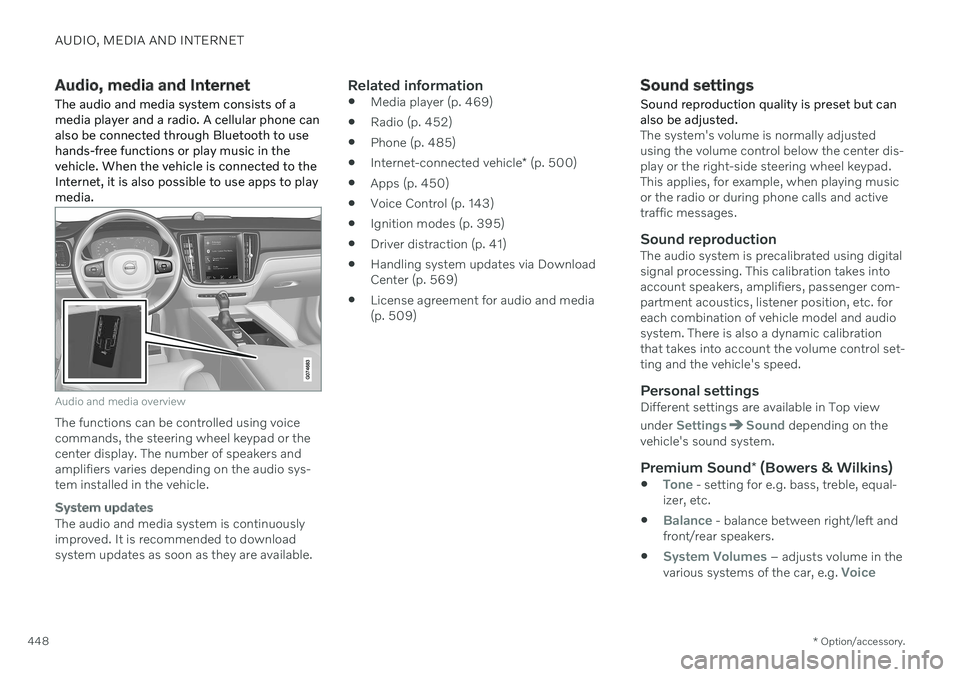
Audio and media overview
The functions can be controlled using voice commands, the steering wheel keypad or thecenter display. The number of speakers andamplifiers varies depending on the audio sys-tem installed in the vehicle.
System updates
The audio and media system is continuously improved. It is recommended to download system updates as soon as they are available.
Related information
Media player (p. 469)
Radio (p. 452)
Phone (p. 485)
Internet-connected vehicle
* (p. 500)
Apps (p. 450)
Voice Control (p. 143)
Ignition modes (p. 395)
Driver distraction (p. 41)
Handling system updates via DownloadCenter (p. 569)
License agreement for audio and media(p. 509)
Sound settings
Sound reproduction quality is preset but can also be adjusted.
The system's volume is normally adjusted using the volume control below the center dis-play or the right-side steering wheel keypad.This applies, for example, when playing musicor the radio or during phone calls and activetraffic messages.
Sound reproductionThe audio system is precalibrated using digitalsignal processing. This calibration takes intoaccount speakers, amplifiers, passenger com-partment acoustics, listener position, etc. foreach combination of vehicle model and audiosystem. There is also a dynamic calibrationthat takes into account the volume control set-ting and the vehicle's speed.
Personal settingsDifferent settings are available in Top view under
SettingsSound depending on the
vehicle's sound system.
Premium Sound * (Bowers & Wilkins)
Tone - setting for e.g. bass, treble, equal-
izer, etc.
Balance - balance between right/left and
front/rear speakers.
System Volumes – adjusts volume in the
various systems of the car, e.g. Voice
Page 454 of 661
||
AUDIO, MEDIA AND INTERNET
* Option/accessory.
452
Update certain apps
1.
Open the Download Center app in App
view.
2. Select
Application updates to open a list
of all available updates.
3. Find the desired app and select
Install.
> The update will begin.
Related information
Apps (p. 450)
Download apps (p. 451)
Deleting apps (p. 452)
Handling system updates via Download Center (p. 569)
Internet-connected vehicle
* (p. 500)
Deleting apps
When the vehicle is connected to the Inter- net, it is possible to uninstall apps.
If the app is being used, it must be closed before it can be uninstalled. 1. Open the
Download Center app in App
view.
2. Select Application updates to open a list
of all installed apps.
3. Find the desired app and select
Uninstallto begin uninstalling the app.
> When the app has been uninstalled, it
will be removed from the list.
Related information
Apps (p. 450)
Download apps (p. 451)
Updating apps (p. 451)
Handling system updates via Download Center (p. 569)
Internet-connected vehicle
* (p. 500)
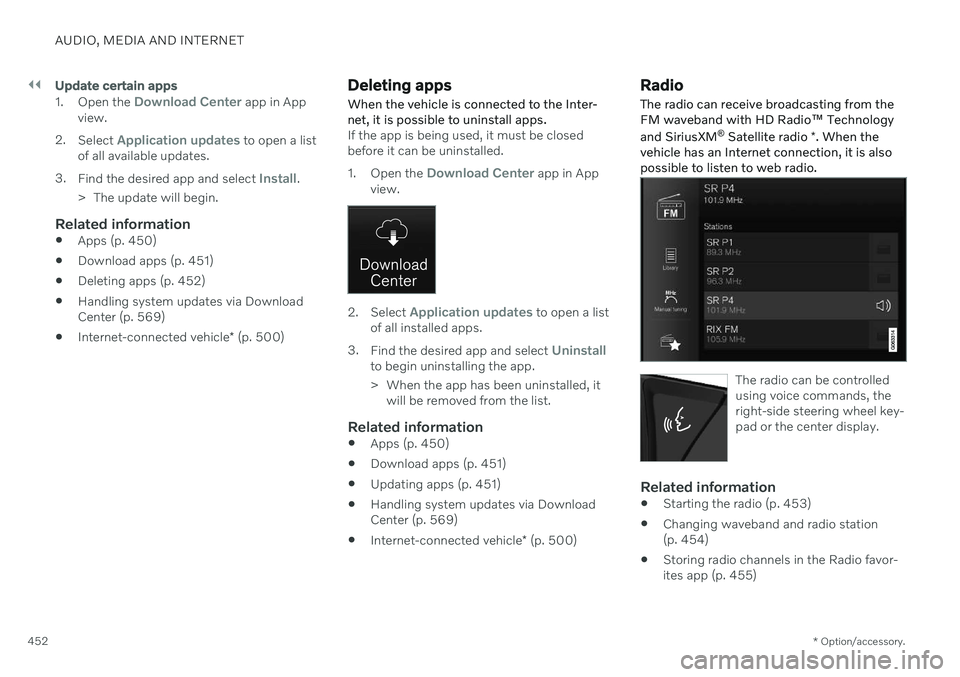
Radio
The radio can receive broadcasting from the FM waveband with HD Radio ™ Technology
and SiriusXM ®
Satellite radio *. When the
vehicle has an Internet connection, it is alsopossible to listen to web radio.
The radio can be controlled using voice commands, theright-side steering wheel key-pad or the center display.
Related information
Starting the radio (p. 453)
Changing waveband and radio station (p. 454)
Storing radio channels in the Radio favor-ites app (p. 455)
Page 456 of 661
AUDIO, MEDIA AND INTERNET
454
Changing waveband and radio station
Instructions for changing wavebands, wave- band lists and radio stations in the selectedlist are provided here.
Changing wavebandsSwipe from App view on the center display and select the desired waveband (e.g. FM) or
open the App menu in the instrument panel with the right-side steering wheel keypad andmake your selection there.
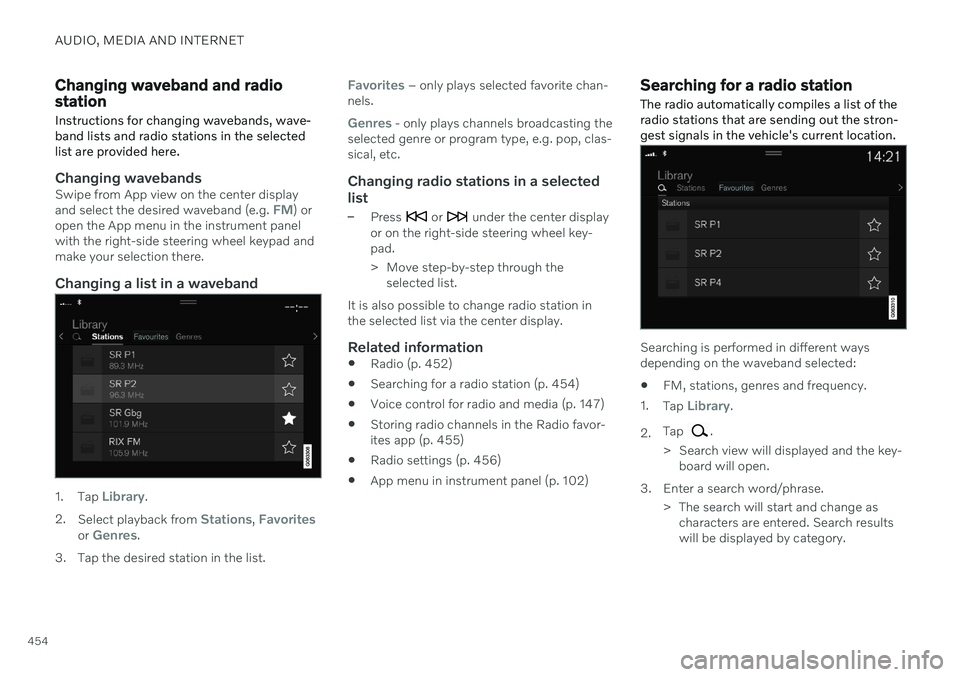
Changing a list in a waveband
1. Tap Library.
2. Select playback from
Stations, Favoritesor Genres.
3. Tap the desired station in the list.
Favorites – only plays selected favorite chan-
nels.
Genres - only plays channels broadcasting the
selected genre or program type, e.g. pop, clas- sical, etc.
Changing radio stations in a selected
list
–Press or under the center display
or on the right-side steering wheel key- pad.
> Move step-by-step through the selected list.
It is also possible to change radio station in the selected list via the center display.
Related information
Radio (p. 452)
Searching for a radio station (p. 454)
Voice control for radio and media (p. 147)
Storing radio channels in the Radio favor-ites app (p. 455)
Radio settings (p. 456)
App menu in instrument panel (p. 102)
Searching for a radio station
The radio automatically compiles a list of the radio stations that are sending out the stron-gest signals in the vehicle's current location.
Searching is performed in different ways depending on the waveband selected:
FM, stations, genres and frequency.
1. Tap
Library.
2. Tap
.
> Search view will displayed and the key- board will open.
3. Enter a search word/phrase. > The search will start and change ascharacters are entered. Search results will be displayed by category.
Page 457 of 661
AUDIO, MEDIA AND INTERNET
455
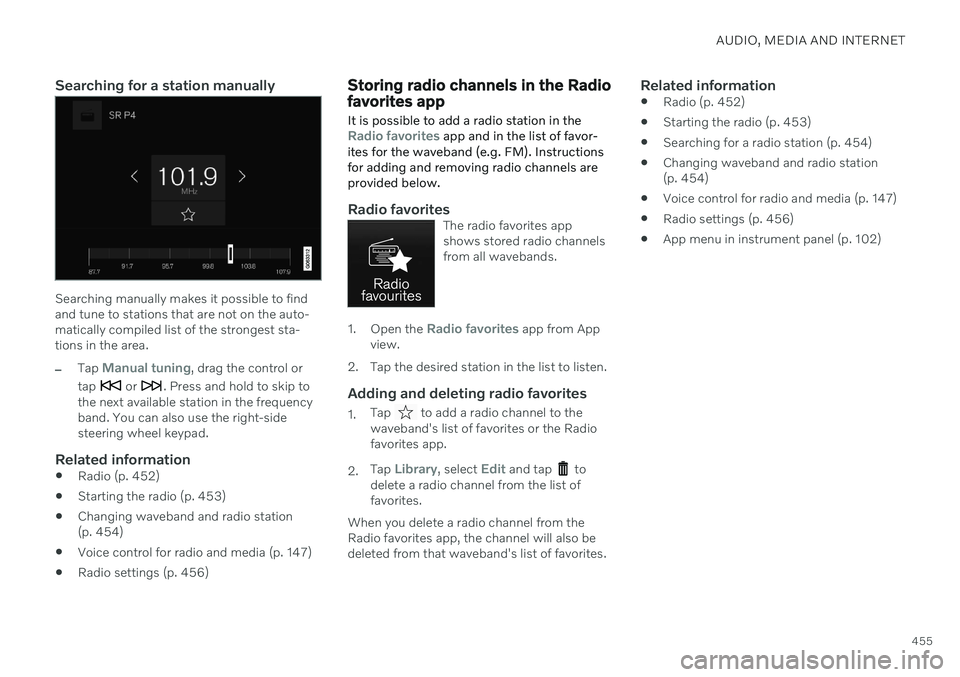
Searching for a station manually
Searching manually makes it possible to find and tune to stations that are not on the auto-matically compiled list of the strongest sta-tions in the area.
–Tap Manual tuning, drag the control or
tap
or . Press and hold to skip to
the next available station in the frequency band. You can also use the right-sidesteering wheel keypad.
Related information
Radio (p. 452)
Starting the radio (p. 453)
Changing waveband and radio station(p. 454)
Voice control for radio and media (p. 147)
Radio settings (p. 456)
Storing radio channels in the Radio favorites app
It is possible to add a radio station in the
Radio favorites app and in the list of favor-
ites for the waveband (e.g. FM). Instructions for adding and removing radio channels areprovided below.
Radio favoritesThe radio favorites app shows stored radio channelsfrom all wavebands.
1. Open the Radio favorites app from App
view.
2. Tap the desired station in the list to listen.
Adding and deleting radio favorites
1. Tap to add a radio channel to the
waveband's list of favorites or the Radio favorites app.
2. Tap
Library, select Edit and tap to
delete a radio channel from the list of favorites.
When you delete a radio channel from theRadio favorites app, the channel will also bedeleted from that waveband's list of favorites.
Related information
Radio (p. 452)
Starting the radio (p. 453)
Searching for a radio station (p. 454)
Changing waveband and radio station(p. 454)
Voice control for radio and media (p. 147)
Radio settings (p. 456)
App menu in instrument panel (p. 102)
Page 458 of 661
AUDIO, MEDIA AND INTERNET
* Option/accessory.
456
Radio settings
There are a number of different radio func- tions that can be activated and deactivated.
Canceling a traffic messageA current broadcast (e.g. a traffic message) can be temporarily interrupted by pressing
in the right-side steering wheel keypad or
tapping Cancel in the center display.
Activating and deactivating radio
functions
Pull down Top view and select SettingsMedia and the desired waveband to see avail-
able functions.
AM/FM Radio2
HD Radio FM: HD Radio
™ Technology:
makes it possible to achieve a sound qual- ity comparable with a CD.
Show Broadcast Information: shows
information on program content, artists, etc.
Freeze Program Name: select to stop
the program service name from scrolling continuously. Instead it freezes after 20seconds.
SiriusXM ®
Satellite radio *
Pull down Top view and select Settings
MediaSiriusXM to show a list of available
options.
Related information
Radio (p. 452)
Settings for SiriusXM ®
Satellite radio *
(p. 463)
Symbols in the center display status bar (p. 122)
RBDS
RBDS radio
RBDS (Radio Broadcast Data System) ena- bles certain functionality 3
, such as:
Searches for program types or new broad- casts
Text information about currently broadcastprograms
Related information
Radio (p. 452)
Radio settings (p. 456)
2
AM radio availability varies depending on model and/or market.3 Certain stations only.
Page 460 of 661
||
AUDIO, MEDIA AND INTERNET
458
How HD Radio ™ Technology
broadcasting works
HD Radio works similarly to conventional radio and broadcasts of this type are availablein many areas of the United States. However,there are a few key differences:
Instead of transmitting one analog signal,stations send out a bundled signal – bothanalog and digital.
An HD Radio receiver can receive bothdigital and analog broadcasts. Dependingon the terrain and location of the vehicle(which will influence the signal strength),the receiver will determine which signal toreceive.
Related information
Radio (p. 452)
Activating and deactivating the HDRadio
™ (p. 458)
HD Radio
™ sub-channels (p. 459)
HD Radio
™ limitations (p. 459)
Changing waveband and radio station(p. 454)
Searching for a radio station (p. 454)
Activating and deactivating the HD Radio
™
HD Radio is deactivated when the car leaves the factory.
When listening to an HD Radio station and driving through areas with weak HD signals(fringe areas), you may experience that theradio repeatedly switches between analog/digital and digital/analog reception. If this hap-pens, it may be desirable to switch HD off. Carry out the following to activate or deacti- vate HD Radio:
1. Drag down the top view and tap on
Settings.
2. Press
Media and FM Radio.
3. Press
HD Radio FM to activate/deacti-
vate the function.
If HD radio is deactivated, the radio will be unable to receive digital broadcasts but it willcontinue to function as a conventional radio(analog FM receiver). Please note that whenHD is switched off, it will not be possible totune in to sub-channels. Activating or deactivating HD Radio only affects the currently selected waveband.
Related information
HD Radio
™ (p. 457)
HD Radio
™
sub-channels (p. 459)
HD Radio
™ limitations (p. 459)
Opening contextual setting in the centerdisplay (p. 131)
Page 461 of 661
AUDIO, MEDIA AND INTERNET
}}
459
HD Radio™ sub-channels
In many cases, a main HD Radio station (FM wavebands only) will also have sub-channelsoffering additional types of programming ormusic.
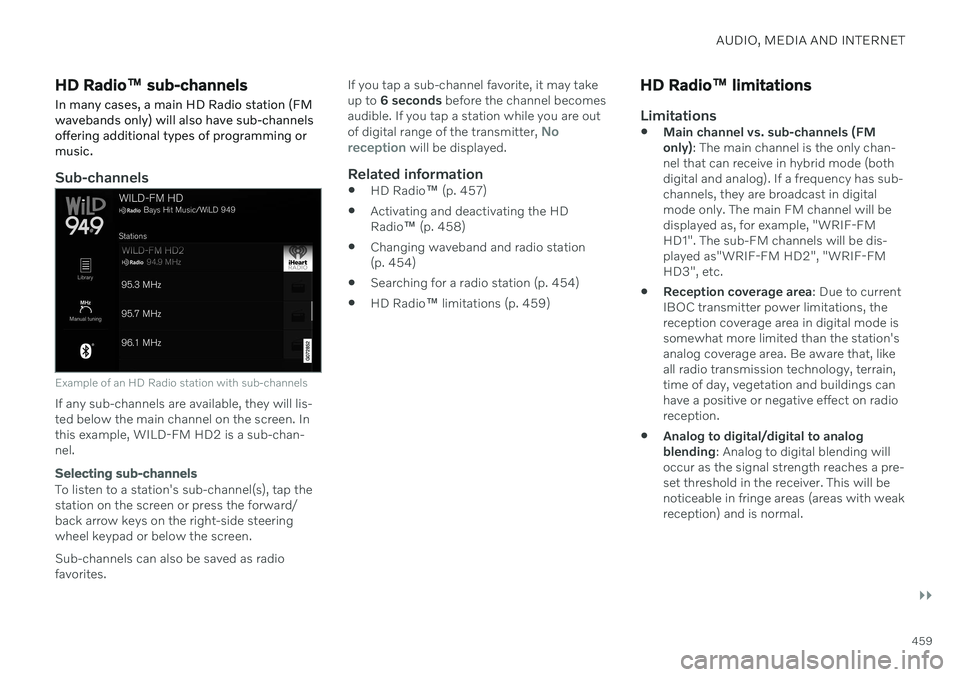
Sub-channels
Example of an HD Radio station with sub-channels
If any sub-channels are available, they will lis- ted below the main channel on the screen. Inthis example, WILD-FM HD2 is a sub-chan-nel.
Selecting sub-channels
To listen to a station's sub-channel(s), tap the station on the screen or press the forward/back arrow keys on the right-side steering wheel keypad or below the screen. Sub-channels can also be saved as radio favorites. If you tap a sub-channel favorite, it may takeup to
6 seconds before the channel becomes
audible. If you tap a station while you are out of digital range of the transmitter,
No
reception will be displayed.
Related information
HD Radio
™ (p. 457)
Activating and deactivating the HD Radio
™ (p. 458)
Changing waveband and radio station(p. 454)
Searching for a radio station (p. 454)
HD Radio
™
limitations (p. 459)
HD Radio ™ limitations
Limitations
Main channel vs. sub-channels (FM only)
: The main channel is the only chan-
nel that can receive in hybrid mode (bothdigital and analog). If a frequency has sub-channels, they are broadcast in digitalmode only. The main FM channel will bedisplayed as, for example, "WRIF-FMHD1". The sub-FM channels will be dis-played as"WRIF-FM HD2", "WRIF-FMHD3", etc.
Reception coverage area
: Due to current
IBOC transmitter power limitations, thereception coverage area in digital mode issomewhat more limited than the station'sanalog coverage area. Be aware that, likeall radio transmission technology, terrain,time of day, vegetation and buildings canhave a positive or negative effect on radioreception.
Analog to digital/digital to analogblending
: Analog to digital blending will
occur as the signal strength reaches a pre-set threshold in the receiver. This will benoticeable in fringe areas (areas with weakreception) and is normal.