stop start VOLVO V60 2021 Owner's Guide
[x] Cancel search | Manufacturer: VOLVO, Model Year: 2021, Model line: V60, Model: VOLVO V60 2021Pages: 661, PDF Size: 12.68 MB
Page 428 of 661
STARTING AND DRIVING
426
Refueling
The fuel tank is equipped with a fuel filling system without a cover.
Refueling the vehicle at a service station
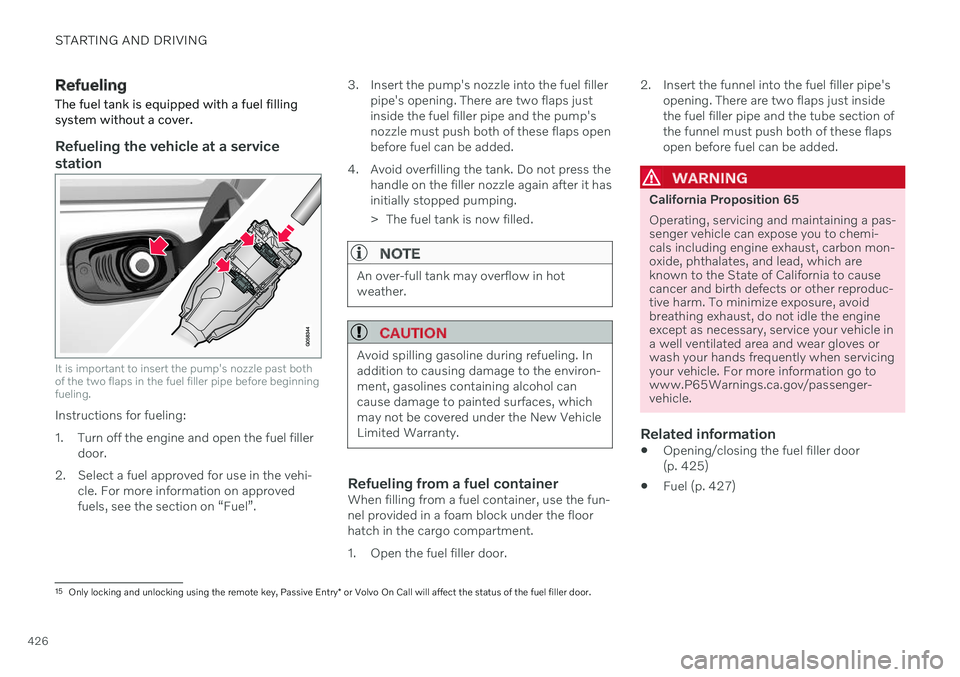
It is important to insert the pump's nozzle past both of the two flaps in the fuel filler pipe before beginningfueling.
Instructions for fueling:
1. Turn off the engine and open the fuel filler door.
2. Select a fuel approved for use in the vehi- cle. For more information on approved fuels, see the section on “Fuel”. 3. Insert the pump's nozzle into the fuel filler
pipe's opening. There are two flaps justinside the fuel filler pipe and the pump'snozzle must push both of these flaps openbefore fuel can be added.
4. Avoid overfilling the tank. Do not press the handle on the filler nozzle again after it hasinitially stopped pumping.
> The fuel tank is now filled.
NOTE
An over-full tank may overflow in hot weather.
CAUTION
Avoid spilling gasoline during refueling. In addition to causing damage to the environ-ment, gasolines containing alcohol cancause damage to painted surfaces, whichmay not be covered under the New VehicleLimited Warranty.
Refueling from a fuel containerWhen filling from a fuel container, use the fun- nel provided in a foam block under the floorhatch in the cargo compartment.
1. Open the fuel filler door. 2. Insert the funnel into the fuel filler pipe's
opening. There are two flaps just inside the fuel filler pipe and the tube section ofthe funnel must push both of these flapsopen before fuel can be added.
WARNING
California Proposition 65 Operating, servicing and maintaining a pas- senger vehicle can expose you to chemi-cals including engine exhaust, carbon mon-oxide, phthalates, and lead, which areknown to the State of California to causecancer and birth defects or other reproduc-tive harm. To minimize exposure, avoidbreathing exhaust, do not idle the engineexcept as necessary, service your vehicle ina well ventilated area and wear gloves orwash your hands frequently when servicingyour vehicle. For more information go towww.P65Warnings.ca.gov/passenger-vehicle.
Related information
Opening/closing the fuel filler door (p. 425)
Fuel (p. 427)
15
Only locking and unlocking using the remote key, Passive Entry * or Volvo On Call will affect the status of the fuel filler door.
Page 432 of 661
||
STARTING AND DRIVING
430heating. This includes: altering fuel injec- tion settings or components, alteringemission system components or locationor removing components, and/or repeateduse of leaded fuel.
NOTE
Unleaded fuel is required for vehicles with three-way catalytic converters.
Heated oxygen sensorsThe heated oxygen sensors monitor the oxy- gen content of the exhaust gases. Readingsare fed into a control module that continuouslymonitors engine functions and controls fuelinjection. The ratio of fuel to air into the engineis continuously adjusted for efficient combus-tion to help reduce harmful emissions.
Related information
Octane rating (p. 428)
Fuel (p. 427)
Overheating of engine and transmission
In certain driving conditions, such as driving in mountainous areas or hot weather, there isa risk of the engine or transmission overheat-ing, especially when carrying heavy loads.
Engine power may be temporarily limited.
Remove any auxiliary lights mounted in front of the grille when driving in hotweather.
If the temperature in the engine's coolingsystem becomes too high, a warning sym-bol will appear in the instrument panel along with the message
Engine
temperature High temperature Stop
safely. Pull over to a safe location and let
the engine idle for a few minutes to cool down.
If the message
Engine temperature
High temperature Turn off engine orEngine coolant Level low, turn off
engine is displayed, stop the vehicle and
turn off the engine.
If the transmission begins to overheat, an alternative gear shifting program will beselected. An integrated protective functionwill also be activated, the warning symbolwill illuminate and the message
Transmission warm Reduce speed to
lower temperature or Transmission hot
Stop safely, wait for cooling will be dis- played in the instrument panel. Follow the recommendations given by reducingspeed or stopping the vehicle safely andletting the engine idle for a few minutes tolet the transmission cool.
If the vehicle begins to overheat, the airconditioning may be temporarily switchedoff.
After a prolonged period of driving indemanding conditions, do not turn off theengine immediately after stopping.
NOTE
It is normal for the engine's cooling fan to operate for a short time after the engine isswitched off.
Symbols in the instrument panel
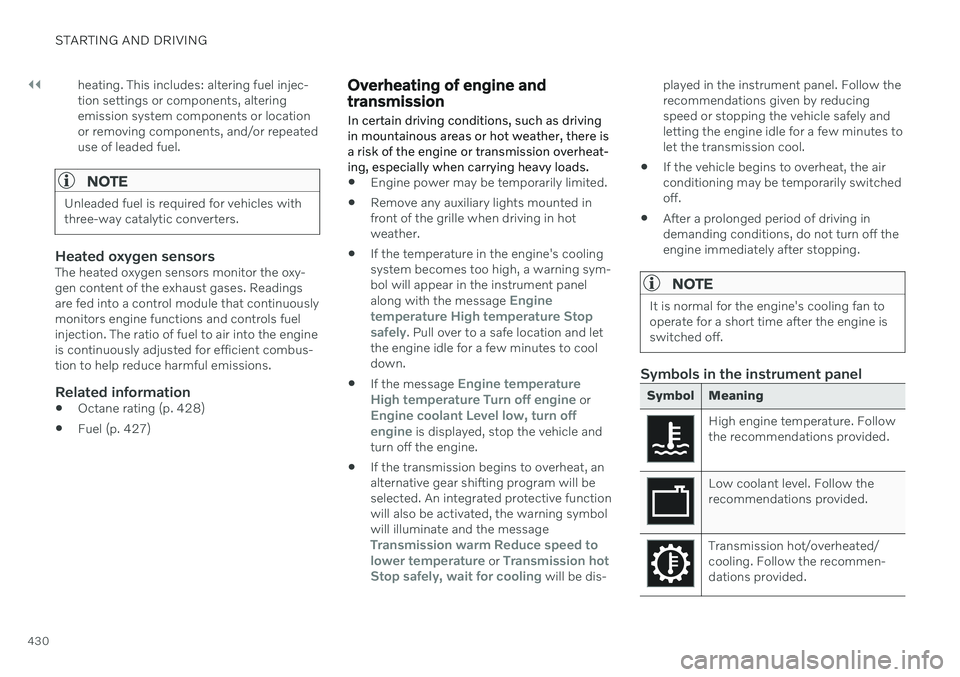
Symbol Meaning
High engine temperature. Follow the recommendations provided.
Low coolant level. Follow the recommendations provided.
Transmission hot/overheated/ cooling. Follow the recommen-dations provided.
Page 435 of 661
STARTING AND DRIVING
433
WARNING
Batteries generate hydrogen gas, which is flammable and explosive.
Do not connect the jumper cable toany part of the fuel system or to anymoving parts. Avoid touching hotmanifolds.
Battery fluid contains sulfuric acid. Donot allow battery fluid to contact eyes,skin, fabrics or painted surfaces.
If contact occurs, flush the affectedarea immediately with water. Obtainmedical help immediately if eyes areaffected.
Never expose the battery to open flameor electric spark. Do not smoke nearthe battery. Failure to follow theinstructions for jump starting can leadto injury.
NOTE
If the starter battery has been discharged to the extent that the vehicle does not havenormal electrical functions and the enginemust then be jump-started with an externalbattery or a battery charger, the Start/Stopfunction may remain activated. If the Start/Stop function shortly thereafter auto-stopsthe engine, there is a huge risk that auto-start of the engine will fail due to insuffi-cient battery capacity since the battery hadnot had time to recharge. If the vehicle has been jump-started or if there has not been enough time for thebattery to be charged with a batterycharger, the Start/Stop function should betemporarily deactivated until the batteryhas been recharged by the vehicle. At anambient temperature of about +15°C(about 60°F), the battery must be chargedby the vehicle for at least one hour. Atlower ambient temperatures, the chargingtime can increase to 3-4 hours. It is advisa-ble to charge the battery with an externalbattery charger.
Related information
Starting the vehicle (p. 392)
Ignition modes (p. 395)
Adjusting the steering wheel (p. 195)
Selecting ignition mode (p. 396)
Support battery (p. 586)
Page 436 of 661
STARTING AND DRIVING
434
Driving with a trailer
There are a number of things to consider when towing a trailer, such as the towbar, thetrailer and how the load is distributed in thetrailer.
Load-carrying capacity is determined by the vehicle's curb weight. The total weight of allpassengers and any installed accessories, e.g.towbar, reduces the vehicle's load-carryingcapacity by the corresponding amount.
Towbars used on the vehicle must beapproved for the applicable use.
Distribute the load on the trailer so thatthe weight on the towbar complies withthe specified maximum towball weight.The tongue weight is calculated as part ofthe vehicle's payload.
Increase the tire pressure to the recom-mended pressure for a full load.
The engine is subjected to more load thanusual when towing a trailer.
Towing a trailer affects the vehicle's han-dling, durability and driving economy.
Do not drive with a heavy trailer when thevehicle is very new. Wait until the mileagehas reached at least 1000 km (620 miles).
On long and steep downgrades, the vehi-cle's brakes are subjected to much moreload than usual. When manually shifting, downshift and adapt speed accordingly.
Follow applicable regulations regarding permitted speed and weight.
Drive slowly when towing a trailer up along and steep incline.
The maximum trailer weights given onlyapply to altitudes up to 1000 meters(3280 feet) above sea level. At higher alti-tudes, engine power (and thus the vehi-cle's climbing ability) is decreased due tothe reduced air density, and the maximumtrailer weight must therefore be reduced.The weight of the vehicle and trailer mustbe decreased by 10% for each additional1000 m (3280 feet) or part thereof.
Avoid driving with a trailer on inclines ofmore than 12%.
Avoid overloading and other incorrect use.
The trailer's brakes must be balanced withthe vehicle's brakes to help ensure safestops (follow applicable local regulations).
CAUTION
Bumper-attached trailer hitches must not be used on Volvos, nor shouldsafety chains be attached to thebumper.
Trailer hitches attaching to the vehiclerear axle must not be used.
Never connect a trailer's hydraulicbrake system directly to the vehiclebrake system, nor a trailer's lightingsystem directly to the vehicle lightingsystem. Consult your nearest author-ized Volvo retailer for correct installa-tion.
When towing a trailer, the trailer'ssafety chains or wire must be correctlyfastened to the attachment points pro-vided in the trailer hitch on the vehicle.The safety chain or wire must never befastened to or wound around the tow-ing ball.
NOTE
The optional detachable trailer hitch may not be available in all markets or on allmodels. Consult your Volvo retailer.
Page 438 of 661
STARTING AND DRIVING
* Option/accessory.
436
Trailer Stability Assist *
Trailer Stability Assist (TSA 18
) is part of the
ESC 19
stability system and is a function
designed to help stabilize a vehicle that is towing a trailer when the vehicle and trailerhave begun to sway. The function is addedwhen installing a towbar. Contact a Volvoretailer for more information.
Reasons for swayingA vehicle towing a trailer may begin to sway for various reasons. Normally this only occursat high speeds. However, if the trailer is over-loaded or unevenly distributed, e.g. too farback, there is a risk of swaying even at lowspeeds. Swaying may be caused by factors such as:
The vehicle and trailer are hit by a sudden, strong crosswind.
The vehicle and trailer are traveling on anuneven road or over a bump.
Sudden movements of the steering wheel.
Once swaying has begun, it can be difficult orimpossible to stop it. This makes the vehicleand trailer difficult to control and there is a riskof swerving into oncoming traffic or driving offthe road.
Trailer Stability Assist functionTrailer Stability Assist continuously monitorsthe vehicle's movements, particularly lateralmovements. If swaying is detected, the brakesare applied individually on the front wheels,which has a stabilizing effect on the vehicleand trailer. This is often enough to enable thedriver to regain control of the vehicle. If the Trailer Stability Assist function's first attempt is not adequate to stop the swayingmotion, the brakes are applied on all wheelsand engine power is temporarily reduced. Asthe swaying motion begins to decrease andthe vehicle and trailer have once againbecome stable, TSA stops regulating thebrakes/engine power and the driver regainscontrol of the vehicle.
NOTE
Trailer Stability Assist is deactivated if the driver activates ESC Sport Mode in the
center display's menu system.
Trailer Stability Assist may not intervene if the driver tries to compensate for the swayingmotion by moving the steering wheel rapidly,because the system will then not be able todetermine if it is the trailer or the driver caus-ing the swaying. When Trailer Stability Assistis activated, the ESC symbolis displayed in the instrumentpanel.
NOTE
A vehicle software update is required when a towbar is retrofitted. Contact a Volvoretailer.
Related information
Driving with a trailer (p. 434)
Electronic Stability Control (p. 271)
18
Trailer Stability Assist
19 Electronic Stability Control
Page 440 of 661
STARTING AND DRIVING
438
Towing using a towline
This section refers to one vehicle being towed behind another using a towline.
Before towing another vehicle, check applica- ble speed limit regulations.
Preparations and towing
CAUTION
For some transmission variants, it is not possible to shift from P position if theengine is switched off. Contact an author-ized Volvo workshop for assistance towingor call a professional towing service.
CAUTION
Note that the vehicle must always be towed with the wheels rolling forward.
Do not tow a vehicle with automatictransmission at a speed greater than80 km/h (50 mph) or for a distancegreater than 80 km (50 miles).
WARNING
Ignition mode
II must be active – all
airbags are deactivated in ignition mode I.
Always have the remote key in thevehicle when it is towed.
WARNING
The brake and steering servos do not work when the engine is off – it takesabout 5 times more pressure on the brakepedal and steering requires much moreeffort than normal.
1. Turn on the hazard warning flashers.
2. Attach the towline to the towing eyelet.
3. Put the vehicle in ignition mode II – with-
out pressing the brake pedal, turn the start knob clockwise and hold it there for about4 seconds. Release the knob, which willautomatically return to its original position.
4. Move the gear selector to neutral (N) and release the parking brake. If the battery charge level is too low, it may not be possible to release the parkingbrake. Connect an auxiliary battery to thevehicle if the battery is discharged.
> The towing vehicle can now start driv-ing. 5. Keep the towline taut when the towing
vehicle slows down by applying light pres- sure to the brake pedal. This will helpavoid jarring movements.
6. Be prepared to apply the brakes to stop the vehicle.
Jump startingDo not tow the vehicle to start the engine. Usean auxiliary battery if the start battery's chargelevel is so low that the engine cannot bestarted.
CAUTION
Attempting to tow with the engine running could result in damage to the three-waycatalytic converter.
Related information
Attaching and removing the towing eyelet (p. 439)
Hazard warning flashers (p. 159)
Recovery (p. 440)
Jump starting using another battery(p. 431)
Selecting ignition mode (p. 396)
Transmission (p. 406)
Page 444 of 661
STARTING AND DRIVING
* Option/accessory.
442
Programming HomeLink ®
*22
Follow these instructions to program HomeLink ®
, reset all programming, or pro-
gram individual buttons.
NOTE
In some vehicles, the ignition must be on or in the "accessory position" before HomeLink ®
can be programmed or used. It
can be a good idea to put new batteries in the remote control being replaced by HomeLink ®
for faster programming and
better radio signal transmission. TheHomeLink ®
buttons should be reset before
programming.
WARNING
While HomeLink ®
is being programmed,
the garage door or gate being programmed may be activated. Make sure that no one isnear the door or gate during programming.When programming a garage door opener,it is advised to park outside of the garage. 1. Point the remote control at the
HomeLink ®
button to be programmed and
hold it about 2-8 cm (1-3 inches) from the button. Do not obstruct the HomeLink ®
indicator light. Note: Some remote controls are more
effective at programming HomeLink ®
from
a distance of about 15-20 cm (6-12 inches). Keep this in mind if you experi-ence any programming difficulties.
2. Press and hold both the remote control button and the HomeLink ®
button to be
programmed. 3. Do not release the buttons until the indica-
tor light has stopped flashing slowly(about once a second) and either flashesquickly (about 10 times a second) orglows steadily. >If the indicator light glows steadily: Indication that programming is com-plete. Press the programmed buttontwice to activate. If the indicator light flashes quickly: The device being programmed with HomeLink ®
may have a security func-
tion that requires an extra step. Try pressing the programmed button twiceto see whether the programmingworks. Otherwise, continue with thefollowing steps.
22 Certain markets only.
Page 446 of 661

||
STARTING AND DRIVING
* Option/accessory.
444
WARNING
If you use HomeLink ®
to open a garage
door or gate, be sure no one is near the gate or door while it is in motion.
Do not use HomeLink ®
with any
garage door opener that lacks safetystop and reverse features as requiredby U.S. federal safety standards (thisincludes any garage door opener modelmanufactured before April 1, 1982). Agarage door that cannot detect anobject - signaling the door to stop andreverse - does not meet current U.S.federal safety standards. For moreinformation, contact HomeLink at:homelink.com.
Related information
HomeLink ®
* (p. 441)
Programming HomeLink ®
* (p. 442)
Type approval for HomeLink ®
* (p. 444)
Type approval for HomeLink ®
*25
FCC (USA) and IC (Canada)This device complies with FCC rules part 15 and Industry Canada RSS-210. Operation issubject to the following two conditions: (1)This device may not cause harmful interfer-ence, and (2) This device must accept anyinterference that may be received includinginterference that may cause undesired opera-tion.
WARNING
The transmitter has been tested and com- plies with FCC and IC rules. Changes ormodifications not expressly approved bythe party responsible for compliance couldvoid the user's authority to operate the device.
26
Type approval for EUGentex Corporation hereby declares that HomeLink
®
Model UAHL5 complies with the
Radio equipment directive 2014/53/EU. Wavelengths within which the radio equip- ment operates:
433.05MHz-434.79MHz <10mW E.R.P.
868.00MHz-868.60MHz <25mW E.R.P.
868.70MHz-868.20MHz <25mW E.R.P.
869.40MHz-869.65MHz <25mW E.R.P.
869.70MHz-870.00MHz <25mW E.R.P.
Certificate holder address: Gentex Corpora-tion, 600 North Centennial Street, Zeeland MI49464, USA For further details, search for support informa- tion on type approval at volvocars.com
Related information
HomeLink ®
* (p. 441)
24
Certain markets only.
25 Certain markets only.
26 The term "IC:" before the certification/registration number only signifies that Industry Canada technical specifications were met.
Page 447 of 661
STARTING AND DRIVING
}}
* Option/accessory.445
Compass*
An integrated compass 27
in the upper right
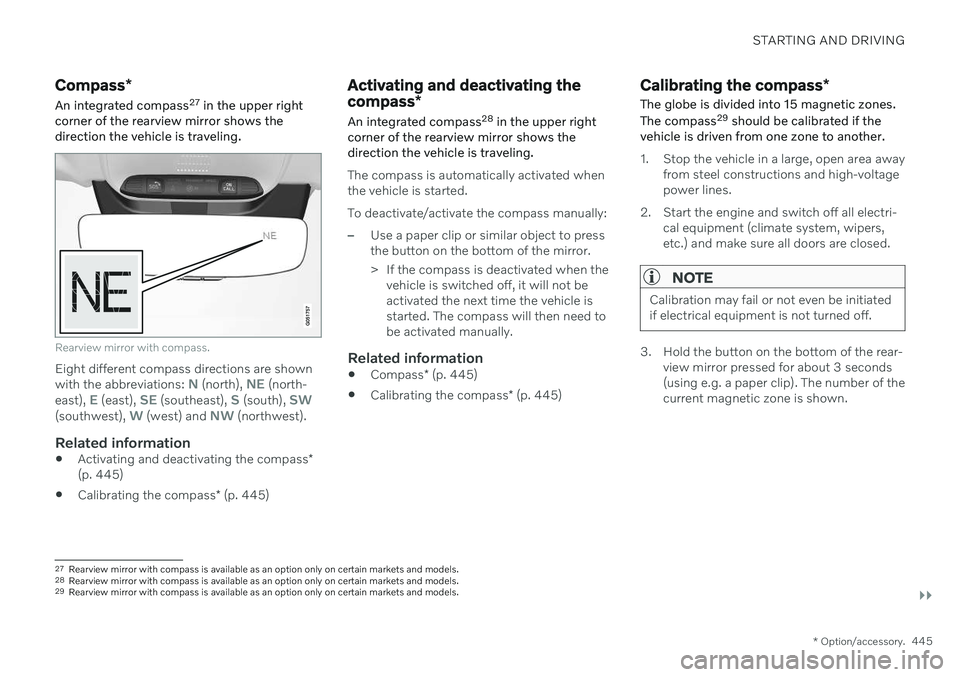
corner of the rearview mirror shows the direction the vehicle is traveling.
Rearview mirror with compass.
Eight different compass directions are shown with the abbreviations: N (north), NE (north-
east), E (east), SE (southeast), S (south), SW(southwest), W (west) and NW (northwest).
Related information
Activating and deactivating the compass
*
(p. 445)
Calibrating the compass
* (p. 445)
Activating and deactivating the compass *
An integrated compass 28
in the upper right
corner of the rearview mirror shows the direction the vehicle is traveling.
The compass is automatically activated when the vehicle is started. To deactivate/activate the compass manually:
–Use a paper clip or similar object to press the button on the bottom of the mirror.
> If the compass is deactivated when the vehicle is switched off, it will not be activated the next time the vehicle isstarted. The compass will then need tobe activated manually.
Related information
Compass
* (p. 445)
Calibrating the compass
* (p. 445)
Calibrating the compass *
The globe is divided into 15 magnetic zones. The compass 29
should be calibrated if the
vehicle is driven from one zone to another.
1. Stop the vehicle in a large, open area away from steel constructions and high-voltage power lines.
2. Start the engine and switch off all electri- cal equipment (climate system, wipers,etc.) and make sure all doors are closed.
NOTE
Calibration may fail or not even be initiated if electrical equipment is not turned off.
3. Hold the button on the bottom of the rear-view mirror pressed for about 3 seconds (using e.g. a paper clip). The number of thecurrent magnetic zone is shown.
27Rearview mirror with compass is available as an option only on certain markets and models.
28 Rearview mirror with compass is available as an option only on certain markets and models.
29 Rearview mirror with compass is available as an option only on certain markets and models.
Page 532 of 661
||
WHEELS AND TIRES
530
General information about the tire pressure monitoring system
In the following description, the tire monitor- ing system is generally referred to as TPMS. Each tire, including the spare (if provided)7
should be checked monthly when cold and inflated to the inflation pressure recom-mended by the vehicle manufacturer on thevehicle placard or tire inflation pressure label.(If your vehicle has tires of a different size thanthe size indicated on the vehicle placard or tireinflation pressure label, you should determinethe proper tire inflation pressure for thosetires.) As an added safety feature, your vehicle has been equipped with a tire pressure monitoringsystem (TPMS) that illuminates a low tirepressure telltale when one or more of yourtires is significantly under-inflated. Accord-ingly, when the low tire pressure telltale illumi-nates, you should stop and check your tires assoon as possible, and inflate them to theproper pressure. Driving on a significantly under-inflated tire causes the tire to overheat and can lead to tirefailure. Under-inflation also reduces fuel effi-ciency and tire tread life, and may affect thevehicle's handling and stopping ability. Please note that the TPMS is not a substitute forproper tire maintenance, and it is the driver'sresponsibility to maintain correct tire pressure,even if under-inflation has not reached thelevel to trigger illumination of the TPMS lowtire pressure telltale. Your vehicle has also been equipped with a TPMS malfunction indicator to indicate whenthe system is not operating properly. TheTPMS malfunction indicator is combined withthe low tire pressure telltale. When the systemdetects a malfunction, the telltale will flash forapproximately one minute and then remaincontinuously illuminated. This sequence willcontinue upon subsequent vehicle start-ups aslong as the malfunction exists. When the mal-function indicator is illuminated, the systemmay not be able to detect or signal low tirepressure as intended. TPMS malfunctions may occur for a variety of reasons, including the installation of replace-ment or alternate tires or wheels on the vehi-cle that prevent the TPMS from functioningproperly. Always check the TPMS malfunction telltale after replacing one or more tires or wheels onyour vehicle to ensure that the replacement oralternate tires and wheels allow the TPMS tocontinue to function properly.
To keep in mind
Always save the new inflation pressure inthe system after changing a tire or adjust-ing the inflation pressure.
If you switch to a tire of another size thanthe factory-mounted tires, the systemmust be reset by storing a new inflationpressure for these tires to avoid falsewarnings.
If a spare wheel 8
is used, it is possible that
the tire pressure monitoring system willnot work correctly due to the differencesbetween the wheels.
The system does not replace the need forregular tire inspection and maintenance.
It is not possible to deactivate the tirepressure monitoring system.
WARNING
Incorrect inflation pressure could lead to tire failure, which could cause thedriver to lose control of the vehicle.
The system cannot predict sudden tiredamage.
6
Tire Pressure Monitoring System (TPMS)
7 Not available on all models.
8 Not available on all models.