stop start VOLVO V60 CROSS COUNTRY 2016 Owner´s Manual
[x] Cancel search | Manufacturer: VOLVO, Model Year: 2016, Model line: V60 CROSS COUNTRY, Model: VOLVO V60 CROSS COUNTRY 2016Pages: 402, PDF Size: 10.32 MB
Page 105 of 402
03 Instruments and controls
03
}}
* Option/accessory, for more information, see Introduction.103
Interior rearview mirror
The interior rearview mirror has an auto-dim function that helps reduce glare from follow-ing vehicle's headlights.
Auto-dim functionThe interior rearview mirror’s auto-dim func-tion is controlled by two sensors: one point-ing forward (located on the forward-facingside of the mirror, which monitors the amountof ambient light) and one pointing rearward(located on the side of the mirror facing thedriver at the upper edge, which senses thestrength of following vehicles' headlights), and work together to help eliminate glare. 21
NOTE
Obstructing the forward sensor with e.g., parking stickers, transponders, etc., or therear sensor by loading the cargo area orthe rear seat in such a way that light isprevented from reaching the sensor willreduce the auto-dim function in the interiorrearview mirror and optional auto-dimfunction in the door mirrors.
Related information
•
Power door mirrors (p. 100)
Digital compass*
The rear-view mirror has an integrated display that shows the compass direction in whichthe vehicle is traveling.
Operation
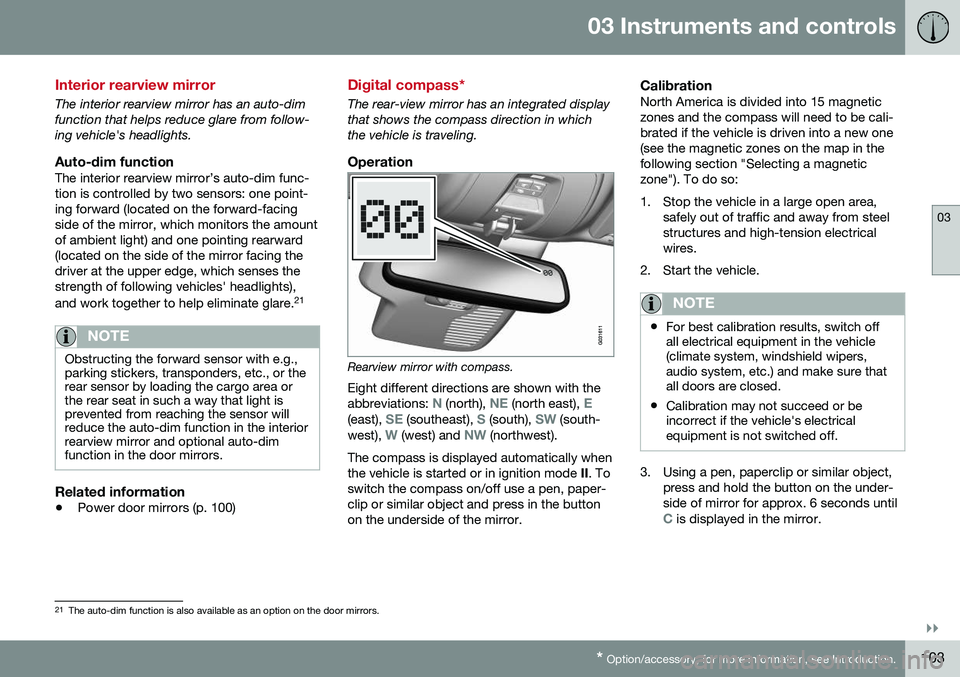
Rearview mirror with compass.
Eight different directions are shown with the abbreviations:
N (north), NE (north east), E(east), SE (southeast), S (south), SW (south-
west), W (west) and NW (northwest).
The compass is displayed automatically when the vehicle is started or in ignition mode II. To
switch the compass on/off use a pen, paper-clip or similar object and press in the buttonon the underside of the mirror.
CalibrationNorth America is divided into 15 magneticzones and the compass will need to be cali-brated if the vehicle is driven into a new one(see the magnetic zones on the map in thefollowing section "Selecting a magneticzone"). To do so:
1. Stop the vehicle in a large open area, safely out of traffic and away from steel structures and high-tension electricalwires.
2. Start the vehicle.
NOTE
• For best calibration results, switch off all electrical equipment in the vehicle(climate system, windshield wipers,audio system, etc.) and make sure thatall doors are closed.
• Calibration may not succeed or beincorrect if the vehicle's electricalequipment is not switched off.
3. Using a pen, paperclip or similar object,
press and hold the button on the under- side of mirror for approx. 6 seconds until
C is displayed in the mirror.
21The auto-dim function is also available as an option on the door mirrors.
Page 114 of 402
03 Instruments and controls
03
112
Information display – messages
The controls on the left steering wheel lever are used to scroll among messages displayedin the instrument panel and to confirm selec-tions. When information, indicator or warning sym- bols illuminate, an explanatory message willbe displayed in the instrument panel. When a warning (p. 72), information (p. 70) or indicator symbol (p. 70) comes on, a corres-ponding message appears in the informationpanel. An error message is stored in a mem-ory list until the fault is rectified. Press OK to acknowledge and scroll among
the messages.
NOTE
If a warning message appears while you are using the trip computer, the messagemust be read and confirmed by pressingOK before the previous activity can be
resumed.
MessageDescription
Stop engineAStop and switch off the engine as soon as possi-ble. Serious risk of dam-age. Contact an author-ized Volvo workshop.
Stop safelyAStop and switch off the engine. Serious risk ofdamage. Contact anauthorized Volvo work-shop.
Service urgentAHave the vehicle checked by an authorized Volvoworkshop immediately.
Service requiredAHave the vehicle checked by an authorized Volvoworkshop as soon as pos-sible.
See man- ualARead the owner's manual.
Book time for mainte-nanceTime to book service at an authorized Volvo retailer.
MessageDescription
Time for regularmainte-nanceTime for regular service at an authorized Volvo work-shop. The timing is deter-mined by the number ofmiles driven, number ofmonths since the lastservice, engine runningtime.
Mainte- nance over-dueIf the service intervals are not followed, the warrantydoes not cover any dam-aged parts. Contact anauthorized Volvo work-shop for service.
Temporarily OFFAA function has been tem- porarily switched off andis reset automatically whiledriving or after startingagain.
Low battery Power savemodeThe audio system is switched off to save cur-rent. Charge the battery.
A There will also be a system-specific part of this message
Page 142 of 402
||
05 Loading and storage
05
140
•The vehicle's wind resistance and fuel consumption will increase with the size ofthe load.
• Drive smoothly. Avoid rapid starts, fastcornering and hard braking.
Related information
• Loading – general (p. 139)
• Load anchoring eyelets (p. 140)
Load anchoring eyelets
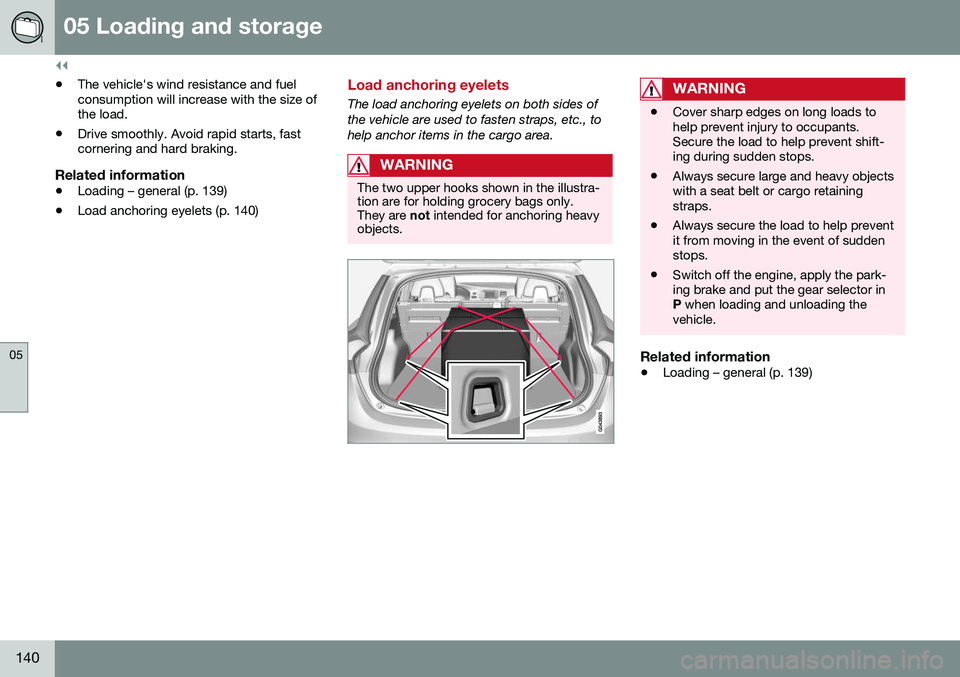
The load anchoring eyelets on both sides of the vehicle are used to fasten straps, etc., tohelp anchor items in the cargo area.
WARNING
The two upper hooks shown in the illustra- tion are for holding grocery bags only.They are
not intended for anchoring heavy
objects.
WARNING
• Cover sharp edges on long loads to help prevent injury to occupants.Secure the load to help prevent shift-ing during sudden stops.
• Always secure large and heavy objectswith a seat belt or cargo retainingstraps.
• Always secure the load to help preventit from moving in the event of suddenstops.
• Switch off the engine, apply the park-ing brake and put the gear selector inP
when loading and unloading the
vehicle.
Related information
• Loading – general (p. 139)
Page 168 of 402
06 Locks and alarm
06
166
Alarm signal
An audible (p. 164) signal is given by a battery powered siren. The alarm cycle lasts for30 seconds. The visual alarm signal is given by flashing all turn signals for approximately 5 minutes oruntil the alarm is turned off.
Related information
•Alarm indicator (p. 165)
• Alarm – arming/disarming (p. 165)
• Alarm – turning off (p. 166)
Alarm – turning off
The alarm system provides a warning if an attempt is made to break into the vehicle. If the alarm is sounding, it can be stopped by pressing the Unlock button on the remote keyor by inserting the remote key in the ignitionslot. Two short flashes from the car's turn sig-nals confirm that the alarm has been turnedoff.
Related information
•Alarm indicator (p. 165)
• Alarm – arming/disarming (p. 165)
• Remote key – replacing the battery (p. 153)
Alarm-related functions
The following is general information regarding the alarm system in your vehicle.
Automatic re-armingIf the doors are unlocked, the locks will auto-matically re-engage (re-lock) and the alarmwill re-arm after 2 minutes unless a door orthe tailgate has been opened.
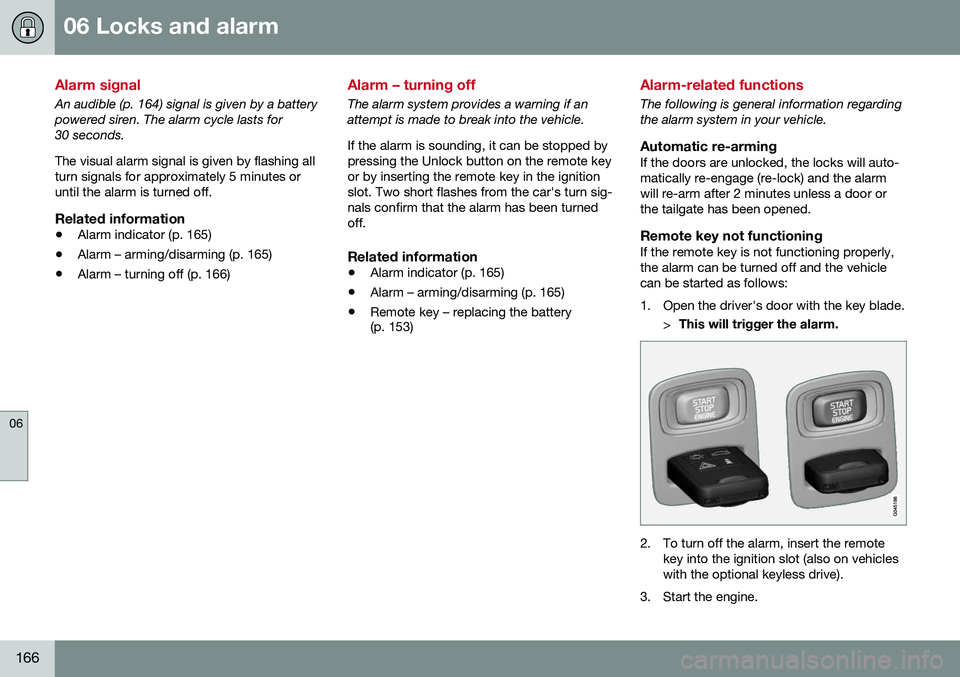
Remote key not functioningIf the remote key is not functioning properly,the alarm can be turned off and the vehiclecan be started as follows:
1. Open the driver's door with the key blade.
>This will trigger the alarm.
2. To turn off the alarm, insert the remote
key into the ignition slot (also on vehicles with the optional keyless drive).
3. Start the engine.
Page 172 of 402
||
07 Driver support
07
170
Spin Control (SC)The SC function is designed to help prevent the drive wheels from spinning while the vehi-cle is accelerating.
Active Yaw Control (AYC)This function helps maintain directional stabil- ity, for example when cornering, by brakingone or more of the wheels if the vehicleshows a tendency to skid or slide laterally.
Corner Traction Control (CTC)CTC compensates for understeering and helps provide additional stability when accel-erating through a curve by preventing theinside wheel from spinning. This is particularlyuseful when accelerating on a curving high-way on-ramp. CTC is most effective if the stability system's Sport mode is selected. See the section
about Sport mode.
Engine Drag Control (EDC)EDC helps keep the engine running if the wheels show a tendency to lock, e.g., whenshifting down in the Geartronic manual shift-ing mode or while using the engine's brakingfunction on a slippery surface. If the enginewere to stop, power steering would not func-tion, making the vehicle more difficult tosteer.
Trailer Stability Assist (TSA)The TSA helps stabilize a vehicle that is tow- ing a trailer when the vehicle and trailer have begun to sway. See Trailer Stability Assist(TSA) (p. 288) for more information. This system is automatically deactivated if the driver selects
Sport mode.
Related information
•Stability system – operation (p. 170)
• Stability system – symbols and messages (p. 172)
• Trailer Stability Assist (TSA) (p. 288)
Stability system – operation
Operation
Sport modeThe stability system is always activated and cannot be switched off.
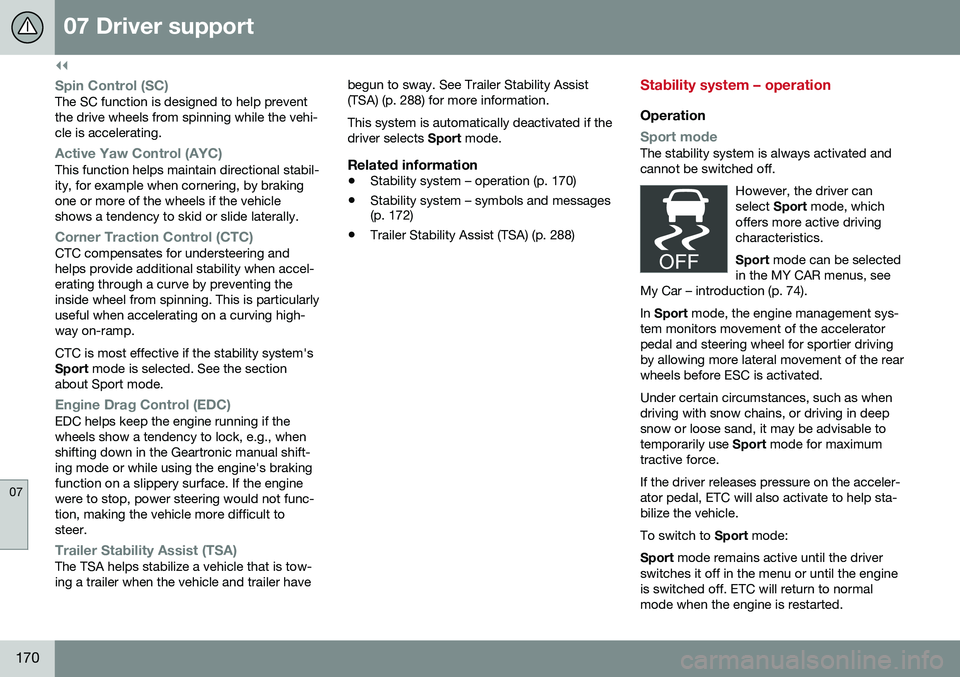
However, the driver canselect Sport mode, which
offers more active drivingcharacteristics. Sport mode can be selected
in the MY CAR menus, see
My Car – introduction (p. 74).
In Sport mode, the engine management sys-
tem monitors movement of the accelerator pedal and steering wheel for sportier drivingby allowing more lateral movement of the rearwheels before ESC is activated. Under certain circumstances, such as when driving with snow chains, or driving in deepsnow or loose sand, it may be advisable totemporarily use Sport mode for maximum
tractive force. If the driver releases pressure on the acceler- ator pedal, ETC will also activate to help sta-bilize the vehicle. To switch to Sport mode:
Sport mode remains active until the driver
switches it off in the menu or until the engine is switched off. ETC will return to normalmode when the engine is restarted.
Page 174 of 402
07 Driver support
07
172
Stability system – symbols and messages
Symbols and messages in the main
instrument panel
A text message can be erased by pressing briefly the OK button on the turn signal lever.
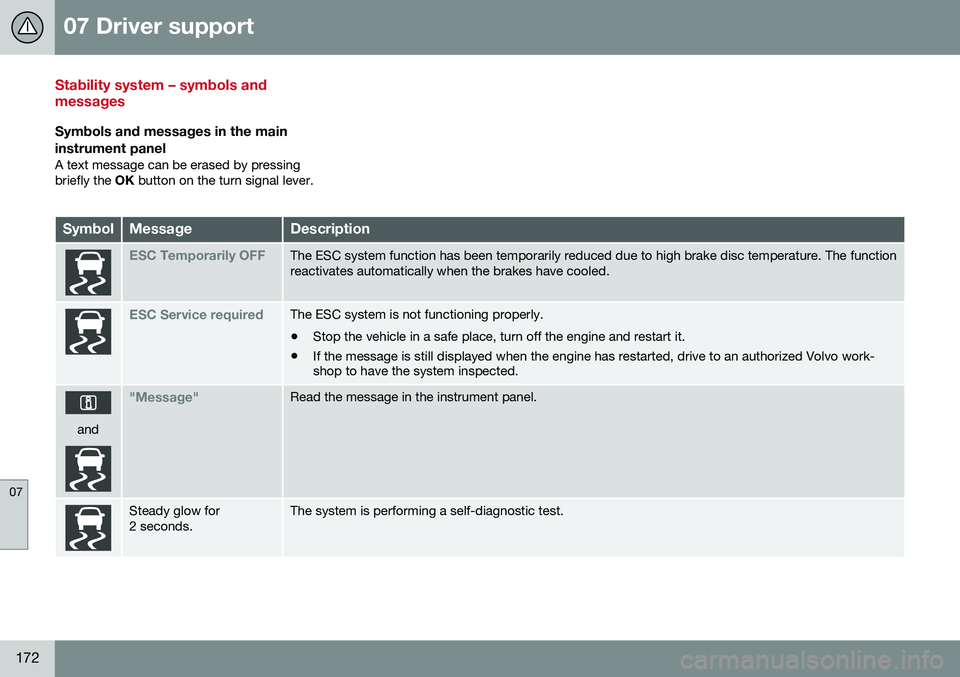
SymbolMessageDescription
ESC Temporarily OFFThe ESC system function has been temporarily reduced due to high brake disc temperature. The function reactivates automatically when the brakes have cooled.
ESC Service requiredThe ESC system is not functioning properly. • Stop the vehicle in a safe place, turn off the engine and restart it.
• If the message is still displayed when the engine has restarted, drive to an authorized Volvo work- shop to have the system inspected.
and
"Message"Read the message in the instrument panel.
Steady glow for 2 seconds.The system is performing a self-diagnostic test.
Page 214 of 402
07 Driver support
07
212* Option/accessory, for more information, see Introduction.
The camera’s limitations
The camera has the same limitations as the human eye. The camera is used by Pedestrian and Cyclist Detection with Full Auto Brake Collision warn-ing – introduction (p. 204), Active High Beams(Active high beams (AHB)* (p. 88)), Road SignInformation (Road Sign Information (RSI)* –introduction (p. 174)) and Driver Alert System(Driver Alert System (p. 217)) with LaneDeparture Warning or Lane Keeping Aid.
NOTE
• To help protect the camera in very hot conditions, it may be temporarilyswitched off for approximately 15minutes after the engine has beenstarted.
• Keep the section of the windshield infront of the camera clean and free ofice, snow, or condensation.
WARNING
•
The camera has the same type of limi- tations as the human eye, i.e., it can-not see as well in heavy snowfall orrain, thick fog or in heavy blowing dustor snow. In such conditions, systemsdepending on the camera may experi-ence greatly reduced functionality ormay be temporarily deactivated.
• Never place any objects, decals, etc.,on the windshield in front of the cam-era. This could reduce or block thecamera’s function, and could causeone or more of the systems that utilizethe camera to stop functioning.
• Strong sunlight, reflections from theroad surface, ice or snow covering theroad, a dirty road surface, or unclearlane marker lines may drasticallyreduce the camera’s capacity todetect the side of a lane, a pedestrian,a cyclist or another vehicle.
Related information
•
Collision warning – introduction (p. 204)
• Collision warning* – function (p. 206)
• Collision warning* – operation (p. 207)
• Collision warning* – Pedestrian detection (p. 209)
• Collision warning* – Cyclist detection(p. 208)
• Collision warning* – limitations (p. 210) •
Collision warning – troubleshooting(p. 213)
• Collision warning – symbols and mes-sages (p. 215)
• Road Sign Information (RSI)* – introduc-tion (p. 174)
• Driver Alert System (p. 217)
• Active high beams (AHB)* (p. 88)
Page 239 of 402
07 Driver support
07
}}
* Option/accessory, for more information, see Introduction.237
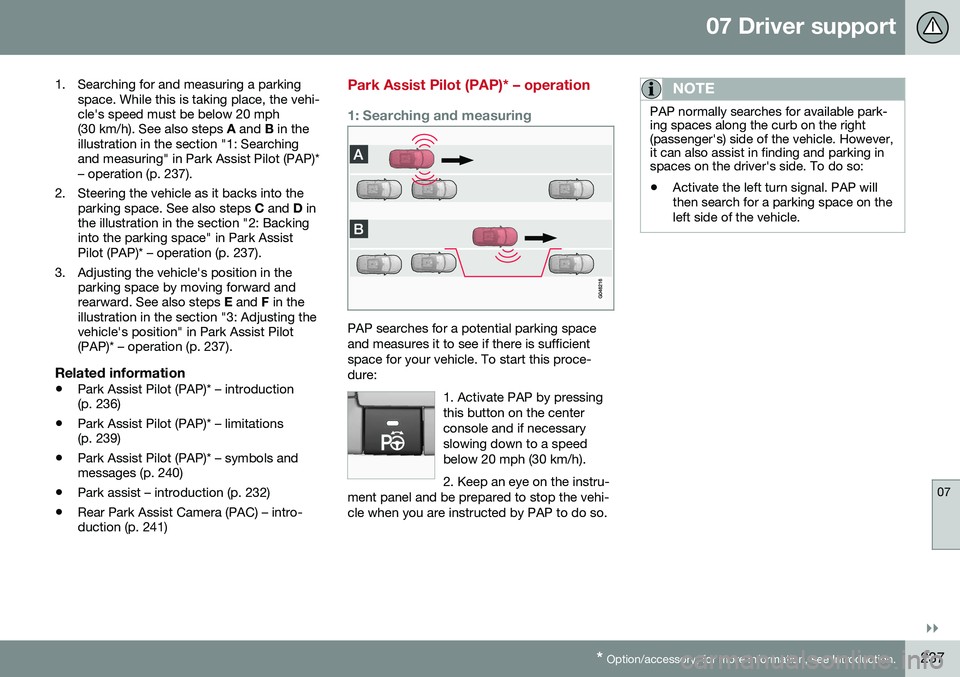
1. Searching for and measuring a parking
space. While this is taking place, the vehi- cle's speed must be below 20 mph(30 km/h). See also steps A and B in the
illustration in the section "1: Searchingand measuring" in Park Assist Pilot (PAP)*– operation (p. 237).
2. Steering the vehicle as it backs into the parking space. See also steps C and D in
the illustration in the section "2: Backinginto the parking space" in Park AssistPilot (PAP)* – operation (p. 237).
3. Adjusting the vehicle's position in the parking space by moving forward andrearward. See also steps E and F in the
illustration in the section "3: Adjusting thevehicle's position" in Park Assist Pilot(PAP)* – operation (p. 237).
Related information
• Park Assist Pilot (PAP)* – introduction(p. 236)
• Park Assist Pilot (PAP)* – limitations(p. 239)
• Park Assist Pilot (PAP)* – symbols andmessages (p. 240)
• Park assist – introduction (p. 232)
• Rear Park Assist Camera (PAC) – intro-duction (p. 241)
Park Assist Pilot (PAP)* – operation
1: Searching and measuring
PAP searches for a potential parking space and measures it to see if there is sufficientspace for your vehicle. To start this proce-dure:
1. Activate PAP by pressingthis button on the centerconsole and if necessaryslowing down to a speedbelow 20 mph (30 km/h). 2. Keep an eye on the instru-
ment panel and be prepared to stop the vehi- cle when you are instructed by PAP to do so.
NOTE
PAP normally searches for available park- ing spaces along the curb on the right(passenger's) side of the vehicle. However,it can also assist in finding and parking inspaces on the driver's side. To do so: • Activate the left turn signal. PAP will then search for a parking space on theleft side of the vehicle.
Page 254 of 402
08 Starting and driving
08
252* Option/accessory, for more information, see Introduction.
Starting the engine
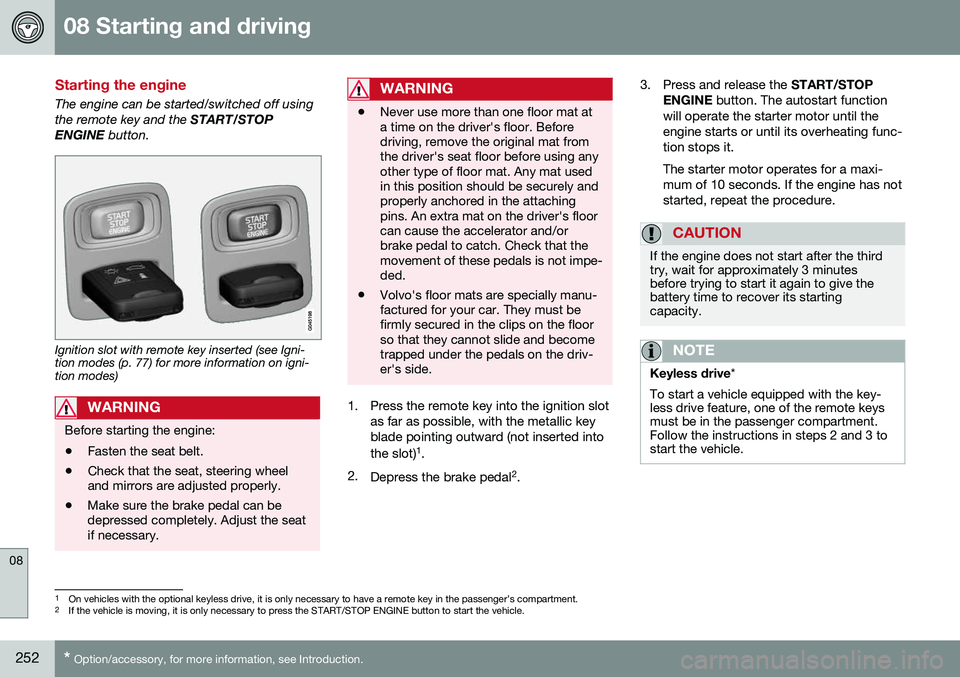
The engine can be started/switched off using the remote key and the START/STOP
ENGINE button.
Ignition slot with remote key inserted (see Igni- tion modes (p. 77) for more information on igni-tion modes)
WARNING
Before starting the engine:
• Fasten the seat belt.
• Check that the seat, steering wheel and mirrors are adjusted properly.
• Make sure the brake pedal can bedepressed completely. Adjust the seatif necessary.
WARNING
•Never use more than one floor mat at a time on the driver's floor. Beforedriving, remove the original mat fromthe driver's seat floor before using anyother type of floor mat. Any mat usedin this position should be securely andproperly anchored in the attachingpins. An extra mat on the driver's floorcan cause the accelerator and/orbrake pedal to catch. Check that themovement of these pedals is not impe-ded.
• Volvo's floor mats are specially manu-factured for your car. They must befirmly secured in the clips on the floorso that they cannot slide and becometrapped under the pedals on the driv-er's side.
1. Press the remote key into the ignition slot
as far as possible, with the metallic key blade pointing outward (not inserted into the slot) 1
.
2. Depress the brake pedal 2
. 3. Press and release the
START/STOP
ENGINE button. The autostart function
will operate the starter motor until the engine starts or until its overheating func-tion stops it. The starter motor operates for a maxi- mum of 10 seconds. If the engine has notstarted, repeat the procedure.
CAUTION
If the engine does not start after the third try, wait for approximately 3 minutesbefore trying to start it again to give thebattery time to recover its startingcapacity.
NOTE
Keyless drive *
To start a vehicle equipped with the key- less drive feature, one of the remote keysmust be in the passenger compartment.Follow the instructions in steps 2 and 3 tostart the vehicle.
1 On vehicles with the optional keyless drive, it is only necessary to have a remote key in the passenger’s compartment.
2 If the vehicle is moving, it is only necessary to press the START/STOP ENGINE button to start the vehicle.
Page 256 of 402
08 Starting and driving
08
254* Option/accessory, for more information, see Introduction.
Switching off the engine
Switch off the engine by pressing the START/
STOP ENGINE button.
If the gear selector is not in the P position or
if the vehicle is moving, press the START/
STOP ENGINE button twice or press and
hold it in until the engine switches off.
Related information
• Ignition modes (p. 77)
Engine Remote Start (ERS)* – introduction
ERS is a feature that makes it possible to remotely start the engine using the remotekey to cool or heat the passenger compart-ment before driving. The climate/ and infotainment systems will start using the same settings as when theengine was switched off. When the engine is started using ERS, it will run for a maximum of 15 minutes beforeautomatically switching off again. After 2 ERSstarts, the engine must be started in the nor-mal way before ERS can be used again.
NOTE
•Always adhere to applicable State, Province and/or Local laws regardingengine idling when using ERS.
• The service life of the remote key'sbattery is affected by ERS use. If thisfeature is used frequently, the batteryshould be replaced once a year, seeRemote key – replacing the battery(p. 153).
WARNING
Keep the following in mind before using ERS:
• The vehicle should be in view.
• The vehicle should be unoccupied.
• The vehicle must not be parked indoors or in an enclosed area.Exhaust fumes are harmful to thehealth.
Related information
•
Engine Remote Start (ERS)* – starting the engine (p. 255)
• Engine Remote Start (ERS)* – switchingoff the engine (p. 255)