center console VOLVO V60 CROSS COUNTRY 2016 Owner´s Manual
[x] Cancel search | Manufacturer: VOLVO, Model Year: 2016, Model line: V60 CROSS COUNTRY, Model: VOLVO V60 CROSS COUNTRY 2016Pages: 402, PDF Size: 10.32 MB
Page 11 of 402
Contents
9
10
Wiper blades – service position.............. 347
Wiper blades – windshield...................... 348
Wiper blades – tailgate........................... 349
Engine compartment – washer fluid....... 349
Battery – symbols................................... 350
Battery – handling................................... 350
Battery – maintenance............................ 351
Battery – changing.................................. 352
Fuses – introduction............................... 354
Fuses – engine compartment................. 355
Fuses – glove compartment................... 358
Fuses – cargo area/trunk........................ 361Fuses – engine compartment cold zone
(Start/Stop only)...................................... 362
Washing the car...................................... 364
Automatic car wash................................ 365
Polishing and waxing.............................. 365
Cleaning the interior................................ 366
Touching up paintwork........................... 368
11
11 Specifications
Label information.................................... 371
Dimensions............................................. 374
Weights................................................... 378
Engine specifications.............................. 379
Oil specifications..................................... 380
Oil volume............................................... 381
Coolant – specification and volume........ 382Transmission oil – specification and vol-
umes....................................................... 382
Brake fluid – specification and volume... 382
Power steering – specification................ 383Fuel tank volume – specification and vol-
ume......................................................... 383 Air conditioning – specification and vol-
ume......................................................... 383
Battery specifications............................. 384
Symbols – general information............... 385
Warning symbols.................................... 385
Indicator symbols.................................... 386
Information symbols............................... 387
Information symbols – ceiling console.... 388
Information symbols – center console.... 388
12
12 Index
Index....................................................... 390
Page 13 of 402
01 Introduction
01
}}
11
On-board owner's manual
The owner's manual can be displayed on the center console screen and you can carry outsearches for the information that you require. To open the owner's manual, press the MY
CAR button on the center console, press OK/
MENU and select
Owner's manual.
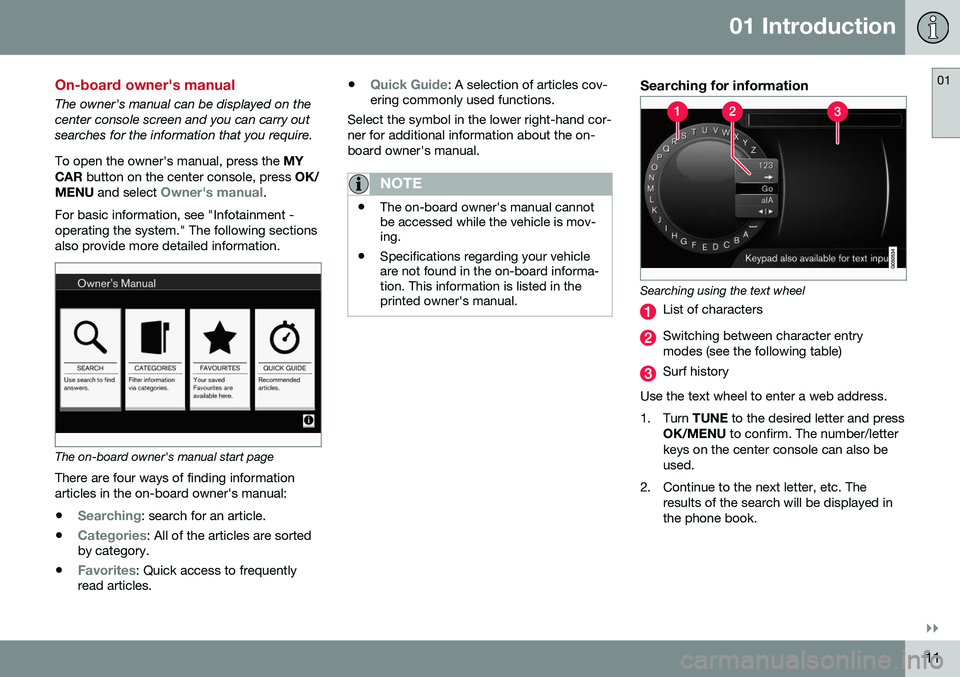
For basic information, see "Infotainment - operating the system." The following sectionsalso provide more detailed information.
The on-board owner's manual start page
There are four ways of finding information articles in the on-board owner's manual:
•
Searching: search for an article.
•
Categories: All of the articles are sorted
by category.
•
Favorites: Quick access to frequently
read articles. •
Quick Guide: A selection of articles cov-
ering commonly used functions.
Select the symbol in the lower right-hand cor- ner for additional information about the on-board owner's manual.
NOTE
• The on-board owner's manual cannot be accessed while the vehicle is mov-ing.
• Specifications regarding your vehicleare not found in the on-board informa-tion. This information is listed in theprinted owner's manual.
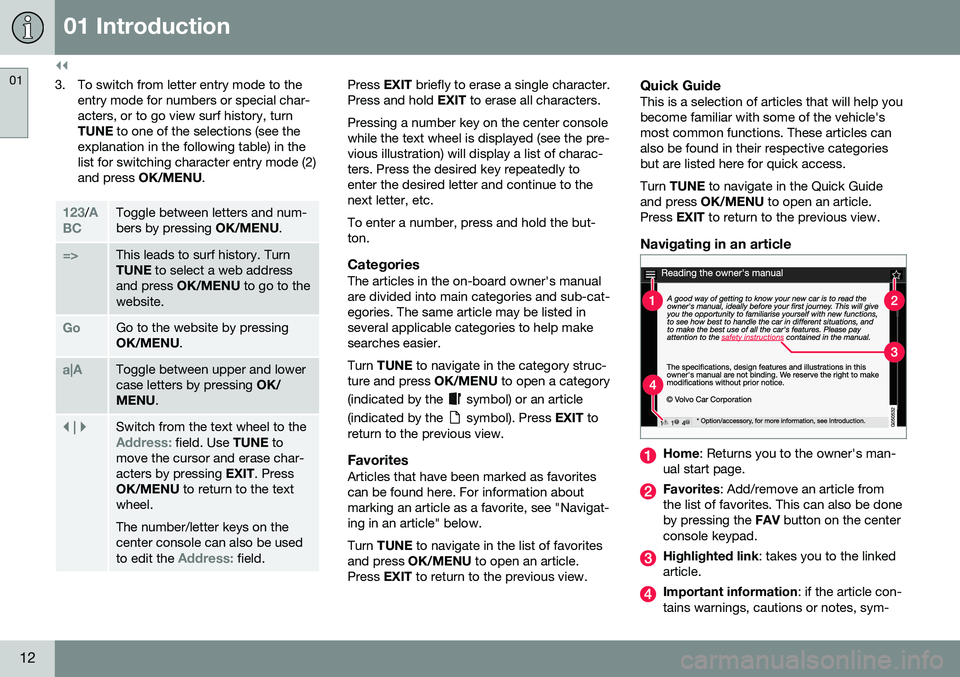
Searching for information
Searching using the text wheel
List of characters
Switching between character entry modes (see the following table)
Surf history
Use the text wheel to enter a web address.
1. Turn TUNE to the desired letter and press
OK/MENU to confirm. The number/letter
keys on the center console can also be used.
2. Continue to the next letter, etc. The results of the search will be displayed inthe phone book.
Page 14 of 402
||
01 Introduction
01
12
3. To switch from letter entry mode to theentry mode for numbers or special char- acters, or to go view surf history, turnTUNE to one of the selections (see the
explanation in the following table) in thelist for switching character entry mode (2)and press OK/MENU .
123/A
BCToggle between letters and num- bers by pressing OK/MENU.
=>This leads to surf history. Turn TUNE to select a web address
and press OK/MENU to go to the
website.
GoGo to the website by pressing OK/MENU .
a|AToggle between upper and lower case letters by pressing OK/
MENU .
| | }Switch from the text wheel to theAddress: field. Use TUNE to
move the cursor and erase char- acters by pressing EXIT. Press
OK/MENU to return to the text
wheel. The number/letter keys on the center console can also be used to edit the
Address: field.
Press EXIT briefly to erase a single character.
Press and hold EXIT to erase all characters.
Pressing a number key on the center console while the text wheel is displayed (see the pre-vious illustration) will display a list of charac-ters. Press the desired key repeatedly toenter the desired letter and continue to thenext letter, etc. To enter a number, press and hold the but- ton.
CategoriesThe articles in the on-board owner's manualare divided into main categories and sub-cat-egories. The same article may be listed inseveral applicable categories to help makesearches easier. Turn TUNE to navigate in the category struc-
ture and press OK/MENU to open a category
(indicated by the
symbol) or an article
(indicated by the
symbol). Press EXIT to
return to the previous view.
FavoritesArticles that have been marked as favorites can be found here. For information aboutmarking an article as a favorite, see "Navigat-ing in an article" below. Turn TUNE to navigate in the list of favorites
and press OK/MENU to open an article.
Press EXIT to return to the previous view.
Quick GuideThis is a selection of articles that will help you become familiar with some of the vehicle'smost common functions. These articles canalso be found in their respective categoriesbut are listed here for quick access. Turn TUNE to navigate in the Quick Guide
and press OK/MENU to open an article.
Press EXIT to return to the previous view.
Navigating in an article
Home : Returns you to the owner's man-
ual start page.
Favorites : Add/remove an article from
the list of favorites. This can also be done by pressing the FAV button on the center
console keypad.
Highlighted link : takes you to the linked
article.
Important information : if the article con-
tains warnings, cautions or notes, sym-
Page 16 of 402
01 Introduction
01
14
About this manual
Reading your owner's manual is a good way to familiarize yourself with the features andsystems in your vehicle.• Before you operate your vehicle for the first time, we recommend that you lookthrough the information found in thechapters "Your Driving Environment" and"During Your Trip."
• Information contained in the balance ofthe manual is extremely useful and shouldbe read after operating the vehicle for thefirst time.
• The manual is structured so that it can beused for reference. For this reason, itshould be kept in the vehicle for readyaccess.
On-board owner's manualWhen the printed manual refers to the on- board owner's manual, this pertains to theinformation displayed on the center consolescreen. The language used on the center console screen and instrument panel can be changed in the
MY CAR system settings menu.
There are four ways of finding information articles in the on-board owner's manual:
•
Searching: search for an article.
•
Categories: All of the articles are sorted
by category. •
Favorites: Quick access to frequently
read articles.
•
Quick Guide: A selection of articles cov-
ering commonly used functions.
Select the symbol in the lower right-hand cor- ner for additional information about the on-board owner's manual.
NOTE
• The on-board owner's manual cannot be accessed while the vehicle is mov-ing.
• Specifications regarding your vehicleare not found in the on-board informa-tion. This information is listed in theprinted owner's manual.
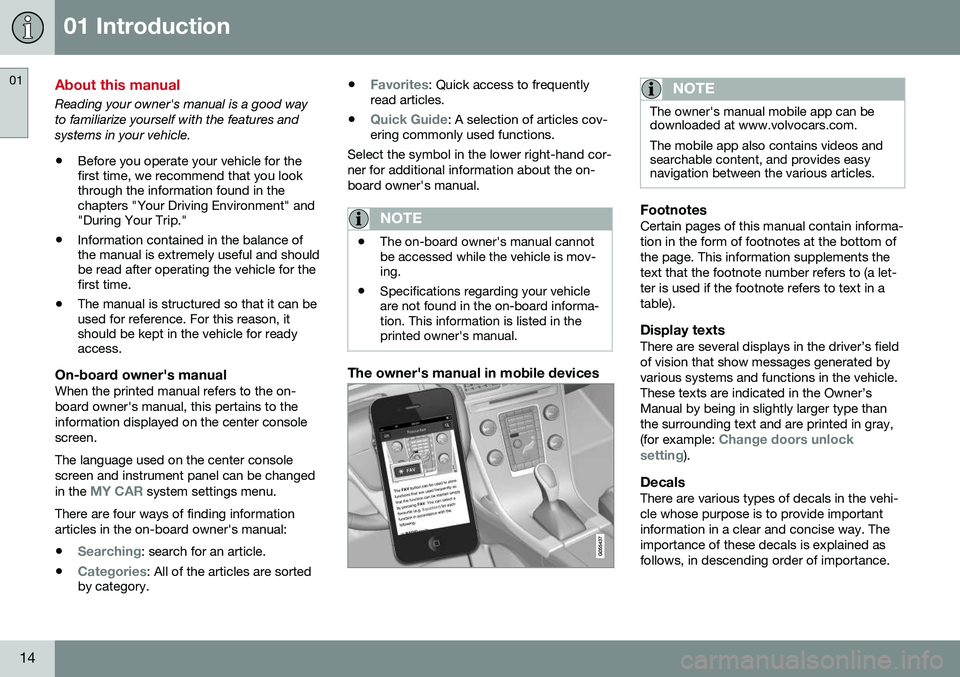
The owner's manual in mobile devices
NOTE
The owner's manual mobile app can be downloaded at www.volvocars.com. The mobile app also contains videos and searchable content, and provides easynavigation between the various articles.
FootnotesCertain pages of this manual contain informa- tion in the form of footnotes at the bottom ofthe page. This information supplements thetext that the footnote number refers to (a let-ter is used if the footnote refers to text in atable).
Display textsThere are several displays in the driver’s fieldof vision that show messages generated byvarious systems and functions in the vehicle.These texts are indicated in the Owner’sManual by being in slightly larger type thanthe surrounding text and are printed in gray, (for example:
Change doors unlock
setting).
DecalsThere are various types of decals in the vehi- cle whose purpose is to provide importantinformation in a clear and concise way. Theimportance of these decals is explained asfollows, in descending order of importance.
Page 20 of 402
01 Introduction
01
18
Change of ownership
When the vehicle changes owners, all per- sonal settings should be reset to the factorydefaults. To reset, press the MY CAR button in the
center console followed by OK/MENU and
select
SettingsReset to factory settings.
User data e.g., for apps, the web browser and for personal settings in menus such asthe climate system and vehicle settingsshould be reset to factory defaults. For vehicles equipped with the optional Volvo On Call with Sensus Connect (VOC), personalsettings stored in the vehicle should bedeleted, see Changing ownership of a vehiclewith Volvo On Call.
Related information
• Volvo ID (p. 21)
Crash event data
This vehicle is equipped with an event data recorder (EDR). The main purpose of an EDRis to record, in certain crash or near crash-likesituations, such as an air bag deployment orhitting a road obstacle, data that will assist inunderstanding how a vehicle's systems per-formed. The EDR is designed to record datarelated to vehicle dynamics and safety sys-tems for a short period of time, typically 30seconds or less. The EDR in this vehicle isdesigned to record such data as:
• How various systems in your vehicle were operating;
• Whether or not the driver and passengersafety belts were buckled/fastened;
• How far (if at all) the driver was depress-ing the accelerator and/or brake pedal;and,
• How fast the vehicle was traveling.
These data can help provide a better under- standing of the circumstances in whichcrashes and injuries occur.NOTE
EDR data are recorded by your vehicle only if a non-trivial crash situation occurs;no data are recorded by the EDR undernormal driving conditions and no personaldata (e.g., name, gender, age, and crashlocation) are recorded. However, otherparties, such as law enforcement, couldcombine the EDR data with the type ofpersonally identifying data routinelyacquired during a crash investigation.
To read data recorded by an EDR, special equipment is required, and access to thevehicle or the EDR is needed. In addition tothe vehicle manufacturer, other parties, suchas law enforcement, that have the specialequipment, can read the information if theyhave access to the vehicle or the EDR. Furthermore, your vehicle is equipped with a number of computers whose task is to con-tinuously control and monitor the vehicle’soperation. They can also register informationduring normal driving conditions if they detecta fault relating to the vehicle’s operation andfunctionality. Some of the stored informationis required by technicians when carrying outservice and maintenance to enable them todiagnose and rectify any faults that haveoccurred in the vehicle and to enable Volvo tofulfill legal and other regulatory requirements.This information may be stored in the vehi-cle’s computers for a certain period of time.
Page 23 of 402
01 Introduction
01
* Option/accessory, for more information, see Introduction.21
Volvo ID
This is your personal ID that can be used to access a number of services 1
Creating a Volvo IDTo create a Volvo ID, provide your personal email address and then follow the instructionsprovided in the email that you will receivefrom Volvo. This can be done from:
• From an Internet-connected vehicle: Enter your email address in the app thatrequires a Volvo ID and follow the instruc-tions provides or press the Internet con- nect (
) button on the center console
and select Apps, Settings and follow the
instructions provided.
• Volvo On Call (VOC*): download the latest version of the VOC app and create aVolvo ID on the start page.
Open Source Software Notice
The systems in your Volvo contain certain free/open source and other software. This product uses certain free / open source and other software originating from thirdparties, that is subject to the GNU GeneralPublic License version 2 and 3 (GPLv2/GPLv3), GNU Lesser General Public Licenseversion 3 (LGPLv3), The FreeType ProjectLicense (“FreeType License”) and otherdifferent and/or additional copyright licenses,disclaimers and notices. The links how toaccess the exact terms of GPLv2, GPLv3,LGPLv3, and the other open source softwarelicenses, disclaimers, acknowledgements andnotices are provided to you below. Pleaserefer to the exact terms of the relevantLicense, regarding your rights under saidlicenses. Volvo Car Corporation (VCC) offersto provide the source code of said free/opensource software to you for a charge coveringthe cost of performing such distribution, suchas the cost of media, shipping and handling,upon written request. Please contact yournearest Volvo retailer. This offer is valid for a period of at least three (3) years from the date of the distribution ofthis product by VCC / or for as long as VCCoffers spare parts or customer support. Portions of this product uses softwarecopyrighted
© v2.4.3/2010 The
FreeTypeProject (www.freetype.org). All rightsreserved. This product includes software under following licenses: GPL v2 : http://www.gnu.org/licenses/old- licenses/gpl-2.0.html
• Linux kernel (merge between MontaVista 2.6.31 kernel and kernel fromL2.6.31_MX51_ER_1007 BSP)
• uBoot (based on v2009.08)
• busybox (based on version 1.13.2.)
GCC runtime library exception: http:// www.gnu.org/licenses/gcc-exception.html
• libgcc_s.so.1
LGPL v3: http://www.gnu.org/licenses/lgpl.html • Libc.so.6, libpthread.so.0, Librt.so.1
The FreeType Project License: http:// www.freetype.org/FTL.TXT
• libfreetype.so.6 (version 2.4.3)
Related information
• About this manual (p. 14)
1
These services vary and may be subject to change. Consult your Volvo retailer.
Page 41 of 402
02 Safety
02
}}
39
WARNING
•Keep the following points in mind with respect to the OWS system. Failure tofollow these instructions couldadversely affect the system's functionand result in serious injury to the occu-pant of the front passenger's seat:
• The full weight of the front seat pas-senger should always be on the seatcushion. The passenger should neverlift him/herself off the seat cushionusing the armrest in the door or thecenter console, by pressing the feet onthe floor, by sitting on the edge of theseat cushion, or by pressing againstthe backrest in a way that reducespressure on the seat cushion. Thiscould cause OWS to disable the front,passenger's side airbag.
WARNING
•
Do not place any type of object on the front passenger's seat in such a waythat jamming, pressing, or squeezingoccurs between the object and thefront seat, other than as a direct resultof the correct use of the AutomaticLocking Retractor/Emergency LockingRetractor (ALR/ELR) seat belt (Childrestraints (p. 47)).
• No objects should be placed under thefront passenger's seat. This couldinterfere with the OWS system's func-tion.
Related information
•
Supplemental Restraint System (SRS) (p. 31)
Side impact protection (SIPS) airbags
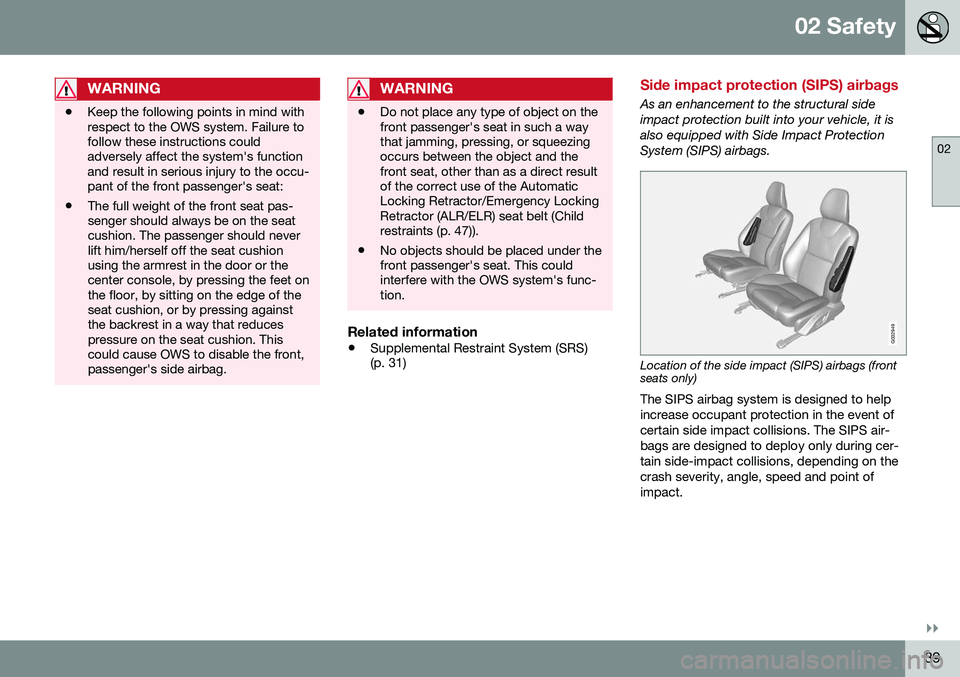
As an enhancement to the structural side impact protection built into your vehicle, it isalso equipped with Side Impact ProtectionSystem (SIPS) airbags.
G032949
Location of the side impact (SIPS) airbags (front seats only) The SIPS airbag system is designed to help increase occupant protection in the event ofcertain side impact collisions. The SIPS air-bags are designed to deploy only during cer-tain side-impact collisions, depending on thecrash severity, angle, speed and point ofimpact.
Page 65 of 402
03 Instruments and controls
03
}}
63
Instrument overview
This overview shows the location of the instrument panel and center console displays,and controls/buttons/switches.
Page 76 of 402
||
03 Instruments and controls
03
74
Reminder – doors not closedIf one of the doors is not closed properly, the
information or warning symbol illuminates
(depending on the vehicle's speed), a graphic will be displayed in instrument panel and an explanatory text message 3
will also be dis-
played in the instrument panel. Stop the vehi- cle in a safe place as soon as possible andclose the door.
If the vehicle is driven at a speedlower than approximately 5 mph(7 km/h), the information symbol illu-
minates.
If the vehicle is driven at a speed higher than approximately 5 mph(7 km/h), the warning symbol illumi-
nates.
If the hood is not closed properly, the warn-
ing symbol illuminates, a graphic will be dis-
played in instrument panel and an explana- tory text message 3
will also be displayed in
the instrument panel. Stop the vehicle in a safe place as soon as possible and close thehood. If the tailgate is not closed properly, the
information symbol illuminates and a graphic
will be displayed in instrument panel. Stop the vehicle in a safe place as soon as possi-ble and close the tailgate.
Related information
• Information displays – introduction (p. 66)
• Information displays – indicator symbols (p. 70)
My Car – introduction
The MY CAR menu system provides access to menus for operating many of the vehicle'sfunctions, such as setting the clock, door mir-rors, lock and alarm settings, etc. Some of the features or functions are stand- ard; others are optional and vary according tomodel/market.
OperationUse the buttons on the center console or thesteering wheel keypad to navigate in themenus.
3
Text message applies only to models with the optional digital instrument panel
Page 77 of 402
03 Instruments and controls
03
* Option/accessory, for more information, see Introduction.75
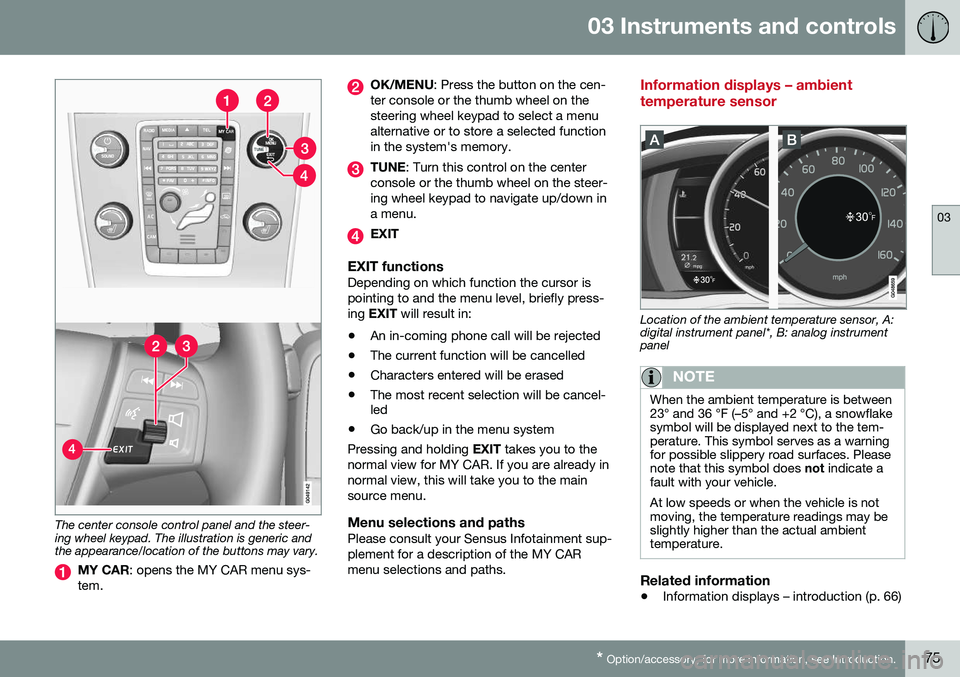
The center console control panel and the steer- ing wheel keypad. The illustration is generic andthe appearance/location of the buttons may vary.
MY CAR : opens the MY CAR menu sys-
tem.
OK/MENU : Press the button on the cen-
ter console or the thumb wheel on the steering wheel keypad to select a menualternative or to store a selected functionin the system's memory.
TUNE : Turn this control on the center
console or the thumb wheel on the steer- ing wheel keypad to navigate up/down ina menu.
EXIT
EXIT functionsDepending on which function the cursor is pointing to and the menu level, briefly press-ing EXIT will result in:
• An in-coming phone call will be rejected
• The current function will be cancelled
• Characters entered will be erased
• The most recent selection will be cancel- led
• Go back/up in the menu system
Pressing and holding EXIT takes you to the
normal view for MY CAR. If you are already in normal view, this will take you to the mainsource menu.
Menu selections and pathsPlease consult your Sensus Infotainment sup-plement for a description of the MY CARmenu selections and paths.
Information displays – ambient temperature sensor
Location of the ambient temperature sensor, A: digital instrument panel*, B: analog instrumentpanel
NOTE
When the ambient temperature is between 23° and 36 °F (–5° and +2 °C), a snowflakesymbol will be displayed next to the tem-perature. This symbol serves as a warningfor possible slippery road surfaces. Pleasenote that this symbol does not indicate a
fault with your vehicle. At low speeds or when the vehicle is not moving, the temperature readings may beslightly higher than the actual ambienttemperature.
Related information
• Information displays – introduction (p. 66)