key VOLVO V60 TWIN ENGINE 2020 Owners Manual
[x] Cancel search | Manufacturer: VOLVO, Model Year: 2020, Model line: V60 TWIN ENGINE, Model: VOLVO V60 TWIN ENGINE 2020Pages: 673, PDF Size: 14.2 MB
Page 372 of 673

DRIVER SUPPORT
* Option/accessory.
370
Park Assist Camera symbols and messages
Symbols and messages for the Park Assist Camera may be displayed in the instrument panel and/or the center display. Severalexamples are provided below.
Symbol Message Meaning
The rear Park Assist sensors are
turned off and no acoustic warnings or field markings for
obstacles/objects will be provided.
The camera is not functioning properly.
Park Assist System Sensors blocked, cleaning nee- dedOne or more of the sensors are blocked. Check and clean/remove the obstacle as soon as possible.
Park Assist System Unavailable Service requiredThe system is not functioning as intended. Contact a workshop A
.
A An authorized Volvo workshop is recommended.
A text message can be erased by briefly press- ing the
button in the center of the right-
side steering wheel keypad. If a message cannot be erased, contact a workshop
A
.
Related information
Park Assist Camera
* (p. 362)
Camera/radar sensor limitations (p. 309)
Page 381 of 673

DRIVER SUPPORT
* Option/accessory.379
Park Assist Pilot * messages
Messages for Park Assist Pilot (PAP 105
) may
be displayed in the instrument panel and/or the center display. Several examples are pro- vided below.
Message Meaning
Park Assist System Sensors blocked, cleaning neededOne or more of the sensors are blocked. Check and clean/remove the obstacle as soon as possible.
Park Assist System Unavailable Service requiredThe system is not functioning as intended. Contact a workshop
A
.
A An authorized Volvo workshop is recommended.
A text message can be erased by briefly press- ing the
button in the center of the right-
side steering wheel keypad. If a message cannot be erased, contact a workshop A
.
Related information
Park Assist Pilot
* (p. 371)
Park Assist Pilot
* limitations (p. 376)
105
Park Assist Pilot
Page 396 of 673

HYBRID INFORMATION
* Option/accessory.
394
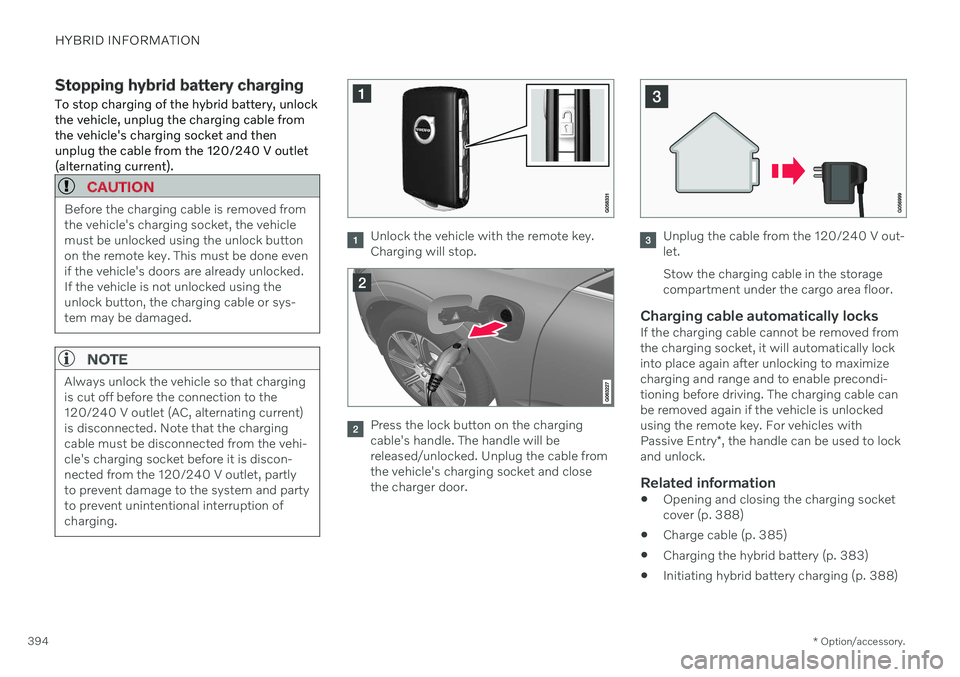
Stopping hybrid battery charging To stop charging of the hybrid battery, unlock the vehicle, unplug the charging cable fromthe vehicle's charging socket and thenunplug the cable from the 120/240 V outlet(alternating current).
CAUTION
Before the charging cable is removed from the vehicle's charging socket, the vehiclemust be unlocked using the unlock buttonon the remote key. This must be done evenif the vehicle's doors are already unlocked.If the vehicle is not unlocked using theunlock button, the charging cable or sys-tem may be damaged.
NOTE
Always unlock the vehicle so that charging is cut off before the connection to the120/240 V outlet (AC, alternating current)is disconnected. Note that the chargingcable must be disconnected from the vehi-cle's charging socket before it is discon-nected from the 120/240 V outlet, partlyto prevent damage to the system and partyto prevent unintentional interruption ofcharging.
Unlock the vehicle with the remote key. Charging will stop.
Press the lock button on the charging cable's handle. The handle will bereleased/unlocked. Unplug the cable fromthe vehicle's charging socket and closethe charger door.
Unplug the cable from the 120/240 V out- let. Stow the charging cable in the storage compartment under the cargo area floor.
Charging cable automatically locksIf the charging cable cannot be removed fromthe charging socket, it will automatically lockinto place again after unlocking to maximizecharging and range and to enable precondi-tioning before driving. The charging cable canbe removed again if the vehicle is unlockedusing the remote key. For vehicles with Passive Entry *, the handle can be used to lock
and unlock.
Related information
Opening and closing the charging socket cover (p. 388)
Charge cable (p. 385)
Charging the hybrid battery (p. 383)
Initiating hybrid battery charging (p. 388)
Page 402 of 673

STARTING AND DRIVING
* Option/accessory.
400
Starting the vehicle
The vehicle can be started using the start knob in the tunnel console when the remotekey is in the passenger compartment.
Start knob in the tunnel console.
WARNING
Before starting:
Buckle your seat belt.
Adjust the seat, steering wheel and mirrors.
Make sure you can fully depress thebrake pedal.
The remote key is not physically used to startthe ignition because the vehicle is equippedwith the keyless Passive Start system. To start the vehicle:
CAUTION
The vehicle cannot be started if the charg- ing cable is still plugged in. Make sure topull out the charging cable from the charg-ing socket before starting the vehicle.
1. The remote key must be inside the vehicle.
For vehicles with Passive Start, the key must be in the front section of the passen-ger compartment. With the optional key- less locking/unlocking function *, the key
can be anywhere in the vehicle.
2. Press and hold down the brake pedal 1
as
far as possible.
3. Turn the start knob clockwise and release. The control will automatically return to the original position.
WARNING
Never use more than one inlay mat at a time on the driver's floor. If any othertype of floor mat is used, remove theoriginal mat from the driver's seat floorbefore driving. All types of mats mustbe securely anchored in the attach-ment points in the floor. Make sure thefloor mat does not impede the move-ment of the brake pedal or acceleratorpedal in any way, as this could be aserious safety hazard.
Volvo's floor mats are specially manu-factured for your vehicle. They must beproperly secured in the attachmentpoints in the floor to help ensure theycannot slide and become trappedunder the pedals.
The starter motor will crank until the enginestarts or until overheating protection is trig-gered. During normal start conditions, the vehicle's electric motor will be prioritized and the gaso-line engine will remain off. This means thatonce the start knob is turned clockwise, theelectric motor has been "started" and the vehi-cle is ready to be driven. The warning andinformation symbols in the instrument panel
1 If the vehicle is moving, it is only necessary to turn the start knob clockwise to start the engine.
Page 403 of 673

STARTING AND DRIVING
}}
401
will go out and the selected theme will be dis- played to indicate that the electric motor isactivated. In some situations, such as in cold weather or if the hybrid battery's charge level is too low,the gasoline engine will start instead.
Error messagesIf the Vehicle key not found message is
shown in the instrument panel at start, place the remote key at the backup reader and thenmake a new start attempt.
Location of the backup reader in the tunnel console.
NOTE
When the remote key is placed in the backup reader, make sure that no othervehicle keys, metal objects or electronicdevices (e.g. cellular phones, tablets, lap-tops or chargers) are in the backup reader.Multiple vehicle keys close to each other inthe backup reader can disrupt their func-tionality.
If Vehicle start System check, wait is dis-
played in the instrument panel while attempt- ing to start the vehicle, wait until the messagedisappears and try again to start the vehicle.
CAUTION
If the engine has not responded after 3 attempts – wait for 3 minutes before star-ting a new attempt. Starting capabilityincreases if the starter battery is given timeto recover.
NOTE
The vehicle cannot be started if the hybrid battery is discharged.
WARNING
Never remove the remote control key from
the vehicle while driving.
WARNING
Always remove the remote key from the passenger compartment when youleave the vehicle and make sure theignition is in mode
0.
Always put the gear selector in
P and
apply the parking brake before leavingthe vehicle. Never leave the vehicleunsupervised while the engine is run-ning.
Always open the garage door fully andmake sure that ventilation is very goodbefore starting the engine in a garage.The exhaust fumes produced by thevehicle contain carbon monoxide,which is invisible and odorless but verytoxic.
Page 406 of 673

||
STARTING AND DRIVING
* Option/accessory.
404
Mode Functions
I The panoramic roof, power windows, 12-volt electricalsocket in the passenger com-partment, Bluetooth, naviga-tion, phone, blower and wind-shield wipers can be used.
The power seats can beadjusted.
The 12-volt electrical socket
* in
the cargo compartment can beused.
Electrical current will be taken
from the battery in this ignitionmode.
II The headlights illuminate.
Warning/indicator lights illumi-nate for 5 seconds.
A number of other systems areactivated. However, seat andrear window heating can onlybe activated when the engineis running.
This ignition mode uses a lot of
current from the battery andshould be avoided wheneverpossible!
A Also activated when the door is opened.
Related information
Starting the vehicle (p. 400)
Adjusting the steering wheel (p. 197)
Jump starting using another battery (p. 442)
Selecting ignition mode (p. 404)
Selecting ignition mode
The vehicle's ignition can be put in various modes (levels) to make different functionsavailable.
Selecting an ignition mode
Start knob in the tunnel console.
Ignition mode 0
– Unlock the vehicle and
keep the remote key in the passenger compartment.
NOTE
To set level I or II without engine start –
do not depress the brake pedal (or clutch
pedal for vehicles with manual transmis- sion) when selecting this ignition mode.
Ignition mode I
– Turn the start knob
clockwise and release it. The control will
Page 450 of 673

||
STARTING AND DRIVING
* Option/accessory.
448
Checking trailer lights *
Automatic check
When the trailer has been connected to the vehicle's electrical system, its lights can bechecked by automatically activating them.This function helps the driver check that thetrailer's lights are functioning correctly beforestarting to drive. In order to perform this check, the vehicle must be switched off.
1. When a trailer is connected to the towbar,
the message
Automatic Trailer Lamp
Check will appear in the instrument panel.
2. Acknowledge the message by pressing the O button on the right-side steering
wheel keypad.
> The light check will begin.
3. Get out of the vehicle to perform the check.
> All of the lights on the trailer will beginflashing, and then illuminate separately one at a time.
4. Visually check that all of the trailer's lights are functioning correctly.
5. After a short time, all of the trailer's lights will start flashing again.
> The light check is completed.
Disabling the automatic check
The automatic light check can be disabled in the center display. 1.Tap
Settings in the Top view.
2. Tap
My CarLights and Lighting.
3. Deselect
Automatic Trailer Lamp
Check.
Manual check
If the automatic check has been disabled, the check can be started manually. 1. Tap
Settings in the Top view.
2. Tap
My CarLights and Lighting.
3. Select
Manual Trailer Lamp Check.
> The light check will begin. Get out of the vehicle to perform the check.
Related information
Driving with a trailer (p. 444)
Towing using a towline
This section refers to one vehicle being towed behind another using a towline.
Never attempt to tow a Twin Engine vehicle behind another vehicle as this could damagethe electric motor. The vehicle must instead belifted onto a tow truck and transported with allfour wheels on the bed or lifting platform ofthe truck (no wheels may touch the road).
Towing another vehicleTowing another vehicle requires a lot of power - use the Constant AWD drive mode. This
helps charge the hybrid battery and improve the vehicle's driving and roadholding characte-ristics. Before towing another vehicle, check applica- ble speed limit regulations.
Jump startingNever attempt to tow the vehicle to start theengine, as this could damage the electricmotor. Use an auxiliary battery if the start bat-tery's charge level is so low that the enginecannot be started.
CAUTION
Attempts to tow-start the vehicle could cause damage to the electrical drive motorand three-way catalytic converter.
Page 460 of 673

AUDIO, MEDIA AND INTERNET
* Option/accessory.
458
Audio, media and Internet
The audio and media system consists of a media player and a radio. A cellular phone canalso be connected through Bluetooth to usehands-free functions or play music in thevehicle. When the vehicle is connected to theInternet, it is also possible to use apps to playmedia.
Audio and media overview
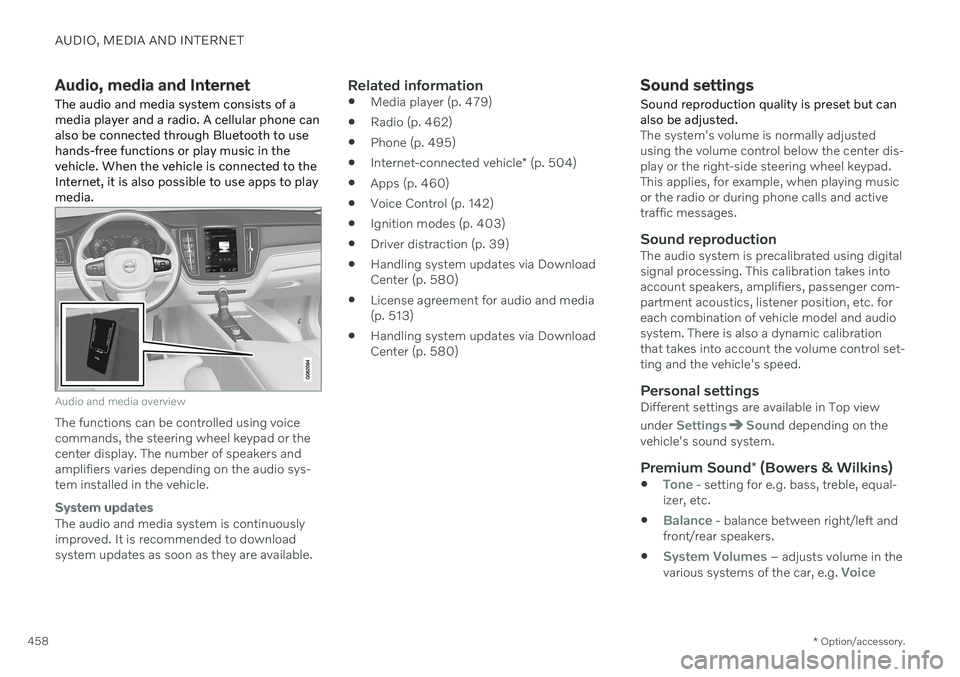
The functions can be controlled using voice commands, the steering wheel keypad or thecenter display. The number of speakers andamplifiers varies depending on the audio sys-tem installed in the vehicle.
System updates
The audio and media system is continuously improved. It is recommended to download system updates as soon as they are available.
Related information
Media player (p. 479)
Radio (p. 462)
Phone (p. 495)
Internet-connected vehicle
* (p. 504)
Apps (p. 460)
Voice Control (p. 142)
Ignition modes (p. 403)
Driver distraction (p. 39)
Handling system updates via DownloadCenter (p. 580)
License agreement for audio and media(p. 513)
Handling system updates via DownloadCenter (p. 580)
Sound settings
Sound reproduction quality is preset but can also be adjusted.
The system's volume is normally adjusted using the volume control below the center dis-play or the right-side steering wheel keypad.This applies, for example, when playing musicor the radio or during phone calls and activetraffic messages.
Sound reproductionThe audio system is precalibrated using digitalsignal processing. This calibration takes intoaccount speakers, amplifiers, passenger com-partment acoustics, listener position, etc. foreach combination of vehicle model and audiosystem. There is also a dynamic calibrationthat takes into account the volume control set-ting and the vehicle's speed.
Personal settingsDifferent settings are available in Top view under
SettingsSound depending on the
vehicle's sound system.
Premium Sound * (Bowers & Wilkins)
Tone - setting for e.g. bass, treble, equal-
izer, etc.
Balance - balance between right/left and
front/rear speakers.
System Volumes – adjusts volume in the
various systems of the car, e.g. Voice
Page 464 of 673

||
AUDIO, MEDIA AND INTERNET
* Option/accessory.
462
Update certain apps
1.
Open the Download Center app in App
view.
2. Select
Application updates to open a list
of all available updates.
3. Find the desired app and select
Install.
> The update will begin.
Related information
Apps (p. 460)
Download apps (p. 461)
Deleting apps (p. 462)
Handling system updates via Download Center (p. 580)
Internet-connected vehicle
* (p. 504)
Deleting apps
When the vehicle is connected to the Inter- net, it is possible to uninstall apps.
If the app is being used, it must be closed before it can be uninstalled. 1. Open the
Download Center app in App
view.
2. Select Application updates to open a list
of all installed apps.
3. Find the desired app and select
Uninstallto begin uninstalling the app.
> When the app has been uninstalled, it
will be removed from the list.
Related information
Apps (p. 460)
Download apps (p. 461)
Updating apps (p. 461)
Handling system updates via Download Center (p. 580)
Internet-connected vehicle
* (p. 504)
Radio
The radio can receive broadcasting from the FM waveband with HD Radio ™ Technology
and SiriusXM ®
Satellite radio *. When the
vehicle has an Internet connection, it is alsopossible to listen to web radio.
The radio can be controlled using voice commands, theright-side steering wheel key-pad or the center display.
Related information
Starting the radio (p. 463)
Changing waveband and radio station (p. 464)
Storing radio channels in the Radio favor-ites app (p. 465)
Page 466 of 673

AUDIO, MEDIA AND INTERNET
464
Changing waveband and radio station
Instructions for changing wavebands, wave- band lists and radio stations in the selectedlist are provided here.
Changing wavebandsSwipe from App view on the center display and select the desired waveband (e.g. FM) or
open the App menu in the instrument panel with the right-side steering wheel keypad andmake your selection there.
Changing a list in a waveband
1. Tap Library.
2. Select playback from
Stations, Favoritesor Genres.
3. Tap the desired station in the list.
Favorites – only plays selected favorite chan-
nels.
Genres - only plays channels broadcasting the
selected genre or program type, e.g. pop, clas- sical, etc.
Changing radio stations in a selected
list
–Press or under the center display
or on the right-side steering wheel key- pad.
> Move step-by-step through the selected list.
It is also possible to change radio station in the selected list via the center display.
Related information
Radio (p. 462)
Searching for a radio station (p. 464)
Voice control for radio and media (p. 146)
Storing radio channels in the Radio favor-ites app (p. 465)
Radio settings (p. 466)
App menu in instrument panel (p. 101)
Searching for a radio station
The radio automatically compiles a list of the radio stations that are sending out the stron-gest signals in the vehicle's current location.
Searching is performed in different ways depending on the waveband selected:
FM, stations, genres and frequency.
1. Tap
Library.
2. Tap
.
> Search view will displayed and the key- board will open.
3. Enter a search word/phrase. > The search will start and change ascharacters are entered. Search results will be displayed by category.