display VOLVO V70 2005 User Guide
[x] Cancel search | Manufacturer: VOLVO, Model Year: 2005, Model line: V70, Model: VOLVO V70 2005Pages: 139, PDF Size: 3.84 MB
Page 79 of 139
If this occurs, reduce vehicle speed to a maximum of 50 mph (80 km/h). The vehicle can be driven approximately 50
miles (80 km), or somewhat farther if the vehicle is not heavily loaded. The tire should be replaced as soon as
possible.
Hard braking and sudden steering maneuvers should be avoided.
In certain cases, it may be difficult to see which self supporting run flat tire is defective. To determine which tire is
damaged, check the inflation pressure of all four tires.WARNING!
• Only specially trained persons should mount self supporting run flat tires.
• If self supporting run flat tires are mounted, the vehicle must be equipped with a Tire Pressure Monitoring System.
• After a low pressure warning has been displayed, do not exceed 50 mph (80 km/h).
• Avoid severe cornering and hard braking, and minimize the distance traveled before replacing the self supporting
run flat tire.
• Self supporting run flat tires cannot be repaired. They must be replaced if damaged or punctured.
pg. 120 Wheels and tires
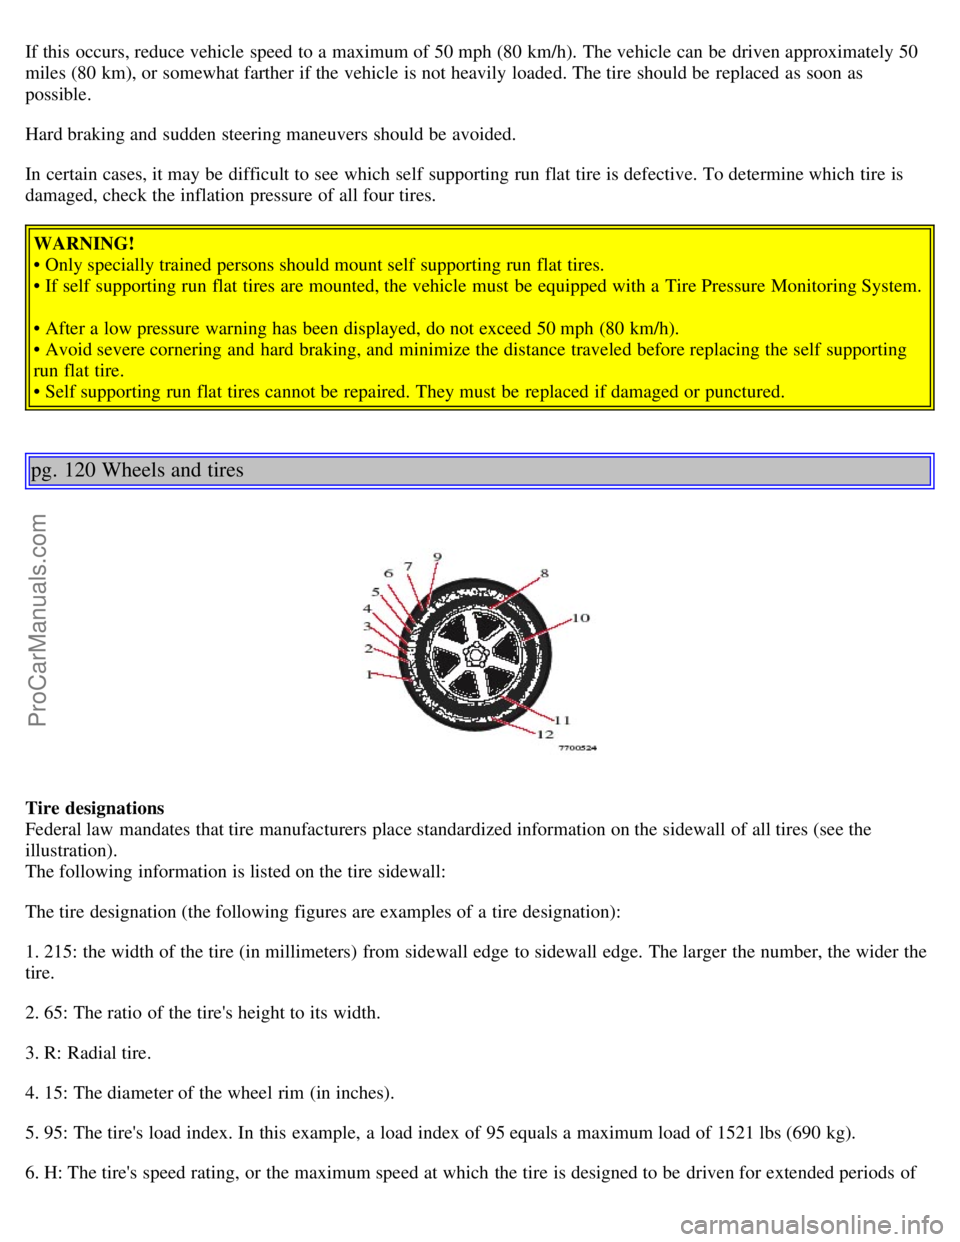
Tire designations
Federal law mandates that tire manufacturers place standardized information on the sidewall of all tires (see the
illustration).
The following information is listed on the tire sidewall:
The tire designation (the following figures are examples of a tire designation):
1. 215: the width of the tire (in millimeters) from sidewall edge to sidewall edge. The larger the number, the wider the
tire.
2. 65: The ratio of the tire's height to its width.
3. R: Radial tire.
4. 15: The diameter of the wheel rim (in inches).
5. 95: The tire's load index. In this example, a load index of 95 equals a maximum load of 1521 lbs (690 kg).
6. H: The tire's speed rating, or the maximum speed at which the tire is designed to be driven for extended periods of
ProCarManuals.com
Page 91 of 139
LocationAmperage
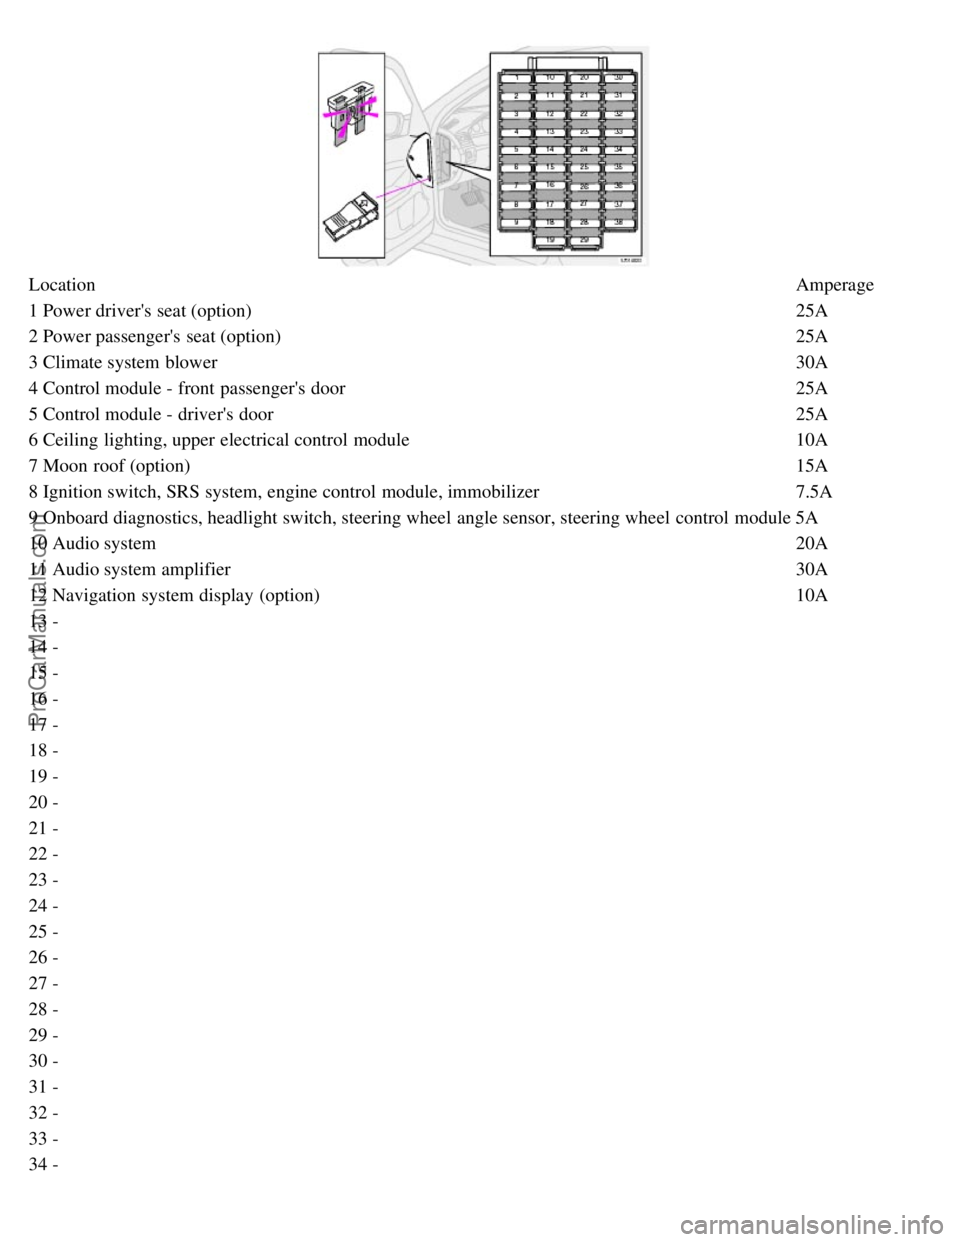
1 Power driver's seat (option) 25A
2 Power passenger's seat (option) 25A
3 Climate system blower 30A
4 Control module - front passenger's door 25A
5 Control module - driver's door 25A
6 Ceiling lighting, upper electrical control module 10A
7 Moon roof (option) 15A
8 Ignition switch, SRS system, engine control module, immobilizer 7.5A
9 Onboard diagnostics, headlight switch, steering wheel angle sensor, steering wheel control module 5A
10 Audio system 20A
11 Audio system amplifier 30A
12 Navigation system display (option) 10A
13 -
14 -
15 -
16 -
17 -
18 -
19 -
20 -
21 -
22 -
23 -
24 -
25 -
26 -
27 -
28 -
29 -
30 -
31 -
32 -
33 -
34 -
ProCarManuals.com
Page 118 of 139
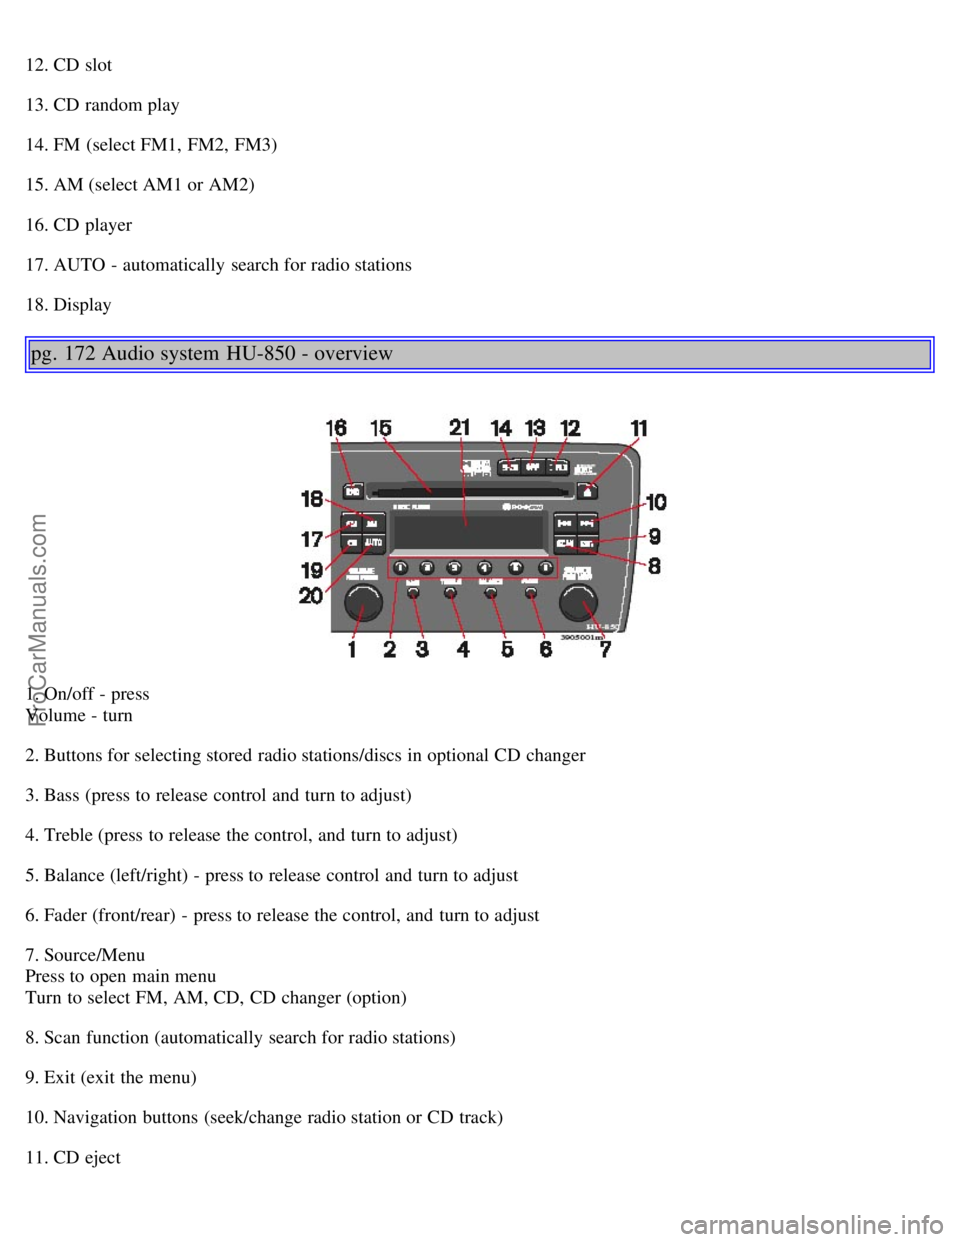
12. CD slot
13. CD random play
14. FM (select FM1, FM2, FM3)
15. AM (select AM1 or AM2)
16. CD player
17. AUTO - automatically search for radio stations
18. Display
pg. 172 Audio system HU-850 - overview
1. On/off - press
Volume - turn
2. Buttons for selecting stored radio stations/discs in optional CD changer
3. Bass (press to release control and turn to adjust)
4. Treble (press to release the control, and turn to adjust)
5. Balance (left/right) - press to release control and turn to adjust
6. Fader (front/rear) - press to release the control, and turn to adjust
7. Source/Menu
Press to open main menu
Turn to select FM, AM, CD, CD changer (option)
8. Scan function (automatically search for radio stations)
9. Exit (exit the menu)
10. Navigation buttons (seek/change radio station or CD track)
11. CD eject
ProCarManuals.com
Page 119 of 139
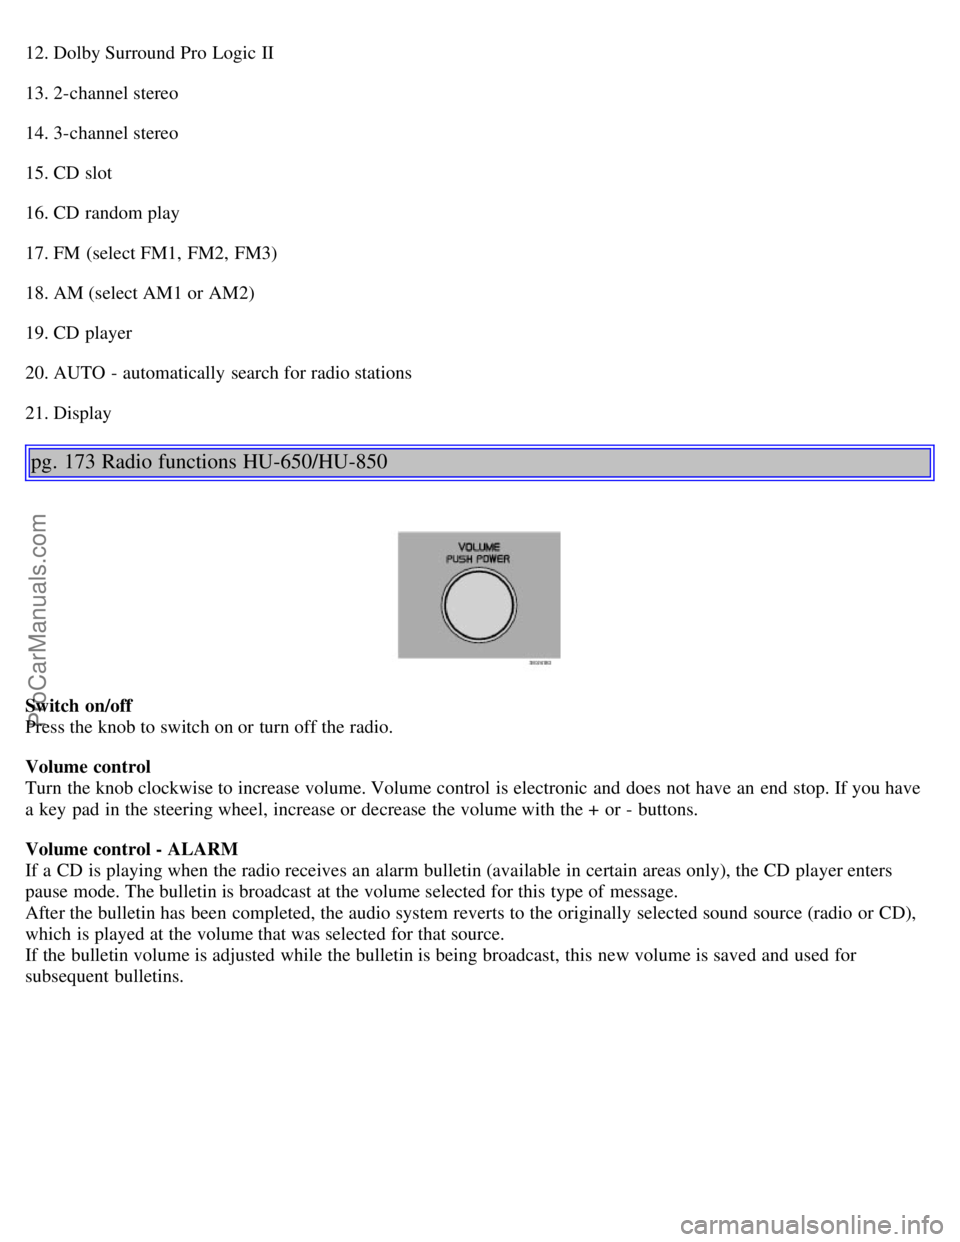
12. Dolby Surround Pro Logic II
13. 2-channel stereo
14. 3-channel stereo
15. CD slot
16. CD random play
17. FM (select FM1, FM2, FM3)
18. AM (select AM1 or AM2)
19. CD player
20. AUTO - automatically search for radio stations
21. Display
pg. 173 Radio functions HU-650/HU-850
Switch on/off
Press the knob to switch on or turn off the radio.
Volume control
Turn the knob clockwise to increase volume. Volume control is electronic and does not have an end stop. If you have
a key pad in the steering wheel, increase or decrease the volume with the + or - buttons.
Volume control - ALARM
If a CD is playing when the radio receives an alarm bulletin (available in certain areas only), the CD player enters
pause mode. The bulletin is broadcast at the volume selected for this type of message.
After the bulletin has been completed, the audio system reverts to the originally selected sound source (radio or CD),
which is played at the volume that was selected for that source.
If the bulletin volume is adjusted while the bulletin is being broadcast, this new volume is saved and used for
subsequent bulletins.
ProCarManuals.com
Page 121 of 139
This function is used to fine-tune the balance of sound in the speakers. To set the level:
1. Press SOURCE.
2. Turn the SOURCE knob, select ADVANCED MENU and press SOURCE.
3. Turn the SOURCE knob, select AUDIO SETTINGS and press SOURCE.
4. Turn the SOURCE knob, select MID EQ LEVEL and press SOURCE.
5. Turn the SOURCE knob, select the desired level and press SOURCE.
6. Press EXIT.
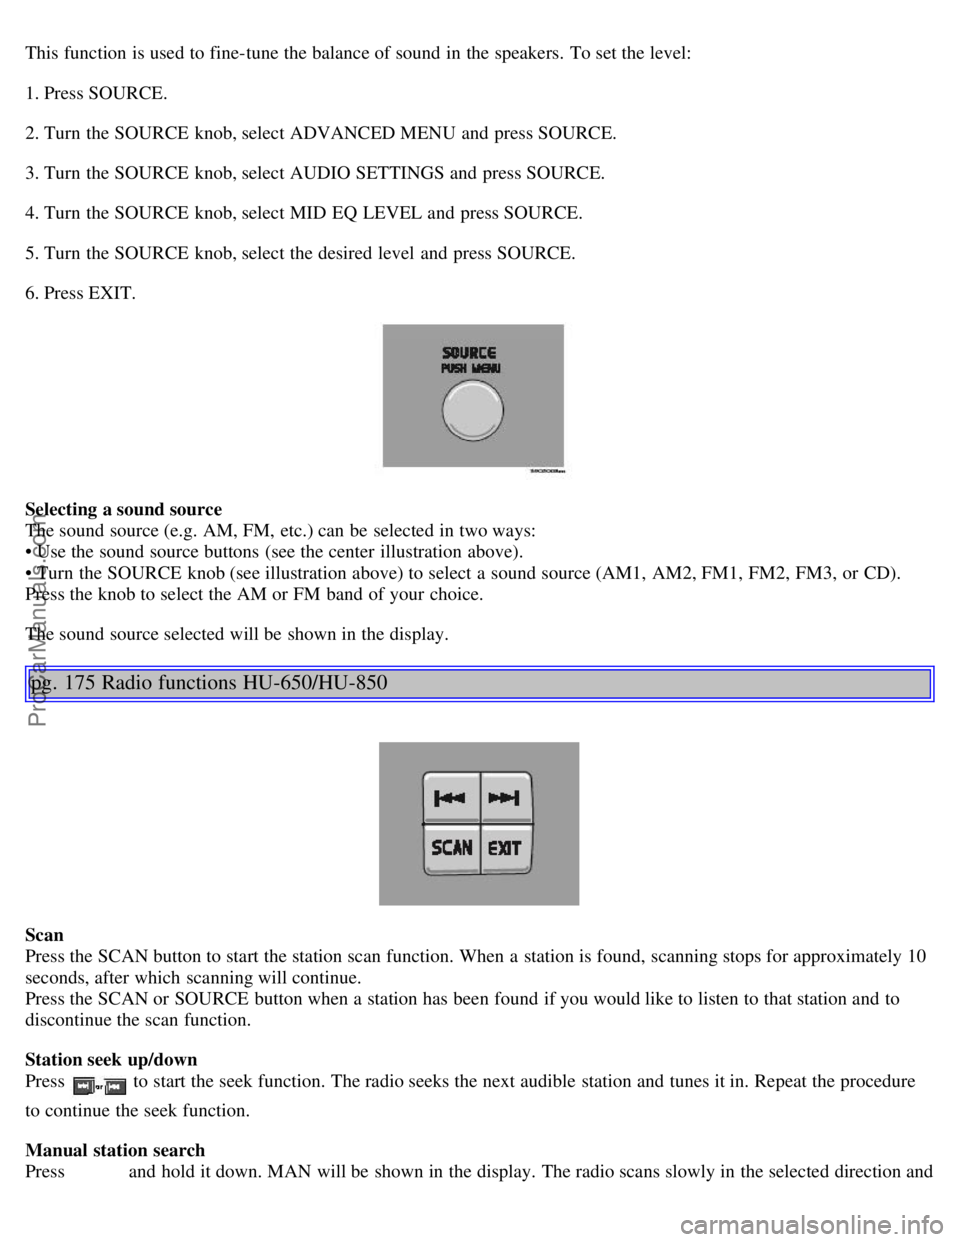
Selecting a sound source
The sound source (e.g. AM, FM, etc.) can be selected in two ways:
• Use the sound source buttons (see the center illustration above).
• Turn the SOURCE knob (see illustration above) to select a sound source (AM1, AM2, FM1, FM2, FM3, or CD).
Press the knob to select the AM or FM band of your choice.
The sound source selected will be shown in the display.
pg. 175 Radio functions HU-650/HU-850
Scan
Press the SCAN button to start the station scan function. When a station is found, scanning stops for approximately 10
seconds, after which scanning will continue.
Press the SCAN or SOURCE button when a station has been found if you would like to listen to that station and to
discontinue the scan function.
Station seek up/down
Press
to start the seek function. The radio seeks the next audible station and tunes it in. Repeat the procedure
to continue the seek function.
Manual station search
Press and hold it down. MAN will be shown in the display. The radio scans slowly in the selected direction and
ProCarManuals.com
Page 122 of 139

will increase the scanning speed after a few seconds. Release the button when the desired frequency appears in the
display.
The frequency can be fine-tuned by short presses on the
keys.
The system will remain in manual search mode for 5 seconds after the button is released, after which it will return to
seek mode.
Steering wheel key pad (option)
If the vehicle is equipped with the key pad in the steering wheel press the right or left arrow to switch between preset
stations.
pg. 176 Radio functions HU-650/HU-850
Storing stations
To store a selected station under one of the station setting buttons 1-6:
1. Tune to the desired station.
2. Press the button under which the station is to be stored and keep it depressed. The audio system sound will be
interrupted for a few seconds and STORED will appear in the display. The station is now stored.
A total of 30 stations can be stored; 6 stations each in AM1, AM2, FM1, FM2, and FM3.
Storing stations automatically
ProCarManuals.com
Page 123 of 139

This function automatically searches for and stores up to 10 strong AM or FM stations in a separate memory. If more
than ten stations are found, the ten strongest ones are stored. This function is especially useful in areas in which you
are not familiar with radio stations or their frequencies.
To use the AUTO function:
1. Select radio mode using the AM or FM buttons, or by turning the SOURCE knob.
2. Start the search by pressing AUTO for more than 2 seconds.
3. AUTO appears in the display and a number of stations with strong signals (max. 10) from the selected frequency
band will be stored in the auto-store memory. If there are no stations with sufficient signal strength, NO STATION is
displayed.
4. Press the AUTO button or the arrow keys on the optional steering wheel controls briefly to select the stored stations.
When the radio is in auto-store mode, AUTO is shown in the display. AUTO disappears when you return to the
normal radio mode.
Return to the normal radio mode by pressing the AM, FM, or EXIT button.
To return to the Auto-store mode, press the AUTO button briefly.
Contents | Top of Page
ProCarManuals.com