engine VOLVO V70 2005 Owner's Guide
[x] Cancel search | Manufacturer: VOLVO, Model Year: 2005, Model line: V70, Model: VOLVO V70 2005Pages: 139, PDF Size: 3.84 MB
Page 70 of 139
setting.
Floor mats: An extra mat on the driver's floor can cause the accelerator pedal to catch. Check that the movement
of the accelerator pedal is not impeded. Not more than one protective floor covering may be used at one time.
Electrical system
When replacing the battery or when carrying out work involving the electrical system, the following should be
observed:
A battery connection to the wrong terminal will damage the electrical system. Be sure to connect the positive battery
cable to the positive battery terminal and the negative battery cable to the negative battery terminal.
If booster batteries are used for starting, they must be properly connected to minimize the risk of the electrical
system being damaged. For correct connection, see "Jump starting" section.
Never disconnect the battery circuit (for example, to replace the battery) while the engine is running, as this may
damage the generator. Always make sure that all the battery connections are properly cleaned and tightened.
If any electrical welding work is performed on the vehicle, the battery's ground lead (negative cable) and all the
connecting cables of the generator must be disconnected and the welder cables placed as near the welding points as
possible.
The radio must be turned off before the battery is disconnected.
Switch off the ignition for at least 10 minutes before disconnecting the battery.
pg. 103 Roof racks/Load carriers
Load carriers (accessory)
Load carriers are available as Volvo accessories. Observe the following points when in use:
To avoid damaging your car and to achieve maximum safety when driving, we recommend using the load carriers
that Volvo has developed especially for your car.
Volvo-approved removable roof racks are designed to carry the maximum allowable roof load for this vehicle: 220
lbs (100 kg). For Non-Volvo roof racks, check the manufacturer's weight limits for the rack.
Never exceed the rack manufacturer's weigh limits and never exceed the maximum rated roof load of 220 lbs (100
kg).
Avoid single-point loads. Distribute loads evenly.
Place heavier cargo at the bottom of the load.
Anchor the cargo correctly with appropriate tie-down equipment.
Check periodically that the load carriers and load are properly secured.
Remember that the car's center of gravity and handling change when you carry a load on the roof.
The car's wind resistance (and correspondingly, fuel consumption) will increase with the size of the load.
Drive smoothly. Avoid rapid starts, fast cornering and hard braking.
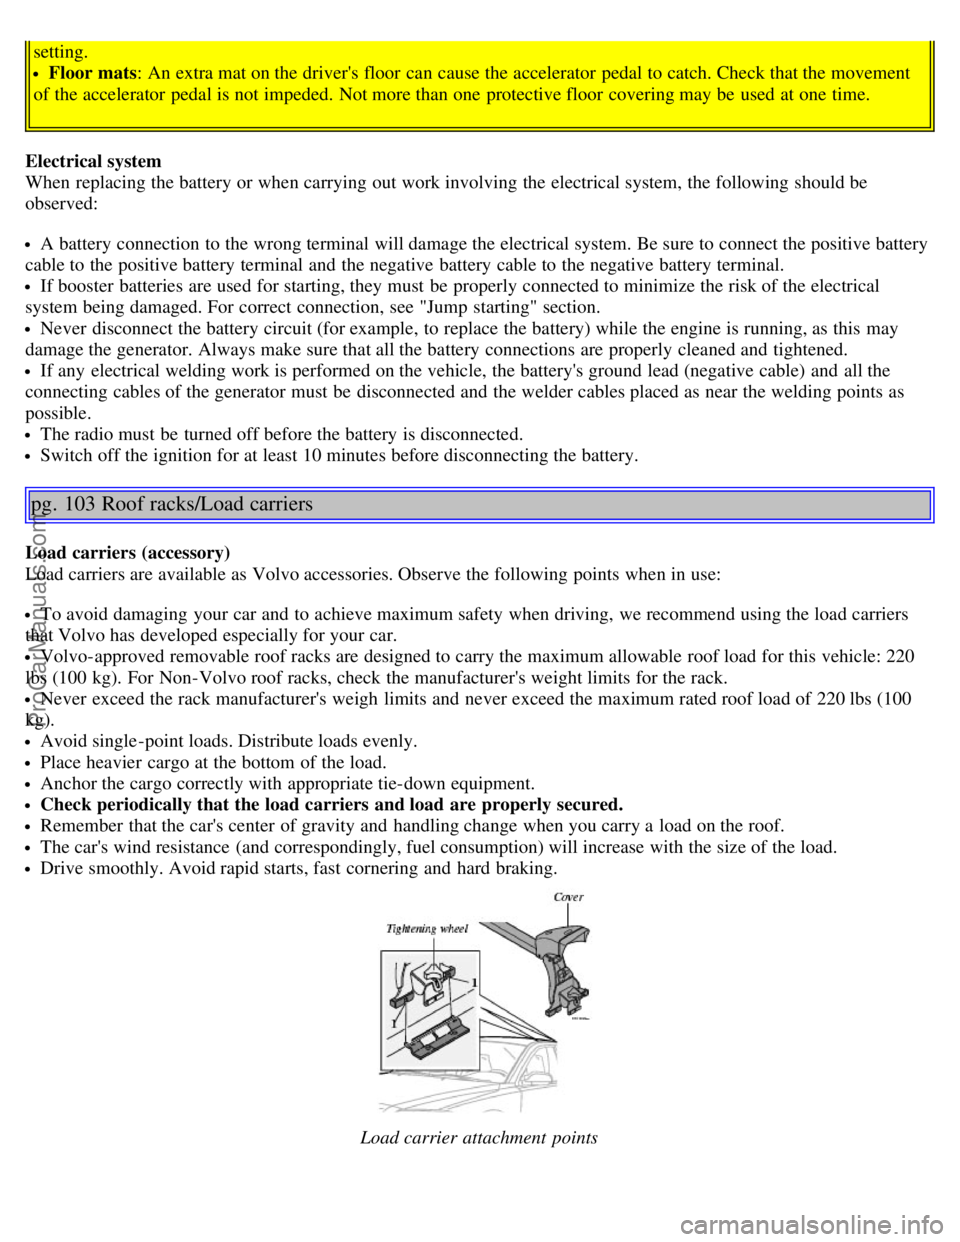
Load carrier attachment points
ProCarManuals.com
Page 88 of 139

2 0 0 5
VOLVO V70
Chapter 8 - Maintenance/Servicing
pg. 129 Maintenance/Servicing
Fuses130
Replacing bulbs135
Paint touch up142
Washing the car143
Cleaning the upholstery145
Maintenance service, Warranty146
Fuel/emissions systems147
Drive belt, Coolant148
Emissions maintenance149
Washer fluid reservoir, Hoisting the car150
Opening the hood, Engine compartment151
Engine oil152
Power steering/Brake fluid reservoirs154
Replacing the battery155
Battery maintenance156
Replacing wiper blades157
pg. 130 Fuses
ProCarManuals.com
Page 89 of 139

Replacing fuses
If an electrical component fails to function, it is possible that a fuse has blown due to a temporary circuit overload.
Fuses are located in four different places:
1. Relays/fuse box in the engine compartment
2. Fuse box in the passenger compartment, behind the plastic cover
3. Fuse box in the passenger compartment, on the edge of the dashboard
4. Fuse box in the cargo area
A label on the inside of each cover indicates the amperage and the electrical components that are connected to each
fuse.
The easiest way to see if a fuse is blown is to remove it. Pull the fuse straight out. If a fuse is difficult to remove, you
will find a special fuse removal tool in the passenger compartment fuse box. From the side, examine the curved metal
wire to see if it is broken. If so, put in a new fuse of the same color and amperage (written on the fuse). Spare fuses
are stored in the fuse box in the passenger compartment. If fuses burn out repeatedly, have the electrical system
inspected by an authorized Volvo retailer.
WARNING!
Never use fuses with higher amperage than those stated on the following pages. Doing so could overload the car's
electrical system.
pg. 131 Fuses in the engine compartment
Relays/fuses in the engine compartment
When replacing fuses, be sure to replace a blown fuse with a new one of the same color and amperage (written on
the fuse). Fuse amperage is also indicated on the inside of the fuse box cover. Fuses in positions marked X are
replacement fuses.
ProCarManuals.com
Page 90 of 139
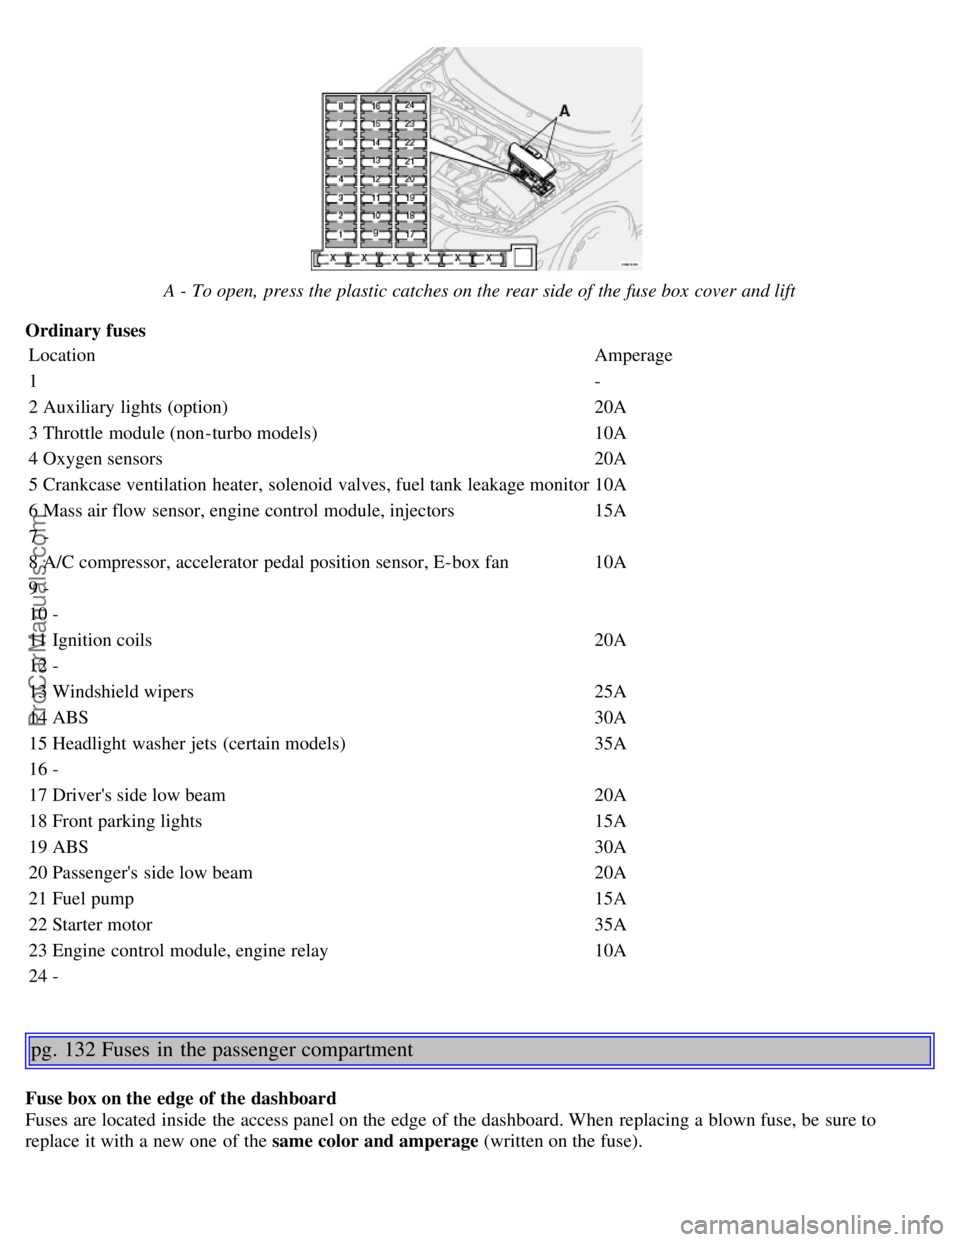
A - To open, press the plastic catches on the rear side of the fuse box cover and lift
Ordinary fuses Location Amperage
1 -
2 Auxiliary lights (option) 20A
3 Throttle module (non-turbo models) 10A
4 Oxygen sensors 20A
5 Crankcase ventilation heater, solenoid valves, fuel tank leakage monitor 10A
6 Mass air flow sensor, engine control module, injectors 15A
7 -
8 A/C compressor, accelerator pedal position sensor, E-box fan 10A
9 -
10 -
11 Ignition coils 20A
12 -
13 Windshield wipers 25A
14 ABS 30A
15 Headlight washer jets (certain models) 35A
16 -
17 Driver's side low beam 20A
18 Front parking lights 15A
19 ABS 30A
20 Passenger's side low beam 20A
21 Fuel pump 15A
22 Starter motor 35A
23 Engine control module, engine relay 10A
24 -
pg. 132 Fuses in the passenger compartment
Fuse box on the edge of the dashboard
Fuses are located inside the access panel on the edge of the dashboard. When replacing a blown fuse, be sure to
replace it with a new one of the same color and amperage (written on the fuse).
ProCarManuals.com
Page 91 of 139
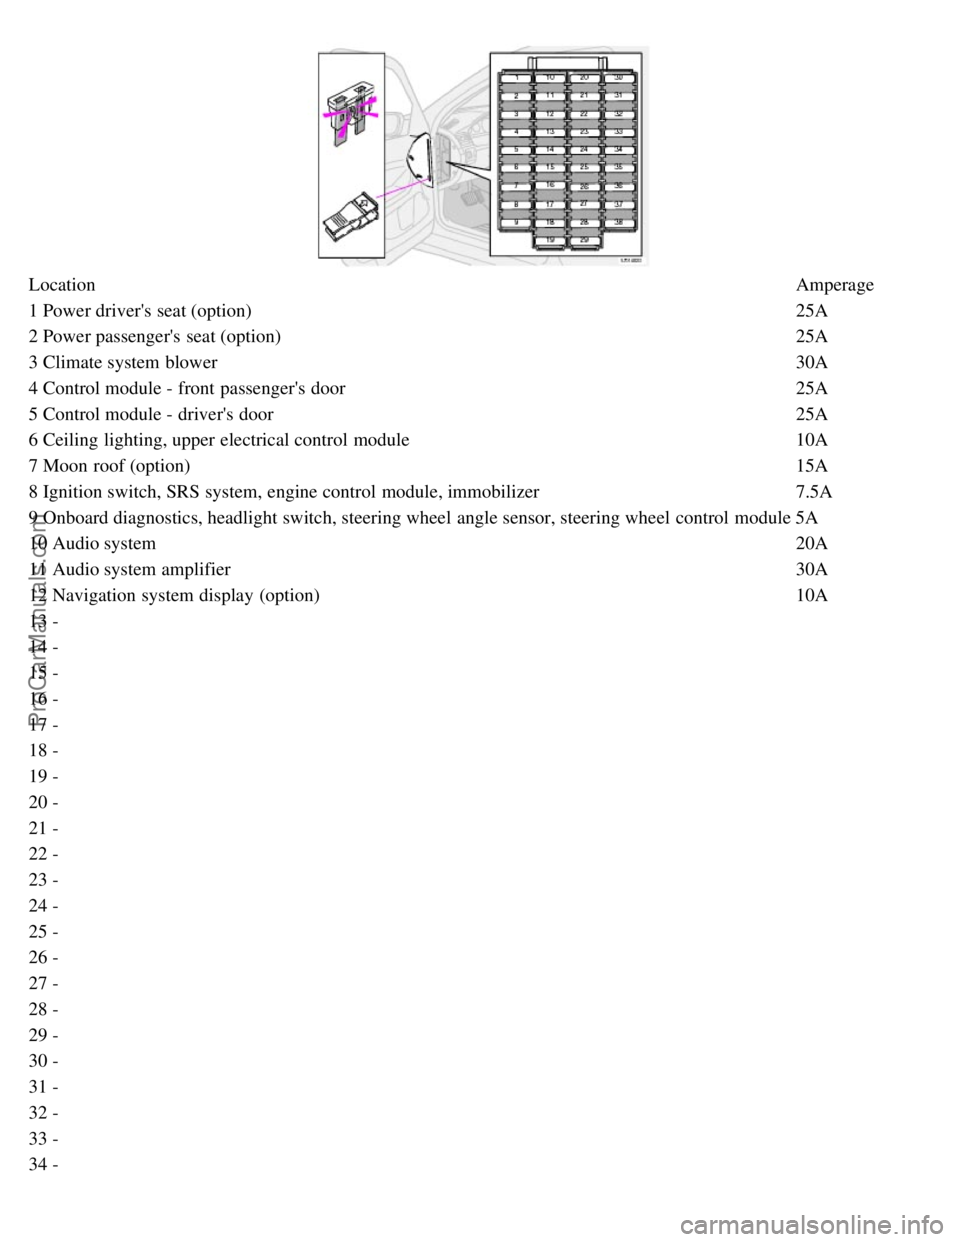
LocationAmperage
1 Power driver's seat (option) 25A
2 Power passenger's seat (option) 25A
3 Climate system blower 30A
4 Control module - front passenger's door 25A
5 Control module - driver's door 25A
6 Ceiling lighting, upper electrical control module 10A
7 Moon roof (option) 15A
8 Ignition switch, SRS system, engine control module, immobilizer 7.5A
9 Onboard diagnostics, headlight switch, steering wheel angle sensor, steering wheel control module 5A
10 Audio system 20A
11 Audio system amplifier 30A
12 Navigation system display (option) 10A
13 -
14 -
15 -
16 -
17 -
18 -
19 -
20 -
21 -
22 -
23 -
24 -
25 -
26 -
27 -
28 -
29 -
30 -
31 -
32 -
33 -
34 -
ProCarManuals.com
Page 95 of 139
Replacing bulbs at the front of the vehicle
All front bulbs (except the optional front fog lights) are replaced from the engine compartment.
WARNING!
Bi -Xenon headlights (option) - due to the high voltage used by these headlights, these bulbs should only be replaced
by an authorized Volvo service technician.
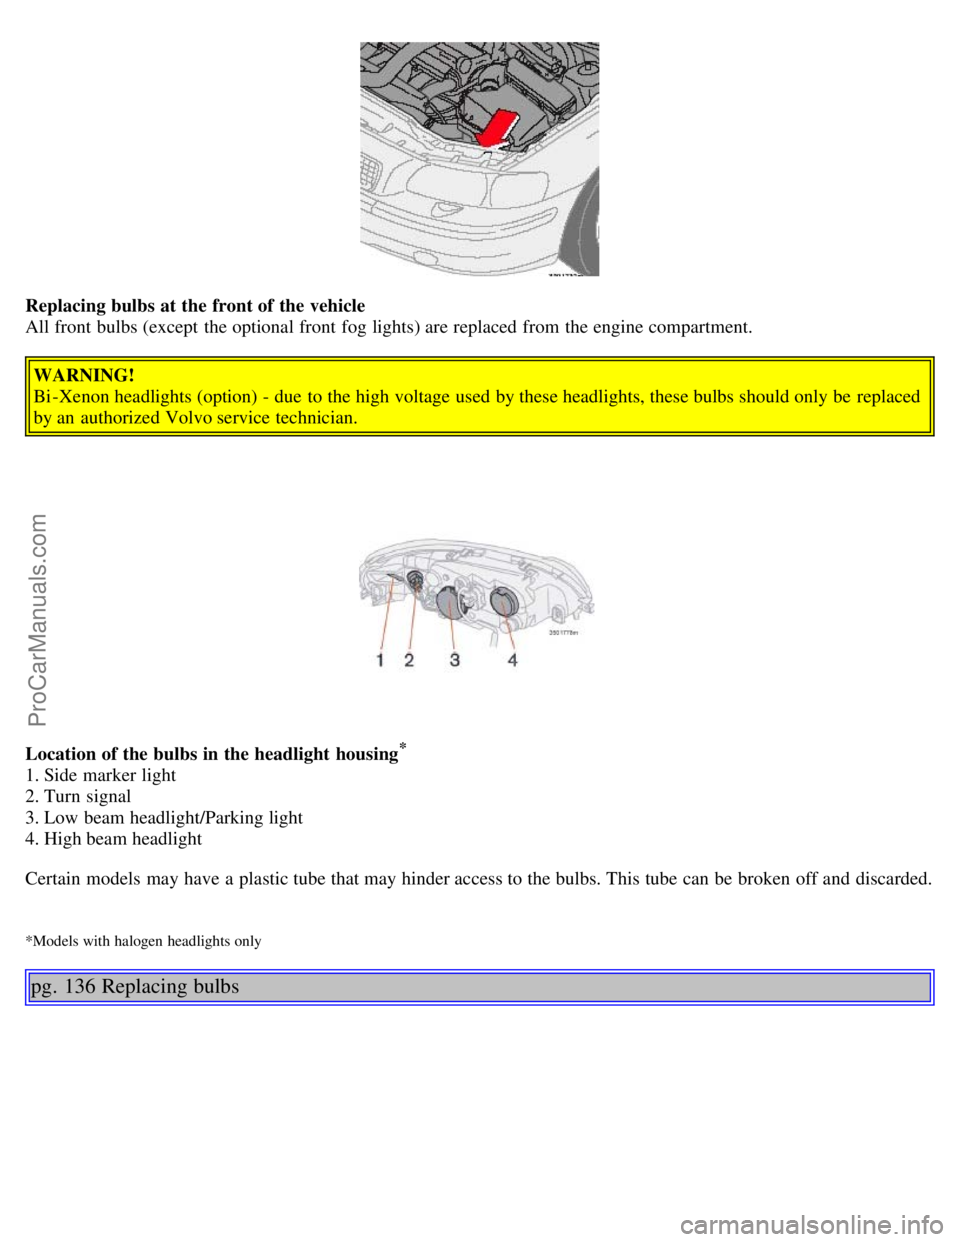
Location of the bulbs in the headlight housing
*
1. Side marker light
2. Turn signal
3. Low beam headlight/Parking light
4. High beam headlight
Certain models may have a plastic tube that may hinder access to the bulbs. This tube can be broken off and discarded.
*Models with halogen headlights only
pg. 136 Replacing bulbs
ProCarManuals.com
Page 103 of 139
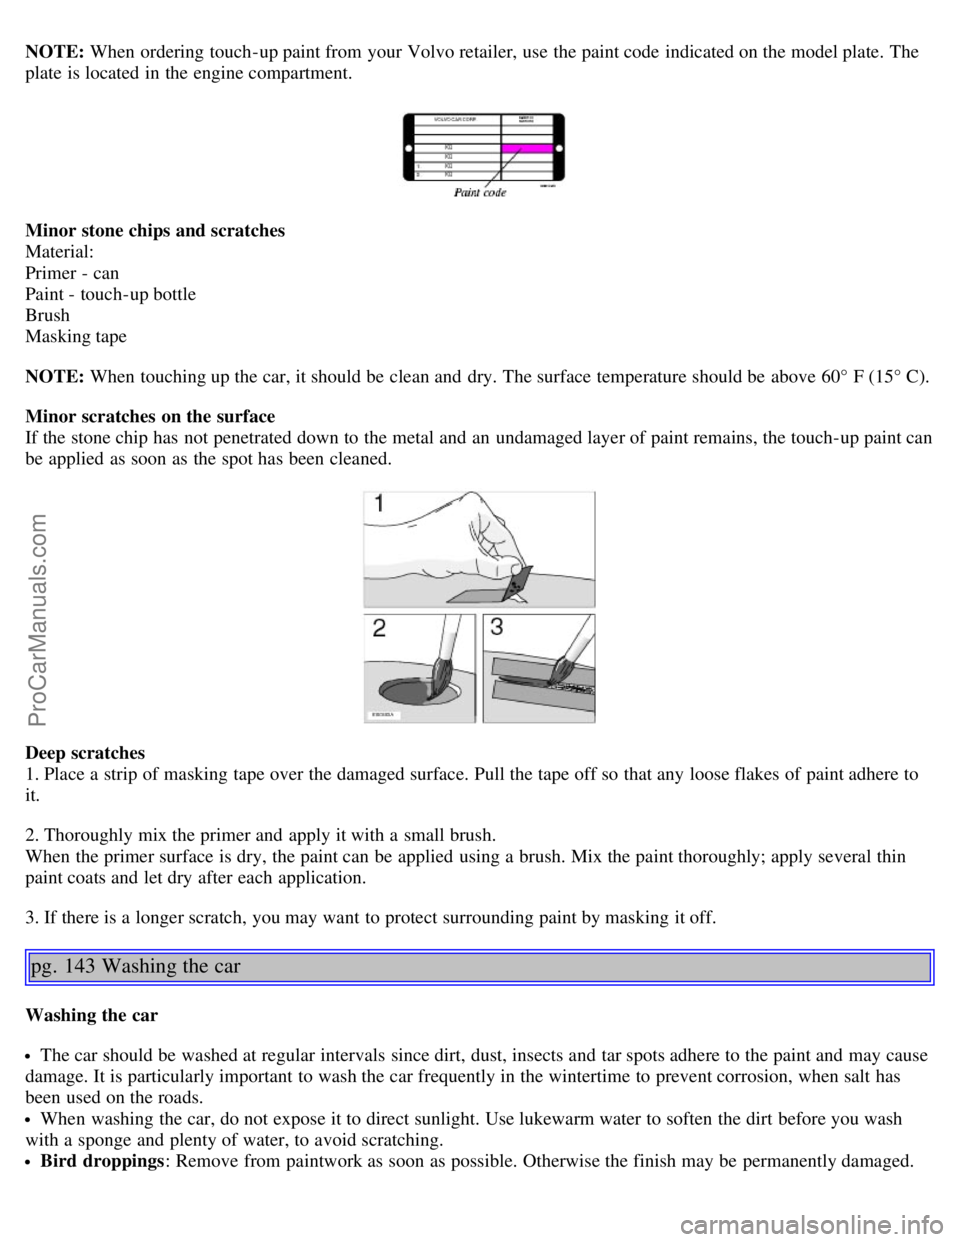
NOTE: When ordering touch-up paint from your Volvo retailer, use the paint code indicated on the model plate. The
plate is located in the engine compartment.
Minor stone chips and scratches
Material:
Primer - can
Paint - touch-up bottle
Brush
Masking tape
NOTE: When touching up the car, it should be clean and dry. The surface temperature should be above 60° F (15° C).
Minor scratches on the surface
If the stone chip has not penetrated down to the metal and an undamaged layer of paint remains, the touch-up paint can
be applied as soon as the spot has been cleaned.
Deep scratches
1. Place a strip of masking tape over the damaged surface. Pull the tape off so that any loose flakes of paint adhere to
it.
2. Thoroughly mix the primer and apply it with a small brush.
When the primer surface is dry, the paint can be applied using a brush. Mix the paint thoroughly; apply several thin
paint coats and let dry after each application.
3. If there is a longer scratch, you may want to protect surrounding paint by masking it off.
pg. 143 Washing the car
Washing the car
The car should be washed at regular intervals since dirt, dust, insects and tar spots adhere to the paint and may cause
damage. It is particularly important to wash the car frequently in the wintertime to prevent corrosion, when salt has
been used on the roads.
When washing the car, do not expose it to direct sunlight. Use lukewarm water to soften the dirt before you wash
with a sponge and plenty of water, to avoid scratching.
Bird droppings : Remove from paintwork as soon as possible. Otherwise the finish may be permanently damaged.
ProCarManuals.com
Page 104 of 139

A detergent can be used to facilitate the softening of dirt and oil.
A water-soluble grease solvent may be used in cases of sticky dirt. However, use a wash place equipped with a
drainage separator.
Remove dirt from the drain holes in the doors and rocker panels.
Dry the car with a clean chamois.
Tar spots can be removed with kerosene or tar remover after the car has been washed.
A stiff-bristle brush and lukewarm soapy water can be used to clean the wiper blades. Frequent cleaning improves
visibility considerably.
Wash off the dirt from the underside (wheel housings, fenders, etc.).
In areas of high industrial fallout, more frequent washing is recommended.
CAUTION:
During high pressure washing, the spray mouthpiece must never be closer to the vehicle than 13" (30 cm). Do not
spray into the locks.
Special moonroof cautions:
- Always close the moonroof and sun shade before washing your vehicle.
- Never use abrasive cleaning agents on the moonroof.
- Never use wax on the rubber seals around the moonroof.
When washing or steam cleaning the engine, avoid spraying water or steam directly on the electrical components or
toward the rear side of the engine.
After cleaning the engine, the spark plug wells should be inspected for water and blown dry if necessary.
Suitable detergents: Special car washing detergents should be used. Mix according to manufacturer's instructions.
Bumpers: The bumpers are painted. Wash the bumpers with the same cleaning agent used on the rest of the car.
Never clean the bumpers with gasoline or paint thinner. Difficult spots can be removed with denatured alcohol. To
avoid scratches, do not dry the bumpers with paper.
WARNING!
When the car is driven immediately after being washed, apply the brakes several times in order to remove any
moisture from the brake linings.
Engine cleaning agents should not be used when the engine is warm. This constitutes a fire risk.
Sideview mirrors with the water repellent glass coating (option)
Cleaning water repellent glass
Do not apply wax, degreasing agents, etc. to this glass. This could damage the coating.
Clean the glass surface with care to avoid scratching.
pg. 144 Washing the car
Automatic washing - simple and quick
We do NOT recommend washing your car in an automatic wash during the first six months (because the
paint will not have hardened sufficiently).
An automatic wash is a simple and quick way to clean your car, but it is worth remembering that it may not be as
thorough as when you yourself go over the car with sponge and water. Keeping the underbody clean is most important,
especially in the winter. Some automatic washers do not have facilities for washing the underbody.
Before driving into an automatic wash, make sure that side view mirrors, auxiliary lamps, etc, are secure, otherwise
ProCarManuals.com
Page 108 of 139
2 0 0 5
VOLVO V70
Chapter 9 - Specifications
pg. 159 Specifications
Label information160
Dimensions and weights161
Engine specifications163
Oil/fluid specifications and volumes164
Fuel system, Distributor ignition system, Suspension165
Electrical system166
Volvo On Call Roadside Assistance167
pg. 160 Label information
1 Vehicle Emission Control Information
Your Volvo is designed to meet all applicable emission standards, as evidenced by the certification label on the
underside of the hood. For further information regarding these regulations, please consult your Volvo retailer.
2 Vacuum hose routing
(underside of hood)
3 Loads and Tire Pressures
(on inside of fuel filler door): Canadian models only.
4 Model plate
Vehicle Identification Number (VIN). Codes for color and upholstery, etc. The plate is located in the engine
compartment, on the inside of the left front fender.
5 Vehicle Identification Number (VIN) *
The VIN plate is located on the top left surface of the dashboard. The VIN is also stamped on the right hand door
pillar.
6 Federal Motor Vehicle Safety Standards (FMVSS) specifications (USA) and Ministry of Transport (CMVSS)
standards (Canada)
Your Volvo is designed to meet all applicable safety standards, as evidenced by the certification label on the facing
side of the driver's door. For further information regarding these regulations, please consult your Volvo retailer.
7 Child safety latch label
ProCarManuals.com
Page 111 of 139
Max tongue weight *** 165 lbs 75 kg
WARNING!
When adding accessories, equipment, luggage and other cargo to your vehicle, the total loaded weight capacity of
the vehicle must not be exceeded.
* The max permissible axle loads or the gross vehicle weight must not be exceeded.
** When driving for prolonged periods at temperatures above 86° F (30° C), the maximum recommended weight is
2000 lbs (900 kg).
***See also section "Trailer towing"
pg. 163 Engine specifications
Engine specifications
Designation: Volvo B 5244 T5 Output 257 hp at 5500 rpm (191 kW/92 rps)
Max. torque 258 ft. lbs. at 2100-5000 rpm (330 Nm/42-87 rps)
Number of cylinders 5
Bore 3.19" (81 mm)
Stroke 3.67" (93.2 mm)
Displacement 2.4 liters
Compression ratio 8.5:1
Number of valves 20
Designation: Volvo B 5254 T2 Output 208 hp at 5000 rpm (154 kW/83 rps)
Max. torque 236 ft. lbs. at 1500-4500 rpm (320 Nm/25-75 rps)
Number of cylinders 5
Bore 3.27" (83 mm)
Stroke 3.67" (93.2 mm)
Displacement 2.5 liters
Compression ratio 9.0:1
Number of valves 20
Designation: Volvo B 5244 S Output 165 hp at 6000 rpm (123 kW/100 rps)
Max. torque 166 ft. lbs. at 4500 rpm (225 Nm/75 rps)
Number of cylinders 5
Bore 3.27" (83 mm)
Stroke 3.54" (90 mm)
Displacement 2.4 liters
Compression ratio 10.3:1
Number of valves 20
Designation: Volvo B 5254 T4 Output 300 hp at 5500 rpm* (220 kW/92 rps)*
ProCarManuals.com