window VOLVO V90 2017 Owner's Guide
[x] Cancel search | Manufacturer: VOLVO, Model Year: 2017, Model line: V90, Model: VOLVO V90 2017Pages: 594, PDF Size: 15.07 MB
Page 209 of 594
CLIMATE CONTROL
}}
* Option/accessory.207
The function utilises several systems in different cases: •
Residual heat from the engine, in a cold cli- mate, heats the passenger compartment tocomfort temperature.
• The ventilation, in a hot climate, cools thepassenger compartment to the current outertemperature.
NOTE
Climate comfort retention is switched off when the car is locked from the outside toavoid using residual heat unnecessarily. Useof the function is intended to maintain climatecomfort when driver or passengers remaininside the car.
Related information
• Climate control (p. 182)
• Starting/stopping preconditioning
* (p. 207)
• Timer for preconditioning
* (p. 208)
• Starting/switching off climate comfort reten- tion
* (p. 210)
• Symbols and messages for parking climatecontrol
* (p. 212)
• Heater
* (p. 213)
• Parking heater
* (p. 214)
Starting/stopping preconditioning *
Preconditioning warms the passenger compart- ment and engine or airs the passenger compart-ment before driving. The function can use directstart from the centre display or a mobile phone.
Starting/stopping from the centre
display
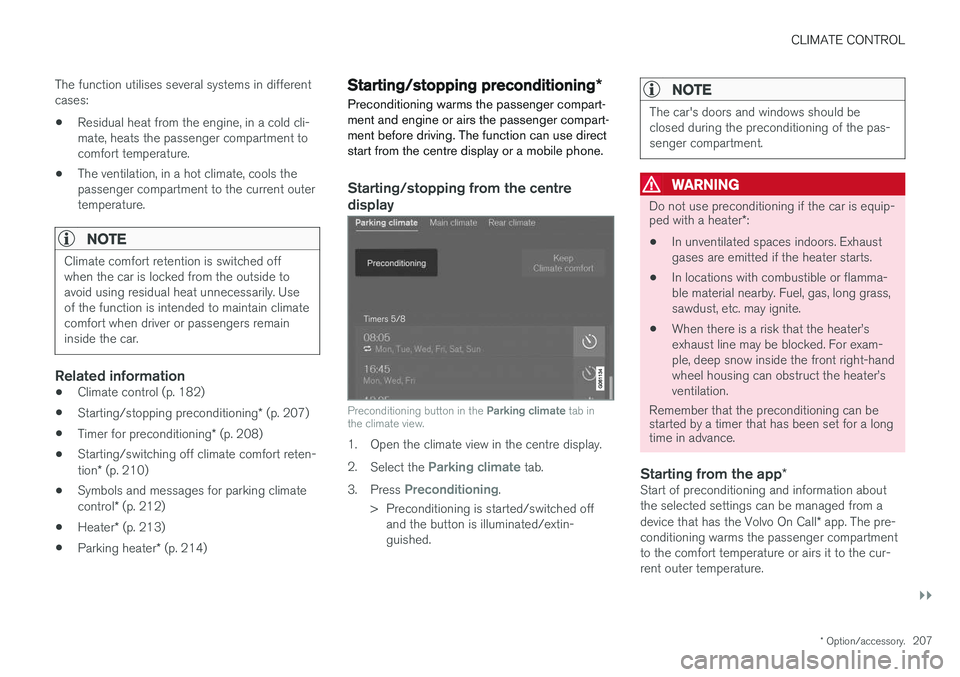
Preconditioning button in the Parking climate tab in
the climate view.
1. Open the climate view in the centre display. 2. Select the
Parking climate tab.
3. Press
Preconditioning.
> Preconditioning is started/switched off and the button is illuminated/extin- guished.
NOTE
The car's doors and windows should be closed during the preconditioning of the pas-senger compartment.
WARNING
Do not use preconditioning if the car is equip- ped with a heater *:
• In unventilated spaces indoors. Exhaust gases are emitted if the heater starts.
• In locations with combustible or flamma-ble material nearby. Fuel, gas, long grass,sawdust, etc. may ignite.
• When there is a risk that the heater
Page 211 of 594
CLIMATE CONTROL
* Option/accessory.209
3.
Press
Add timer.
> A pop-up window is shown.
NOTE
It is not possible to add a time setting if there already are 8 settings entered for the timer.Delete a time setting in order to be able toadd a new one.
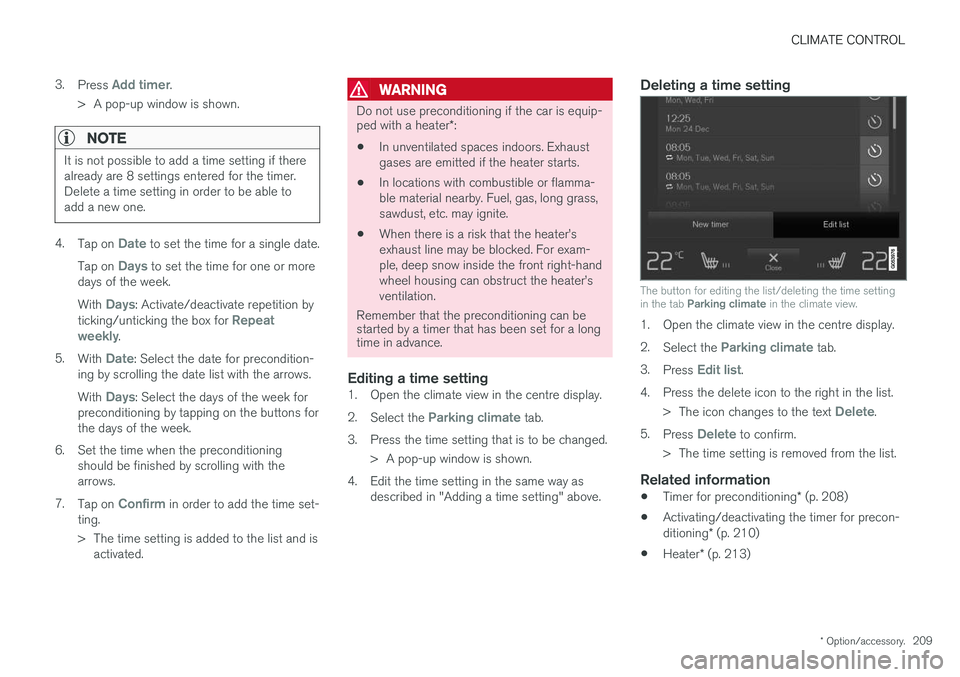
4. Tap on Date to set the time for a single date.
Tap on
Days to set the time for one or more
days of the week. With
Days: Activate/deactivate repetition by
ticking/unticking the box for Repeat
weekly.
5. With
Date: Select the date for precondition-
ing by scrolling the date list with the arrows. With
Days: Select the days of the week for
preconditioning by tapping on the buttons for the days of the week.
6. Set the time when the preconditioning should be finished by scrolling with thearrows.
7. Tap on
Confirm in order to add the time set-
ting.
> The time setting is added to the list and is activated.
WARNING
Do not use preconditioning if the car is equip- ped with a heater *:
• In unventilated spaces indoors. Exhaust gases are emitted if the heater starts.
• In locations with combustible or flamma-ble material nearby. Fuel, gas, long grass,sawdust, etc. may ignite.
• When there is a risk that the heater
Page 239 of 594
LOCKS AND ALARM
}}
* Option/accessory.237
simultaneously, also called Global opening
1
.
See the section "Locking/unlocking from the outside".
Tailgate - Unlocks the tailgate only and
disarms its alarm. On cars with power oper- ated tailgate *, the tailgate is opened auto-
matically when the button is held depressed. The tailgate is also closed with a long press -acoustic warning signals sound. See the sec-tion "Power operated tailgate".
Panic function – Used to attract attention
in an emergency. Press and hold the button for at least 3 seconds or press it twice within3 seconds to activate the direction indicatorsand the horn. The function can be turned offwith the same button once it has been activefor at least 5 seconds. Otherwise the func-tion switches off automatically after3 minutes.
WARNING
If anyone is left in the car, make sure the power windows and sunroof are de-energisedby always taking the remote control key withyou when you leave the car.
NOTE
Be aware of the risk of locking the remote control key/Key Tag in the car. A remote control key/Key Tag left in the car will be deactivated when the car is locked andthe alarm is armed using another valid key.The deactivated key is reactivated when thecar is unlocked.
InterferenceRemote control key functions for keyless starting and keyless locking/unlocking * can be disrupted
by electromagnetic fields and screening.
NOTE
Avoid storing the remote control key close to metal objects or electronic apparatus, e.g.mobile phones, tablets, laptops or chargers -preferably no closer than 10-15 cm.
If there is still interference - use the remote con- trol key's key blade and then place the key in thebackup reader in the cup holder to disarm thecar. See section "Locking/unlocking with thedetachable key blade".
NOTE
When the remote control key is placed in the cup holder, make sure that no other car keys,metal objects or electronic apparatus (e.g.mobile phones, tablets, laptops or chargers)are in the cup holder. Several car keys closeto each other in the cup holder can causeinterference with each other.
Loss of a remote control keyIf you lose a remote control key then a new one can be ordered at a workshop - an authorisedVolvo workshop is recommended. The remainingremote control keys must be taken to the work-shop. The code of the missing key must beerased from the system as a theft preventionmeasure. The current number of keys registered to the car can be checked in the centre display's top view.
Related information
• Remote control key range (p. 238)
• Detachable key blade (p. 250)
• Replacing the battery in the remote controlkey (p. 257)
• Locking/unlocking from the inside (p. 245)
• Locking/unlocking from the outside (p. 241)
• Driver profiles (p. 174)
1
Used, for example, to quickly air the car during hot weather.
Page 244 of 594
||
LOCKS AND ALARM
* Option/accessory.
242
Touch-sensitive surfaces
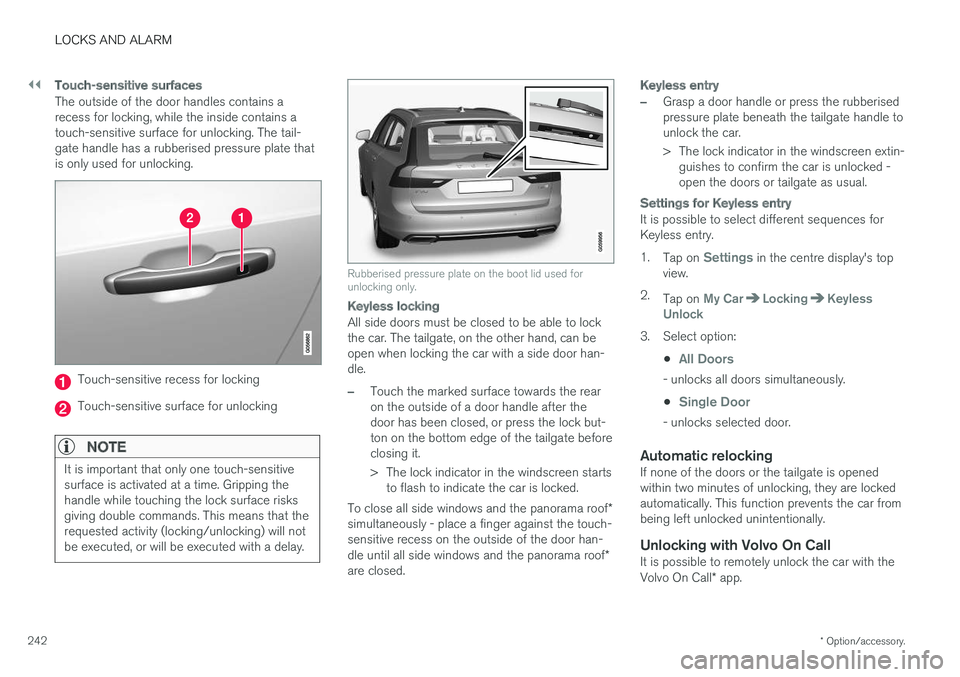
The outside of the door handles contains a recess for locking, while the inside contains atouch-sensitive surface for unlocking. The tail-gate handle has a rubberised pressure plate thatis only used for unlocking.
Touch-sensitive recess for locking
Touch-sensitive surface for unlocking
NOTE
It is important that only one touch-sensitive surface is activated at a time. Gripping thehandle while touching the lock surface risksgiving double commands. This means that therequested activity (locking/unlocking) will notbe executed, or will be executed with a delay.
Rubberised pressure plate on the boot lid used for unlocking only.
Keyless locking
All side doors must be closed to be able to lock the car. The tailgate, on the other hand, can beopen when locking the car with a side door han-dle.
–Touch the marked surface towards the rear on the outside of a door handle after thedoor has been closed, or press the lock but-ton on the bottom edge of the tailgate beforeclosing it.
> The lock indicator in the windscreen starts
to flash to indicate the car is locked.
To close all side windows and the panorama roof *
simultaneously - place a finger against the touch- sensitive recess on the outside of the door han- dle until all side windows and the panorama roof *
are closed.
Keyless entry
–Grasp a door handle or press the rubberised pressure plate beneath the tailgate handle tounlock the car.
> The lock indicator in the windscreen extin- guishes to confirm the car is unlocked - open the doors or tailgate as usual.
Settings for Keyless entry
It is possible to select different sequences for Keyless entry. 1. Tap on
Settings in the centre display's top
view.
2. Tap on
My CarLockingKeyless
Unlock
3. Select option:
•
All Doors
- unlocks all doors simultaneously.
•
Single Door
- unlocks selected door.
Automatic relockingIf none of the doors or the tailgate is opened within two minutes of unlocking, they are lockedautomatically. This function prevents the car frombeing left unlocked unintentionally.
Unlocking with Volvo On CallIt is possible to remotely unlock the car with the Volvo On Call * app.
Page 247 of 594
LOCKS AND ALARM
}}
* Option/accessory.245
Locking/unlocking from the inside
The doors and tailgate can be locked and unlocked from inside using the central locking controls in the front doors. The lock controls * on
the rear doors each lock their own rear door.
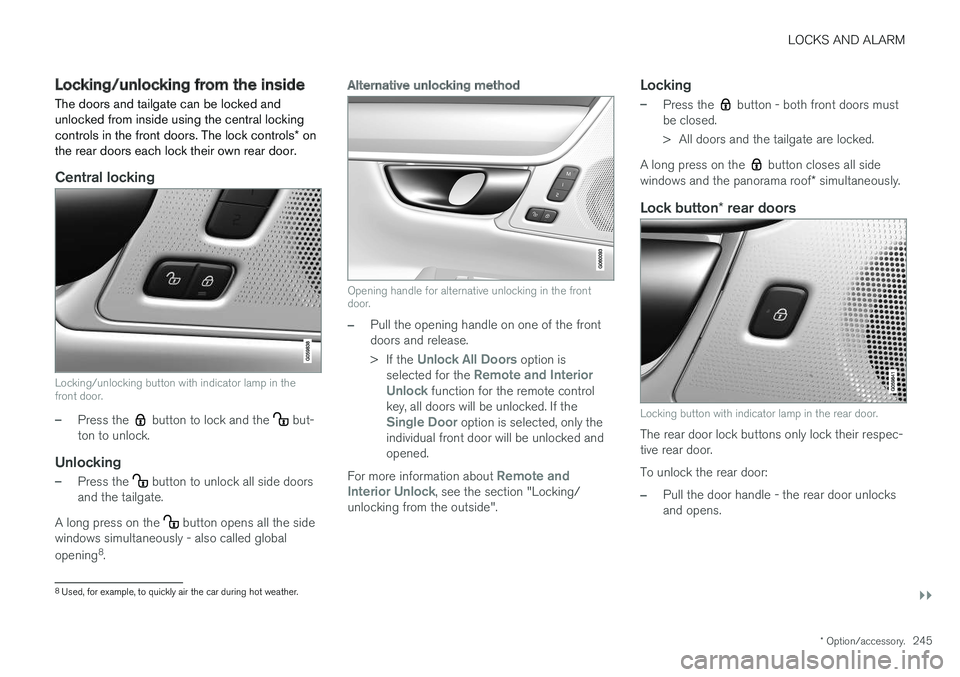
Central locking
Locking/unlocking button with indicator lamp in the front door.
–Press the button to lock and the but-
ton to unlock.
Unlocking
–Press the button to unlock all side doors
and the tailgate.
A long press on the
button opens all the side
windows simultaneously - also called global opening 8
.
Alternative unlocking method
Opening handle for alternative unlocking in the front door.
–Pull the opening handle on one of the front doors and release. > If the
Unlock All Doors option is
selected for the Remote and Interior
Unlock function for the remote control
key, all doors will be unlocked. If the
Single Door option is selected, only the
individual front door will be unlocked and opened.
For more information about
Remote and
Interior Unlock, see the section "Locking/
unlocking from the outside".
Locking
–Press the button - both front doors must
be closed.
> All doors and the tailgate are locked.
A long press on the
button closes all side
windows and the panorama roof * simultaneously.
Lock button * rear doors
Locking button with indicator lamp in the rear door.
The rear door lock buttons only lock their respec- tive rear door. To unlock the rear door:
–Pull the door handle - the rear door unlocks and opens.
8
Used, for example, to quickly air the car during hot weather.
Page 251 of 594
LOCKS AND ALARM
}}
* Option/accessory.249
Related information
•Remote control key (p. 236)
• Power operated tailgate
* (p. 253)
• Opening/closing the tailgate with foot move- ment
* (p. 256)
Using private locking
The tailgate can be locked with the private lock- ing function when the car is taken in for service,left at a hotel or similar.
NOTE
The car needs to be in ignition mode I as a
minimum for the private locking function to be activated.
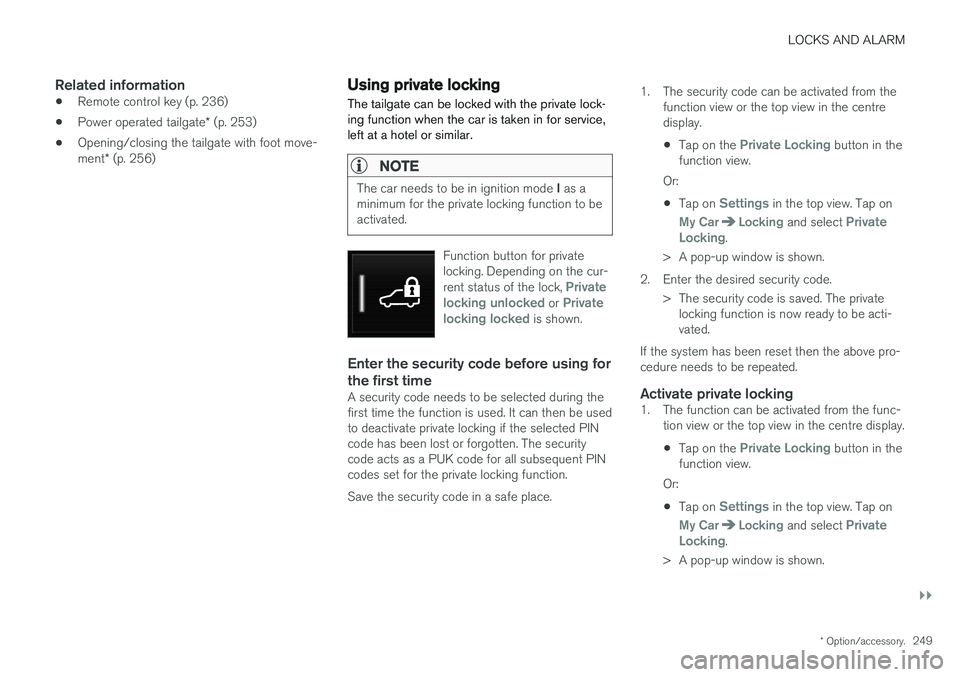
Function button for private locking. Depending on the cur- rent status of the lock,
Private
locking unlocked or Private
locking locked is shown.
Enter the security code before using for the first time
A security code needs to be selected during the first time the function is used. It can then be usedto deactivate private locking if the selected PINcode has been lost or forgotten. The securitycode acts as a PUK code for all subsequent PINcodes set for the private locking function. Save the security code in a safe place. 1. The security code can be activated from the
function view or the top view in the centre display.
• Tap on the
Private Locking button in the
function view.
Or:
• Tap on
Settings in the top view. Tap on
My CarLocking and select Private
Locking.
> A pop-up window is shown.
2. Enter the desired security code. > The security code is saved. The privatelocking function is now ready to be acti- vated.
If the system has been reset then the above pro-cedure needs to be repeated.
Activate private locking1. The function can be activated from the func- tion view or the top view in the centre display.
• Tap on the
Private Locking button in the
function view.
Or:
• Tap on
Settings in the top view. Tap on
My CarLocking and select Private
Locking.
> A pop-up window is shown.
Page 252 of 594
||
LOCKS AND ALARM
* Option/accessory.
250 2. Enter the code to be used in order to unlock
the tailgate after locking and tap on
Confirm.
> The tailgate is locked. Locking is con- firmed by a green indication at the button in the function view and the private lock-ing box being ticked in the settings view.
Deactivate private locking1. The function can be deactivated from the function view or the top view in the centredisplay.
• Tap on the
Private Locking button in the
function view.
Or:
• Tap on
Settings in the top view. Tap on
My CarLocking and select Private
Locking.
> A pop-up window is shown.
2. Enter the code that was used for locking and tap on
Confirm.
> The tailgate is unlocked. Unlocking is con- firmed by the green indication at the but- ton in the function view disappearing andthe tick disappearing from the privatelocking box in the settings view.
NOTE
If the PIN code has been lost/forgotten, or if the wrong PIN code has been entered morethan three times, the security code can beused to deactivate the private locking.
NOTE
Is private locking is activated and the car is unlocked via Volvo On Call * or the Volvo On
Call * app, private locking will be deactivated
automatically.
Related information
• Using the glovebox (p. 225)
• Locking/unlocking the tailgate (p. 247)
Detachable key blade The remote control key contains a detachable key blade of metal with which a number of func-tions can be activated and some operations car-ried out.
The key blade's unique code is provided by authorised Volvo workshops, which are recom-mended when ordering new key blades.
The key blade's application areasUsing the remote control key's detachable keyblade:
• the left-hand 9
front door can be opened
manually if central locking cannot be acti-vated with the remote control key.
• all doors are emergency locked - see thesection "Locking/unlocking with detachablekey blade".
• the rear doors' mechanical child safety lockscan be activated/deactivated - see the sec-tion "Child safety locks".
The button-less key 10
(Key Tag) does not have a
detachable key blade. If necessary, use thedetachable key blade from the normal remotecontrol key.
9 This applies whether the car is left-hand drive or right-hand drive.
10 Supplied with cars equipped with the keyless locking/unlocking option (Passive Entry *).
Page 263 of 594
LOCKS AND ALARM
}}
* Option/accessory.261
Child safety locks
The child safety locks prevent children from being able to open a rear door from the inside. There is an electric * and a manual lock.
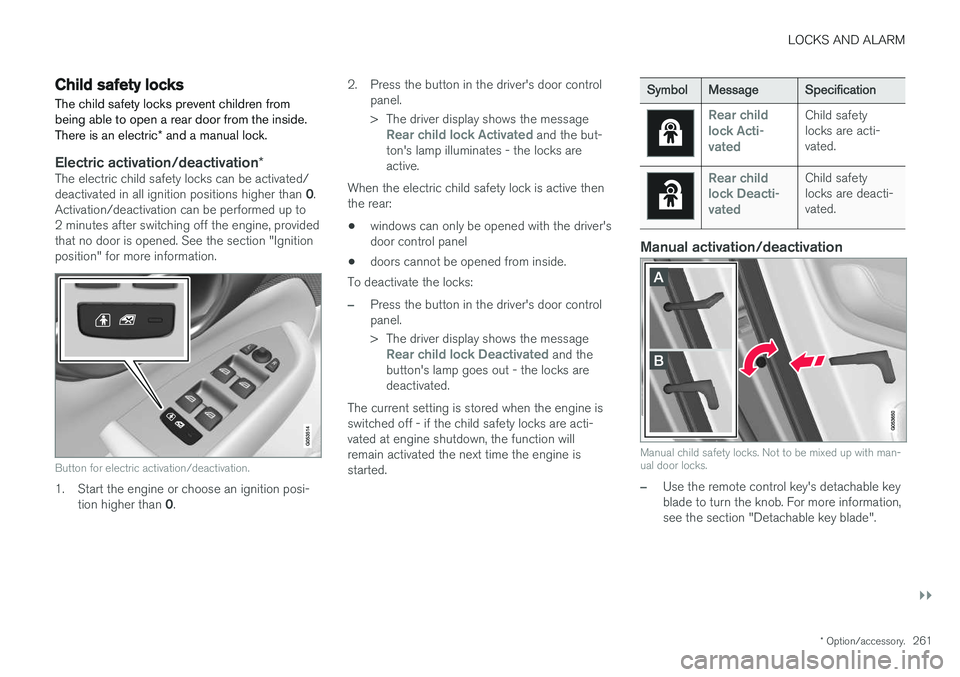
Electric activation/deactivation *The electric child safety locks can be activated/ deactivated in all ignition positions higher than 0.
Activation/deactivation can be performed up to 2 minutes after switching off the engine, providedthat no door is opened. See the section "Ignitionposition" for more information.
Button for electric activation/deactivation.
1. Start the engine or choose an ignition posi-
tion higher than 0. 2. Press the button in the driver's door control
panel.
> The driver display shows the message
Rear child lock Activated and the but-
ton's lamp illuminates - the locks are active.
When the electric child safety lock is active thenthe rear:
• windows can only be opened with the driver'sdoor control panel
• doors cannot be opened from inside.
To deactivate the locks:
–Press the button in the driver's door control panel.
> The driver display shows the message
Rear child lock Deactivated and the
button's lamp goes out - the locks are deactivated.
The current setting is stored when the engine isswitched off - if the child safety locks are acti-vated at engine shutdown, the function willremain activated the next time the engine isstarted.
Symbol Message Specification
Rear child lock Acti-
vatedChild safety locks are acti-vated.
Rear child lock Deacti-
vatedChild safety locks are deacti-vated.
Manual activation/deactivation
Manual child safety locks. Not to be mixed up with man- ual door locks.
–Use the remote control key's detachable key blade to turn the knob. For more information,see the section "Detachable key blade".
Page 264 of 594
||
LOCKS AND ALARM
* Option/accessory.
262
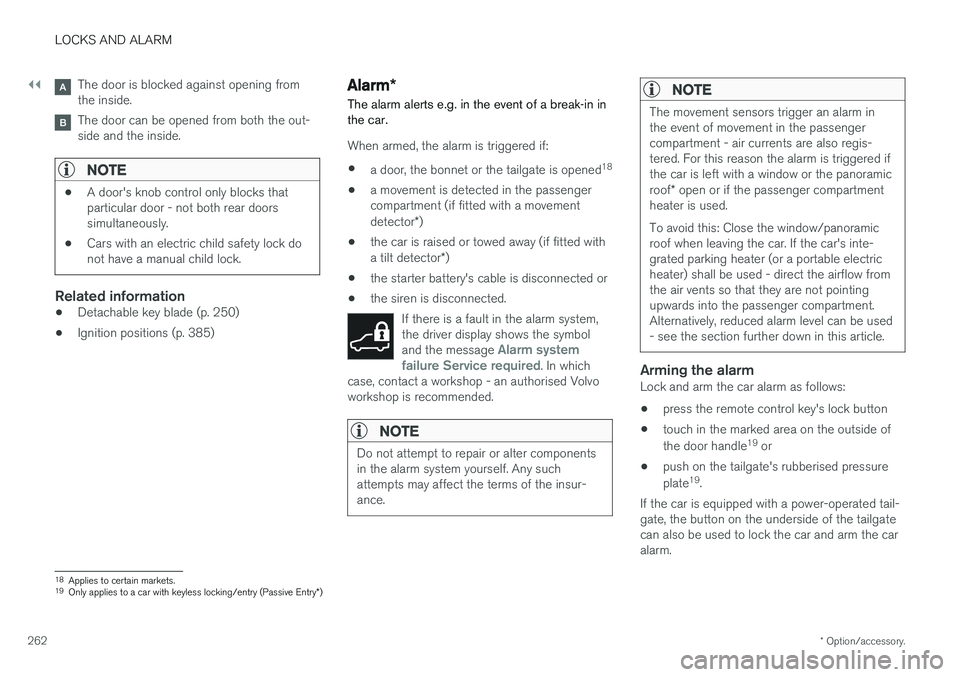
The door is blocked against opening from the inside.
The door can be opened from both the out- side and the inside.
NOTE
• A door's knob control only blocks that particular door - not both rear doorssimultaneously.
• Cars with an electric child safety lock donot have a manual child lock.
Related information
• Detachable key blade (p. 250)
• Ignition positions (p. 385)
Alarm
*
The alarm alerts e.g. in the event of a break-in in the car.
When armed, the alarm is triggered if:
• a door, the bonnet or the tailgate is opened 18
• a movement is detected in the passenger compartment (if fitted with a movement detector
*)
• the car is raised or towed away (if fitted witha tilt detector
*)
• the starter battery's cable is disconnected or
• the siren is disconnected.
If there is a fault in the alarm system, the driver display shows the symbol and the message
Alarm system
failure Service required. In which
case, contact a workshop - an authorised Volvo workshop is recommended.
NOTE
Do not attempt to repair or alter components in the alarm system yourself. Any suchattempts may affect the terms of the insur-ance.
NOTE
The movement sensors trigger an alarm in the event of movement in the passengercompartment - air currents are also regis-tered. For this reason the alarm is triggered ifthe car is left with a window or the panoramic roof * open or if the passenger compartment
heater is used. To avoid this: Close the window/panoramic roof when leaving the car. If the car's inte-grated parking heater (or a portable electricheater) shall be used - direct the airflow fromthe air vents so that they are not pointingupwards into the passenger compartment.Alternatively, reduced alarm level can be used- see the section further down in this article.
Arming the alarmLock and arm the car alarm as follows:
• press the remote control key's lock button
• touch in the marked area on the outside of the door handle 19
or
• push on the tailgate's rubberised pressureplate 19
.
If the car is equipped with a power-operated tail- gate, the button on the underside of the tailgatecan also be used to lock the car and arm the caralarm.
18 Applies to certain markets.
19 Only applies to a car with keyless locking/entry (Passive Entry *)
Page 323 of 594
DRIVER SUPPORT
}}
* Option/accessory.321
High temperatureAt very high temperatures the camera and radar unit can temporarily be switched off forabout 15 minutes after the engine is started soas to protect the unit's electronics. The cameraand radar unit restarts automatically when thetemperature has fallen sufficiently.
Damaged windscreen
IMPORTANT
If a crack, scratch or stone chip in the wind- screen in front of one of the camera andradar unit “windows” covers an area ofapprox. 0.5 x 3.0 mm or larger, a workshopmust be contacted to have the windscreenreplaced. An authorised Volvo workshop isrecommended. If not rectified it can lead to reduced perform- ance for the driver support systems that usethe camera and radar unit. This may mean that functions are reduced, deactivated completely or give incorrect func-tion response. To avoid the risk of failed, deficient or reduced operation of driver support systemsthat use the radar unit, the following alsoapplies:
• Volvo recommends
against repairing
cracks, scratches or stone chips in thearea in front of the camera and radar unit.Instead, the whole windscreen should bereplaced.
• Before replacing a windscreen, contactan authorised Volvo workshop to verifythat the correct windscreen is orderedand fitted.
• The same type or Volvo-approved wind- screen wipers must be fitted duringreplacement.
IMPORTANT
When the windscreen is replaced, the camera and radar unit must be recalibrated at theworkshop to ensure the functionality of all thecar