spare wheel VOLVO V90 2017 Owners Manual
[x] Cancel search | Manufacturer: VOLVO, Model Year: 2017, Model line: V90, Model: VOLVO V90 2017Pages: 594, PDF Size: 15.07 MB
Page 12 of 594
10
WHEELS AND TYRES
Tyres482
Tyres' rotation direction 483
Tread wear indicators on the tyres 484
Checking the tyre pressures 484
Tyre monitoring *
485
Checking tyre pressure with the tyre monitoring system * 487
Rectifying low tyre pressure with tyremonitoring * 488
Calibrating tyre monitoring *
489
Emergency puncture repair kit 490
Using the emergency puncture repair kit 491
Inflate tyres with the compressor from the emergency puncture repair kit 494
When changing wheels 495
Removing a wheel 495
Fitting the wheels 497
Wheel bolts 498
Spare wheel *
498
Winter wheels 499
Tool kit 500
Warning triangle 500
Jack *
501
First aid kit 501
Dimension designation for wheel rim 502
Dimension designation for tyre502
MAINTENANCE AND SERVICE
Volvo service programme506
Car status 506
Book service and repair 506
Inspection and service of the system for vehicle gas * 509
Remote updates 509
System updates 510
Data transmission between car and workshop 511
Raise the car 512
Opening and closing the bonnet 514
Engine compartment overview 515
Engine oil 516
Checking and filling with engine oil 517
Topping up coolant 518
Servicing the climate control system 520
Bulb replacement 520
Replacing the dipped beam bulb 522
Replacing the main beam lamp 523
Replacing daytime running lightbulb/position lamp bulb, front 524
Replacing the front direction indica-tor bulb 524
Replacing the reversing lamp bulb 525
Replacing the rear fog lamp bulb 526
Bulb specifications 526
Page 228 of 594
||
LOADING AND STORAGE
* Option/accessory.
226
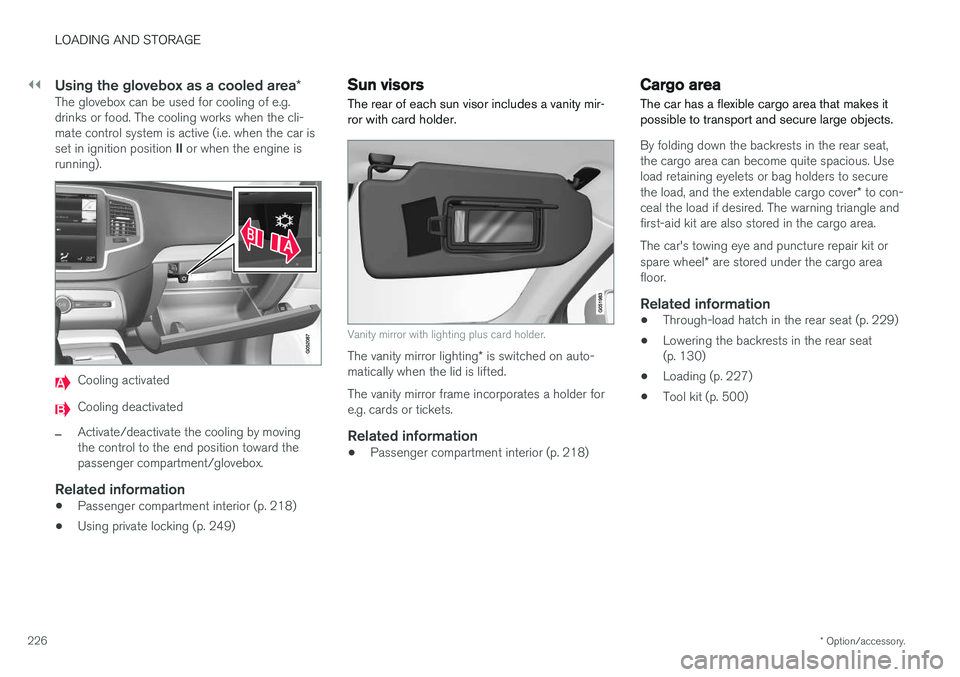
Using the glovebox as a cooled area *The glovebox can be used for cooling of e.g. drinks or food. The cooling works when the cli-mate control system is active (i.e. when the car is set in ignition position II or when the engine is
running).
Cooling activated
Cooling deactivated
–Activate/deactivate the cooling by moving the control to the end position toward thepassenger compartment/glovebox.
Related information
• Passenger compartment interior (p. 218)
• Using private locking (p. 249)
Sun visors The rear of each sun visor includes a vanity mir- ror with card holder.
Vanity mirror with lighting plus card holder.
The vanity mirror lighting
* is switched on auto-
matically when the lid is lifted. The vanity mirror frame incorporates a holder for e.g. cards or tickets.
Related information
• Passenger compartment interior (p. 218)
Cargo area
The car has a flexible cargo area that makes it possible to transport and secure large objects.
By folding down the backrests in the rear seat, the cargo area can become quite spacious. Useload retaining eyelets or bag holders to secure the load, and the extendable cargo cover * to con-
ceal the load if desired. The warning triangle and first-aid kit are also stored in the cargo area. The car's towing eye and puncture repair kit or spare wheel * are stored under the cargo area
floor.
Related information
• Through-load hatch in the rear seat (p. 229)
• Lowering the backrests in the rear seat (p. 130)
• Loading (p. 227)
• Tool kit (p. 500)
Page 381 of 594
DRIVER SUPPORT
}}
* Option/accessory.379
Limitations of Park Assist Pilot *
The Active parking assistance (Park Assist Pilot – PAP) function may have limitations in certainsituations.
Parking is discontinuedA parking sequence will be discontinued:
• if the driver moves the steering wheel
• if the car is driven too quickly - above 7 km/h (4 mph)
• if the driver presses
Cancel in the centre
display
• when the anti-lock brakes or the Electronic stability control are engaged - e.g. when awheel loses grip on a slippery road.
Where applicable, a message in the centre dis-play states the reason for a parking sequencebeing discontinued.
NOTE
Dirt, ice and snow covering the sensors will reduce their function and may prevent meas-urement.
IMPORTANT
Under certain circumstances, PAP is unable to find parking spaces - one reason for thismay be the fact that there is interference withthe sensors from external sound sourceswhich emit the same ultrasound frequenciesas those with which the system works. Examples of such sources include horns, wet tyres on asphalt, pneumatic brakes andexhaust noises from motorcycles etc.
Driver responsibilityThe driver should bear in mind that the PAP is an aid – not an infallible, fully-automatic function.The driver must therefore be prepared to inter-rupt a parking step. There are also a few details to bear in mind while parking, e.g.:
• PAP bases itself on the locations of vehiclesalready parked nearby - if they are inap-propriately parked, your own car's tyres andwheel rims may be damaged by contact withthe kerb.
• PAP is designed for parking on straightstreets - not sharp curves or bends. For thisreason, make sure the car is parallel to theparking space when PAP measures thespace. •
Parking spaces on narrow streets are notalways feasible, since the space required formanoeuvring may not be sufficient.
• Bear in mind that the front of the car mayswing out towards oncoming traffic whilebeing parked.
• Objects situated higher than the detectionareas of the sensors are not taken intoaccount when calculating the parkingmanoeuvre. This may cause PAP to turn intothe parking space too early, and hence suchparking spaces should be avoided.
• The driver is responsible for determiningwhether the space selected by PAP is suita-ble for parking.
• Use approved tyres 28
with the correct tyre
pressure - this affects the ability of PAP topark the car.
• Heavy rain or snow may cause the system tomeasure the parking space incorrectly.
• Do not use PAP if snow chains or a sparewheel are fitted.
• Do not use PAP if cargo items are protrudingfrom the car.
• Perpendicular parking spaces may be missedor offered unnecessarily if one parked car isprotruding more than other parked cars.
28
"Approved tyres" refers to tyres of the same type and make as those fitted new on delivery from the factory.
Page 418 of 594
STARTING AND DRIVING
* Option/accessory.
416 •
Speed camera information
* (p. 350)
• Driving with a trailer (p. 426)
• Driving in water (p. 413)
• Alarm
* (p. 262)
• Level control
* and shock absorption (p. 405)
• Warning triangle (p. 500)
• Emergency puncture repair kit (p. 490)
• Spare wheel
* (p. 498)
Winter driving
For winter driving it is important to perform cer- tain checks of the car in order to ensure that itcan be driven safely.
Check the following in particular before the cold season:
• The engine coolant must contain 50% glycol.This mixture protects the engine againstfrost erosion down to approximately –35 °C.To avoid health risks, different types of glycolmust not be mixed.
• The fuel tank must be kept filled to preventcondensation.
• Engine oil viscosity is important. Oils withlower viscosity (thinner oils) facilitate startingin cold weather and also reduce fuel con-sumption while the engine is cold. Readmore about suitable oils in the section"Adverse driving conditions for engine oil".
IMPORTANT
Low viscosity oil must not be used for hard driving or in hot weather.
• The condition of the starter battery and charge level must be inspected. Coldweather places great demands on the starter battery and its capacity is reduced by thecold.
• Use washer fluid with antifreeze to avoid iceforming in the washer fluid reservoir.
Slippery driving conditionsTo achieve optimum roadholding Volvo recom-mends using winter tyres on all wheels if there isa risk of snow or ice.
NOTE
The use of winter tyres is a legal requirement in certain countries. Studded tyres are notpermitted in all countries.
Practise driving on slippery surfaces under con- trolled conditions to learn how the car reacts.
Related information
•Topping up coolant (p. 518)
• Adverse driving conditions for engine oil(p. 569)
• Starter battery (p. 530)
• Winter wheels (p. 499)
• Filling washer fluid (p. 529)
• Replacing a wiper blade (p. 528)
• Parking climate
* (p. 206)
• Activating/deactivating defrost of windowsand door mirrors (p. 194)
Page 488 of 594
||
WHEELS AND TYRES
* Option/accessory.
486
General information on the tyre monitoring system
In the information below, the tyre monitoring sys- tem is referred to generically as TPMS. Each tyre, including the spare tyre *, should be
checked once a month. When checking, the tyre should be cold and have the air pressure recom-mended by the car manufacturer specified on thetyre pressure label or in the tyre pressure table. Ifthe car has tyres of a different size than that rec-ommended by the manufacturer, find out whatthe correct air pressure level is for these. As an extra safety feature, the car is equipped with a tyre pressure monitoring system (TPMS),which shows when the air pressure in one ormore tyres is too low. When the indicator symbolfor low air pressure is lit, stop and check the tyresas soon as possible and inflate to the correct airpressure. Driving with tyres that have tyre pressure that is too low may cause the tyre to overheat, whichcan cause a puncture. Low tyre pressure alsoreduces fuel efficiency as well as tyre service life,and can affect car handling and stopping ability.Note that TPMS does not replace regular tyremaintenance. It is the driver's responsibility tomaintain correct tyre pressure, even if the limit forlow tyre pressure has not been reached so thatthe indicator symbol illuminates. The car is also equipped with a TPMS system fault indicator, which indicates when the system is not functioning correctly. The TPMS systemfault indicator is combined with the indicator sym-bol for low tyre pressure. When the systemdetects a fault, the symbol in the driver displaywill flash for about one minute and then remainilluminated. This procedure will be repeated whenthe car is started until the fault has been rectified.When the symbol is illuminated, the system's abil-ity to detect or warn of low tyre pressure may beaffected. A TPMS system fault can occur for several rea- sons, such as after changing to a spare tyre, orchanging tyres or wheels that prevent TPMS fromfunctioning correctly. Always check the indicator symbol for TPMS after changing one or more tyres in order toensure the new tyre or wheel is working correctlywith TPMS.
Messages in the driver displayThe following messages may be shown when theindicator symbol is illuminated:
•
Tyre pressure low Check tyres, calibrate
after fill
•Tyre pressure system Temporarily
unavailable
•Tyre pressure system Service required.
If the system cannot determine which tyre has low pressure, all four tyres will be indicated in thecentre display.
To bear in mind
• Always calibrate the system after a wheelchange or tyre pressure adjustment. See thetyre pressure label on the driver's side doorpillar for Volvo's recommended tyre pres-sures.
• The system does not replace normal tyremaintenance.
• There is no option to deactivate ITPMS.
Related information
•Tyres (p. 482)
• Checking tyre pressure with the tyre monitor- ing system
* (p. 487)
• Calibrating tyre monitoring
* (p. 489)
• Rectifying low tyre pressure with tyre moni-toring
* (p. 488)
Page 497 of 594
WHEELS AND TYRES
}}
* Option/accessory.495
IMPORTANT
Risk of overheating. The compressor must not run for more than 10 minutes.
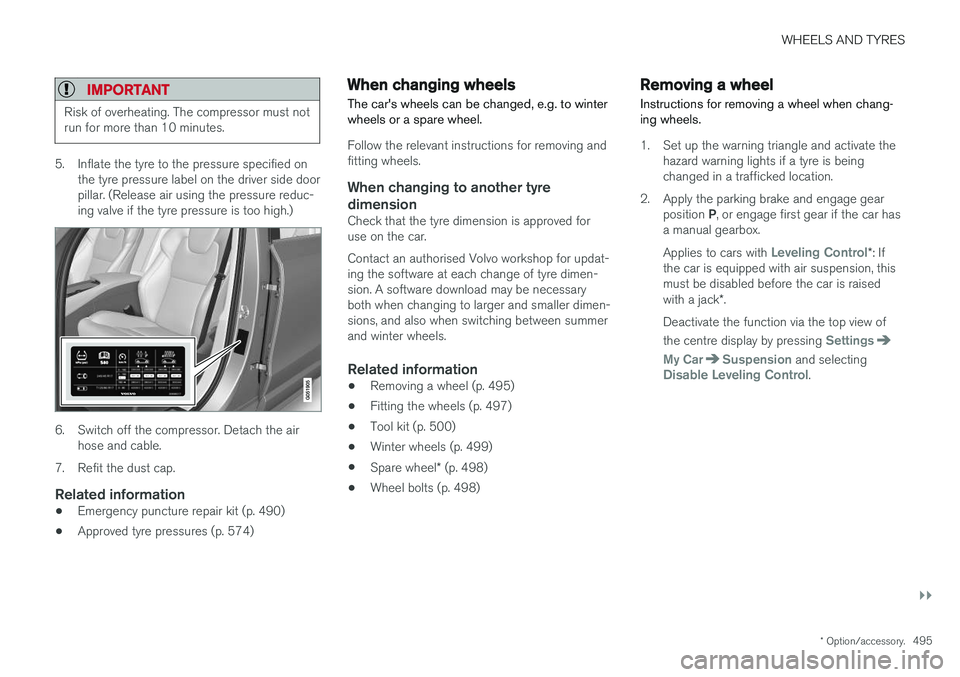
5. Inflate the tyre to the pressure specified on
the tyre pressure label on the driver side door pillar. (Release air using the pressure reduc-ing valve if the tyre pressure is too high.)
6. Switch off the compressor. Detach the airhose and cable.
7. Refit the dust cap.
Related information
• Emergency puncture repair kit (p. 490)
• Approved tyre pressures (p. 574)
When changing wheels
The car's wheels can be changed, e.g. to winter wheels or a spare wheel.
Follow the relevant instructions for removing and fitting wheels.
When changing to another tyre
dimension
Check that the tyre dimension is approved foruse on the car. Contact an authorised Volvo workshop for updat- ing the software at each change of tyre dimen-sion. A software download may be necessaryboth when changing to larger and smaller dimen-sions, and also when switching between summerand winter wheels.
Related information
• Removing a wheel (p. 495)
• Fitting the wheels (p. 497)
• Tool kit (p. 500)
• Winter wheels (p. 499)
• Spare wheel
* (p. 498)
• Wheel bolts (p. 498)
Removing a wheel
Instructions for removing a wheel when chang- ing wheels.
1. Set up the warning triangle and activate the hazard warning lights if a tyre is being changed in a trafficked location.
2. Apply the parking brake and engage gear position P, or engage first gear if the car has
a manual gearbox. Applies to cars with
Leveling Control* : If
the car is equipped with air suspension, this must be disabled before the car is raised with a jack *.
Deactivate the function via the top view of the centre display by pressing
Settings
My CarSuspension and selectingDisable Leveling Control.
Page 499 of 594
WHEELS AND TYRES
* Option/accessory.497
Crank up the jack
* so that it makes contact
with the car's jacking point. Check that the head of the jack is correctly positioned in thejacking point so that the bump in the centreof the head fits into the jacking point holeand the base is positioned vertically belowthe jacking point. Also make sure you turnthe jack so that the crank is as far away fromthe side of the car as possible, at which pointthe jack's arms are perpendicular to thedirection of the car.
WARNING
Never crawl under the car when it is raised on the jack. Passengers must leave the car when it is raised on the jack. If a wheel must bechanged in a trafficked environment, passen-gers must stand in a safe place.
9. Lift the car so that the wheel is free. Remove the wheel bolts and lift off the wheel.
Related information
• When changing wheels (p. 495)
• Raise the car (p. 512)
• Fitting the wheels (p. 497)
• Tool kit (p. 500)
Fitting the wheels Instructions for fitting a wheel when changing wheels.
WARNING
Never crawl under the car when it is raised on the jack. Passengers must leave the car when it is raised on the jack. If a wheel must bechanged in a trafficked environment, passen-gers must stand in a safe place.
1. Clean the contact surfaces between wheel and hub.
2. Put on the wheel. Tighten the wheel bolts thoroughly. Do not use lubricant on the threads of the
wheel bolts.
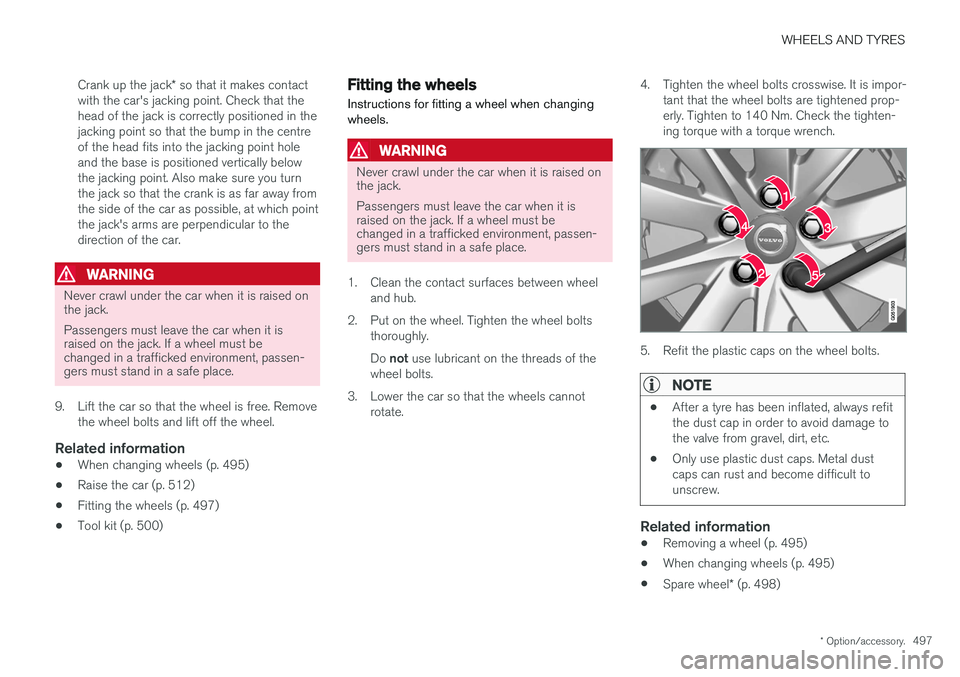
3. Lower the car so that the wheels cannot rotate. 4. Tighten the wheel bolts crosswise. It is impor-
tant that the wheel bolts are tightened prop- erly. Tighten to 140 Nm. Check the tighten-ing torque with a torque wrench.
5. Refit the plastic caps on the wheel bolts.
NOTE
• After a tyre has been inflated, always refit the dust cap in order to avoid damage tothe valve from gravel, dirt, etc.
• Only use plastic dust caps. Metal dustcaps can rust and become difficult tounscrew.
Related information
•Removing a wheel (p. 495)
• When changing wheels (p. 495)
• Spare wheel
* (p. 498)
Page 500 of 594
WHEELS AND TYRES
* Option/accessory.
498
Wheel bolts
Wheel bolts are used to attach the wheels to the hubs.
IMPORTANT
The wheel bolts must be tightened to 140 Nm. Overtightening or loose tightening maydamage the nuts and the bolts.
Only use rims that are tested and approved by Volvo and which are Volvo genuine accessories. Check the tightening torque of the wheel bolts with a torque wrench. Do not use lubricant on the threads of the wheel
bolts.
Locking wheel bolts *In the foam block under the cargo area floor there is space for the sleeve for the lockablewheel bolts.
Related information
•When changing wheels (p. 495)
Spare wheel
*
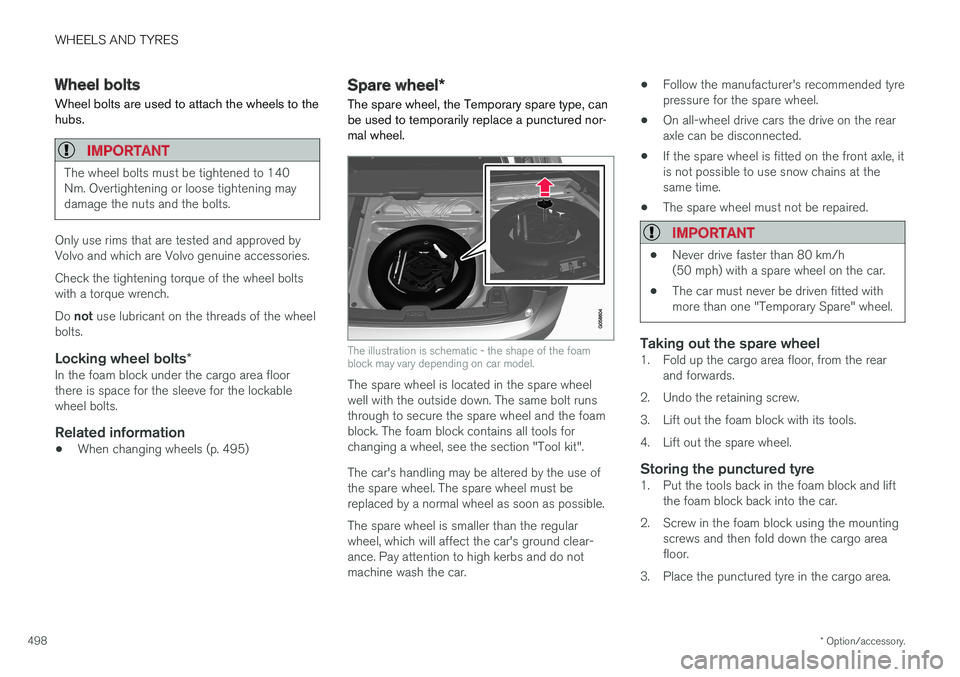
The spare wheel, the Temporary spare type, can be used to temporarily replace a punctured nor-mal wheel.
The illustration is schematic - the shape of the foam block may vary depending on car model.
The spare wheel is located in the spare wheel well with the outside down. The same bolt runsthrough to secure the spare wheel and the foamblock. The foam block contains all tools forchanging a wheel, see the section "Tool kit". The car's handling may be altered by the use of the spare wheel. The spare wheel must bereplaced by a normal wheel as soon as possible. The spare wheel is smaller than the regular wheel, which will affect the car's ground clear-ance. Pay attention to high kerbs and do notmachine wash the car. •
Follow the manufacturer's recommended tyrepressure for the spare wheel.
• On all-wheel drive cars the drive on the rearaxle can be disconnected.
• If the spare wheel is fitted on the front axle, itis not possible to use snow chains at thesame time.
• The spare wheel must not be repaired.
IMPORTANT
• Never drive faster than 80 km/h (50 mph) with a spare wheel on the car.
• The car must never be driven fitted withmore than one "Temporary Spare" wheel.
Taking out the spare wheel1. Fold up the cargo area floor, from the rear
and forwards.
2. Undo the retaining screw.
3. Lift out the foam block with its tools.
4. Lift out the spare wheel.
Storing the punctured tyre1. Put the tools back in the foam block and lift the foam block back into the car.
2. Screw in the foam block using the mounting screws and then fold down the cargo area floor.
3. Place the punctured tyre in the cargo area.
Page 502 of 594
WHEELS AND TYRES
* Option/accessory.
500
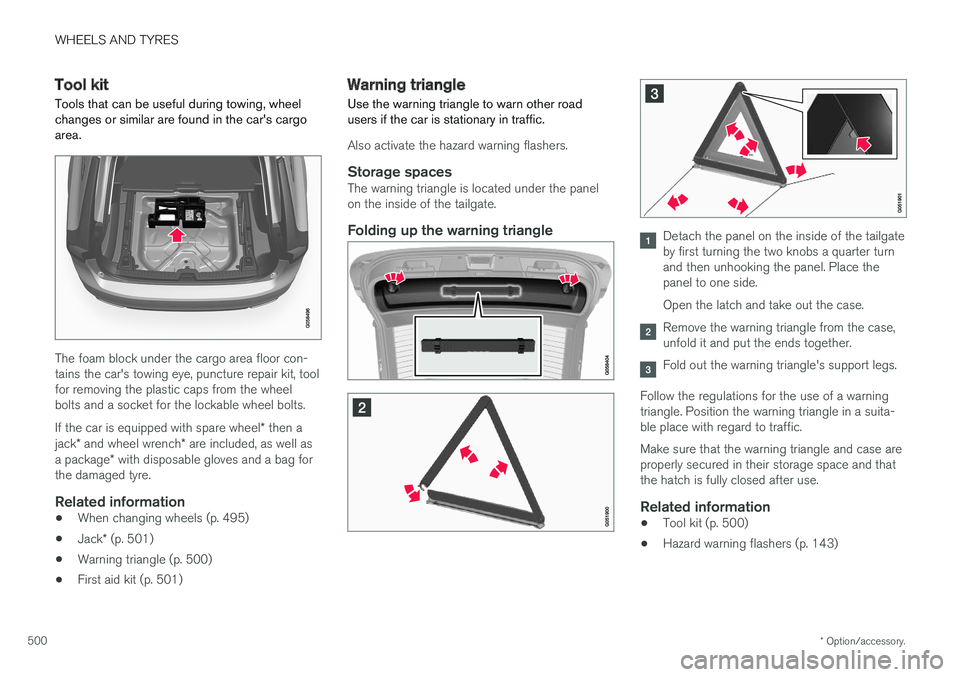
Tool kit Tools that can be useful during towing, wheel changes or similar are found in the car's cargoarea.
The foam block under the cargo area floor con- tains the car's towing eye, puncture repair kit, toolfor removing the plastic caps from the wheelbolts and a socket for the lockable wheel bolts. If the car is equipped with spare wheel * then a
jack * and wheel wrench * are included, as well as
a package * with disposable gloves and a bag for
the damaged tyre.
Related information
• When changing wheels (p. 495)
• Jack
* (p. 501)
• Warning triangle (p. 500)
• First aid kit (p. 501)
Warning triangle
Use the warning triangle to warn other road users if the car is stationary in traffic.
Also activate the hazard warning flashers.
Storage spacesThe warning triangle is located under the panel on the inside of the tailgate.
Folding up the warning triangleDetach the panel on the inside of the tailgate by first turning the two knobs a quarter turnand then unhooking the panel. Place thepanel to one side. Open the latch and take out the case.
Remove the warning triangle from the case, unfold it and put the ends together.
Fold out the warning triangle's support legs.
Follow the regulations for the use of a warning triangle. Position the warning triangle in a suita-ble place with regard to traffic. Make sure that the warning triangle and case are properly secured in their storage space and thatthe hatch is fully closed after use.
Related information
• Tool kit (p. 500)
• Hazard warning flashers (p. 143)
Page 503 of 594
WHEELS AND TYRES
* Option/accessory.501
Jack*
Use the jack to raise the car when changing a wheel.
Only use the original jack when fitting a spare wheel or when changing between summer andwinter wheels. The jack's thread must always bewell greased.
IMPORTANT
The tools and jack * must be stored in the
intended location in the car's cargo area when not in use.
The jack needs to be cranked together to the correct position in order to have space.
NOTE
The normal car jack is only designed for occa- sional, short-term use, such as when chang-ing a wheel after a puncture, changing to win-ter/summer wheels, etc. Only the jack for thespecific car model may be used to raise thecar. If the car is to be jacked up more often, orfor a longer time than is required just tochange a wheel, use of a garage jack is rec-ommended. In this instance, follow theinstructions for use that come with the equip-ment.
Applies to cars with level control *
If the car is equipped with air suspension then this must be deactivated before the car is raisedwith the jack. Switch off the function via the centre display:1.
Press on
Settings in the top view:
2. Press
My CarSuspension .
3. Select
Disable Leveling Control.
Related information
• Tool kit (p. 500)
• Raise the car (p. 512)
First aid kit The first aid kit contains first aid equipment.
Store the first aid kit in the space on the right- hand side in the cargo area.
Related information
•
Tool kit (p. 500)