odometer VOLVO V90 2018 Owner´s Manual
[x] Cancel search | Manufacturer: VOLVO, Model Year: 2018, Model line: V90, Model: VOLVO V90 2018Pages: 656, PDF Size: 11.78 MB
Page 5 of 656
3
Top tether anchors72
Lower child seat attachment points 73
ISOFIX/LATCH lower anchors 74
Integrated booster cushion *
75
Folding up the integrated booster cushion * 77
Folding down the integrated boostercushion * 78
DISPLAYS AND VOICE CONTROL
Instruments and controls in left-hand drive vehicles
82
Instrument panel 84
Instrument panel settings 88
Fuel gauge 89
Trip computer 89
Displaying trip data in the instrumentpanel 91
Resetting the trip odometer 92
Displaying trip statistics in the centerdisplay 92
Trip statistics settings 93
Date and time 94
Ambient temperature sensor 94
Indicator symbols in the instrument panel 95
Warning symbols in the instrument panel 97
Instrument panel licenses 98
App menu in instrument panel 104
Handling the App menu in the instru-ment panel 105
Messages in the instrument panel 106
Handling messages in the instru-ment panel 107
Handling messages saved from theinstrument panel 109
Center display overview 111
Handling the center display114
Activating and deactivating the cen- ter display 117
Navigating in the center display's views 117
Handling tiles in the center display 121
Function view in the center display 124
Moving apps and buttons in the cen-ter display 126
Symbols in the center display status bar 126
Using the center display keyboard 128
Changing keyboard language in thecenter display 131
Entering characters, letters andwords by hand in the center display 131
Changing the appearance of thecenter display 133
Turning off and adjusting the volumeof the center display system sounds 133
Changing system units of measurement 134
Changing system language 134
Opening settings in the center display 134
Opening contextual setting in thecenter display 135
Changing settings in the center display 136
Resetting user data when the vehiclechanges owners 136
Resetting center display settings 137
Page 86 of 656
DISPLAYS AND VOICE CONTROL
* Option/accessory.
84
Instrument panel
The instrument panel displays information rela- ted to the vehicle and driving.
The instrument panel contains gauges, indicators and monitoring and warning symbols. What isshown in the instrument panel varies dependingon the equipment, settings and functions cur-rently active. The instrument panel is activated as soon as a door is opened, i.e. in ignition mode 0. The panel
will power down after a short period of time if it is not used. To reactivate it, do one of the following:
• Depress the brake pedal.
• Activate ignition mode
I.
• Open one of the doors. The instrument panel is available in two versions: 12"
* and 8".WARNING
If the instrument panel is not functioning properly, information about brakes, airbags orother safety-related systems may not be dis-played. The driver will then not be able tocheck the status of the vehicle systems orreceive relevant warnings and information.
WARNING
If the instrument panel turns off, does not activate when the ignition is switched on, orpart/all of the panel cannot be read, do notdrive the vehicle. Consult a workshop immedi-ately. Volvo recommends an authorized Volvoworkshop.
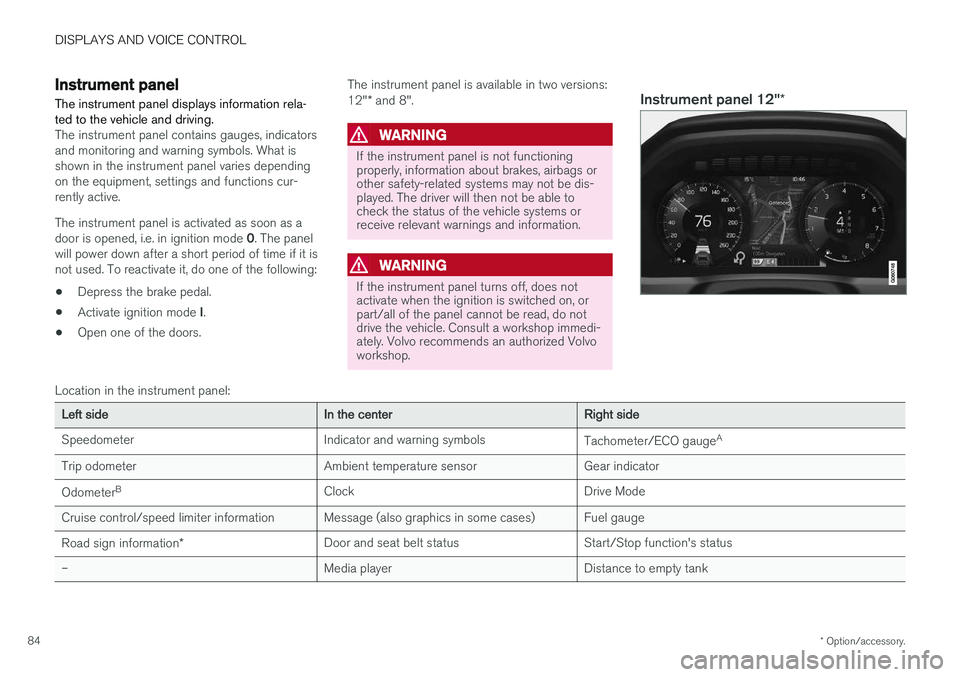
Instrument panel 12" *
Location in the instrument panel:
Left sideIn the centerRight side
Speedometer Indicator and warning symbols Tachometer/ECO gaugeA
Trip odometer Ambient temperature sensor Gear indicator Odometer B
Clock Drive Mode
Cruise control/speed limiter information Message (also graphics in some cases) Fuel gauge
Road sign information * Door and seat belt status Start/Stop function's status
– Media player Distance to empty tank
Page 88 of 656
||
DISPLAYS AND VOICE CONTROL
86
Left sideIn the centerRight side
Gear indicator Cruise control/speed limiter information Navigation information Tachometer/ECO gauge A
Door and seat belt status Clock
Distance to empty tank Start/Stopp function's status App menu (activated using steering wheel keypad) Ambient temperature sensor – Current fuel consumption
Indicator and warning symbols – OdometerB
– – Trip odometer
– – Indicator and warning symbols
– – Voice Control
– – Engine temperature gauge
– – Message (also graphics in some cases)
A
Depends on selected drive mode.
B Total distance.
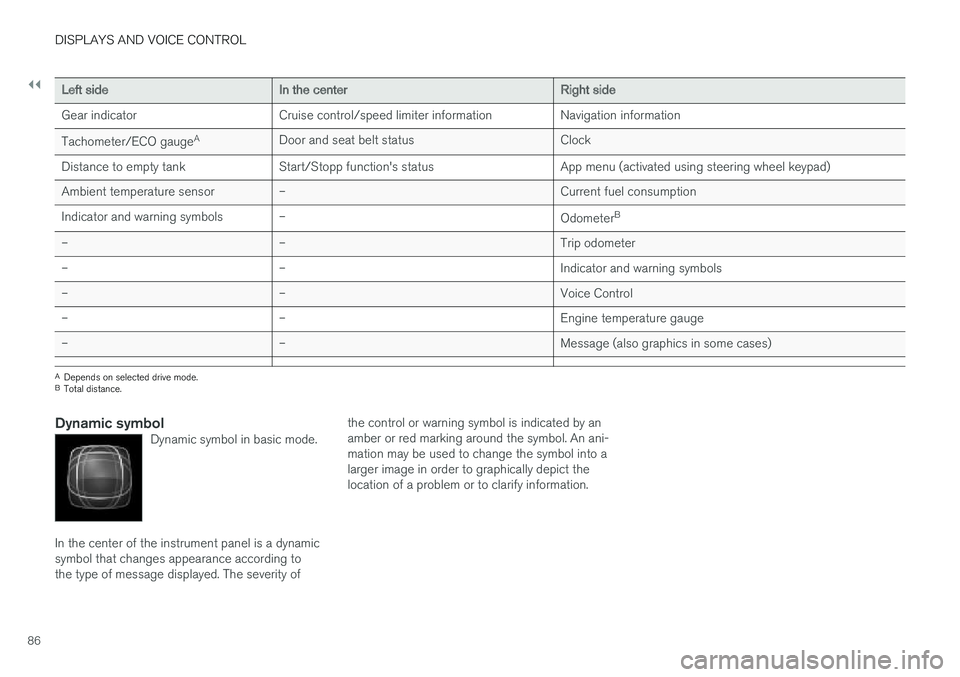
Dynamic symbolDynamic symbol in basic mode.
In the center of the instrument panel is a dynamic symbol that changes appearance according tothe type of message displayed. The severity of the control or warning symbol is indicated by anamber or red marking around the symbol. An ani-mation may be used to change the symbol into alarger image in order to graphically depict thelocation of a problem or to clarify information.
Page 92 of 656
||
DISPLAYS AND VOICE CONTROL
* Option/accessory.
90
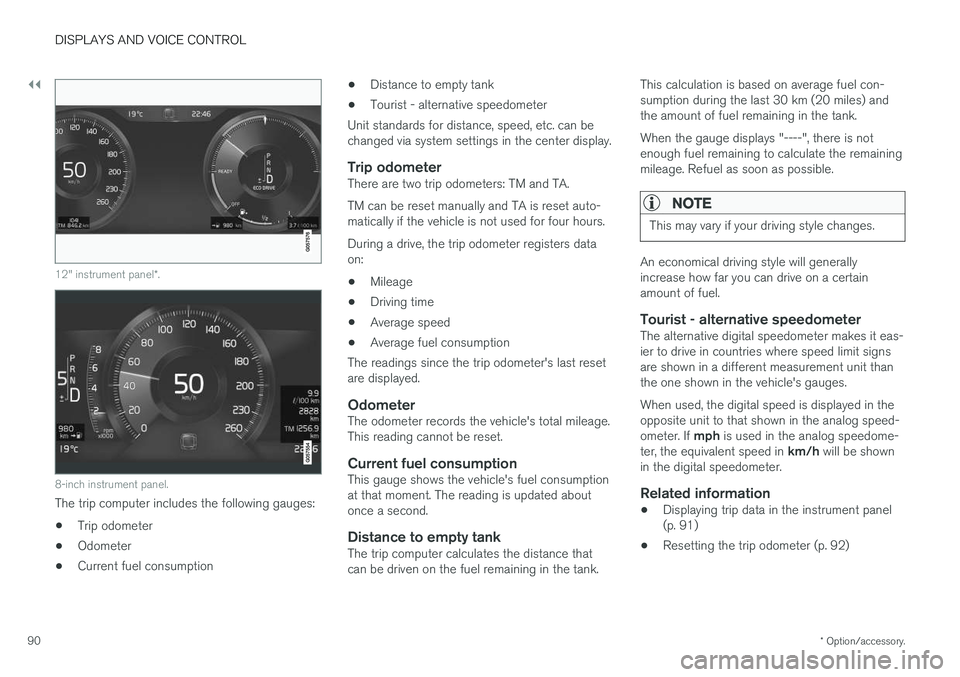
12" instrument panel *.
8-inch instrument panel.
The trip computer includes the following gauges:
• Trip odometer
• Odometer
• Current fuel consumption •
Distance to empty tank
• Tourist - alternative speedometer
Unit standards for distance, speed, etc. can be changed via system settings in the center display.
Trip odometerThere are two trip odometers: TM and TA. TM can be reset manually and TA is reset auto- matically if the vehicle is not used for four hours. During a drive, the trip odometer registers data on:
• Mileage
• Driving time
• Average speed
• Average fuel consumption
The readings since the trip odometer's last resetare displayed.
OdometerThe odometer records the vehicle's total mileage.This reading cannot be reset.
Current fuel consumptionThis gauge shows the vehicle's fuel consumptionat that moment. The reading is updated aboutonce a second.
Distance to empty tankThe trip computer calculates the distance thatcan be driven on the fuel remaining in the tank. This calculation is based on average fuel con-sumption during the last 30 km (20 miles) andthe amount of fuel remaining in the tank. When the gauge displays "----", there is not enough fuel remaining to calculate the remainingmileage. Refuel as soon as possible.
NOTE
This may vary if your driving style changes.
An economical driving style will generally increase how far you can drive on a certainamount of fuel.
Tourist - alternative speedometerThe alternative digital speedometer makes it eas-ier to drive in countries where speed limit signsare shown in a different measurement unit thanthe one shown in the vehicle's gauges. When used, the digital speed is displayed in the opposite unit to that shown in the analog speed- ometer. If
mph is used in the analog speedome-
ter, the equivalent speed in km/h will be shown
in the digital speedometer.
Related information
• Displaying trip data in the instrument panel (p. 91)
• Resetting the trip odometer (p. 92)
Page 93 of 656
DISPLAYS AND VOICE CONTROL
}}
91
•
Displaying trip statistics in the center display (p. 92)
• Instrument panel (p. 84)
Displaying trip data in theinstrument panel
Data recorded and calculated by the trip com- puter can be displayed on the instrument panel.
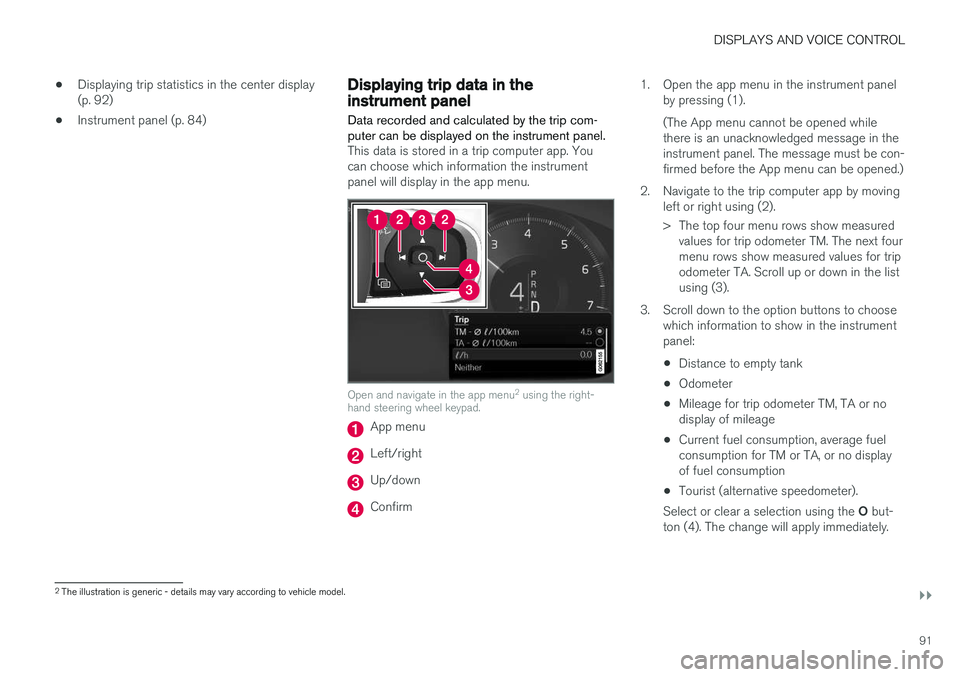
This data is stored in a trip computer app. You can choose which information the instrumentpanel will display in the app menu.
Open and navigate in the app menu 2
using the right-
hand steering wheel keypad.
App menu
Left/right
Up/down
Confirm 1. Open the app menu in the instrument panel
by pressing (1). (The App menu cannot be opened while there is an unacknowledged message in theinstrument panel. The message must be con-firmed before the App menu can be opened.)
2. Navigate to the trip computer app by moving left or right using (2).
> The top four menu rows show measuredvalues for trip odometer TM. The next four menu rows show measured values for tripodometer TA. Scroll up or down in the listusing (3).
3. Scroll down to the option buttons to choose which information to show in the instrumentpanel:
• Distance to empty tank
• Odometer
• Mileage for trip odometer TM, TA or nodisplay of mileage
• Current fuel consumption, average fuelconsumption for TM or TA, or no displayof fuel consumption
• Tourist (alternative speedometer).
Select or clear a selection using the O but-
ton (4). The change will apply immediately.
2 The illustration is generic - details may vary according to vehicle model.
Page 94 of 656
||
DISPLAYS AND VOICE CONTROL
92
Related information
•Trip computer (p. 89)
• Resetting the trip odometer (p. 92)
Resetting the trip odometer
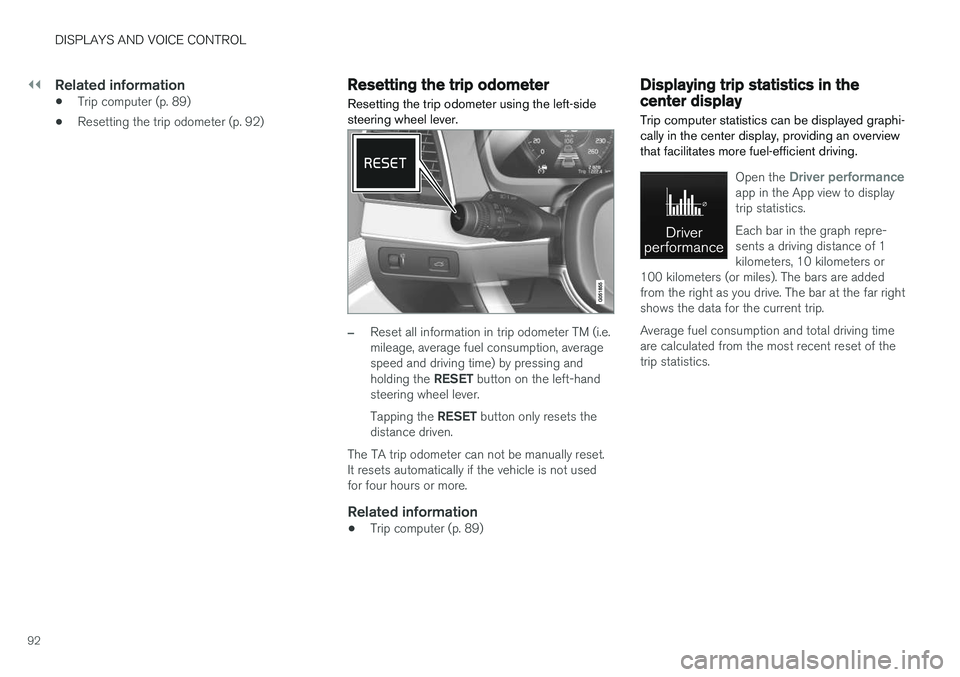
Resetting the trip odometer using the left-side steering wheel lever.
–Reset all information in trip odometer TM (i.e. mileage, average fuel consumption, averagespeed and driving time) by pressing and holding the RESET button on the left-hand
steering wheel lever. Tapping the RESET button only resets the
distance driven.
The TA trip odometer can not be manually reset. It resets automatically if the vehicle is not usedfor four hours or more.
Related information
• Trip computer (p. 89)
Displaying trip statistics in thecenter display
Trip computer statistics can be displayed graphi- cally in the center display, providing an overviewthat facilitates more fuel-efficient driving.
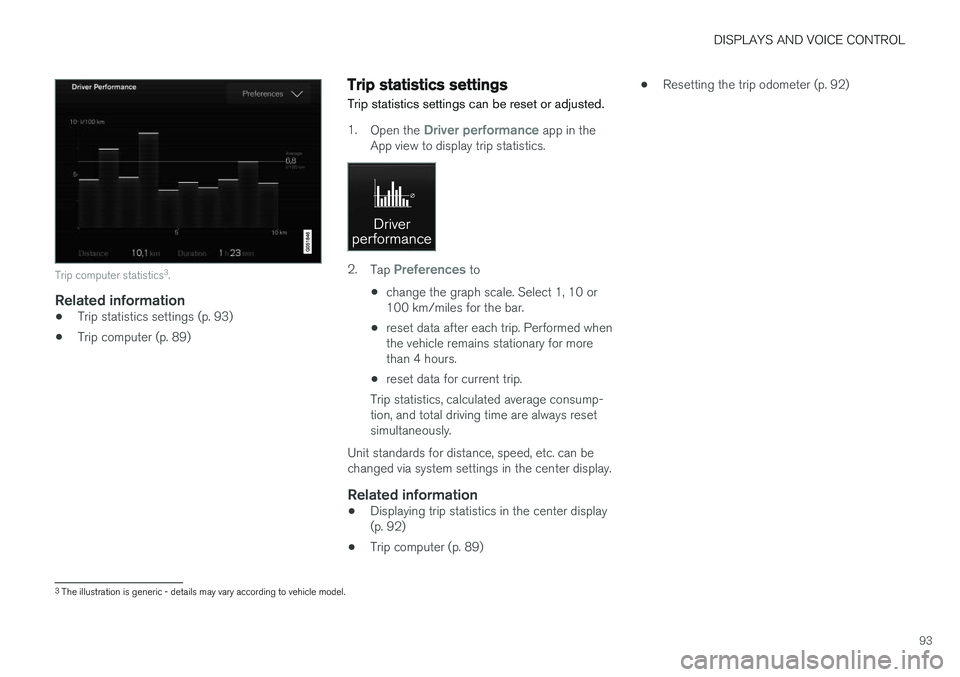
Open the Driver performanceapp in the App view to display trip statistics. Each bar in the graph repre- sents a driving distance of 1kilometers, 10 kilometers or
100 kilometers (or miles). The bars are addedfrom the right as you drive. The bar at the far rightshows the data for the current trip. Average fuel consumption and total driving time are calculated from the most recent reset of thetrip statistics.
Page 95 of 656
DISPLAYS AND VOICE CONTROL
93
Trip computer statistics3
.
Related information
• Trip statistics settings (p. 93)
• Trip computer (p. 89)
Trip statistics settings
Trip statistics settings can be reset or adjusted.
1. Open the Driver performance app in the
App view to display trip statistics.
2. Tap Preferences to
• change the graph scale. Select 1, 10 or 100 km/miles for the bar.
• reset data after each trip. Performed whenthe vehicle remains stationary for morethan 4 hours.
• reset data for current trip.
Trip statistics, calculated average consump-tion, and total driving time are always resetsimultaneously.
Unit standards for distance, speed, etc. can bechanged via system settings in the center display.
Related information
• Displaying trip statistics in the center display(p. 92)
• Trip computer (p. 89) •
Resetting the trip odometer (p. 92)
3
The illustration is generic - details may vary according to vehicle model.
Page 107 of 656
DISPLAYS AND VOICE CONTROL
}}
105
AppFunctions
Trip com- puter Select a trip odometer, changeinstrument panel display set-tings, etc.
Media player Select active source for media player.
Phone Call a contact from the call list.
Navigation Guide to destination, etc.
Related information
• Instrument panel (p. 84)
• Center display overview (p. 111)
• Handling the App menu in the instrument panel (p. 105)
Handling the App menu in theinstrument panel
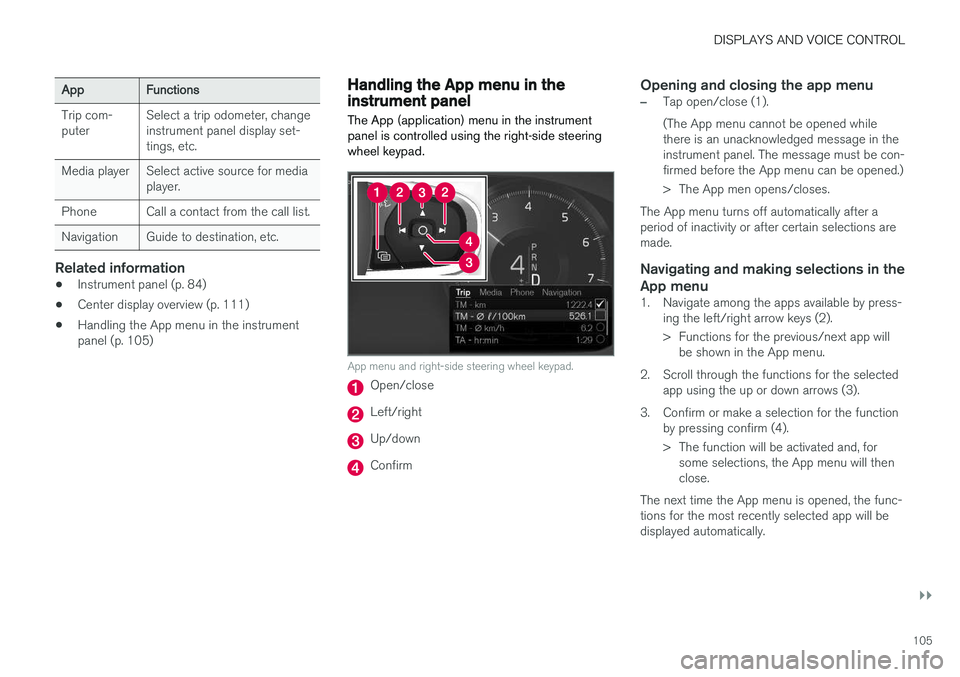
The App (application) menu in the instrument panel is controlled using the right-side steeringwheel keypad.
App menu and right-side steering wheel keypad.
Open/close
Left/right
Up/down
Confirm
Opening and closing the app menu
–Tap open/close (1). (The App menu cannot be opened while there is an unacknowledged message in theinstrument panel. The message must be con-firmed before the App menu can be opened.)
> The App men opens/closes.
The App menu turns off automatically after a period of inactivity or after certain selections aremade.
Navigating and making selections in the
App menu
1. Navigate among the apps available by press- ing the left/right arrow keys (2).
> Functions for the previous/next app willbe shown in the App menu.
2. Scroll through the functions for the selected app using the up or down arrows (3).
3. Confirm or make a selection for the function by pressing confirm (4).
> The function will be activated and, forsome selections, the App menu will then close.
The next time the App menu is opened, the func-tions for the most recently selected app will bedisplayed automatically.
Page 405 of 656
STARTING AND DRIVING
* Option/accessory.403
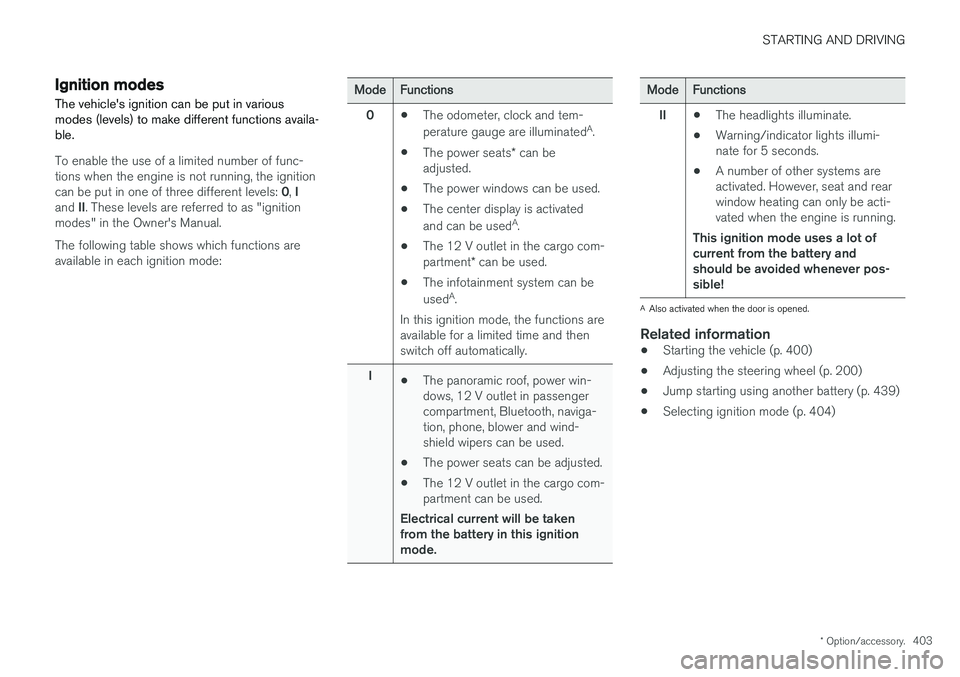
Ignition modes
The vehicle's ignition can be put in various modes (levels) to make different functions availa-ble.
To enable the use of a limited number of func- tions when the engine is not running, the ignition can be put in one of three different levels: 0, I
and II. These levels are referred to as "ignition
modes" in the Owner's Manual. The following table shows which functions are available in each ignition mode:
ModeFunctions
0 •The odometer, clock and tem- perature gauge are illuminated A
.
• The power seats
* can be
adjusted.
• The power windows can be used.
• The center display is activatedand can be used A
.
• The 12 V outlet in the cargo com- partment
* can be used.
• The infotainment system can be used A
.
In this ignition mode, the functions are available for a limited time and then switch off automatically.
I •The panoramic roof, power win-dows, 12 V outlet in passengercompartment, Bluetooth, naviga-tion, phone, blower and wind-shield wipers can be used.
• The power seats can be adjusted.
• The 12 V outlet in the cargo com-partment can be used.
Electrical current will be takenfrom the battery in this ignitionmode.ModeFunctions
II •The headlights illuminate.
• Warning/indicator lights illumi- nate for 5 seconds.
• A number of other systems areactivated. However, seat and rearwindow heating can only be acti-vated when the engine is running.
This ignition mode uses a lot ofcurrent from the battery andshould be avoided whenever pos-sible!
A Also activated when the door is opened.
Related information
• Starting the vehicle (p. 400)
• Adjusting the steering wheel (p. 200)
• Jump starting using another battery (p. 439)
• Selecting ignition mode (p. 404)
Page 574 of 656
MAINTENANCE AND SERVICE
* Option/accessory.
572
Sending vehicle information to the
workshop8
Vehicle-related information can be sent at any time from the vehicle, e.g. if you schedule a visitto a workshop and would like to assist yourworkshop by providing additional basic informa-tion. Sending vehicle information is not the sameas scheduling service.
1. Open the Car status app from App view in
the center display.
2. Tap the
Appointments button.
3. Tap the
Send vehicle data button.
> A message confirming that vehicle-related information has been sent will appear at the top of the center display. You cancancel data transmission by tapping thecheckbox in the activity indicator. Information is sent via the vehicle's Inter- net connection 9
. Vehicle information can be accessed by any retailer if they are provided with your vehicle iden- tification number (VIN
10
).
Vehicle information contentsThe most recently saved vehicle-related informa- tion will be sent (the last time the vehicle wasturned on). This includes information regarding:
• service requirements
• time since last service was performed
• function status
• fluid levels
• mileage (odometer reading)
• Vehicle Identification Number (VIN 10
)
• software version
• diagnostic information.
Related information
•Scheduling service and repairs (p. 570)
• Vehicle status (p. 570)
• Navigating in the center display's views(p. 117)
• Internet-connected vehicle
* (p. 497)
8
Certain markets only.
9 There may be a charge for transmitting data over the Internet, depending on your service plan.
10 Vehicle Identification Number.