USB port VOLVO V90 CROSS COUNTRY 2017 Owner´s Manual
[x] Cancel search | Manufacturer: VOLVO, Model Year: 2017, Model line: V90 CROSS COUNTRY, Model: VOLVO V90 CROSS COUNTRY 2017Pages: 552, PDF Size: 13.6 MB
Page 6 of 552
4
Using turn signals146
Passenger compartment lighting 147
Home safe lighting 150
Approach lighting 150
Messages in the instrument panel and center display 150
Handling messages in the instru-ment panel and center display 152
Handling messages stored from theinstrument panel and center display 154
Instrument panel App menu 155
Using the instrument panel App menu 156
Using the windshield wipers 157
Activating/deactivating the rain sensor 157
Windshield and headlight washers 158
Tailgate window wiper and washer 159
Steering wheel 160
Adjusting the steering wheel 161
Seats 162
Manually operated front seats 162
Power front seats *
163
Adjusting power front seats *
163
Adjusting the passenger's seat from the driver's seat * 164
Using the power seat memory function *
164
Multifunctional front seats *
165
Adjusting function settings in the multifunctional front seats *166
Rear seats 169
Adjusting the second row head restraints 169
Folding down the rear seat backrests 171
Driver profiles 172
Selecting a driver profile 173
Editing a driver profile 174
Linking a remote key to a driver profile 174
Importing/exporting a driver profile from/to a USB flash drive 175
CLIMATE
Climate control system
178
Perceived temperature 178
Climate system sensors 179
Air quality 179
Clean Zone Interior Package (CZIP) *
180
Interior Air Quality System (IAQS) *
181
Passenger compartment air filter 181
Automatic climate control 182
Climate system controls 182
Climate system controls in the center display 183
Rear climate system controls on the tunnel console * 185
Setting the blower speed 185
Setting the temperature 187
Turning recirculation on and off 189
Defrosting windows and mirrors 190
Turning steering wheel heating * on
and off 192
Air conditioning 193
Turning seat heating * on and off
194
Turning front seat ventilation * on and off
195
Air distribution 196
Opening/closing/directing air vents 197
Adjusting air distribution 198
Page 177 of 552
INSTRUMENTS AND CONTROLS
}}
175
4. Open Top view in the center display and tap
SettingsSystemDriver ProfilesEdit Profile.
5. Select
Connect key to link the selected pro-
file to the remote key currently being used. A profile can only be linked to the remote keythat is currently being used. If there are sev-eral keys in the vehicle at the same time,
More than one key is found, put the key you want to connect on backup reader
will be displayed.
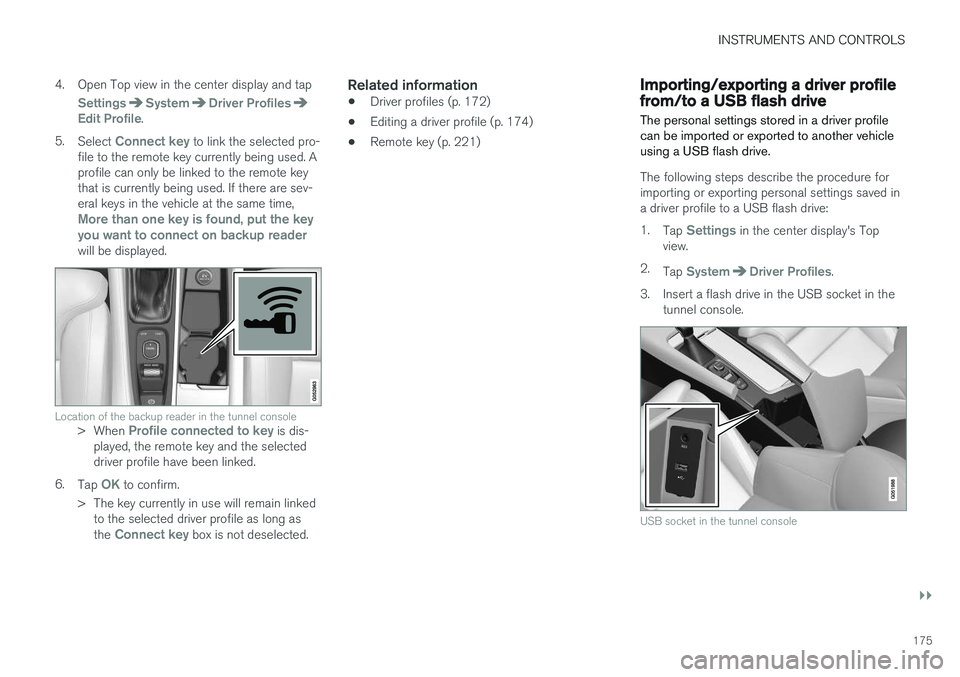
Location of the backup reader in the tunnel console> When Profile connected to key is dis-
played, the remote key and the selected driver profile have been linked.
6. Tap
OK to confirm.
> The key currently in use will remain linked to the selected driver profile as long as the
Connect key box is not deselected.
Related information
• Driver profiles (p. 172)
• Editing a driver profile (p. 174)
• Remote key (p. 221)
Importing/exporting a driver profile from/to a USB flash drive The personal settings stored in a driver profile can be imported or exported to another vehicleusing a USB flash drive.
The following steps describe the procedure for importing or exporting personal settings saved ina driver profile to a USB flash drive: 1.
Tap
Settings in the center display's Top
view.
2. Tap
SystemDriver Profiles.
3. Insert a flash drive in the USB socket in the tunnel console.
USB socket in the tunnel console
Page 178 of 552
||
INSTRUMENTS AND CONTROLS
1764.
Select
Import profile from USB/Export
profile to USB.
NOTE
• The Guest profile cannot be imported or
exported
• Several profiles can be exported to USB but only
one profile can be imported.
When a profile is imported, it overwrites the one currently being used in the vehicle.
5. Select the profile(s) to be imported/exported. 6. Select
OK.
If an export does not succeed, this may be due to:
• USB flash drive is full.
• USB flash drive was not inserted correctly orwas removed before the export was comple-ted.
If an import does not succeed, this may be dueto:
• USB flash drive was not inserted correctly orwas removed before the import was comple-ted.
• No driver profile had been stored on the USBflash drive.
• The driver profile file on the USB flash driveis damaged.
Related information
•Driver profiles (p. 172)
Page 406 of 552
||
INFOTAINMENT
* Option/accessory.
404
iTunes taggingFrom the center display's Top view, tapSiriusXM
Settings. Tap theiTunes Tagging menu. Tap
the iTunes Tagging box to activate/deactivate
this function and tap Close to return to Home
view. Tap Tags List to display a list of all tagged
songs. If the function is activated, the
iTunes tag button
will be displayed in Home view. If a song is played that you would like to buy in the iTunes store, tapthis button while the song is playing to tag it. If a song with
iTunes Tagging information is availa-
ble, the button will be selectable. Tap the button to tag the song. If you would like to buy a taggedsong via iTunes, Tap the iTunes tag button. To buy a song in iTunes, begin by connecting an iPhone/iPod/iPad to the USB socket in the tun-nel console. The iTunes tagging list will automati-cally be transferred to the device and removedfrom the list in the vehicle. If the device is con-nected when a song is tagged, the data will auto-matically be saved in the device. To purchase thesong, consult the iTunes support page.
Related information
• SiriusXM ®
Satellite radio * (p. 402)
• Using the center display keyboard (p. 31)
• SiriusXM ®
Satellite radio * settings (p. 404)
• Connecting a device via the AUX/USBsocket (p. 418)
SiriusXM ®
Satellite radio * settings
There are numerous settings that can be made to enhance your SiriusXM ®
Satellite radio listen-
ing experience.
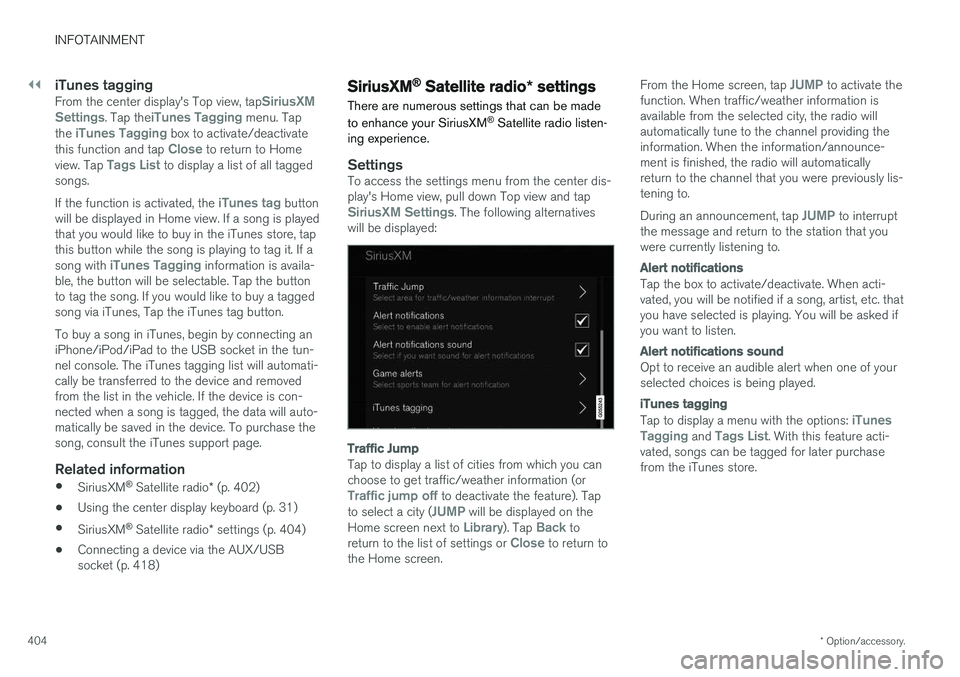
SettingsTo access the settings menu from the center dis- play's Home view, pull down Top view and tap
SiriusXM Settings. The following alternatives
will be displayed:
Traffic Jump
Tap to display a list of cities from which you can choose to get traffic/weather information (or
Traffic jump off to deactivate the feature). Tap
to select a city (JUMP will be displayed on the
Home screen next to Library). Tap Back to
return to the list of settings or Close to return to
the Home screen. From the Home screen, tap
JUMP to activate the
function. When traffic/weather information is available from the selected city, the radio willautomatically tune to the channel providing theinformation. When the information/announce-ment is finished, the radio will automaticallyreturn to the channel that you were previously lis-tening to. During an announcement, tap
JUMP to interrupt
the message and return to the station that you were currently listening to.
Alert notifications
Tap the box to activate/deactivate. When acti- vated, you will be notified if a song, artist, etc. thatyou have selected is playing. You will be asked ifyou want to listen.
Alert notifications sound
Opt to receive an audible alert when one of your selected choices is being played.
iTunes tagging
Tap to display a menu with the options: iTunes
Tagging and Tags List. With this feature acti-
vated, songs can be tagged for later purchase from the iTunes store.
Page 420 of 552
INFOTAINMENT
418
Text message settings
The following settings can be made for text mes- sages received through a paired and connectedcell phone.
Text message settings
–Pull down the center display's Top view and tap
SettingsCommunicationText
Messages and choose among the following
settings:
•
Notification in center display: shows
text messages in the center display's sta- tus bar.
•
Notification in driver display: shows
text messages in the instrument panel. With this alternative active, incoming mes-sages can be handled from the right-sidesteering wheel keypad.
•
Text message tone: select an audible
signal for incoming text messages.
Related information
• Connecting/disconnecting a cell phone (p. 413)
• Pairing a cell phone (p. 412)
• Handling text messages (p. 416)
Connecting a Bluetooth ®
device
Bluetooth ®
-enabled devices can be paired and
connected to the infotainment system to stream media and in some cases connect to the Inter-net.
Many cell phones and other devices currently on the market offer wireless Bluetooth ®
technology.
Consult your Volvo retailer or go to support.volvocars.com for any questions regar-ding a device's compatibility with the vehicle'sinfotainment system. The procedure for pairing and connecting a Bluetooth ®
-enabled device is the same as for a
cell phone. See the articles "Pairing a cell phone" and "Connecting/disconnecting a cell phone" fordetails.
Related information
• Pairing a cell phone (p. 412)
• Connecting/disconnecting a cell phone(p. 413)
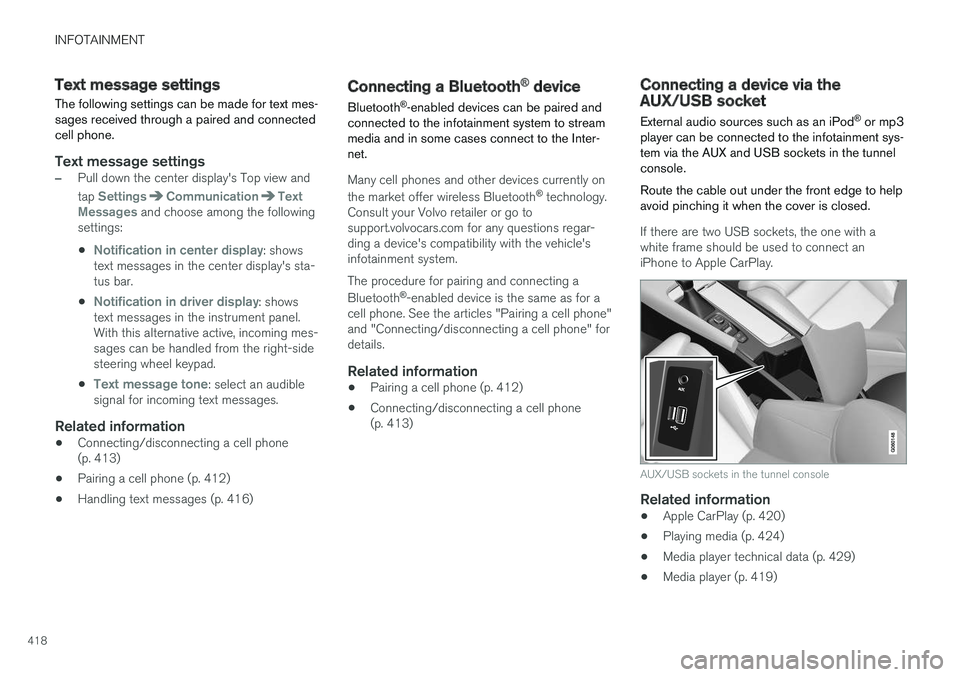
Connecting a device via the AUX/USB socket
External audio sources such as an iPod ®
or mp3
player can be connected to the infotainment sys- tem via the AUX and USB sockets in the tunnelconsole. Route the cable out under the front edge to help avoid pinching it when the cover is closed.
If there are two USB sockets, the one with a white frame should be used to connect aniPhone to Apple CarPlay.
AUX/USB sockets in the tunnel console
Related information
• Apple CarPlay (p. 420)
• Playing media (p. 424)
• Media player technical data (p. 429)
• Media player (p. 419)
Page 429 of 552

INFOTAINMENT
427
3.
Tap
Search.
> The infotainment system will search through all connected devices and any results will be displayed by category.
Swipe the screen horizontally to display each cat-egory separately.
Related information
• Media player (p. 419)
• Playing media (p. 424)
• Using the center display keyboard (p. 31)
Playing media through the AUX/USB sockets
An external media device, such as an iPod or an mp-3 player can be connected to the infotain-ment system.
A device with rechargeable batteries can be recharged when it is connected to the USBsocket (if the ignition is on or the engine is run-ning). To simplify the use of a USB flash drive, it is advisable to only store files with compatible fileformats on it. It will take considerably longer forthe system to index the files on the drive if it con-tains anything other than compatible files. In addition to audio, the vehicle's media player also supports video playback when the externaldevice is connected to the USB socket. Certain mp-3 players have proprietary file formats that are not supported by the infotainment sys-tem.
Related information
• Connecting a device via the AUX/USBsocket (p. 418)
Streaming media through a Bluetooth connection The media player is equipped with Bluetooth ®
for streaming audio files from external Bluetooth ®
-enabled devices.
Related information
• Connecting a Bluetooth ®
device (p. 418)
• Playing media (p. 424)
• Voice control for radio and media (p. 121)
• Media player (p. 419)
• Ignition modes (p. 375)
• Media player technical data (p. 429)
Page 431 of 552
INFOTAINMENT
}}
429
•
None: no results will be shown.
Updating GracenoteGracenote's contents are updated continuously. For optimal functionality, always use the latestversion. See support.volvocars.com for informa-tion and downloads.
Related information
•
Infotainment system license information(p. 437)
• Playing media (p. 424)
Video
The media player can play video from USB-con- nected devices.
No video will be available when the vehicle is moving. Video will resume playing when the vehi-cle is stationary. See the article "Media player technical data" for a list of video formats supported by the mediaplayer.
Related information
• Playing media (p. 424)
• Media player (p. 419)
• Media player technical data (p. 429)
Media player technical data The following tables list compatible file formats and other technical specifications for the mediaplayer.
Audio files
For- mat File extension
Codec
MP3 .mp3 MPEG1 Layer III, MPEG2 Layer III, MP3 Pro (mp3compatible),MP3 HD (mp3compatible)
AAC .m4a, .m4b, .aac AAC LC (MPEG-4 part III Audio),HE-AAC (aacPlusv1/v2)
WMA .wma WMA8/9, WMA9/10 Pro
WAV .wav LPCM
FLAC .flac FLAC
Video files
Format File extension
MP4 .mp4, .m4v
MPEG-PS .mpg, .mp2, .mpeg, .m1v
Page 542 of 552
INDEX
540Bluetooth cell phone connection 414
Booster cushion, integrated 87, 89, 91
Booster cushions 83
Brake assist system 351
Brake lights 146, 352Brakes
auto-hold 350
Brake system Brake pad inspection 349
fluid 531
general information 348, 350, 351
Bulbs 501 replacing 497
specifications 503
C
Camera
driver support systems 294
limitations 295
Camera, Park Assist 334, 336, 338, 339
Capacity weight 450, 529
Cargo area, steel grid 209
Cargo area cover 211
Cargo compartment fuses 494
raising/lowering the level 202
Cargo net 208
Cargo space 202
Car wash 514
Catalytic converter 368CD, USB, iPod, AUX, Bluetooth, Recents, Library, Shuffle, Similar, Change device,Audio Language, Off, Subtitle Language, Video, DivX ® VOD 424
CD player 424 Cell phone hands-free 411
Pairing 412
Cell phone voice control 120 Center display changing settings 30
cleaning 519
keyboard 31
navigating in 38
overview 28
screen in the center console 44
symbols in the status bar 43
Chains 451
Changing a wheel 454Child restraints recalls and registration 77
Child restraint systems 77 booster cushions 83
convertible seats 80
infant seats 78
ISOFIX/LATCH anchors 84
top tether anchors 86
Child safety 75 booster cushions 83
child restraint systems 77, 85
convertible seats 80
infant seats 78
Child safety locks 240 Child seats lower attachment points 85
City safety 298, 306City Safety crossing traffic 303
detecting objects 301
limitations 306
rear collision warning 310
symbols and messages 309
troubleshooting 304
City Safety, On/Off 300 City Safety ™
Multi Target 304