four wheel drive VOLVO V90 CROSS COUNTRY 2017 Owner´s Manual
[x] Cancel search | Manufacturer: VOLVO, Model Year: 2017, Model line: V90 CROSS COUNTRY, Model: VOLVO V90 CROSS COUNTRY 2017Pages: 552, PDF Size: 13.6 MB
Page 99 of 552
INSTRUMENTS AND CONTROLS
* Option/accessory.97
1. Press (1) to open the app menu in the
instrument panel. The app menu cannot be opened if there is an a message in the instrument panel thathas not been confirmed. Press (4) to confirm.
2. The top four lines show readings from trip odometer TM. The following four lines showreadings from trip odometer TA. Scroll up/down in the list using (3).
3. Scroll to the selection buttons in the lines below TA and select the trip odometer to bedisplayed.
• Current fuel consumption
• Distance to empty
• Odometer
• Trip odometers TM, TA or none
• Tourist (alternative speedometer).
Select or deselect an alternative using thecenter button (4). The change will be madeimmediately.
Resetting a trip odometer
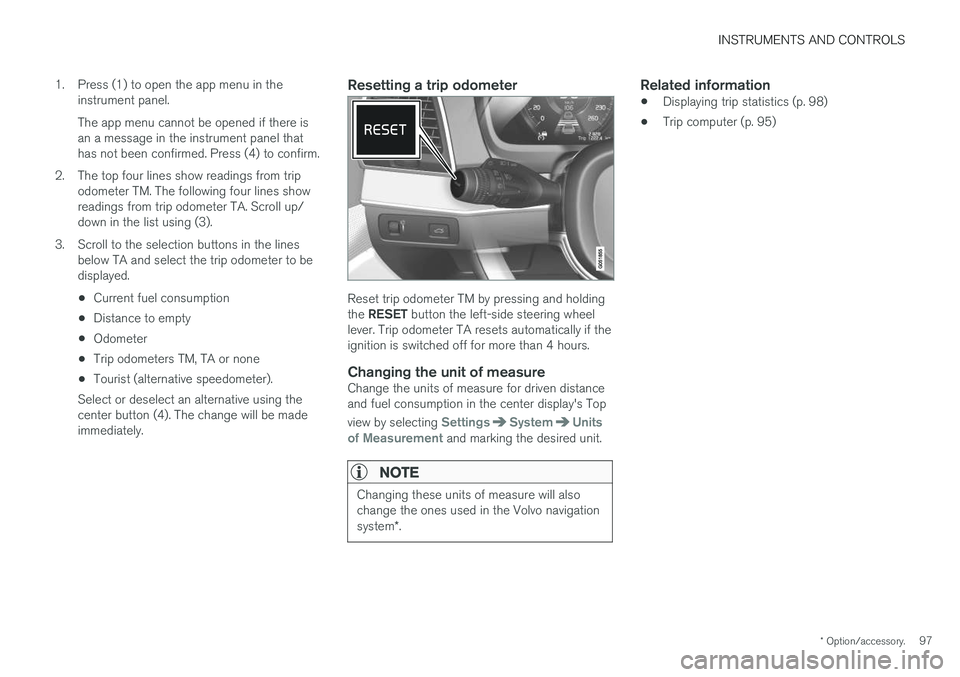
Reset trip odometer TM by pressing and holding the RESET button the left-side steering wheel
lever. Trip odometer TA resets automatically if the ignition is switched off for more than 4 hours.
Changing the unit of measureChange the units of measure for driven distanceand fuel consumption in the center display's Top view by selecting
SettingsSystemUnits
of Measurement and marking the desired unit.
NOTE
Changing these units of measure will also change the ones used in the Volvo navigation system *.
Related information
• Displaying trip statistics (p. 98)
• Trip computer (p. 95)
Page 383 of 552
STARTING AND DRIVING
* Option/accessory.381
DYNAMIC
Dynamic drive mode is designed to provide
sportier driving characteristics. Gear shifting will be faster and more distinct and will occur athigher rpm. Steering response will be more immediate and the suspension will be stiffer 3
to help reduce
body roll when cornering.
Start/Stop will be
deactivated.
INDIVIDUAL
This setting allows you to adapt a drive mode to your personal preferences. Select one of the other drive modes as a basis and change the settings to provide the drivingcharacteristics that you prefer. These settings willbe stored in a driver profile. INDIVIDUAL is only available if it has been acti- vated in the center display.
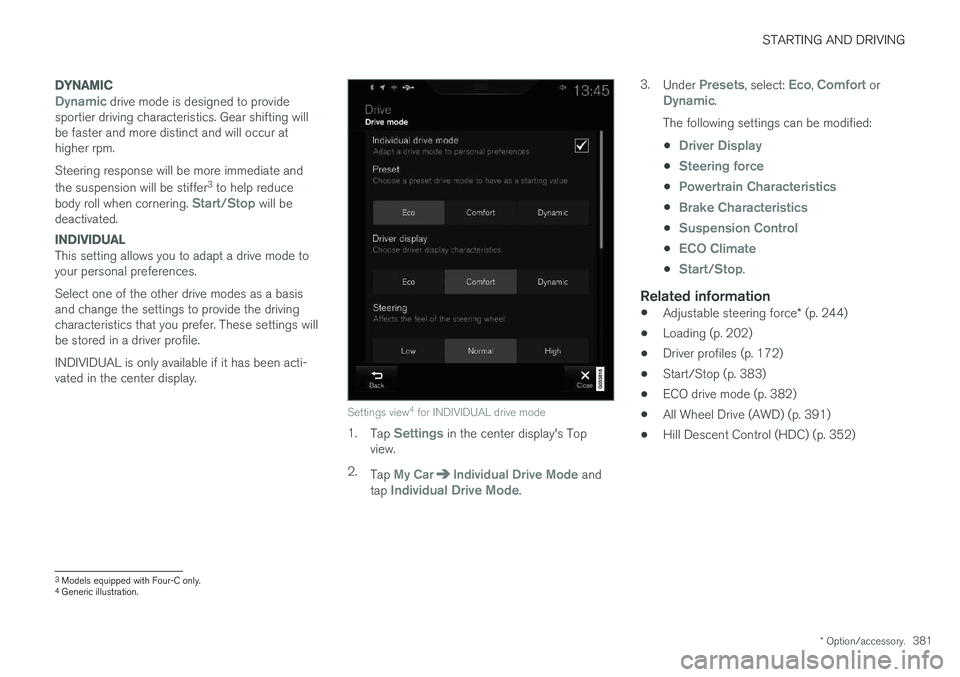
Settings view 4
for INDIVIDUAL drive mode
1. Tap Settings in the center display's Top
view.
2. Tap
My CarIndividual Drive Mode and
tap Individual Drive Mode. 3.
Under
Presets, select: Eco, Comfort orDynamic.
The following settings can be modified: •
Driver Display
•Steering force
•Powertrain Characteristics
•Brake Characteristics
•Suspension Control
•ECO Climate
•Start/Stop.
Related information
• Adjustable steering force
* (p. 244)
• Loading (p. 202)
• Driver profiles (p. 172)
• Start/Stop (p. 383)
• ECO drive mode (p. 382)
• All Wheel Drive (AWD) (p. 391)
• Hill Descent Control (HDC) (p. 352)
3
Models equipped with Four-C only.
4 Generic illustration.
Page 448 of 552
WHEELS AND TIRES
446
Tire sidewall designations
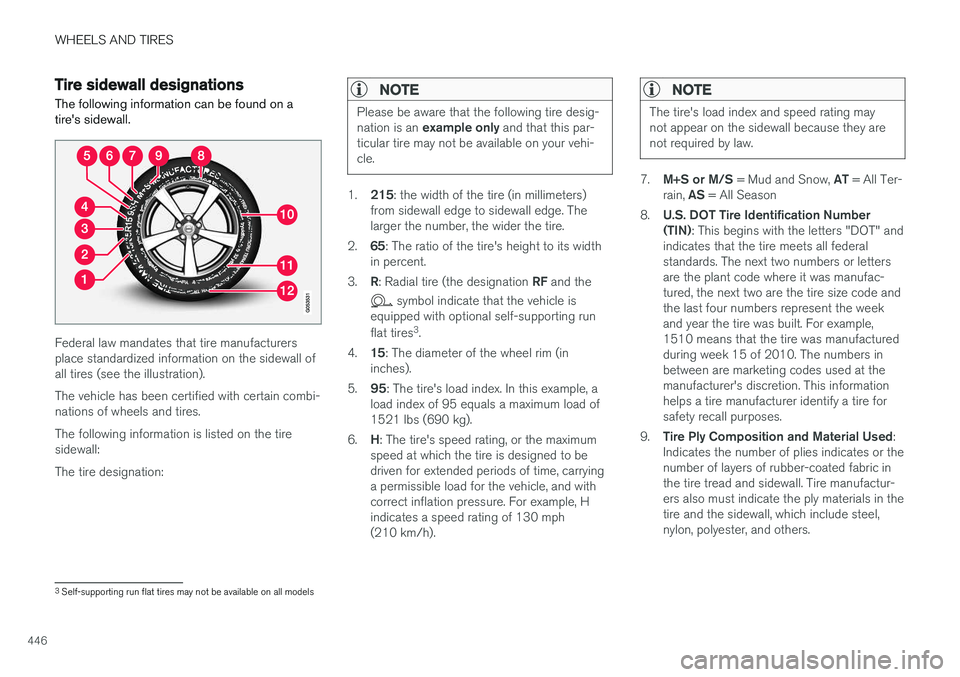
The following information can be found on a tire's sidewall.
Federal law mandates that tire manufacturers place standardized information on the sidewall ofall tires (see the illustration). The vehicle has been certified with certain combi- nations of wheels and tires. The following information is listed on the tire sidewall: The tire designation:
NOTE
Please be aware that the following tire desig- nation is an example only and that this par-
ticular tire may not be available on your vehi- cle.
1. 215 : the width of the tire (in millimeters)
from sidewall edge to sidewall edge. The larger the number, the wider the tire.
2. 65: The ratio of the tire's height to its width
in percent.
3. R: Radial tire (the designation RF and the
symbol indicate that the vehicle is
equipped with optional self-supporting run flat tires 3
.
4. 15: The diameter of the wheel rim (in
inches).
5. 95: The tire's load index. In this example, a
load index of 95 equals a maximum load of 1521 lbs (690 kg).
6. H: The tire's speed rating, or the maximum
speed at which the tire is designed to bedriven for extended periods of time, carryinga permissible load for the vehicle, and withcorrect inflation pressure. For example, Hindicates a speed rating of 130 mph(210 km/h).
NOTE
The tire's load index and speed rating may not appear on the sidewall because they arenot required by law.
7. M+S or M/S = Mud and Snow, AT = All Ter-
rain, AS = All Season
8. U.S. DOT Tire Identification Number (TIN) : This begins with the letters "DOT" and
indicates that the tire meets all federalstandards. The next two numbers or lettersare the plant code where it was manufac-tured, the next two are the tire size code andthe last four numbers represent the weekand year the tire was built. For example,1510 means that the tire was manufacturedduring week 15 of 2010. The numbers inbetween are marketing codes used at themanufacturer's discretion. This informationhelps a tire manufacturer identify a tire forsafety recall purposes.
9. Tire Ply Composition and Material Used :
Indicates the number of plies indicates or thenumber of layers of rubber-coated fabric inthe tire tread and sidewall. Tire manufactur-ers also must indicate the ply materials in thetire and the sidewall, which include steel,nylon, polyester, and others.
3 Self-supporting run flat tires may not be available on all models
Page 463 of 552
WHEELS AND TIRES
}}
461
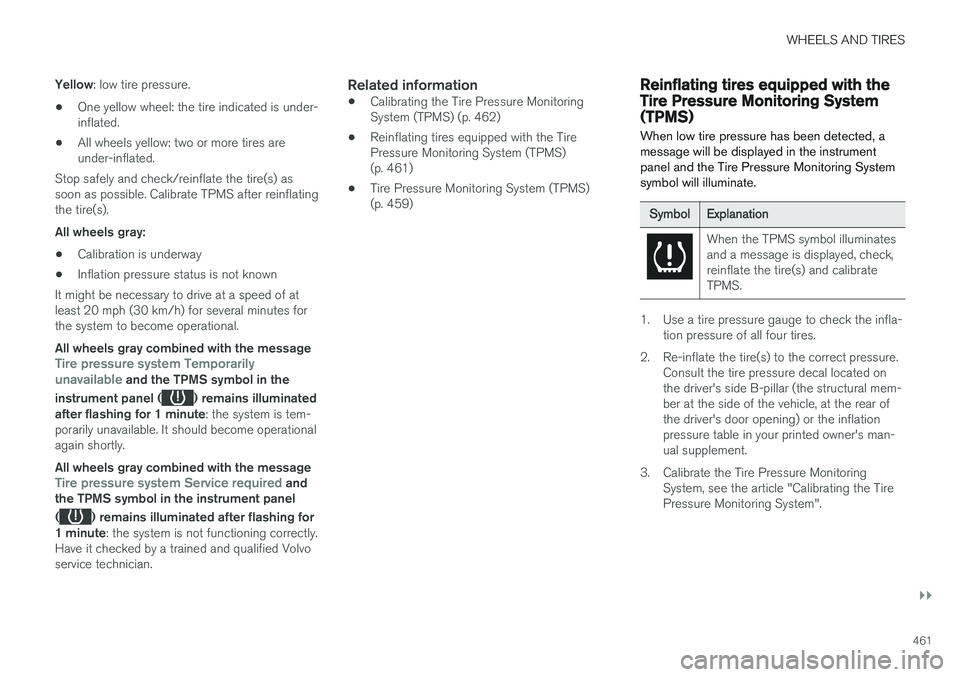
Yellow
: low tire pressure.
• One yellow wheel: the tire indicated is under- inflated.
• All wheels yellow: two or more tires areunder-inflated.
Stop safely and check/reinflate the tire(s) assoon as possible. Calibrate TPMS after reinflatingthe tire(s). All wheels gray:
• Calibration is underway
• Inflation pressure status is not known
It might be necessary to drive at a speed of at least 20 mph (30 km/h) for several minutes forthe system to become operational. All wheels gray combined with the message
Tire pressure system Temporarily
unavailable and the TPMS symbol in the
instrument panel (
) remains illuminated
after flashing for 1 minute : the system is tem-
porarily unavailable. It should become operational again shortly. All wheels gray combined with the message
Tire pressure system Service required and
the TPMS symbol in the instrument panel (
) remains illuminated after flashing for
1 minute : the system is not functioning correctly.
Have it checked by a trained and qualified Volvo service technician.
Related information
• Calibrating the Tire Pressure MonitoringSystem (TPMS) (p. 462)
• Reinflating tires equipped with the TirePressure Monitoring System (TPMS)(p. 461)
• Tire Pressure Monitoring System (TPMS)(p. 459)
Reinflating tires equipped with the Tire Pressure Monitoring System(TPMS) When low tire pressure has been detected, a message will be displayed in the instrumentpanel and the Tire Pressure Monitoring Systemsymbol will illuminate.
Symbol
Explanation
When the TPMS symbol illuminates and a message is displayed, check,reinflate the tire(s) and calibrateTPMS.
1. Use a tire pressure gauge to check the infla-
tion pressure of all four tires.
2. Re-inflate the tire(s) to the correct pressure. Consult the tire pressure decal located on the driver's side B-pillar (the structural mem-ber at the side of the vehicle, at the rear ofthe driver's door opening) or the inflationpressure table in your printed owner's man-ual supplement.
3. Calibrate the Tire Pressure Monitoring System, see the article "Calibrating the TirePressure Monitoring System".
Page 465 of 552
WHEELS AND TIRES
}}
463
6. Tap the calibration button. 7.
Tap
OK after the tire pressure in all four tires
has been checked and adjusted.
8. Drive the vehicle. > The calibration process will be completedwhile driving and will be interrupted if the vehicle is parked and the engine isswitched off. Calibration continues auto-matically when driving resumes.
When enough data has been collected to detecta low tire pressure situation, the tires' color in thecenter display will change to green. The systemwill not give any text confirmation when calibra-tion is finished although it will state if calibrationfails. When driving with heavy loads or at sus-tained highway speeds, the tire pressure shouldbe adjusted to the recommended inflation pres-sures. After adjusting inflation pressure, repeat steps 1-8.
NOTE
Always remember to calibrate the Tire Pres- sure Monitoring System when the wheelshave been changed or the tire inflation pres-sure has been corrected according to the tirepressure decal or tire inflation pressure table. If correct reference values have not been set, the system cannot issue low tire pressurealerts correctly. The vehicle must be parked with the engine running to access the calibration button andto start the calibration process.
WARNING
The exhaust gases contain carbon monoxide, which is invisible and odorless but very poi-sonous. For this reason, always perform thecalibration procedure outdoors or in a work-shop with exhaust gas evacuation equipment.
Related information
• Tire Pressure Monitoring System (TPMS) (p. 459)
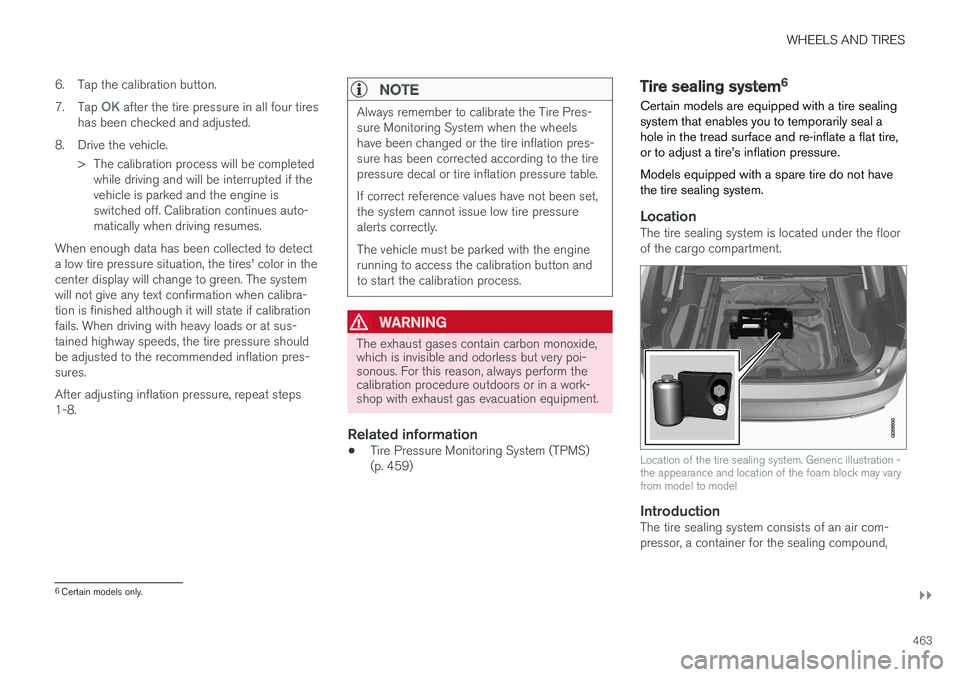
Tire sealing system 6
Certain models are equipped with a tire sealing system that enables you to temporarily seal ahole in the tread surface and re-inflate a flat tire,or to adjust a tire