key battery VOLVO V90 CROSS COUNTRY 2021 User Guide
[x] Cancel search | Manufacturer: VOLVO, Model Year: 2021, Model line: V90 CROSS COUNTRY, Model: VOLVO V90 CROSS COUNTRY 2021Pages: 683, PDF Size: 14.19 MB
Page 276 of 683
||
KEY, LOCKS AND ALARM
274
Related information
Private Locking (p. 272)
Alarm The alarm emits sound and light signals if anyone without a valid remote key attemptsto break into the vehicle or interferes with thestart battery or alarm siren.
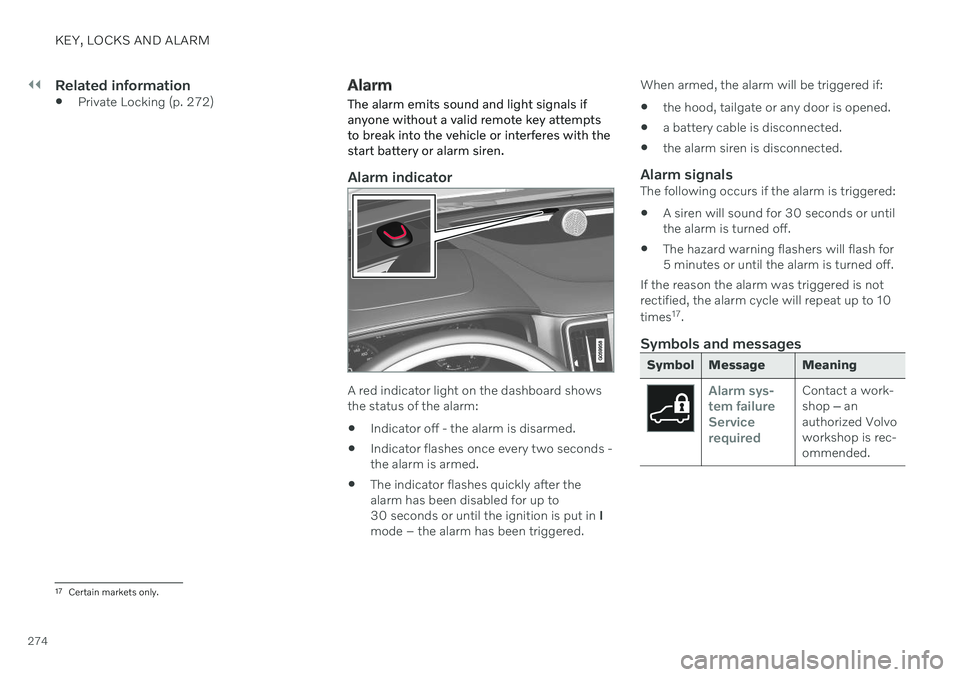
Alarm indicator
A red indicator light on the dashboard shows the status of the alarm:
Indicator off - the alarm is disarmed.
Indicator flashes once every two seconds -the alarm is armed.
The indicator flashes quickly after thealarm has been disabled for up to30 seconds or until the ignition is put in
I
mode – the alarm has been triggered. When armed, the alarm will be triggered if:
the hood, tailgate or any door is opened.
a battery cable is disconnected.
the alarm siren is disconnected.
Alarm signalsThe following occurs if the alarm is triggered:
A siren will sound for 30 seconds or untilthe alarm is turned off.
The hazard warning flashers will flash for5 minutes or until the alarm is turned off.
If the reason the alarm was triggered is notrectified, the alarm cycle will repeat up to 10 times 17
.
Symbols and messages
Symbol Message Meaning
Alarm sys- tem failureServicerequiredContact a work- shop ‒ an
authorized Volvoworkshop is rec-ommended.
17 Certain markets only.
Page 277 of 683
KEY, LOCKS AND ALARM
275
NOTE
Do not attempt to repair or alter any of the components in the alarm system yourself.Any such attempt could affect the termsand conditions of your insurance policy.
Related information
Arming and disarming the alarm (p. 275)
Arming and disarming the alarm
The alarm is armed when the vehicle is locked and disarmed when the vehicle isunlocked. The alarm can also be disarmedwithout a functioning key.
Arming and disarming the alarmThe alarm is armed when the vehicle is locked and disarmed when the vehicle is unlocked.
Disarming the alarm without a functioning remote key
The vehicle can be unlocked and disarmed even if the remote key is not functioning e.g. ifthe battery is discharged.
1. Open the driver's door using the detacha- ble key blade.
> This will trigger the alarm.
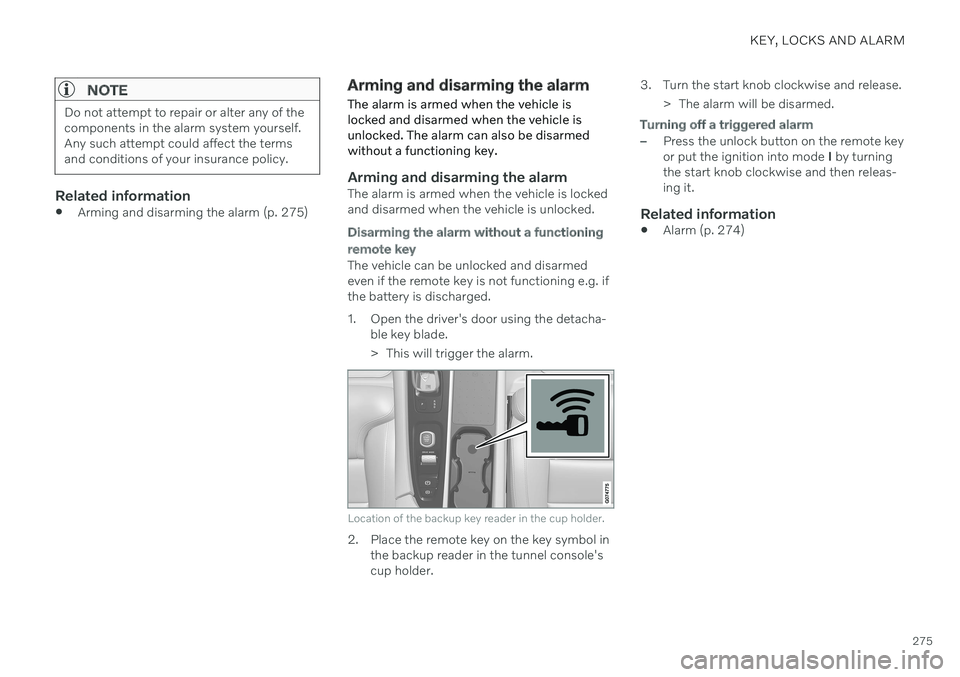
Location of the backup key reader in the cup holder.
2. Place the remote key on the key symbol inthe backup reader in the tunnel console's cup holder. 3. Turn the start knob clockwise and release.
> The alarm will be disarmed.
Turning off a triggered alarm
–Press the unlock button on the remote key or put the ignition into mode I by turning
the start knob clockwise and then releas-ing it.
Related information
Alarm (p. 274)
Page 401 of 683
STARTING AND DRIVING
}}
399
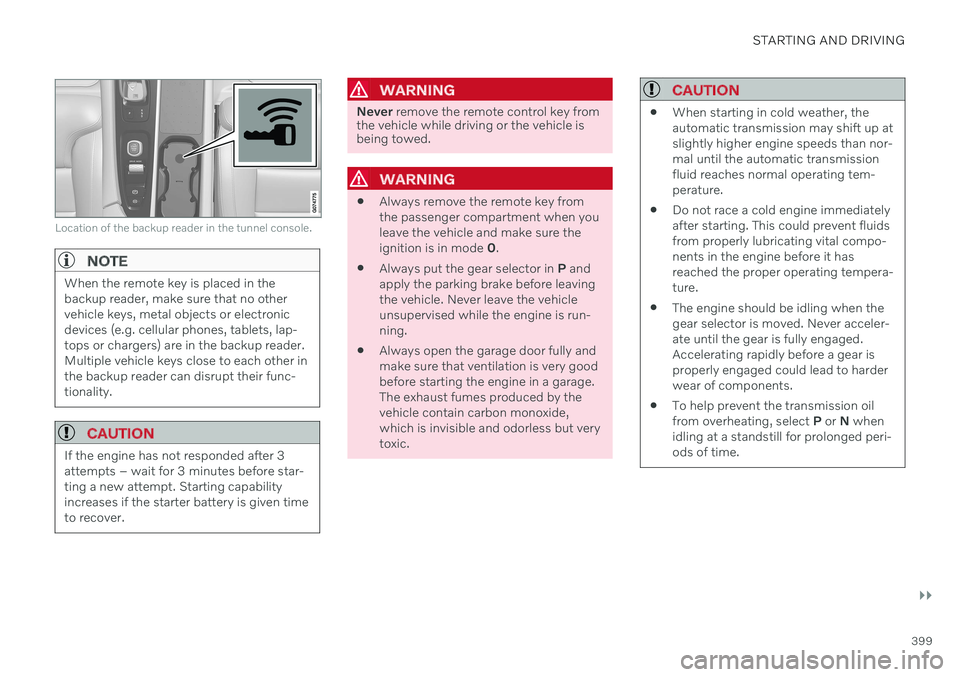
Location of the backup reader in the tunnel console.
NOTE
When the remote key is placed in the backup reader, make sure that no othervehicle keys, metal objects or electronicdevices (e.g. cellular phones, tablets, lap-tops or chargers) are in the backup reader.Multiple vehicle keys close to each other inthe backup reader can disrupt their func-tionality.
CAUTION
If the engine has not responded after 3 attempts – wait for 3 minutes before star-ting a new attempt. Starting capabilityincreases if the starter battery is given timeto recover.
WARNING
Never remove the remote control key from
the vehicle while driving or the vehicle is being towed.
WARNING
Always remove the remote key from the passenger compartment when youleave the vehicle and make sure theignition is in mode
0.
Always put the gear selector in
P and
apply the parking brake before leavingthe vehicle. Never leave the vehicleunsupervised while the engine is run-ning.
Always open the garage door fully andmake sure that ventilation is very goodbefore starting the engine in a garage.The exhaust fumes produced by thevehicle contain carbon monoxide,which is invisible and odorless but verytoxic.
CAUTION
When starting in cold weather, the automatic transmission may shift up atslightly higher engine speeds than nor-mal until the automatic transmissionfluid reaches normal operating tem-perature.
Do not race a cold engine immediatelyafter starting. This could prevent fluidsfrom properly lubricating vital compo-nents in the engine before it hasreached the proper operating tempera-ture.
The engine should be idling when thegear selector is moved. Never acceler-ate until the gear is fully engaged.Accelerating rapidly before a gear isproperly engaged could lead to harderwear of components.
To help prevent the transmission oilfrom overheating, select
P or N when
idling at a standstill for prolonged peri-ods of time.
Page 404 of 683
||
STARTING AND DRIVING
402
Related information
Starting the vehicle (p. 398)
Adjusting the steering wheel (p. 203)
Jump starting using another battery (p. 444)
Selecting ignition mode (p. 402)
Selecting ignition mode
The vehicle's ignition can be put in various modes (levels) to make different functionsavailable.
Selecting an ignition mode
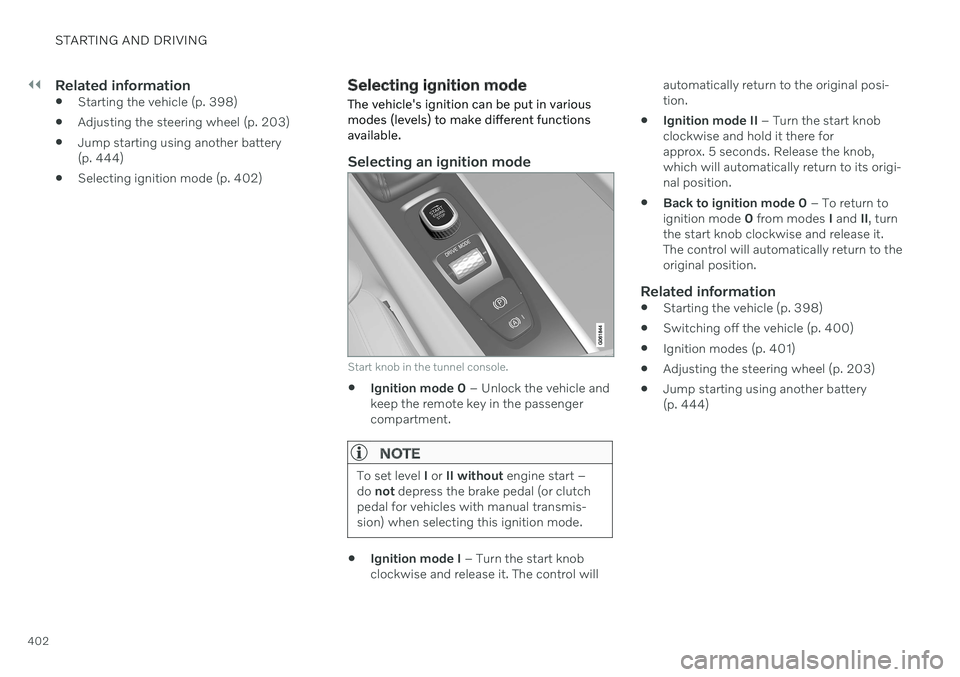
Start knob in the tunnel console.
Ignition mode 0
– Unlock the vehicle and
keep the remote key in the passenger compartment.
NOTE
To set level I or II without engine start –
do not depress the brake pedal (or clutch
pedal for vehicles with manual transmis- sion) when selecting this ignition mode.
Ignition mode I
– Turn the start knob
clockwise and release it. The control will automatically return to the original posi- tion.
Ignition mode II
– Turn the start knob
clockwise and hold it there forapprox. 5 seconds. Release the knob,which will automatically return to its origi-nal position.
Back to ignition mode 0
– To return to
ignition mode 0 from modes I and II, turn
the start knob clockwise and release it.The control will automatically return to theoriginal position.
Related information
Starting the vehicle (p. 398)
Switching off the vehicle (p. 400)
Ignition modes (p. 401)
Adjusting the steering wheel (p. 203)
Jump starting using another battery(p. 444)
Page 453 of 683
STARTING AND DRIVING
}}
451
WARNING
Ignition mode
II must be active – all
airbags are deactivated in ignition mode I.
Always have the remote key in thevehicle when it is towed.
WARNING
The brake and steering servos do not work when the engine is off – it takesabout 5 times more pressure on the brakepedal and steering requires much moreeffort than normal.
1. Turn on the hazard warning flashers.
2. Attach the towline to the towing eyelet.
3. Put the vehicle in ignition mode II – with-
out pressing the brake pedal, turn the start knob clockwise and hold it there for about4 seconds. Release the knob, which willautomatically return to its original position.
4. Move the gear selector to neutral (N) and release the parking brake. If the battery charge level is too low, it may not be possible to release the parkingbrake. Connect an auxiliary battery to thevehicle if the battery is discharged.
> The towing vehicle can now start driv-ing. 5. Keep the towline taut when the towing
vehicle slows down by applying light pres- sure to the brake pedal. This will helpavoid jarring movements.
6. Be prepared to apply the brakes to stop the vehicle.
Jump startingDo not tow the vehicle to start the engine. Usean auxiliary battery if the start battery's chargelevel is so low that the engine cannot bestarted.
CAUTION
Attempting to tow with the engine running could result in damage to the three-waycatalytic converter.
Related information
Attaching and removing the towing eyelet (p. 451)
Hazard warning flashers (p. 165)
Recovery (p. 453)
Jump starting using another battery(p. 444)
Selecting ignition mode (p. 402)
Transmission (p. 412)
Attaching and removing the towing eyelet
Use the towing eyelet when towing. Screw the towing eyelet securely into place in thethreaded outlet behind the cover on the right-hand side of the front and rear bumpers.
NOTE
If the vehicle is equipped with a towbar, there is no rear attachment for the towingeye.
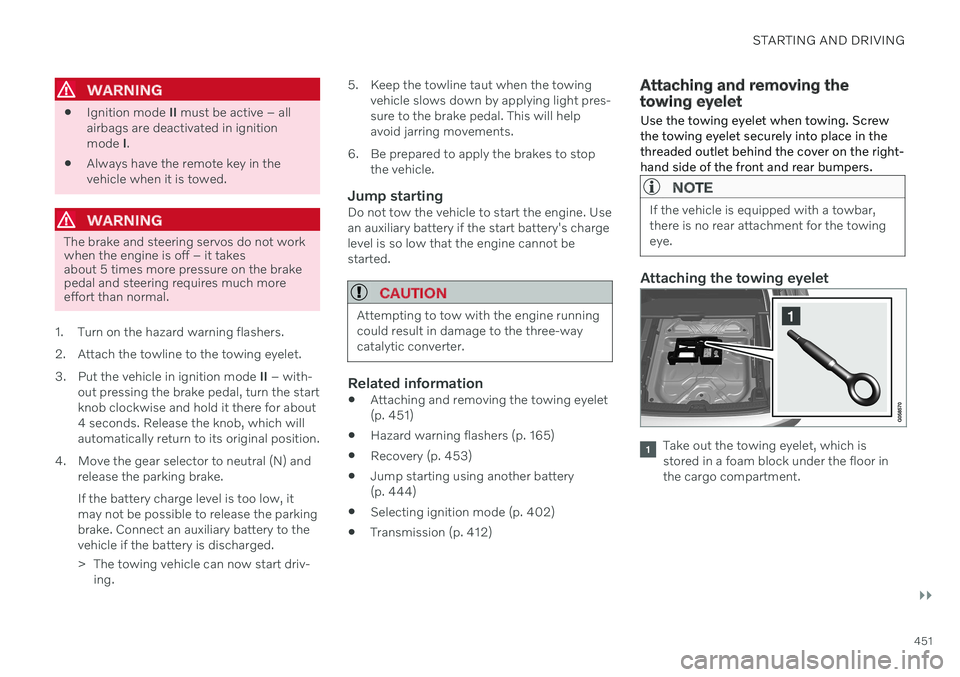
Attaching the towing eyelet
Take out the towing eyelet, which is stored in a foam block under the floor inthe cargo compartment.
Page 586 of 683
||
MAINTENANCE AND SERVICE
584
Monthly:
Check cold tire pressure in all tires. Inspect the tires for wear.
Check that engine coolant and other fluidlevels are between the indicated "min"and "max" markings.
Clean interior glass surfaces with a glasscleaner and soft paper towels.
Wipe driver information displays with asoft cloth.
Visually inspect battery terminals for cor-rosion. Corrosion may indicate a loose ter-minal connector, or a battery near the endof its useful service life. Consult your Volvoretailer for additional information.
As needed:
Wash the vehicle, including the undercarriage, to reduce wear that can be caused by abuildup of dirt, and corrosion that can becaused by salt residues. Clean leaves and twigs from air intake vents at the base of the windshield, and from other pla-ces where they may collect.
NOTE
Complete service information for qualified technicians is available online for purchaseor subscription at www.volvotechinfo.com.
Related information
Vehicle status (p. 586)
Scheduling service and repairs (p. 587)
Connecting equipment to the vehicle's data link connector (p. 37)
Technician certification (p. 38)
Climate control system service (p. 592)
Maintenance of the brake system (p. 405)
Engine compartment overview (p. 594)
Data transfer between vehicle and workshop over Wi-Fi
Volvo workshops have a designated Wi-Fi network for data transfer between your vehi-cle and the workshop. Your visit to the work-shop will be easier and more effective whendiagnostics information and software can betransferred over the workshop's network.
At the workshop, your service technician can connect your vehicle to the workshop's Wi-Finetwork to perform troubleshooting anddownload software. For this type of communi-cation, the vehicle only connects to a work-shop's network. It is not possible to connectthe vehicle to another Wi-Fi network (e.g. yourhome network) in the same way as to a work-shop's network.
Connecting with remote keyConnection is usually managed by the servicetechnician, who will use the remote key but-tons. It is therefore important to bring a keywith buttons with you when you visit theworkshop. Pressing the lock button on theremote key three times will connect the vehi-cle to the workshop's Wi-Fi network. When the car is connected to a Wi-Fi net- work, the
symbol appears in the center
display.
Page 666 of 683
INDEX
664Auto-hold brakes 409
activating/deactivating 410
after collision 411
driver support 278
Automatic car wash 637 Automatic engine stop auto-stop 425
Automatic high beam 161
Automatic locking 268
Automatic relocking 249, 263
Automatic transmission 412, 413 kickdown 418
oil 658
Trailer 446
B
Backrestfront seat, adjusting 190, 191, 194, 195 , 196, 197
rear seat, folding 200
Battery jump-start 444
Maintenance 600
recycling 604
starter battery 600
support 602
symbols on the battery 604
Blind Spot Information 352
BLIS 352 activating/deactivating 353
limitations 354
Symbols and messages 355
Blower adjusting 228, 229
air distribution 213
air vents 214
Bluetooth connect 489
connecting vehicle to Internet 515
phone 499
settings 507
Book service and repair 587
Booster cushions 74 Brake assist after collision 411
Brake fluid grade 659
Brake functions 403
Brakes 403 anti-lock brakes, ABS 403
auto-brake with Pilot Assist 323auto-braking with Adaptive Cruise
Control 323automatic when stationary 409
Brake Assist System, BAS 404
brake lights 165
brake system 403
emergency brake lights 165
Maintenance 405
on salted roads 405
on wet roads 405
parking brake 406
brake system fluid 659
C
Camera sensorsee Camera 390
Camera unit 390 limitations 390
maintenance and cleaning 393
Symbols and messages 395
Capacity weight 561, 655 Care Key restricted remote key 256
settings 257
Cargo compartment 569 attachment points 572
cargo net 577
Page 673 of 683
INDEX
671
Locks and remote keys 244 Low battery charge level
start battery 443
Low beams 159
Low-speed driving 432 activate with function button 433
M
Maintained climate comfort 239start/stop 239
Maintenance 582 corrosion protection 641
Max. axle weight 655
Max. roof load 655
Media player 483, 484, 485 compatible file formats 491
voice control 153
Messages and symbols Adaptive Cruise Control 302
Assistance at risk of collision 350
BLIS 355
camera and radar unit 395
City Safety 344
Cross Traffic Alert 363
Lane Keeping Aid 328
Park Assist Camera 377
Park Assist Pilot 386
Parking Assist 368
Pilot Assist 314
stability and traction control system 282
Messages in display 110, 144 handling 111, 144
saved 112, 145
Mileage 93 Misting condensation in headlights 634, 637
Mood lighting 168 adjusting 168
N
Netcargo compartment 577
O
Occupant safety 45
Occupant weight sensor 59
Octane rating 440
Oil, see also Engine oil 658
Oil filter 595
Oil level 596
On-board diagnostics 582
On-board Diagnostic socket 37
Option/accessory 21
Outside temperature gauge 98
Overheating 442, 446
Owner's information 16
OWNER'S MANUAL 21 environmental labeling 23
in cellular phone 20
in the center display 17, 18
P
Paddle at steering wheel 202 Paint
color code 643
paint damage and touch-up 641, 642 , 643
Panoramic roof 179 opening and closing 180
pinch protection 172
sun shade 182
ventilation position 181
Parallel parking 379
Park Assist Camera 369 activating 375
limitations 390
Page 675 of 683
INDEX
673
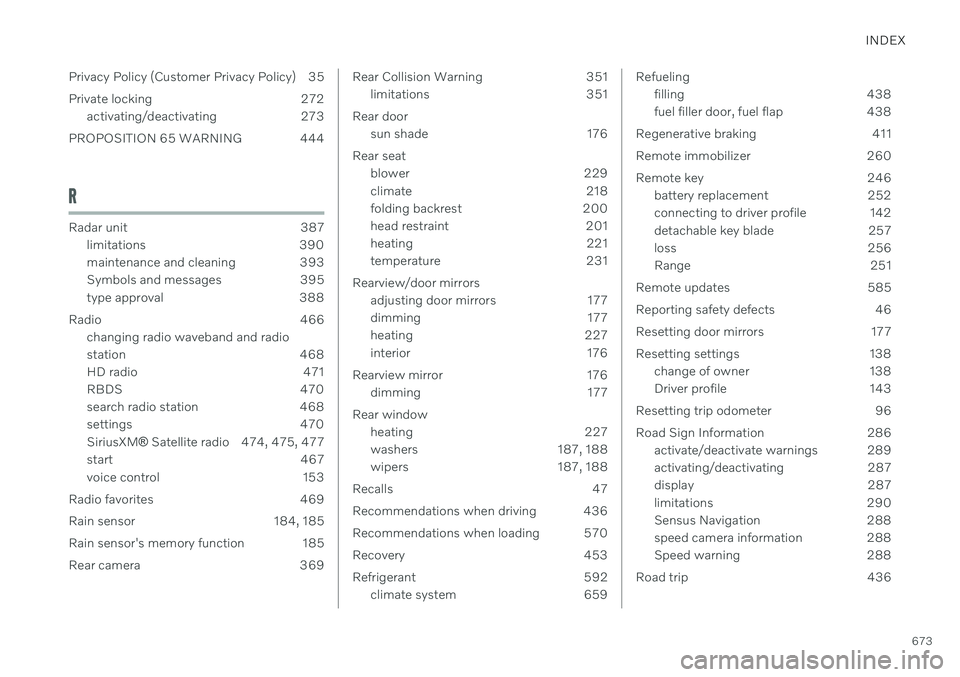
Privacy Policy (Customer Privacy Policy) 35
Private locking 272
activating/deactivating 273
PROPOSITION 65 WARNING 444
R
Radar unit 387 limitations 390
maintenance and cleaning 393
Symbols and messages 395
type approval 388
Radio 466 changing radio waveband and radio
station 468
HD radio 471
RBDS 470
search radio station 468
settings 470 SiriusXM ® Satellite radio 474, 475, 477
start 467
voice control 153
Radio favorites 469
Rain sensor 184, 185
Rain sensor's memory function 185
Rear camera 369
Rear Collision Warning 351 limitations 351
Rear door sun shade 176
Rear seat blower 229
climate 218
folding backrest 200
head restraint 201
heating 221
temperature 231
Rearview/door mirrors adjusting door mirrors 177
dimming 177
heating 227
interior 176
Rearview mirror 176 dimming 177
Rear window heating 227
washers 187, 188
wipers 187, 188
Recalls 47
Recommendations when driving 436
Recommendations when loading 570
Recovery 453
Refrigerant 592 climate system 659Refueling
filling 438
fuel filler door, fuel flap 438
Regenerative braking 411
Remote immobilizer 260
Remote key 246 battery replacement 252
connecting to driver profile 142
detachable key blade 257
loss 256
Range 251
Remote updates 585
Reporting safety defects 46
Resetting door mirrors 177
Resetting settings 138 change of owner 138
Driver profile 143
Resetting trip odometer 96
Road Sign Information 286 activate/deactivate warnings 289
activating/deactivating 287
display 287
limitations 290
Sensus Navigation 288
speed camera information 288
Speed warning 288
Road trip 436
Page 677 of 683
INDEX
675
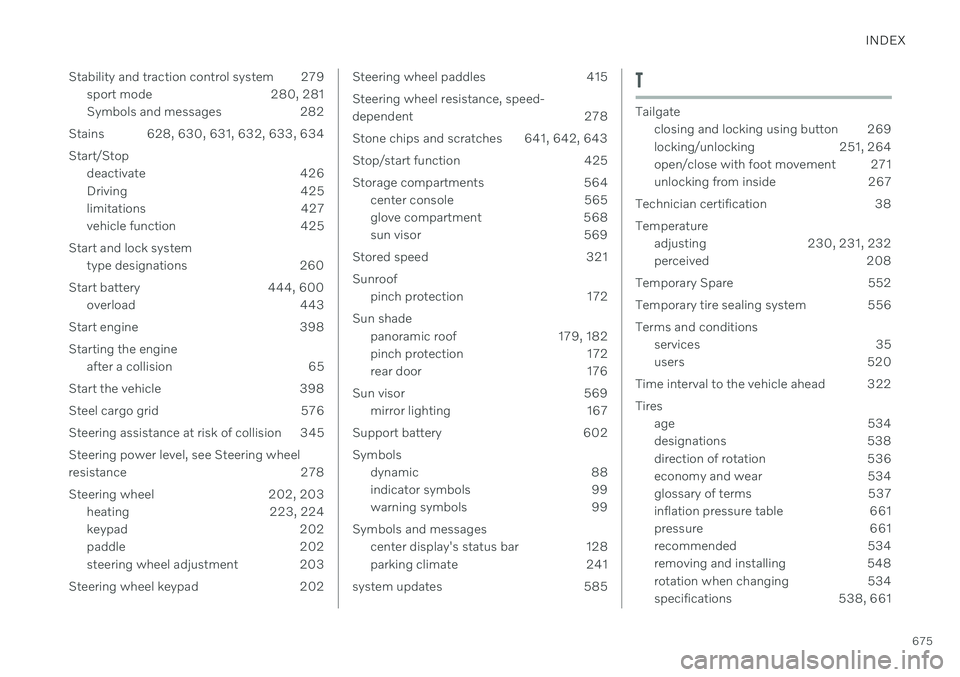
Stability and traction control system 279
sport mode 280, 281
Symbols and messages 282
Stains 628, 630, 631, 632, 633, 634
Start/Stop deactivate 426
Driving 425
limitations 427
vehicle function 425
Start and lock system type designations 260
Start battery 444, 600 overload 443
Start engine 398 Starting the engine after a collision 65
Start the vehicle 398
Steel cargo grid 576
Steering assistance at risk of collision 345 Steering power level, see Steering wheel
resistance 278
Steering wheel 202, 203 heating 223, 224
keypad 202
paddle 202
steering wheel adjustment 203
Steering wheel keypad 202
Steering wheel paddles 415 Steering wheel resistance, speed-
dependent 278
Stone chips and scratches 641, 642, 643
Stop/start function 425
Storage compartments 564 center console 565
glove compartment 568
sun visor 569
Stored speed 321 Sunroof pinch protection 172
Sun shade panoramic roof 179, 182
pinch protection 172
rear door 176
Sun visor 569 mirror lighting 167
Support battery 602 Symbols dynamic 88
indicator symbols 99
warning symbols 99
Symbols and messages center display's status bar 128
parking climate 241
system updates 585T
Tailgate closing and locking using button 269
locking/unlocking 251, 264
open/close with foot movement 271
unlocking from inside 267
Technician certification 38 Temperature adjusting 230, 231, 232
perceived 208
Temporary Spare 552
Temporary tire sealing system 556 Terms and conditions services 35
users 520
Time interval to the vehicle ahead 322 Tires age 534
designations 538
direction of rotation 536
economy and wear 534
glossary of terms 537
inflation pressure table 661
pressure 661
recommended 534
removing and installing 548
rotation when changing 534
specifications 538, 661