mirror VOLVO V90 CROSS COUNTRY 2021 Owners Manual
[x] Cancel search | Manufacturer: VOLVO, Model Year: 2021, Model line: V90 CROSS COUNTRY, Model: VOLVO V90 CROSS COUNTRY 2021Pages: 683, PDF Size: 14.19 MB
Page 6 of 683
4
Resetting center display settings138
Table of settings in the center display 139
Driver profiles 140
Selecting a driver profile 141
Changing a driver profile's name 141
Protecting a driver profile 142
Linking a remote key to a driver profile 142
Resetting driver profile settings 143
Messages in the center display 144
Handling messages in the center display 144
Handling messages saved fromthe center display 145
Head-up display *
146
Activating and deactivating the head-up display * 147
Head-up display settings *
148
Voice Control 149
Use voice recognition 150
Voice control for cellular phones 152
Voice control for radio and media 153
Voice control settings 154
LIGHTING
Lighting control and panel156
Adjusting light functions via the center display 157
Parking lights 158
Daytime running lights 158
Low beams 159
Using high beam 160
Active high beam 161
Using turn signals 162
Active Bending Lights *
162
Front fog lights/corner illumination *
163
Rear fog light 164
Brake lights 165
Emergency brake lights 165
Hazard warning flashers 165
Using home safe lighting 166
Welcome Light 166
Interior Lighting 166
Adjusting interior lighting 168
WINDOWS, GLASS AND MIRRORS
Windows, glass and mirrors 172
Pinch protection for windows and sun curtains 172
Reset procedure for pinch protection 173
Power windows 174
Operating the power windows 174
Using sun curtains *
176
Rearview/door mirrors 176
Adjusting the rearview mirror dim-ming function 177
Adjusting the door mirrors 177
Panoramic roof *
179
Operating the panoramic roof *
180
Auto closing the panoramic roof *
sun curtain 182
Wiper blades and washer fluid 183
Using the windshield wipers 183
Using the rain sensor 184
Activating and deactivating therain sensor's memory function 185
Using the windshield and head-light washers 186
Using the rear window wiper/washer 187
Using automatic rear windowwiping when backing up 188
Page 7 of 683
5
SEATS AND STEERING WHEEL
Manual front seats190
Power * front seats
191
Adjusting the power * front seats
191
Storing positions for seats, mir- rors and head-up display *192
Using stored positions for seats,mirrors and head-up display *193
Front seat massage * settings
194
Adjusting front seat massage set-tings * 195
Adjusting * front seat cushion length
196
Adjusting front seat side bolstersettings * 197
Adjusting front seat lumbar support *
197
Adjusting the passenger seat fromthe driver's seat * 199
Folding down the rear seat backrests 200
Adjusting the rear seat head restraints 201
Steering wheel controls and horn 202
Adjusting the steering wheel 203
CLIMATE CONTROL
Climate 206
Climate zones 206
Climate control sensors 207
Perceived temperature 208
Climate control system voice commands 208
Air quality 209
CleanZone *
210
Clean Zone Interior Package *
210
Interior Air Quality System *
211
Activating and deactivating the air quality sensor * 211
Passenger compartment air filter 212
Advanced Air Cleaner *
212
Air distribution 212
Adjusting air distribution 213
Opening, closing and directing air vents 214
Air distribution options 215
Climate system controls 218
Activating and deactivating power front seats * 220
Activating and deactivating theheated front seat * 221
Activating and deactivating theheated rear seats * 221
Activating and deactivating front seat ventilation
* 223
Activating and deactivating theheated steering wheel *223
Activating and deactivating auto-matic steering wheel heating *224
Activating auto climate control 224
Activating and deactivating recir- culation 225
Activating and deactivating therecirculation timer setting 225
Activating and deactivating maxdefroster 226
Activating and deactivating theheated rear window and door mirrors 227
Automatically activating and deac-tivating the heated rear windowand door mirrors 227
Setting the blower speed for thefront seats 228
Setting the blower speed for the rear seats * 229
Setting the temperature for the front seats 230
Setting the temperature for the rear seats * 231
Synchronize temperature 232
Activating and deactivating air conditioning 233
Page 61 of 683

SAFETY
}}
59
WARNING
No objects or accessory equipment, e.g. dashboard covers, may be placedon, attached to, or installed near the airbag cover (the area above the glovecompartment) or the area affected byairbag deployment.
There should be no loose articles, suchas coffee cups on the floor, seat, ordashboard area.
Never try to open the airbag cover onthe steering wheel or the passenger'sside dashboard. This should only bedone by a trained and qualified Volvoservice technician.
Failure to follow these instructions canresult in injury to the vehicle's occu-pants.
Related information
Airbags (p. 55)
Occupant weight sensor (p. 59)
Occupant weight sensor
The Occupant Weight Sensor (OWS) is designed to meet the regulatory require-ments of Federal Motor Vehicle SafetyStandard (FMVSS) 208 and is designed todisable (will not inflate) the passenger's sidefront airbag under certain conditions.
Occupant Weight Sensor (OWS) indicator light
Disabling the passenger's side front airbag
Volvo recommends that ALL occupants (adults and children) shorter than 140 cm(4 feet 7 inches) be seated in the back seat ofany vehicle with a front passenger side airbagand be properly restrained for their size andweight. The OWS works with sensors that are part of the front passenger's seat and seat belt. Thesensors are designed to detect the presence of a properly seated occupant and determine ifthe passenger's side front airbag should beenabled (may inflate) or disabled (will notinflate). The OWS will disable (will not inflate) the pas- senger's side front airbag when:
the front passenger's seat is unoccupied,or has small/medium objects in the frontseat,
the system determines that an infant ispresent in a rear-facing infant seat that isinstalled according to the manufacturer'sinstructions,
the system determines that a small child ispresent in a forward-facing child restraintthat is installed according to the manufac-turer's instructions,
the system determines that a small child ispresent in a booster seat,
a child or a small person occupies thefront passenger's seat.
The OWS uses a PASSENGER AIRBAG OFFindicator lamp which will illuminate and stayon to remind you that the passenger's sidefront airbag is disabled. The PASSENGERAIRBAG OFF indicator lamp is located in theoverhead console, near the base of the rear-view mirror.
Page 70 of 683
SAFETY
68
Child restraints
Suitable child restraints should always be used when children travel in the vehicle.
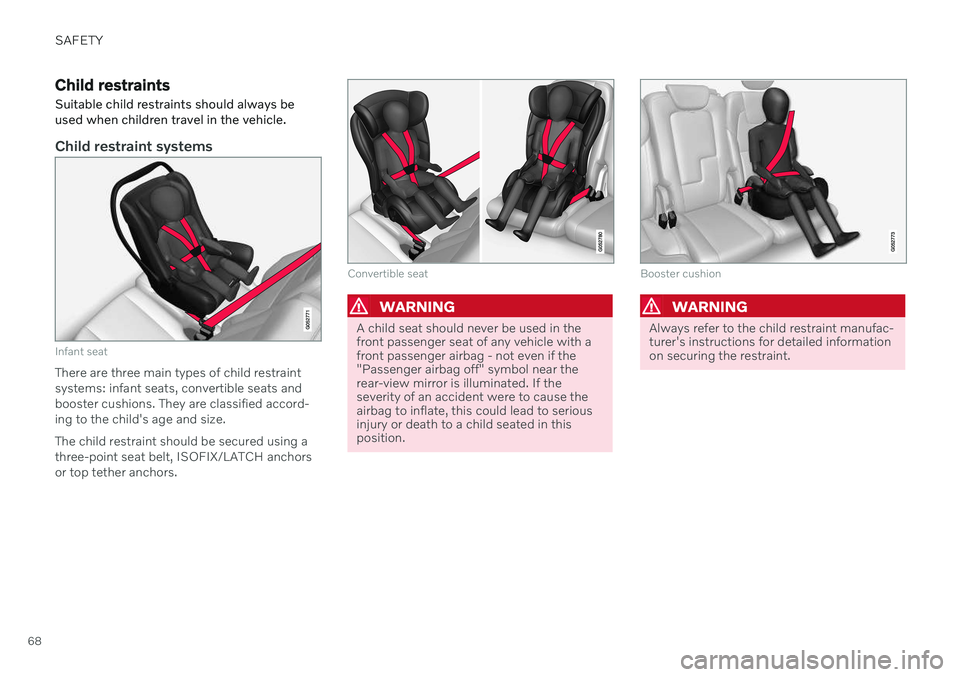
Child restraint systems
Infant seat
There are three main types of child restraint systems: infant seats, convertible seats andbooster cushions. They are classified accord-ing to the child's age and size. The child restraint should be secured using a three-point seat belt, ISOFIX/LATCH anchorsor top tether anchors.
Convertible seat
WARNING
A child seat should never be used in the front passenger seat of any vehicle with afront passenger airbag - not even if the"Passenger airbag off" symbol near therear-view mirror is illuminated. If theseverity of an accident were to cause theairbag to inflate, this could lead to seriousinjury or death to a child seated in thisposition.
Booster cushion
WARNING
Always refer to the child restraint manufac- turer's instructions for detailed informationon securing the restraint.
Page 72 of 683
SAFETY
70
Infant seatsSuitable child restraints should always be used when children (depending on their age/size) are seated in the vehicle.
Securing an infant seat with a seat belt
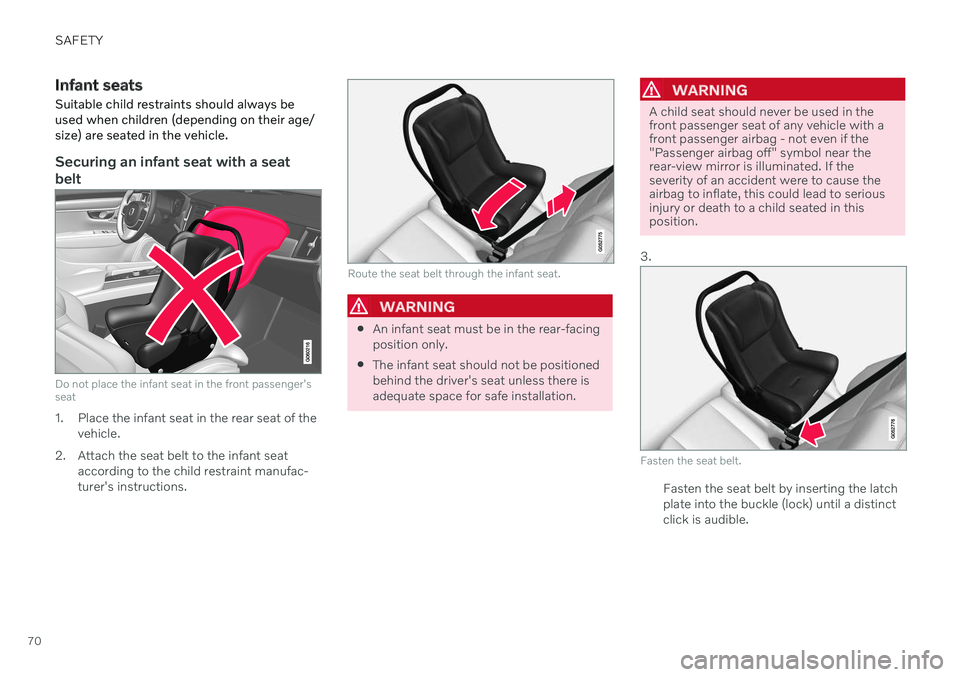
Do not place the infant seat in the front passenger's seat
1. Place the infant seat in the rear seat of the vehicle.
2. Attach the seat belt to the infant seat according to the child restraint manufac- turer's instructions.
Route the seat belt through the infant seat.
WARNING
An infant seat must be in the rear-facing position only.
The infant seat should not be positionedbehind the driver's seat unless there isadequate space for safe installation.
WARNING
A child seat should never be used in the front passenger seat of any vehicle with afront passenger airbag - not even if the"Passenger airbag off" symbol near therear-view mirror is illuminated. If theseverity of an accident were to cause theairbag to inflate, this could lead to seriousinjury or death to a child seated in thisposition.
3.
Fasten the seat belt.
Fasten the seat belt by inserting the latch plate into the buckle (lock) until a distinctclick is audible.
Page 76 of 683
||
SAFETY
74
WARNING
It should not be possible to move the child restraint more than 2.5 cm (1 in.) in anydirection along the seat belt path.
The convertible seat can be removed by unbuckling the seat belt and letting it retractcompletely.
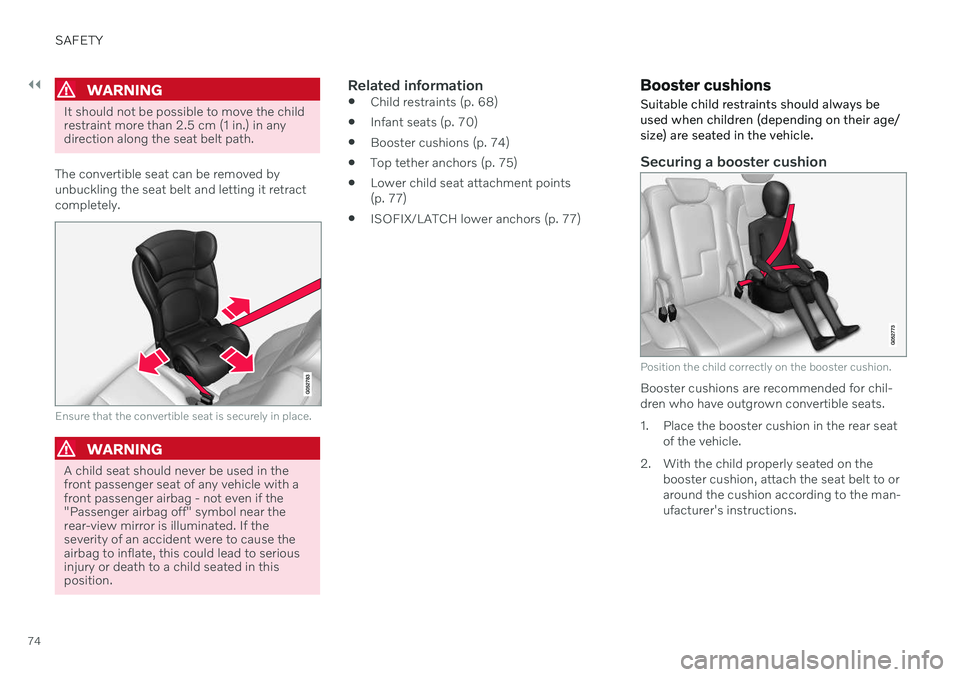
Ensure that the convertible seat is securely in place.
WARNING
A child seat should never be used in the front passenger seat of any vehicle with afront passenger airbag - not even if the"Passenger airbag off" symbol near therear-view mirror is illuminated. If theseverity of an accident were to cause theairbag to inflate, this could lead to seriousinjury or death to a child seated in thisposition.
Related information
Child restraints (p. 68)
Infant seats (p. 70)
Booster cushions (p. 74)
Top tether anchors (p. 75)
Lower child seat attachment points (p. 77)
ISOFIX/LATCH lower anchors (p. 77)
Booster cushions
Suitable child restraints should always be used when children (depending on their age/size) are seated in the vehicle.
Securing a booster cushion
Position the child correctly on the booster cushion.
Booster cushions are recommended for chil- dren who have outgrown convertible seats.
1. Place the booster cushion in the rear seat of the vehicle.
2. With the child properly seated on the booster cushion, attach the seat belt to or around the cushion according to the man-ufacturer's instructions.
Page 89 of 683
DISPLAYS AND VOICE CONTROL
* Option/accessory.87
Driver's door
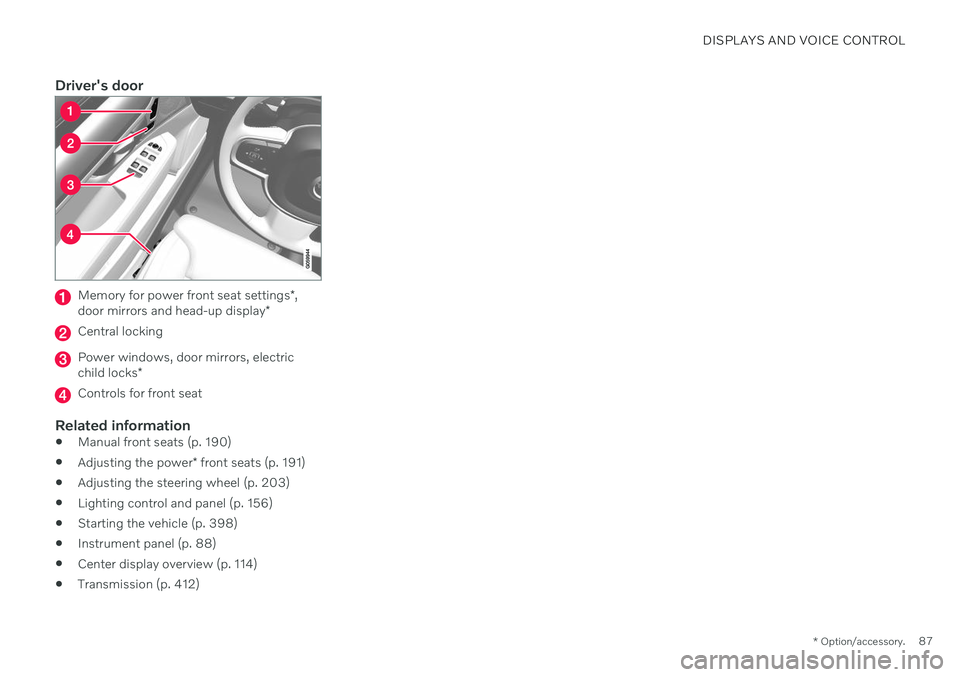
Memory for power front seat settings *,
door mirrors and head-up display *
Central locking
Power windows, door mirrors, electric child locks*
Controls for front seat
Related information
Manual front seats (p. 190)
Adjusting the power
* front seats (p. 191)
Adjusting the steering wheel (p. 203)
Lighting control and panel (p. 156)
Starting the vehicle (p. 398)
Instrument panel (p. 88)
Center display overview (p. 114)
Transmission (p. 412)
Page 117 of 683
DISPLAYS AND VOICE CONTROL
* Option/accessory.115
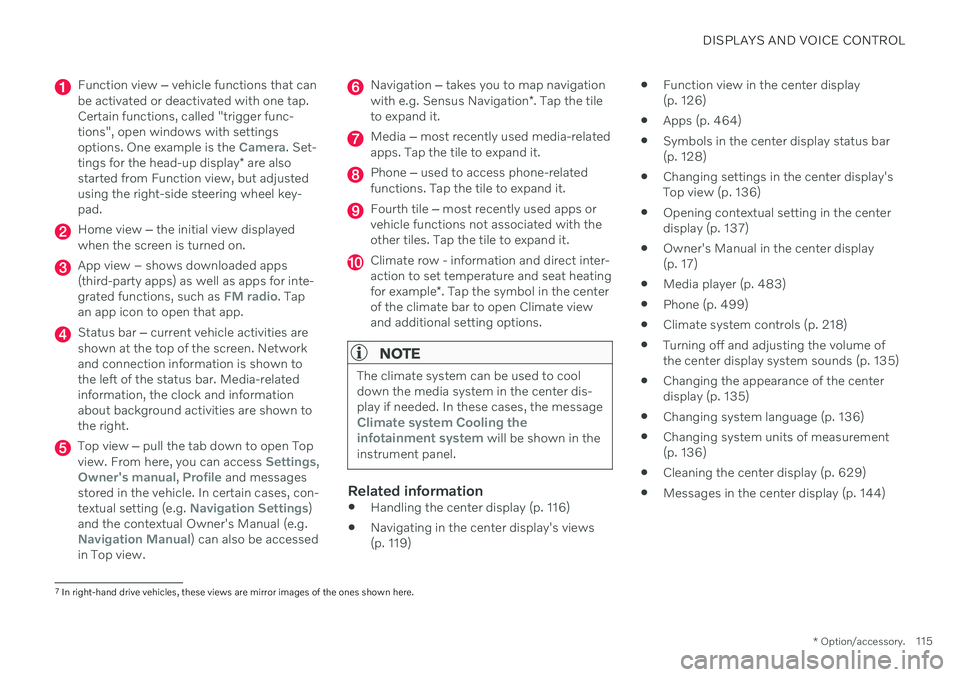
Function view ‒ vehicle functions that can
be activated or deactivated with one tap. Certain functions, called "trigger func-tions", open windows with settingsoptions. One example is the
Camera. Set-
tings for the head-up display * are also
started from Function view, but adjusted using the right-side steering wheel key-pad.
Home view ‒ the initial view displayed
when the screen is turned on.
App view – shows downloaded apps (third-party apps) as well as apps for inte-grated functions, such as
FM radio. Tap
an app icon to open that app.
Status bar ‒ current vehicle activities are
shown at the top of the screen. Network and connection information is shown tothe left of the status bar. Media-relatedinformation, the clock and informationabout background activities are shown tothe right.
Top view ‒ pull the tab down to open Top
view. From here, you can access Settings,Owner's manual, Profile and messages
stored in the vehicle. In certain cases, con- textual setting (e.g.
Navigation Settings)
and the contextual Owner's Manual (e.g.
Navigation Manual) can also be accessed
in Top view.
Navigation ‒ takes you to map navigation
with e.g. Sensus Navigation *. Tap the tile
to expand it.
Media ‒ most recently used media-related
apps. Tap the tile to expand it.
Phone ‒ used to access phone-related
functions. Tap the tile to expand it.
Fourth tile ‒ most recently used apps or
vehicle functions not associated with the other tiles. Tap the tile to expand it.
Climate row - information and direct inter- action to set temperature and seat heating for example *. Tap the symbol in the center
of the climate bar to open Climate view and additional setting options.
NOTE
The climate system can be used to cool down the media system in the center dis-play if needed. In these cases, the message
Climate system Cooling the
infotainment system will be shown in the
instrument panel.
Related information
Handling the center display (p. 116)
Navigating in the center display's views (p. 119)
Function view in the center display(p. 126)
Apps (p. 464)
Symbols in the center display status bar(p. 128)
Changing settings in the center display'sTop view (p. 136)
Opening contextual setting in the centerdisplay (p. 137)
Owner's Manual in the center display(p. 17)
Media player (p. 483)
Phone (p. 499)
Climate system controls (p. 218)
Turning off and adjusting the volume ofthe center display system sounds (p. 135)
Changing the appearance of the centerdisplay (p. 135)
Changing system language (p. 136)
Changing system units of measurement(p. 136)
Cleaning the center display (p. 629)
Messages in the center display (p. 144)
7
In right-hand drive vehicles, these views are mirror images of the ones shown here.
Page 137 of 683

DISPLAYS AND VOICE CONTROL
135
New lines in free-text fields in handwriting mode
Create a new line by drawing above the characters in the handwriting field as shown in the illustration15
.
Writing blank spaces in free-text fields
Make a blank space by drawing a line from left to right 16
.
Related information
Using the center display keyboard (p. 130)
Changing the appearance of the center display The appearance of the center display can be changed by selecting a different theme.
1.
Tap Settings in the Top view.
2. Tap
My CarDisplaysDisplay
Themes.
3. Select a theme, e.g.
Minimalistic orChrome Rings.
In addition to these themes, you can also choose between
Normal and Bright. InNormal, the background of the screen is dark
and the text is light. This option is the default setting for all themes. If the bright version isselected, the background will be light and thetext will be dark. This option can, for example,make the screen easier to see in bright day-light conditions. These alternatives are always available for selection and are not affected by the ambientlighting.
Related information
Changing settings in the center display'sTop view (p. 136)
Activating and deactivating the center dis-play (p. 119)
Cleaning the center display (p. 629)
Turning off and adjusting the volume of the center displaysystem sounds
The volume of the center display system sounds can be adjusted or turned off com-pletely.
1. Tap Settings in the Top view in the center
display.
2. Tap
SoundSystem Volumes.
3. Pull the control under
Touch Sounds to
adjust the volume or turn off screen tap sounds. Pull the control to the desiredsound level.
Related information
Center display overview (p. 114)
Changing settings in the center display'sTop view (p. 136)
Sound settings (p. 462)
15
For Arabic keyboards, draw the same character, but in mirror image.
16 For Arabic keyboards, draw the line from right to left.
Page 141 of 683
DISPLAYS AND VOICE CONTROL
}}
* Option/accessory.139
Table of settings in the center display
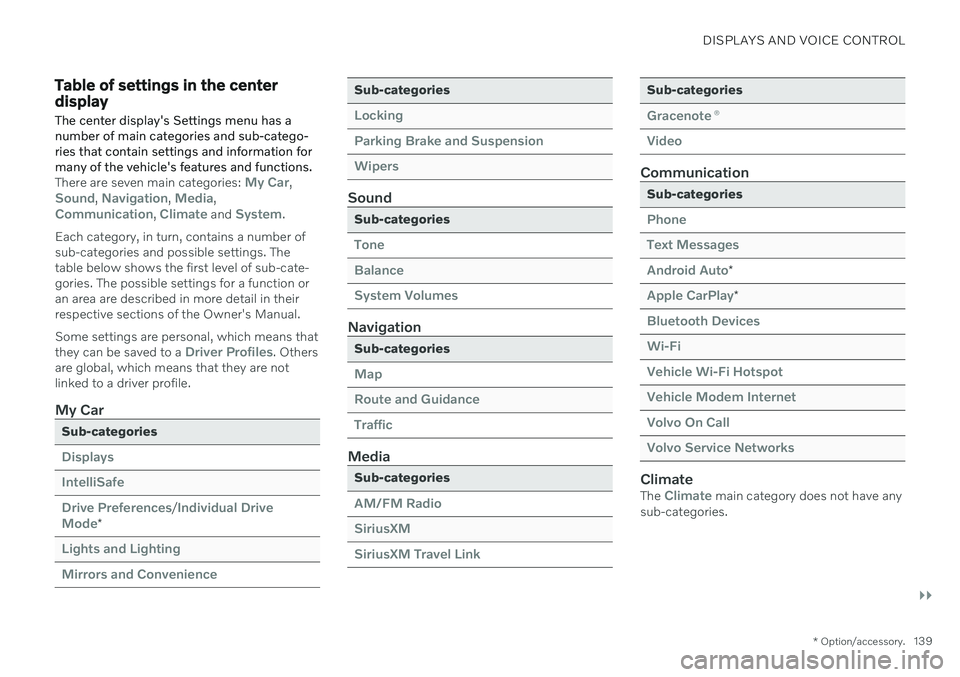
The center display's Settings menu has a number of main categories and sub-catego-ries that contain settings and information formany of the vehicle's features and functions.
There are seven main categories: My Car,Sound, Navigation, Media,Communication, Climate and System.
Each category, in turn, contains a number of sub-categories and possible settings. Thetable below shows the first level of sub-cate-gories. The possible settings for a function oran area are described in more detail in theirrespective sections of the Owner's Manual. Some settings are personal, which means that they can be saved to a
Driver Profiles. Others
are global, which means that they are not linked to a driver profile.
My Car
Sub-categories
Displays IntelliSafeDrive Preferences
/Individual Drive
Mode*
Lights and Lighting Mirrors and Convenience
Sub-categories
Locking Parking Brake and SuspensionWipers
Sound
Sub-categories
Tone BalanceSystem Volumes
Navigation
Sub-categories
Map Route and GuidanceTraffic
Media
Sub-categories
AM/FM Radio SiriusXMSiriusXM Travel Link
Sub-categories
Gracenote ®
Video
Communication
Sub-categories
Phone Text MessagesAndroid Auto
*
Apple CarPlay*
Bluetooth Devices Wi-FiVehicle Wi-Fi Hotspot Vehicle Modem Internet Volvo On Call Volvo Service Networks
ClimateThe Climate main category does not have any
sub-categories.