transmission VOLVO V90 CROSS COUNTRY 2021 Owners Manual
[x] Cancel search | Manufacturer: VOLVO, Model Year: 2021, Model line: V90 CROSS COUNTRY, Model: VOLVO V90 CROSS COUNTRY 2021Pages: 683, PDF Size: 14.19 MB
Page 11 of 683
9
STARTING AND DRIVING
Starting the vehicle398
Switching off the vehicle 400
Ignition modes 401
Selecting ignition mode 402
Brake functions 403
Brakes 403
Brake Assist System 404
Braking on wet roads 405
Braking on salted roads 405
Maintenance of the brake system 405
Parking brake 406
Activating and deactivating the parking brake 406
Settings for automatically activat-ing the parking brake 408
Parking on a hill 408
Parking brake malfunction 408
Auto-hold brakes 409
Activating and deactivating Auto-hold at a standstill 410
Hill Start Assist 411
Braking assist after a collision 411
Regenerative braking *
411
Transmission 412
Automatic transmission 412
Shifting gears with automatic transmission413
Using the steering wheel paddles *
to shift 415
Shiftlock 417
Deactivating the automatic shiftlock 417
The kickdown function 418
The Launch function *
418
Automatic transmission symbolsand messages 419
All Wheel Drive (AWD) 419
Drive modes *
419
Changing drive mode *
421
Eco drive mode 422
Activating and deactivating Ecodrive mode using the function button 424
Start/Stop function 425
Driving with the Start/Stop function 425
Deactivating the Start/Stop function 426
Conditions for the Start/Stop function 427
Leveling control * and suspension
429
Leveling control settings *
432
Low Speed Control 432
Activating and deactivating LowSpeed Control using the functionbutton 433
Hill Descent Control
433
Activating and deactivating Hill Descent Control using the func-tion button 434
Economical driving 435
Preparing for a long trip 436
Winter driving 436
Driving through standing water 437
Opening/closing the fuel filler door 438
Refueling 438
Fuel 439
Octane rating 440
Emission controls 442
Overheating of engine and trans-mission 442
Battery drain 443
Jump starting using another battery 444
Driving with a trailer 446
Trailer Stability Assist *
448
Checking trailer lights 449
Towing using a towline 450
Attaching and removing the tow-ing eyelet 451
Recovery 453
HomeLink ®
* 454
Programming HomeLink ®
* 455
Page 15 of 683
13
Fuses in the engine compartment607
Fuses under the glove compartment 612
Fuses in the cargo compartment 618
Replacing bulbs 623
Removing the plastic cover to replace bulbs 624
Location of exterior lights 624
Replacing the low beam headlightbulbs 625
Replacing the high beam headlightbulbs 626
Replacing daytime running lights/front parking light bulbs 626
Replacing front turn signal bulbs 627
Bulb specifications 628
Cleaning the interior 628
Cleaning the center display 629
Cleaning the head-up display * and
instrument panel 630
Cleaning fabric upholstery andceiling liner 630
Cleaning the seat belt 631
Cleaning textile floor and inlay mats 632
Cleaning leather upholstery *
632
Cleaning the leather steering wheel 633
Cleaning interior plastic, metal andwood surfaces 634
Cleaning the exterior
634
Polishing and waxing 635
Hand washing 636
Automatic car washes 637
High-pressure washing 638
Cleaning the wiper blades 639
Cleaning exterior plastic, rubber and trim components 639
Cleaning rims 640
Corrosion protection 641
Paintwork 641
Touching up minor paint damage 642
Color codes 643
Changing rear window wipers 643
Replacing windshield wiper blades 644
Putting the wiper blades in serviceposition 645
Filling washer fluid 646
SPECIFICATIONS
Type designations650
Dimensions 653
Weights 655
Towing capacity and tongue weight 656
Engine specifications 657
Engine oil specifications 658
Transmission fluid specifications 658
Brake fluid specifications 659
Fuel tank volume 659
Air conditioning specifications 659
Approved tire pressure 661
Page 89 of 683
DISPLAYS AND VOICE CONTROL
* Option/accessory.87
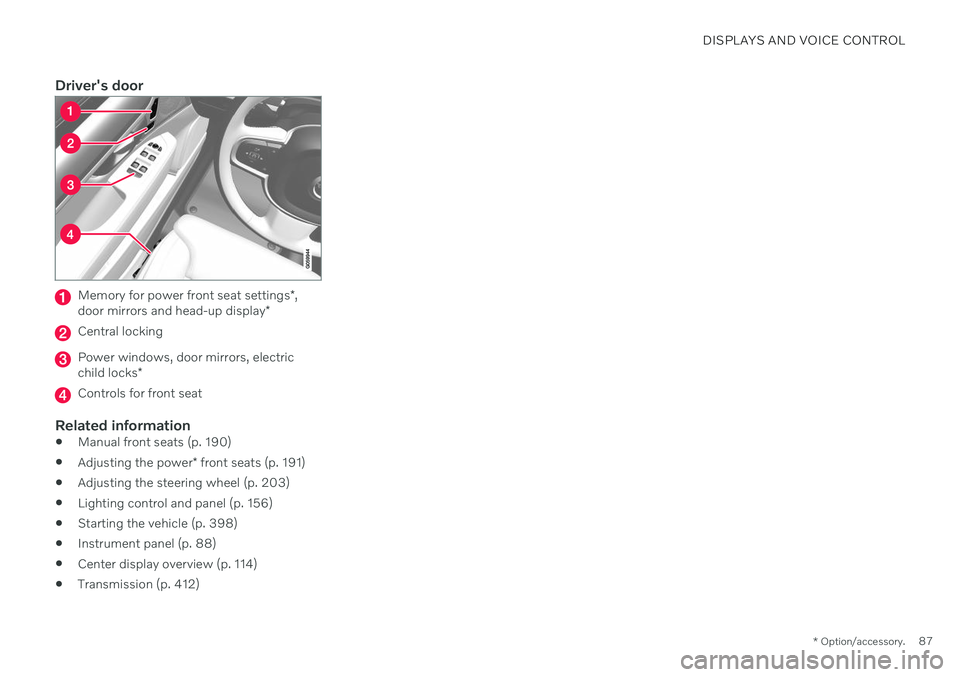
Driver's door
Memory for power front seat settings *,
door mirrors and head-up display *
Central locking
Power windows, door mirrors, electric child locks*
Controls for front seat
Related information
Manual front seats (p. 190)
Adjusting the power
* front seats (p. 191)
Adjusting the steering wheel (p. 203)
Lighting control and panel (p. 156)
Starting the vehicle (p. 398)
Instrument panel (p. 88)
Center display overview (p. 114)
Transmission (p. 412)
Page 204 of 683

||
SEATS AND STEERING WHEEL
* Option/accessory.
202
Tap the Headrest Fold but-
ton to activate/deactivate folding.
Manually push the head restraint until it clicks into position.
WARNING
Do not lower the head restraint if there are passengers in any of the rear seats.
WARNING
The head restraint must be locked in the upright position after it has been folded up.
Folding the rear seat outboard head restraints using the handle
For vehicles with the electric folding function *,
the outboard head restraints can be folded using the handle on the top of the seat (see illustration
.) Note that this method also
folds down the backrests. To fold down only the head restraints, e.g. to improve visibility, use the center display * instead. On models
without electrically folding backrests, the head restraints cannot be moved.
Related information
Folding down the rear seat backrests (p. 200)
Steering wheel controls and horn The steering wheel has a horn and controls for e.g. driver support systems and voice con-trol.
Steering wheel keypads and paddles
*.
Driver support system controls. 5
Paddle
* for manually shifting gears (auto-
matic transmission).
Controls for voice commands, accessing menus and messages, and handlingphone calls.
5 Cruise Control, Adaptive Cruise Control *, Distance Alert * and Pilot Assist.
Page 322 of 683
||
DRIVER SUPPORT
* Option/accessory.
320
Related information
Driver support systems (p. 278)
Adaptive Cruise Control
* (p. 294)
Pilot Assist
* (p. 304)
Distance Alert
* (p. 358)
Head-up display
* (p. 146)
Switching target vehicles with driver support
At certain speeds, vehicles with automatic transmissions and the driver support func- tions Adaptive Cruise Control * and Pilot
Assist * can switch target vehicles.
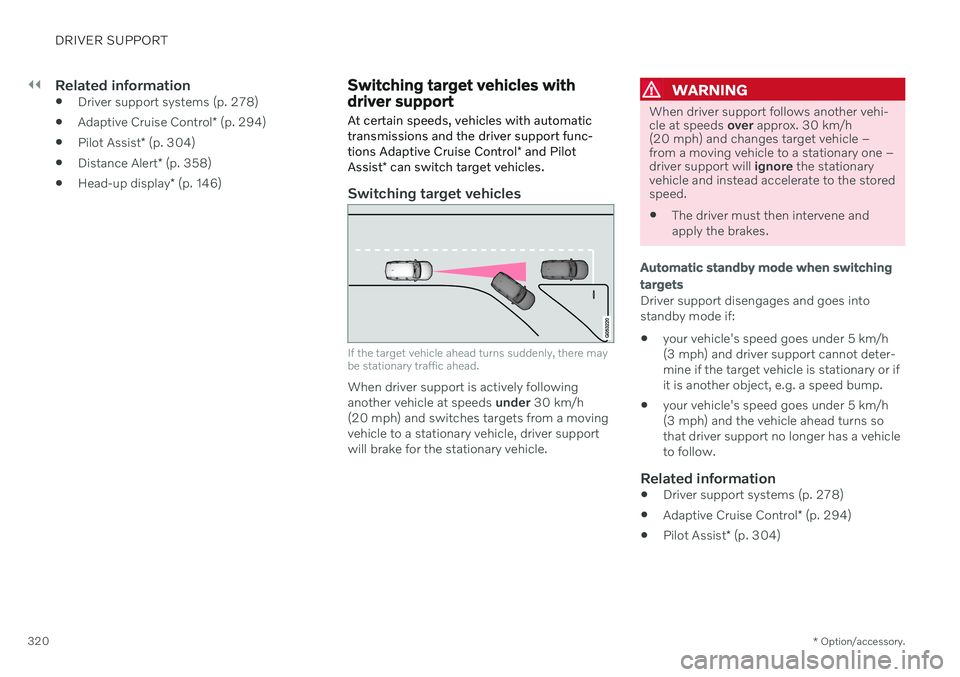
Switching target vehicles
If the target vehicle ahead turns suddenly, there may be stationary traffic ahead.
When driver support is actively following another vehicle at speeds under 30 km/h
(20 mph) and switches targets from a movingvehicle to a stationary vehicle, driver supportwill brake for the stationary vehicle.
WARNING
When driver support follows another vehi- cle at speeds over approx. 30 km/h
(20 mph) and changes target vehicle –from a moving vehicle to a stationary one –driver support will ignore the stationary
vehicle and instead accelerate to the storedspeed. The driver must then intervene and apply the brakes.
Automatic standby mode when switching targets
Driver support disengages and goes into standby mode if:
your vehicle's speed goes under 5 km/h(3 mph) and driver support cannot deter-mine if the target vehicle is stationary or ifit is another object, e.g. a speed bump.
your vehicle's speed goes under 5 km/h(3 mph) and the vehicle ahead turns sothat driver support no longer has a vehicleto follow.
Related information
Driver support systems (p. 278)
Adaptive Cruise Control
* (p. 294)
Pilot Assist
* (p. 304)
Page 323 of 683
DRIVER SUPPORT
* Option/accessory.321
Adjusting set speed for driver support
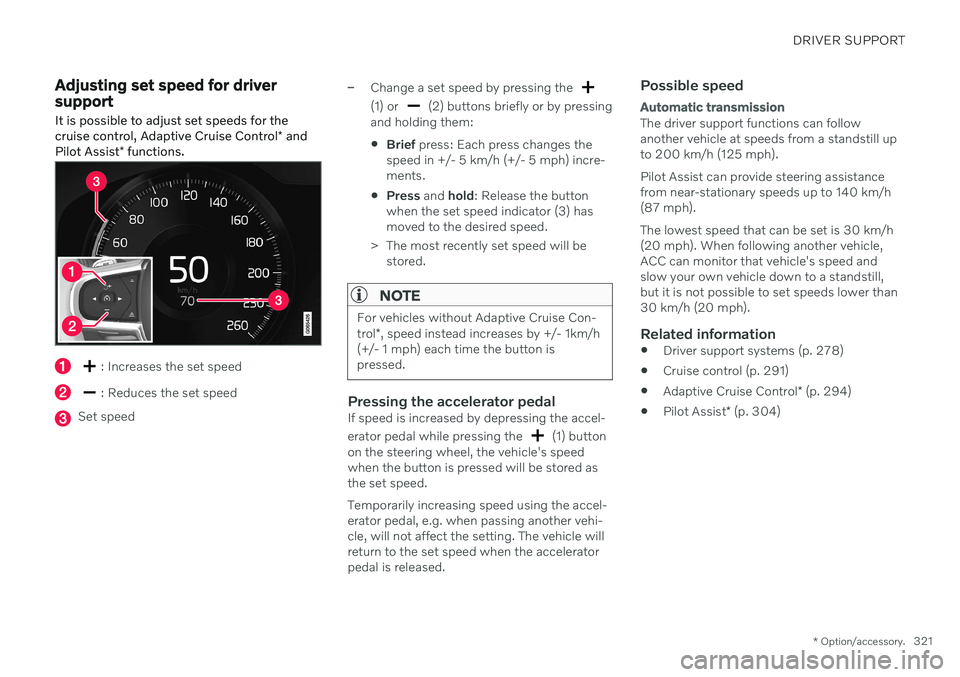
It is possible to adjust set speeds for the cruise control, Adaptive Cruise Control * and
Pilot Assist * functions.
: Increases the set speed
: Reduces the set speed
Set speed
–Change a set speed by pressing the
(1) or (2) buttons briefly or by pressing
and holding them:
Brief
press: Each press changes the
speed in +/- 5 km/h (+/- 5 mph) incre- ments.
Press
and hold: Release the button
when the set speed indicator (3) hasmoved to the desired speed.
> The most recently set speed will be stored.
NOTE
For vehicles without Adaptive Cruise Con- trol *, speed instead increases by +/- 1km/h
(+/- 1 mph) each time the button is pressed.
Pressing the accelerator pedalIf speed is increased by depressing the accel- erator pedal while pressing the
(1) button
on the steering wheel, the vehicle's speed when the button is pressed will be stored asthe set speed. Temporarily increasing speed using the accel- erator pedal, e.g. when passing another vehi-cle, will not affect the setting. The vehicle willreturn to the set speed when the acceleratorpedal is released.
Possible speed
Automatic transmission
The driver support functions can follow another vehicle at speeds from a standstill upto 200 km/h (125 mph). Pilot Assist can provide steering assistance from near-stationary speeds up to 140 km/h(87 mph). The lowest speed that can be set is 30 km/h (20 mph). When following another vehicle,ACC can monitor that vehicle's speed andslow your own vehicle down to a standstill,but it is not possible to set speeds lower than30 km/h (20 mph).
Related information
Driver support systems (p. 278)
Cruise control (p. 291)
Adaptive Cruise Control
* (p. 294)
Pilot Assist
* (p. 304)
Page 367 of 683
DRIVER SUPPORT
}}
* Option/accessory.365
Related information
Driver support systems (p. 278)
Park Assist front, rear and sides
* (p. 365)
Activating or deactivating Park Assist
*
(p. 366)
Park Assist symbols and messages (p. 368)
Park Assist limitations (p. 367)
Park Assist front, rear and sides
*
Park Assist (PAS 102
) behaves differently
depending on which part of the vehicle is approaching an obstacle.
Front camera
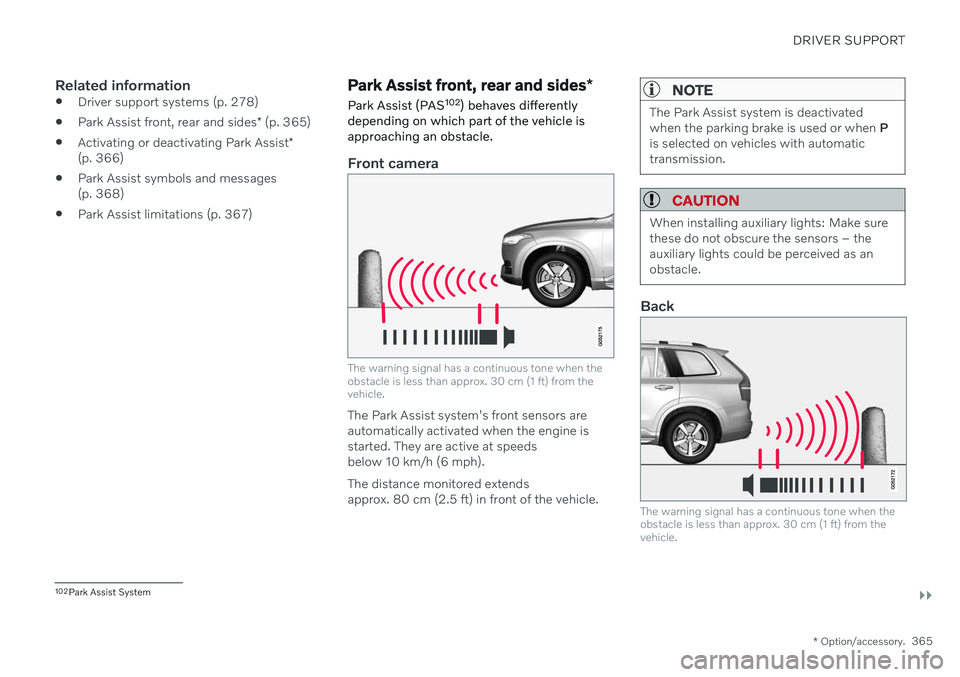
The warning signal has a continuous tone when the obstacle is less than approx. 30 cm (1 ft) from thevehicle.
The Park Assist system's front sensors are automatically activated when the engine isstarted. They are active at speedsbelow 10 km/h (6 mph). The distance monitored extends approx. 80 cm (2.5 ft) in front of the vehicle.
NOTE
The Park Assist system is deactivated when the parking brake is used or when P
is selected on vehicles with automatictransmission.
CAUTION
When installing auxiliary lights: Make sure these do not obscure the sensors – theauxiliary lights could be perceived as anobstacle.
Back
The warning signal has a continuous tone when the obstacle is less than approx. 30 cm (1 ft) from thevehicle.
102 Park Assist System
Page 401 of 683
STARTING AND DRIVING
}}
399
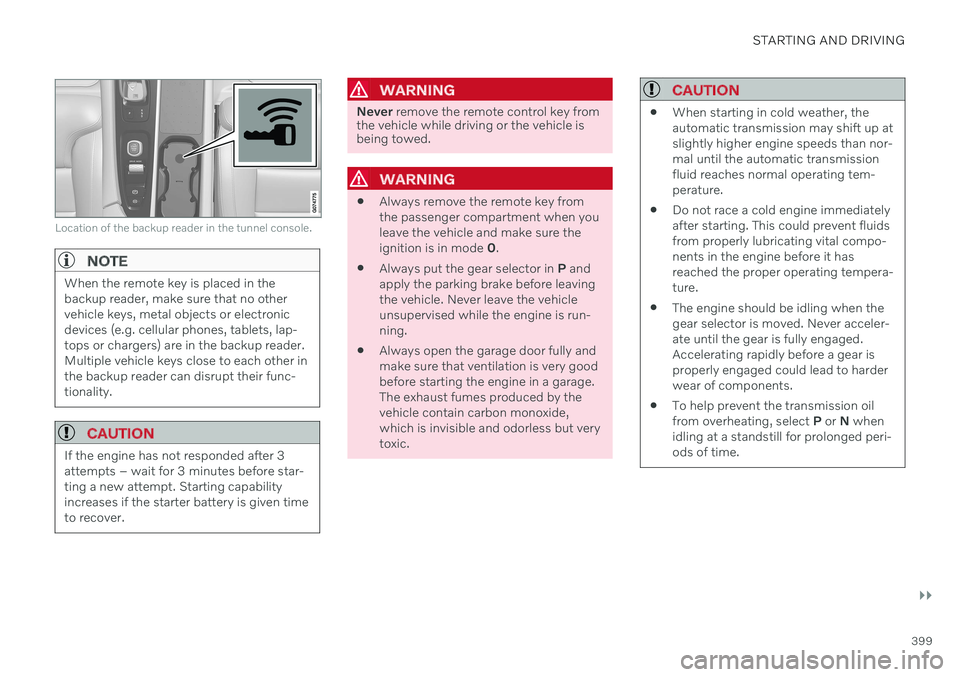
Location of the backup reader in the tunnel console.
NOTE
When the remote key is placed in the backup reader, make sure that no othervehicle keys, metal objects or electronicdevices (e.g. cellular phones, tablets, lap-tops or chargers) are in the backup reader.Multiple vehicle keys close to each other inthe backup reader can disrupt their func-tionality.
CAUTION
If the engine has not responded after 3 attempts – wait for 3 minutes before star-ting a new attempt. Starting capabilityincreases if the starter battery is given timeto recover.
WARNING
Never remove the remote control key from
the vehicle while driving or the vehicle is being towed.
WARNING
Always remove the remote key from the passenger compartment when youleave the vehicle and make sure theignition is in mode
0.
Always put the gear selector in
P and
apply the parking brake before leavingthe vehicle. Never leave the vehicleunsupervised while the engine is run-ning.
Always open the garage door fully andmake sure that ventilation is very goodbefore starting the engine in a garage.The exhaust fumes produced by thevehicle contain carbon monoxide,which is invisible and odorless but verytoxic.
CAUTION
When starting in cold weather, the automatic transmission may shift up atslightly higher engine speeds than nor-mal until the automatic transmissionfluid reaches normal operating tem-perature.
Do not race a cold engine immediatelyafter starting. This could prevent fluidsfrom properly lubricating vital compo-nents in the engine before it hasreached the proper operating tempera-ture.
The engine should be idling when thegear selector is moved. Never acceler-ate until the gear is fully engaged.Accelerating rapidly before a gear isproperly engaged could lead to harderwear of components.
To help prevent the transmission oilfrom overheating, select
P or N when
idling at a standstill for prolonged peri-ods of time.
Page 410 of 683
STARTING AND DRIVING
408
Settings for automatically activating the parking brake Choose whether the parking brake should be activated automatically when the vehicle isswitched off.
To change this setting: 1.Tap
Settings in the center display's Top
view.
2. Tap
My CarParking Brake and
Suspension and select or deselect theAuto Activate Parking Brake function.
Related information
Activating and deactivating the parking brake (p. 406)
Parking brake (p. 406)
Parking on a hill
Always use the parking brake when parking on a hill.
WARNING
Always apply the parking brake when park- ing on an incline. Selecting a gear or put-ting the automatic transmission in P may
not be sufficient to keep the vehicle sta-tionary in all situations.
If the vehicle is pointing uphill:
Turn the front wheels so they are pointing away from
the curb.
If the vehicle is pointing downhill:
Turn the front wheels so they are pointingtoward
the curb.
Heavy load uphill
Heavy loads, such as a trailer, could cause the vehicle to roll backward when the parkingbrake is released automatically on steep uphillgradients. To help avoid this, pull the controlupward while you are driving away. Releasethe control when the vehicle gains traction.
Related information
Activating and deactivating the parkingbrake (p. 406)
Parking brake malfunction
If you are unable to deactivate or activate the parking brake after several attempts, contactan authorized Volvo workshop.
A audible warning signal will sound if the park- ing brake is activated while the vehicle isbeing driven. If the vehicle must be parked before the prob- lem is rectified, turn the wheels as when park-ing on an incline and put the gear selector inP .
Low battery charge levelIf the battery charge level is too low, it will notbe possible to activate or deactivate the park-ing brake. Connect an auxiliary battery to thevehicle if the battery is discharged.
Replacing brake padsDue to the design of the electric parkingbrake, the rear brake pads must be replacedby a workshop. An authorized Volvo workshopis recommended.
Page 414 of 683
STARTING AND DRIVING
* Option/accessory.
412
Transmission
The transmission is part of the vehicle's drive- line (power transmission) between the engineand the drive wheels. The function of thetransmission is to change gears dependingon speed and power needs.
The vehicle has an 8-speed automatic trans- mission. The number of gears allows theengine's torque and power band to be effec-tively utilized. Two of the gears are overdrive gears that save fuel when driving at a constant engine speed.Both the gear selector and the steering wheelpaddles can be used to shift up or down man-ually. The selected gear selector position willbe displayed in the instrument panel.
Related information
Automatic transmission (p. 412)
Automatic transmission
Gear position is selected automatically to make driving as energy efficient as possible.The transmission also has a manual mode.
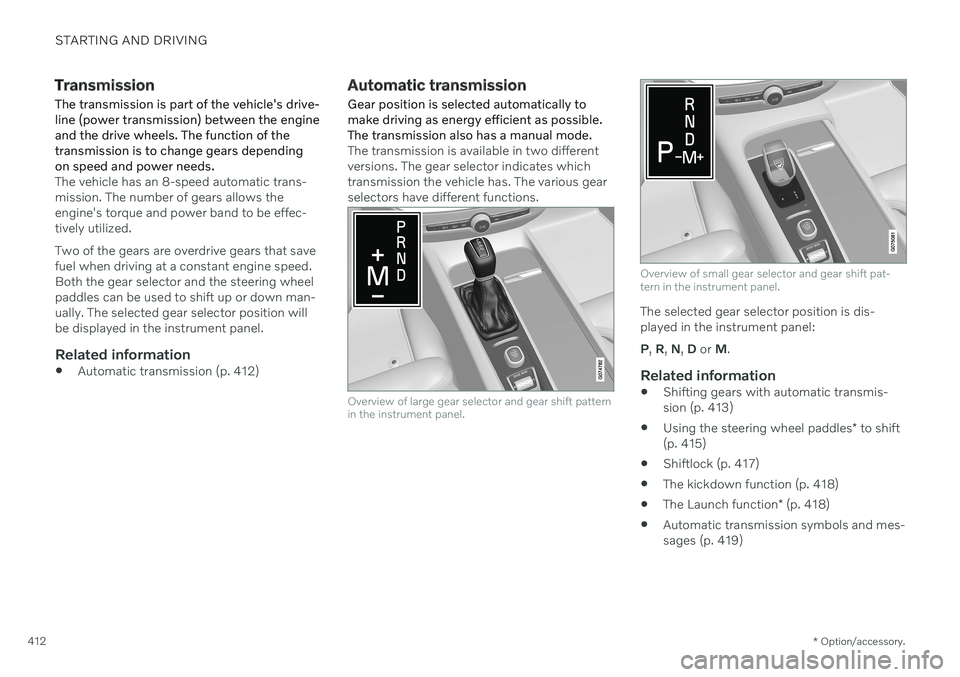
The transmission is available in two different versions. The gear selector indicates whichtransmission the vehicle has. The various gearselectors have different functions.
Overview of large gear selector and gear shift pattern in the instrument panel.
Overview of small gear selector and gear shift pat- tern in the instrument panel.
The selected gear selector position is dis- played in the instrument panel: P , R , N , D or M.
Related information
Shifting gears with automatic transmis- sion (p. 413)
Using the steering wheel paddles
* to shift
(p. 415)
Shiftlock (p. 417)
The kickdown function (p. 418)
The Launch function
* (p. 418)
Automatic transmission symbols and mes-sages (p. 419)