maintenance and service VOLVO XC60 2018 Owner´s Manual
[x] Cancel search | Manufacturer: VOLVO, Model Year: 2018, Model line: XC60, Model: VOLVO XC60 2018Pages: 660, PDF Size: 11.77 MB
Page 624 of 660
||
MAINTENANCE AND SERVICE
6221. Place a strip of masking tape over the dam-
aged surface. Pull the tape off so that any loose flakes of paint adhere to it. If the damage goes down to the bare metal, you may need to use primer first. If the paintdamage is on a plastic surface, an adhesiveprimer should be used for better results.Spray the primer into the lid of the spray canand brush on thinly.
2. Light sanding with a very fine-grained sand- paper or similar may be required beforepainting (e.g. if there are uneven edges).Clean the area carefully and let it dry.
3. Thoroughly mix the primer and apply it with a small brush, toothpick or similar. When theprimer is dry, apply one or more coats ofpaint and then a clear coat, letting the paintdry between each application.
If there is a longer scratch, follow the same pro-cedure as above, but first mask off the surround-ing area to protect the undamaged paint. Touch-up pens and spray paints are available at Volvo retailers.
NOTE
If the stone chip has not gone down to the bare metal and an undamaged coat of paintremains, apply base coat and clear coatimmediately after cleaning the surface.
Related information
• Paintwork (p. 621)
• Color codes (p. 622)
Color codes
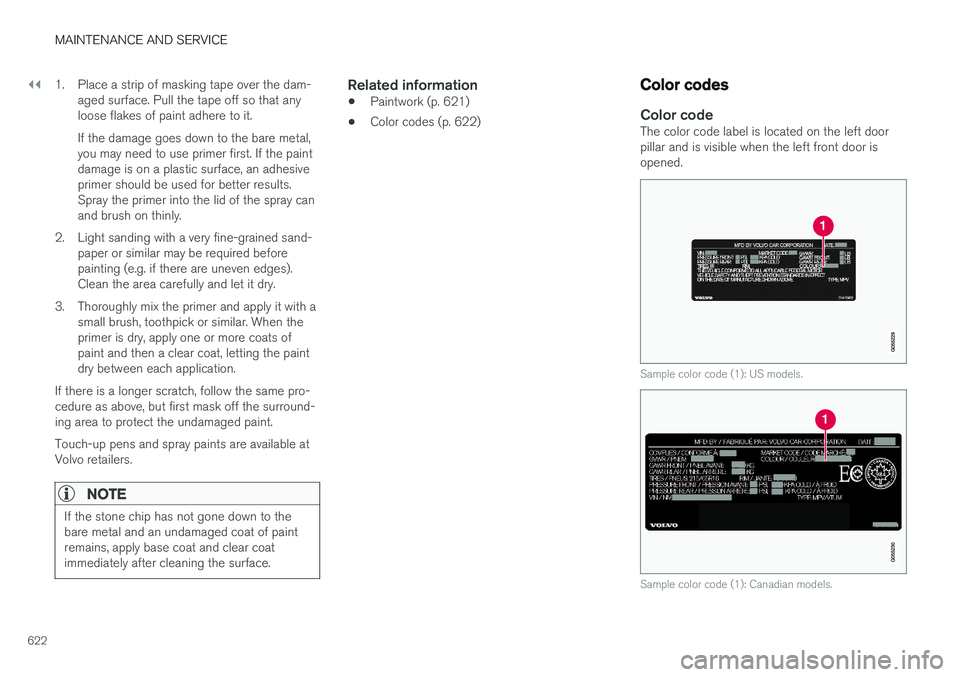
Color codeThe color code label is located on the left door pillar and is visible when the left front door isopened.
Sample color code (1): US models.
Sample color code (1): Canadian models.
Page 625 of 660
MAINTENANCE AND SERVICE
}}
623
It is important to use the right color.
Related information
•
Paintwork (p. 621)
• Touching up minor paint damage (p. 621)
Changing rear window wipers
The wiper blades help remove water from the windshield and rear window. Along with thewasher fluid, they clean the glass and helpimprove visibility while driving. The windshieldand rear window wiper blades can be replaced.
Changing rear window wipers
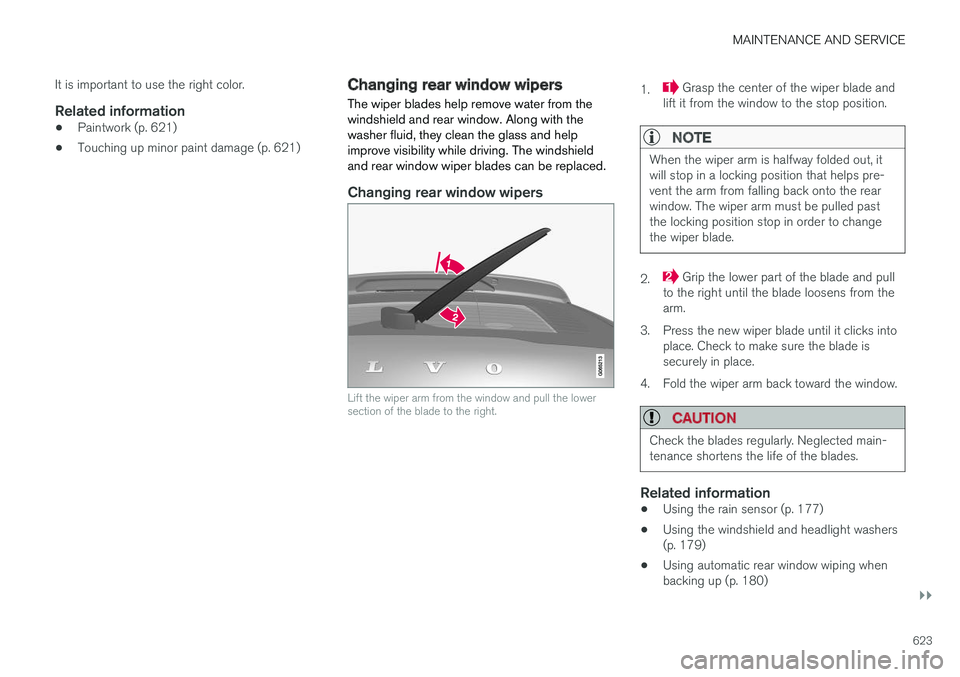
Lift the wiper arm from the window and pull the lower section of the blade to the right.
1. Grasp the center of the wiper blade and
lift it from the window to the stop position.
NOTE
When the wiper arm is halfway folded out, it will stop in a locking position that helps pre-vent the arm from falling back onto the rearwindow. The wiper arm must be pulled pastthe locking position stop in order to changethe wiper blade.
2. Grip the lower part of the blade and pull
to the right until the blade loosens from the arm.
3. Press the new wiper blade until it clicks into place. Check to make sure the blade issecurely in place.
4. Fold the wiper arm back toward the window.
CAUTION
Check the blades regularly. Neglected main- tenance shortens the life of the blades.
Related information
• Using the rain sensor (p. 177)
• Using the windshield and headlight washers (p. 179)
• Using automatic rear window wiping whenbacking up (p. 180)
Page 626 of 660
MAINTENANCE AND SERVICE
* Option/accessory.
624 •
Heated windshield washer nozzles
* (p. 177)
• Using the rain sensor's memory function (p. 178)
• Using the rear window wiper/washer(p. 180)
• Filling washer fluid (p. 626)
• Windshield wipers in the service position(p. 625)
• Replacing windshield wiper blades (p. 624)
• Using the windshield wipers (p. 176)
Replacing windshield wiper blades
The wiper blades help remove water from the windshield and rear window. Along with thewasher fluid, they clean the glass and helpimprove visibility while driving. The windshieldand rear window wiper blades can be replaced.
Replacing wiper blades
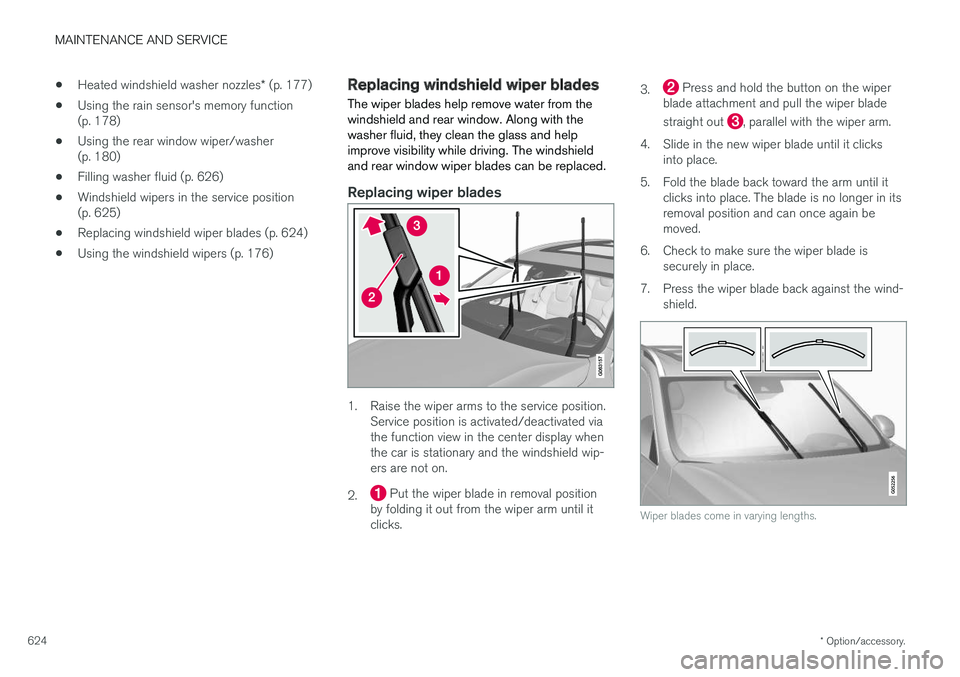
1. Raise the wiper arms to the service position. Service position is activated/deactivated via the function view in the center display whenthe car is stationary and the windshield wip-ers are not on.
2.
Put the wiper blade in removal position
by folding it out from the wiper arm until it clicks. 3.
Press and hold the button on the wiper
blade attachment and pull the wiper blade straight out
, parallel with the wiper arm.
4. Slide in the new wiper blade until it clicks into place.
5. Fold the blade back toward the arm until it clicks into place. The blade is no longer in its removal position and can once again bemoved.
6. Check to make sure the wiper blade is securely in place.
7. Press the wiper blade back against the wind- shield.
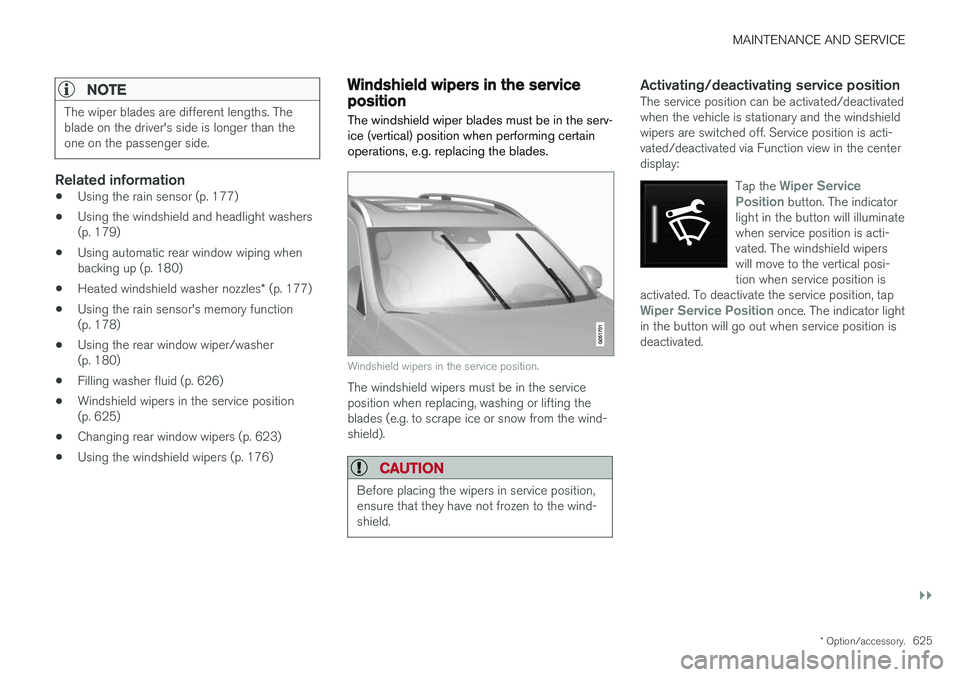
Wiper blades come in varying lengths.
Page 627 of 660
MAINTENANCE AND SERVICE
}}
* Option/accessory.625
NOTE
The wiper blades are different lengths. The blade on the driver's side is longer than theone on the passenger side.
Related information
•Using the rain sensor (p. 177)
• Using the windshield and headlight washers (p. 179)
• Using automatic rear window wiping whenbacking up (p. 180)
• Heated windshield washer nozzles
* (p. 177)
• Using the rain sensor's memory function(p. 178)
• Using the rear window wiper/washer(p. 180)
• Filling washer fluid (p. 626)
• Windshield wipers in the service position(p. 625)
• Changing rear window wipers (p. 623)
• Using the windshield wipers (p. 176)
Windshield wipers in the serviceposition
The windshield wiper blades must be in the serv- ice (vertical) position when performing certainoperations, e.g. replacing the blades.
Windshield wipers in the service position.
The windshield wipers must be in the service position when replacing, washing or lifting theblades (e.g. to scrape ice or snow from the wind-shield).
CAUTION
Before placing the wipers in service position, ensure that they have not frozen to the wind-shield.
Activating/deactivating service positionThe service position can be activated/deactivated when the vehicle is stationary and the windshieldwipers are switched off. Service position is acti-vated/deactivated via Function view in the centerdisplay:
Tap the
Wiper Service
Position button. The indicator
light in the button will illuminate when service position is acti-vated. The windshield wiperswill move to the vertical posi-tion when service position is
activated. To deactivate the service position, tap
Wiper Service Position once. The indicator light
in the button will go out when service position is deactivated.
Page 628 of 660
||
MAINTENANCE AND SERVICE
* Option/accessory.
626 The wiper blades will also move out of service position if:
• The windshield wipers are turned on.
• The windshield washers are turned on.
• The rain sensor is activated.
• The vehicle begins moving.
CAUTION
If the wiper arms in service position are raised from the windshield, they must be folded backagainst the windscreen before activating wip-ing, washing or rain sensor as well as beforedeparture. This is to prevent scratching thepaint on the hood.
Related information
• Using the rain sensor (p. 177)
• Using the windshield and headlight washers (p. 179)
• Using automatic rear window wiping whenbacking up (p. 180)
• Heated windshield washer nozzles
* (p. 177)
• Using the rain sensor's memory function(p. 178)
• Using the rear window wiper/washer(p. 180)
• Filling washer fluid (p. 626)
• Replacing windshield wiper blades (p. 624) •
Changing rear window wipers (p. 623)
• Using the windshield wipers (p. 176)
Filling washer fluid
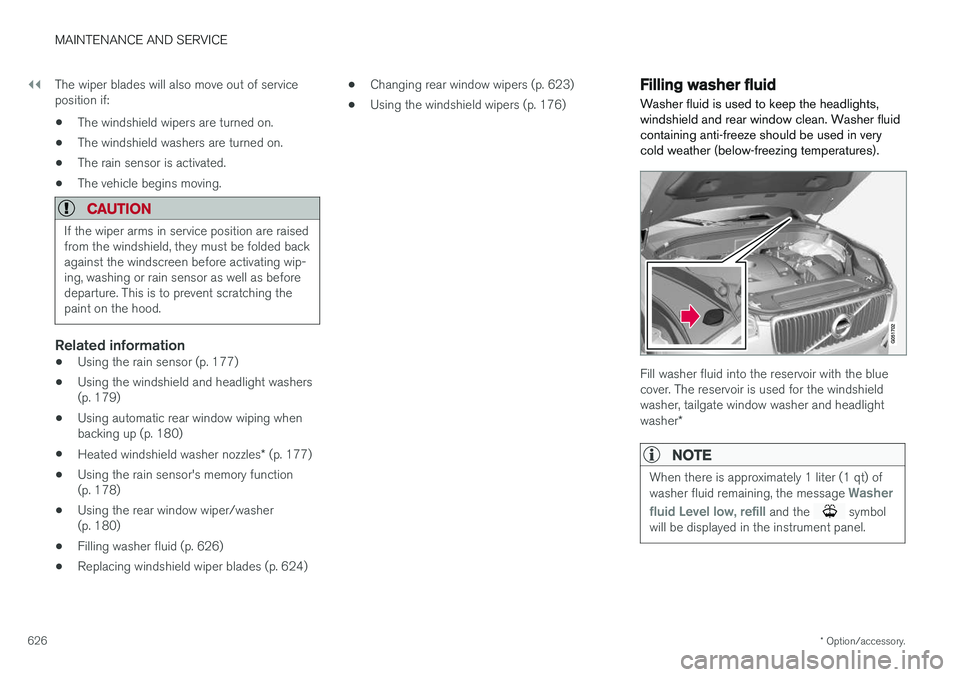
Washer fluid is used to keep the headlights, windshield and rear window clean. Washer fluidcontaining anti-freeze should be used in verycold weather (below-freezing temperatures).
Fill washer fluid into the reservoir with the blue cover. The reservoir is used for the windshieldwasher, tailgate window washer and headlight washer *
NOTE
When there is approximately 1 liter (1 qt) of washer fluid remaining, the message Washer
fluid
Level low, refill and the symbol
will be displayed in the instrument panel.
Page 629 of 660
MAINTENANCE AND SERVICE
* Option/accessory.627
Recommended grade:
Washer fluid recom-
mended by Volvo, with frost protection during cold weather and temperatures below the freez-ing point.
CAUTION
Use Volvo's original washer fluid or an equiva- lent fluid with the recommended pH valuebetween 6 and 8, diluted as recommended,e.g. in a 1:1 solution with pH-neutral water.
CAUTION
Use washer fluid with anti-freeze when tem- peratures are below the freezing point to helpkeep the pump, reservoir and hoses fromfreezing.
Volume:
• Vehicles
with headlight washing: 5.3 liters
(5.6 qts).
• Vehicles
without headlight washing: 3.5 lit-
ers (3.7 qts).
Related information
• Using the rain sensor (p. 177)
• Using the windshield and headlight washers (p. 179)
• Using automatic rear window wiping whenbacking up (p. 180) •
Heated windshield washer nozzles
* (p. 177)
• Using the rain sensor's memory function(p. 178)
• Using the rear window wiper/washer(p. 180)
• Windshield wipers in the service position(p. 625)
• Replacing windshield wiper blades (p. 624)
• Changing rear window wipers (p. 623)
• Using the windshield wipers (p. 176)
Page 646 of 660
INDEX
644
B
Backrestfront seat, adjusting 184, 185, 188, 189 , 190
rear seat, folding 192
Battery jump-start 441
Maintenance 592
start 592
support 595
symbols on the battery 596
warning symbols 596
BLIS 341, 342, 343, 344 Blower adjusting 223, 224
air distribution 206
air vents 207
Bluetooth connect 485
connecting vehicle to Internet 503
phone 492
settings 501
Book service and repair 576
Booster cushions 71Brake assist after collision 411
Brake fluidgrade 639
Brake functions 402
Brake light 159
Brakes 403 anti-lock brakes, ABS 403
automatic when stationary 409
Brake Assist System, BAS 404
brake lights 159
brake system 402
emergency brake lights 159
handbrake 405
Maintenance 405
on salted roads 405
on wet roads 404
brake system fluid 639
C
Camera sensor 337
Camera unit 323
Capacity weight 550, 635
Cargo compartment 561
attachment points 563
cargo net 568
electrical outlet 556, 558
Lighting 162
Cargo compartment cover 564, 566
cargo net 568
Car wash 614, 615, 617, 618, 619, 620
Catalytic converter 439 recovery 447
CD player 483
Cell phone, see Phone 493
Center console 555Center display change appearance 129
cleaning 609
climate controls 212
Function view 120
keyboard 124
messages 138, 139, 140
operation 110, 113, 117, 122
overview 107
settings 130, 131, 132
switch off and change volume 129
symbols in status bar 122
views 113
Central locking 249
Change of owner 132
Changing a wheel 536
Checking engine oil level 585