ESP VOLVO XC60 TWIN ENGINE 2019 Manual Online
[x] Cancel search | Manufacturer: VOLVO, Model Year: 2019, Model line: XC60 TWIN ENGINE, Model: VOLVO XC60 TWIN ENGINE 2019Pages: 695, PDF Size: 14.96 MB
Page 466 of 695
||
STARTING AND DRIVING
* Option/accessory.464
Preconditioning
Whenever possible, precondition the vehiclebefore driving by connecting the chargingcable to an electrical outlet.
Avoid parking the vehicle somewhere wherethe interior will become too hot or too coldwhile the vehicle is parked. If possible, parkthe vehicle in a climate-controlled garage.
During a short drive after passenger com-partment preconditioning, turn off the pas-senger compartment fan or the air condition-ing in a hot climate.
If preconditioning is not possible when it iscold outside, use seat and steering wheelheating first. Avoid heating the entire pas-senger compartment to reduce the amountof current being taken from the hybrid bat-tery.
Driving
Choose the Pure drive mode to help mini-mize electric power consumption.
Maintain a steady speed and a generous fol-lowing distance to traffic ahead to minimizebraking. This drive mode has the lowestpower consumption.
Balance energy requirements using theaccelerator pedal. Use the indicator on theinstrument panel to see available electricpower and avoid starting the combustionengine unnecessarily. The electric motor is
more effective than the combustion engine,especially at low speeds.
When braking is necessary, brake gentlyusing the brake pedal. This will help rechargethe hybrid battery. A regenerative function isintegrated in the brake pedal and can beaugmented by the electric motor's brakingcapacity when the gear selector is in modeB.
Higher speeds increase energy consumption- air resistance increases with speed.
Activate the Hold function in the Functionview at high speeds when traveling fartherthan is possible using the hybrid battery'scapacity.
Whenever possible, avoid using the Chargefunction to charge the hybrid battery. Charg-ing the battery using the combustion engineincreases fuel consumption and carbon diox-ide emissions.
In a cold climate, reduce heating of the wind-shield/rear window, mirrors, seats and thesteering wheel.
Maintain the correct pressure in the tires andcheck pressure regularly.
The type of tires used could affect energyconsumption - consult a retailer for advice onsuitable tires.
Remove unnecessary items from the vehicle- the heavier the load, the higher the fuelconsumption.
Roof loads increase air resistance andincrease fuel consumption. Remove roofboxes, ski racks, etc. that are not in use.
Avoid driving with the windows open.
Do not keep the vehicle still on an upwardgradient by using the accelerator pedal. Usethe brakes instead.
Related information
Drive-E ‒ purer driving pleasure (p. 27)
Energy distribution in hybrid mode using mapdata* (p. 456)
Factors affecting electric motor range(p. 465)
Using the electric motor only (p. 465)
Hybrid gauge (p. 87)
Checking tire pressure (p. 563)
Page 477 of 695
STARTING AND DRIVING
}}
475
Emission controls
Three-way catalytic converter
Keep your engine properly tuned. Certainengine malfunctions, particularly involving theelectrical, fuel or distributor ignition systems,may cause unusually high three-way catalyticconverter temperatures. Do not continue tooperate your vehicle if you detect enginemisfire, noticeable loss of power or otherunusual operating conditions, such as engineoverheating or backfiring. A properly tunedengine will help avoid malfunctions thatcould damage the three-way catalytic con-verter.
Do not park your vehicle over combustiblematerials, such as grass or leaves, which cancome into contact with the hot exhaust sys-tem and cause such materials to ignite undercertain wind and weather conditions.
Excessive starter cranking (in excess of oneminute), or an intermittently firing or floodedengine can cause three-way catalytic con-verter or exhaust system overheating.
Remember that tampering or unauthorizedmodifications to the engine, the Engine Con-trol Module, or the vehicle may be illegal andcan cause three-way catalytic converter orexhaust system overheating. This includes:altering fuel injection settings or compo-nents, altering emission system components
or location or removing components, and/orrepeated use of leaded fuel.
NOTE
Unleaded fuel is required for vehicles withthree-way catalytic converters.
Heated oxygen sensors
The heated oxygen sensors monitor the oxygencontent of the exhaust gases. Readings are fedinto a control module that continuously monitorsengine functions and controls fuel injection. Theratio of fuel to air into the engine is continuouslyadjusted for efficient combustion to help reduceharmful emissions.
Related information
Octane rating (p. 473)
Fuel (p. 472)
Overheating of engine andtransmission
In demanding driving conditions, such as drivingin mountainous areas or hot weather, there is arisk of the engine or transmission overheating,especially when carrying heavy loads.
Engine power may be temporarily limited.
Remove any auxiliary lights mounted in frontof the grille when driving in hot weather.
If the temperature in the engine's coolingsystem becomes too high, a warning symbolwill appear in the instrument panel along withthe message Engine temperature Hightemperature Stop safely. Pull over to asafe location and let the engine idle for a fewminutes to cool down.
If the message Engine temperature Hightemperature Turn off engine or Enginecoolant Level low, turn off engine is dis-played, stop the vehicle and turn off theengine.
If the transmission begins to overheat, analternative gear shifting program will beselected. An integrated protective functionwill also be activated, the warning symbol willilluminate and the message Transmissionwarm Reduce speed to lowertemperature or Transmission hot Stopsafely, wait for cooling will be displayed inthe instrument panel. Follow the recommen-dations given by reducing speed or stopping
Page 478 of 695
||
STARTING AND DRIVING
476
the vehicle safely and letting the engine idlefor a few minutes to let the transmissioncool.
If the vehicle begins to overheat, the air con-ditioning may be temporarily switched off.
After a prolonged period of driving indemanding conditions, do not turn off theengine immediately after stopping.
NOTE
It is normal for the engine's cooling fan tooperate for a short time after the engine isswitched off.
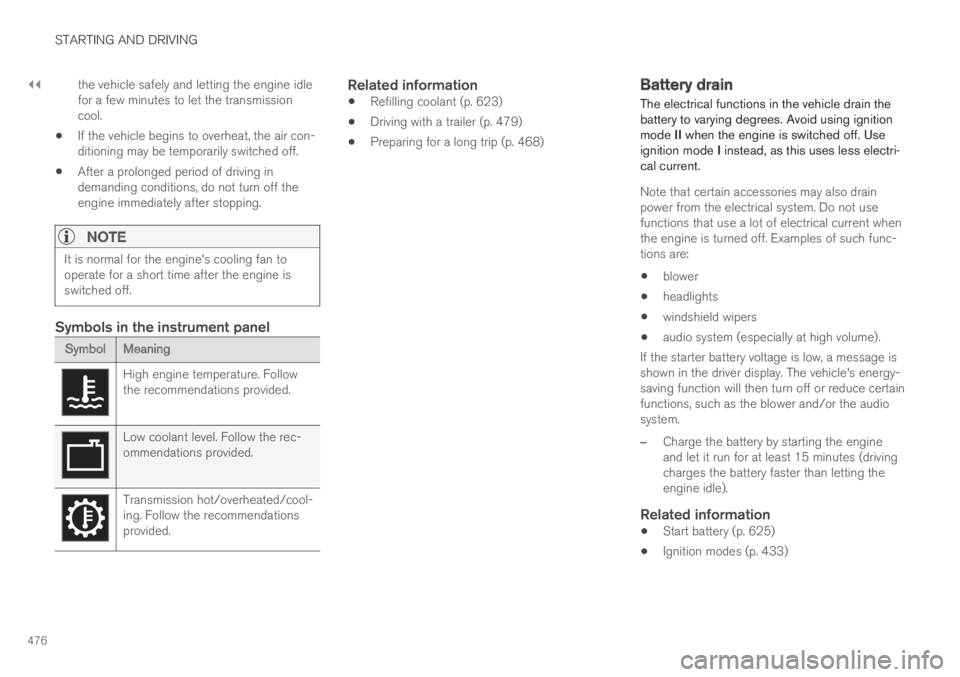
Symbols in the instrument panel
SymbolMeaning
High engine temperature. Followthe recommendations provided.
Low coolant level. Follow the rec-ommendations provided.
Transmission hot/overheated/cool-ing. Follow the recommendationsprovided.
Related information
Refilling coolant (p. 623)
Driving with a trailer (p. 479)
Preparing for a long trip (p. 468)
Battery drain
The electrical functions in the vehicle drain thebattery to varying degrees. Avoid using ignitionmode II when the engine is switched off. Useignition mode I instead, as this uses less electri-cal current.
Note that certain accessories may also drainpower from the electrical system. Do not usefunctions that use a lot of electrical current whenthe engine is turned off. Examples of such func-tions are:
blower
headlights
windshield wipers
audio system (especially at high volume).
If the starter battery voltage is low, a message isshown in the driver display. The vehicle's energy-saving function will then turn off or reduce certainfunctions, such as the blower and/or the audiosystem.
–Charge the battery by starting the engineand let it run for at least 15 minutes (drivingcharges the battery faster than letting theengine idle).
Related information
Start battery (p. 625)
Ignition modes (p. 433)
Page 481 of 695
STARTING AND DRIVING
}}
479
Installing the ball holder
1. If necessary, remove the cotter pin from thelocking bolt and slide the locking bolt out ofthe towbar assembly.
2. Slide the ball holder into the towbar assem-bly.
3. Align the hole in the ball holder with the onein the towbar assembly.
4. Slide the locking bolt through the towbarassembly/ball holder.
5. Insert the cotter pin in the hole at the end ofthe locking bolt.
WARNING
Be sure the towbar is securely locked inposition before attaching anything to it.
Always attach the trailer's safety wiresecurely to the towbar's safety wireattachment bracket.
Removing the ball holder
1. Remove the cotter pin from the locking boltand slide the locking bolt out of the ballholder/towbar assembly.
2. Pull the ball holder out of the towbar assem-bly.
Stowing the ball holder
WARNING
When not in use, the detachable ball holdershould always be properly stowed in the des-ignated location under the floor of the cargocompartment.
Related information
Driving with a trailer (p. 479)
Towing capacity and tongue weight (p. 668)
Driving with a trailer
There are a number of things to consider whentowing a trailer, such as the towbar, the trailerand how the load is distributed in the trailer.
Load-carrying capacity is determined by the vehi-cle's curb weight. The total weight of all passen-gers and any installed accessories, e.g. towbar,reduces the vehicle's load-carrying capacity bythe corresponding amount.
Towbars used on the vehicle must beapproved for the applicable use.
Distribute the load on the trailer so that theweight on the towbar complies with thespecified maximum towball weight. Thetongue weight is calculated as part of thevehicle's payload.
Increase the tire pressure to the recom-mended pressure for a full load.
The engine is subjected to more load thanusual when towing a trailer.
Towing a trailer affects the vehicle's han-dling, durability and driving economy.
Do not drive with a heavy trailer when thevehicle is very new. Wait until the mileagehas reached at least 1000 km (620 miles).
On long and steep downgrades, the vehicle'sbrakes are subjected to much more loadthan usual. When manually shifting, down-shift and adapt speed accordingly.
Page 485 of 695
STARTING AND DRIVING
483
Disabling the automatic check
The automatic light check can be disabled in thecenter display.
1.Tap Settings in the Top view.
2.Tap My CarLights and Lighting.
3.Deselect Automatic Trailer Lamp Check.
Manual check
If the automatic check has been disabled, thecheck can be started manually.
1.Tap Settings in the Top view.
2.Tap My CarLights and Lighting.
3.Select Manual Trailer Lamp Check.
>The light check will begin. Get out of thevehicle to perform the check.
Related information
Driving with a trailer (p. 479)
Towing using a towline
This section refers to one vehicle being towedbehind another using a towline.
Twin Engine vehicles may not be towed behindanother vehicle due to the risk of damage to theelectric motor. The vehicle must be lifted onto atow truck and transported with all four wheels onthe bed or lifting platform of the truck (no wheelsmay touch the road).
Towing another vehicle
Towing another vehicle requires a lot of power -use the AWD drive mode. This helps charge thehybrid battery and improve the vehicle's drivingand roadholding characteristics.
Before towing another vehicle, check applicablespeed limit regulations.
Jump starting
Do not tow the vehicle to start the engine. Use anauxiliary battery if the start battery's charge levelis so low that the engine cannot be started.
CAUTION
Attempts to tow-start the vehicle could causedamage to the electrical drive motor andthree-way catalytic converter.
Related information
Attaching and removing the towing eyelet(p. 484)
Hazard warning flashers (p. 161)
Recovery (p. 485)
Jump starting using another battery (p. 477)
Selecting ignition mode (p. 434)
Page 488 of 695
||
STARTING AND DRIVING
* Option/accessory.486
programmable buttons and an indicator light inthe mirror.
For more information about HomeLink®, pleasevisit www.HomeLink.com, www.youtube.com/HomeLinkGentex or call 1-800-355-3515.
Save the original remote controls for future pro-gramming (e.g. for use in another vehicle). It isalso advisable to delete the button programmingif the vehicle is sold.
Related information
Using HomeLink®* (p. 487)
Programming HomeLink®* (p. 486)
Type approval for HomeLink®* (p. 488)
Programming HomeLink®*12
Follow these instructions to program
HomeLink®, reset all programming, or programindividual buttons.
NOTE
In some vehicles, the ignition must be on or in
the "accessory position" before HomeLink®
can be programmed or used. It can be a goodidea to put new batteries in the remote con-
trol being replaced by HomeLink® for fasterprogramming and better radio signal trans-
mission. The HomeLink® buttons should bereset before programming.
WARNING
While HomeLink® is being programmed, thegarage door or gate being programmed maybe activated. Make sure that no one is nearthe door or gate during programming. Whenprogramming a garage door opener, it isadvised to park outside of the garage.
1.Point the remote control at the HomeLink®
button to be programmed and hold it about2-8 cm (1-3 inches) from the button. Do not
obstruct the HomeLink® indicator light.
Note: Some remote controls are more effec-
tive at programming HomeLink® from a dis-tance of about 15-20 cm (6-12 inches). Trymoving the remote control closer or furtheraway if you are experiencing any difficultiesprogramming.
2.Press and hold both the remote control but-
ton and the HomeLink® button to be pro-grammed.
3. Do not release the buttons until the indicatorlight has stopped flashing slowly (about oncea second) and either flashes quickly (about10 times a second) or glows steadily.
>Steady glow: Indication that program-ming is complete. Press the programmedbutton twice to activate.
Flashing quickly: The device being pro-
grammed with HomeLink® may have asecurity function that requires an extrastep. Try pressing the programmed buttontwice to see whether the programmingworks. Otherwise, continue with the fol-lowing steps.
10Certain markets only.11HomeLink and the HomeLink house symbol are registered trademarks of Gentex Corporation.12Certain markets only.
Page 490 of 695
||
STARTING AND DRIVING
* Option/accessory.488
WARNING
If you use HomeLink® to open a garagedoor or gate, be sure no one is near thegate or door while it is in motion.
Do not use HomeLink® with any garagedoor opener that lacks safety stop andreverse features as required by US fed-eral safety standards (this includes anygarage door opener model manufacturedbefore April 1, 1982). A garage door thatcannot detect an object - signaling thedoor to stop and reverse - does not meetcurrent U.S. federal safety standards. Formore information, contact HomeLink at:www.homelink.com.
Related information
HomeLink®* (p. 485)
Programming HomeLink®* (p. 486)
Type approval for HomeLink®* (p. 488)
Type approval for HomeLink®*15
FCC (USA) and IC (Canada)
This device complies with FCC rules part 15 andIndustry Canada RSS-210. Operation is subjectto the following two conditions: (1) This devicemay not cause harmful interference, and (2) Thisdevice must accept any interference that may bereceived including interference that may causeundesired operation.
WARNING
The transmitter has been tested and complieswith FCC and IC rules. Changes or modifica-tions not expressly approved by the partyresponsible for compliance could void theuser's authority to operate the device.16
Type approval for EU
Gentex Corporation hereby declares that
HomeLink® Model UAHL5 complies with theRadio equipment directive 2014/53/EU.
Wavelengths within which the radio equipmentoperates:
433.05MHz-434.79MHz <10mW E.R.P.
868.00MHz-868.60MHz <25mW E.R.P.
868.70MHz-868.20MHz <25mW E.R.P.
869.40MHz-869.65MHz <25mW E.R.P.
869.70MHz-870.00MHz <25mW E.R.P.
Certificate holder address: Gentex Corporation,600 North Centennial Street, Zeeland MI 49464,USA
For more information, see support.volvocars.com.
Related information
HomeLink®* (p. 485)
14Certain markets only.15Certain markets only.16The term "IC:" before the certification/registration number only signifies that Industry Canada technical specifications were met.
Page 525 of 695
AUDIO, MEDIA AND INTERNET
}}
* Option/accessory.523
Apple® CarPlay®*
With CarPlay, you can listen to music, makephone calls, get driving instructions, send/receive messages and use Siri, all while remain-ing focused on driving.
CarPlay works with selectApple devices. If the car doesnot already support CarPlay,this can be retrofitted. Contacta Volvo retailer to installCarPlay.
Information about supported apps and compati-ble phones is available on the Apple website:www.apple.com/ios/carplay/. Using apps that arenot compatible with CarPlay could cause the con-nection between iPhone and the vehicle to belost. Please note that Volvo is not responsible forthe content of CarPlay.
When using map navigation via CarPlay, guidancewill only be shown on the center display and notin the instrument panel or head-up display.
CarPlay apps can be controlled from the centerdisplay, a phone or with the right-side steeringwheel keypad (for certain functions). The appscan also be voice-controlled using Siri. Press and
hold the button on the steering wheel tostart voice control with Siri. Press briefly to acti-vate the vehicle's own voice control system. If Siri
cuts off too soon, press and hold the 6 but-ton on the steering wheel.
By using Apple CarPlay you acknowledgethe following: Apple CarPlay is a serviceprovided by Apple Inc. under its terms andconditions. Volvo Cars is thus notresponsible for Apple CarPlay or itsfeatures/applications. When using AppleCarPlay, certain information from your car(including its position) is transferred to youriPhone. In relation to Volvo Cars, you arefully responsible for your and any othersperson
Page 528 of 695
AUDIO, MEDIA AND INTERNET
* Option/accessory.526
Android Auto*
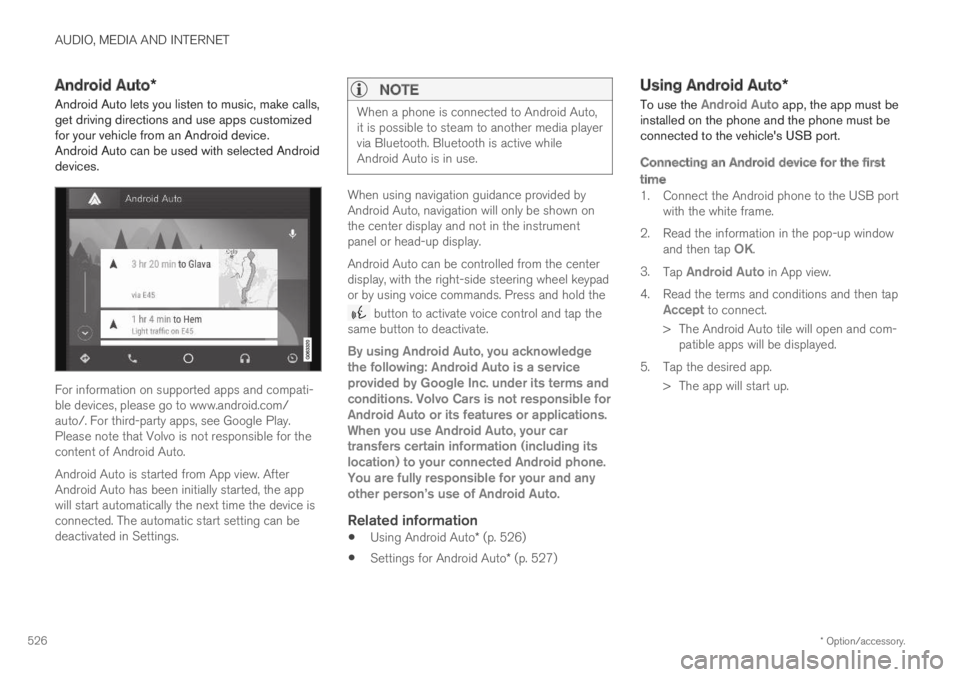
Android Auto lets you listen to music, make calls,get driving directions and use apps customizedfor your vehicle from an Android device.Android Auto can be used with selected Androiddevices.
For information on supported apps and compati-ble devices, please go to www.android.com/auto/. For third-party apps, see Google Play.Please note that Volvo is not responsible for thecontent of Android Auto.
Android Auto is started from App view. AfterAndroid Auto has been initially started, the appwill start automatically the next time the device isconnected. The automatic start setting can bedeactivated in Settings.
NOTE
When a phone is connected to Android Auto,it is possible to steam to another media playervia Bluetooth. Bluetooth is active whileAndroid Auto is in use.
When using navigation guidance provided byAndroid Auto, navigation will only be shown onthe center display and not in the instrumentpanel or head-up display.
Android Auto can be controlled from the centerdisplay, with the right-side steering wheel keypador by using voice commands. Press and hold the
button to activate voice control and tap thesame button to deactivate.
By using Android Auto, you acknowledgethe following: Android Auto is a serviceprovided by Google Inc. under its terms andconditions. Volvo Cars is not responsible forAndroid Auto or its features or applications.When you use Android Auto, your cartransfers certain information (including itslocation) to your connected Android phone.You are fully responsible for your and anyother person
Page 539 of 695
AUDIO, MEDIA AND INTERNET
}}
* Option/accessory.537
Settings for Bluetooth devices
Settings for Bluetooth-connected devices.
1.Tap Settings in the Top view.
2.Tap CommunicationBluetoothDevices and select settings:
Add device - start the procedure for pairinga new device.
Previously paired devices - lists regis-tered/paired devices.
Remove device - remove a connecteddevice.
Allowed services for this device - selectwhat the device will be used for: makingcalls, sending/receiving messages, stream-ing media, Internet connection.
Internet connection connect the vehicle tothe Internet using the device's Bluetoothconnection.
Bluetooth ®
declaration of conformity
USA
FCC CAUTION
Changes or modifications not expressly approvedby the party responsible for compliance couldvoid the user's authority to operate the equip-ment. This transmitter must not be co-located oroperated in conjunction with any other antennaor transmitter.
Canada
This device complies with Industry Canadalicense-exempt RSS standard(s). Operation issubject to the following two conditions:
(1) this device may not cause interference, and
(2) this device must accept any interference,including interference that may cause undesiredoperation of the device.
Related information
Phone (p. 528)
Phone settings (p. 536)
Internet-connected vehicle* (p. 537)
Connecting a phone to the car via Bluetoothfor the first time (p. 529)
Internet-connected vehicle*
When the vehicle is connected to the Internet, itis possible to use web radio and music servicesvia apps, download software and contact retail-ers from the vehicle.
The vehicle can be connected to the Internetusing Bluetooth, Wi-Fi or the vehicle's integratedmodem (SIM card).
When the vehicle is connected to the Internet, itis possible to share the vehicle's Internet connec-