remote start VOLVO XC60 TWIN ENGINE 2020 Owner's Manual
[x] Cancel search | Manufacturer: VOLVO, Model Year: 2020, Model line: XC60 TWIN ENGINE, Model: VOLVO XC60 TWIN ENGINE 2020Pages: 687, PDF Size: 14.65 MB
Page 408 of 687
||
STARTING AND DRIVING
* Option/accessory.
406
Mode Functions
I The panoramic roof, power windows, 12-volt electricalsocket in the passenger com-partment, Bluetooth, naviga-tion, phone, blower and wind-shield wipers can be used.
The power seats can beadjusted.
The 12-volt electrical socket
* in
the cargo compartment can beused.
Electrical current will be taken
from the battery in this ignitionmode.
II The headlights illuminate.
Warning/indicator lights illumi-nate for 5 seconds.
A number of other systems areactivated. However, seat andrear window heating can onlybe activated when the engineis running.
This ignition mode uses a lot of
current from the battery andshould be avoided wheneverpossible!
A Also activated when the door is opened.
Related information
Starting the vehicle (p. 402)
Adjusting the steering wheel (p. 202)
Jump starting using another battery (p. 451)
Selecting ignition mode (p. 406)
Selecting ignition mode
The vehicle's ignition can be put in various modes (levels) to make different functionsavailable.
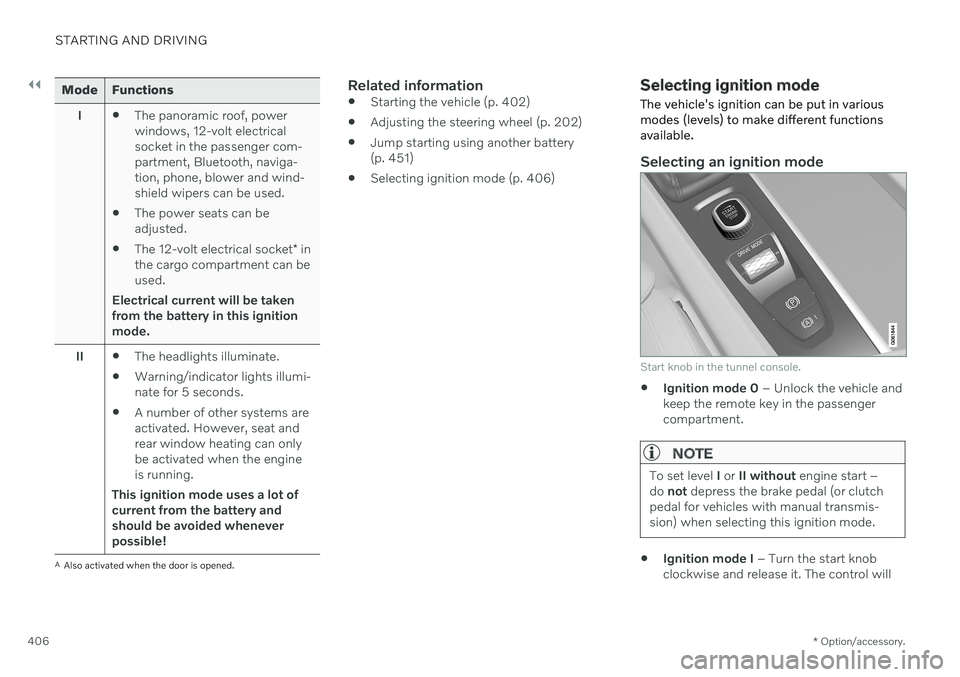
Selecting an ignition mode
Start knob in the tunnel console.
Ignition mode 0
– Unlock the vehicle and
keep the remote key in the passenger compartment.
NOTE
To set level I or II without engine start –
do not depress the brake pedal (or clutch
pedal for vehicles with manual transmis- sion) when selecting this ignition mode.
Ignition mode I
– Turn the start knob
clockwise and release it. The control will
Page 465 of 687
STARTING AND DRIVING
* Option/accessory.463
only be lifted with the tow truck's lifting equip- ment.
WARNING
No person or object should be behind the tow truck when the vehicle is lifted ontothe bed of the truck.
Related information
Attaching and removing the towing eyelet (p. 461)
HomeLink ®
*18
HomeLink ®
19
is a programmable remote con-
trol, integrated in the vehicle electrical sys- tem, that can control up to three differentdevices (e.g. garage door opener, alarm sys-tem, outdoor and indoor lighting) and therebyreplace the remote controls for these.
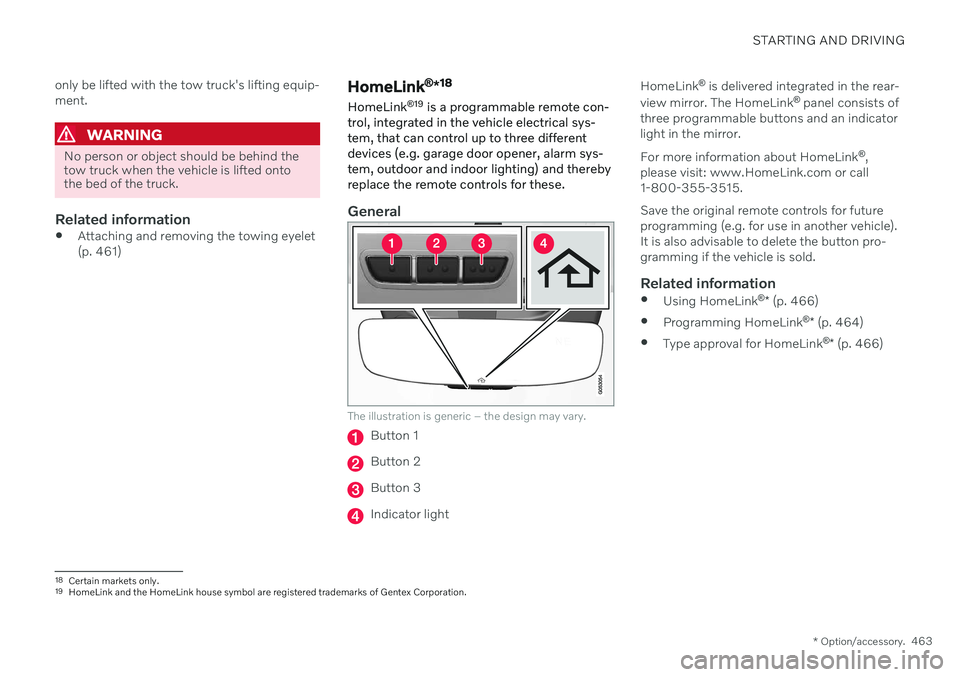
General
The illustration is generic – the design may vary.
Button 1
Button 2
Button 3
Indicator light HomeLink
®
is delivered integrated in the rear-
view mirror. The HomeLink ®
panel consists of
three programmable buttons and an indicator light in the mirror. For more information about HomeLink ®
,
please visit: www.HomeLink.com or call 1-800-355-3515. Save the original remote controls for future programming (e.g. for use in another vehicle).It is also advisable to delete the button pro-gramming if the vehicle is sold.
Related information
Using HomeLink ®
* (p. 466)
Programming HomeLink ®
* (p. 464)
Type approval for HomeLink ®
* (p. 466)
18
Certain markets only.
19 HomeLink and the HomeLink house symbol are registered trademarks of Gentex Corporation.
Page 466 of 687
STARTING AND DRIVING
* Option/accessory.
464
Programming HomeLink ®
*20
Follow these instructions to program HomeLink ®
, reset all programming, or pro-
gram individual buttons.
NOTE
In some vehicles, the ignition must be on or in the "accessory position" before HomeLink ®
can be programmed or used. It
can be a good idea to put new batteries in the remote control being replaced by HomeLink ®
for faster programming and
better radio signal transmission. TheHomeLink ®
buttons should be reset before
programming.
WARNING
While HomeLink ®
is being programmed,
the garage door or gate being programmed may be activated. Make sure that no one isnear the door or gate during programming.When programming a garage door opener,it is advised to park outside of the garage. 1. Point the remote control at the
HomeLink ®
button to be programmed and
hold it about 2-8 cm (1-3 inches) from the button. Do not obstruct the HomeLink ®
indicator light. Note: Some remote controls are more
effective at programming HomeLink ®
from
a distance of about 15-20 cm (6-12 inches). Keep this in mind if you experi-ence any programming difficulties.
2. Press and hold both the remote control button and the HomeLink ®
button to be
programmed. 3. Do not release the buttons until the indica-
tor light has stopped flashing slowly(about once a second) and either flashesquickly (about 10 times a second) orglows steadily. >If the indicator light glows steadily: Indication that programming is com-plete. Press the programmed buttontwice to activate. If the indicator light flashes quickly: The device being programmed with HomeLink ®
may have a security func-
tion that requires an extra step. Try pressing the programmed button twiceto see whether the programmingworks. Otherwise, continue with thefollowing steps.
20 Certain markets only.
Page 468 of 687
STARTING AND DRIVING
* Option/accessory.
466
Using HomeLink ®
*22
Once HomeLink ®
is programmed, it can be
used instead of the separate remote controls.
Press and hold the programming button. The garage door, gate, alarm system, etc. will beactivated (this may take several seconds). Ifthe button is held down for more than 20 sec-onds, reprogramming will begin. The indicatorlight will glow steadily or flash when the but-ton has been pressed. The original remotecontrols may be used concurrently with HomeLink ®
if desired.
NOTE
When the ignition is switched off, HomeLink ®
will be active for at least
7 minutes.
NOTE
HomeLink ®
cannot be used if the vehicle is
locked and the alarm is armed * from the
outside.
WARNING
If you use HomeLink ®
to open a garage
door or gate, be sure no one is near the gate or door while it is in motion.
Do not use HomeLink ®
with any
garage door opener that lacks safetystop and reverse features as requiredby US federal safety standards (thisincludes any garage door opener modelmanufactured before April 1, 1982). Agarage door that cannot detect anobject - signaling the door to stop andreverse - does not meet current U.S.federal safety standards. For moreinformation, contact HomeLink at:www.homelink.com.
Related information
HomeLink ®
* (p. 463)
Programming HomeLink ®
* (p. 464)
Type approval for HomeLink ®
* (p. 466)
Type approval for HomeLink ®
*23
FCC (USA) and IC (Canada)This device complies with FCC rules part 15 and Industry Canada RSS-210. Operation issubject to the following two conditions: (1)This device may not cause harmful interfer-ence, and (2) This device must accept anyinterference that may be received includinginterference that may cause undesired opera-tion.
WARNING
The transmitter has been tested and com- plies with FCC and IC rules. Changes ormodifications not expressly approved bythe party responsible for compliance couldvoid the user's authority to operate the device.
24
Type approval for EUGentex Corporation hereby declares that HomeLink
®
Model UAHL5 complies with the
Radio equipment directive 2014/53/EU. Wavelengths within which the radio equip- ment operates:
433.05MHz-434.79MHz <10mW E.R.P.
868.00MHz-868.60MHz <25mW E.R.P.
22
Certain markets only.
23 Certain markets only.
24 The term "IC:" before the certification/registration number only signifies that Industry Canada technical specifications were met.
Page 595 of 687
MAINTENANCE AND SERVICE
* Option/accessory.593
Data transfer between vehicle and workshop over Wi-Fi
Volvo workshops have a designated Wi-Fi network for data transfer between your vehi-cle and the workshop. Your visit to the work-shop will be easier and more effective whendiagnostics information and software can betransferred over the workshop's network.
At the workshop, your service technician can connect your vehicle to the workshop's Wi-Finetwork to perform troubleshooting anddownload software. For this type of communi-cation, the vehicle only connects to a work-shop's network. It is not possible to connectthe vehicle to another Wi-Fi network (e.g. yourhome network) in the same way as to a work-shop's network.
Connecting with remote keyConnection is usually managed by the servicetechnician, who will use the remote key but-tons. It is therefore important to bring a keywith buttons with you when you visit theworkshop. Pressing the lock button on theremote key three times will connect the vehi-cle to the workshop's Wi-Fi network. When the car is connected to a Wi-Fi net- work, the
symbol appears in the center
display.
WARNING
The vehicle may not be driven when it is connected to the workshop's networks andsystems.
Related information
Handling system updates via Download Center (p. 594)
Scheduling service and repairs (p. 595)
Download Center With the vehicle connected to the Internet 1
,
updates for a number of the vehicle's sys- tems can be downloaded from the center dis-play.
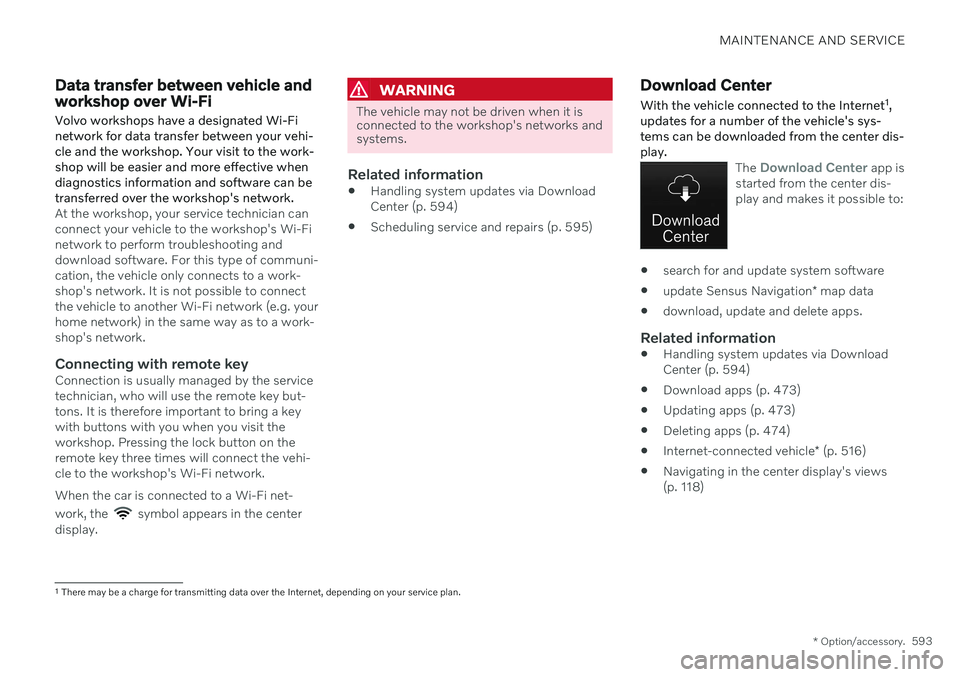
The Download Center app is
started from the center dis- play and makes it possible to:
search for and update system software
update Sensus Navigation
* map data
download, update and delete apps.
Related information
Handling system updates via Download Center (p. 594)
Download apps (p. 473)
Updating apps (p. 473)
Deleting apps (p. 474)
Internet-connected vehicle
* (p. 516)
Navigating in the center display's views(p. 118)
1
There may be a charge for transmitting data over the Internet, depending on your service plan.
Page 643 of 687
MAINTENANCE AND SERVICE
}}
* Option/accessory.641
Automatic car washes
The vehicle should be washed as soon as it becomes dirty. The longer the dirt remains,the more difficult it will be to keep the vehicleclean. It could also lead to paint damage.
Washing your vehicle in an automatic car wash is a fast and easy way to keep your vehi-cle clean, but it does not reach all areas of thevehicle. Volvo recommends washing yourvehicle by hand or supplementing automaticcar washes with a hand wash.
NOTE
Volvo recommends not washing the vehi- cle in an automatic car wash during thefirst few months; the paintwork on newvehicles takes some time to fully harden.
CAUTION
Before driving the vehicle into a car wash, deactivate the Automatic Braking whenStationary and Automatic Parking BrakeApplication functions. If the functions arenot deactivated, the brake system willseize when the vehicle is stationary and thevehicle will not be able to roll.
CAUTION
For automatic car washes in which the vehicle is pulled forward on rolling wheels:
1. Before washing the vehicle, make sure that the automatic rain sensor is deac- tivated. If it is not deactivated andinadvertently starts, the wiper armscould be damaged.
2. To help prevent damage from the auto- matic car wash machinery, make surethat the door mirrors are folded in,antennas retracted or removed, andany auxiliary lights secured.
3. Drive into the automatic car wash.
4. Turn off the "Automatic Braking when Stationary" function using the
but-
ton in the tunnel console.
5. Turn off the "Automatic Parking Brake Application" function in the center dis- play's Top view.
6. Turn off the engine by turning the start knob in the tunnel console clockwise.Hold the knob in position for at least2 seconds.
The vehicle is now ready for the automaticcar wash.
CAUTION
The system will automatically change to P
mode if the above steps are not followed. In P mode, the wheels are locked, which
they should not be when the vehicle isbeing washed in a car wash.
NOTE
Keep in mind that if the vehicle is equipped with the keyless locking and unlocking function *, the doors and tailgate/trunk lid
may open when washing the vehicle if the remote key is within range.
Related information
Cleaning the exterior (p. 638)
Polishing and waxing (p. 638)
Hand washing (p. 639)
High-pressure washing (p. 642)
Cleaning the wiper blades (p. 642)
Cleaning exterior plastic, rubber and trim components (p. 643)
Cleaning rims (p. 644)
Corrosion protection (p. 644)
Auto-hold brakes (p. 414)
Page 675 of 687
INDEX
673
HomeLink
® remote control
programmable 463
Home safe lighting, Homesafe Lighting, Follow me home lighting, follow-me-
home lighting 165
Honk 201
Hood, opening 599
Horn 201
Hybrid battery 611 Charging 385
Hybrid battery gauge 90
Hybrid gauge 89
Hybrid mode 423, 429
I
IAQS (Interior Air Quality System) 208
IC (Inflatable Curtain) 62
ID, Volvo 28
Identification number 40
Ignition mode 405, 406
Immobilizer 251 Electronic immobilizer 251
Indicator symbols 97
Individual drive mode 423
Infant seats 69
Inflatable curtain 62
Inflatable Curtain 62
Inflating tires 565Inflation pressure adjusting 546
Checking 545
decal with recommended pressure 547
Inflation pressure monitoring 547 action 551
save new inflation pressure 549
Status 550
Inflation pressure table 665
Information display 86, 88
Infotainment (Audio and media) 470
Instrument cluster 86 settings 88
Instrument illumination 167
Instrument lighting 167
Instrument panel 86 App menu 107, 108 hybrid-related symbols and mes-
sages 397
messages 109
settings 88
Instruments and controls 84Instruments overview left-hand drive vehicle 84
Integrated booster cushion 78 folding down 81
folding up 80
IntelliSafe driver support 31
Interior Air Quality System 208
Intermittent wiping 181 Internet, see Internet-connected vehi- cle 516
Internet-connected vehicle 516 book service and repair 595
No connection or poor connection 521
send car data 596
system updates 594
iPod ®, connecting 498
ISOFIX/LATCH anchors 77
J
Jack 553
Jump-start 451
Page 679 of 687
INDEX
677
R
Radar sensorsee Radar sensor 309
Radar unit 309 limitations 313
maintenance and cleaning 317
type approval 310
Radio 474 changing radio waveband and radio
station 476
HD radio 479
RBDS 478
search radio station 476
settings 478 SiriusXM ® Satellite radio 482, 483,
484
start 475
voice control 152
Radio favorites 477
Rain sensor 181, 182
Rain sensor's memory function 182
Raise the rear end 578
Rear camera 366
Rear Collision Warning 332 limitations 332
Rear seat
climate 215
folding backrest 198
head restraint 199
heating 217
Rearview/door mirrors adjusting door mirrors 174
dimming 174
heating 221
interior 173
Rearview mirror 173 dimming 174
Rear window heating 221
washers 184, 185
wipers 184, 185
Recalls 47
Recommendations when driving 442
Recommendations when loading 577
Recovery 462Red Key restricted remote key 247
settings 248
Refrigerant 599 climate system 664
Refueling filling 445
fuel filler door, fuel flap 444Remote immobilizer 251
Remote key 238battery replacement 243
connecting to driver profile 141
detachable key blade 249
loss 246
Range 242
Remote updates 593
Reporting safety defects 46
Resetting door mirrors 174
Resetting settings 137 change of owner 137
Driver profile 143
Resetting trip odometer 94
Road Sign Information 341 activating/deactivating 342
display 342
limitations 345
Sensus Navigation 343
settings 344
speed camera information 343
Speed warning 343
Road trip 442
Roll-over protection 277
Roll Stability Control 277
Roof load, max. weight 659
Run-off Mitigation 356