lights VOLVO XC70 2015 Owner´s Manual
[x] Cancel search | Manufacturer: VOLVO, Model Year: 2015, Model line: XC70, Model: VOLVO XC70 2015Pages: 408, PDF Size: 11.26 MB
Page 86 of 408
03 Your driving environment
Instruments and controls
03
84
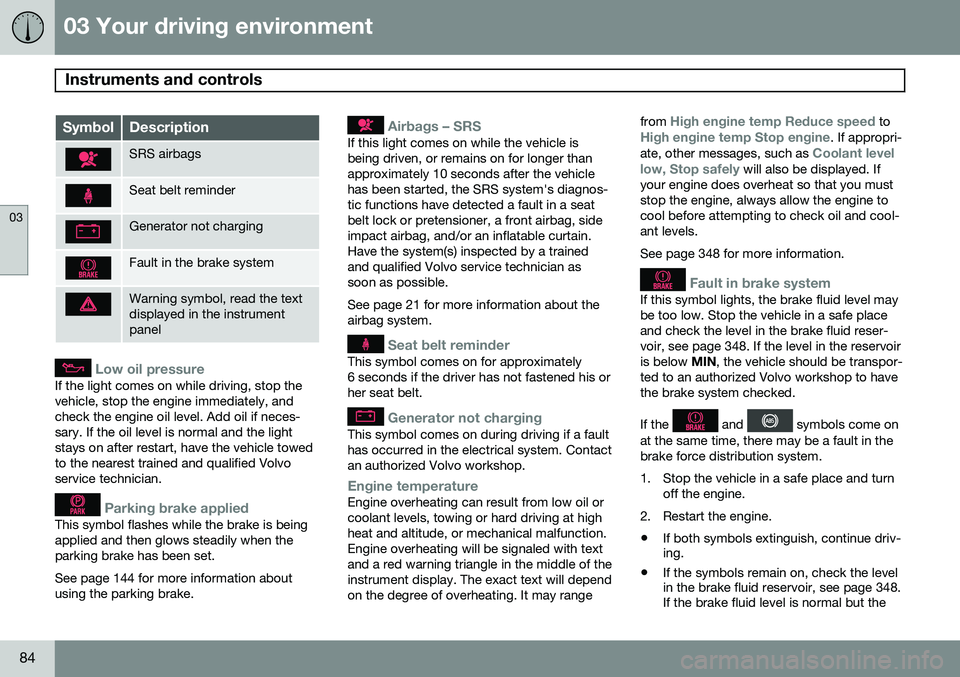
SymbolDescription
SRS airbags
Seat belt reminder
Generator not charging
Fault in the brake system
Warning symbol, read the text displayed in the instrumentpanel
Low oil pressure
If the light comes on while driving, stop the vehicle, stop the engine immediately, andcheck the engine oil level. Add oil if neces-sary. If the oil level is normal and the lightstays on after restart, have the vehicle towedto the nearest trained and qualified Volvoservice technician.
Parking brake applied
This symbol flashes while the brake is being applied and then glows steadily when theparking brake has been set. See page 144 for more information about using the parking brake.
Airbags – SRS
If this light comes on while the vehicle is being driven, or remains on for longer thanapproximately 10 seconds after the vehiclehas been started, the SRS system's diagnos-tic functions have detected a fault in a seatbelt lock or pretensioner, a front airbag, sideimpact airbag, and/or an inflatable curtain.Have the system(s) inspected by a trainedand qualified Volvo service technician assoon as possible. See page 21 for more information about the airbag system.
Seat belt reminder
This symbol comes on for approximately 6 seconds if the driver has not fastened his orher seat belt.
Generator not charging
This symbol comes on during driving if a fault has occurred in the electrical system. Contactan authorized Volvo workshop.
Engine temperatureEngine overheating can result from low oil or coolant levels, towing or hard driving at highheat and altitude, or mechanical malfunction.Engine overheating will be signaled with textand a red warning triangle in the middle of theinstrument display. The exact text will dependon the degree of overheating. It may rangefrom
High engine temp Reduce speed toHigh engine temp Stop engine. If appropri-
ate, other messages, such as Coolant level
low, Stop safely will also be displayed. If
your engine does overheat so that you must stop the engine, always allow the engine tocool before attempting to check oil and cool-ant levels. See page 348 for more information.
Fault in brake system
If this symbol lights, the brake fluid level may be too low. Stop the vehicle in a safe placeand check the level in the brake fluid reser-voir, see page 348. If the level in the reservoiris below MIN, the vehicle should be transpor-
ted to an authorized Volvo workshop to havethe brake system checked. If the
and symbols come on
at the same time, there may be a fault in the brake force distribution system.
1. Stop the vehicle in a safe place and turn off the engine.
2. Restart the engine.
• If both symbols extinguish, continue driv- ing.
• If the symbols remain on, check the levelin the brake fluid reservoir, see page 348.If the brake fluid level is normal but the
Page 87 of 408
03 Your driving environment
Instruments and controls
03
}}
* Option/accessory, for more information, see Introduction.85
symbols are still lit, the vehicle can be driven, with great care, to an authorizedVolvo workshop to have the brake systemchecked.
• If the level in the reservoir is below
MIN,
the vehicle should be transported to anauthorized Volvo workshop to have thebrake system checked.
WARNING
• If the fluid level is below the
MIN mark
in the reservoir or if a warning mes- sage is displayed in the text window:DO NOT DRIVE . Have the vehicle
towed to a trained and qualified Volvoservice technician and have the brakesystem inspected.
• If the
and symbols
are on at the same time, there is a risk of reduced vehicle stability.
Warning symbol
The red warning symbol lights up to indicate a problem related to safety and/or drivability.A message will also appear in the instrumentpanel. The symbol remains visible until thefault has been rectified but the text messagecan be cleared with the OK button, see page 207. The warning symbol can alsocome on in conjunction with other symbols. Action:
1. Stop in a safe place. Do not drive the
vehicle further.
2. Read the information on the information display. Implement the action in accord- ance with the message in the display.Clear the message using OK.
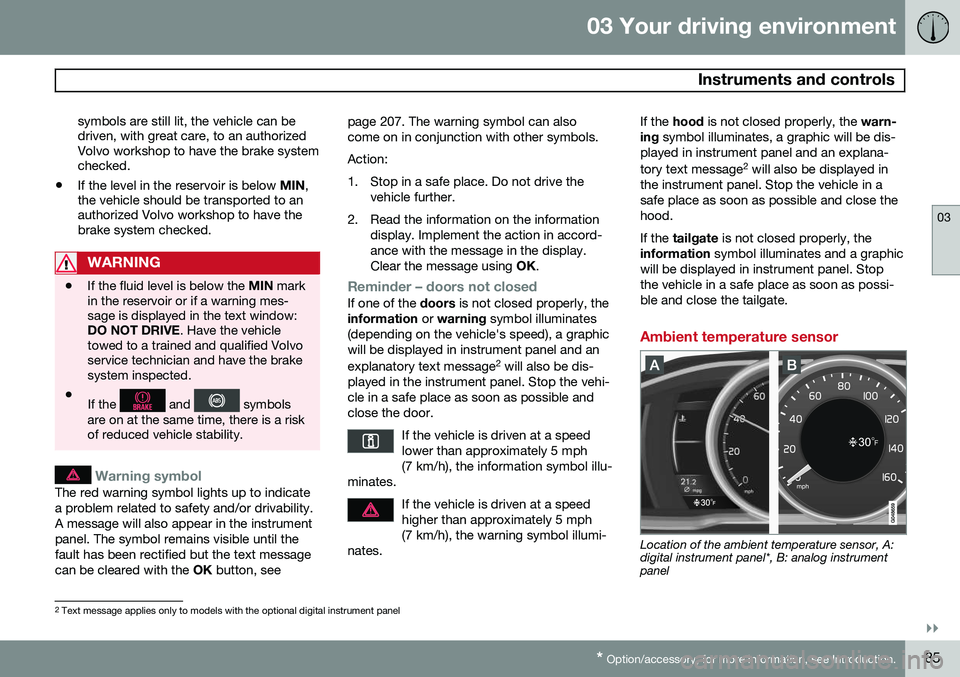
Reminder – doors not closedIf one of the doors is not closed properly, the
information or warning symbol illuminates
(depending on the vehicle's speed), a graphic will be displayed in instrument panel and an explanatory text message 2
will also be dis-
played in the instrument panel. Stop the vehi- cle in a safe place as soon as possible andclose the door.
If the vehicle is driven at a speedlower than approximately 5 mph(7 km/h), the information symbol illu-
minates.
If the vehicle is driven at a speed higher than approximately 5 mph(7 km/h), the warning symbol illumi-
nates.
If the hood is not closed properly, the warn-
ing symbol illuminates, a graphic will be dis-
played in instrument panel and an explana- tory text message 2
will also be displayed in
the instrument panel. Stop the vehicle in a safe place as soon as possible and close thehood. If the tailgate is not closed properly, the
information symbol illuminates and a graphic
will be displayed in instrument panel. Stop the vehicle in a safe place as soon as possi-ble and close the tailgate.
Ambient temperature sensor
Location of the ambient temperature sensor, A: digital instrument panel*, B: analog instrumentpanel
2 Text message applies only to models with the optional digital instrument panel
Page 90 of 408
03 Your driving environment
Ignition modes
03
88* Option/accessory, for more information, see Introduction.
Inserting and removing the remote key
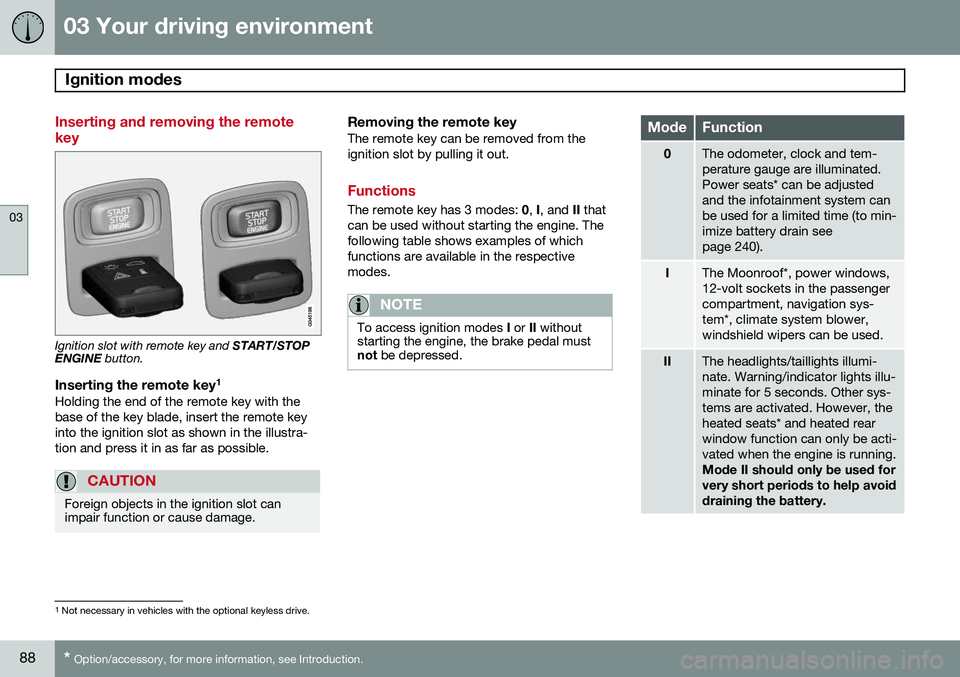
Ignition slot with remote key and START/STOP
ENGINE button.
Inserting the remote key 1Holding the end of the remote key with the base of the key blade, insert the remote keyinto the ignition slot as shown in the illustra-tion and press it in as far as possible.
CAUTION
Foreign objects in the ignition slot can impair function or cause damage.
Removing the remote keyThe remote key can be removed from the ignition slot by pulling it out.
Functions
The remote key has 3 modes:
0, I, and II that
can be used without starting the engine. The following table shows examples of whichfunctions are available in the respectivemodes.
NOTE
To access ignition modes I or II without
starting the engine, the brake pedal must not be depressed.
ModeFunction
0The odometer, clock and tem- perature gauge are illuminated.Power seats* can be adjustedand the infotainment system canbe used for a limited time (to min-imize battery drain seepage 240).
IThe Moonroof*, power windows, 12-volt sockets in the passengercompartment, navigation sys-tem*, climate system blower,windshield wipers can be used.
IIThe headlights/taillights illumi- nate. Warning/indicator lights illu-minate for 5 seconds. Other sys-tems are activated. However, theheated seats* and heated rearwindow function can only be acti-vated when the engine is running. Mode II should only be used for very short periods to help avoiddraining the battery.
1
Not necessary in vehicles with the optional keyless drive.
Page 101 of 408
03 Your driving environment
Lighting
03
}}
99
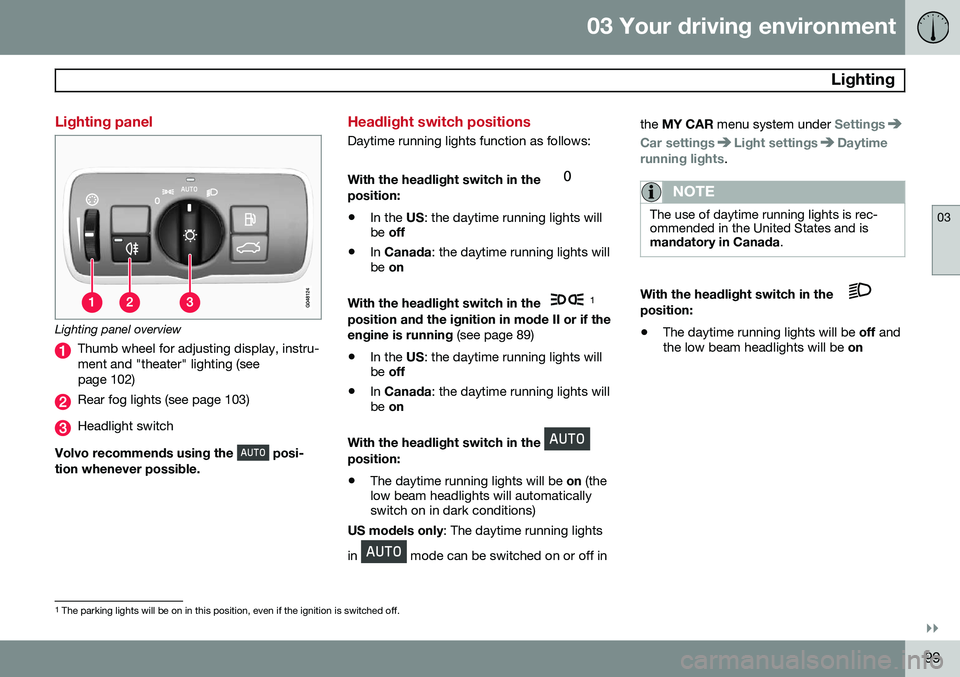
Lighting panel
Lighting panel overview
Thumb wheel for adjusting display, instru- ment and "theater" lighting (seepage 102)
Rear fog lights (see page 103)
Headlight switch
Volvo recommends using the
posi-
tion whenever possible.
Headlight switch positions
Daytime running lights function as follows: With the headlight switch in the
position:
• In the
US: the daytime running lights will
be off
• In
Canada : the daytime running lights will
be on
With the headlight switch in the
1
position and the ignition in mode II or if the engine is running (see page 89)
• In the
US: the daytime running lights will
be off
• In
Canada : the daytime running lights will
be on
With the headlight switch in the
position: • The daytime running lights will be
on (the
low beam headlights will automatically switch on in dark conditions)
US models only : The daytime running lights
in
mode can be switched on or off in the
MY CAR menu system under
Settings
Car settingsLight settingsDaytime
running lights.
NOTE
The use of daytime running lights is rec- ommended in the United States and ismandatory in Canada .
With the headlight switch in the position:
• The daytime running lights will be
off and
the low beam headlights will be on
1
The parking lights will be on in this position, even if the ignition is switched off.
Page 102 of 408
03 Your driving environment
Lighting
03
100* Option/accessory, for more information, see Introduction.
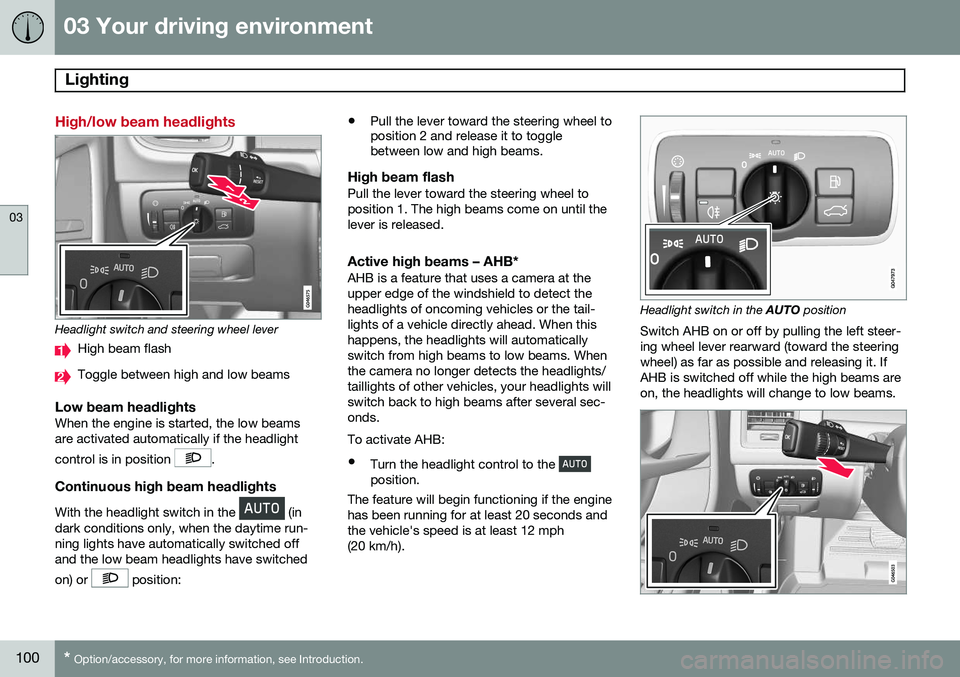
High/low beam headlights
Headlight switch and steering wheel lever
High beam flash
Toggle between high and low beams
Low beam headlightsWhen the engine is started, the low beams are activated automatically if the headlight control is in position
.
Continuous high beam headlights
With the headlight switch in the (in
dark conditions only, when the daytime run- ning lights have automatically switched offand the low beam headlights have switched on) or
position: •
Pull the lever toward the steering wheel to position 2 and release it to togglebetween low and high beams.
High beam flashPull the lever toward the steering wheel to position 1. The high beams come on until thelever is released.
Active high beams – AHB*AHB is a feature that uses a camera at theupper edge of the windshield to detect theheadlights of oncoming vehicles or the tail-lights of a vehicle directly ahead. When thishappens, the headlights will automaticallyswitch from high beams to low beams. Whenthe camera no longer detects the headlights/taillights of other vehicles, your headlights willswitch back to high beams after several sec-onds. To activate AHB:
• Turn the headlight control to the
position.
The feature will begin functioning if the engine has been running for at least 20 seconds andthe vehicle's speed is at least 12 mph(20 km/h).
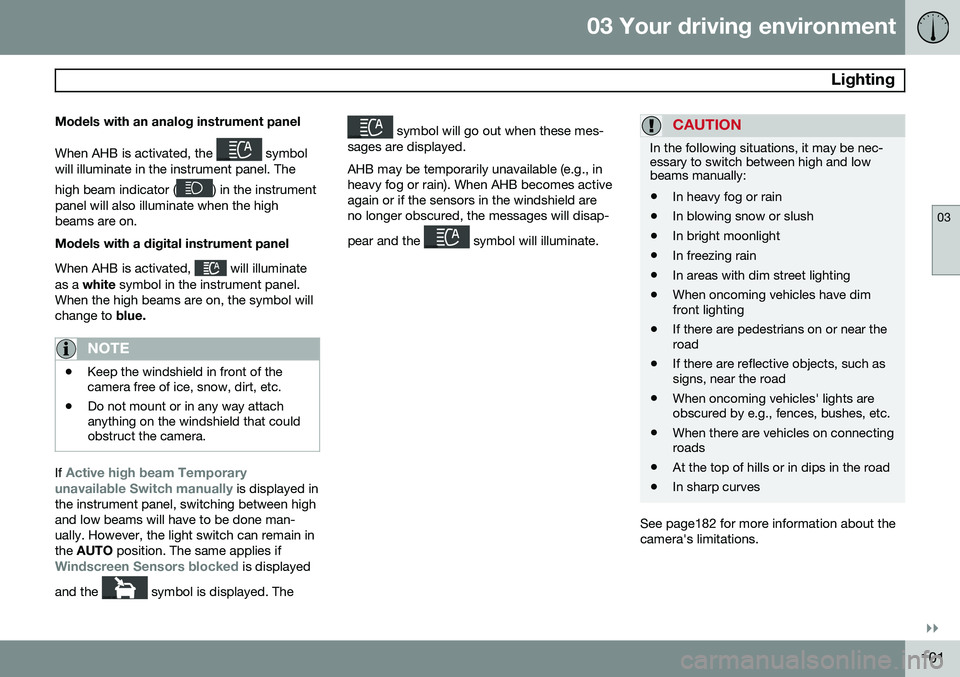
Headlight switch in the AUTO position
Switch AHB on or off by pulling the left steer- ing wheel lever rearward (toward the steeringwheel) as far as possible and releasing it. IfAHB is switched off while the high beams areon, the headlights will change to low beams.
Page 103 of 408
03 Your driving environment
Lighting
03
}}
101
Models with an analog instrument panel When AHB is activated, the
symbol
will illuminate in the instrument panel. The high beam indicator (
) in the instrument
panel will also illuminate when the high beams are on. Models with a digital instrument panel When AHB is activated,
will illuminate
as a white symbol in the instrument panel.
When the high beams are on, the symbol will change to blue.
NOTE
•Keep the windshield in front of the camera free of ice, snow, dirt, etc.
• Do not mount or in any way attachanything on the windshield that couldobstruct the camera.
If Active high beam Temporary
unavailable Switch manually is displayed in
the instrument panel, switching between high and low beams will have to be done man-ually. However, the light switch can remain inthe AUTO position. The same applies if
Windscreen Sensors blocked is displayed
and the
symbol is displayed. The
symbol will go out when these mes-
sages are displayed. AHB may be temporarily unavailable (e.g., in heavy fog or rain). When AHB becomes activeagain or if the sensors in the windshield areno longer obscured, the messages will disap- pear and the
symbol will illuminate.
CAUTION
In the following situations, it may be nec- essary to switch between high and lowbeams manually:
• In heavy fog or rain
• In blowing snow or slush
• In bright moonlight
• In freezing rain
• In areas with dim street lighting
• When oncoming vehicles have dim front lighting
• If there are pedestrians on or near theroad
• If there are reflective objects, such assigns, near the road
• When oncoming vehicles' lights areobscured by e.g., fences, bushes, etc.
• When there are vehicles on connectingroads
• At the top of hills or in dips in the road
• In sharp curves
See page182 for more information about the camera's limitations.
Page 104 of 408
03 Your driving environment
Lighting
03
102* Option/accessory, for more information, see Introduction.
Tunnel detection (models with the rain sensor* only)
The rain sensor reacts to the change in light- ing conditions when, for example, the vehicleenters a tunnel and the tunnel detection fea-ture will then activate the low beam head-lights. The low beams will be switched offapprox. 20 seconds after the vehicle leavesthe tunnel. The rain sensor does not have to be activated for tunnel detection to function.
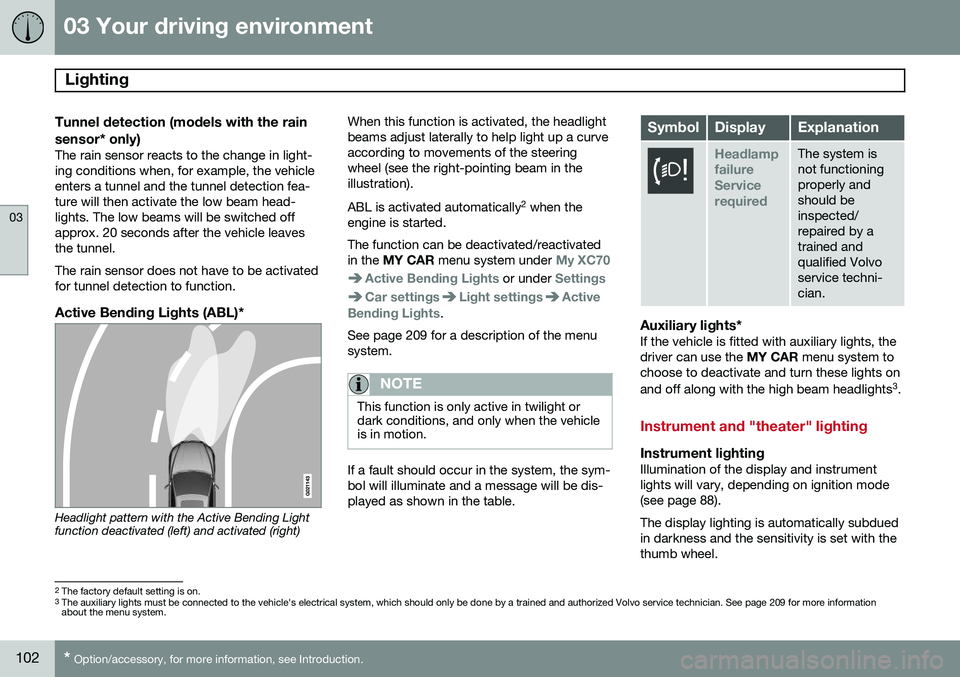
Active Bending Lights (ABL)*
Headlight pattern with the Active Bending Light function deactivated (left) and activated (right) When this function is activated, the headlight beams adjust laterally to help light up a curveaccording to movements of the steeringwheel (see the right-pointing beam in theillustration). ABL is activated automatically
2
when the
engine is started. The function can be deactivated/reactivated in the MY CAR menu system under
My XC70
Active Bending Lights or under Settings
Car settingsLight settingsActive
Bending Lights.
See page 209 for a description of the menu system.
NOTE
This function is only active in twilight or dark conditions, and only when the vehicleis in motion.
If a fault should occur in the system, the sym- bol will illuminate and a message will be dis-played as shown in the table.
SymbolDisplayExplanation
Headlamp failureServicerequiredThe system is not functioningproperly andshould beinspected/repaired by atrained andqualified Volvoservice techni-cian.
Auxiliary lights*If the vehicle is fitted with auxiliary lights, the driver can use the MY CAR menu system to
choose to deactivate and turn these lights on and off along with the high beam headlights 3
.
Instrument and "theater" lighting
Instrument lightingIllumination of the display and instrument lights will vary, depending on ignition mode(see page 88). The display lighting is automatically subdued in darkness and the sensitivity is set with thethumb wheel.
2 The factory default setting is on.
3 The auxiliary lights must be connected to the vehicle's electrical system, which should only be done by a trained and authorized Volvo service technician. See page 209 for more information about the menu system.
Page 105 of 408
03 Your driving environment
Lighting
03
}}
103
The intensity of the instrument lighting is adjusted with the thumb wheel.
"Theater" lightingWhen the overhead courtesy lighting hasgone out and the engine is running, severalLEDs located near the roof console illuminateto provide faint lighting for the occupants ofthe front seats. This lighting goes out justafter the overhead courtesy lighting when thevehicle is locked.
Parking lights
Headlight switch in the parking light position
Turn the headlight switch to the
posi-
tion (the license plate lighting comes on at the same time). Canadian models:
If the ignition is in position
II or the engine is running, the daytime run-
ning lights will also be on. With the headlight switch in this position, the parking lights will remain on even when theignition is switched off. In dark ambient lighting conditions, the rear parking lights also illuminate when the tailgateis opened to alert anyone traveling behindyour vehicle. This happens regardless of theposition that the headlight control is in orwhich mode the ignition is in.
Rear fog lights
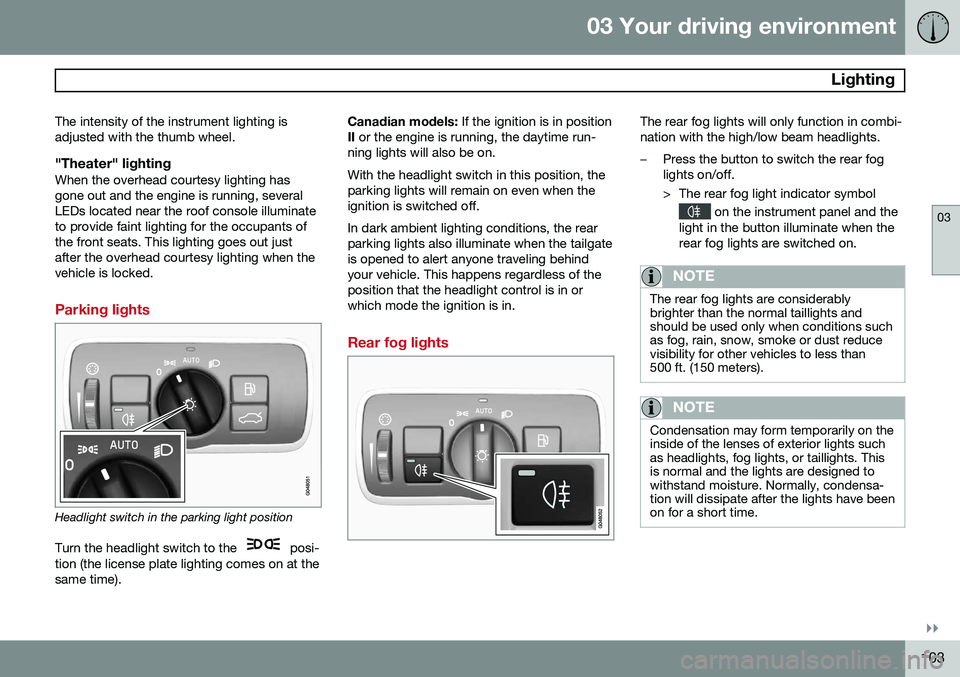
The rear fog lights will only function in combi- nation with the high/low beam headlights.
–Press the button to switch the rear fog lights on/off.
> The rear fog light indicator symbol
on the instrument panel and the
light in the button illuminate when the rear fog lights are switched on.
NOTE
The rear fog lights are considerably brighter than the normal taillights andshould be used only when conditions suchas fog, rain, snow, smoke or dust reducevisibility for other vehicles to less than500 ft. (150 meters).
NOTE
Condensation may form temporarily on the inside of the lenses of exterior lights suchas headlights, fog lights, or taillights. Thisis normal and the lights are designed towithstand moisture. Normally, condensa-tion will dissipate after the lights have beenon for a short time.
Page 107 of 408
03 Your driving environment
Lighting
03
}}
* Option/accessory, for more information, see Introduction.105
The lighting in the front part of the passenger compartment is controlled with the buttons(1) and (2) in the roof console. Switch (3) has three positions for all passen- ger compartment lighting:
• Off
: right side depressed, automatic light-
ing off.
• Neutral position
: automatic lighting is
on.
• On
– left side depressed, passenger
compartment lighting on.
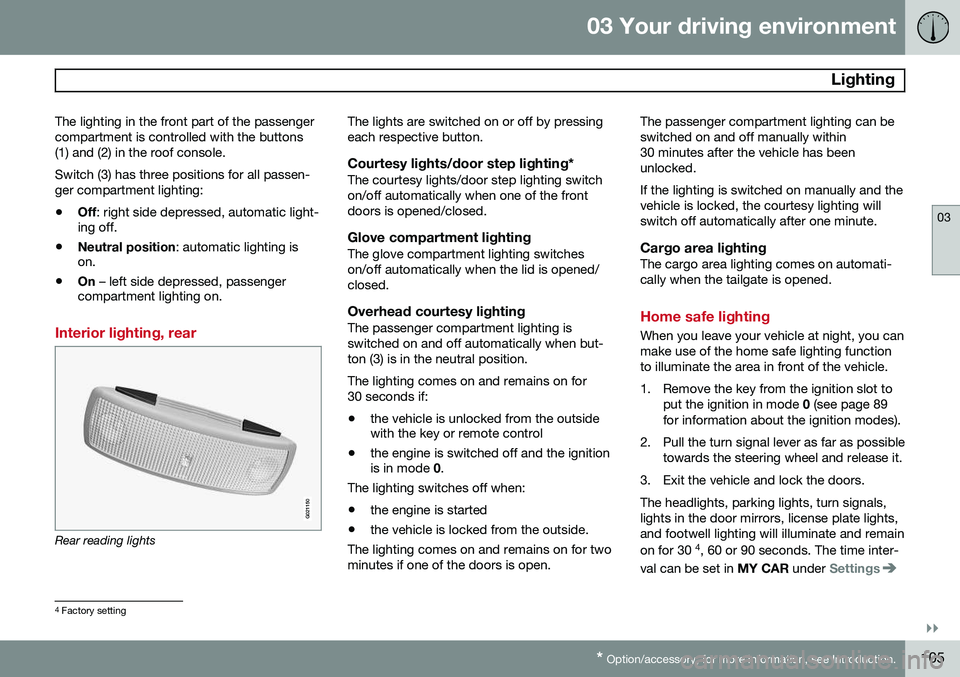
Interior lighting, rear
G021150
Rear reading lights The lights are switched on or off by pressing each respective button.
Courtesy lights/door step lighting*The courtesy lights/door step lighting switchon/off automatically when one of the frontdoors is opened/closed.
Glove compartment lightingThe glove compartment lighting switcheson/off automatically when the lid is opened/closed.
Overhead courtesy lightingThe passenger compartment lighting isswitched on and off automatically when but-ton (3) is in the neutral position. The lighting comes on and remains on for 30 seconds if:
• the vehicle is unlocked from the outside with the key or remote control
• the engine is switched off and the ignitionis in mode
0.
The lighting switches off when:
• the engine is started
• the vehicle is locked from the outside.
The lighting comes on and remains on for two minutes if one of the doors is open. The passenger compartment lighting can beswitched on and off manually within30 minutes after the vehicle has beenunlocked. If the lighting is switched on manually and the vehicle is locked, the courtesy lighting willswitch off automatically after one minute.
Cargo area lightingThe cargo area lighting comes on automati-cally when the tailgate is opened.
Home safe lighting
When you leave your vehicle at night, you can make use of the home safe lighting functionto illuminate the area in front of the vehicle.
1. Remove the key from the ignition slot to
put the ignition in mode 0 (see page 89
for information about the ignition modes).
2. Pull the turn signal lever as far as possible towards the steering wheel and release it.
3. Exit the vehicle and lock the doors.The headlights, parking lights, turn signals, lights in the door mirrors, license plate lights,and footwell lighting will illuminate and remain on for 30 4
, 60 or 90 seconds. The time inter-
val can be set in MY CAR under
Settings
4
Factory setting
Page 108 of 408
03 Your driving environment
Lighting
03
106
Car settingsLight settingsHome safe
light duration. See page 209 for a descrip-
tion of the menu system.
Approach lighting
Approach lighting is activated by pressing the approach light button on the remote key (seethe illustration on page 61). When the function has been activated, the parking lights, indicator lights, door mirrorlights, license plate lighting, dome lightingand door step lighting come on. The time interval for this lighting can be set by pressing MY CAR and going to
Car
settings
Light settingsApproach light
duration. See page 209 for a description of
the menu system.