Maximum fuel VOLVO XC90 2013 Owner´s Manual
[x] Cancel search | Manufacturer: VOLVO, Model Year: 2013, Model line: XC90, Model: VOLVO XC90 2013Pages: 310, PDF Size: 8.62 MB
Page 142 of 310
06 Starting and driving
Fuel requirements
06
140
Gasoline containing alcohol and ethers,
"Oxygenated fuels"
Some fuel suppliers sell gasoline containing
"oxygenates" which are usually alcohols or
ethers. In some areas, state or local laws
require that the service pump be marked indi-
cating use of alcohols or ethers. However,
there are areas in which the pumps are
unmarked. If you are not sure whether there is
alcohol or ethers in the gasoline you buy, check
with the service station operator. To meet sea-
sonal air quality standards, some areas require
the use of "oxygenated" fuel.
Volvo allows the use of the following "oxygen-
ated" fuels; however, the octane ratings listed
on page 139 must still be met.
Alcohol – EthanolFuels containing up to 10% ethanol by volume
may be used. Ethanol may also be referred to
as Ethyl alcohol, or "Gasohol".
Ethers – MTBE: Fuels containing up to
15% MTBE may be used.
MethanolDo not use gasolines containing methanol
(methyl alcohol, wood alcohol). This practice
can result in vehicle performance deterioration
and can damage critical parts in the fuel sys-
tem. Such damage may not be covered under
the New Vehicle Limited Warranty.
Weight distribution affects handlingAt the specified curb weight your vehicle has a
tendency to understeer, which means that the
steering wheel has to be turned more than
might seem appropriate for the curvature of a
bend.
This ensures good stability and reduces the
risk of rear wheel skid. Remember that these
properties can alter with the vehicle load.
The heavier the load in the cargo area, the less
the tendency to understeer.
Handling, roadholdingVehicle load, tire design and inflation pressure
all affect vehicle handling. Therefore, check
that the tires are inflated to the recommended
pressure according to the vehicle load. See
"Tire pressure" section.
Loads should be distributed so that capacity
weight or maximum permissible axle loads are
not exceeded.
Conserving electrical currentKeep the following in mind to help minimize
battery drain:
•When the engine is not running, avoid turn-
ing the ignition key to position II (see
page 145). Many electrical systems (the
audio system, the optional infotainment/
navigation systems, power windows, etc)
will function with the ignition key in positionI. This position reduces drain on the bat-
tery.
•Please keep in mind that using systems,
accessories, etc that consume a great deal
of current when the engine is not running
could result in the battery being completely
drained. Driving or having the engine run-
ning for approximately 15 minutes will help
keep the battery charged.
NOTE
A warning message will be displayed in the
text window in the instrument panel when
the battery charge is low.
Page 143 of 310
06 Starting and driving
Refueling
06
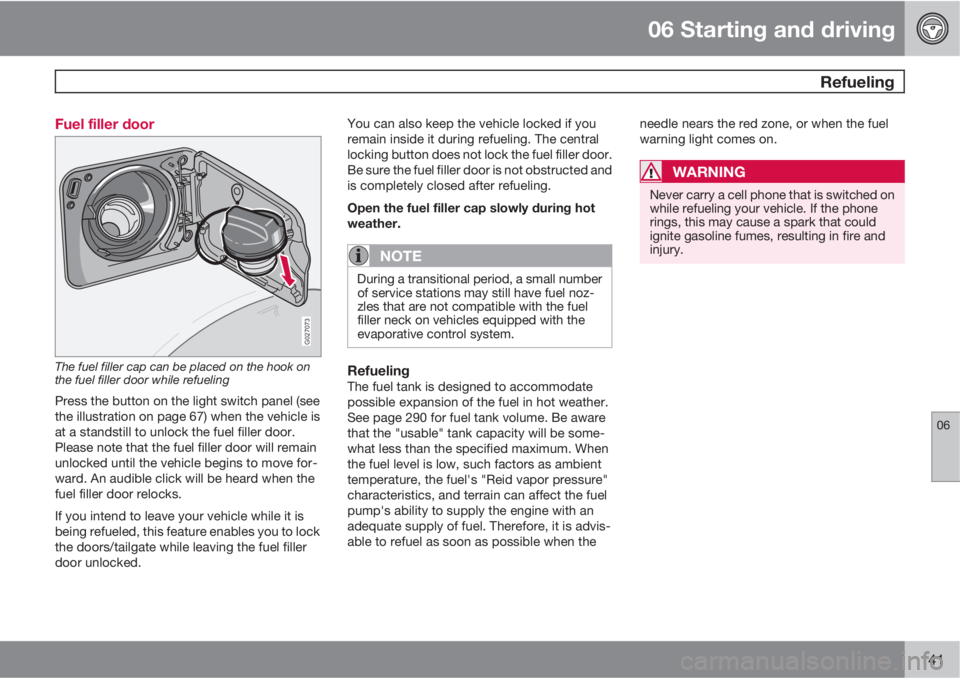
141 Fuel filler door
G027073
The fuel filler cap can be placed on the hook on
the fuel filler door while refueling
Press the button on the light switch panel (see
the illustration on page 67) when the vehicle is
at a standstill to unlock the fuel filler door.
Please note that the fuel filler door will remain
unlocked until the vehicle begins to move for-
ward. An audible click will be heard when the
fuel filler door relocks.
If you intend to leave your vehicle while it is
being refueled, this feature enables you to lock
the doors/tailgate while leaving the fuel filler
door unlocked.You can also keep the vehicle locked if you
remain inside it during refueling. The central
locking button does not lock the fuel filler door.
Be sure the fuel filler door is not obstructed and
is completely closed after refueling.
Open the fuel filler cap slowly during hot
weather.
NOTE
During a transitional period, a small number
of service stations may still have fuel noz-
zles that are not compatible with the fuel
filler neck on vehicles equipped with the
evaporative control system.
RefuelingThe fuel tank is designed to accommodate
possible expansion of the fuel in hot weather.
See page 290 for fuel tank volume. Be aware
that the "usable" tank capacity will be some-
what less than the specified maximum. When
the fuel level is low, such factors as ambient
temperature, the fuel's "Reid vapor pressure"
characteristics, and terrain can affect the fuel
pump's ability to supply the engine with an
adequate supply of fuel. Therefore, it is advis-
able to refuel as soon as possible when theneedle nears the red zone, or when the fuel
warning light comes on.
WARNING
Never carry a cell phone that is switched on
while refueling your vehicle. If the phone
rings, this may cause a spark that could
ignite gasoline fumes, resulting in fire and
injury.
Page 149 of 310
06 Starting and driving
Difficult driving conditions
06
147 Driving on rough/unpaved surfaces
The Volvo XC90 is designed primarily for on-
road driving, and it has excellent handling cha-
racteristics on very rough or unpaved roads.
When driving on poorly maintained or unpaved
roads, please keep the following in mind:
•Reduce speed on rough surfaces to mini-
mize possible damage to the vehicle's
underbody.
•When driving on soft surfaces such as dry
sand or snow, try to avoid stopping if at all
possible.
WARNING
•Avoid driving diagonally across steep
inclines as this could increase the risk of
a roll-over. Try to drive straight up or
down the slope.
•If the road is very steep, avoid turning
the vehicle around to help avoid the risk
of rolling over. Back the vehicle up or
down the incline instead.
NOTE
Avoid driving on steep inclines if the fuel
tank is nearly empty. If the flow of fuel to the
engine is interrupted due to the vehicle's
angle of inclination, this could result in dam-
age to the three-way catalytic converter. We
recommend keeping the fuel tank at least
half full when driving on steep inclines.
Driving through water
The vehicle can be driven through water up to
a depth of approximately 16 inches (40 cm), at
a maximum speed of 6 mph (10 km/h).
Take particular care when driving through flow-
ing water.
Clean the electrical connections for trailer wir-
ing after driving in mud or water.
When driving through water, maintain low
speed and do not stop in the water.
WARNING
After driving through water, press lightly on
the brake pedal to ensure that the brakes
are functioning normally. Water or mud can
make the brake linings slippery, resulting in
delayed braking effect.
CAUTION
•Engine damage will occur if water is
drawn into the air cleaner.
•If the vehicle is driven through water
deeper than 18 in (48 cm), water may
enter the differential and the transmis-
sion. This reduces the oil's lubricating
capacity and may shorten the service
life of these components.
•Do not allow the vehicle to stand in
water up to the door sills longer than
absolutely necessary. This could result
in electrical malfunctions.
•If the engine has been stopped while the
car is in water, do not attempt to restart
the engine. Have the car towed out of
the water.
Page 151 of 310
06 Starting and driving
Automatic transmission
06
149
KickdownAutomatic shift to a lower gear (kickdown) is
achieved by depressing the accelerator pedal
fully and briskly. An upshift will occur when
approaching the top speed for a particular gear
or by releasing the accelerator pedal slightly.
Kickdown can be used for maximum acceler-
ation or when passing at highway speeds.
NOTE
The gear selector must be in the D (Drive)
position for kickdown to function.
Manual shifting – Geartronic
You can move the gear selector freely between
the MAN (Manual) and D (Drive) positions to
select forward gears while driving. Gears 3, 4,
5, and 6 have a "lock-up" function which
reduces engine speed and helps save fuel.
NOTE
Reverse, Neutral, and Park cannot be
selected in Geartronic mode.
•A "lock-up" feature1 reduces engine speed
and help saves fuel.The currently selected gear will be displayed in
the instrument panel (see page 58).
•To access the MAN shifting position from
D, move the gear selector to the left to
MAN.
•To return to the D positions from MAN,
move the gear selector to the right.
While driving
If you select the MAN position while driving, the
gear that was being used in the D position will
also initially be selected in MAN position.
•Move the gear selector forward (toward
"+") to shift to a higher gear or rearward
(toward "– ") to shift to a lower gear.
•If you hold the gear selector toward "–", the
transmission will downshift one gear and
will utilize the braking power of the engine.
If the current speed is too high for using a
lower gear, the downshift will not occur
until the speed has decreased enough to
allow the lower gear to be used.
•If you slow down to a very low speed, the
transmission will automatically shift down.
•When starting in the MAN position, 3rd
gear is the highest gear that may be
selected.
W – Winter/Wet driving mode –
enhanced vehicle traction
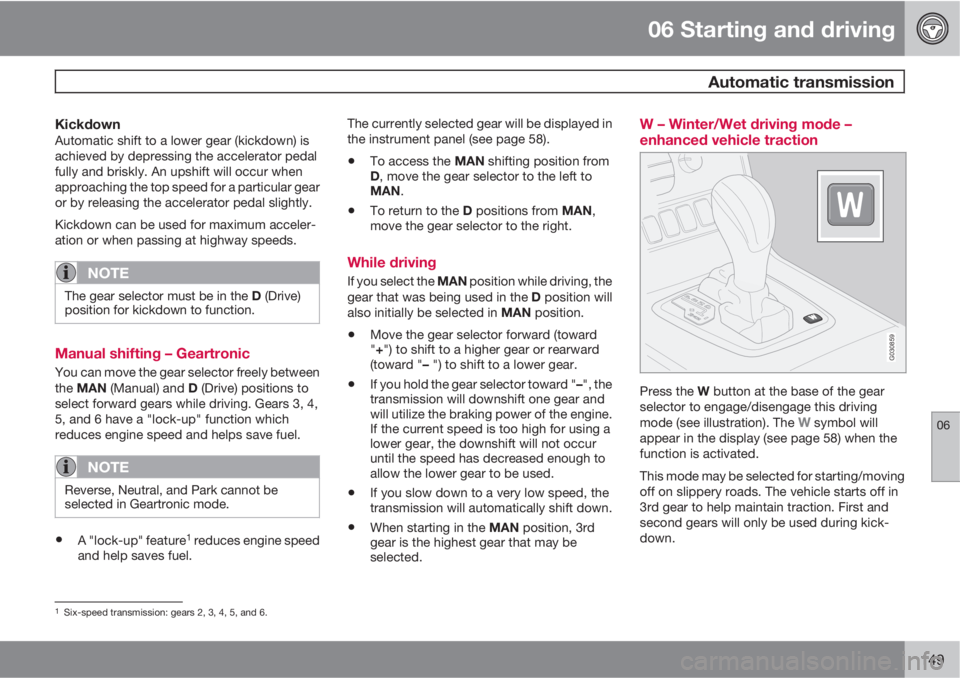
G030859
Press the W button at the base of the gear
selector to engage/disengage this driving
mode (see illustration). The
W symbol will
appear in the display (see page 58) when the
function is activated.
This mode may be selected for starting/moving
off on slippery roads. The vehicle starts off in
3rd gear to help maintain traction. First and
second gears will only be used during kick-
down.
1Six-speed transmission: gears 2, 3, 4, 5, and 6.
Page 187 of 310
07 Wheels and tires
Vehicle loading
07
185
Properly loading your vehicle will provide maxi-
mum return of vehicle design performance.
Before loading your vehicle, familiarize yourself
with the following terms for determining your
vehicle's weight ratings, with or without a
trailer, from the vehicle's Federal/ Canadian
Motor Vehicle Safety Standards (FMVSS/
CMVSS) label, and the vehicle's tire informa-
tion placard.
Curb weightThe weight of the vehicle including a full tank
of fuel and all standard equipment. It does not
include passengers, cargo, or optional equip-
ment.
Capacity weightAll weight added to the curb weight, including
cargo and optional equipment. When towing,
trailer hitch tongue load is also part of cargo
weight.
NOTE
For trailer towing information, please refer to
the section "Towing a trailer."
Permissible axle weightThe maximum allowable weight that can be
carried by a single axle (front or rear). Thesenumbers are shown on the Federal/Canadian
Motor Vehicle Safety Standards (FMVSS/
CMVSS) label. The total load on each axle must
never exceed its maximum permissible weight.
Gross vehicle weight (GVW)The vehicle's curb weight + cargo + passen-
gers.
A table listing important weight limits for your
vehicle, is in chapter "Dimension and weights".
For the location of the various labels in your
vehicle, see page 284
Steps for Determining Correct Load
Limit
•Locate the statement "the combined
weight of occupants and cargo should
never exceed XXX pounds" on your vehi-
cle's placard.
•Determine the combined weight of the
driver and passengers that will be riding in
your vehicle.
•Subtract the combined weight of the driver
and passengers from XXX kilograms or
XXX pounds.
•The resulting figure equals the available
amount of cargo and luggage load
capacity. For example, if the "XXX" amount
equals 1400 lbs. and there will be five150 lb. passengers in your vehicle, the
amount of available cargo and luggage
load capacity is 650 lbs. (1400-750 (5 x
150) = 650 lbs.)
•Determine the combined weight of luggage
and cargo being loaded on the vehicle.
That weight may not safely exceed the
available cargo and luggage load capacity
calculated in Step 4.
•If your vehicle will be towing a trailer, load
from your trailer will be transferred to your
vehicle. Consult this manual
1 to determine
how this reduces the available cargo and
luggage load capacity of your vehicle.
WARNING
•Exceeding the permissible axle weight,
gross vehicle weight, or any other
weight rating limits can cause tire over-
heating resulting in permanent defor-
mation or catastrophic failure.
•Do not use replacement tires with lower
load carrying capacities than the tires
that were original equipment on the
vehicle because this will lower the vehi-
cle's GVW rating. Use only tires with the
correct load carrying capacity. Consult
your Volvo retailer for information.
1For "Towing a trailer" see page 163.